
Stripe and Quickbooks Integration Guide
14 MIN READ
|
Updated on June 5, 2025

As a business owner, keeping your financial records organized and up-to-date is essential for making informed decisions and staying on top of your company’s finances. However, this tedious task can be eliminated with the integration of Stripe and QuickBooks.
In this blog, we’ll explore three different methods for syncing your Stripe data in QuickBooks so you can streamline your accounting process and focus on growing your business.
If you’re a SaaS or subscription-based business, we’ll also explain how Chargebee can help you manage and automate Stripe recurring payments in QuickBooks.
Before we dive into integrating Stripe and QuickBooks, here’s a quick look at what these platforms are and what they offer.
Stripe is a popular payment processing platform. It offers a full suite of Application Programming Interface (API) services that enable companies of all sizes to accept payments online.

With Stripe, you can:
QuickBooks is a popular accounting software for small and medium-sized enterprises (SMBs). QuickBooks provides robust features and an easy-to-use interface for businesses to handle all of their bookkeeping needs and monitor their financial health.

With QuickBooks, you can:
Are you already using Stripe and QuickBooks? Here’s why you should integrate both platforms (if you haven’t already).
When you have two platforms that aren’t integrated, you waste a lot of time on manual data entry. In a Zapier study, 76% of respondents estimate spending one to three hours daily moving data from one system to another.
By integrating Stripe and QuickBooks, businesses can automate the process of recording financial transactions. With the integration, transactions processed through Stripe can be automatically synced with QuickBooks, reducing the risk of errors and improving the accuracy of financial data.
Reconciliation is the process of matching transactions against your bank statements. It ensures that your records are accurate and free of any discrepancies that could affect your bottom line.
However, reconciling your accounts manually is extremely time-consuming. It also increases the risk of human errors (which take even more time to correct). Integrating Stripe and QuickBooks takes minutes instead of hours to reconcile your accounts.
Cash flow planning is essential to running a successful business. It allows you to make better decisions when it comes to current and future spending.
Integrating Stripe and QuickBooks lets you sync and view your business transactions from one place — there’s no need to switch between different apps. With QuickBooks Cash Flow Center, you can create accurate forecasts and ensure that you have enough to meet your financial obligations.
If you haven’t already integrated Stripe and QuickBooks, you’re missing out on opportunities to improve your processes. There are three integration methods.

Let’s go through each one.
If you’re a QuickBooks Online user, here’s how you can get it synced with Stripe.
QuickBooks offers a range of third-party apps that let you extend the capabilities of QuickBooks Online. There are free and paid apps available.


Unfortunately, Stripe doesn’t offer a native app for QuickBooks Online. You’ll need to install a third-party app (like Synder) to get integration features. Synder lets you sync payment activities from Stripe and import historical transactions into QuickBooks.

From the setup page in Snyder, select QuickBooks under ‘Accounting system’ and Stripe under ‘Payment processors.’ You can also integrate those here if you’re using an e-commerce platform like Shopify or BigCommerce to power your online store.

Log in to your accounts, and setting up will take a few moments.
You’ll see your transactions from the dashboard once your Stripe and QuickBooks accounts are connected. Choose the transactions you want to sync and select the ‘Sync’ button.

You can also import historical data from the past months or even years.

Synder offers a simple way to integrate Stripe and QuickBooks, but it comes at a cost. The Starter plan starts at $9.99 monthly, which only lets you import up to 50 monthly transactions and one year of historical data. If you need to sync more transactions or integrate more platforms, you’ll need to upgrade to a higher plan.
Here’s a look at Synder’s pricing:

QuickBooks Desktop is accounting software that you install on your computer. It’s a good option for businesses that need inventory-based features.
If you’re a QuickBooks Desktop user, here’s how you can integrate it with Stripe.
The first step is to head to the Apps for QuickBooks Desktop site. Like the apps for QuickBooks Online, free and paid options are available.


Stripe doesn’t offer a native app for QuickBooks Desktop, so you’ll need to install a third-party app. We’ll use Synder again for this example, as it offers an easy way to import your Stripe transaction data into QuickBooks.
Click ‘Learn More,’ and you’ll go directly to Synder’s site to create a new account and download its QuickBooks Connector app.

Once you install and open the Synder app, you’ll head to a setup page where you can connect QuickBooks and Stripe. Follow the on-screen prompts to complete the setup process.

Once your accounts are set up, it’s time to sync your transaction data. Select the transactions you want to sync and click the ‘Sync’ button to import them into QuickBooks. You can also import years of historical transactions and categorize them in QuickBooks.

Synder lets you record your Stripe transaction data easily and quickly into QuickBooks. You can even reconcile your accounts in one click.
The Starter plan starts at $13 per month, which lets you sync up to 50 monthly transactions and integrate one e-commerce or payment gateway. You’ll need to upgrade to a higher-tier plan to sync more transactions or integrate more platforms.
Here’s a look at the monthly pricing for Synder:

You can also save 28% by switching to a yearly plan. There’s a 7-day free trial available, so you can try Synder before making a financial commitment.
Stripe customers can also use a third-party automation tool like Zapier to bring transactions into QuickBooks.
Follow these steps to get started.
Zapier is a cloud-based service that lets you create automated workflows for the platforms you use. It offers integrations for Stripe and QuickBooks. With Zaps, you can create workflows that trigger when certain actions occur.

When you create a new Zap, you can connect your Stripe account. Enter your login information and authorize Zapier to share data with Stripe.

Then, repeat the process to connect your QuickBooks Online account.
Once you connect Stripe and QuickBooks to Zapier, you’ll create Zaps to send data between them. Zapier also offers a library of pre-built Zaps that you can start using right away.
Here are examples of popular workflows:

The first Zap triggers when a new transaction is recorded in Stripe. It’ll find the right QuickBooks Online customer (or create a new customer) and add a sales receipt in their name.
After you configure your trigger and actions, you’ll be able to test your Zap. It’s always a good idea to test your workflows to ensure that everything is working properly.

Name and save your Zap to start using it.
Zapier offers a simple way to connect Stripe to QuickBooks. However, some Zaps (like the Stripe integration above) are only available to users on paid plans, which will undoubtedly cut into your profits.
Here’s a look at Zapier’s pricing:

With these methods, you’ll be able to sync Stripe with QuickBooks in no time. Choose the best method for you, and don’t forget to test the integrations before they go live. The last thing you want is to have duplicate entries in your accounting system.
The easiest way to integrate Stripe and QuickBooks is with a third-party app. It allows you to sync your data and import historical transactions.
However, you can use two other methods to add Stripe payments to QuickBooks without connecting to a third-party app.
Let’s look at those now.
Connecting your bank account to QuickBooks lets you download and categorize your transactions. There’s no manual data entry required with this method.
Follow these steps to get started.
First, log in to your QuickBooks Online account. Then, click on the Transactions tab in the left-hand menu. Select ‘Banking’ and click ‘Connect account.’

Search for your bank and enter your login details. Your bank may require a verification code before it can connect to QuickBooks.
If you have multiple banking accounts, choose the one you use to receive payments (e.g., a business checking account). Then select how far back you want to pull transactions from.

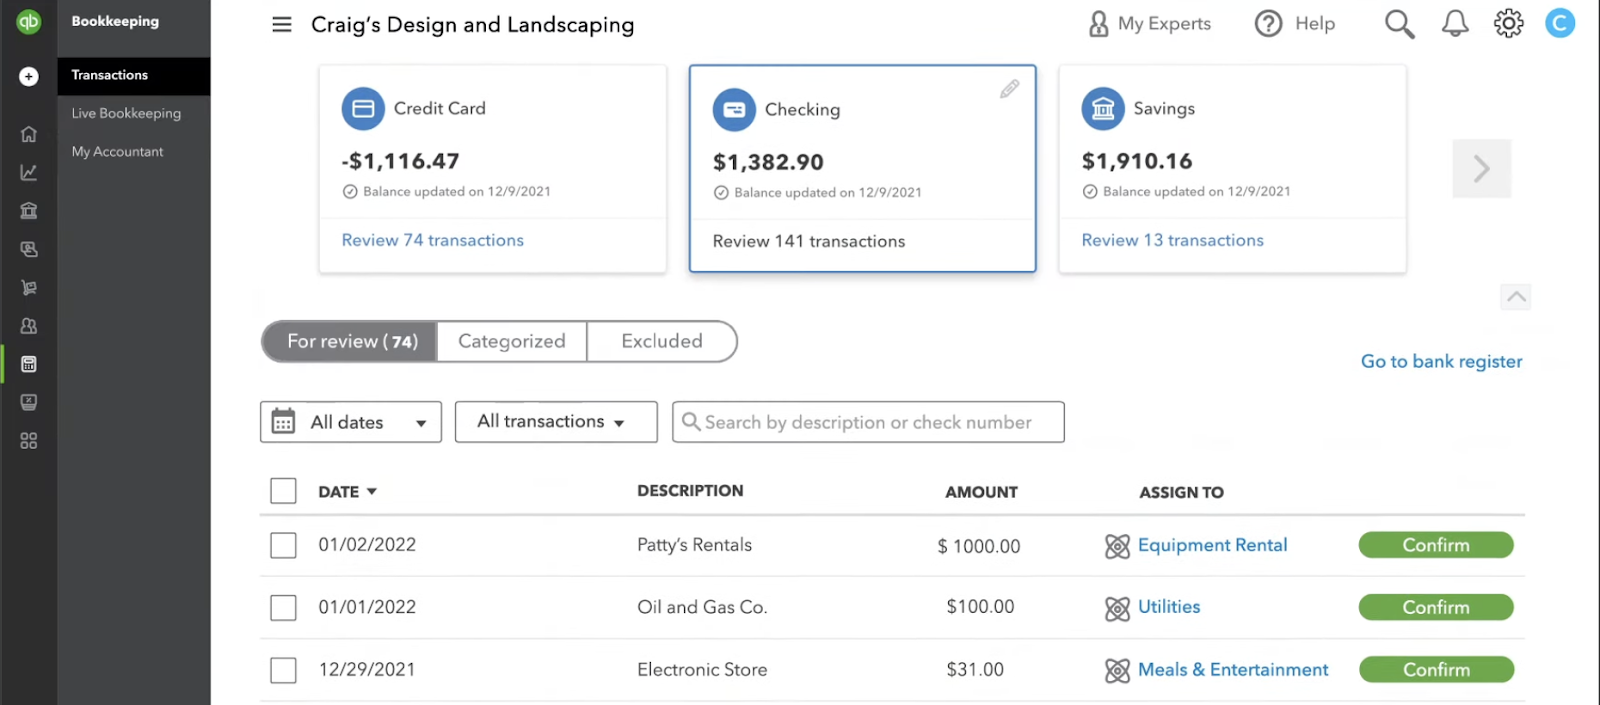
Once you connect your bank account, QuickBooks will download the latest transactions. However, they aren’t actually in QuickBooks yet. You’ll need to review and categorize them.
Go to the ‘Transactions’ tab and click on ‘Banking.’ Then, select the account you connected in the previous step, and you’ll see a list of line items that are ready for review.

Select a transaction, fill out the fields, and click the ‘Add’ button. Consider adding a ‘Stripe’ tag to indicate Stripe sales.

Over time, QuickBooks will recognize transactions and even categorize them for you. However, it’s still a good idea to review individual line items to ensure that everything is correct.
If your bank account doesn’t connect with QuickBooks or if you want to enter older transactions, you can manually import transactions.
Follow these steps to get started.
The first step is to log in to your bank account and download your transaction data as a CSV file. In most cases, you should see a link to download your account activity. However, each bank has different data export steps, so you may need to search for these instructions.
Choose the right account and check the date range before downloading your transaction data.

Choose a QuickBooks Online (QBO) file format if it’s available.
Before you upload your transaction data into QuickBooks, you must ensure that the CSV file is in the right format. QuickBooks only supports CSV files in a 3-column or 4-column format.
The 3-column format has columns for Date, Description, and Amount (in that order).

The 4-column format has columns for Date, Description, Credit, and Debit (in that order):

QuickBooks recommends the following when formatting your CSV file:
Click on the ‘Transactions’ tab and click ‘Banking.’ Then click the ‘Upload transactions’ button.

Select the CSV file containing your transactions and choose the QuickBooks account to which you want to upload the data (if you have multiple accounts). Confirm the transactions you want to import, click ‘Let’s go,’ and you’ll see a list of transactions.
Don’t forget to categorize your transactions to add them to your account.
Integrating Stripe and QuickBooks is possible, but it requires some workarounds. We’ve got you covered if you’re a SaaS or subscription-based business looking for a better way to sync and manage your accounts.
Chargebee is a subscription management platform that handles all your recurring billing and invoicing needs. It gives you full visibility into every subscriber’s lifecycle from the time they sign up all the way up to cancellation. With Chargebee’s secure and frictionless checkout page, you’ll be able to offer a seamless checkout experience and start accepting payments in minutes.
Moreover, Chargebee integrates seamlessly with your existing tech stack so that you can manage and automate your subscription billing from one place.
The Chargebee and QuickBooks Online integration streamlines the accounting process for your SaaS business, allowing you to focus on more important tasks instead of getting bogged down with tedious data entry.
Once you set up the one-time integration, it’ll automatically sync:
Your data will flow into the chart of accounts that you designate. Watch this video below to learn more about connecting Chargebee to QuickBooks:
Are you already using Stripe as your payment gateway?
Chargebee supports a range of payment gateways, including Stripe and PayPal. Accept Stripe Automated Clearing House (ACH) and Single Euro Payment Area (SEPA) recurring payments. Take advantage of Chargebee’s subscription management features like smart dunning, which helps you reduce involuntary churn and recover lost revenue.
Configuring online payments via Stripe is straightforward, and you can even offer bank transfers for customers who prefer offline payment methods.

Schedule a demo today to see how Chargebee can streamline your accounting.
Schedule a Demo →There are two ways you can add a Stripe payment in QuickBooks:
You can also use a subscription management platform like Chargebee to sync Stripe payments automatically in QuickBooks.
Stripe charges 2.9% plus 30 cents per successful card charge. Add a new expense category in QuickBooks and give it a name like ‘Stripe Fees.’ Download your balance report from Stripe and enter the fees for each transaction in the expense category you created.
With Chargebee, you can also map Stripe processing fees to an expense account in QuickBooks using the reconciliation feature. Stripe fees will automatically be recorded in QuickBooks when you reconcile your account.
Reconciling your accounts ensures the accuracy of your financial records. However, manually matching transactions against your bank statements is tedious and time-consuming.
With the Chargebee plugin, you can automate payment reconciliation of Stripe payments into QuickBooks at the click of a button. What would normally take hours takes only a few minutes.
Stripe and QuickBooks are robust platforms that let you accept payments online and manage your finances. However, manually moving data from one platform to the other could be more efficient and prone to errors.
Fortunately, there are a few Stripe QuickBooks integration solutions available. These include using third-party apps that QuickBooks offers in its app center to sync your transaction data. You can also connect your bank account to QuickBooks and categorize Stripe transactions.
However, if you’re a SaaS or subscription-based business, you may find managing recurring payments from your customers challenging. We’ve got just the thing.
Chargebee is a subscription management platform that lets you manage and automate your recurring payments — offering a better checkout experience, running pricing experiments, customizing billing cycles, and more. It also integrates with Stripe and QuickBooks, allowing you to streamline your accounting.
Learn more about our subscription management platform.
Schedule a demo to see how Chargebee can help you grow and scale your SaaS business
