Tutorial Scope
This tutorial aims to help Apple App developers implement a mobile web browser-based checkout in their apps. Apple App developers who are not mandated to use Apple's in-app payment methods can use this tutorial to implement a mobile web browser-based checkout in their Apple Apps and save 15% or 30% commission rates on transactions. Learn more about Apple guidelines for business.
As per the ruling made by the US court on April 30, 2025, Apple has made changes to its guidelines 3.1.1, 3.1.1(a), 3.1.3, and 3.1.3(a) as published in this notification. These changes allow App developers to include buttons, external links, or other calls to action in their United States storefront apps that can redirect users to alternative payment methods outside of the App Store. For regions other than the United States, app developers have to request optional entitlements and need to adhere to Apple guidelines while redirecting users to external purchase methods. Learn more about external purchase entitlements.
Prerequisites
Before implementing web checkout for your mobile app, ensure that the following setup is complete:
Option 1: Manual Setup
- Set up the required product and plan to be used for subscriptions.
- Configure your checkout experience in Chargebee.
- Obtain your Chargebee API key to generate the checkout URL using the Checkout for New Item API.
Option 2: Guided Setup
Alternatively, follow this tutorial to integrate checkout for a new subscription.
Steps to implement checkout experience in a mobile web browser
To offer this checkout experience, you need to add a CTA (Call to Action) in your App and initiate the external web checkout that is powered by Chargebee. Here are the steps:
In you mobile application, include a button or external link that will redirect users to an external web checkout page.
Note: Choose to offer the in-app payment method of Apple, along with a regular browser-based checkout, or just offer the browser-based checkout experience in your app. You can include a single or multiple buttons. While the in-app payment method of Apple provides a complete in-app experience, browser-based checkout involves redirecting the user to a mobile web browser for completing payments.
A screen with both in-app and browser-based checkout options can look like this:
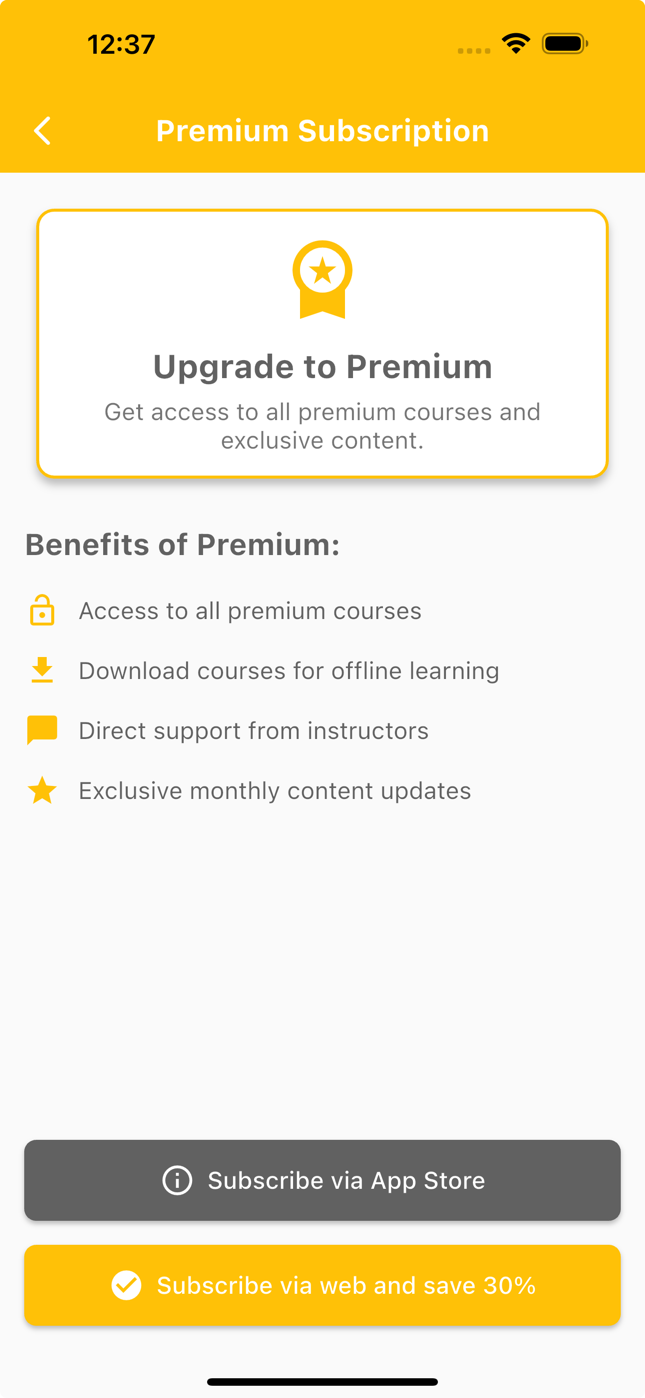
Checkout Action Button When the user taps Subscribe via web and save 30%, your app should call the backend service to generate the Chargebee checkout URL.Use the Checkout for new Item API or follow this tutorial to create the checkout session. Your backend should return the hosted_page object in the response.
Note for v3 Checkout Users:
This tutorial demonstrates the full-page checkout experience. If you’re using Chargebee’s v3 pop-up checkout, you might encounter an issue where the pop-up doesn’t load in the Safari browser on iPhone.
This happens because Safari blocks pop-ups by default when opened by a website. To resolve this, refer to our article for the recommended workaround.In your backend service, you can generate the checkout URL using the following steps:
Setup the Chargebee client library, and initialize it. Below is a code snippet in NodeJS:
    const chargebee = new Chargebee({
      site : "honeycomics-v3-test",
      apiKey : "test_qwerty",
    });
Call the Checkout for new Item API by calling the client library method
checkout_new_for_items. This will return the Hosted Page resource.The id is a unique identifier of the
hosted_pageobject used to track the state of the checkout process.The url received from the above object is the unique link to the hosted checkout page, which you can embed in your website.
You can also pass the customer details to create a customer in Chargebee. Below is a code snippet of how you can create a new checkout in NodeJS.
    chargebee.hosted_page.checkout_new_for_items({
        subscription_items: {
          item_price_id: "premium-usd-monthly"
      },
      customer: {
        first_name: "Bruce",
        last_name: "Wayne",
        email: "wayne@wentrpise.com"
      }
      }).request(function(error, result) {
        if (error) {
            // Handle error
        } else {
            res.send(result.hosted_page.url);
      }
    });
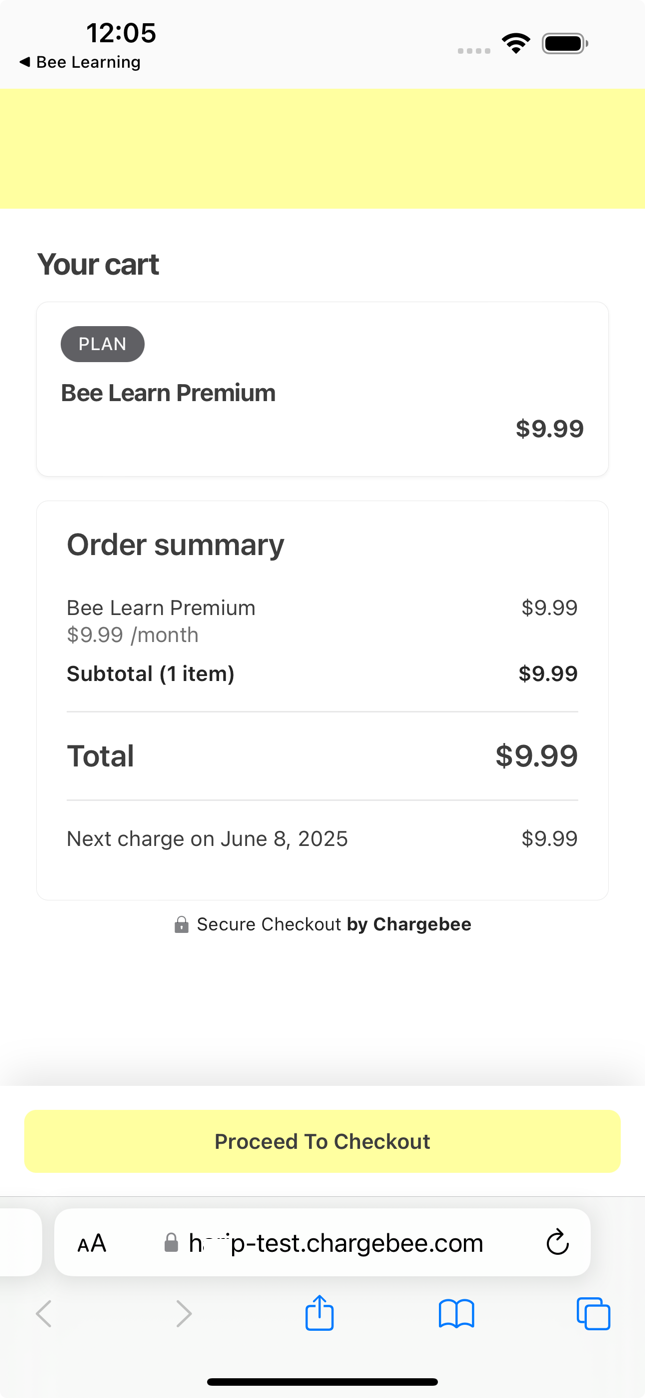
When your app receives the url, open it in a web browser to redirect the user to the Chargebee checkout page.
Here’s an example using Swift:
    if let url = URL(string: urlSting), UIApplication.shared.canOpenURL(url) {
        UIApplication.shared.open(url)
    }
The checkout page will be displayed according to your configuration which you can modify in Chargebee as per your branding.
Once the user completes the checkout, a new subscription is created in Chargebee. We recommend listening to relevant webhook events such as
subscription_createdorinvoice_generatedto confirm a successful checkout and grant the appropriate entitlements to the customer. You can use the id to retrieve the hosted page object and access the associated subscription and invoice details.After a successful checkout, use the redirect_url to deep link back into your application. This URL receives query parameters such as the
hosted_page_idandstate, which you can use to restore session context or track the checkout outcome. For example:http://yoursite.com?id=<hosted_page_id>&state=succeeded.
We're always happy to help you with any questions you might have! Click here to reach out to us.