Introduction
As online businesses continue to thrive, having a seamless and transparent pricing structure becomes paramount. Chargebee, a leading subscription and billing platform, offers an intuitive and robust pricing table that allows businesses to display their service offerings and subscription plans clearly. If you're using Wix, a versatile workspace tool, embedding Chargebee's pricing table can streamline your business management and enhance customer experience. In this blog post, we'll guide you through the steps to embed Chargebee pricing table in Wix effortlessly.
Prerequisites
To follow along with this tutorial, you will need the below steps:
- An active Chargebee account: Sign up for a Chargebee account if you don't have one already.
- An Pricing Tables account. Signup for a an Pricing Tables account if you don't have one already.
- A Wix account. Signup here, if you don't have one already.
AtomicPricing is currently in beta and is only available to Chargebee Customers in the US Data Center. We are making continuous enhancements to the product and will be making this available to all customers soon.
Building the pricing table
Building the pricing table is a critical step in presenting your products or services to potential customers in a way that resonates with them and drives conversions. Let's explore the details of this process and discover the key to a successful pricing presentation.
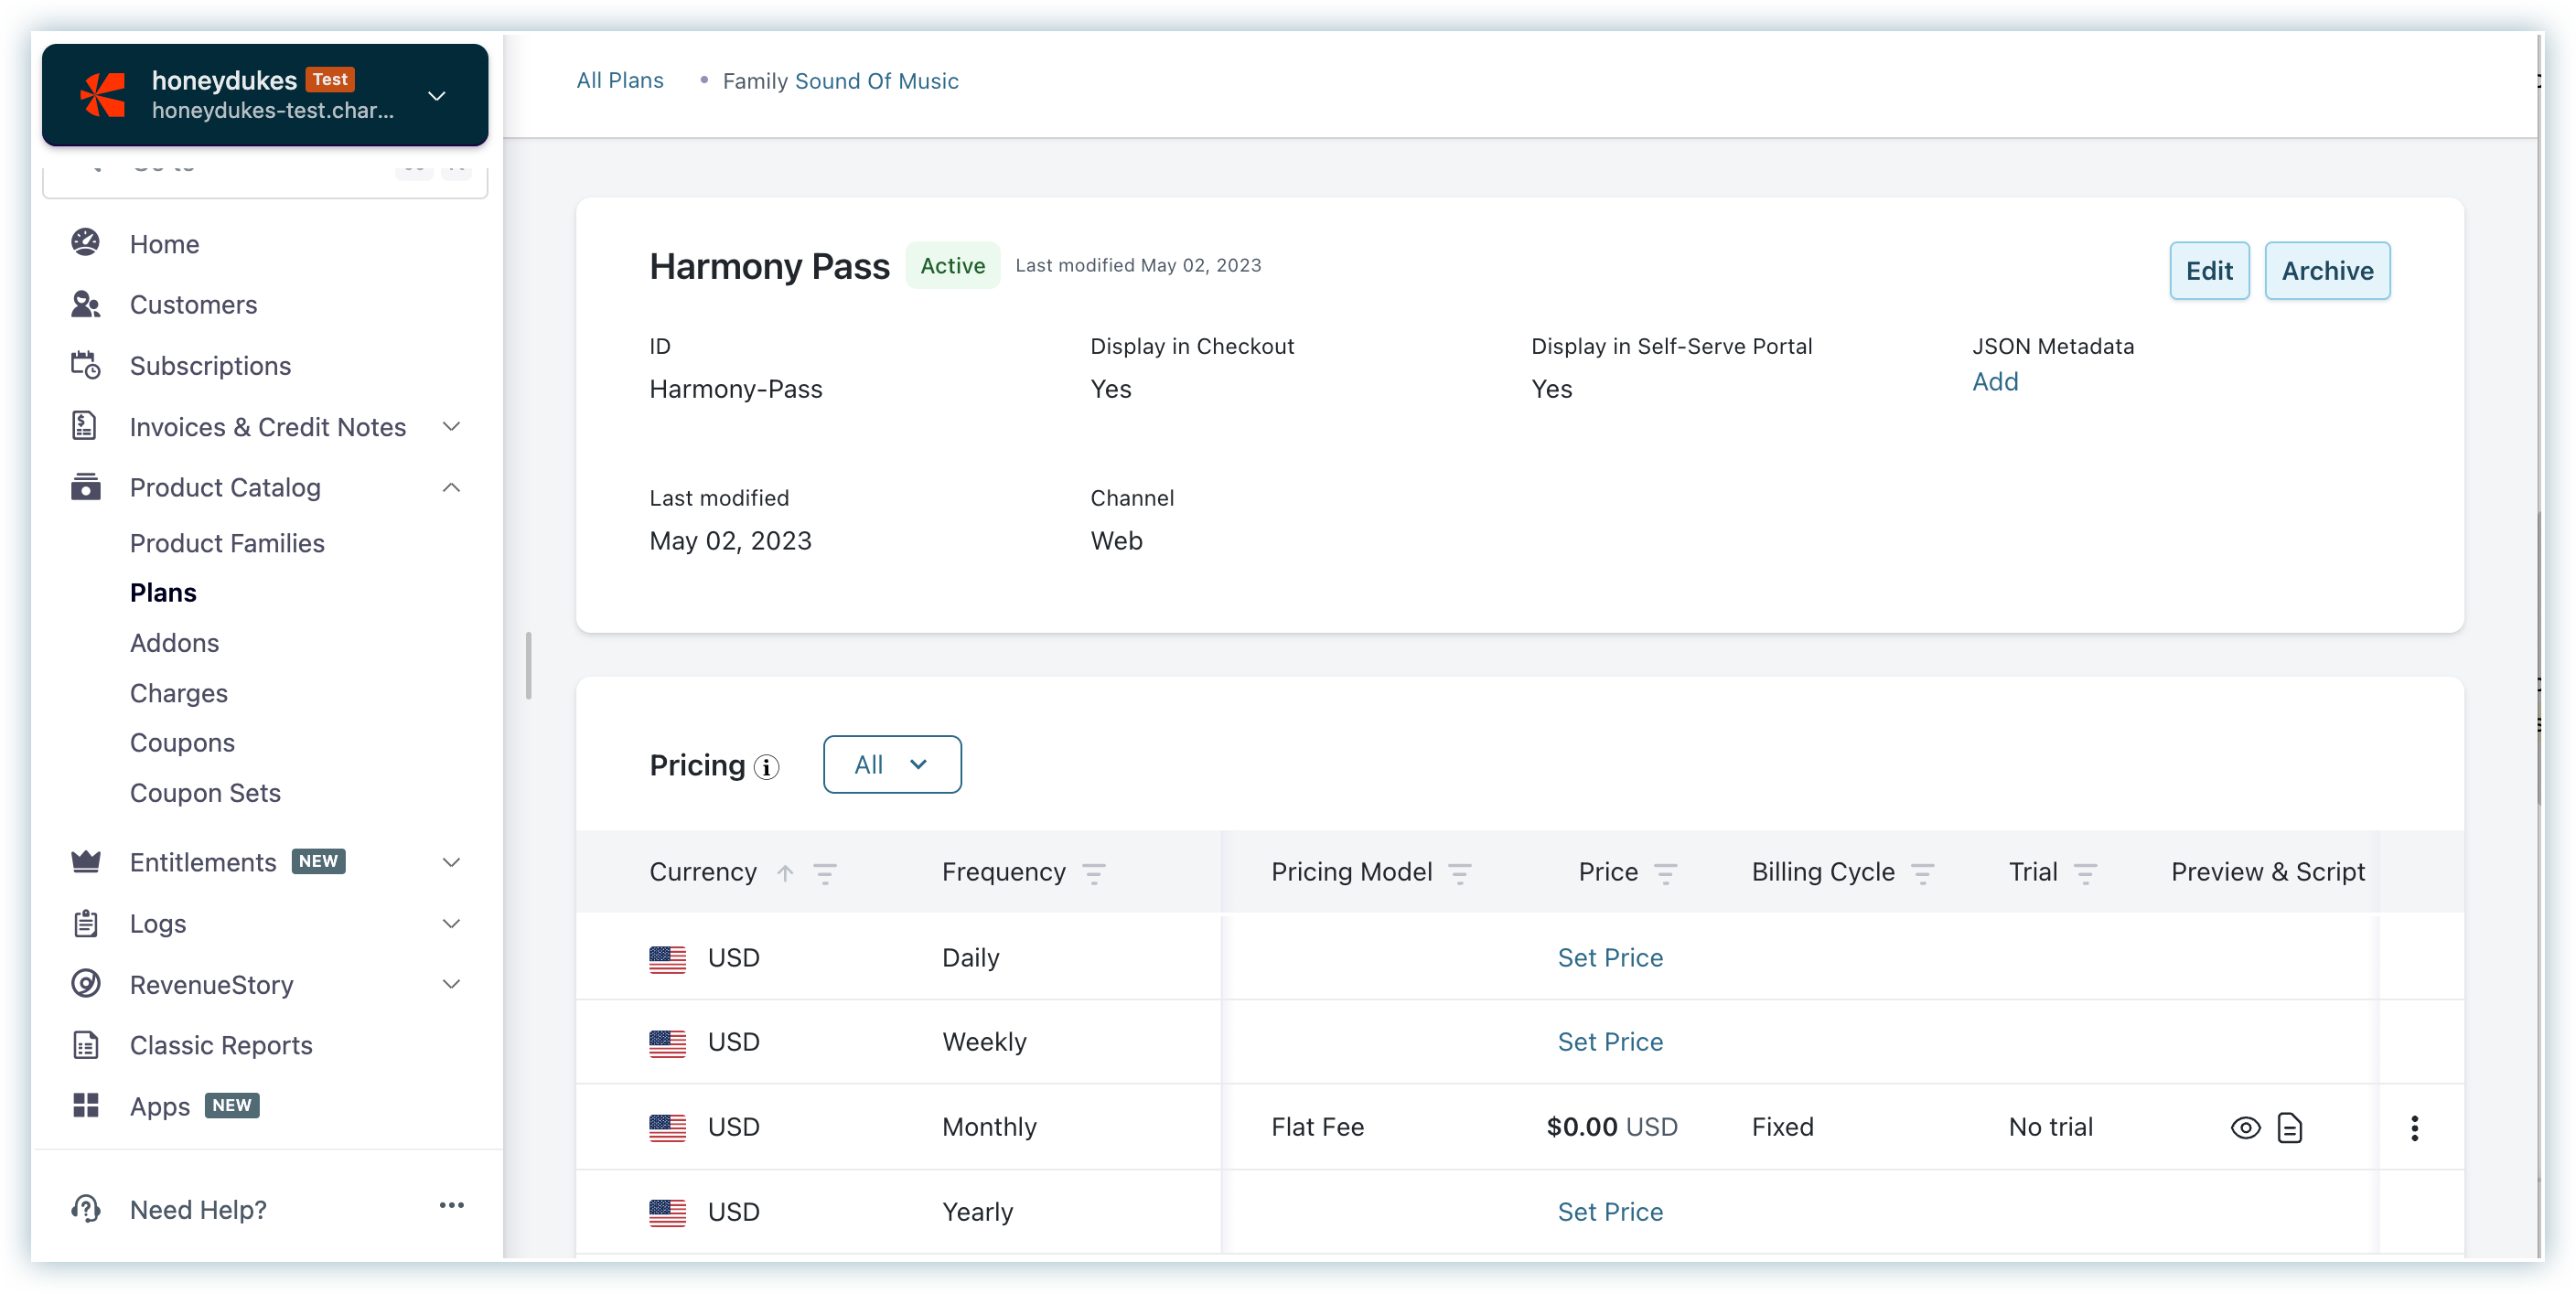
Step 1: Configuring Product Catalog and Plans in Chargebee
In your Chargebee site, you need to create plans and set up the pricing plans that align with your business model. Here's how to create a plan:
Create product families and categorize your plans and addons under these product families.
To create a new product family, follow these steps:
Click Product Catalog > Product Families > + Create Product Family.
In the Create a Product Family page, enter the product family name, description, and modify the product family id(if required).
Click Create
Creating a Plan. To create a new plan on your Chargebee site, follow these steps:
Click Product Catalog > Plans > + Create Plan.
In the Create a New Plan page, click the Product Family dropdown and select the product family to which you want to associate the plan.
Save the plan.
Fill in the details for your plan, such as plan name, pricing, billing frequency, etc.
Step 2: Obtain the Chargebee Embed Code
Once you've successfully configured your pricing plans, it's time to proceed to Pricing Tables.
Follow the steps below to obtain the Chargebee Embed code from Pricing Tables.
- Log in to Pricing Tables.
- Click Add new connection.
- Enter your Chargebee domain and Full-Access API key.
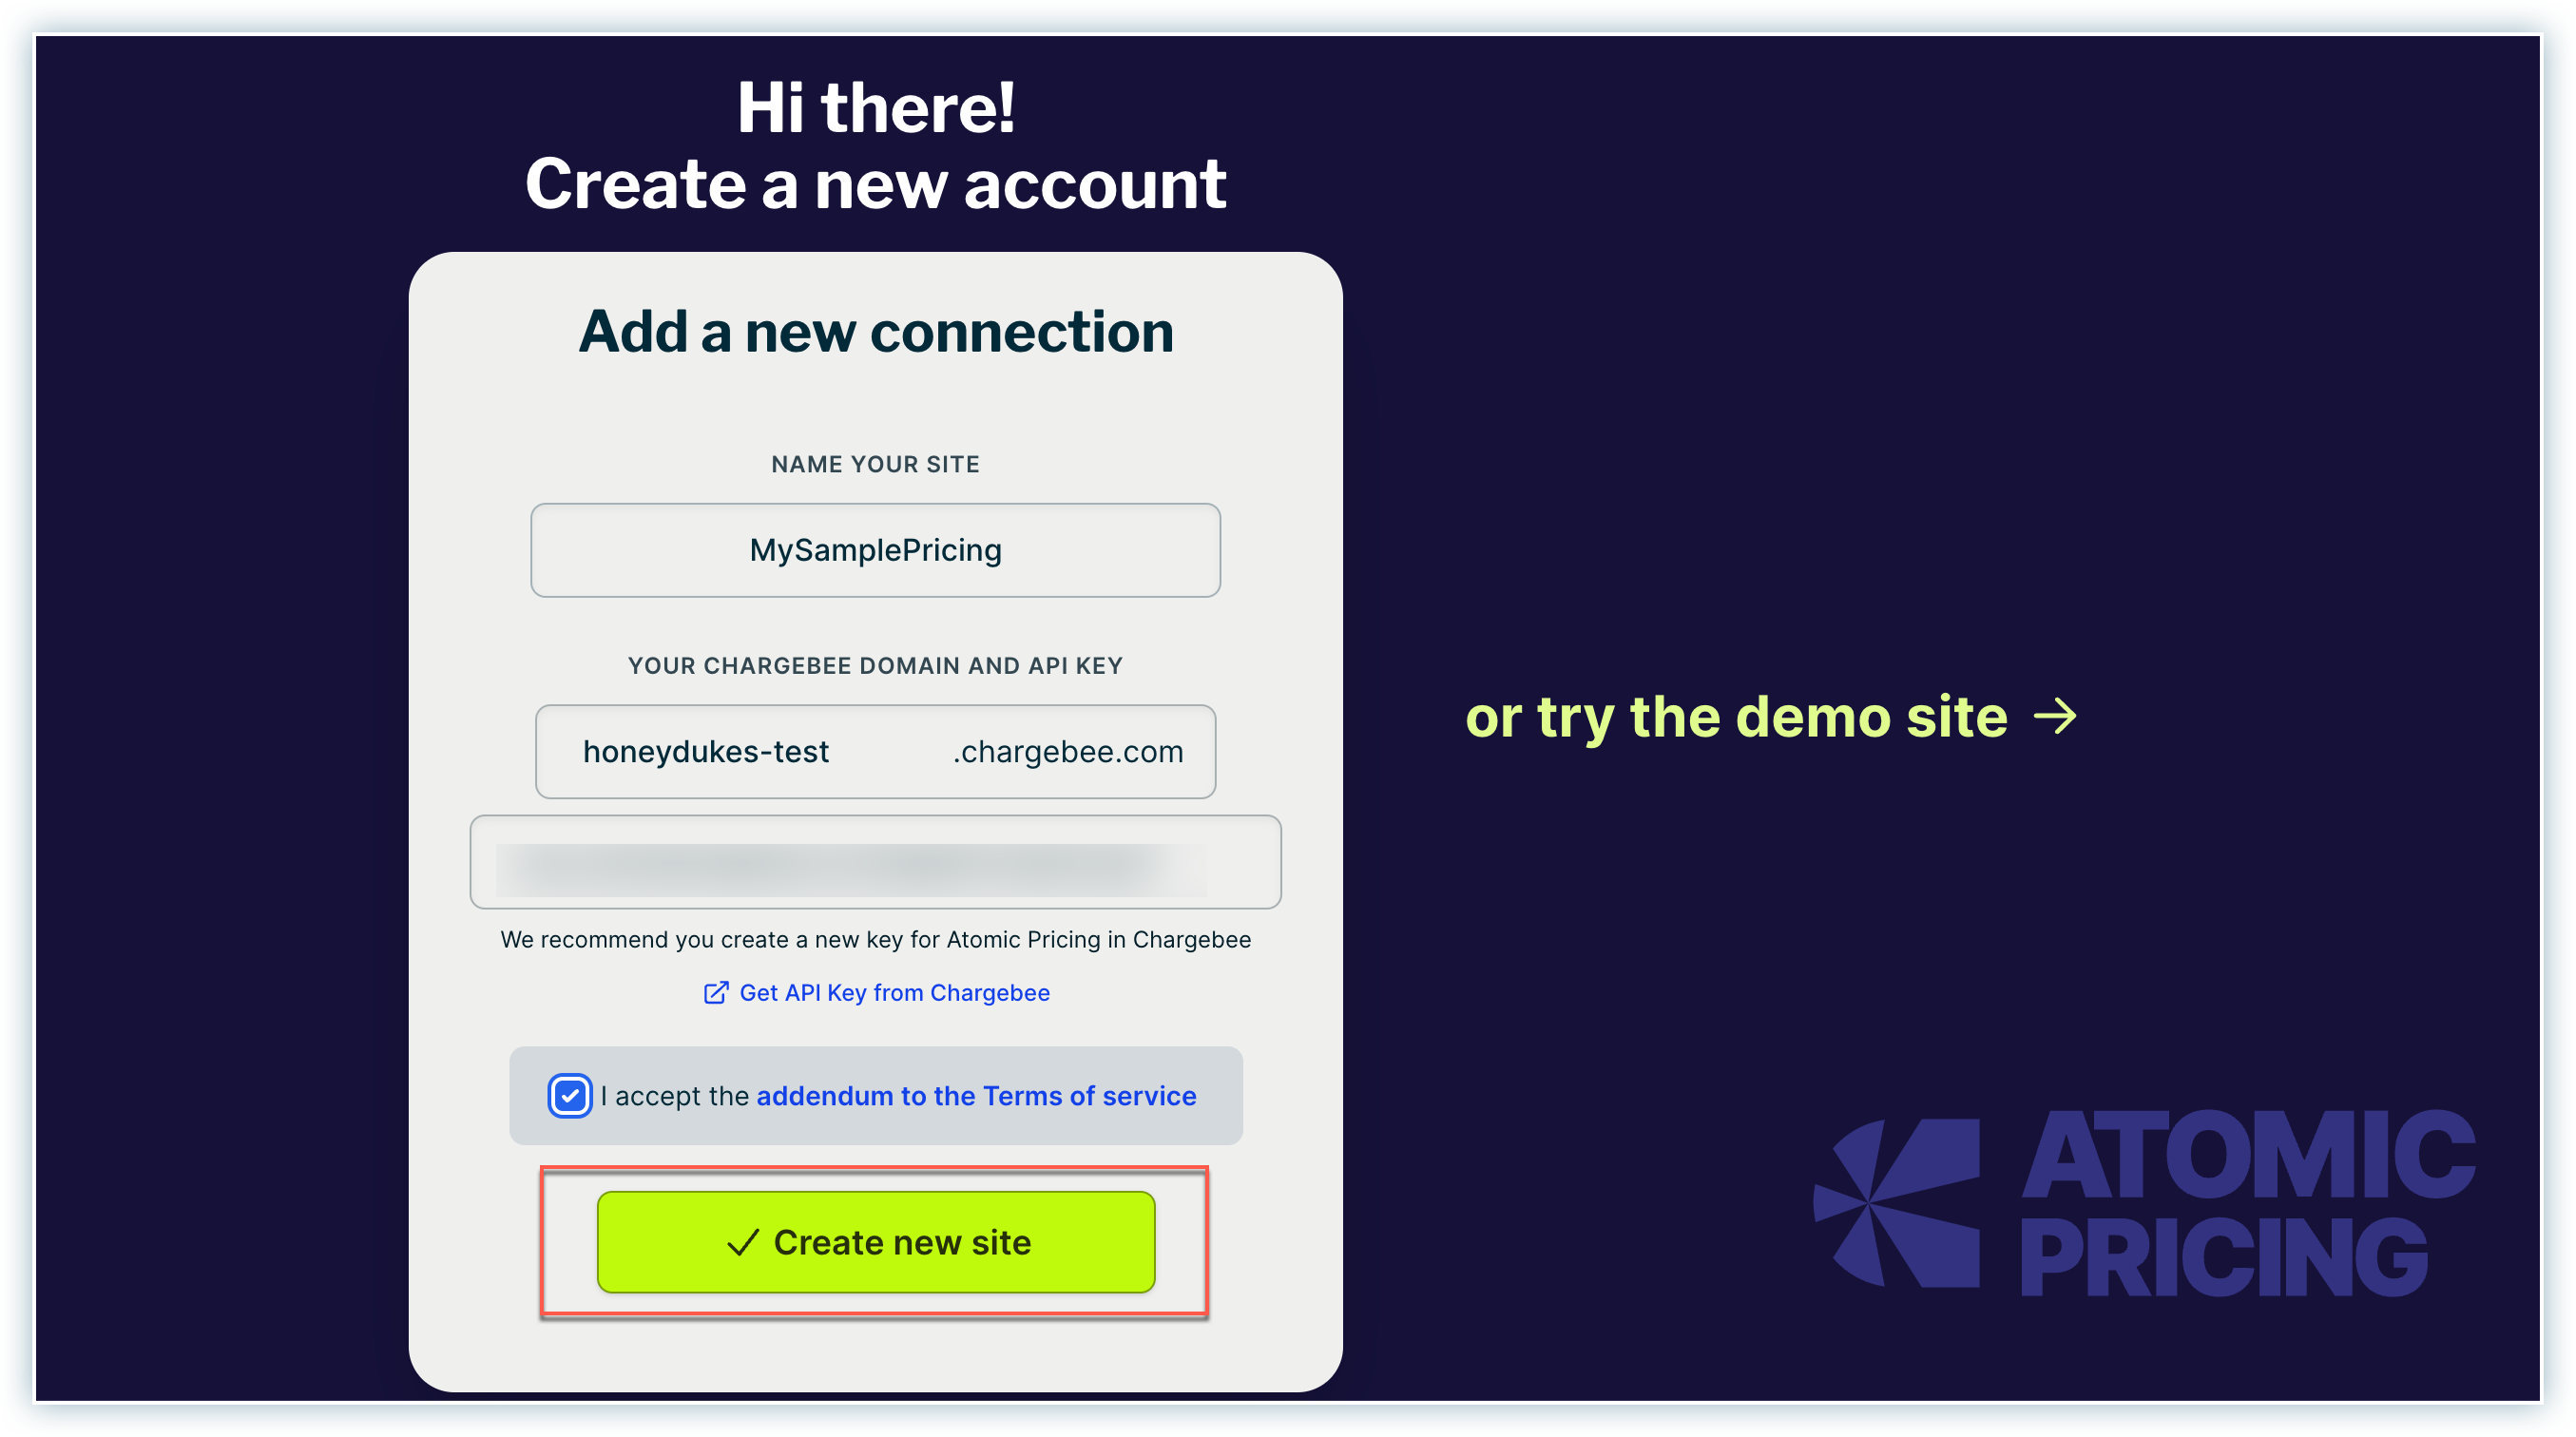
- Click Create new site. Your product catalog information from Chargebee will be pulled into the Pricing Tables dashboard.
- Customize the table based on your preferences, such as the theme, order of the plans, features, etc.
- Click Publish changes once you are satisfied with the customization.
- Click Embed/Copy Pricing Page to get the pricing table URL.
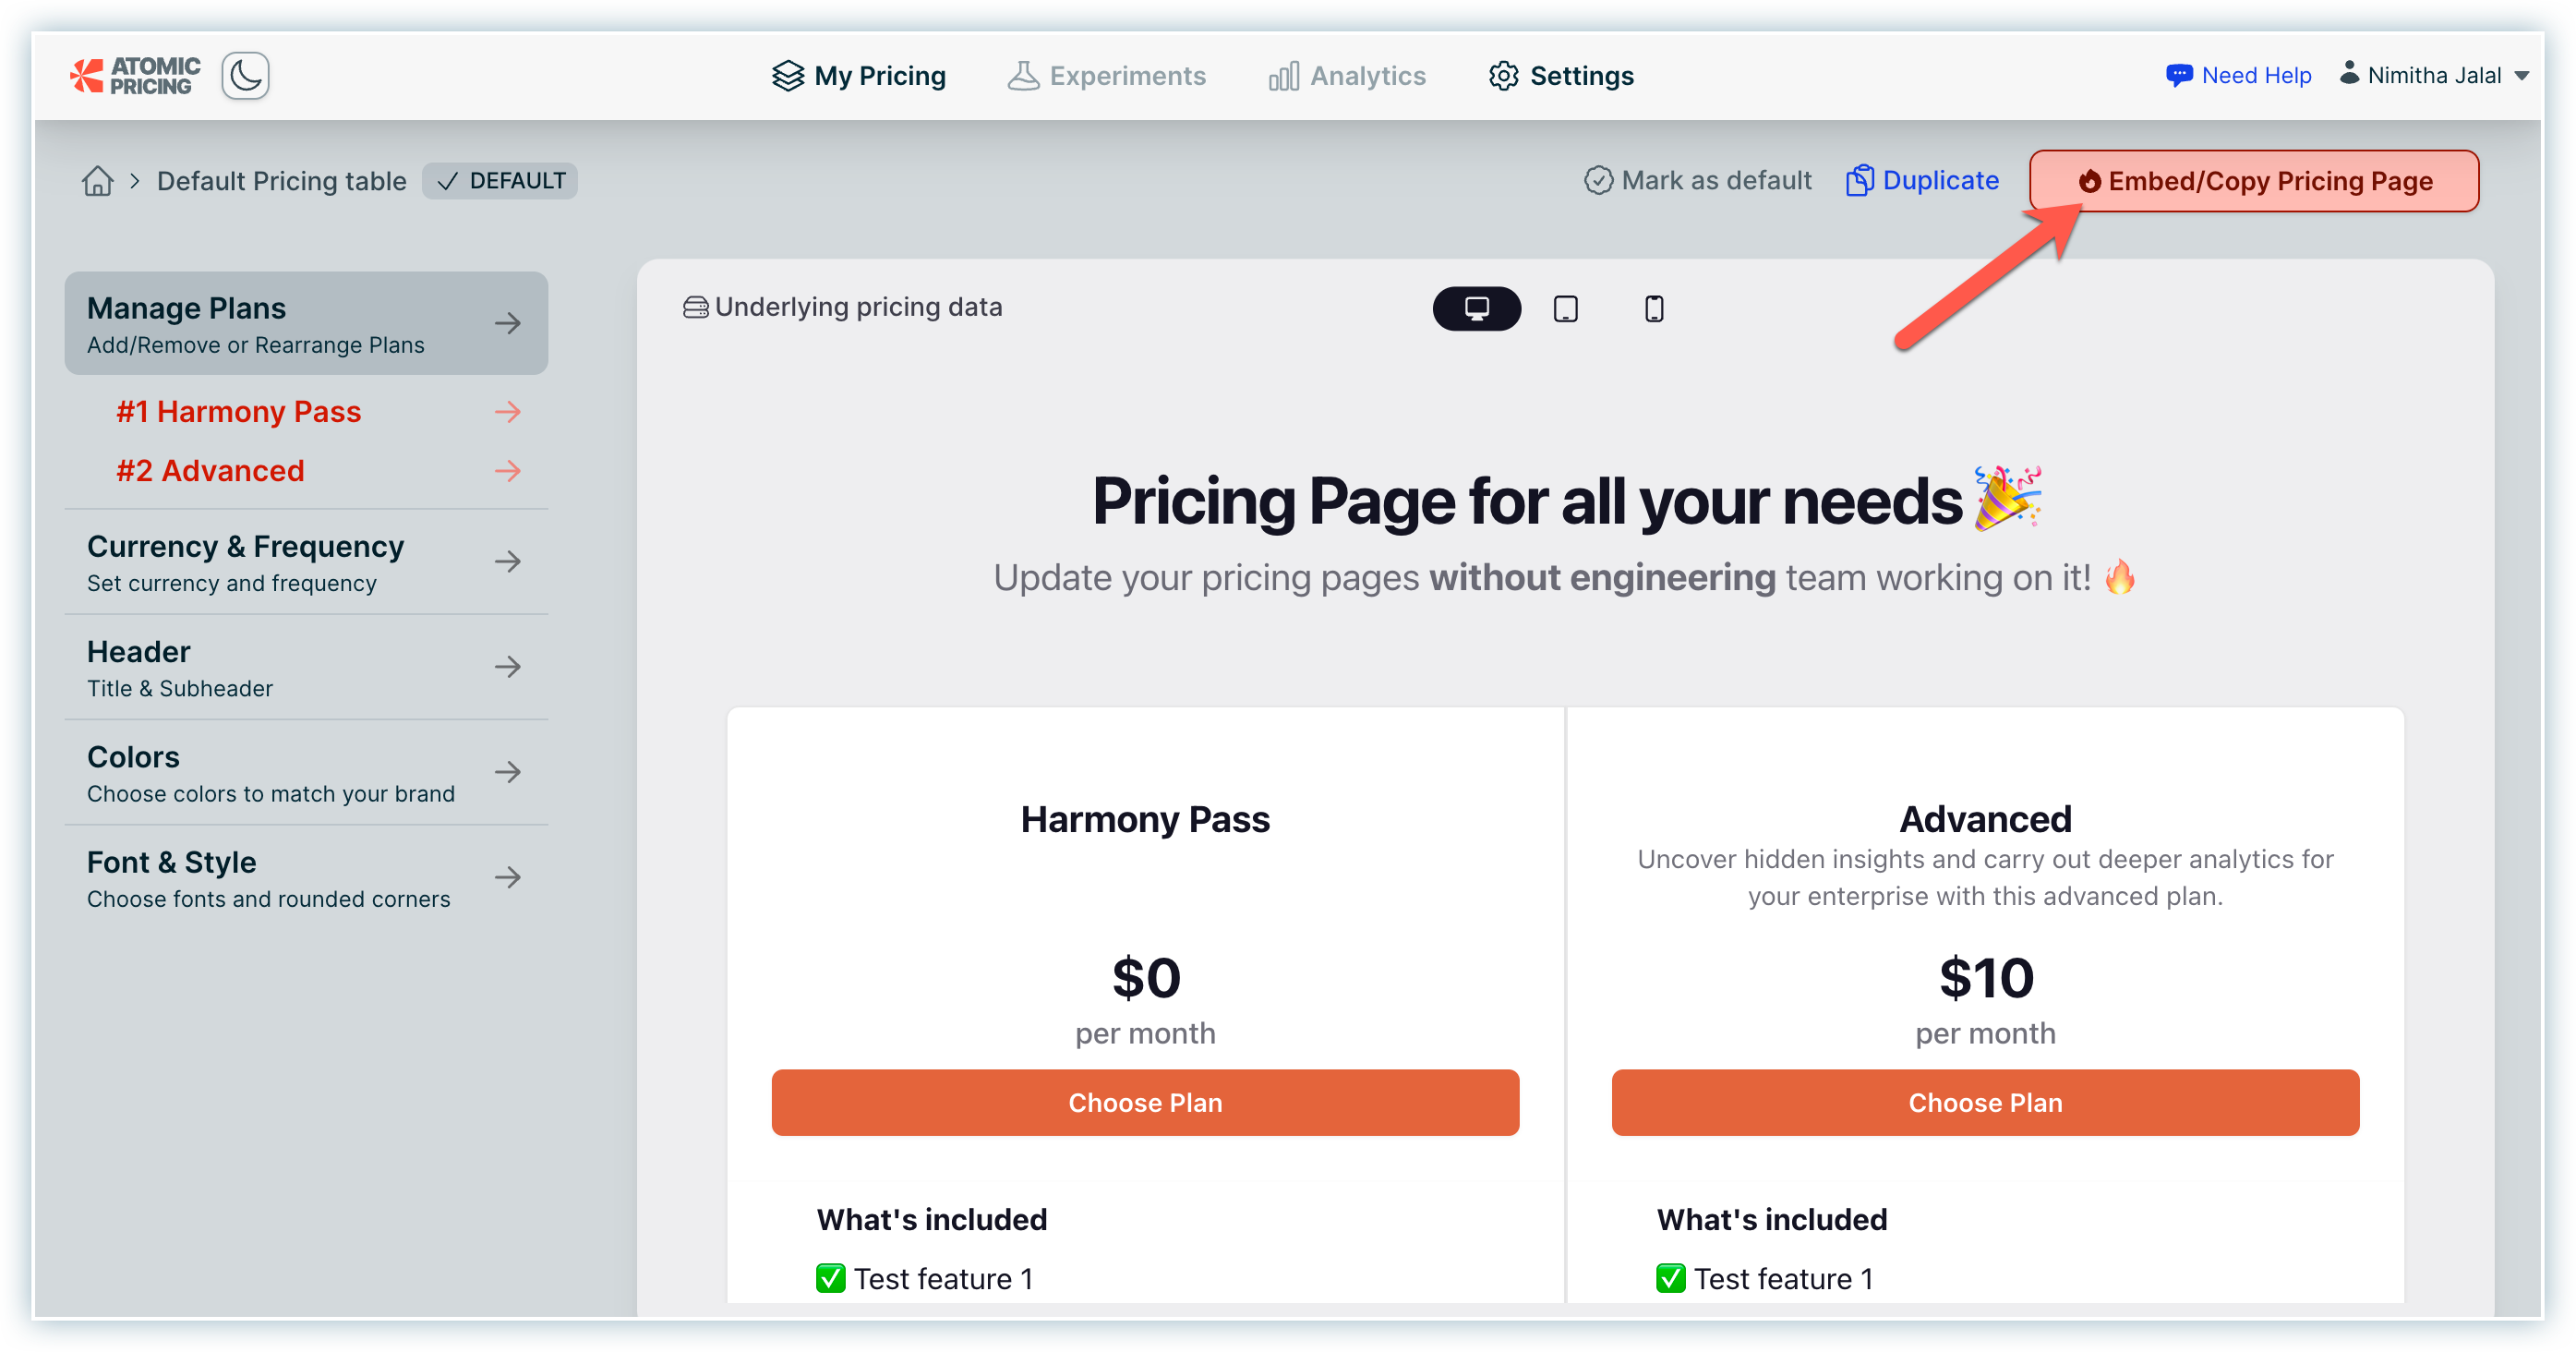
- Finally, click Copy URL to complete the process.
Example: No code pricing table url
https://hosted.atomicpricing.com/sites/01GV57EG6A1V28QR8KYBK8FE3J/pricing/default
Step 3: Open Wix and Create a New Site
Enhance your Wix workspace by embedding the Chargebee pricing table in just a few simple steps:
- Log in to your Wix workspace.
- Create a new site where you'd like to embed the Chargebee pricing table.
- Name the page accordingly to indicate that it contains the pricing information.
- Proceed to embed the Chargebee pricing table on the newly created page.
Step 4: Add an HTML Embed Block
Here are the steps to embed external content in Wix:
- Within the page, click the + Add Section button to add a new element.
- Go to add elements in side pannel and select Embed Code from the list.
- Click Embed HTML to insert new HTML code section. Once the "Embed HTML" section is added, you will see a block added with settings and fields to add the HTML code.
- Paste the copied embed script into the HTML embed editor.
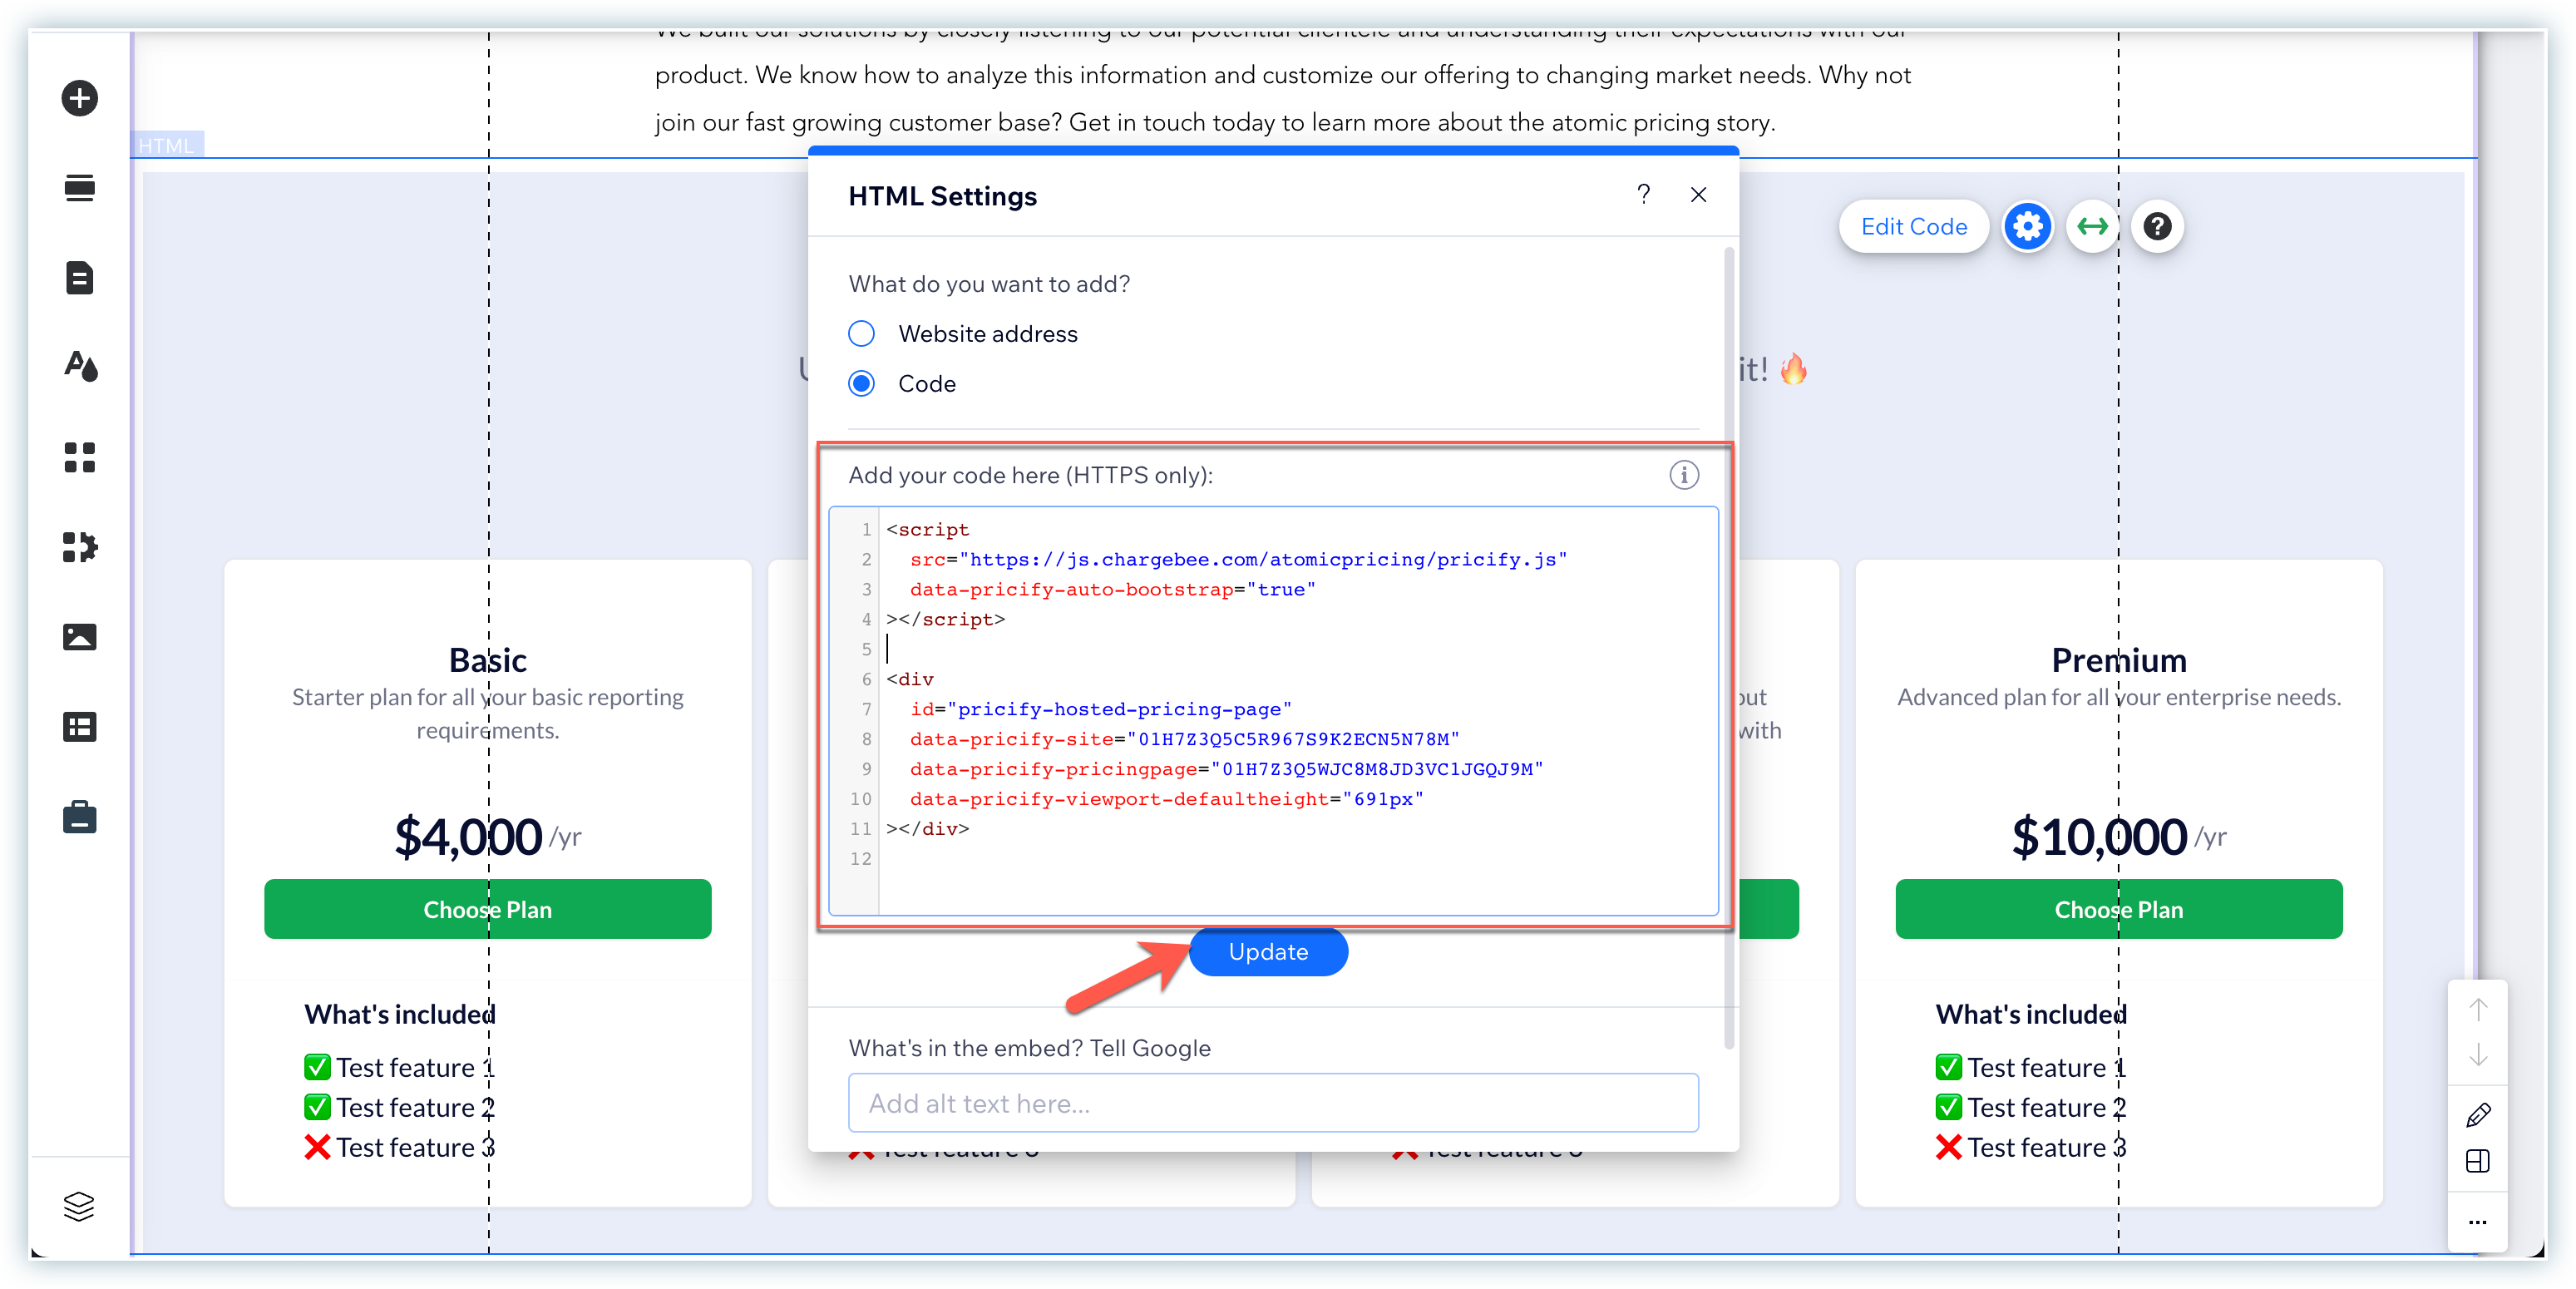
Pricing Tables Page Embed Script - Click Update.
Step 5: Save and Preview
Now, publish your Wix site. You can preview it to see how the pricing table looks and functions within your workspace by publishing the page.

Benefits of Embedding Chargebee Pricing Table in Wix
Seamless Business Management: By integrating Chargebee pricing table into Wix, you can manage your subscription plans and pricing details from a centralized location. This simplifies the process of updating and modifying your offerings as your business evolves.
Enhanced Customer Experience: Transparent pricing table help your customers understand the value of your services and make informed decisions. With Chargebee's professional and attractive pricing presentation, you can build trust and credibility with your audience. You can also run pricing & package experiments for targetted specific customer segments. with ease.
Real-time Updates: Any changes made in your Chargebee account will automatically reflect in the embedded pricing table on your Wix page. This ensures that your customers always have access to the most up-to-date information.
Integrating Chargebee no-code pricing table into your Wix website is a smart move to streamline your business management and provide a clear overview of your subscription plans and pricing options. By following the steps outlined in this blog post, you can embed the pricing table easily and efficiently. Embrace the power of Chargebee and Wix to simplify your business operations and create a delightful experience for your customers. Happy embedding!
We're always happy to help you with any questions you might have! Click here to reach out to us.