Introduction
chargebee-init is a new CLI for the Node.js ecosystem which helps with integrating various Chargebee services to an existing application. With minimal setup and configuration, it generates the required routes and handlers for most commonly used Chargebee features like:
- Checkout one-time charges
- Checkout a subscription plan
- Manage payment methods
- Customer portal
- Handle incoming webhook events
Currently supported frameworks are Next.js and Express. Although the rest of this tutorial focuses on Next.js, the steps outlined will broadly be similar for any supported framework.
Requirements
For the purposes of this tutorial, we will bootstrap a Next.js app using create-next-app. Skip to running chargebee-init if you have an existing app.
Setup a Next.js app
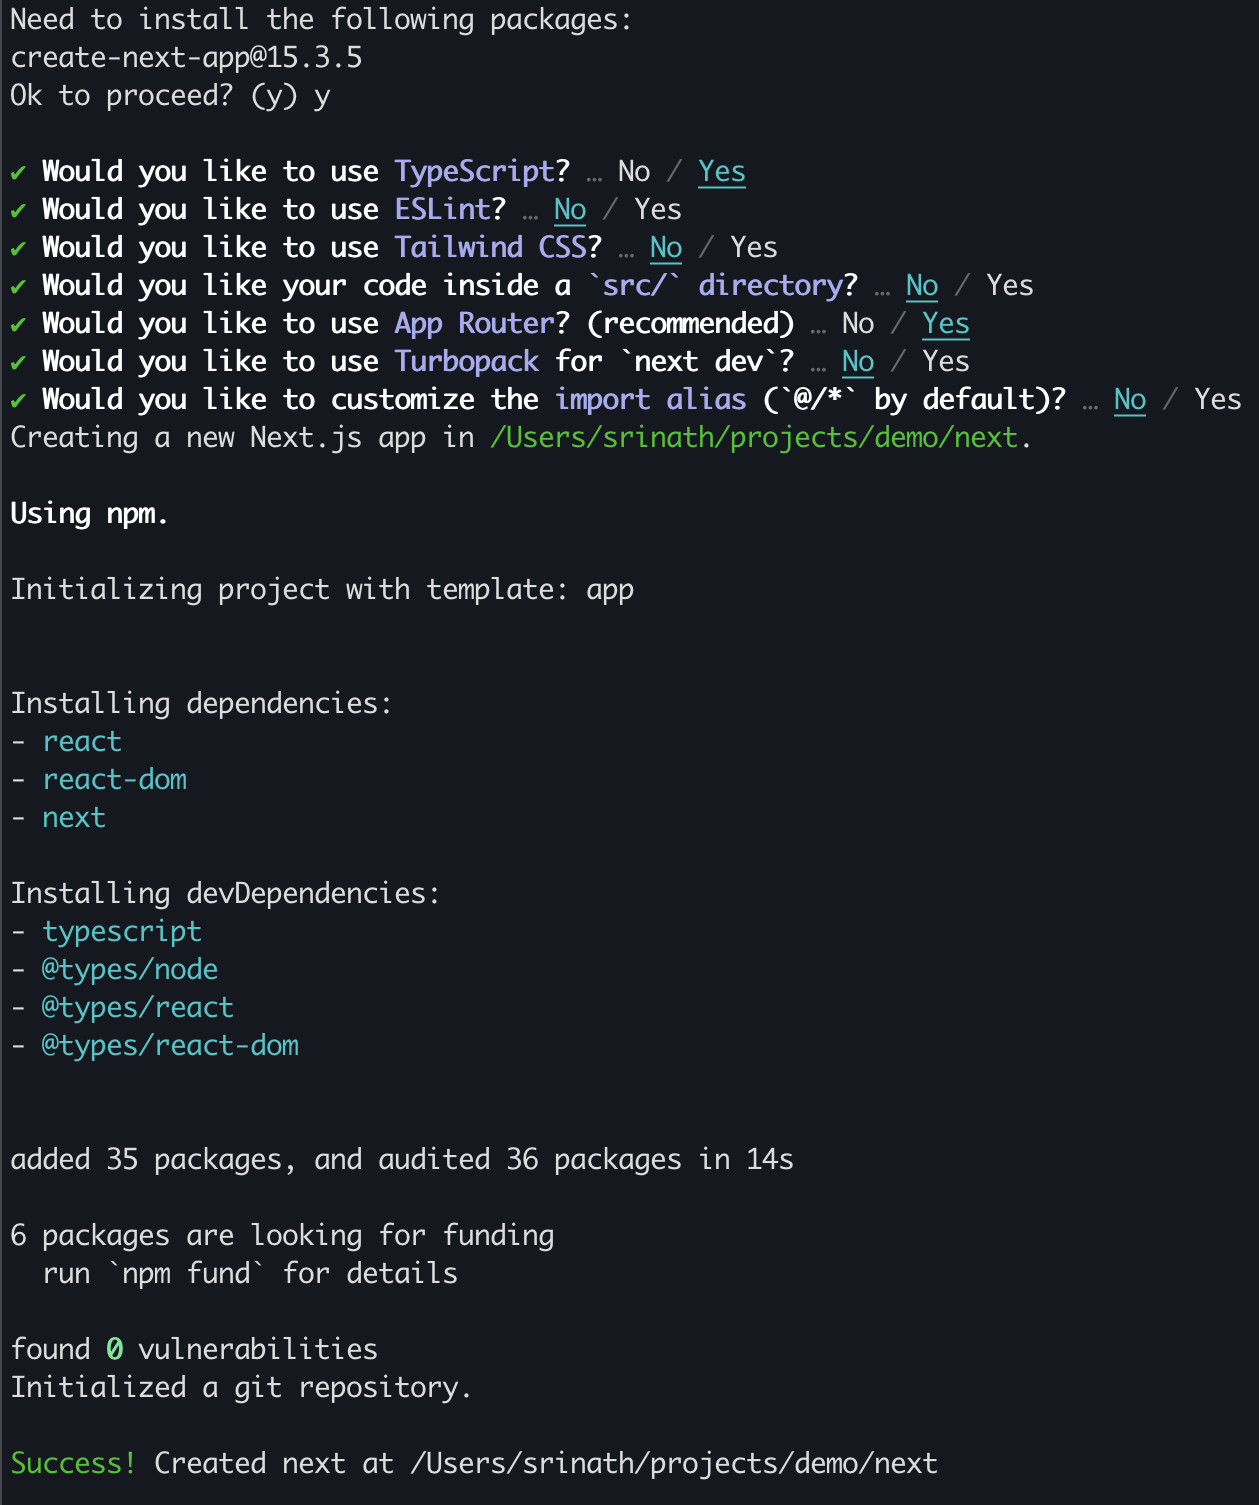
To bootstrap a Next.js app, run npx create-next-app next. The important options to keep in mind are:
- Use TypeScript as
chargebee-initonly generates TypeScript files for now - Use App Router
The options and output should look something like this:
To make sure everything works, run the following commands and point your browser to http://localhost:3000. You should be greeted by your Next.js app!
npm run build
npm run dev
For additional help regarding Next.js, please refer to their docs.
Running chargebee-init
With a working Next.js app, we can now run chargebee-init! In your app directory, simply run npx chargebee-init to download and run the CLI.
Note: If you use git or a similar SCM tool to manage your source code, create a new branch before you proceed to test the Chargebee features in isolation before merging to your main branch.
cd next
git checkout -b feat/chargebee-init
npx chargebee-init
The tool uses sensible defaults where possible, and requires only a couple of choices to be made. If all checks pass, you will see a bunch of new files and an updated package.json file:
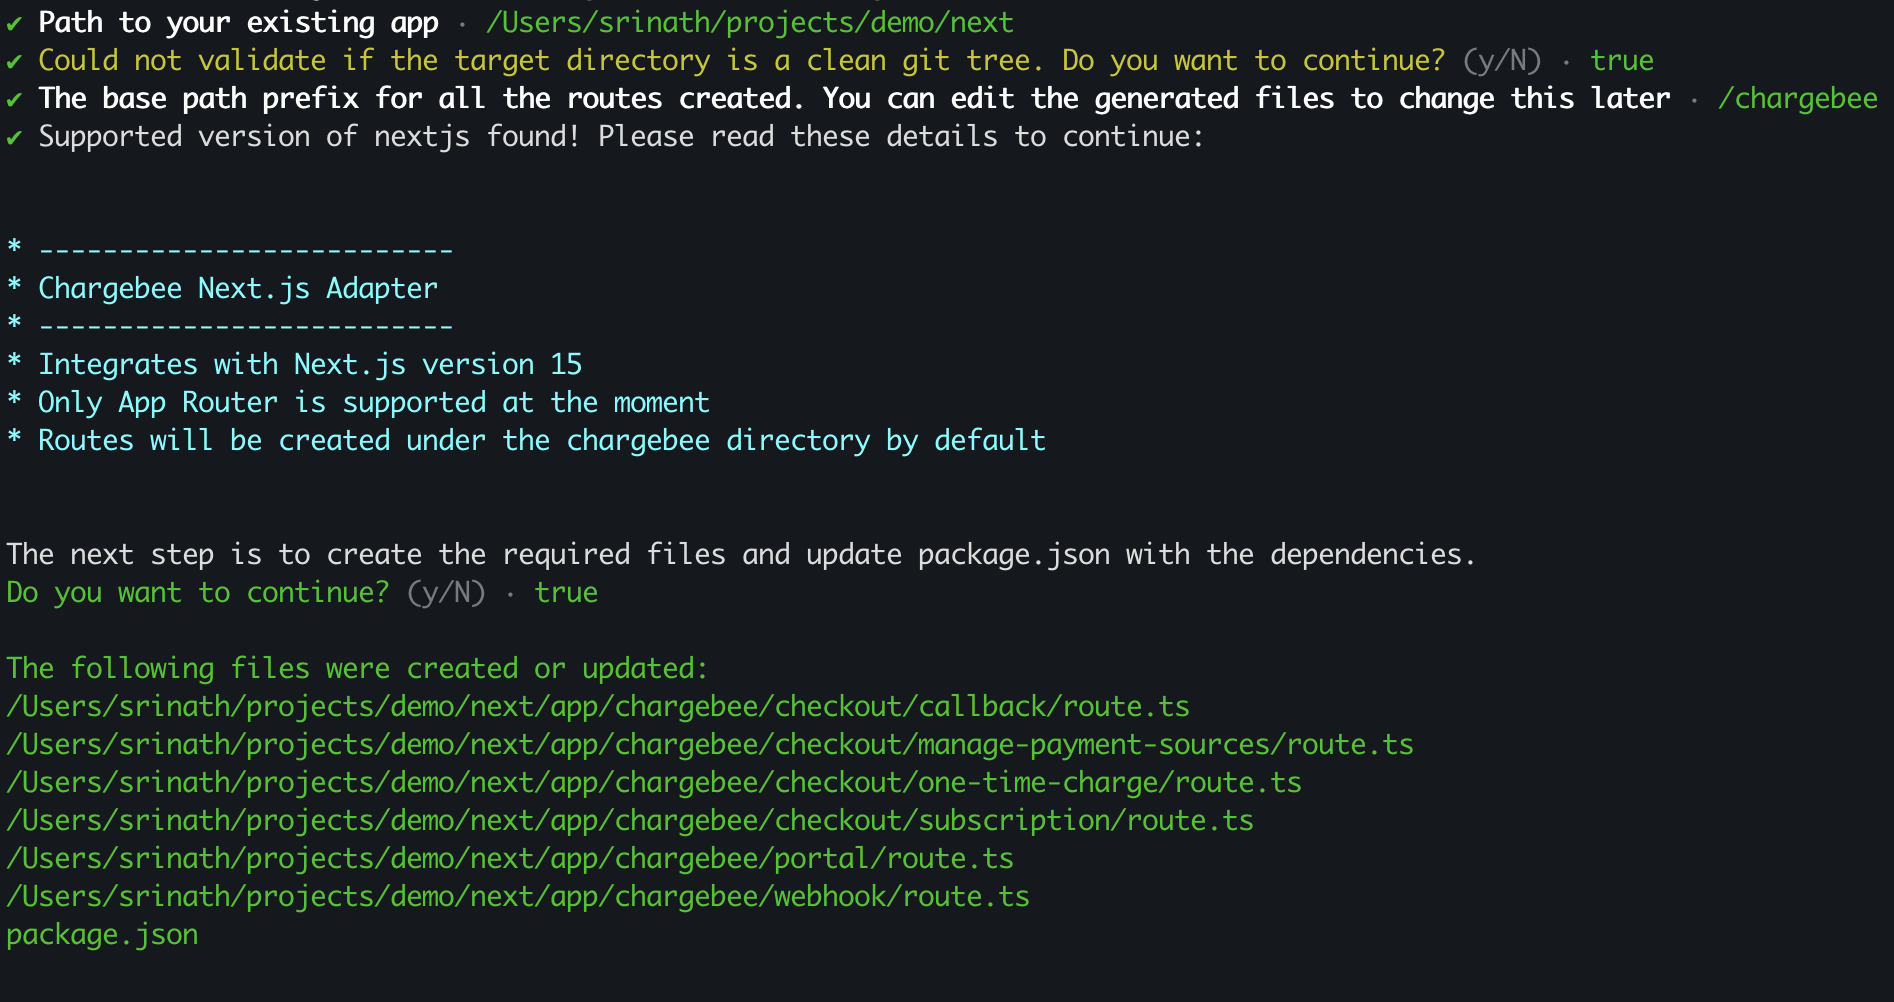
Since the CLI creates and updates files in your app directory, it performs various checks before it creates/updates the required files:
- Ensure there is a valid
package.jsonin the root directory - Validate if
"next"is a dependency and it's version matches>=15 - Ensure a clean working git tree. If the
gitcommand isn't available, or if the app directory has uncommitted changes, a warning is raised which can be overridden - Determine if the files are to be written to
apporsrc/app
Let's take a quick look at layout of the chargebee directory and review one of generated files.
Implementation details
Your app directory will now have a layout similar to the one shown below. Depending on your choice of prefix path, you may have a different root directory instead of chargebee.
next
└── app
    └── chargebee
        └── checkout
            └── one-time-charge
                └── route.ts
            └── subscription
            └── manage-payment-sources
        └── portal
        └── webhook
Thanks to Next.js's file-based routing, each route handler will be written to a feature-specific parent directory, with a route.ts file containing the implementation. For example, checkout/subscription/route.ts will contain the following code:
import {
	client,
	createSubscriptionCheckout,
	raiseWarning,
	type SubscriptionInput,
} from "@chargebee/nextjs";
import type { NextRequest } from "next/server.js";

export const GET = createSubscriptionCheckout({
	apiKey: process.env.CHARGEBEE_API_KEY!,
	site: process.env.CHARGEBEE_SITE!,
	apiPayload: async (req: NextRequest): Promise<SubscriptionInput> => {
		raiseWarning();
		const chargebee = await client.getFromEnv();
		// https://api-explorer.chargebee.com/item_prices/list_item_prices
		const { list } = await chargebee.itemPrice.list({
			limit: 1,
			item_type: {
				is: "plan",
			},
			status: {
				is: "active",
			},
		});

		return {
			subscription_items: [{ item_price_id: list[0]?.item_price.id }],
			redirect_url: `${req.nextUrl.origin}/chargebee/checkout/callback`,
		} as SubscriptionInput;
	},
});
Each route is set up with a GET handler, and the implementation is exported from the framework-specific adapter package @chargebee/nextjs. These adapters are thin wrappers which use the Chargebee Node SDK to perform the required requests, handle errors and return the appropriate response, all wrapped in framework specific objects.
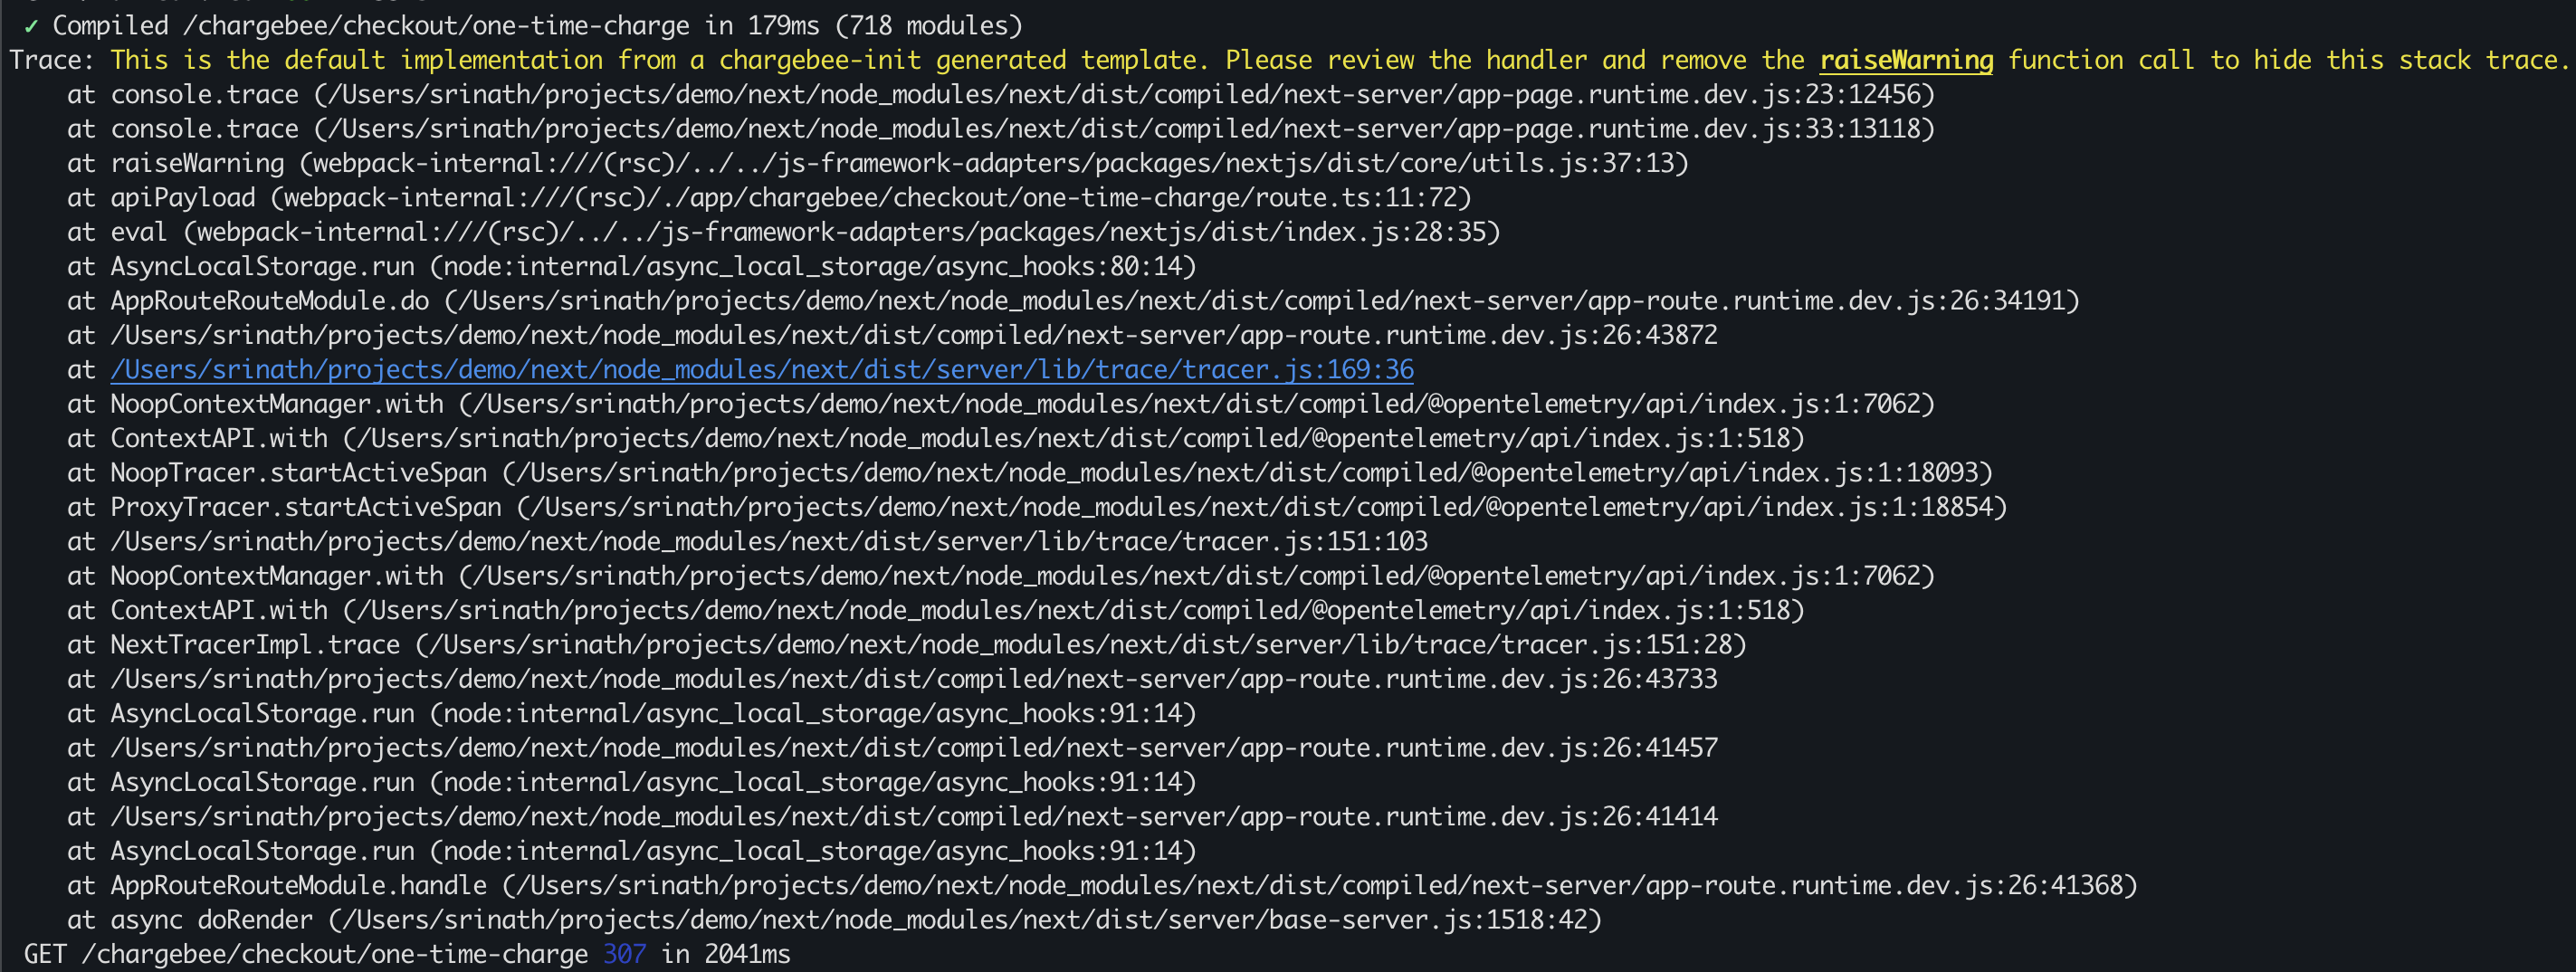
The apiPayload method allows for the required input to the API to be constructed as per the app's implementation: it may contain a static list of subscription_items, read from a JSON file, queried from a database, etc. In this example, the default implementation uses the Chargebee API to fetch a single itemPrice and return it so it's visible as a subscription in the checkout page.
Note: The default implementations of apiPayload print a warning with a stack trace to the console. This is to encourage the developers to review those generated files and customize the implementation. Please remove the raiseWarning() method call so you don't see the following in the console everytime the route is invoked:
Additional configuration
Although chargebee-init tries to minimize manual effort, some manual configuration is required at this point. This may change in the future as more features are added.
Setting the required environment variables
Creating the webhook endpoint through the Chargebee console
You can review the list of required manual configuration at any time by running npx chargebee-init help nextjs which will output the following steps:
Define the required
process.env.*variables either by adding them to your .env file or replacing them at build time:CHARGEBEE_SITE="site-name"CHARGEBEE_API_KEY=""CHARGEBEE_WEBHOOK_AUTH="username:password"Run
npm|pnpm|bun installto grab the required packagesConfigure the webhook URL in the Chargebee dashboard with basic auth set to the username and password defined in
CHARGEBEE_WEBHOOK_AUTHReview the routes created under the chargebee/ directory and make necessary changes
In the case of our Next.js app, update or create a .env file in the root directory and set the environment variables shown above. You may optionally choose to create the webhook and set the CHARGEBEE_WEBHOOK_AUTH to test the incoming webhook handler. Don't forget to run npm install or the equivalent command for your package manager to install the required @chargebee/nextjs dependency.
Test run
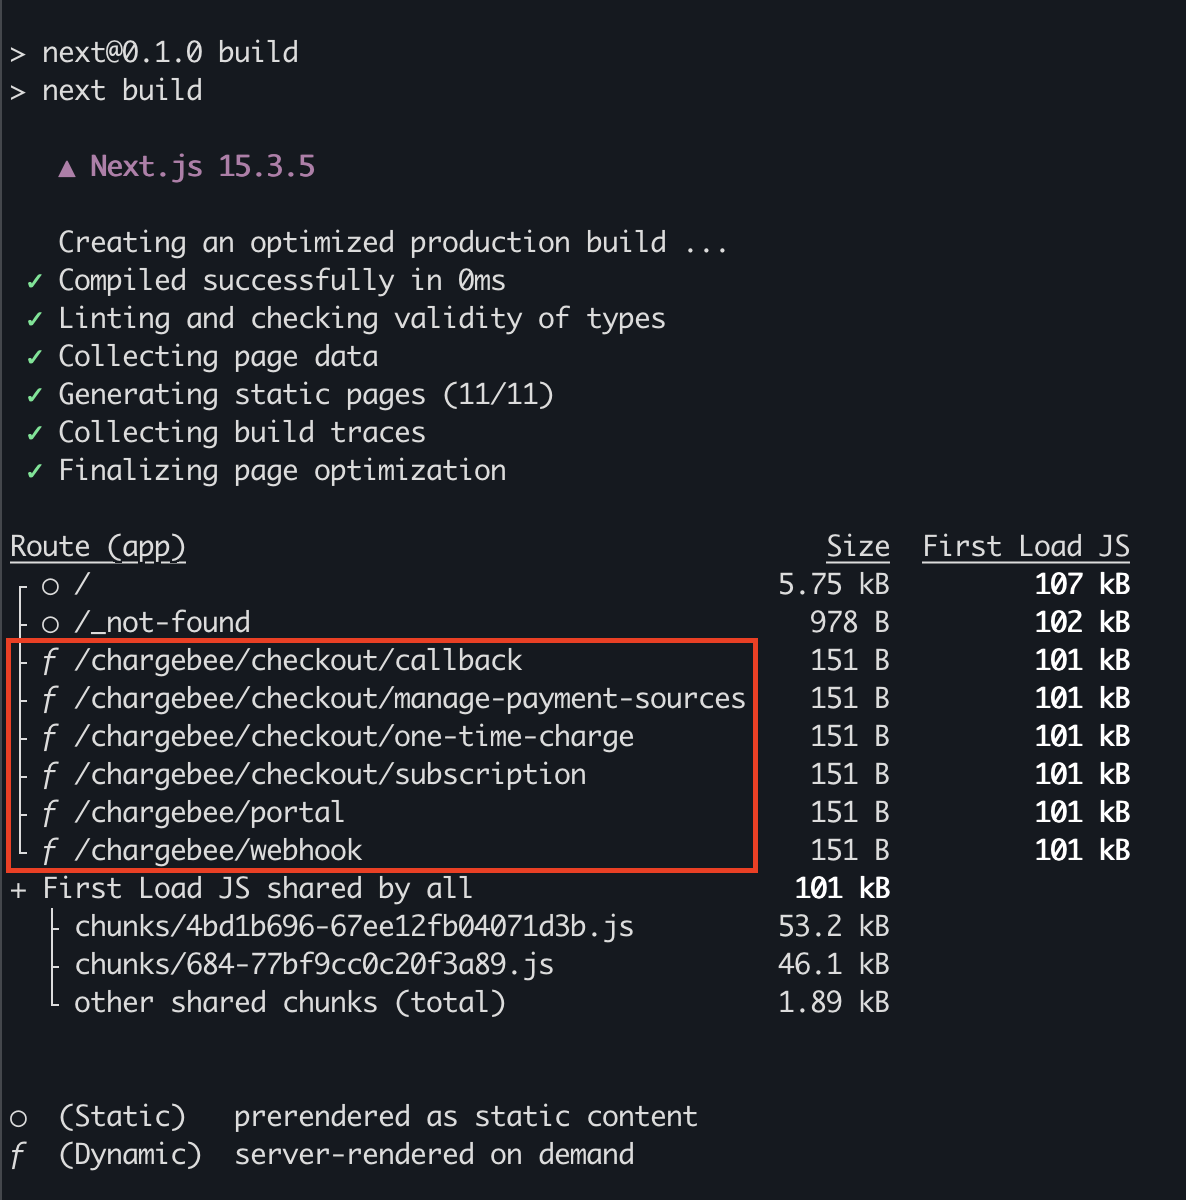
Now that the hard part is done, let's take it for a spin! Running npm run build should show the new routes created by chargebee-init:
With the routes validated, run npm run dev to start the server. Visiting http://localhost:3000/chargebee/checkout/subscription should now redirect you to the hosted checkout page with a single subscription (if one exists in your test site):

Looking ahead
chargebee-init aims to fill the gap between the low-code and no-code solution for the Node.js ecosystem by getting rid of the boring work of setting up repetitive code, while letting the developers customize the most commonly used Chargebee features. As we continue to listen to community feedback on developer tooling, we look forward to supporting other popular Node.js frameworks and expanding the support for more Chargebee services in the future.
The Developer Experience at Chargebee can be reached at dx@chargebee.com.
We're always happy to help you with any questions you might have! Click here to reach out to us.