
# Overview
API-based integration can be used when you can authorize the users and you want to use Chargebee's Single Sign-On (SSO) capability for providing portal access to your users for managing their billing and subscription details.
API-based integration can be used for the below:
- Checkout
- Portal
# Checkout via API
Integrating using API provides you with better control over the features and functionalities, but requires extensive programming knowledge to work with.
API integration is recommended if you,
- Have a user authentication system at your end.
- Or need more control than what is offered through a Drop-in script.
For example, overriding price and changing trial end.
Learn more on how to integrate Checkout via API.
# Call Flow
You need to have an HTTPS end-point at your end which uses Chargebee Hosted Page API and returns a Hosted Page object.
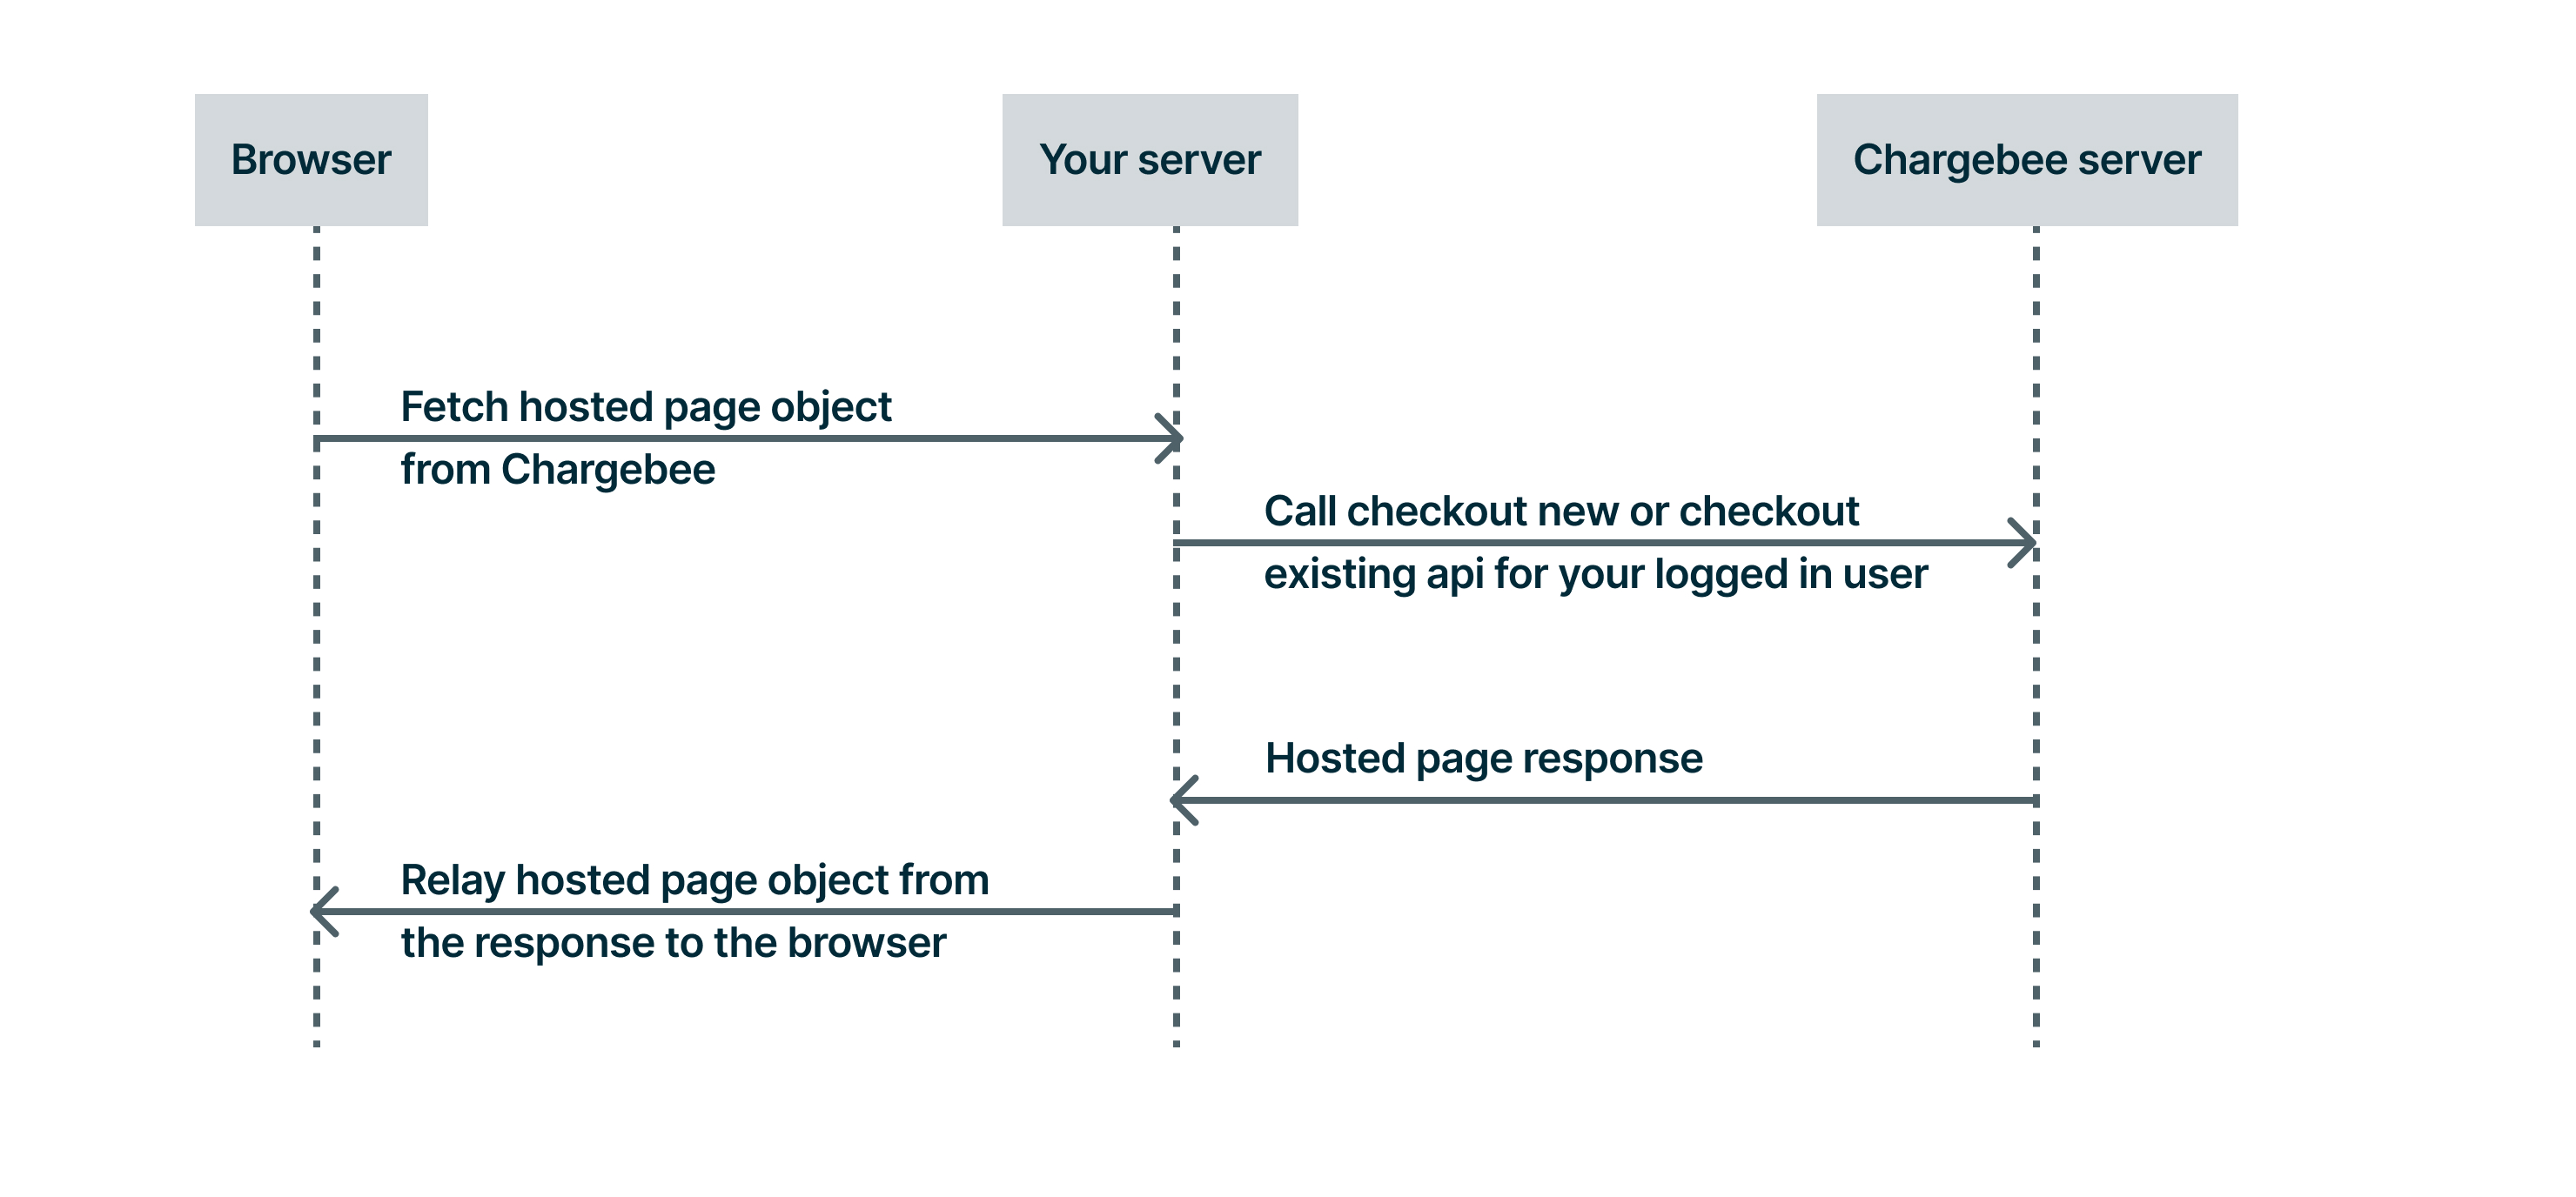
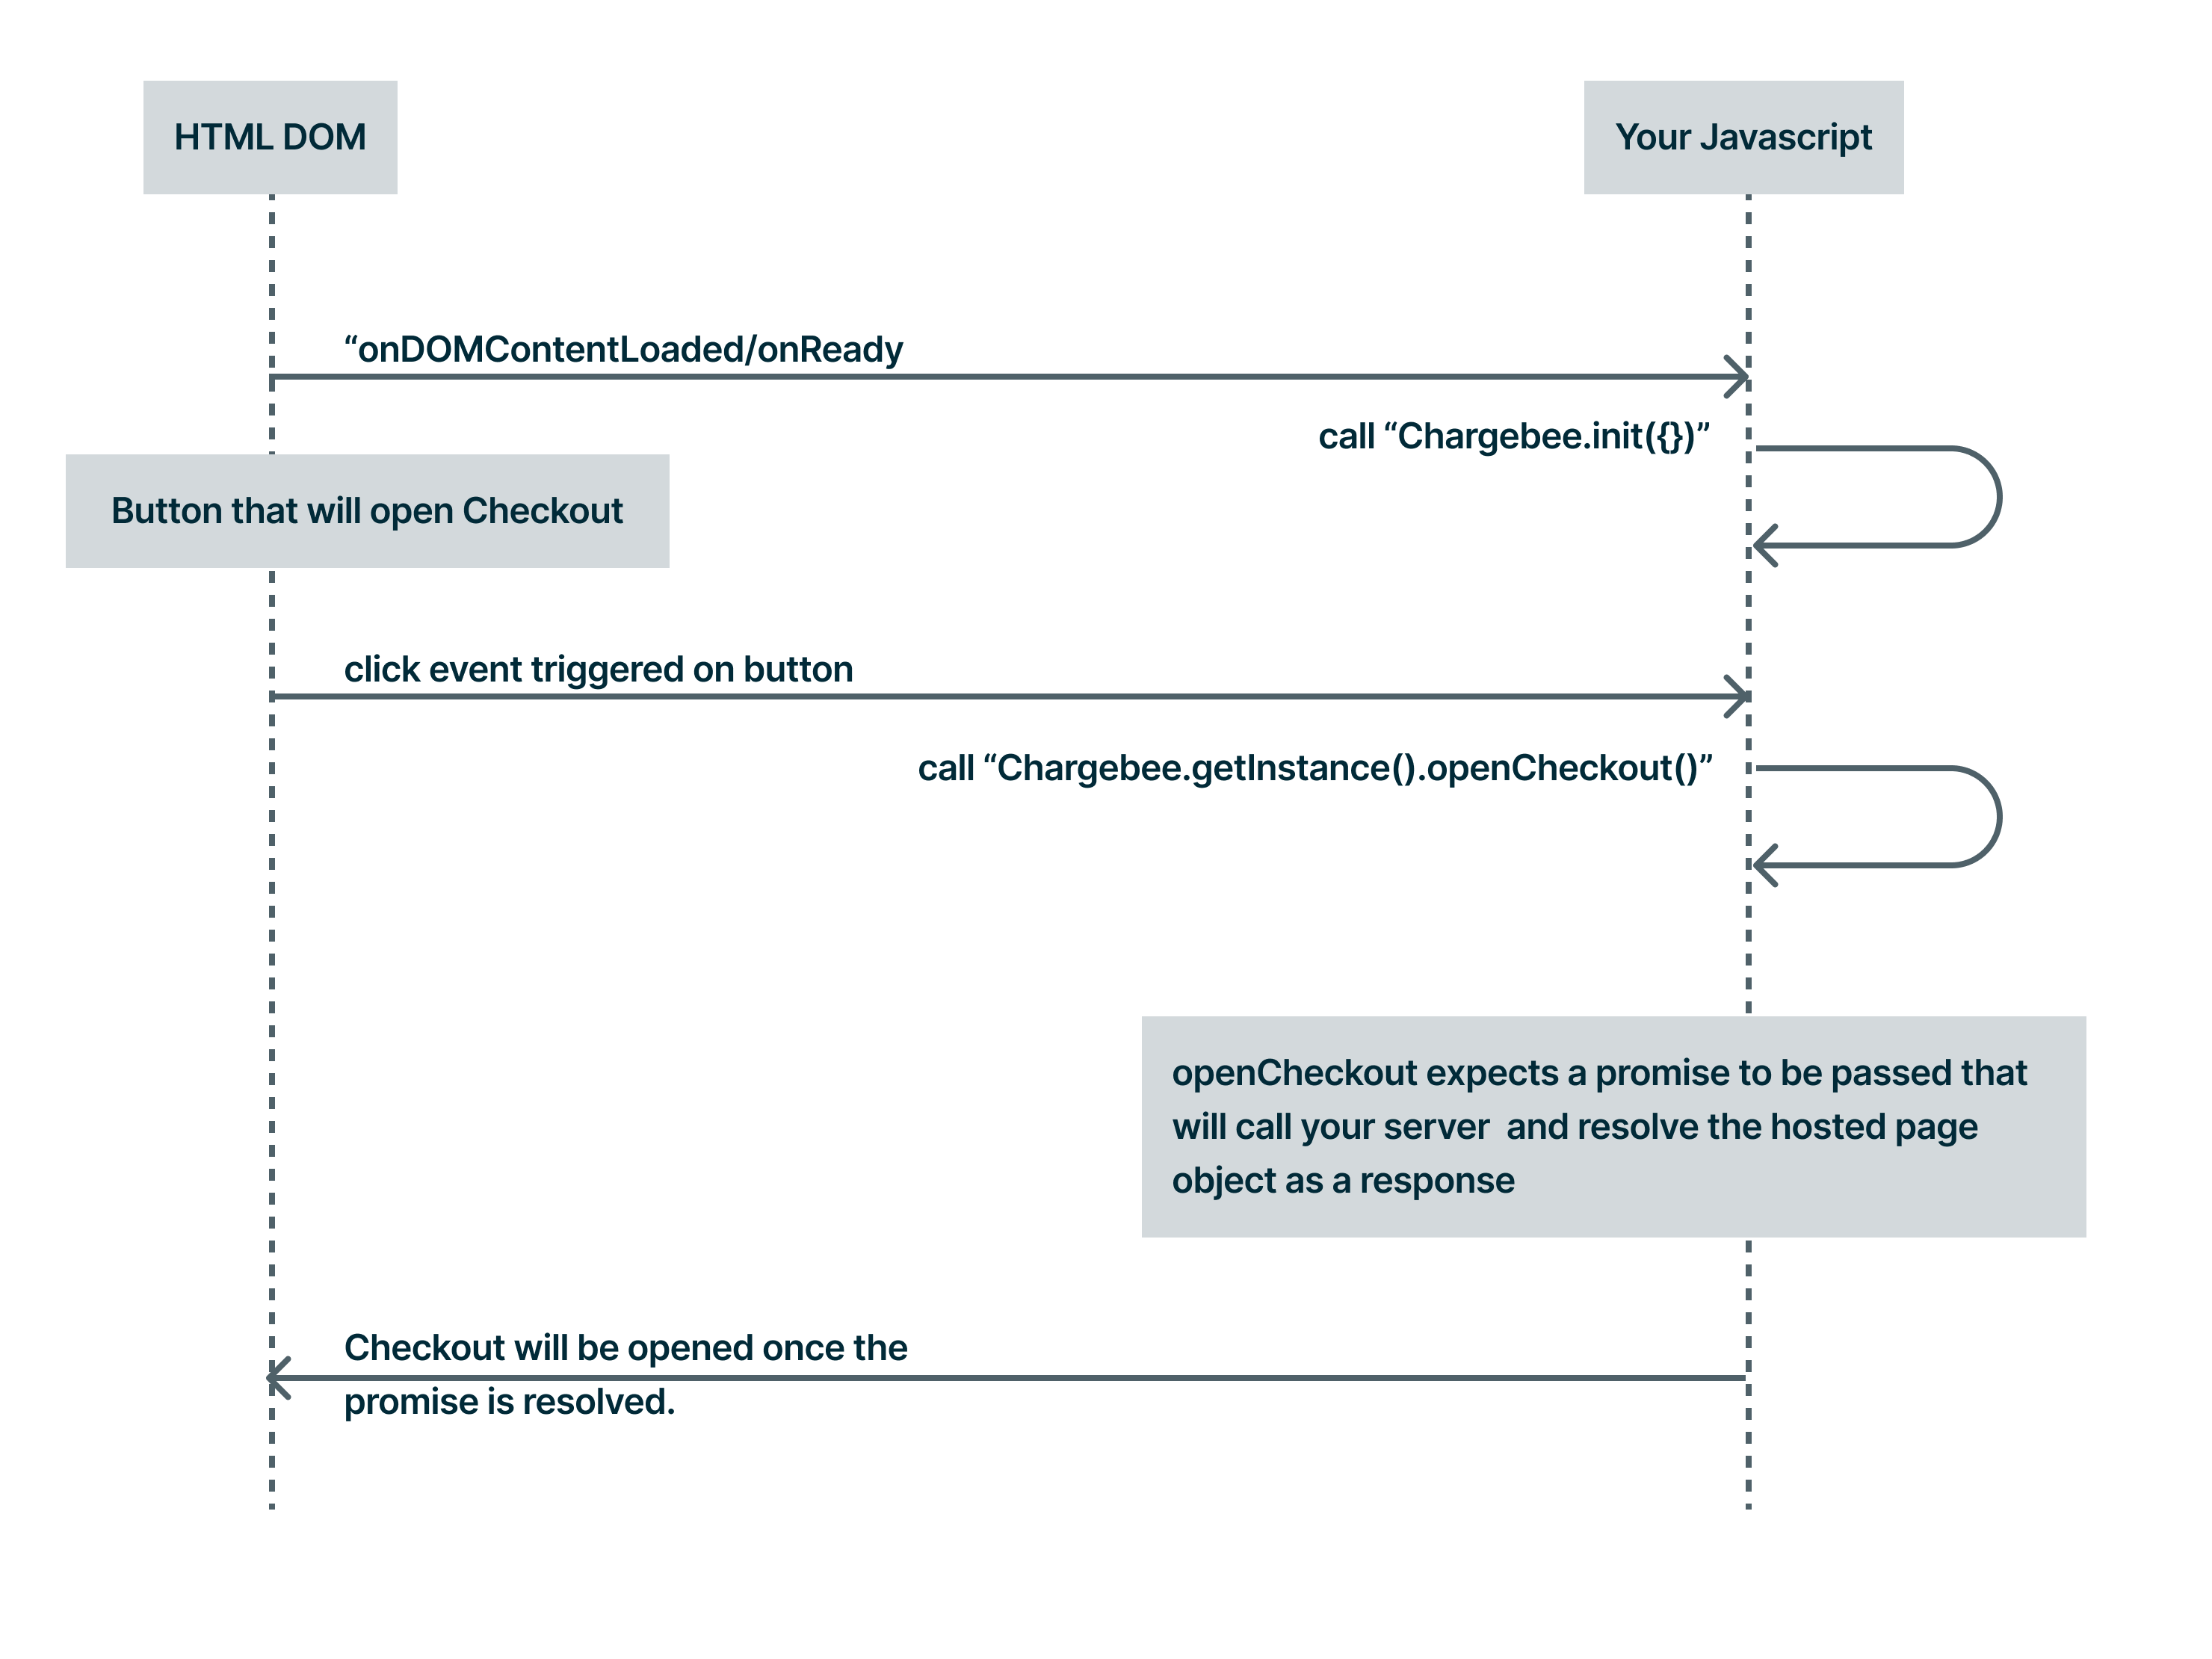
Then use Chargebee.js to open the checkout
# Portal via API
Integrating the portal via API allows you to reuse your app's authentication to open the self-serve portal. This improves your end-user experience as they need not sign in again.
Learn more on how to integrate the portal via API.
# Call Flow
You need to have an HTTPS end-point at your end, that will use Chargebee portal session API and return a portal session object as a response.
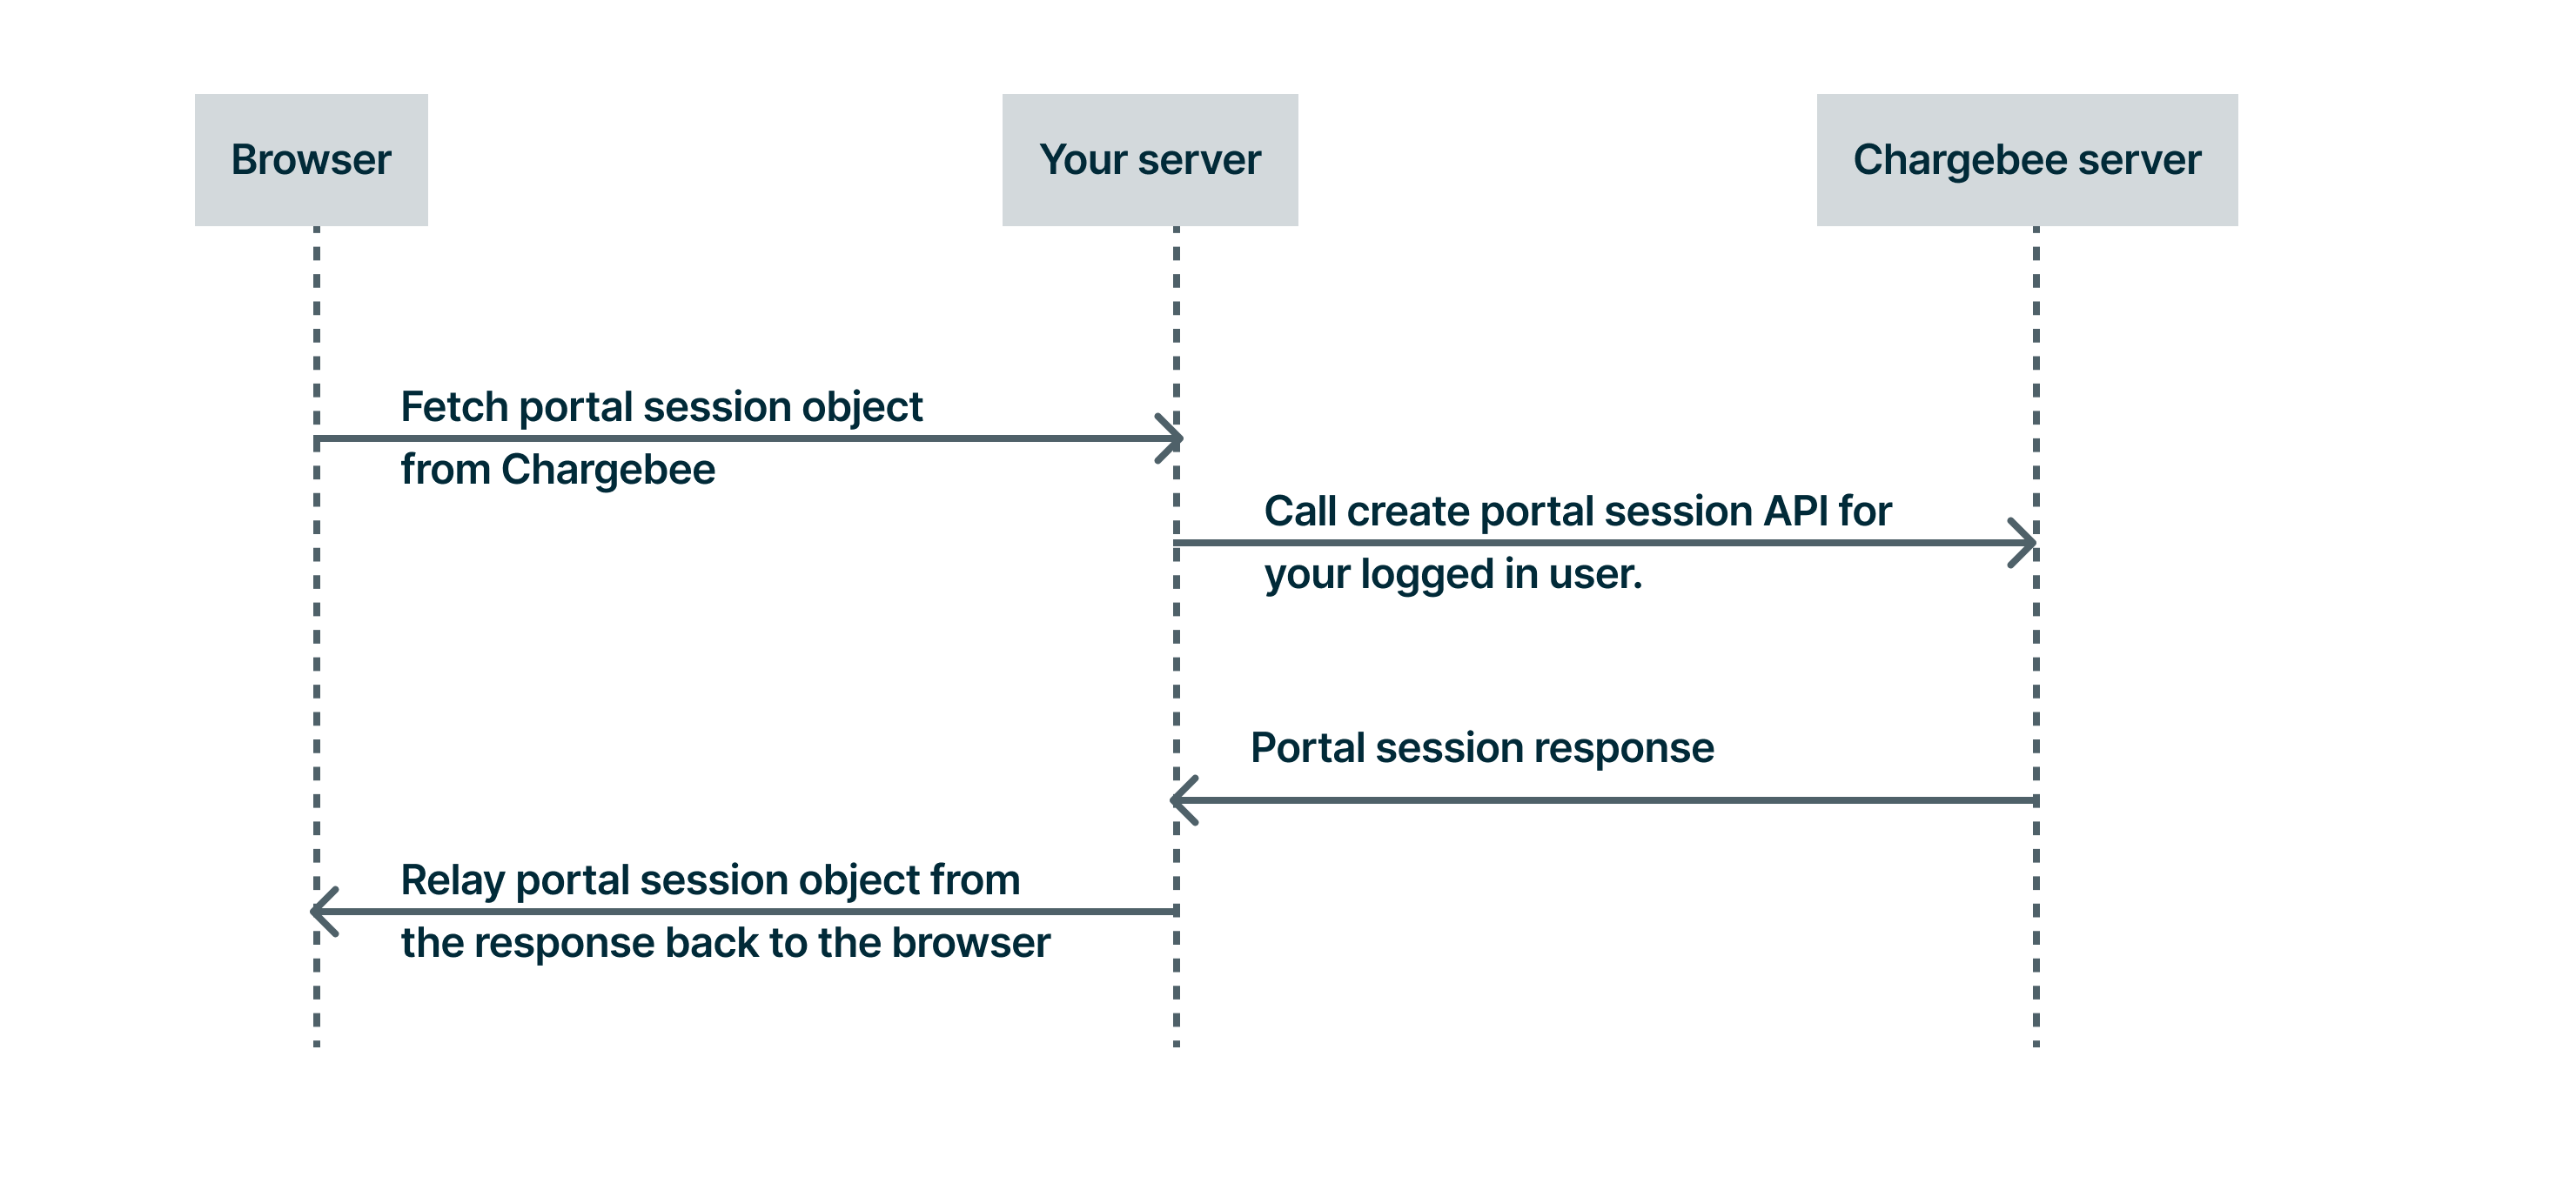
Then use chargebee.js to open the self-serve portal

