
# How to Integrate
Using Chargebee.js is the quickest way to start accepting payments. From within Chargebee's Billing UI, you can generate the script needed to integrate both Checkout and Customer Portal into your website.
# Integrating Checkout
To generate the checkout button code, go to Settings > Configure Chargebee > Checkout and Self-Serve Portal > Integrate with Chargebee and select the necessary product family and plan. Add addons and charges to it. For more information about integration options, see Integration options for the full-page checkout (opens new window).
# Options to select while generating the drop-in script
- Product family
- Plan
- Addons
- Charges
- Layout
The checkout button code is updated with the selected options.
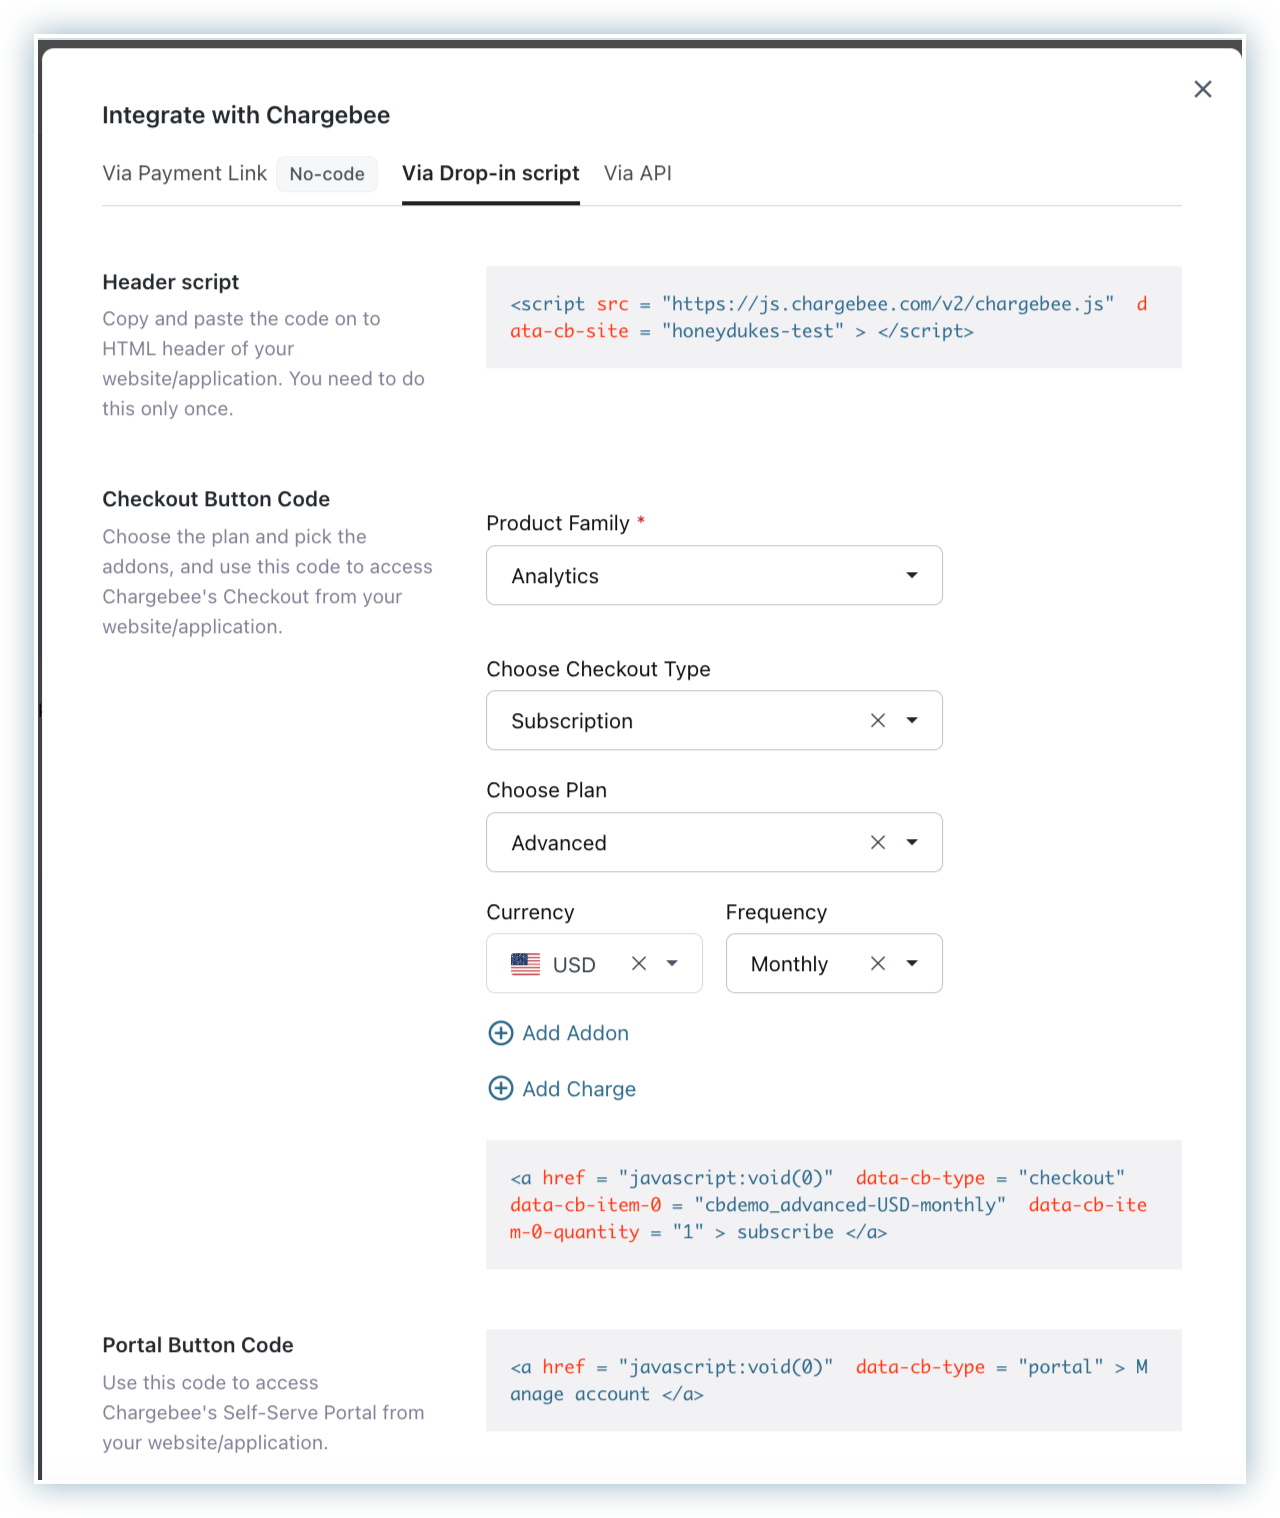
Copy and embed it in the Subscribe button on your website or application. See line 8 in the following code:
- html

# Cart customization
The cart customization feature is recommended if your cart requires dynamic quantity changes and additional details collection through custom fields. This feature provides complete JavaScript functionality to add or remove plans, addons, and coupons, and to update quantities.
Set the flag isItemsModel = true.
You can get the required values of plan price point ID, addon price point ID, and many more from Chargebee, and use them as inputs when opening the checkout window.
For more information, see Cart objects.
- html
# Integrating portal
You can copy the drop-in script from the Chargebee user interface and embed it in your website's code.
To generate the portal button code, go to Settings > Configure Chargebee > Checkout and Self-Serve Portal > Integrate with Chargebee.
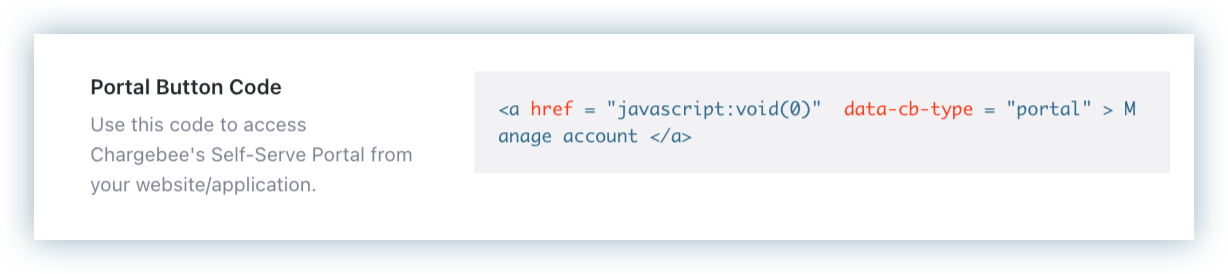
Copy and embed it in the Portal button snippet on your website or application.
See line 14 in the following code:
<!DOCTYPE html>
<html lang="en">
  <head>
    <meta charset="UTF-8" />
    <meta http-equiv="X-UA-Compatible" content="IE=edge" />
    <meta name="viewport" content="width=device-width, initial-scale=1.0" />
    <title>Document</title>
    <script
      src="http://js.chargebee.com/v2/chargebee.js"
      data-cb-site="acme-test"
    ></script>
  </head>
  <body>
    <a href="javascript:void(0)" data-cb-type="portal">Open customer portal</a>
  </body>
</html>
2
3
4
5
6
7
8
9
10
11
12
13
14
15
16
Product Catalog 1.0
