Configuring Self-Serve Client Portal
Overview
Receivables offers a seamless, secure, and customizable self-serve client portal that allows your customers to easily access the information they need and real-time data to identify payment status, invoices, and issues promptly. It provides your customers with complete visibility of their account receivables data, including invoices, account statements, collection activities, and the ability to make online payments.
With the intuitive interface of the client portal, customers are able to:
- View account receivables and collections details.
- View and manage all unpaid invoices.
- Make payments for invoices.
- Perform collection-related activities on invoices, such as raising issues and promising to pay.
- Generate account and ledger statements for a specific time period.
Configure the components of the client portal to provide access for customers to view and manage their account receivables and real-time collection data.
Configuring Components of Client Portal
You can configure various components of the client portal, such as receivables stats, reminder settings, data columns, invoice properties, and more. To configure the components of the client portal, navigate to Settings > Configurations > Client Portal Settings.
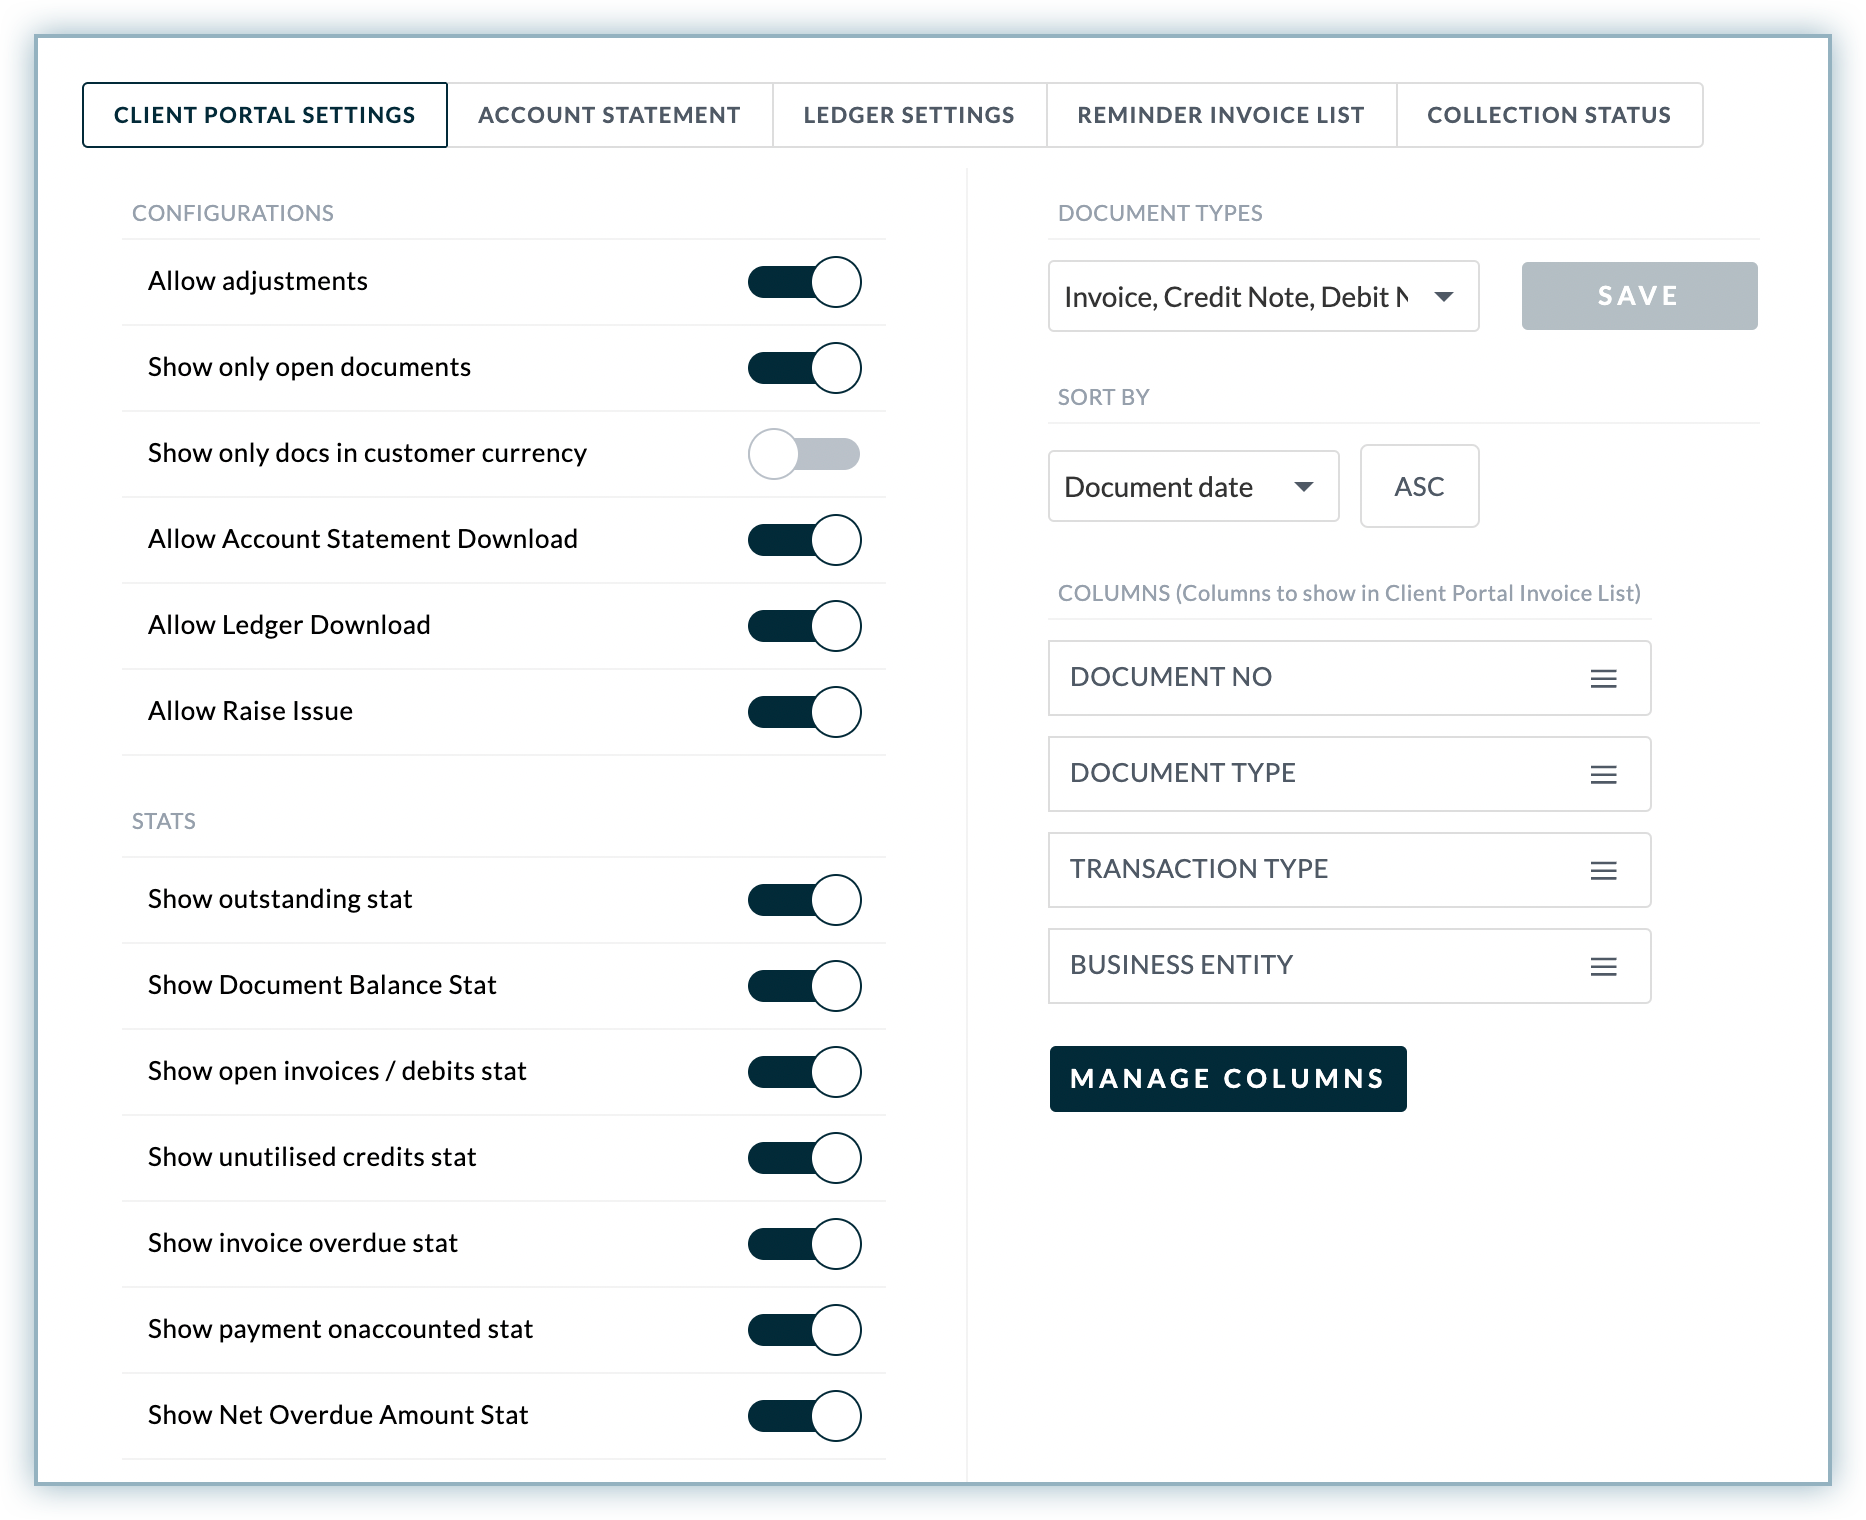
The client portal settings allow you to configure and manage the client portal based on two categories:
Action-Oriented Configurations
Enabling Customer Actions in Client Portal
The action-oriented configurations allow your customers to see primary details of their account receivables and collections activities.
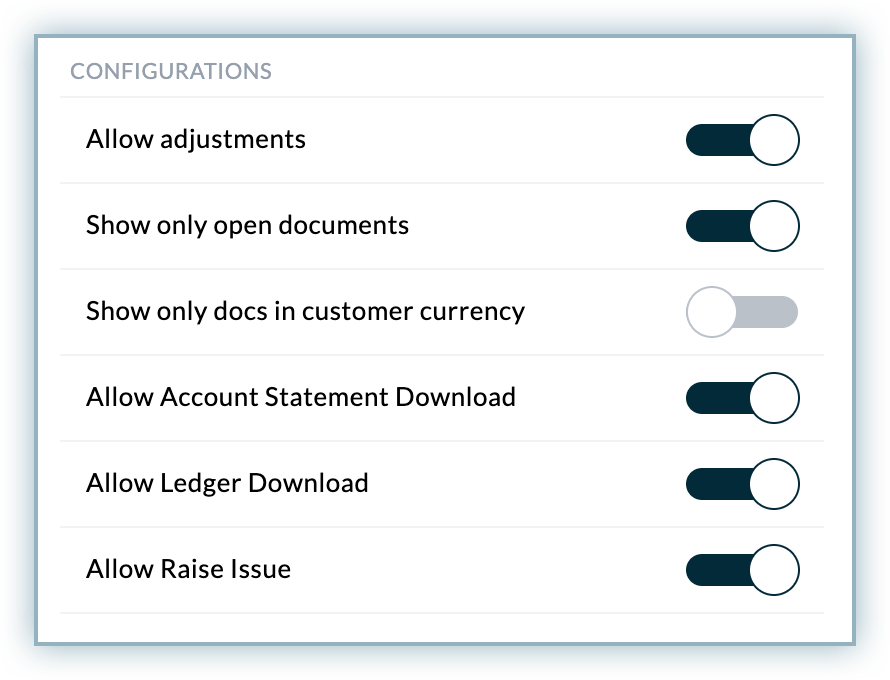
Using the configurations, you can enable or disable the following features in the client portal:
- Allow Account Statement Download: Enable this feature to allow customers to download the account statement in Excel/CSV and PDF.
- Allow Ledger Download: Enable this feature to allow customers to download the ledger statement from the client portal.
- Allow Raise Issue: Enable this feature to allow customers to raise issues for their invoices and other documents.
Data-Oriented Configurations
Showing Statistics in Client Portal
Statistics in the Receivables client portal display the primary data about collections and account receivables specific to a customer. It helps customers keep track of their payable amounts and account summary, including total outstanding amount, invoices, payments, and more. Enable this feature to allow your customers to view their account and financial summary in one place.
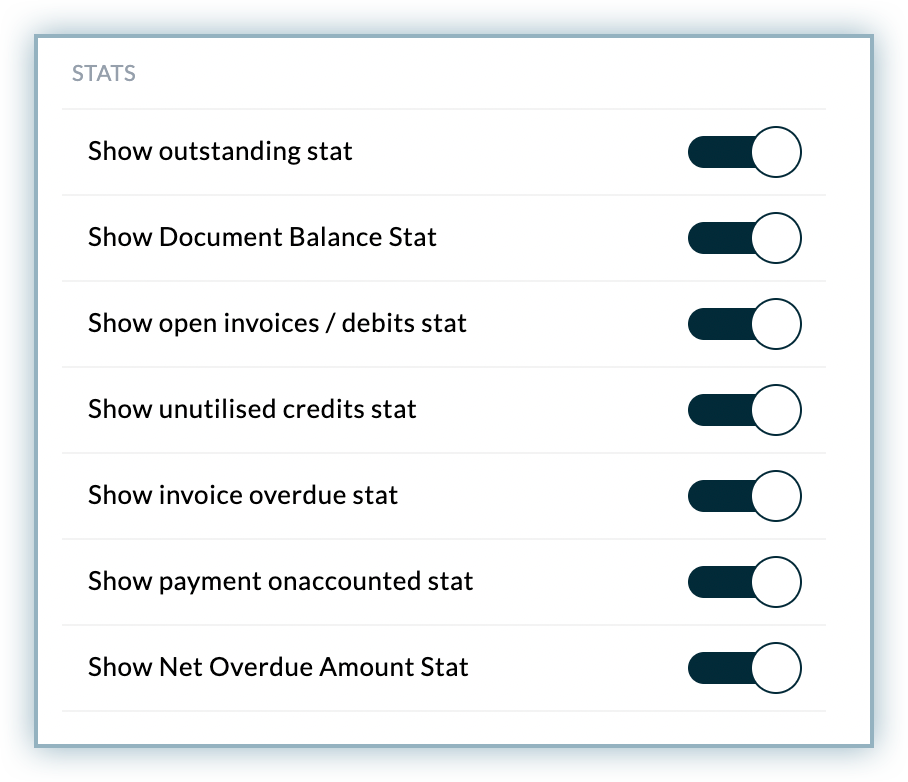
Using the Stats in Client Portal Settings, you can enable or disable the following statistics options:
- Show only open documents: Enable this feature to display open invoices and open debit notes.
- Show only docs in customer currency: Enable this option to show invoices/transactions in the customer's currency only. If there are invoices in multiple currencies, enabling this option will show invoices that have the customer's default currency.
- Show Outstanding stat: Enable this option to show the total outstanding amount in the statistics.
- Show Document Balance stat: Enable this option to show the total balance in the statistics.
- Show open invoices/debits stat: Enable this option to show the total pending balance from open invoices/debits in the statistics.
- Show unutilized credits stat: Enable this option to show the total unutilized credit that has not been utilized.
- Show invoice overdue stat: Enable this option to show the total overdue invoice amount in the statistics.
- Show payment unaccounted stat: Enable this option to show the total payment amount which is not adjusted against invoices.
- Show Net Overdue Amount stat: Enable this option to show the total net overdue amount in the statistics.
Configuring Client Portal Access Button
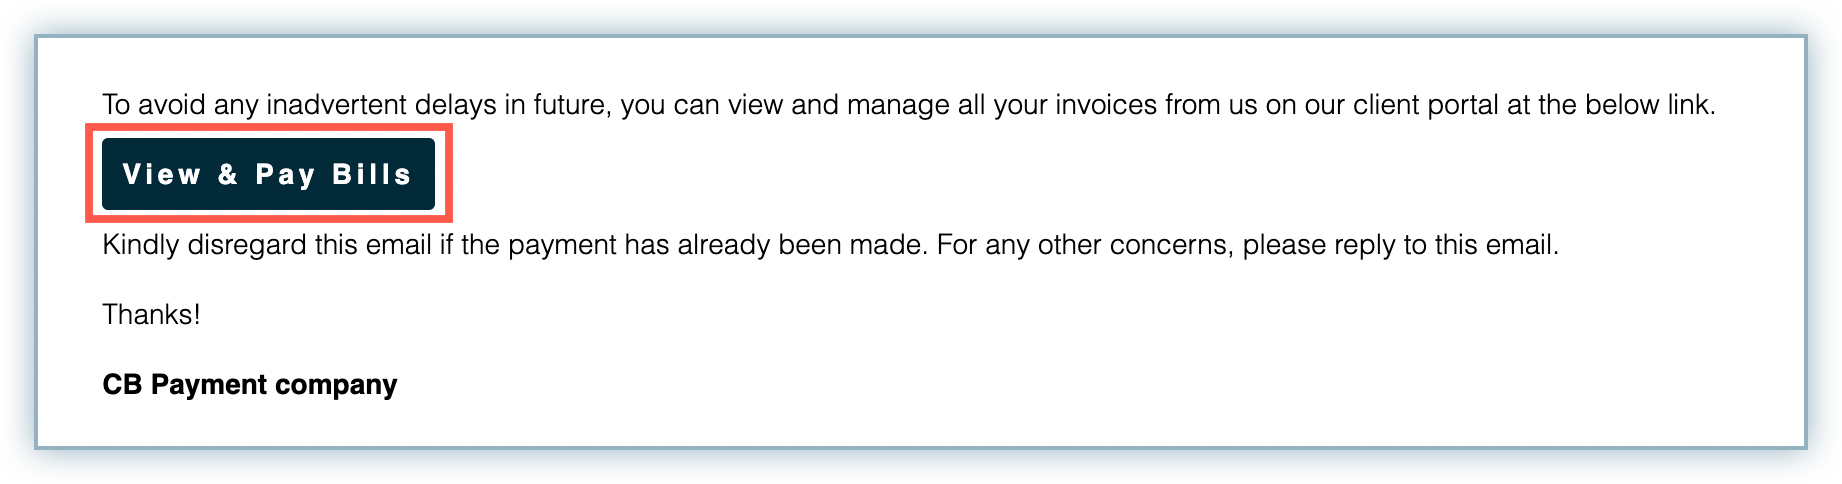
The client portal access button gives your customer access to their client portal. When you use the clientPortalLink template variable in an email template, a client portal access button appears in the email reminder. The template variable is the placeholder that holds a call-to-action button to allow your customers to access the client portal and pay bills online.
The following sample email reminder displays a button that allows customers to access their client portal and pay bills online.
You can also customize the text of the client portal access button from the reminder settings. To edit the text of the client portal access button, follow these steps:
-
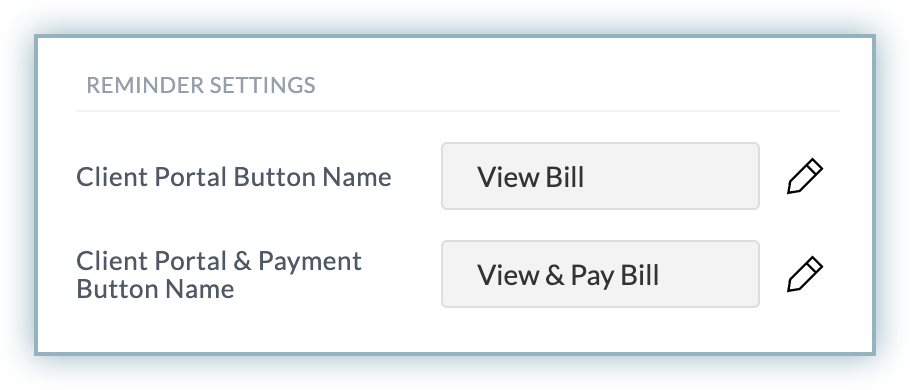
Navigate to Client Portal Settings > Reminder Settings.
-
Under Reminder Settings, add the button name for the following buttons:
- Add the client portal button name in the Client Portal Button Name textbox.
- Add the client portal and payment button name in the Client Portal and Payment Button Name textbox.
-
Click Save.
Configuring Data Properties
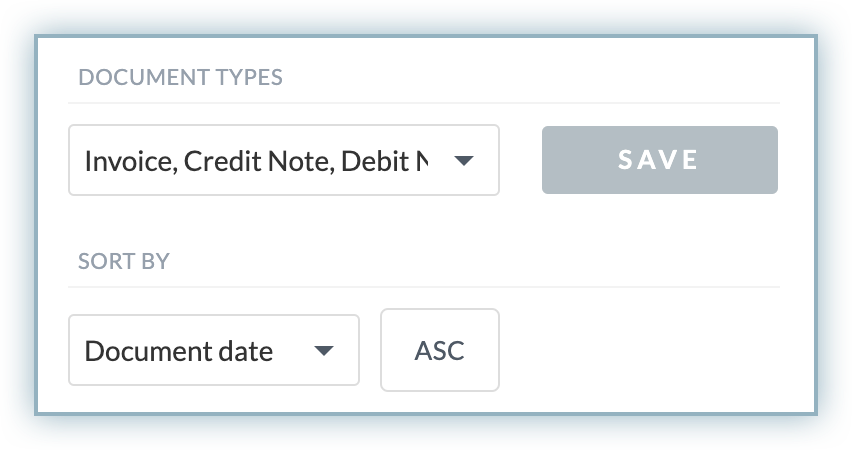
The data displayed in the client portal report contains invoices and other account receivables information. Configuring the data properties of the client portal report enables your customer to view and understand their documents, invoices, credit notes, and debit notes in a particular order.
You can configure the following data properties in the client portal:
- Document Types: Select a specific document type from invoices, debit notes, credit notes, and payments to be made visible in the client portal.
- Sort By: Select a default sorting order of the invoice/transactions table in the client portal.
Managing Data Columns of Invoice/Transaction Table
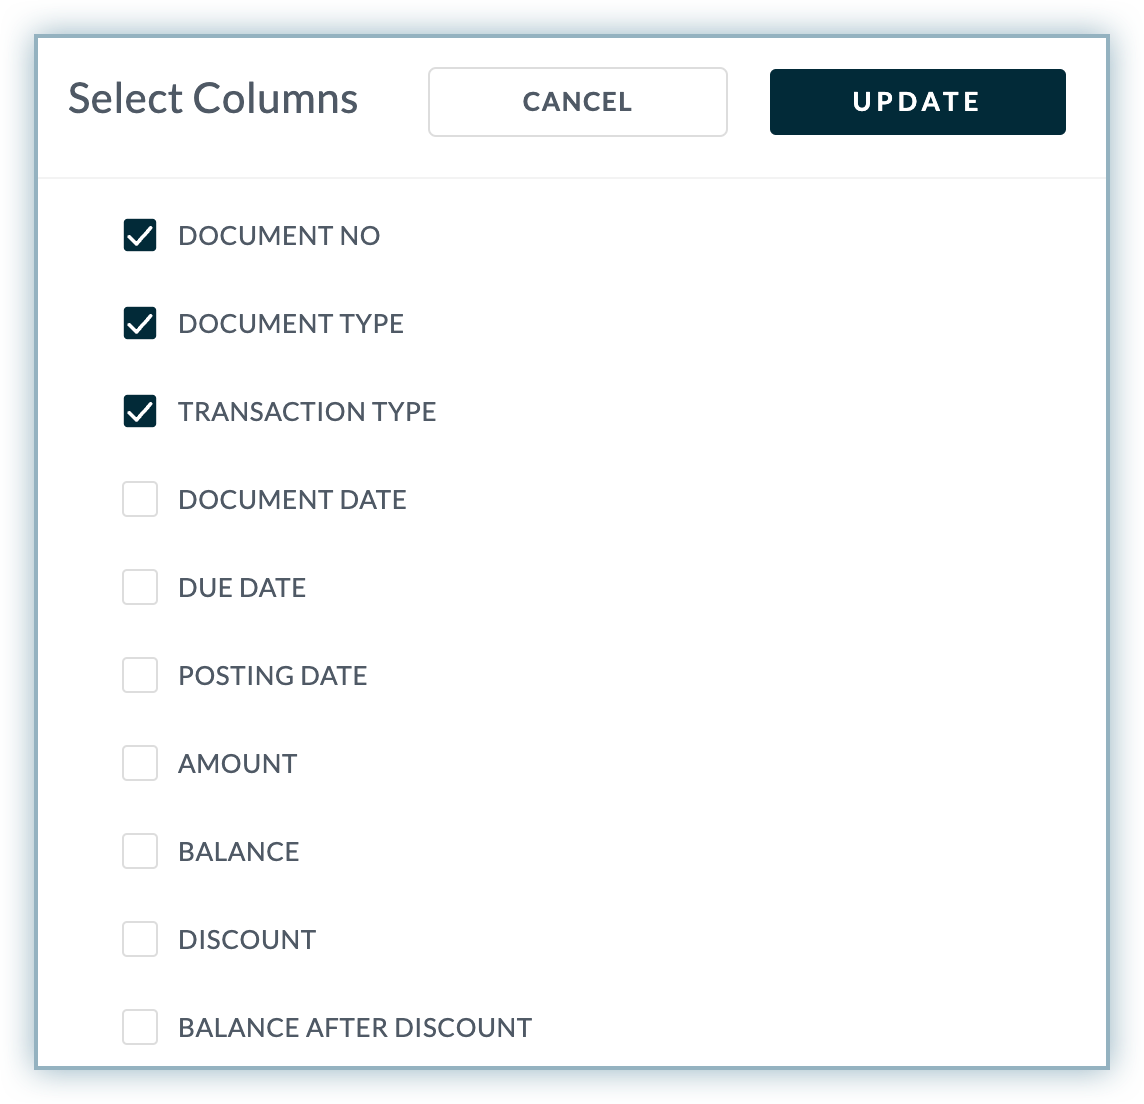
The invoice/transaction table in the client portal displays the invoices along with the collection data related to the customers. The table includes columns such as document types, balance, due date, discounts, and more. Managing the data columns allows you to show or hide specific columns of the table in the client portal. To manage the data columns of the table, follow these steps:
- Log in to Receivables.
- Navigate to Settings > Configuration > Client Portal Settings.
- In the Client Portal Settings page, under the Columns section, click Manage Columns.
- In the Select Columns page, select the columns that you want to show or hide in the client portal invoice report.
- Click Update.
Was this article helpful?