Configuring Ledger Statements
Overview
Receivables offers your customers the option to generate ledger statements effortlessly. A ledger is an essential document for your business to keep track of all financial transactions involved in the business collection process. Receivables ledger statements contain information about all debit and credit transactions associated with a customer, such as invoices, debit notes, credit notes, payments, and more.
For businesses, it's essential to provide customers with clear and concise ledger statements so they can make informed decisions about their invoices and billing information. Receivables allows you to automate the process of generating ledgers and allows your customers to generate ledgers from their Self-Serve Client Portal.
- Via Self-Serve Client Portal
- Via Email Reminders
Via Self-Serve Client Portal
You can allow your customers to download the ledger statement from the Receivables Self-Serve Client Portal. To enable this feature in the self-serve client portal, follow these steps:
- Click Settings > Configurations > Client Portal Settings.
- Enable the Allow Ledger Download option.
Note:
You can also configure the duration of ledger statements from the ledger settings page.
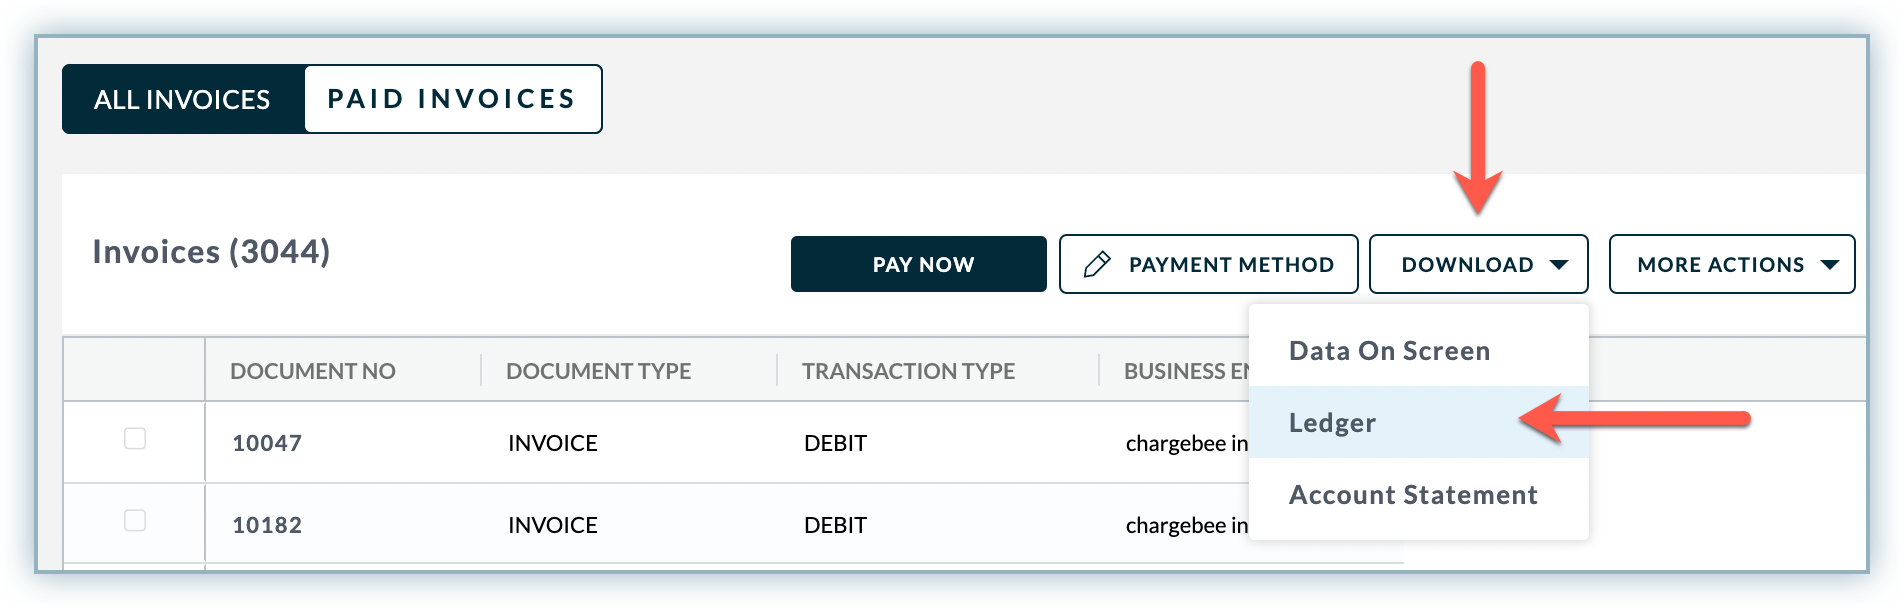
The following image shows how your customers can download their ledger statement from the self-serve client portal.
Via Email Reminders
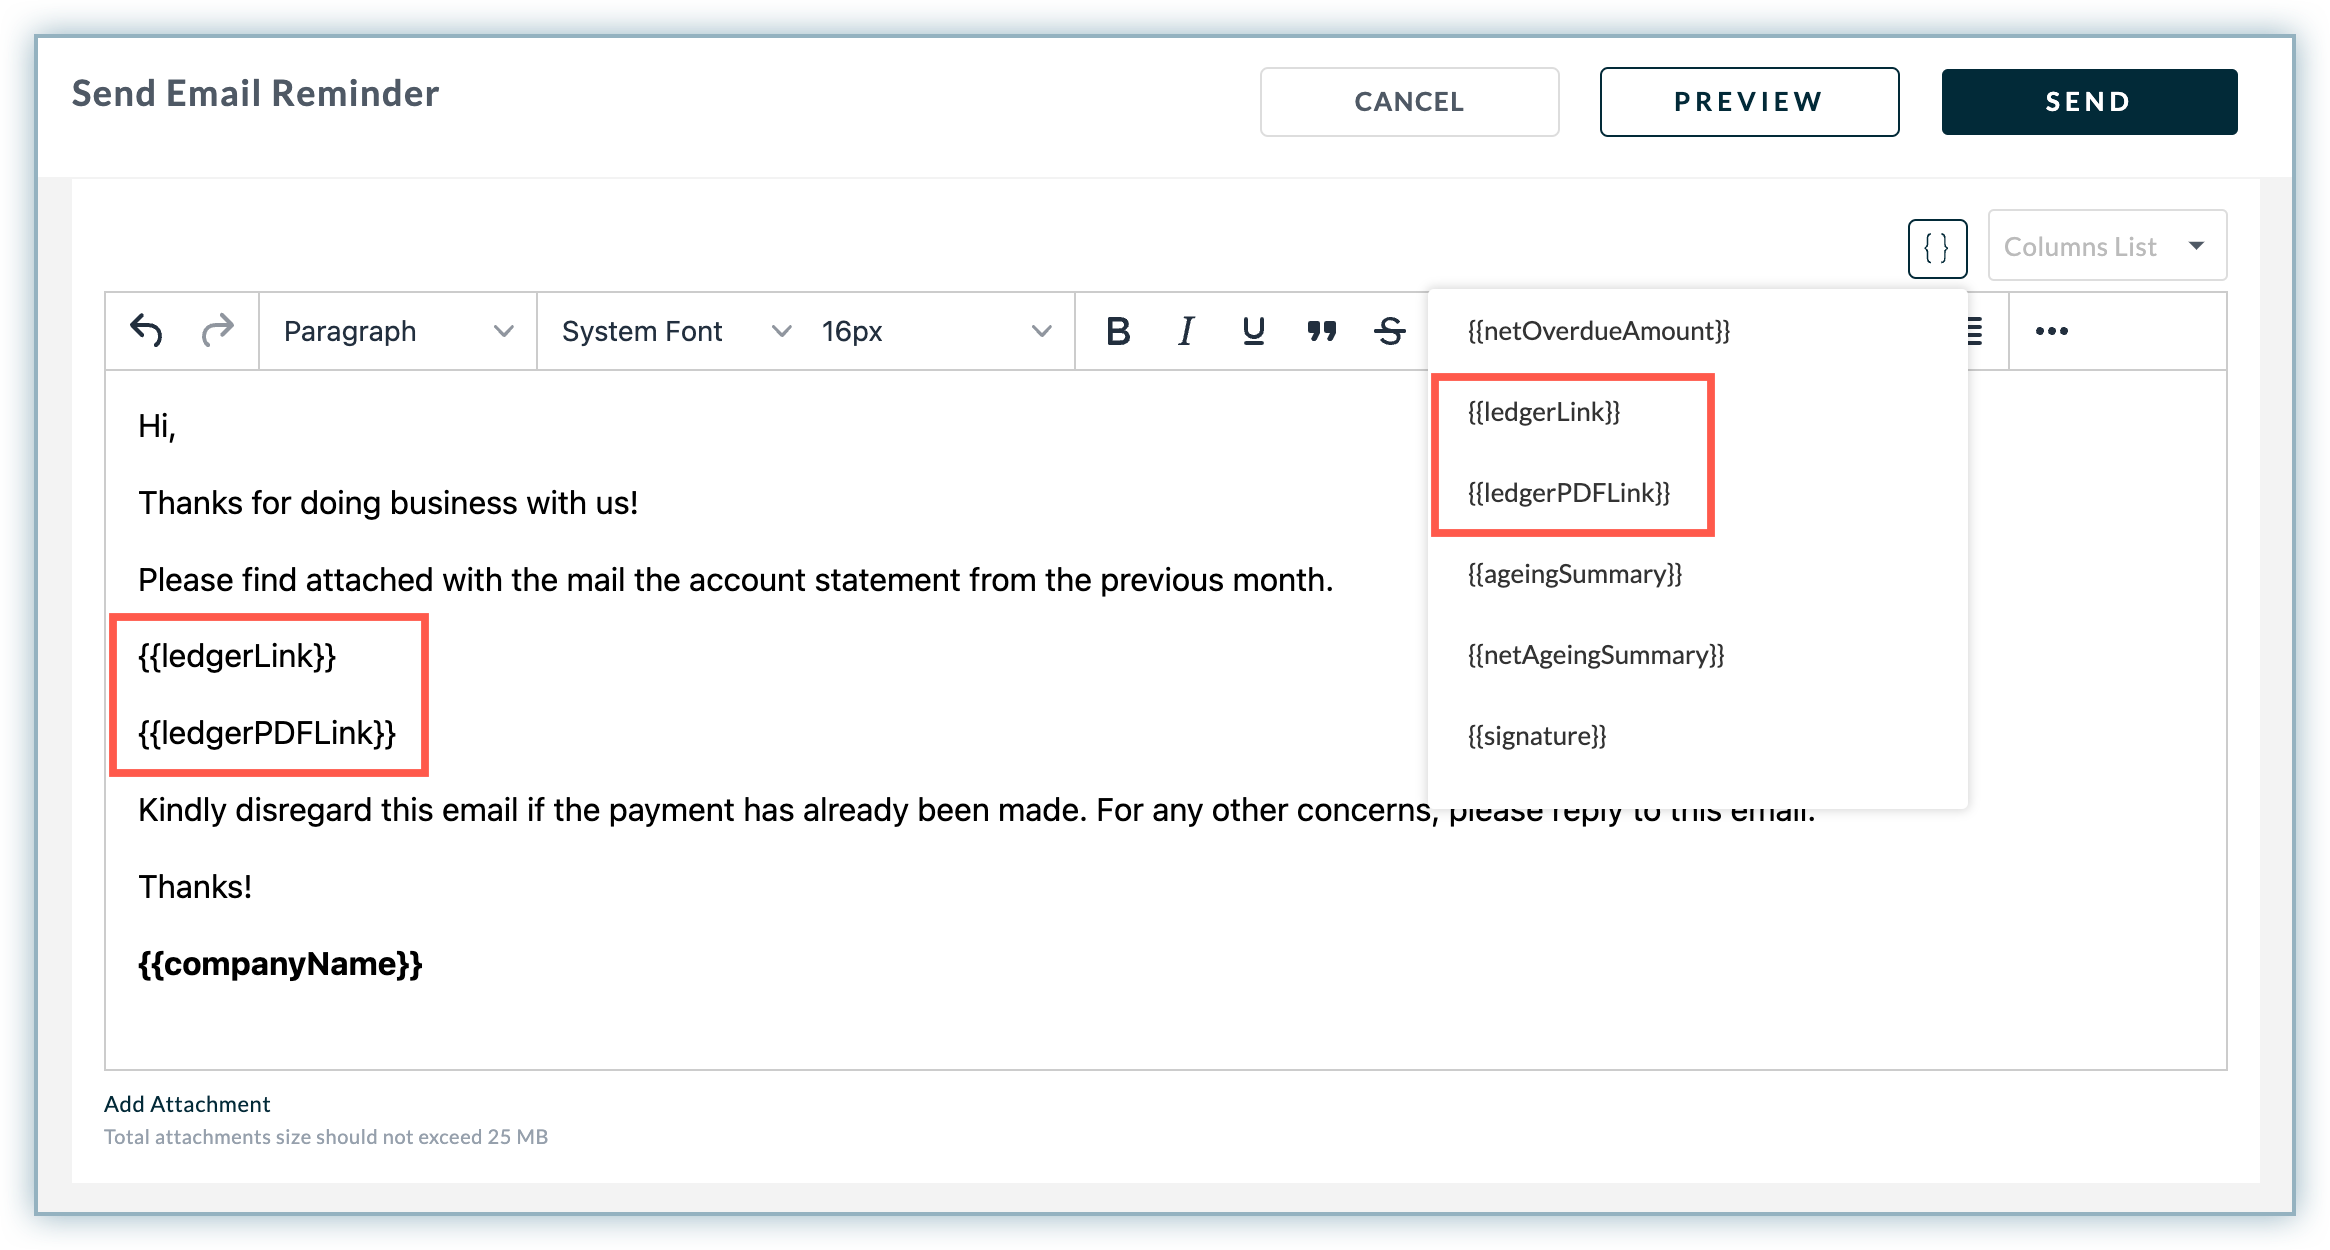
Receivables offers predefined template variables allowing you to send the ledger statement to customers via email reminders. Use the ledgerLink and ledgerPDFLink template variables in the email template to allow your customers to generate ledger statements (Excel/CSV or PDF) from the email reminders.
Configuring Ledger Statement Properties
You can configure the following properties of the ledger statement before it is ready for your clients to download.
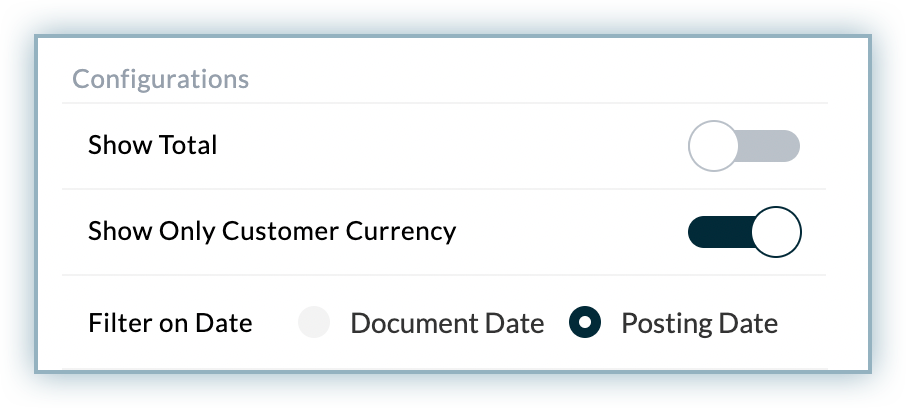
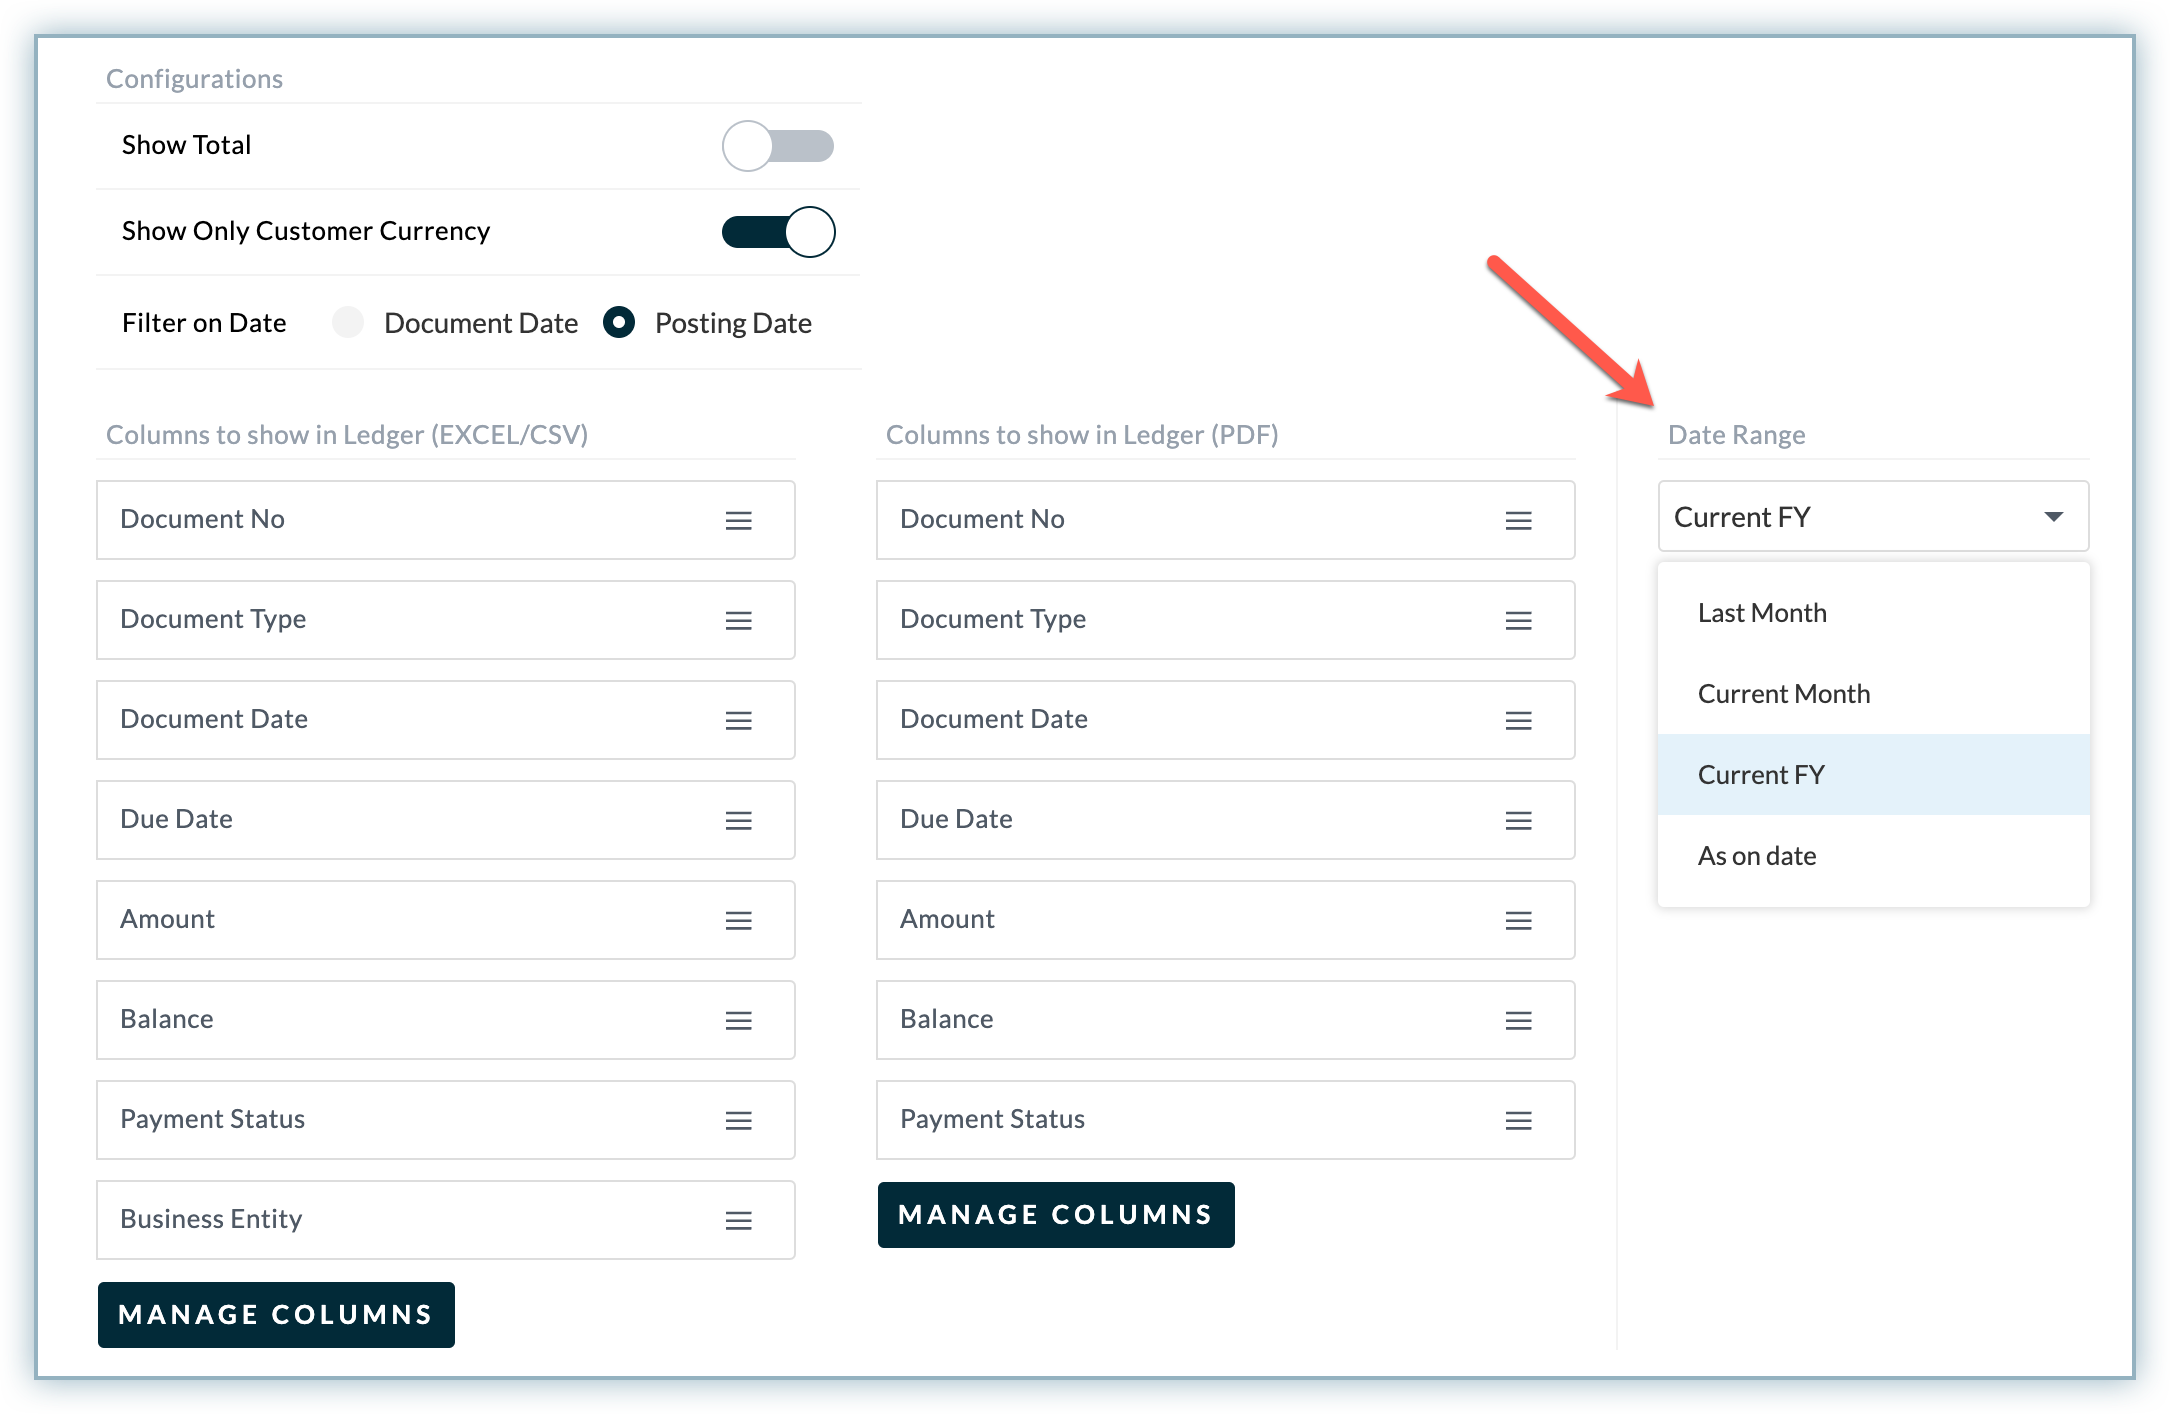
- Show Total: Enable this option to show total of Amount and Balance columns in the ledger statement**.**
- Show Only Customer Currency: Enable this option to show invoices/transactions in customer's currency only. If there are invoices in multiple currency, then enabling this option will show invoices that have customer's default currency.
- Filter on Date: Filter the statement data based on document date or posting date.
To configure the ledger statement property, follow these steps:
- Login to your Receivables account.
- Click Settings > Configuration > Ledger Settings.
- Under the Configuration section, select the toggle on/off for ledger statement properties.
Managing data columns of Ledger Statement
In addition to configuring properties, you can also manage the data columns of the ledger statement by inserting, deleting, and rearranging the data columns as required.
You can manage the columns of ledger statement based on the given two operations:
- Rearrange Columns: To rearrange the data columns in ledger statement, click and drag the columns to a specific position. The other columns will automatically adjust their positions and appear in the account statement accordingly.
- Manage Columns: This allows you to manage the data columns in ledger statement and view specific columns that you want to include in the statement. This can be helpful if you want to keep a certain type of information or if you need to hide a columns from the statement.
To manage the data columns in ledger statement, follow these steps:
- Login to Receivables.
- Navigate to Settings > Configurations > Ledger Settings.
- On the Ledger Settings tab, select a ledger statement(Excel/CSV, or PDF) and click Manage Columns. For the Ledger PDF, you can select upto ten columns that gives customers more columns in the ledger PDF.
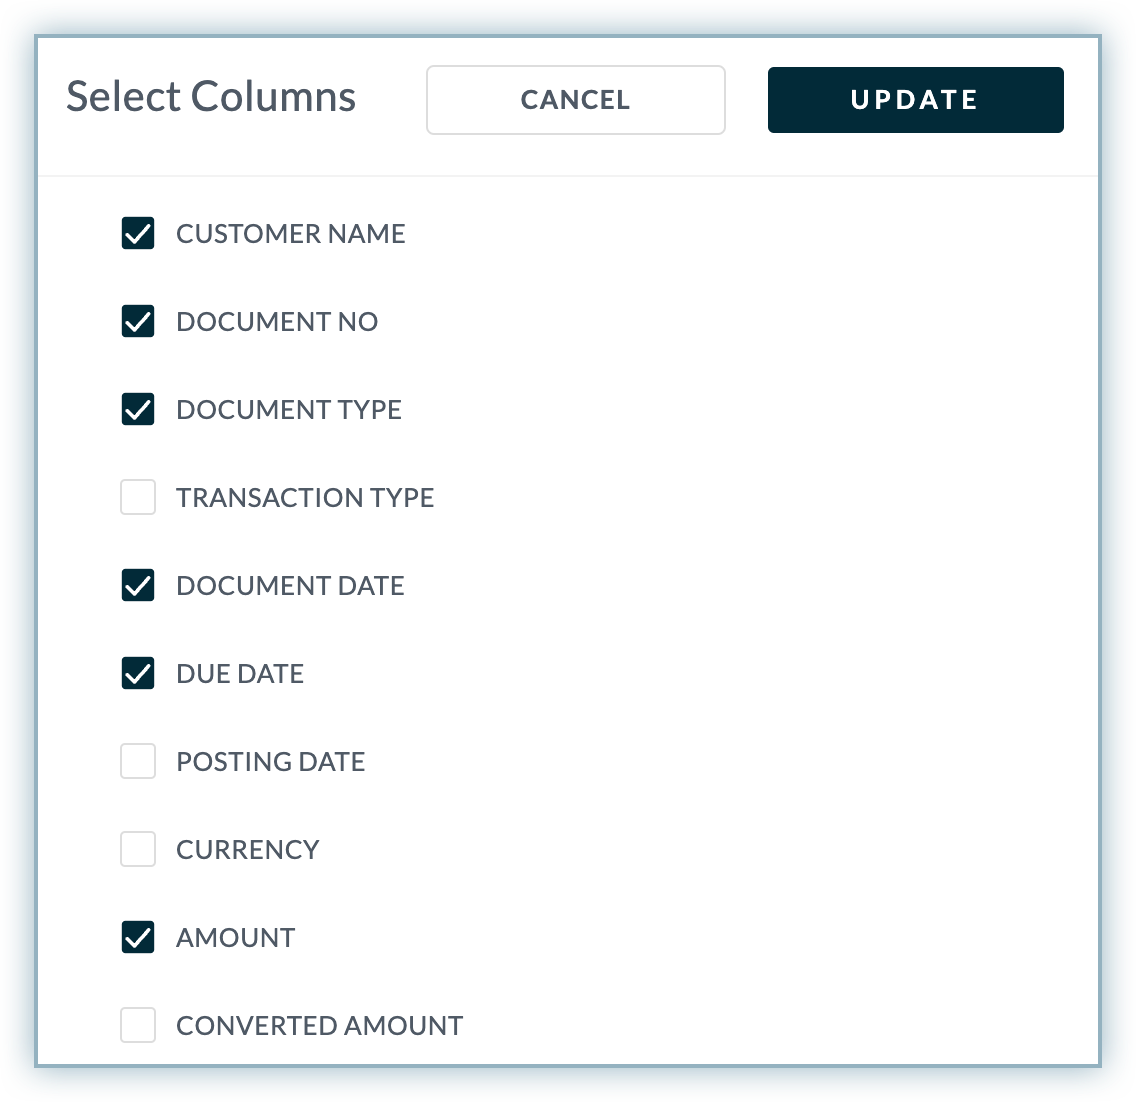
- In the Select Columns page, select the column checkboxes that you want to show/hide in the ledger statement.
- Click Update.
Configuring the Duration of Ledger Statement
You can set the date-range of the ledger statement that allows customers to download the ledger statement for a particular time-period.
To configure the date range of the ledger statement, follow these steps:
- Click Settings > Configurations > Ledger Settings.
- Expand the Date Range field and select a date range from the following options:
- Last Month
- Current Month
- Current FY
- As on date
Was this article helpful?