Managing Receivables for Customers from Multiple Business Entities
Introduction
In the dynamic world of modern business, many enterprises operate as multi-business entities, managing multiple subsidiaries, divisions, or branches. As exciting as this expansion can be, it brings unique challenges in the realm of accounts receivable. Following up with customers from different entities, tracking and engaging with them for outstanding dues, and getting unified reports from a single instance are some of the biggest challenges.
Let's see what Chargebee Receivables offers for a multi-business-entity organization.
Chargebee Receivables' Multi-Business Entity solution enables you to manage accounts receivable for customers belonging to various business entities from a single Receivables site.
- Manage accounts receivable for customers from various entities.
- Have customizable Customer and Invoice views using Business Entity as a filter.
- Create business-entity-specific cohorts for targeted engagement with customers.
- Create reports with customers categorized among business entities.
Let's dive deeper into these offerings:
Multi-Entity as an Advanced Filter
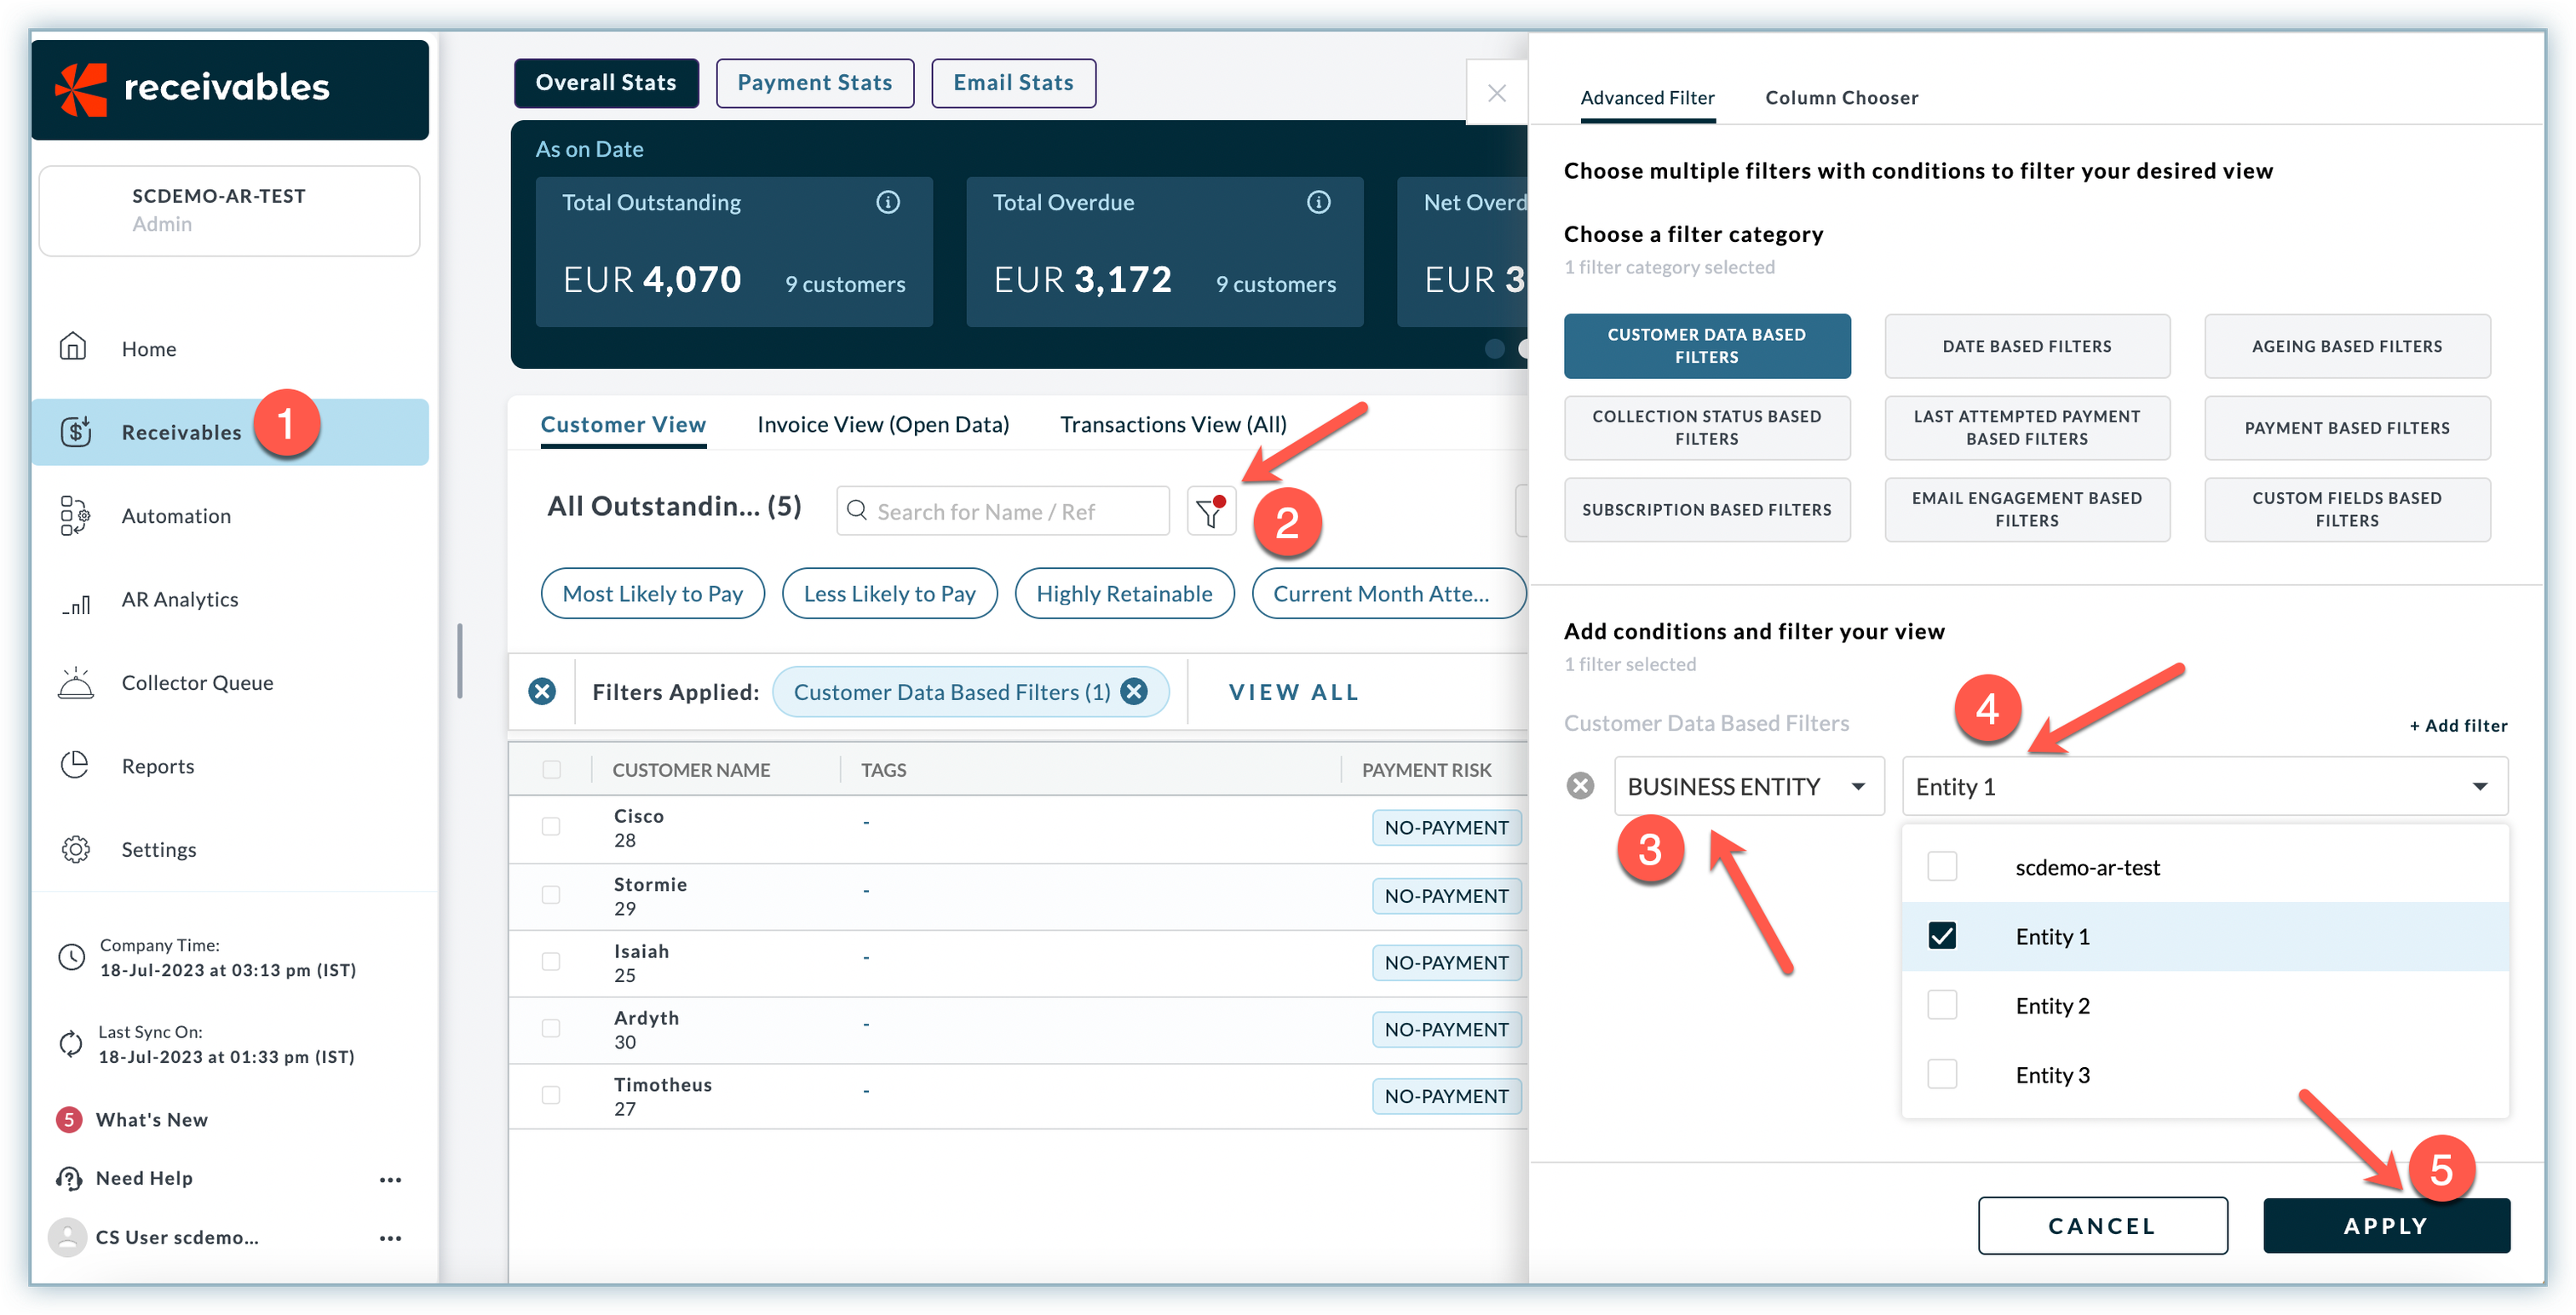
Filter your customers' data in the Customer View, Invoice View, and Transaction View under the Receivables View by selecting the desired Business Entity as an advanced filter.
- Log in to your Receivables site and go to Receivables from the left navigation pane. Customer View will open as the default page.
- Click the Advanced Filter button.
- Select Business Entity from the Select Field drop-down menu under Customer Data Based Filters.
- Select the desired entity name from the Select Option drop-down menu.
- Click Apply.
Business Entity as an Auto Engagement Rule
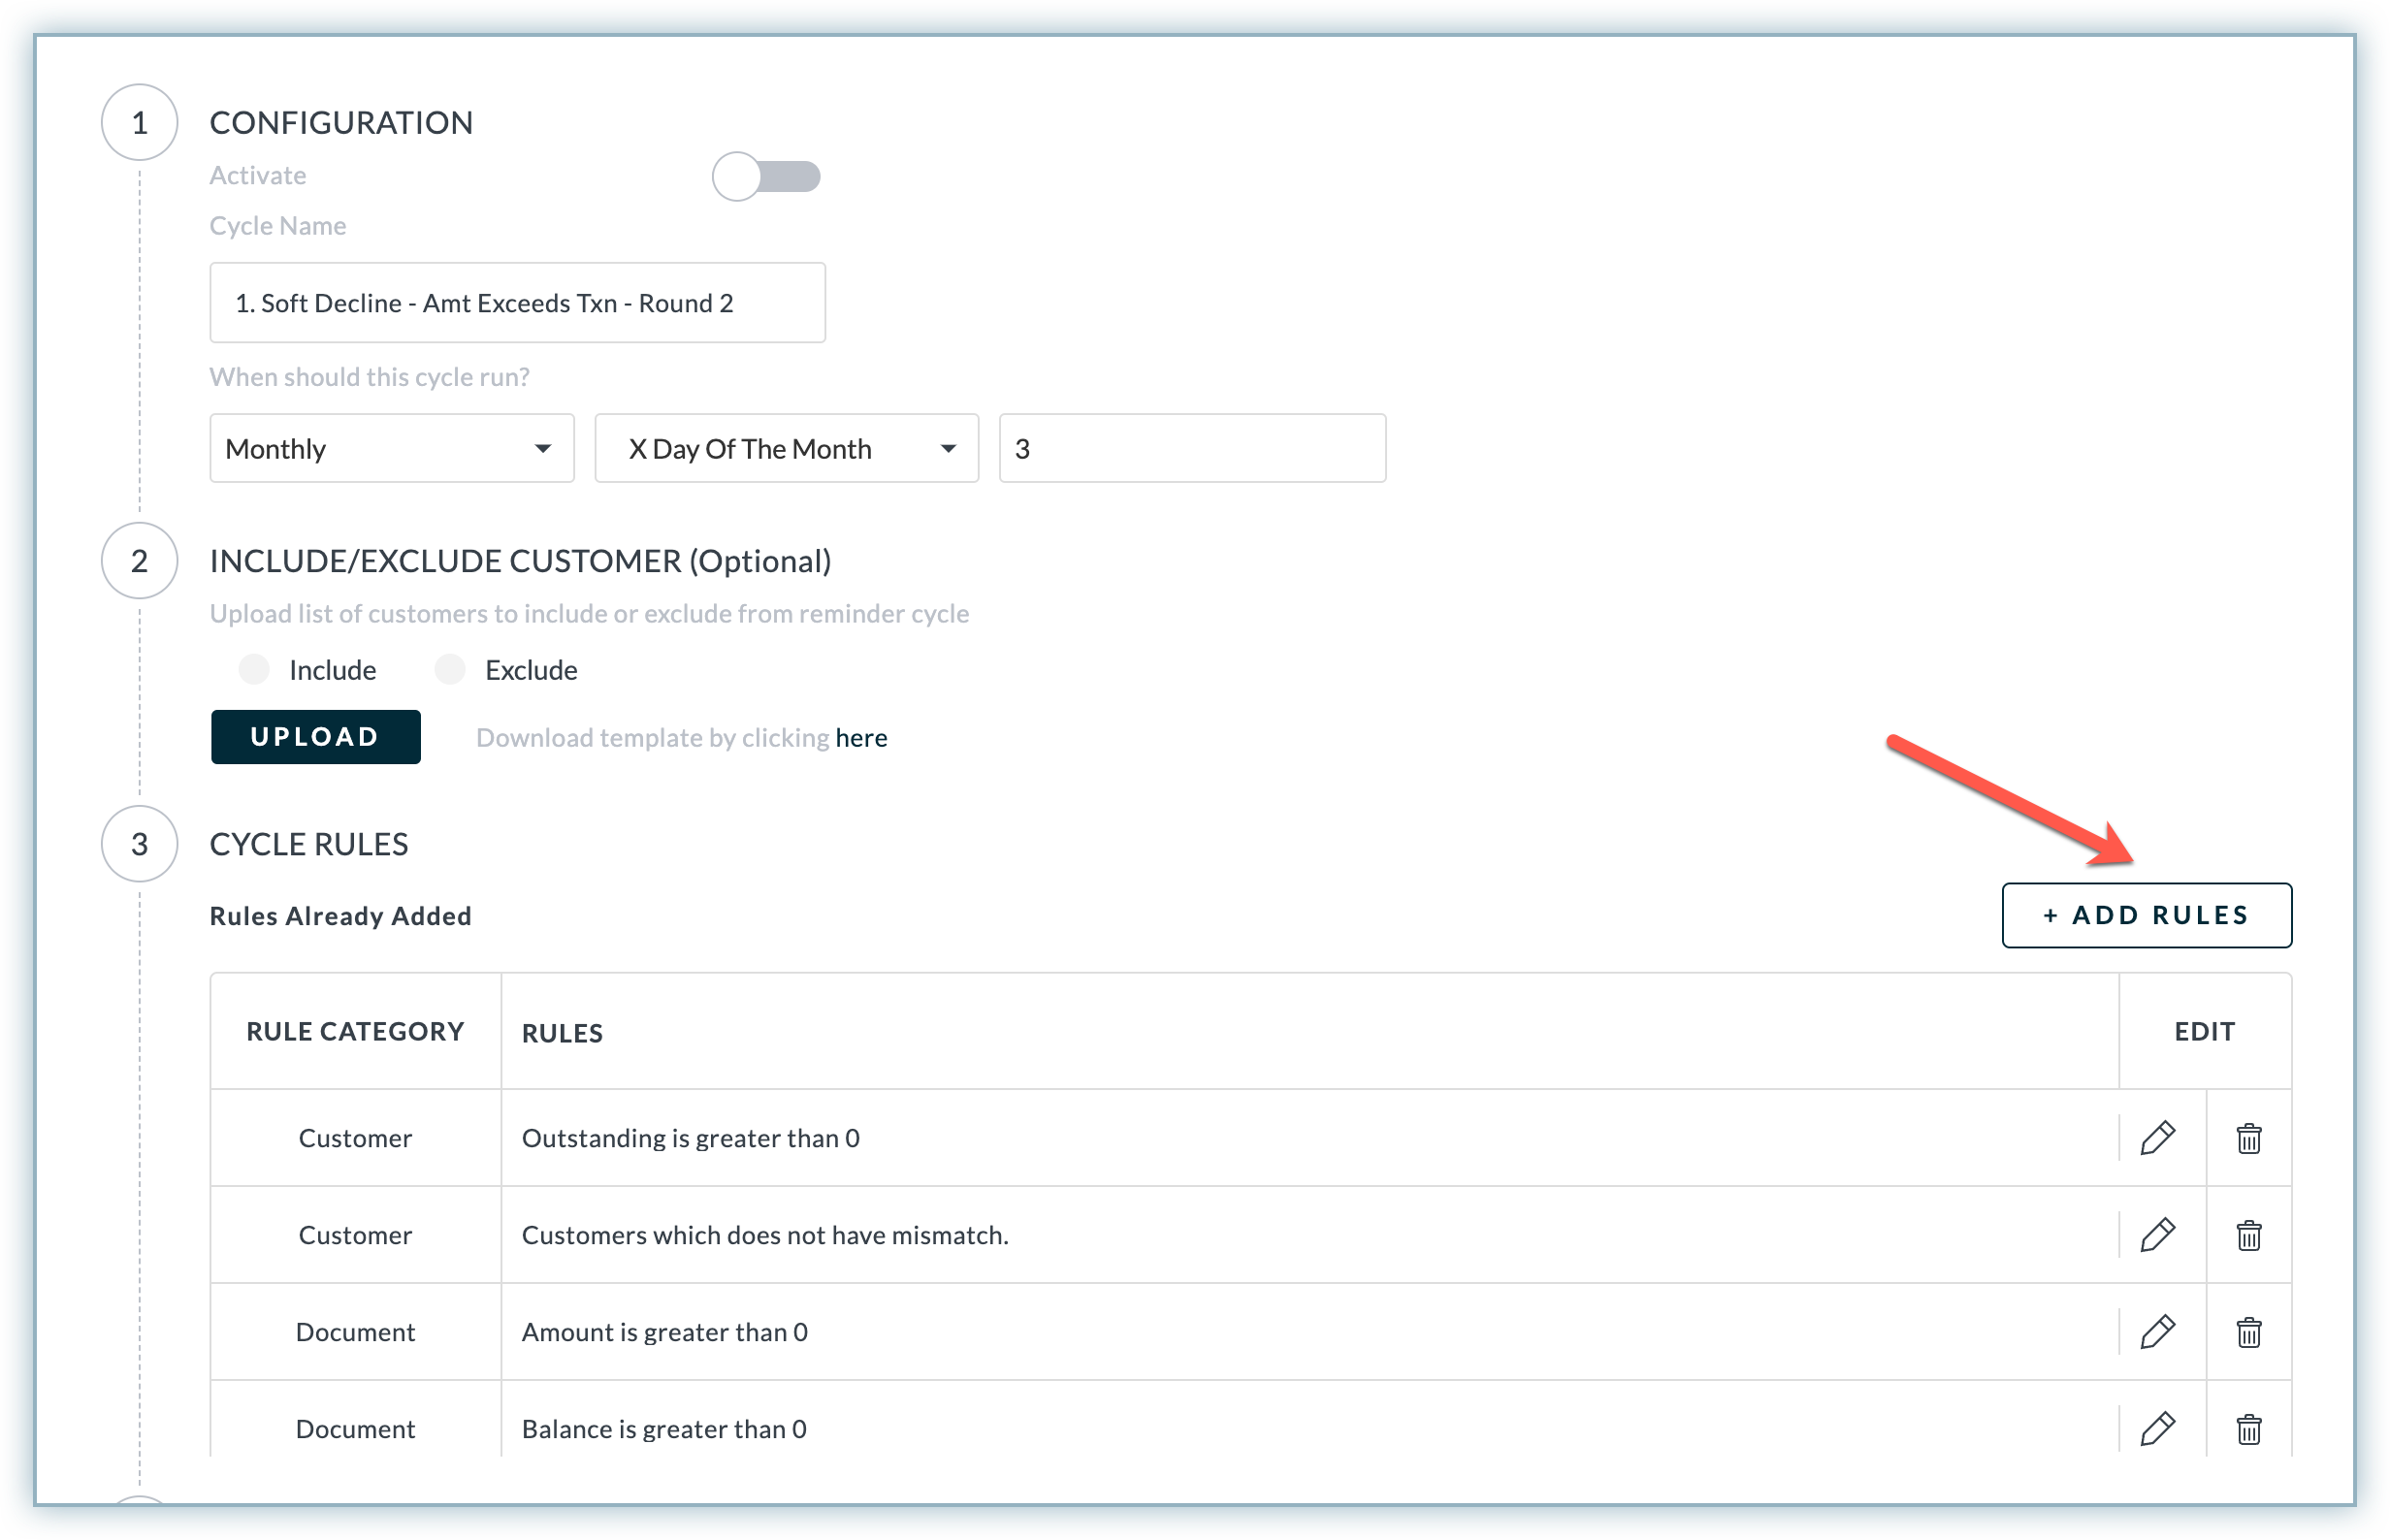
Filter customers and create cohorts based on a business entity by selecting the relevant filter while adding rules for your Auto Engagement cycle.
Follow the steps below to add Business Entity as an Auto Engagement rule:
-
Go to Automation from the left navigation pane.
-
Select the desired Automation Cycle.
-
Click Add Rules under Cycle Rules.
-
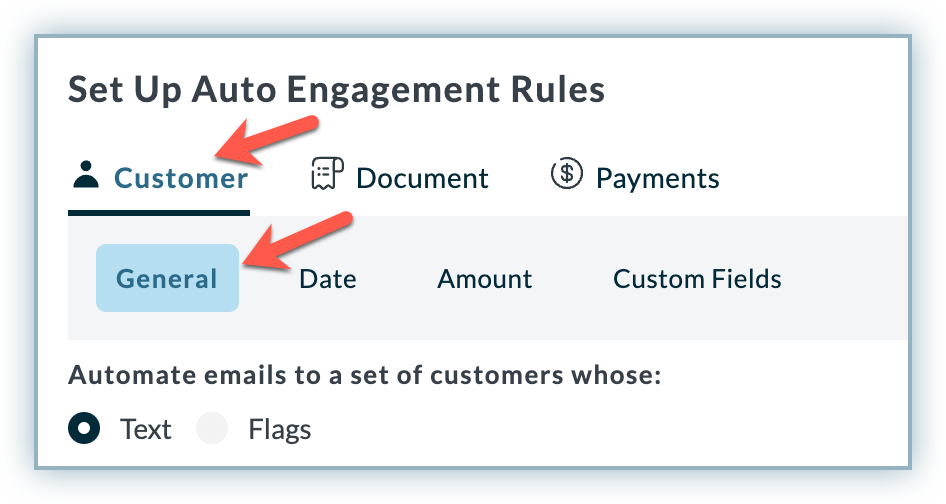
Ensure you are on the Customer tab and have selected General rule category. These are selected by default.
-
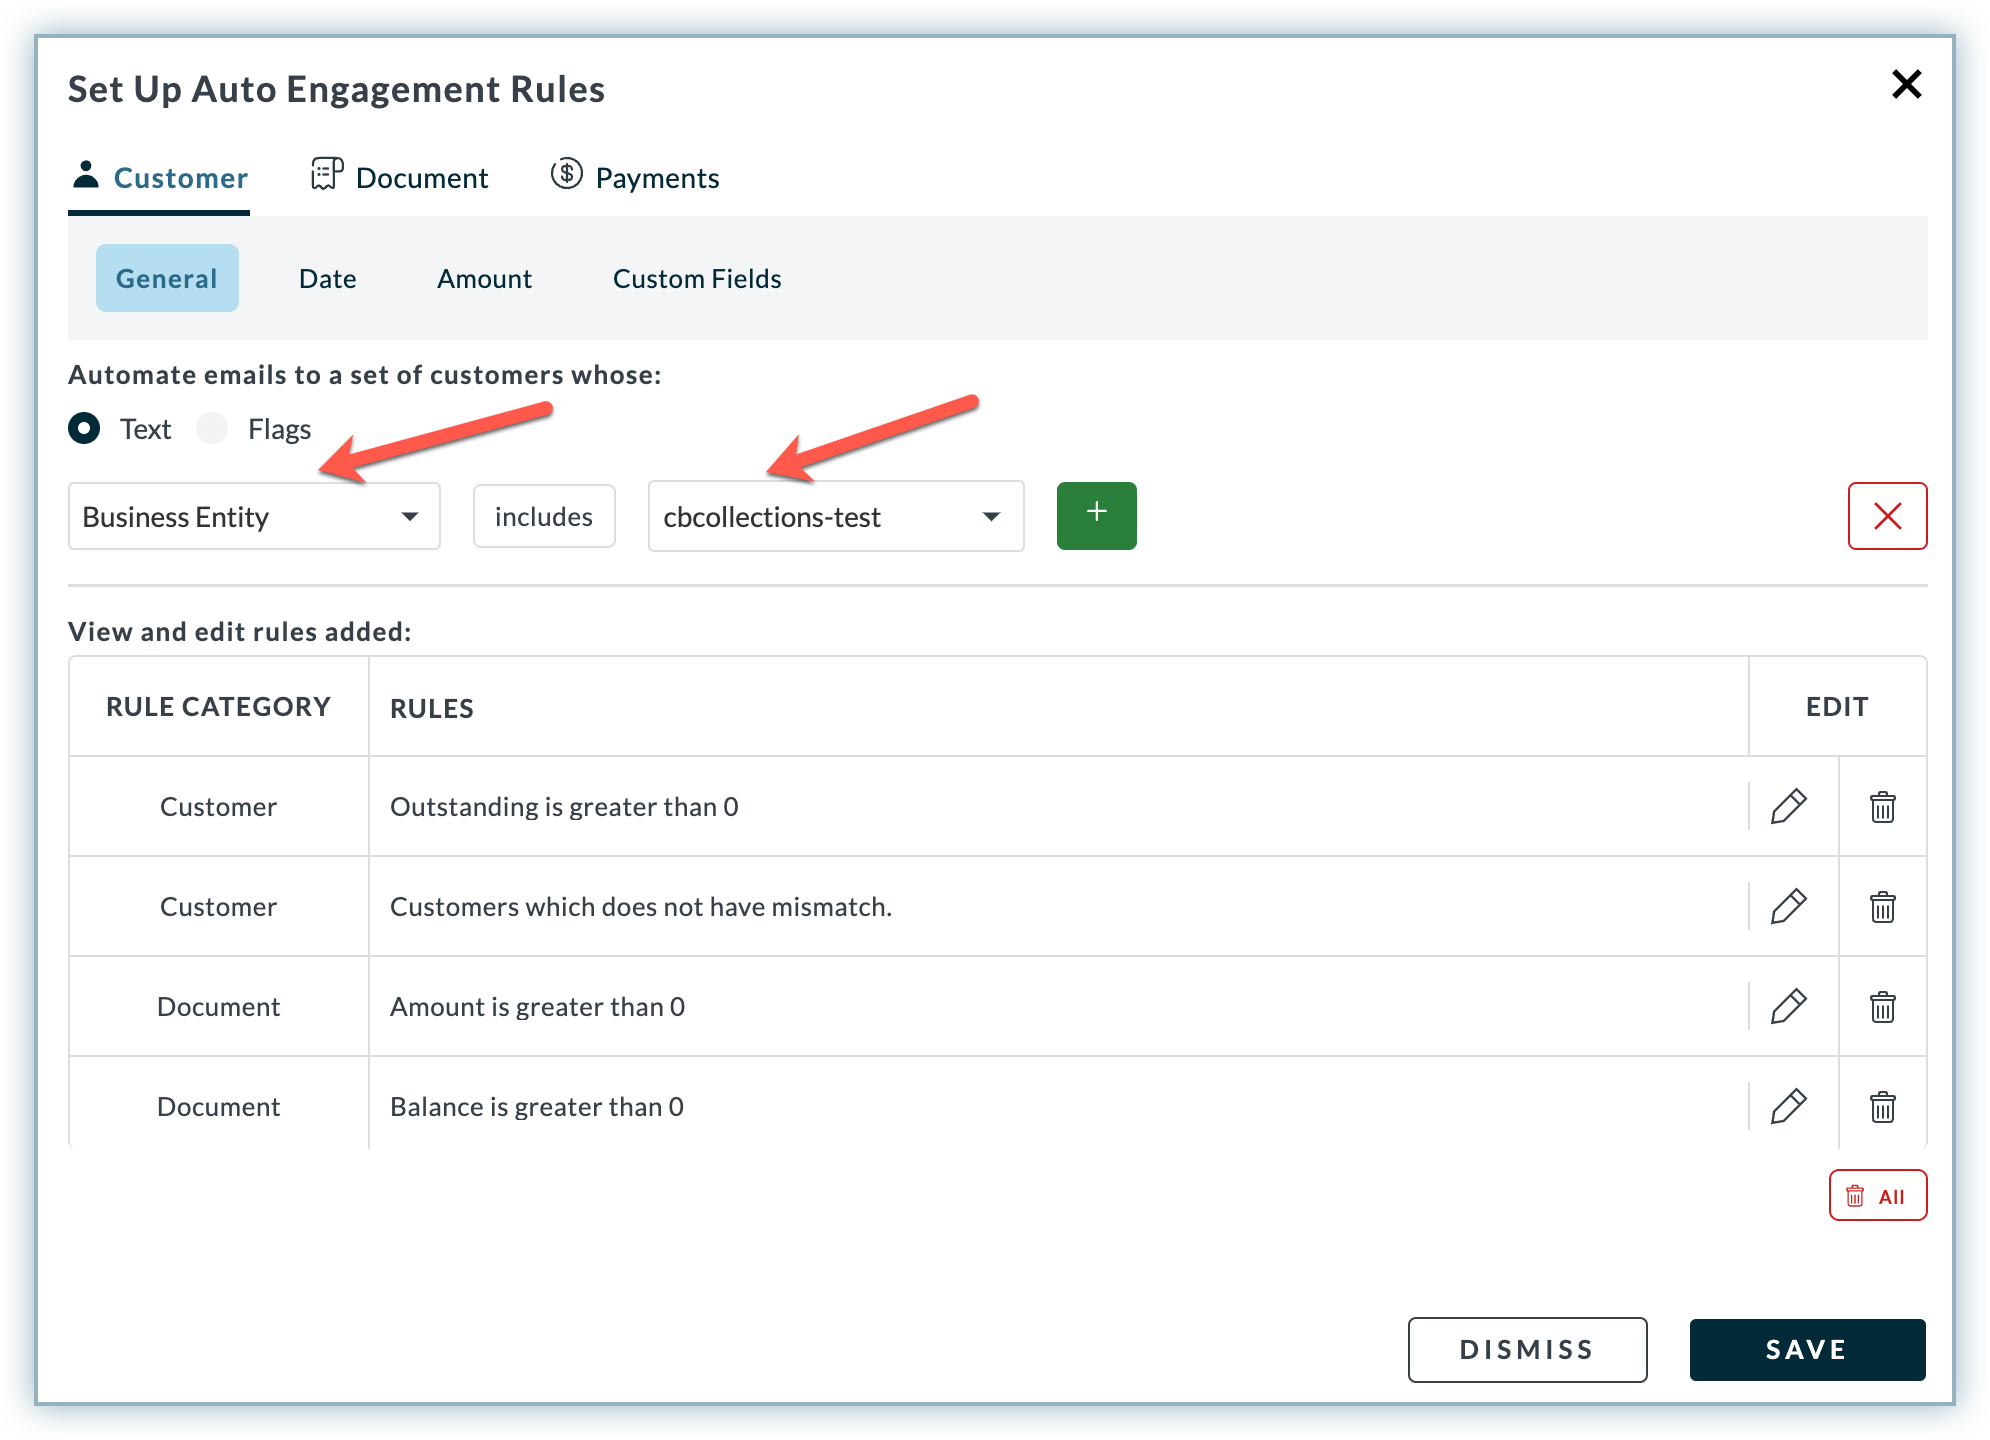
Select Business Entity from the Select Field drop-down menu.
-
Select the entity name from the Business Entity drop-down menu.
-
Click Save
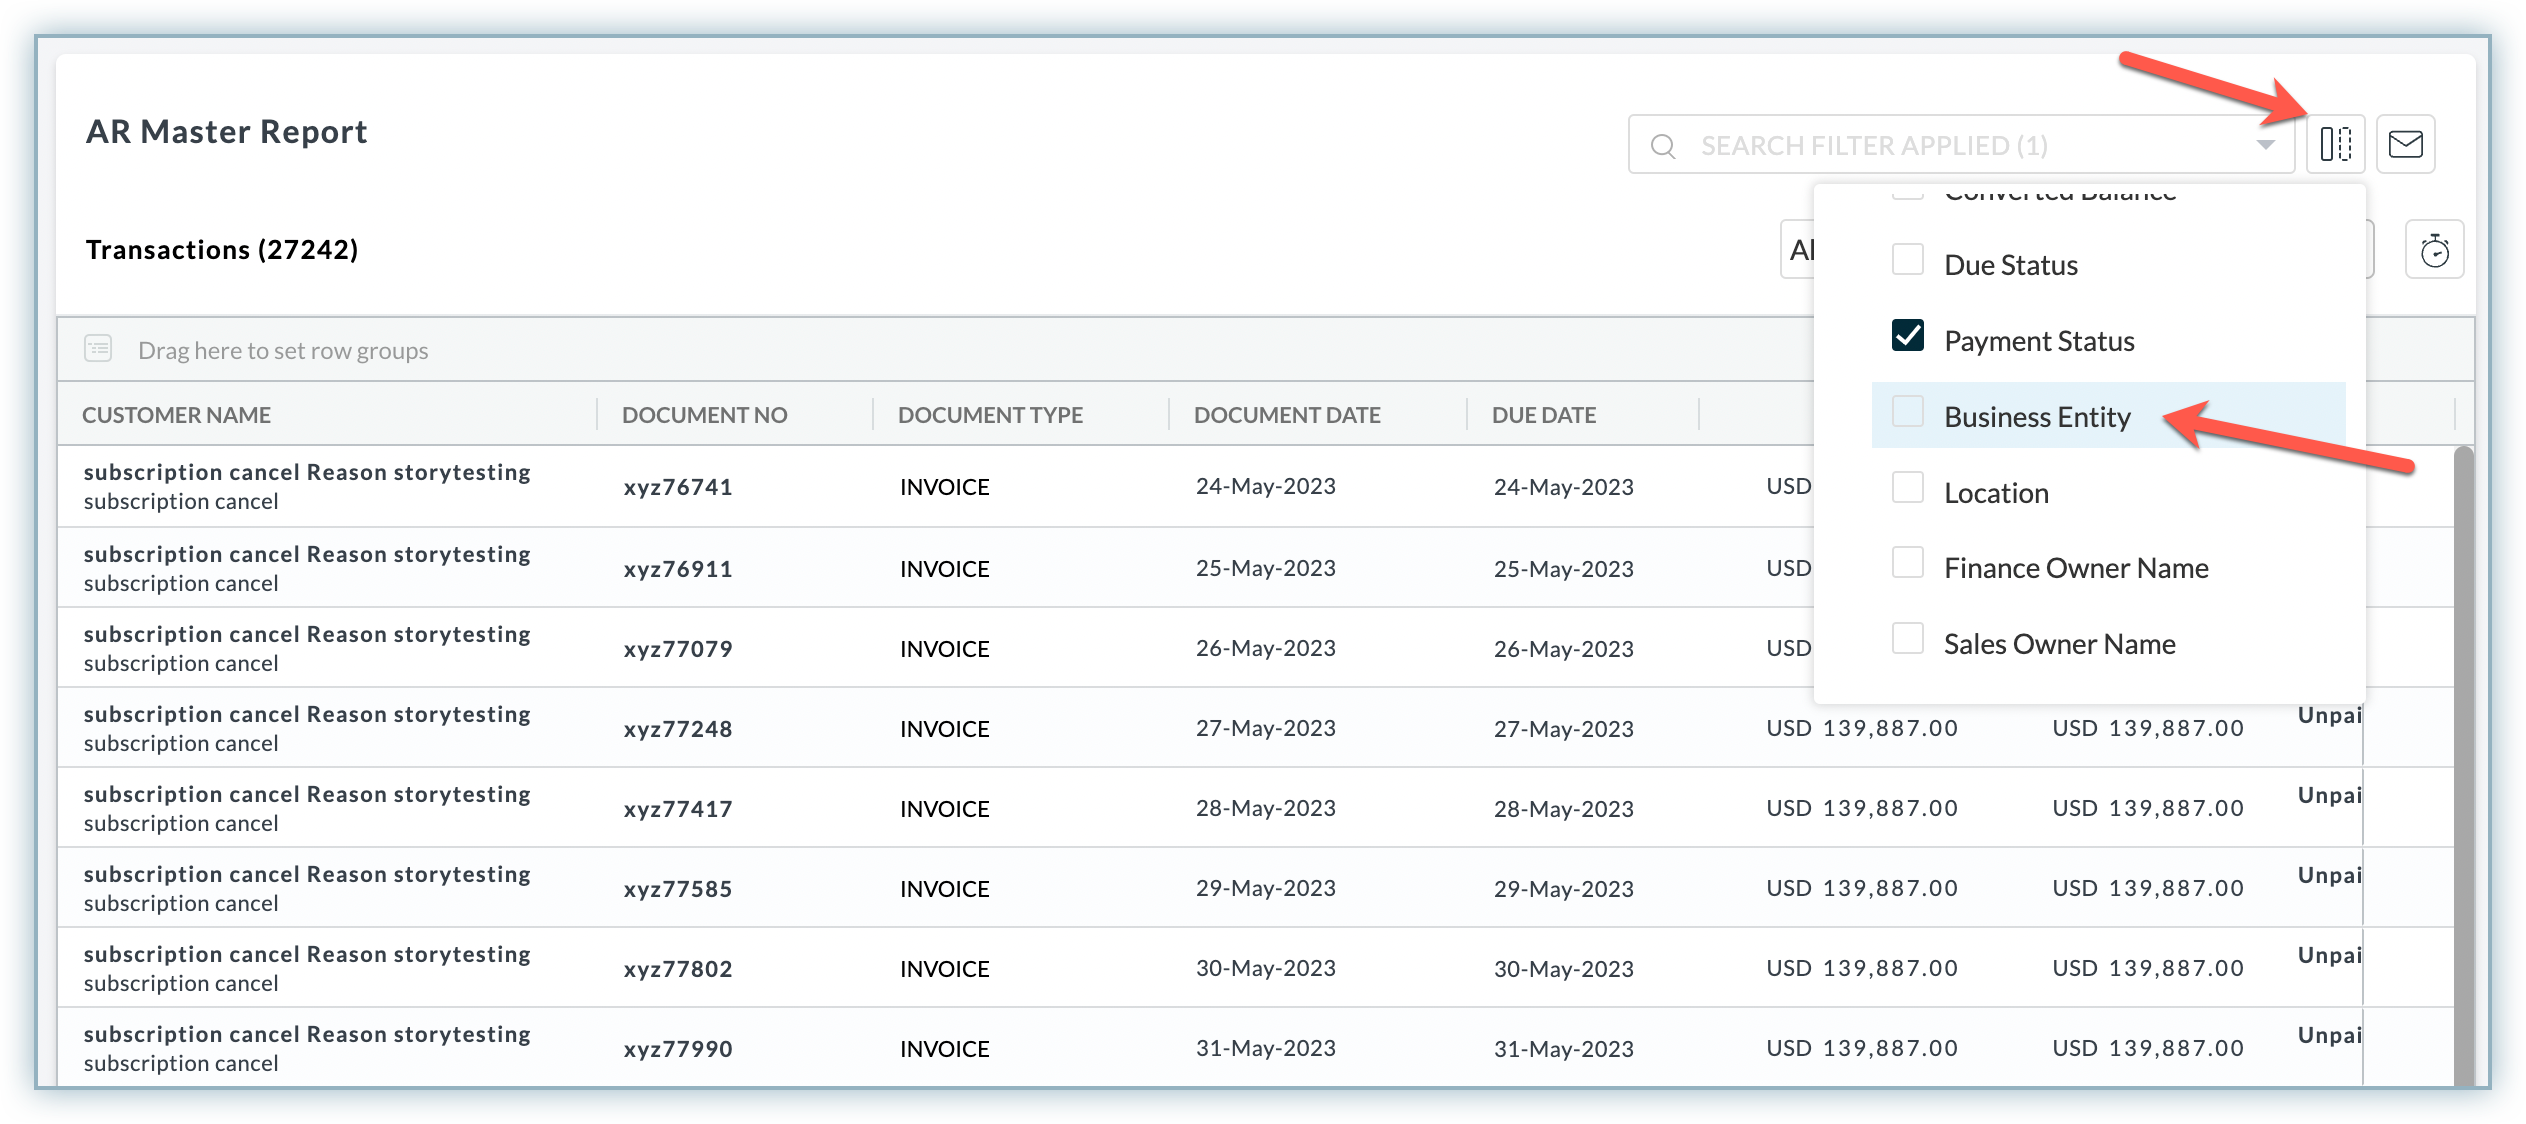
Business Entity in Reports
Add Business Entity as a column in all the reports in Chargebee Receivables.
Follow the steps below:
-
Go to Reports from the left-navigation pane.
-
Click on any report.
-
Click the column chooser button and select Business Entity.
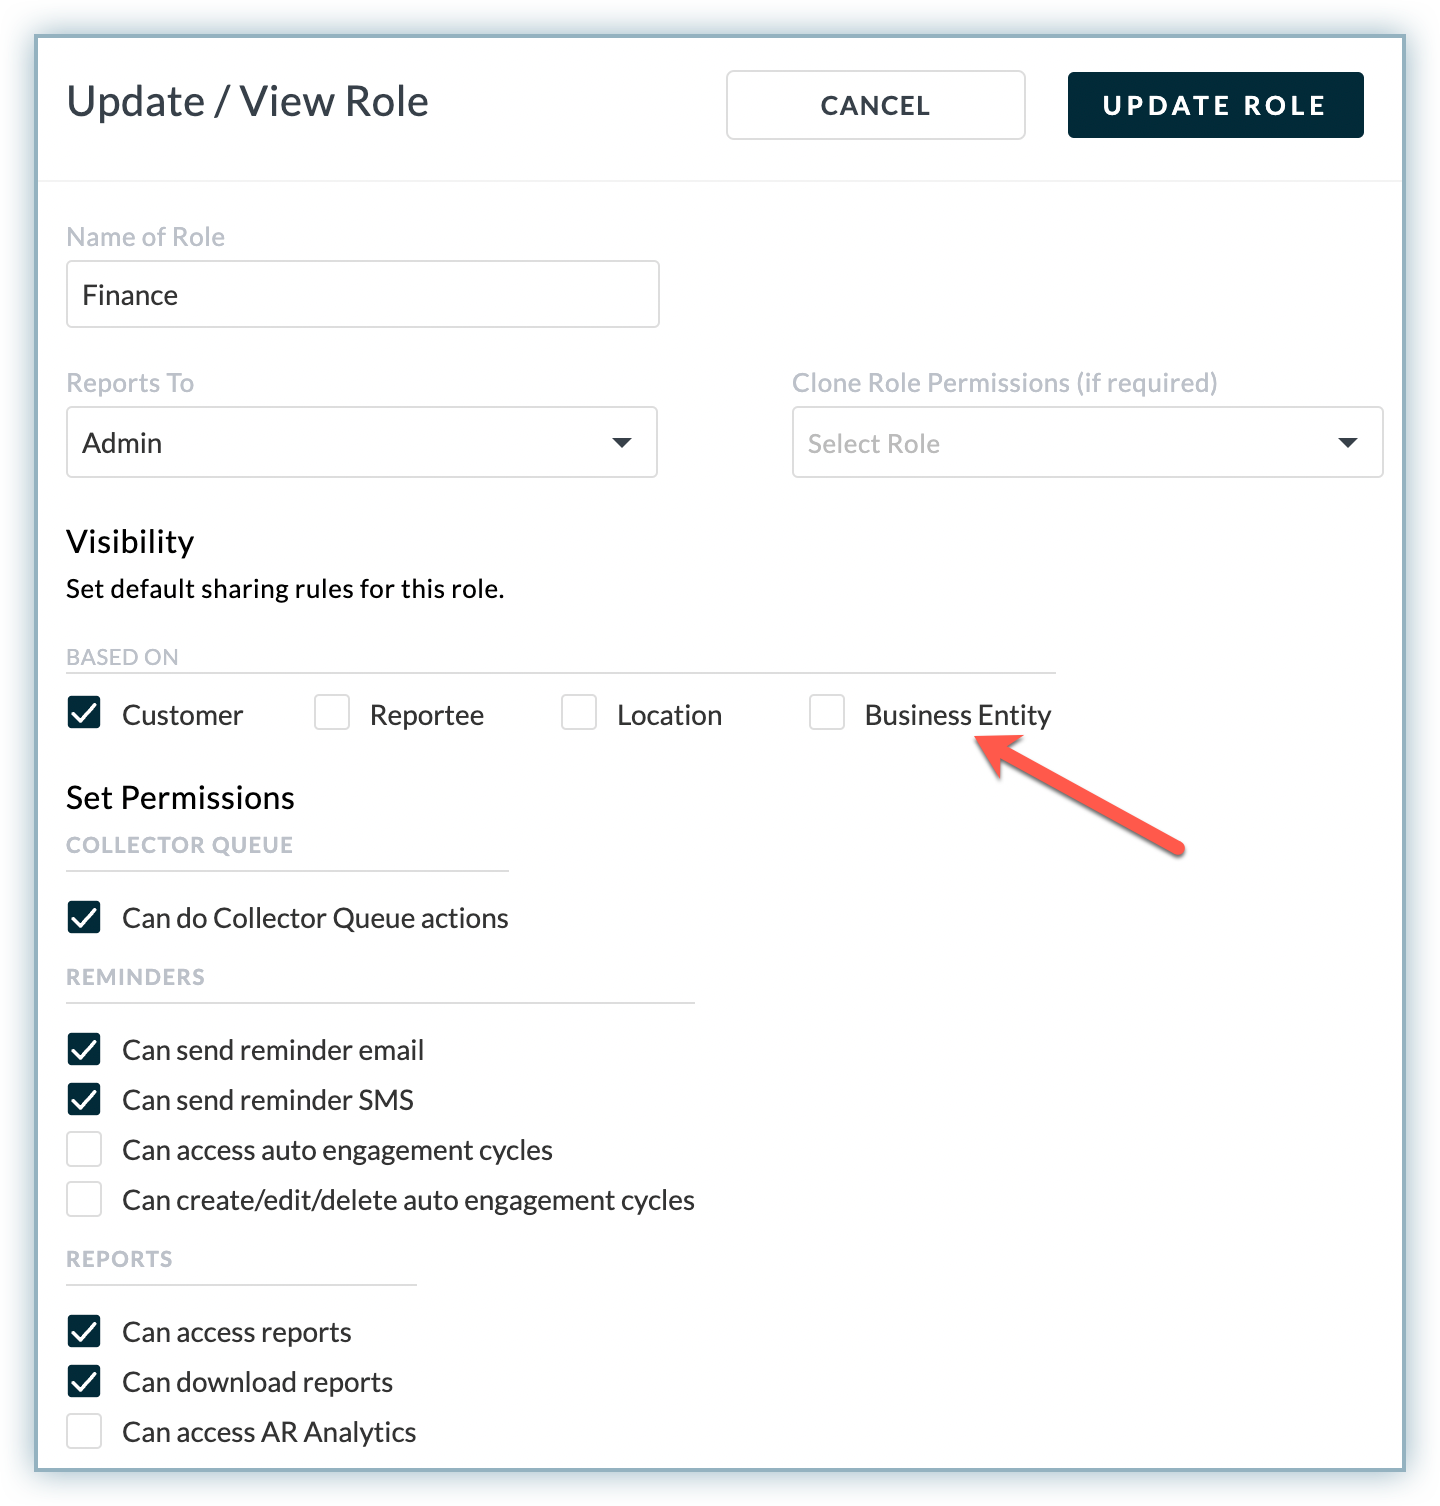
Business Entity in User Roles
Set default sharing rules for a User Role based on Business Entity for your users who belong to a specific role in Chargebee Receivables.
Follow the steps below:
-
Go to Settings > Rules and permission.
-
Select the role from the hierarchy tree or add a new role.
-
Select Business Entity under Visibility > BASED ON.
-
Click Update Role if you are updating an existing role and click Create Role if you are adding a new role.
Additional feedback for Microsoft/American English style:
- Use American English spellings (e.g., "customize," "organize," "behavior").
- Use "and" instead of "&" in running text.
- Use the Oxford comma in lists.
- Use em dashes (—) for parenthetical statements, not double hyphens or en dashes.
- Use sentence case for headings unless referring to UI elements.
- Use consistent casing for UI labels (e.g., "Log in" not "Login").
- Use parallel structure and punctuation in bullet and numbered lists.
- Clarify passive or wordy sentences for directness and clarity.
- Tone is generally clear and instructional, but can be more concise and direct in some places.
- No date format issues found.
- Markdown and formatting are consistent.
Was this article helpful?