User Management
Overview
User management involves defining and managing users, roles, and their access levels in Receivables. User Management settings provide administrators with a high-level view of their users and their privileges. As a result, businesses gain the ability to better understand what each of their team members is responsible for. In Receivables, you can define specific roles and permissions for all your users based on your organization hierarchy using User Management settings.
A user with admin privileges can perform the following operations in User Management settings:
- Create or update roles and permissions
- Invite, update, and delete users
- Download user mapping data
- Create organization hierarchy
Roles and Permissions
This feature allows you to define a set of roles and permissions for users to control how they interact with the application. It helps define user access to the Receivables application.
Adding/Updating Roles and Permissions
In Receivables, you can create any number of roles and set up the permissions associated with those roles for your users. It's crucial that you define the right permissions for various roles based on your business requirements and team structure. You can create roles and set permissions in two ways:
- By creating a new custom role
- By cloning an existing role
To create a new custom role in Receivables, follow these steps:
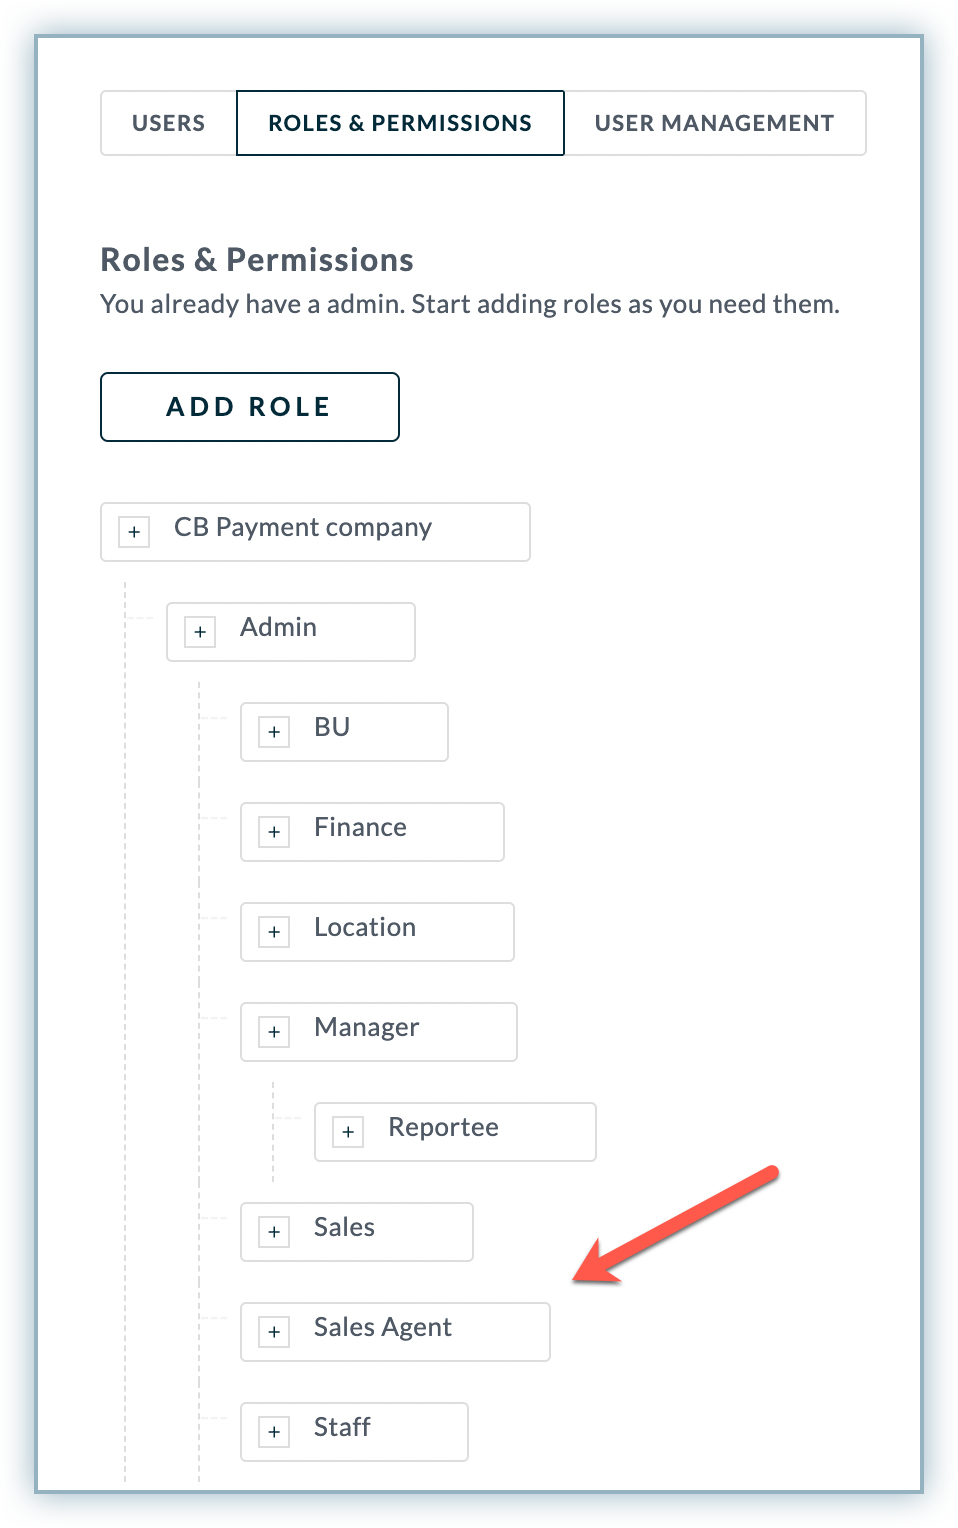
- Click Settings > Users & Permissions > Roles and Permissions.
- In the Roles & Permissions page, click Add Role.
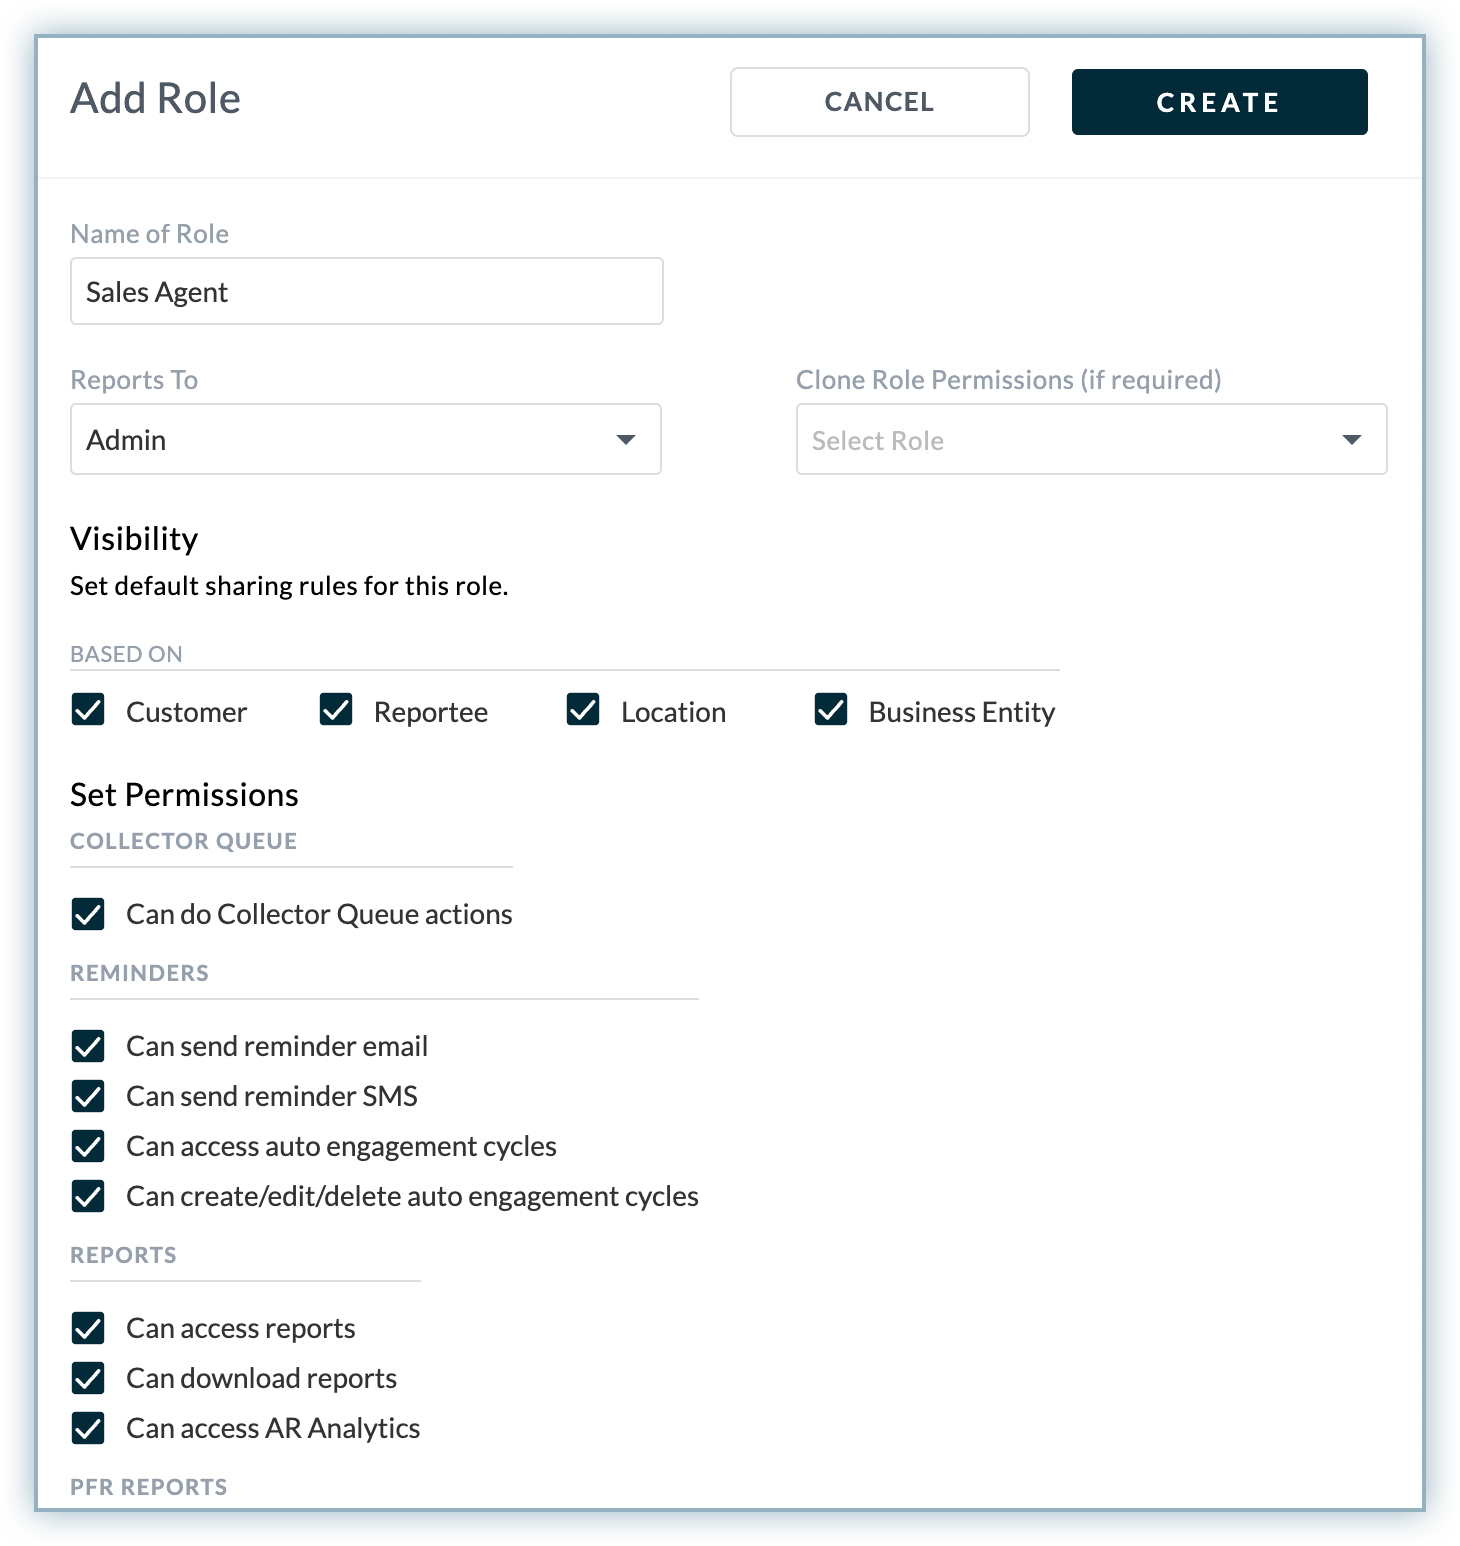
- In the Add Role page, specify the following details:
- Role details: Add the following details about the role:
- Enter the name of the role.
- Select the role into which this role will report.
- Under Clone Role Permissions, select a role from the drop-down list that you want to clone for this new role. The visibility and permissions are auto-populated based on the role you select. You can make necessary changes to them as required for this new role.
- Visibility: The visibility allows users to control which data is shown based on customer, reportee, location, and business unit. When creating or updating a role, you can select any of the applicable options.
- Permissions: Enable the permissions for this role based on various permission categories. For more information about these permissions, see Permissions in Receivables.
- Role details: Add the following details about the role:
- Click Create.
After creating a new role, you can click on a specific role in the organization hierarchy to view or update the role details at any time in the future.
Permissions in Receivables
In Receivables, permissions can be grouped into various feature categories that permit the user to access a certain feature. The table below demonstrates the permissions available in Receivables based on various feature categories.
| Feature Category | Permissions | Description |
|---|---|---|
| Collector Queue | Can do Collector Queue actions. | Collector Queue actions like Raise Issue etc. is usually performed by collectors. But you can set this permission for other roles as well. |
| Reminders | Can send Email and SMS reminder Can access auto engagement cycles Can create/edit/delete auto engagement cycles | The Reminder operation is handled by the collector, sales, and admin user persona. You can set this permission for every user-persona. |
| Reports | Can access reports Can download reports Can access AR Analytics | Data shown in the reports will be as per visibility set in the role. |
| User Management | Can invite/edit/delete users Can add/edit roles | The permission can be given to user with admin or owner level access. The user management access allows you to invite, edit, and delete users in the application. |
| Import | Can import Financial Data Can import CRM Activity Can import Customer Mapping Can import User Mapping Can import Customer Contacts | Import various types of data into the AR dashboard. An admin or owner role should have access to this permission. |
| Admin Settings | Can edit company details Can configure client portal settings Can configure collection status | This permission can be set for the users with admin or owner level access. |
| Payment | Can configure Payments | "Can edit company details" must be selected to get permission to configure payments. |
These feature categories and permissions allow you to create or update a role within the application.
Inviting Users to Receivables
Note
Only users with invite, edit, or delete user permissions can invite other users in the application.
You can invite your team members to your Receivables account and assign them specific roles with associated permissions so they can facilitate all your collection-related activities. Once your team members are invited, they can sign up and start using Receivables based on their role and permissions.
To invite your team members to your Receivables account, follow these steps:
- Log in to your Receivables account.
- Click Settings > Users & Permissions > Users.
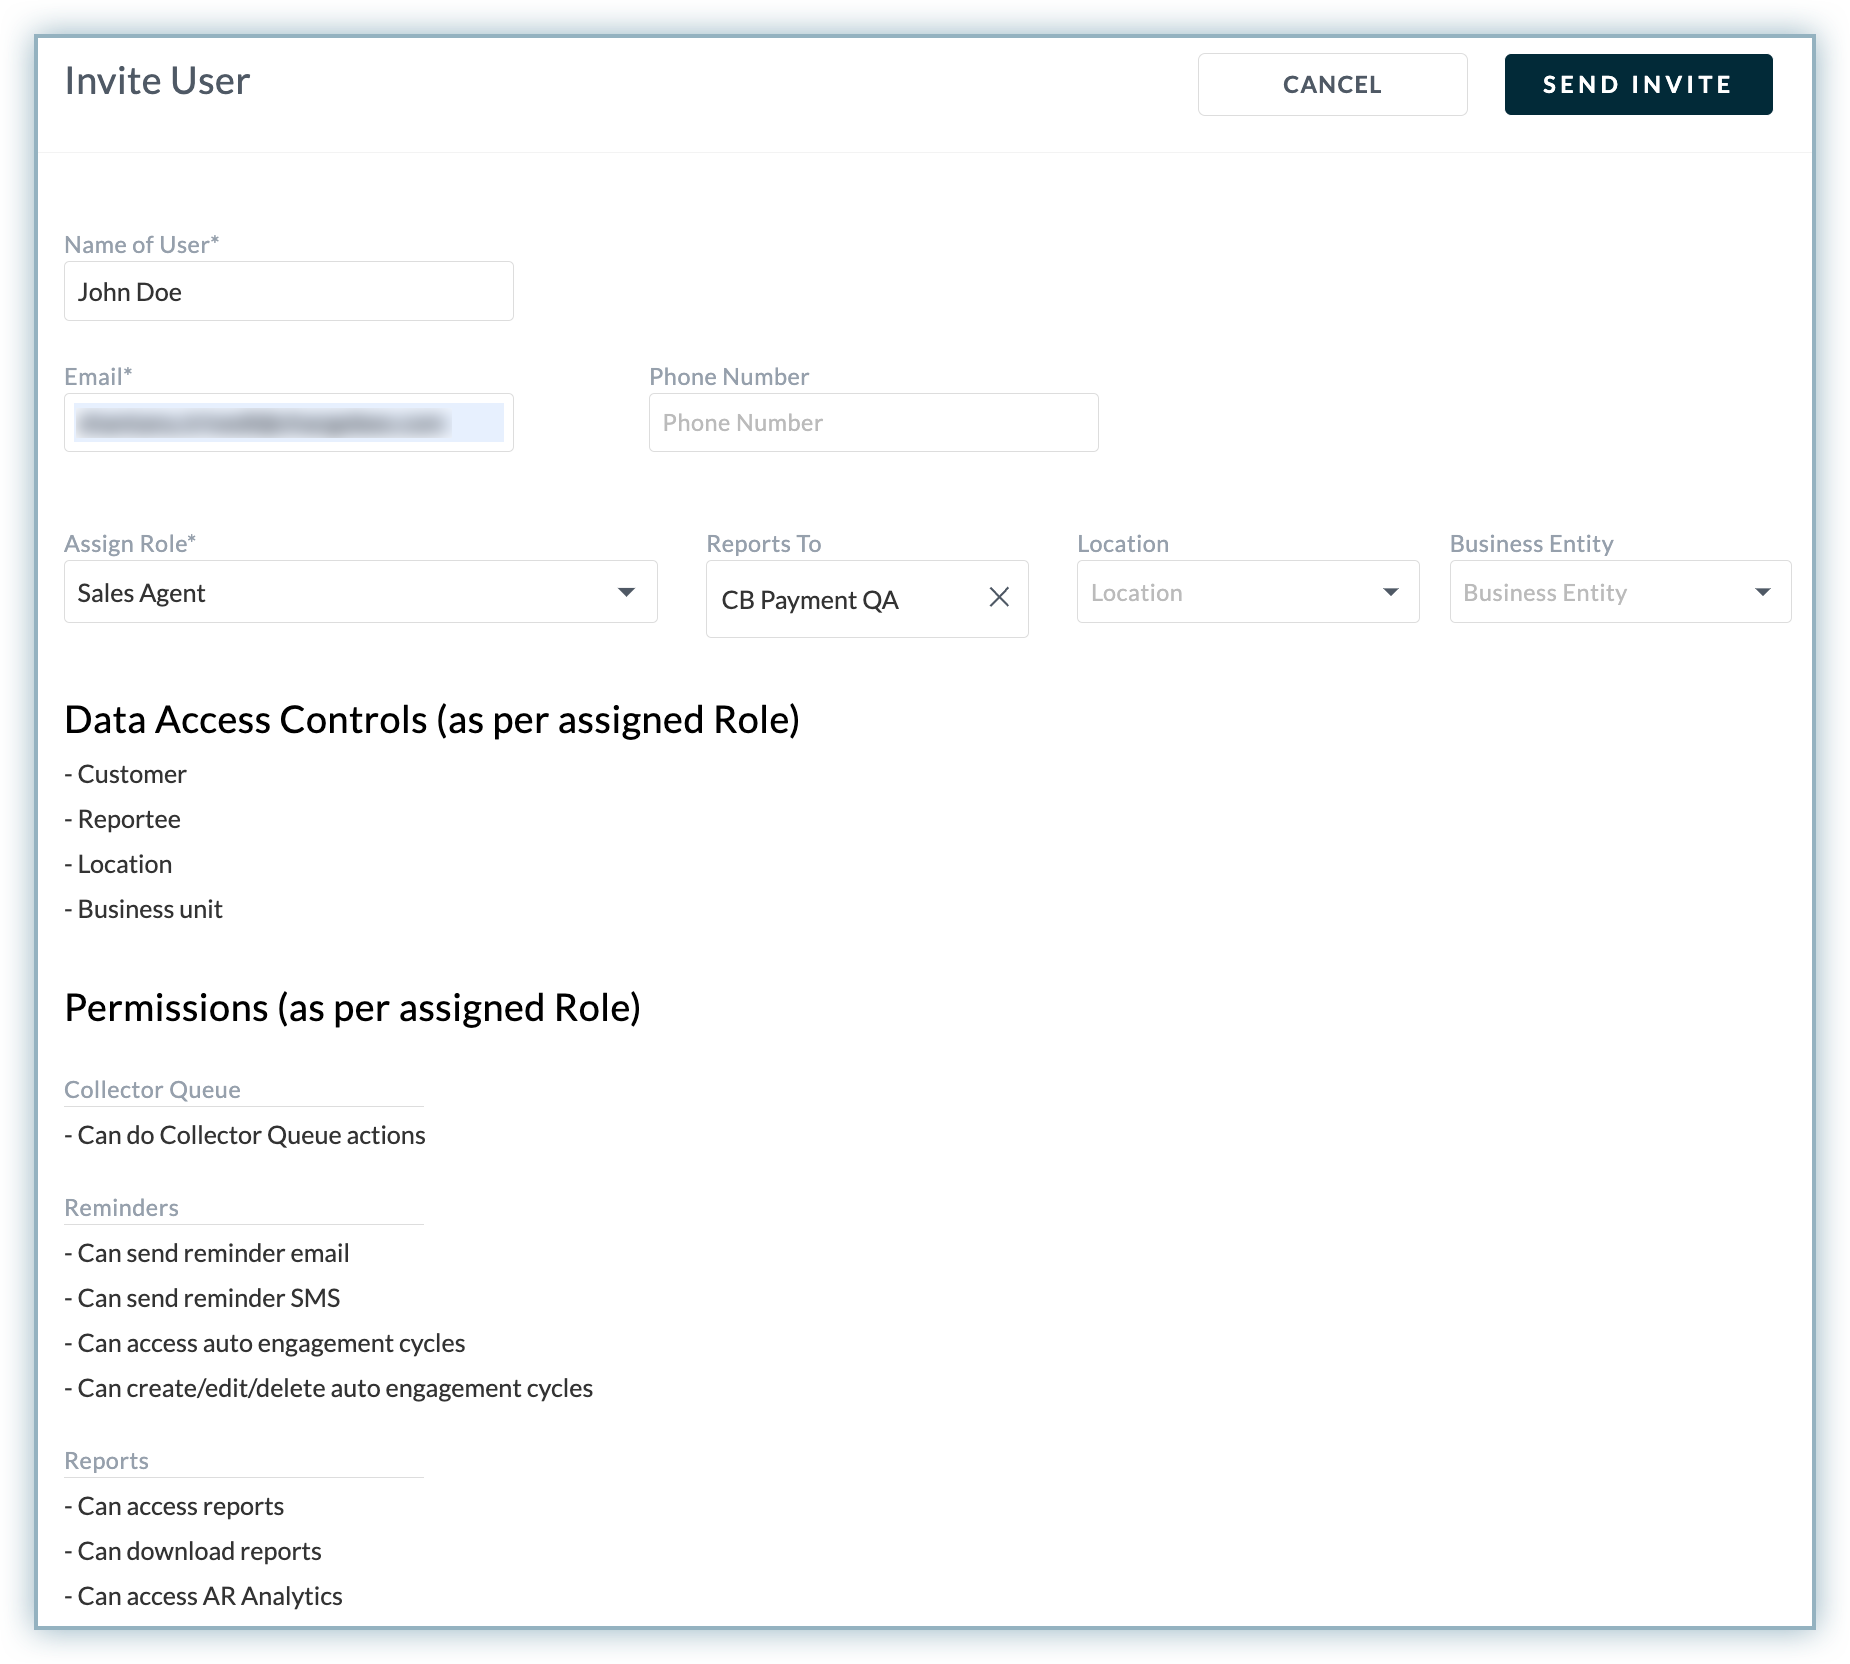
- In the Invite User page, specify the user details such as name, email address, role, and visibility.
- Click Send Invite.
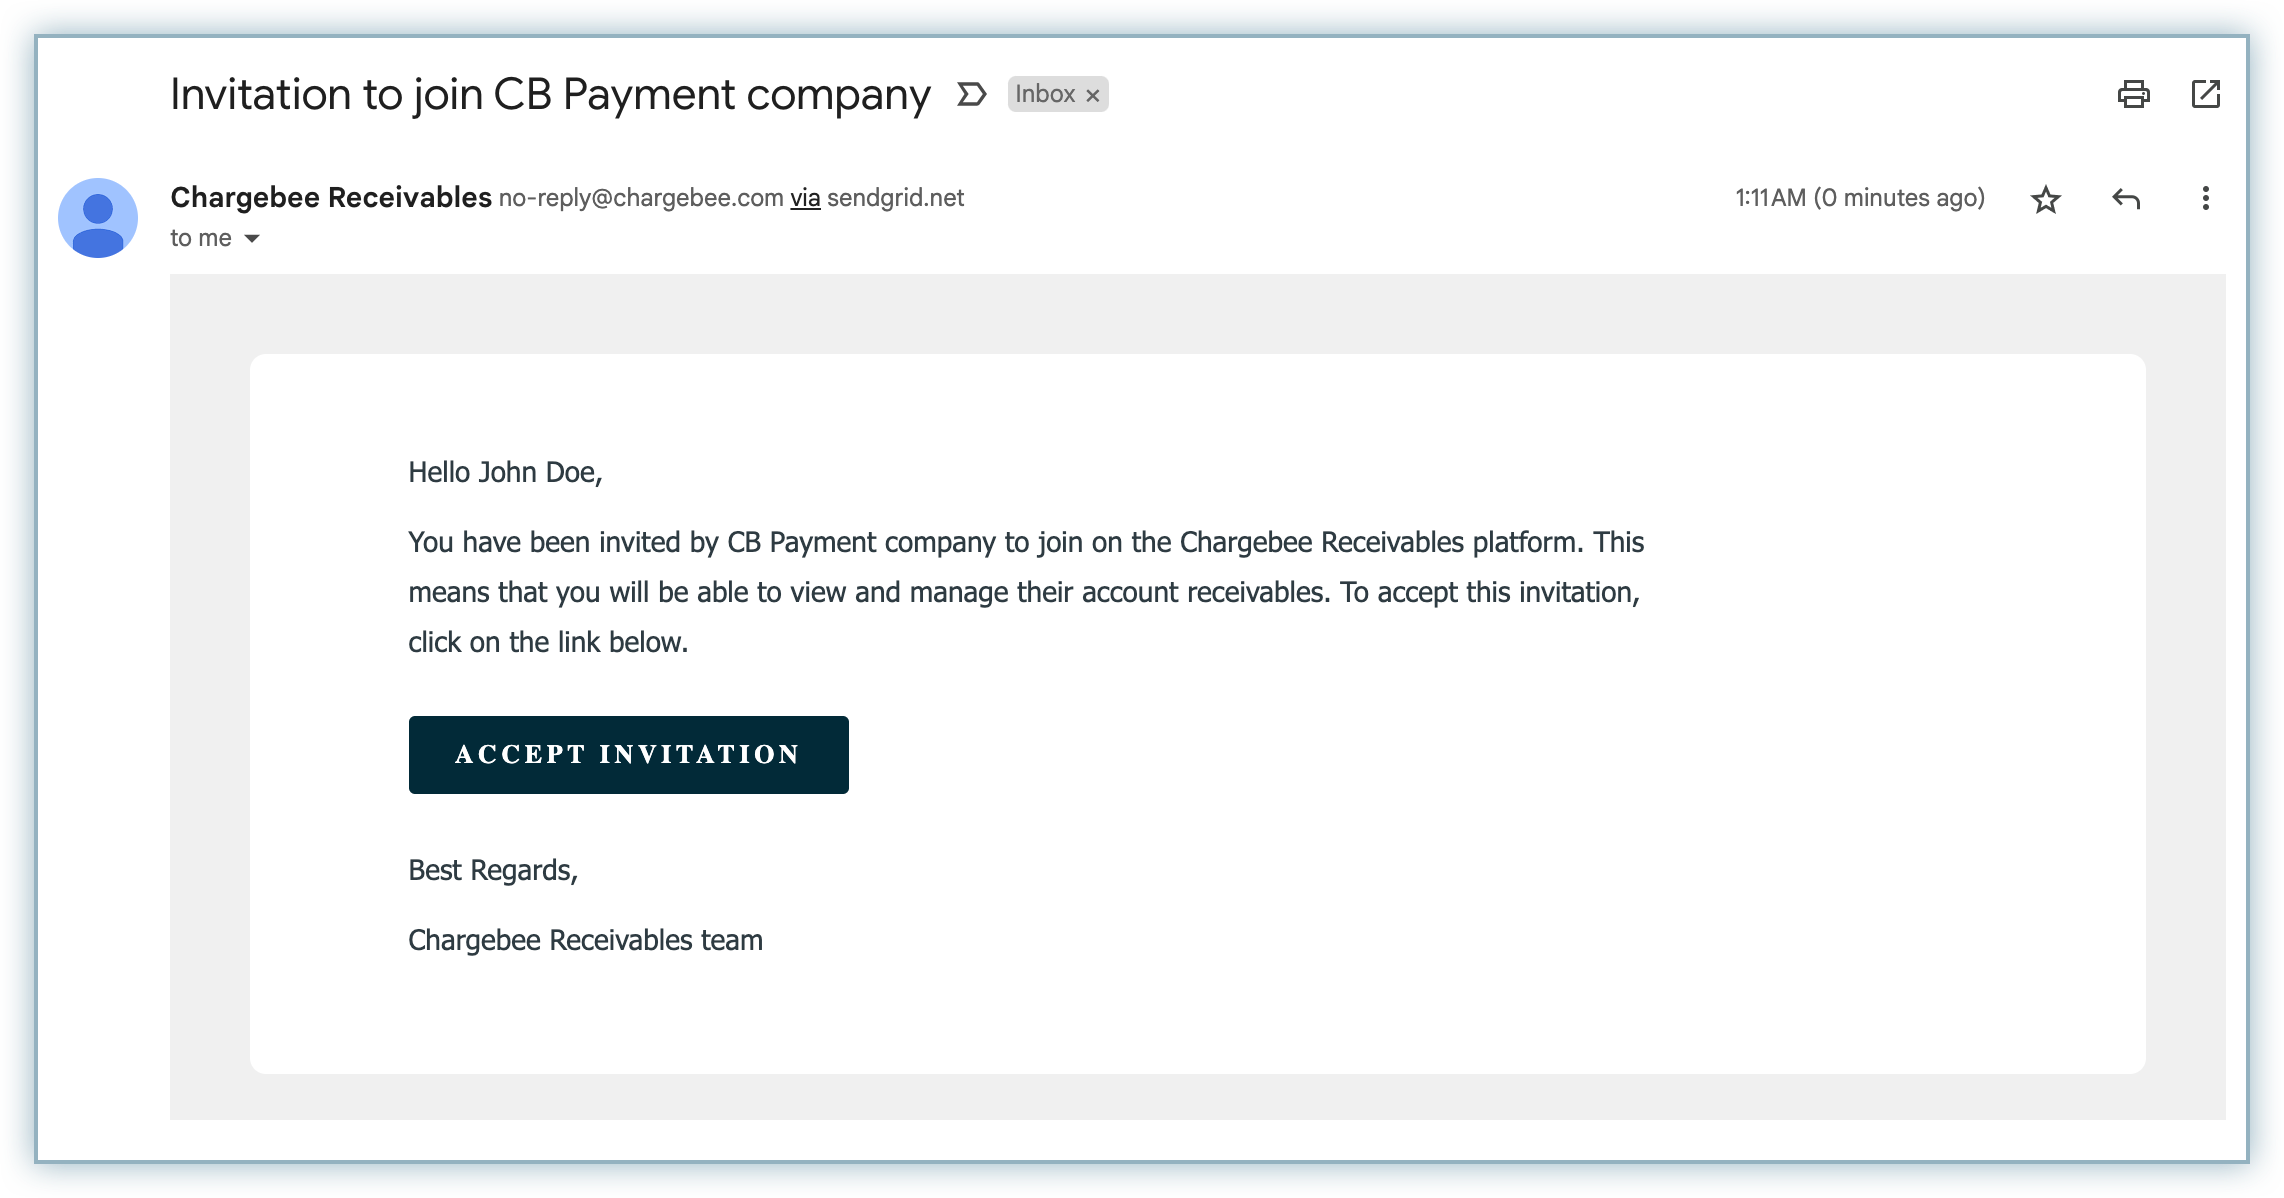
The user will receive an email with an invitation link. They can complete the sign-up process by accepting the invitation and creating a new password.
Learn more about common user personas and actions in Receivables, and assign roles and permissions to users as you invite them.
Note
Contact Chargebee Receivables Support if you want to update your email address after creating an account in Receivables.
Updating Roles and Permissions for a User
Note
If you need to update a user's permissions, you can update the role corresponding to the permissions. See updating roles and permissions in Receivables.
The Users and Permissions page allows you to update information about users such as their names, roles, and permissions. User-specific roles and permissions are configured by admins only in Receivables.
To update a user and associated roles and permissions, follow these steps:
- Click Settings > Users & Permissions > Users.
- Select a specific user from the list of users and click the ellipsis icon next to the user.
- Click Edit.
- In the Update User page, update the following details:
- User details: You can specify the name and contact number of the user.
- Assign Role: Select a specific role from the drop-down to update the role for the user.
- Visibility: Define the location, business unit (if required), etc.
- Click Update.

In addition, you can modify the permissions for specific users by updating their roles. If you wish to delete a user profile from the application, click the ellipsis icon next to a specific user profile, and click Delete.
Downloading User Data
Note
Only users with invite, edit, or delete user permissions can download the user data.
You can view a list of all users from the users page, but when you need a consolidated view of user data with user details, visibility, and status, you can download the user data in Excel format from the users page. To download the consolidated view of user data, follow these steps:
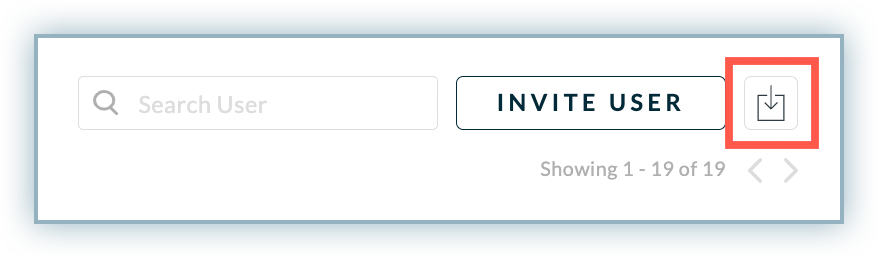
- Click Settings > Users & Permissions > Users.
- Click the Download icon next to the Invite Users button to download the list of all the users in Receivables.
Once the file is downloaded, you can check your system for an excel file with a table that contains various columns including the name of the user, email, roles and so on.
User Management Data
Downloading User Mapping Data
Note
Only users with the User Management permission can download the user mapping data.
Downloading user mapping data allows you to view all the customers that are mapped to users. The report contains the user details, mapped customers, finance owner (if any), visibility, and other additional details about users.
For instance, if you want to see all the customers who are mapped to a specific user via direct or indirect mapping visibility, you can download the user mapping data for that particular user. In direct visibility, customers are mapped to the user directly. In indirect visibility, the visibility of the customer for a specific user is defined based on location, reportee, and business unit.
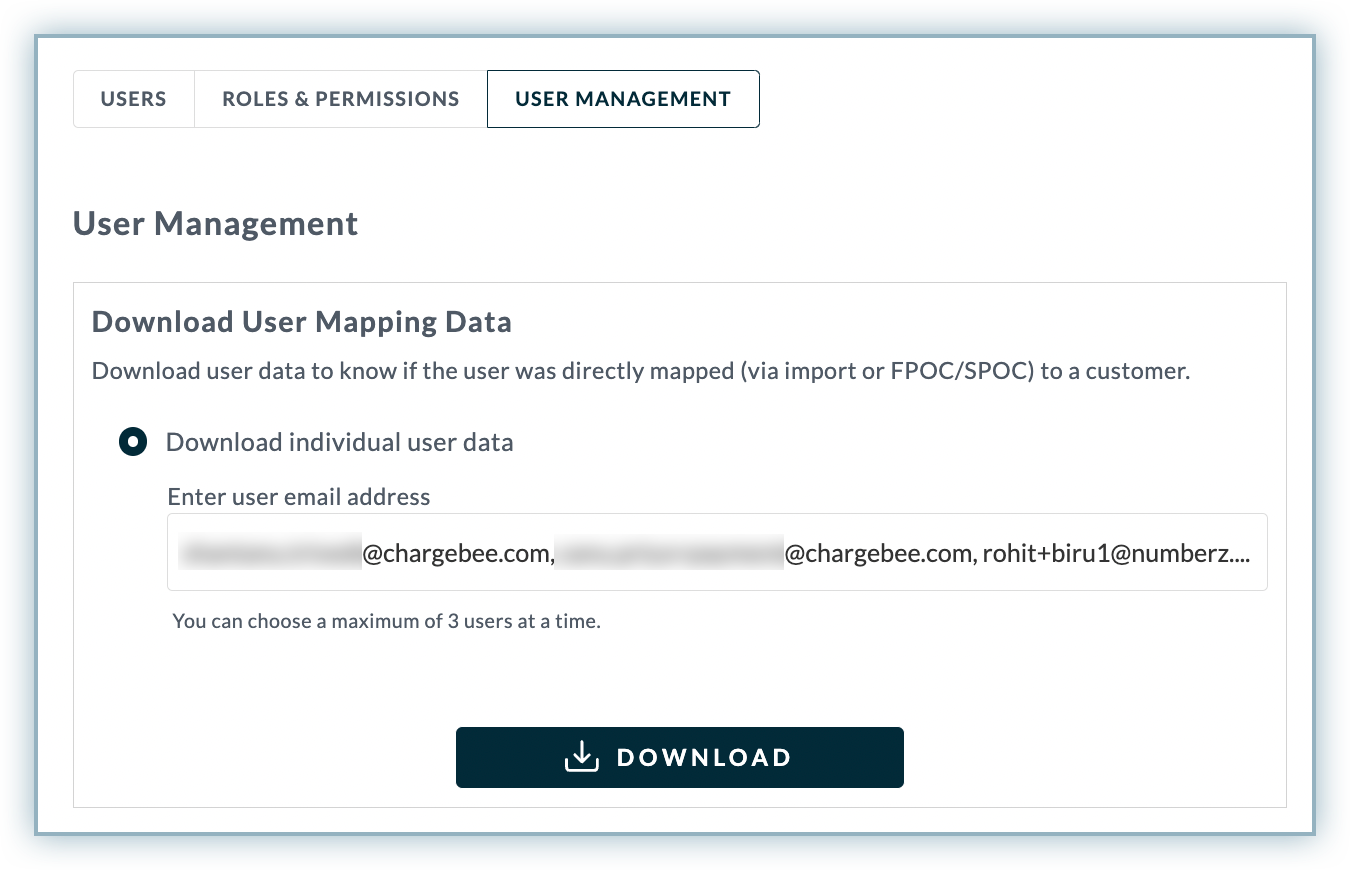
Receivables allows you to download user mapping data for up to three users at a time.
To download the user management data, follow these steps:
- Click Settings > Users & Permissions > User Management.
- In the User Management page, specify email address(es) of the user or select user(s) from the list for whom you want to download user mapping data.
- Click Download.
You will receive an email with the download link. Click Download Report to download a file that includes user details, role, mapped customer, and other user-specific details.

See also
Was this article helpful?