Managing Offers
Availability
Growth solutions are currently in early access and available only for Chargebee Billing and Retention customers at no additional cost during the EAP period. Sign up to join the Early Adopter Program to learn more about these solutions.
Introduction
Offers within your Growth application allow you to manage the offers presented to your subscribers. An Offer is a standalone object that encapsulates and abstracts a customized incentive for your target subscribers. It enables revenue teams to offer tailored benefits such as discounts, trial or billing extensions, pauses, and plan changes, without altering your core product catalog or billing configuration. Offers are a secret weapon for Revenue Growth teams, designed to drive subscriber actions and positively impact revenue growth across various lifecycle stages.
You can create Offers in Chargebee Growth Solutions using the no-code interface for specific objectives and have them presented to desired target audiences. Offers can be embedded in plays and presented proactively as in-app offers, or within cancellation pages and presented to subscribers at the moment of cancellation. This Offers page allows you to review your existing offers and create new offers based on your business goals. Each offer includes key details such as its name, objective, category, and more.
Things to Consider
Before you start creating a new offer in your Chargebee Growth Solutions site, it’s helpful to understand the various configuration options available. This ensures you build targeted offers that align with your business goals and customer journey.
Offer Objective
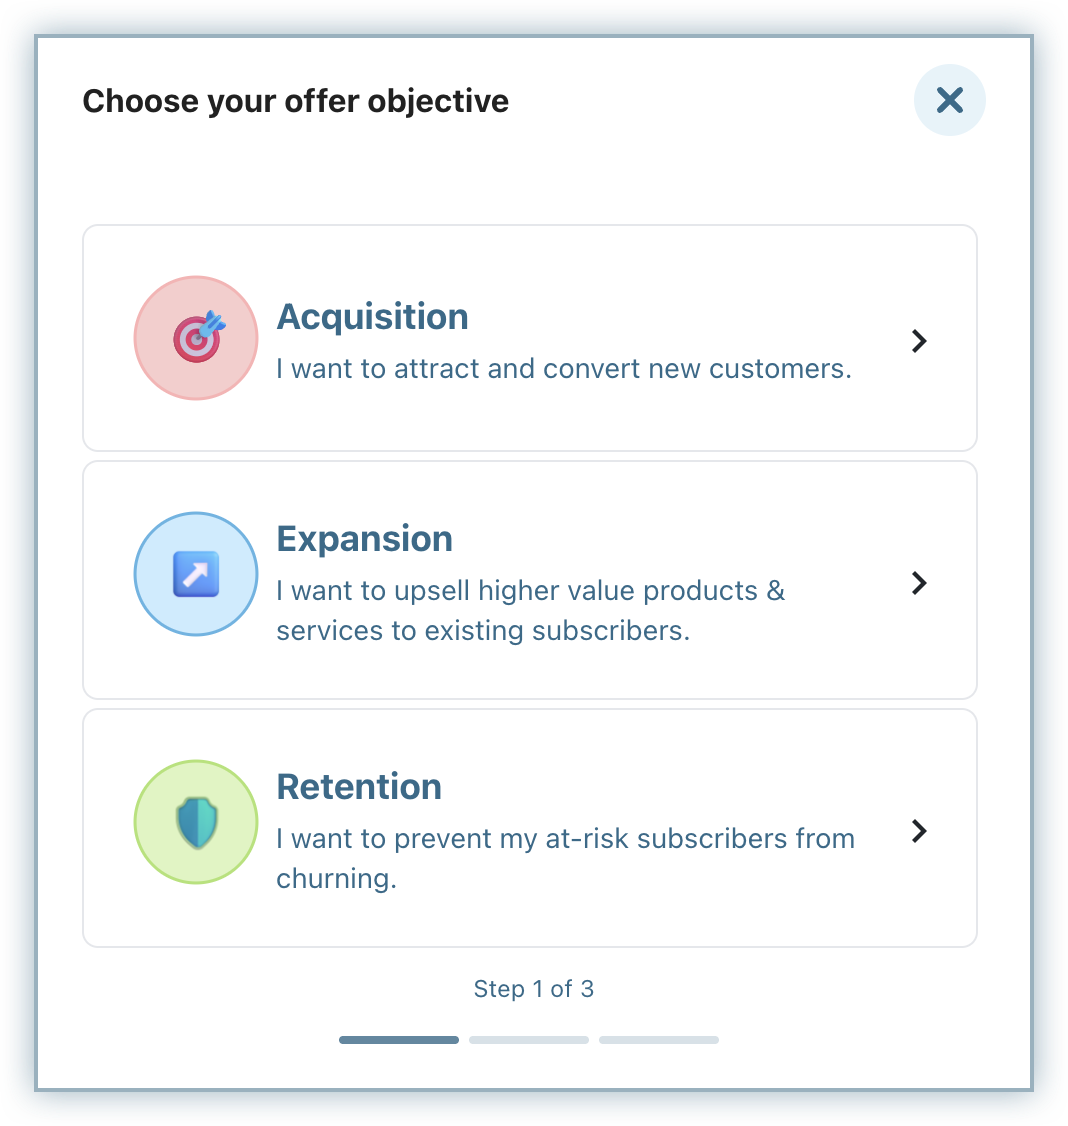
The objective defines the purpose of your offer and helps tailor its setup accordingly. You can choose from the following objectives:
- Acquisition: Use this to convert trial users to paying subscribers.
- Expansion: Encourage high potential customers to upgrade or buy add-ons, driving upsell or cross-sell opportunities.
- Retention: Deploy offers to prevent churn, typically shown to customers who are either at risk of cancellation or are in the process of cancelling their subscription.
Each objective type customizes the offer flow and available fields, helping you measure impact effectively.
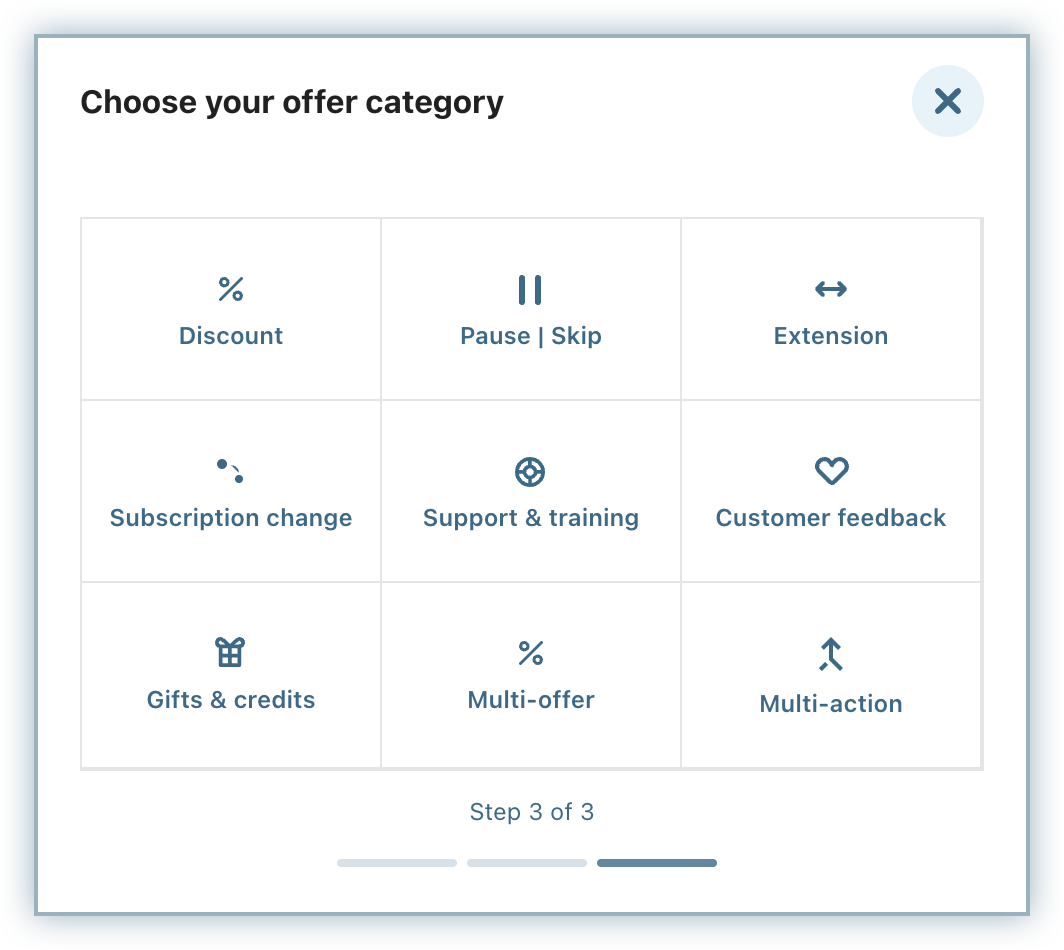
Offer Category
The offer category determines the kind of incentive you’re providing, the required input fields for your offer settings, and drives both reporting and benchmarking. Choosing a category helps Chargebee Growth Solutions structure your offer creation and track outcomes effectively.
Examples of offer categories include (actual categories may vary in your site setup depending on your offer objective):
- Discounts: Offer a percentage reduction in price to incentivize sign-ups, renewals, or upgrades.
- Extensions(trial extensions/billing extensions): Extend a customer's trial period or billing cycle to give them more time before committing or paying.
- Trial Conversion(to a new plan or current plan): Convert trial users into paying customers by offering a seamless transition to the current plan or a new plan. Trial conversions can also be done with discounts to offer a percentage reduction in price to incentivize the conversion.
- Add-ons additions: Provide complimentary or discounted access to paid add-ons to enhance the core subscription offering.
- Plan Upgrades/Downgrades/Swaps: Incentivize movement across plan tiers or types, whether to upsell, down-sell, or laterally shift users.
- Pauses/Skips: Allow customers to temporarily pause billing or skip cycles as a retention strategy during low-usage periods.
- Training & Support: Offer personalized onboarding, consultation, or priority support as a value-added benefit for specific users.
The category you choose influences the required fields during offer setup and the type of input collected from users.
Offer Processing
Offer processing defines what happens after a customer accepts an offer. This determines how the action is fulfilled and what backend logic is triggered. You can choose from:
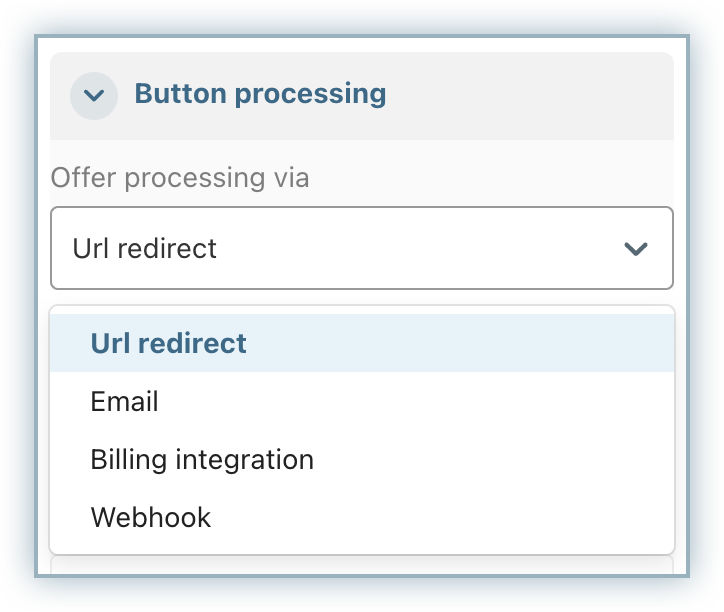
- Chargebee Billing Integration: Directly process the offer through your Chargebee Billing setup—ideal for billing changes like plan updates, discounts, etc.
- Chargebee Checkout: Process the trial conversion offers via Chargebee In-app checkout or Full page checkout, invoking the checkout flow when an end subscriber chooses to accept a trial conversion offer.
- URL Redirect: Redirect users to a specific URL dynamically based on context. e.g. custom checkout redirection.
- Webhook: Trigger a webhook to communicate with external systems or execute custom logic.
- Email Alert: Send an email notification, typically used when an internal agent is needed to manually follow up on the offer acceptance.
Each processing method can be configured further, including what the user sees after accepting the offer (confirmation, feedback form, redirect, etc,.).
Offer Placement
Once your offer is ready, you can assign it to a placement within an existing Experience. Placement determines when and where the offer appears on your site or in your product flow.
Note
The placement option is only available for offers with Retention objective and can only be used to place offers within Cancellation pages. To place offers within plays, directly place offers within the play builder interface.
Key considerations for placing Retention offers within cancellation pages:
- View a list of available placements under the Placement column for each offer.
- To place a Retention offer within cancellation page, select the placement option.
- You will be taken to the placement section within the offer editor.
- If a placement already has an offer assigned, its name will appear in grey.
- You can only assign one offer per placement, so choose wisely based on context and goal.
Creating an Offer
To create a new Offer on your Growth application, follow these steps:
- Navigate to the Offers page. This page allows your to view all your existing offers and create new ones.
- Click + New Offer to create a new offer from scratch.
- On the Choose your offer objective pop-up, select the objective for which you’re creating the offer. Learn more about offer objectives here. You can select from the following options:
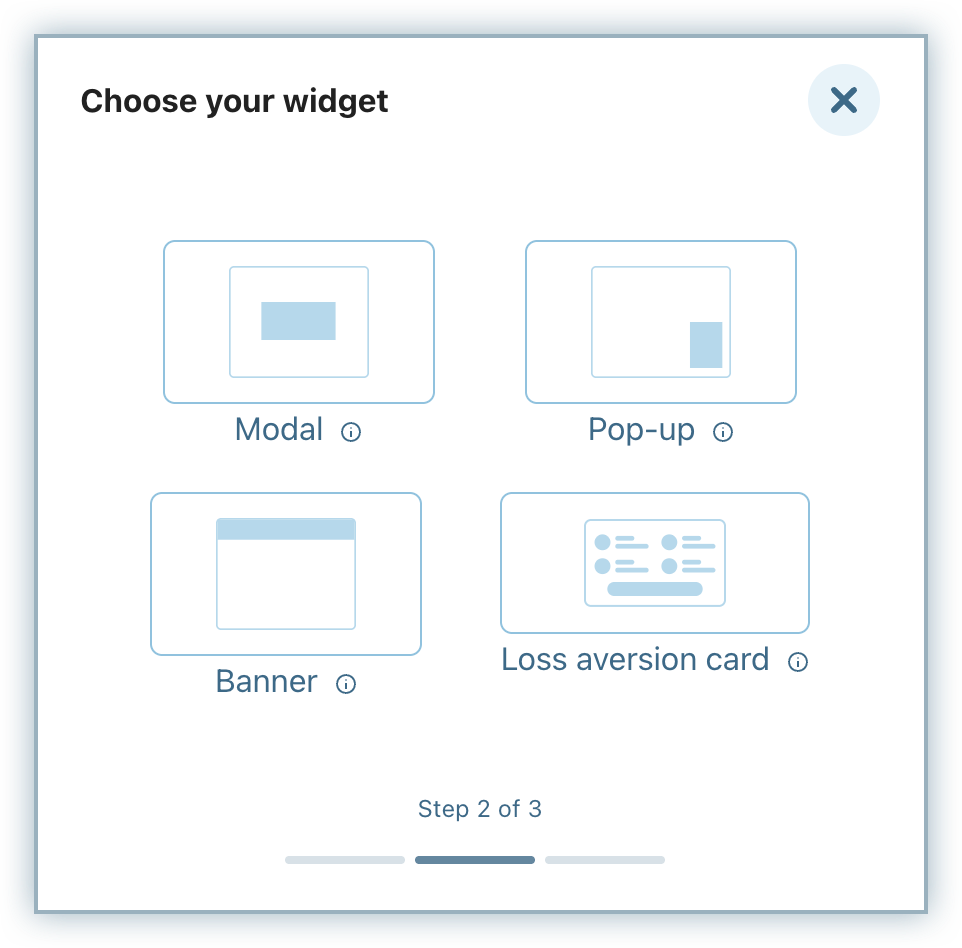
- On the Choose your widget pop-up, select the widget type for the offer from the following options:
- Modal: The offer gets displayed as a modal when customer visits the page and blocks out the rest of the screen.
- Pop-up: The offer gets displayed as a pop-up when customer visits the page and doesn’t block the rest of the screen.
- Banner: The offer gets displayed as a banner either above or below the page content.
- Loss aversion card: This option is available only for creating Retention offers. The offer gets displayed as a card on the cancel pages.
- On the Choose your offer category pop-up, select the type of offer that you want to create. Learn more about offer categories here.
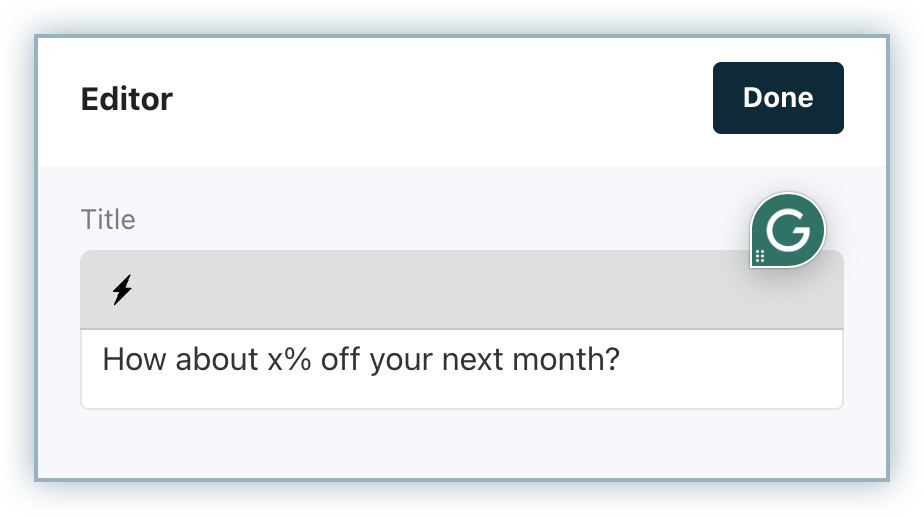
- Once you’ve selected the category, you will be redirected to the Editor screen where you you can configure several elements of your offer. You can modify:
- Title: Click the edit icon to modify the title for your offer.
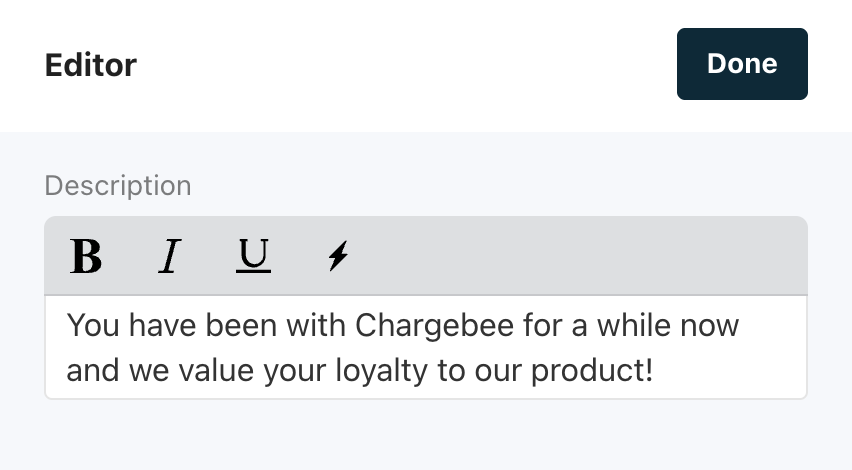
- Description: Click the edit icon to modify the description for your Offer.
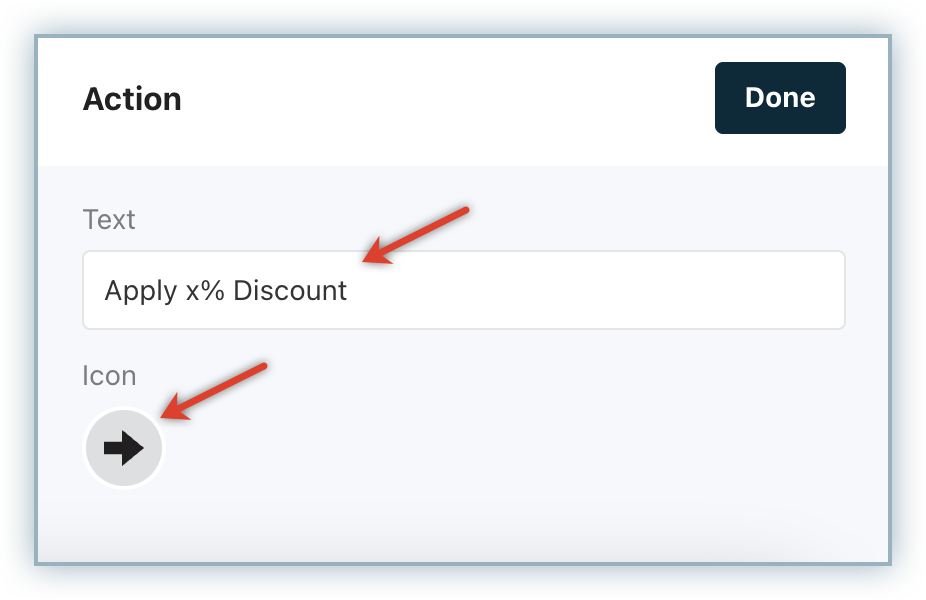
- Action(CTA): Click the edit icon to modify the content that appears on the Action button of the Offer.
- Text: Modify the text that appears on the Offer’s Call-to-action button.
- Icon: Add a relevant icon to go along with the text on the Offer’s Call-to-action button.
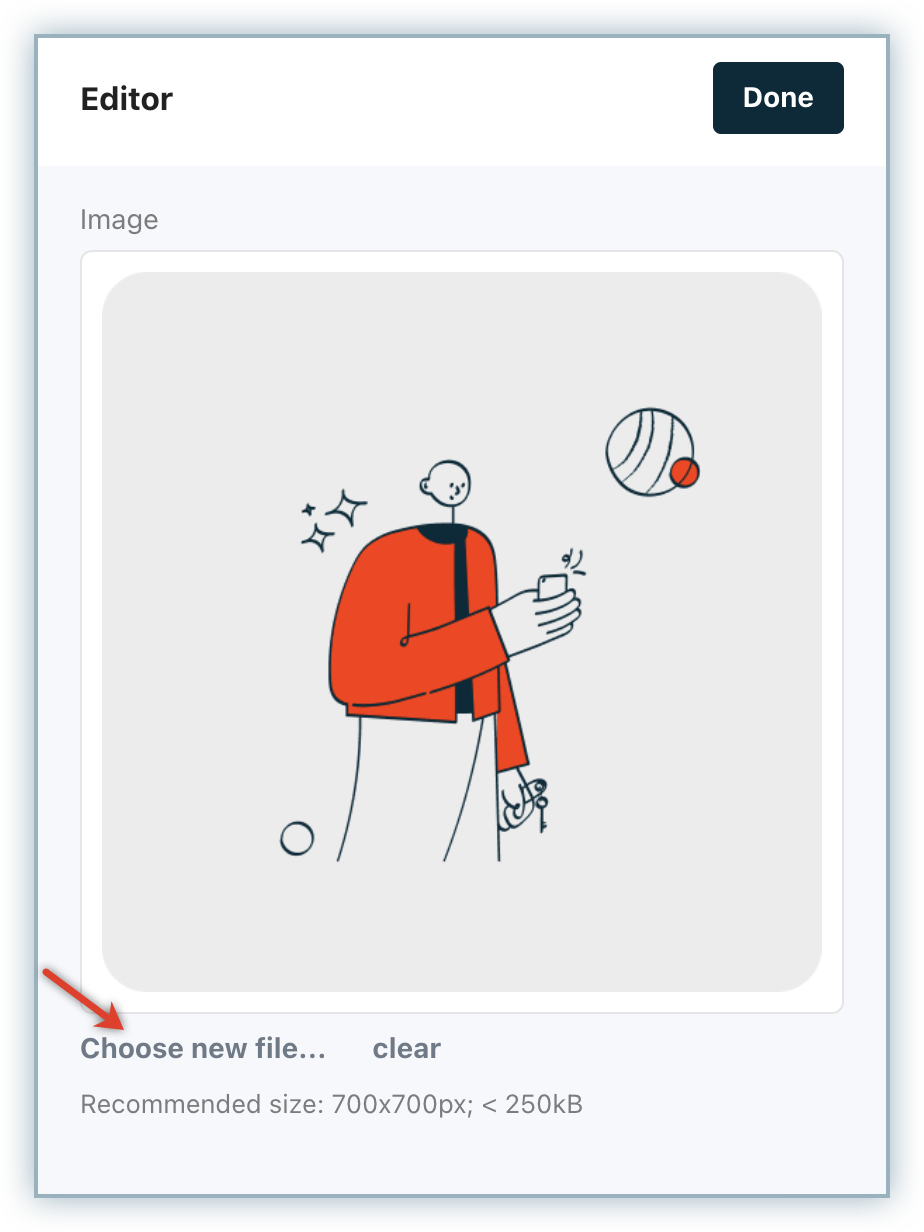
- Image: Click the edit icon and choose a new image file to be displayed for your Offer.
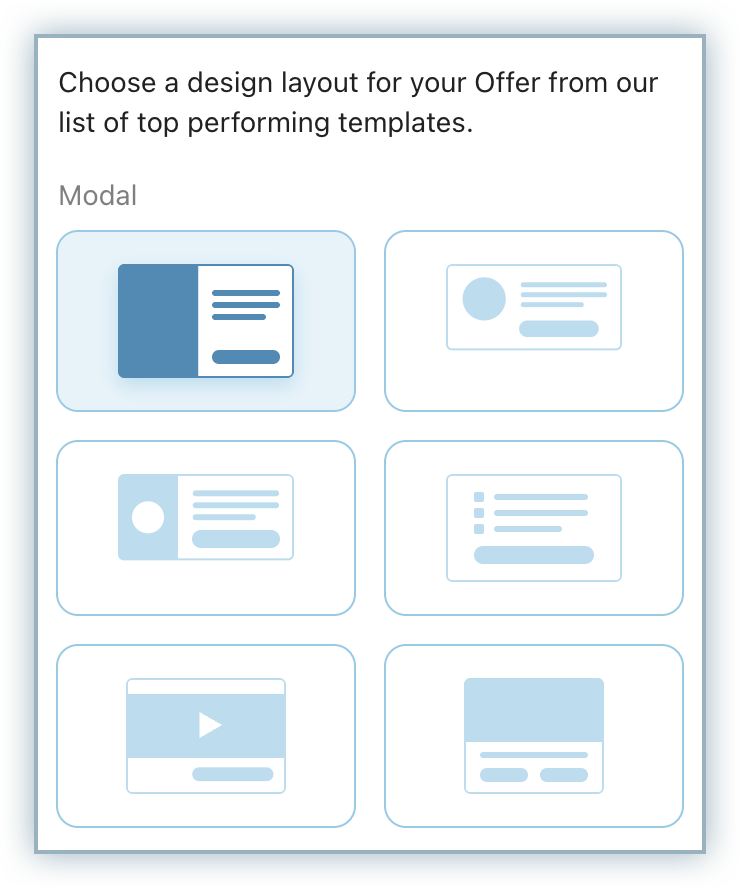
- Design Layout: You can choose a suitable design layout for your offer from the list of default templates available for modal offers. We do not have design layouts for popup and banners.
- Button: You can do the following:
- Settings: Select the processing action and configure key meta details about the offer button.
- Button Processing: Configure how your offer will be processed when a customer accepts the offer. You can select from the following options:
- Button Processing: Configure how your offer will be processed when a customer accepts the offer. You can select from the following options:
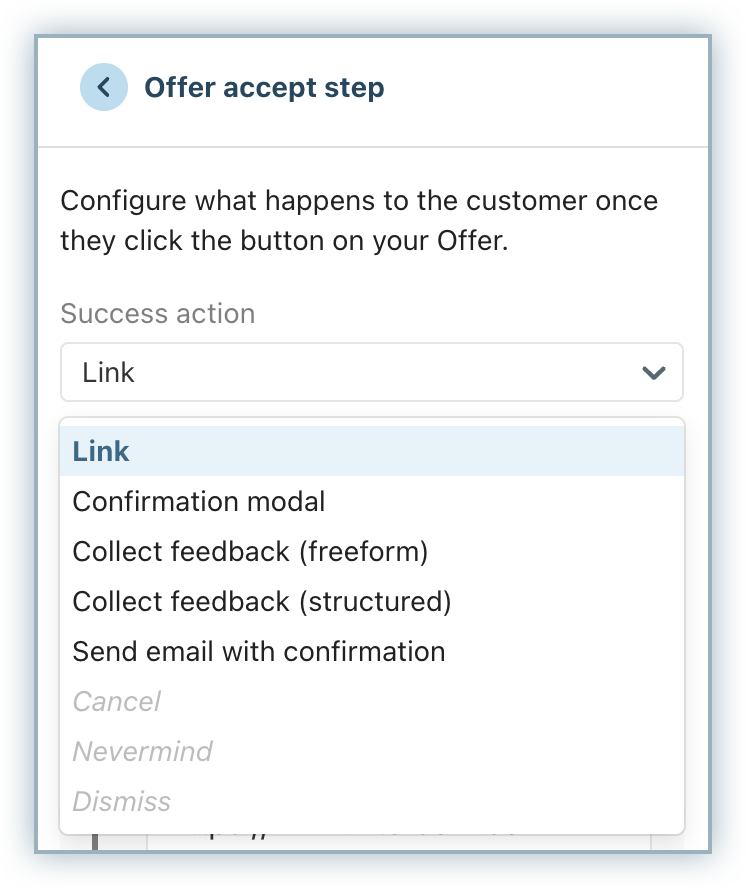
- Accept Step: Configure what a user sees after they click the offer button. You can select from the following options:
- Link: Route the user to a link of your choice. When a user hits the Offer Accept button they will be taken to the link destination that you specify.
- Confirmation modal: Show a confirmation before redirecting them off the page.
- Collect feedback (freeform): Allow the user to input a message into an email that gets triggered when the user hits send.
- Collect feedback (structured): Gather additional feedback by asking an additional structured question after the initial offer button.
- Send email with confirmation: Trigger an email when the user hits the accept button that can be processed in an external system by an agent. This action is often used when you have agents processing an offer, as it gives you the option to send the key details over to the agent without forcing the user to type or select anything. You can configure the message that is sent with the email in the offer sidebar to help inform your agents on what to do with that offer accept.
- Dismiss: The dismiss action allows users to close the offer rather than continue processing it. We recommend that you use this only in a multi-CTA use case where you want to present an easy option for the user to return to the survey and complete it. For multi-CTA offers, you will see Settings and Accept Step sections for each offer button.
- Cancel: The cancel option allows you to add a cancel button to any offer you choose. We recommend that you use this only in a multi-CTA use case where you want to present an offer or a direct option to cancel in a single modal.
- Nevermind: The nevermind option allows you to present a Nevermind button on your offer to redirect users off the cancel page. This works in the same way as the Nevermind buttons on the cancel page.
- Settings: Select the processing action and configure key meta details about the offer button.
- Offer Settings: View and configure key details about your Offer settings.
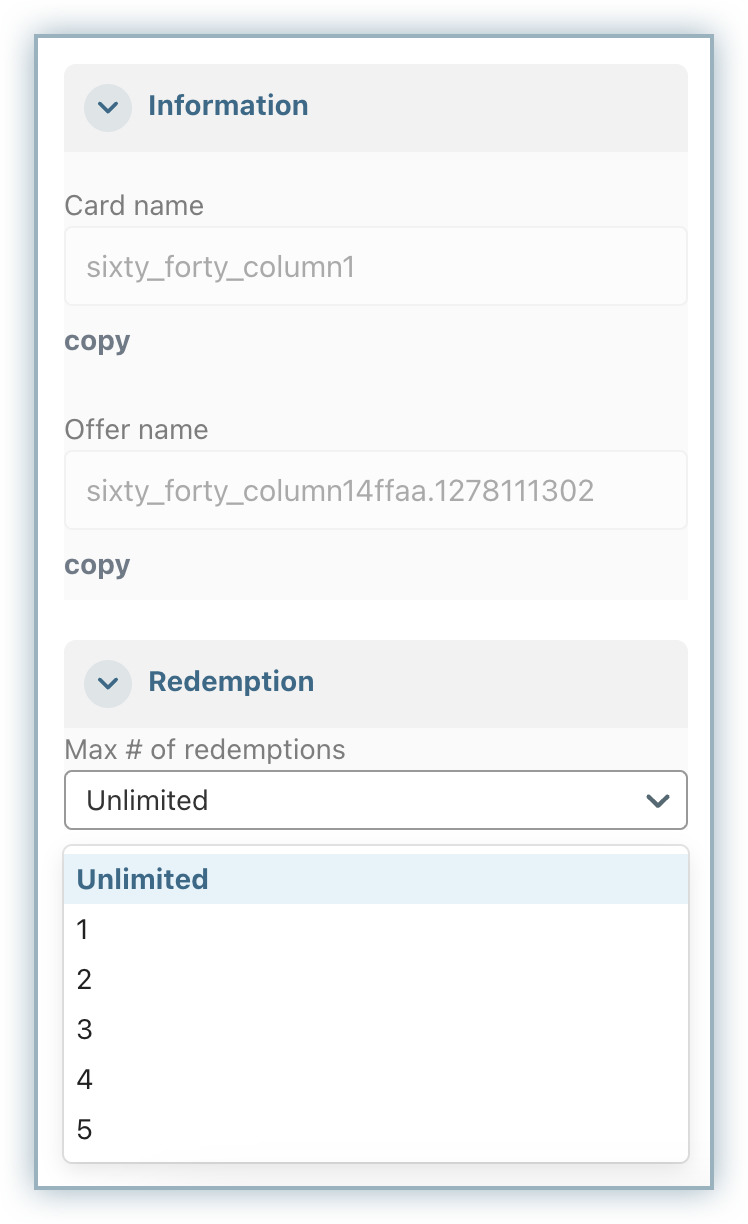
- Information: This tab lets you define key metadata for your offer, which can be used in downstream integrations or to control how many times a specific offer can be redeemed.
- The Card name and Offer name can be used when setting up webhooks or integrations to 3rd party systems as these fields are immutable.
- Redemptions: This allows you to set the maximum number of times a single customer can accept this offer.
- Placement: Once you've finished editing your offer, you can either click Done to save it as a draft or move to the Placement tab to add it to an Experience. Learn more about offer placement here.
- Information: This tab lets you define key metadata for your offer, which can be used in downstream integrations or to control how many times a specific offer can be redeemed.
- Click Done to save your changes to the Offer.
- On the Publish changes immediately pop-up, click Publish now to go live with your offer or click Save draft to save your changes and publish later.
You have successfully created a new Offer.
Editing an Offer
To edit an existing offer in your Growth application, follow these steps:
- Navigate to the Offers page, where all your existing offers are listed.
- Click to open the offer that you want to edit. Alternatively, click the Ellipsis icon on the offer and click Edit.
- You will be redirected to the Offer Editor screen where you can make necessary changes to the offer details such as the description, button text, settings, or placement. Click Revert to undo any changes you’ve made.
- Once you’re done, click Done to save your updates.
Archiving an Offer
You can archive offers in your Chargebee Growth application at any point in time to declutter your offer management page. However, before archiving an offer, you must remove its placement from all associated experiences.
To archive an offer, follow these steps:
- Navigate to the Offers page, where all your existing offers are displayed.
- Click the Ellipsis icon next to the offer and select the Archive option in the menu.
Was this article helpful?