Automations
Overview
Customer engagement is one of the most important aspects of a business. It improves scalability and profitability, leading to increased exposure and sales. As a business grows and its customer base expands, maintaining close engagement with customers becomes more difficult, which can reduce customer engagement. It's important for businesses to find ways to automate or streamline customer engagement processes so they can continue to interact effectively with customers as the business scales.
Auto Engagement—an efficient and cost-effective solution—not only helps you schedule automated email and SMS reminders for customers, but also provides clear visibility into your customers' engagement with products and services. It allows you to maximize the performance of business collection processes and gain a competitive edge in customer engagement, regardless of business function. You can also measure the performance of each cycle and reminder you send to customers by generating a client engagement report.
Use cases of Auto Engagement
Note:
Contact your admin to get access to this feature.
Auto Engagement is an automation tool in Receivables that allows you to send automatic recurring reminders (via email and SMS) to your customers using rules based on simple to complex business functions. There are many use cases for auto engagement, helping businesses improve productivity and increase customer engagement.
The following illustration demonstrates some common use cases of Auto Engagement in businesses.
This feature is only accessible to specific user roles. For more information, see setting up roles and permissions in Receivables.
Note:
Cannot find the use case you need? Contact Chargebee Receivables Support.
Automate Channelisation of Engagement
Chargebee Receivables auto engagement cycle enables you to automate the channelisation of collection activity process by engaging more targeted customer to pay early. Here are the major steps visualized in the auto engagement cycle phases.
Before scheduling an auto engagement cycle for your AR profile, it goes through the following phases:
Cycle Planning and Creation Phase: Planning an engagement cycle involves a number of steps from adding a new cycle to configuring cycle details. For a typical business function, you can create multiple cycles and configure each one of them based on various frequencies. See, Creating Auto Engagement Cycle.
Setting Target Customers for Cycle: By default, all the customers are included whenever a specific cycle is defined. It's beneficial for businesses to plan the cycle for specific customers to adapt the robustness of auto engagement cycle. This gives you complete control over the engagement cycle, and to whom the reminder should be sent.
Cycle Rules Assessment: Cycle rule assessment is another phase of auto engagement cycle that ensures all the business functions are implemented in cycle rules correctly and business collection activities are organized and up-to date. The assessment helps you make necessary adjustment in the cycle rules so that automatic reminders always reach the right customers with right set of invoices based on specific conditions/rules.
Adding Cycle Reminders: Adding reminders to the cycle is one of the important phase in auto engagement cycle that helps you schedule automatic reminders(email and SMS) for the customers. You can configure multiple reminders in one cycle and each reminder can have their own set of rules defined so that the reminder goes to the targeted customers.
Creating Auto Engagement Cycle
Auto Engagement Cycles enables you to create reminders cycle for your business collection activities and incorporates automation processes into your collection. To create a new cycle and schedule a reminder for a particular collection activity specific to a customer, refer to the following operations that have to be executed sequentially:
Adding a new Cycle
Adding a new cycle enable you to configure the cycle rules and reminders that execute during the cycle. You can configure the cycle rules and reminders after creating a new cycle. The frequency can be controlled regardless of whether the cycle is an existing or new one through the selection of weekly, monthly, or daily frequency.
To add a new cycle, follow these steps:
-
Click Automations > Create New .
-
Enter the name of cycle and select a Frequency.
-
Click Save.
Once a cycle is added, it will redirect you to Cycle details page where you can define the properties of a cycle such as cycle rules, reminders, and so on.
Configuring Cycle Details
By configuring an existing or newly created cycle, you can specify the cycle rules and reminders that should be sent to the customers. You can configure the following details of a cycle in the Cycle details page:
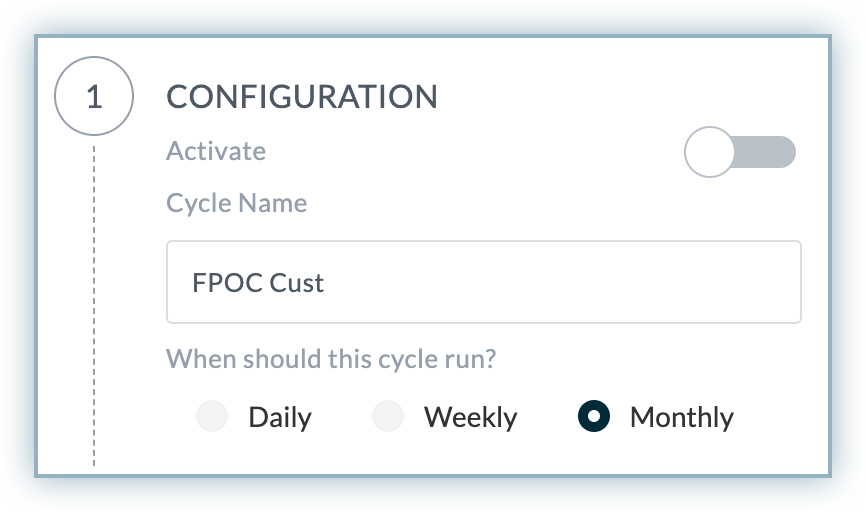
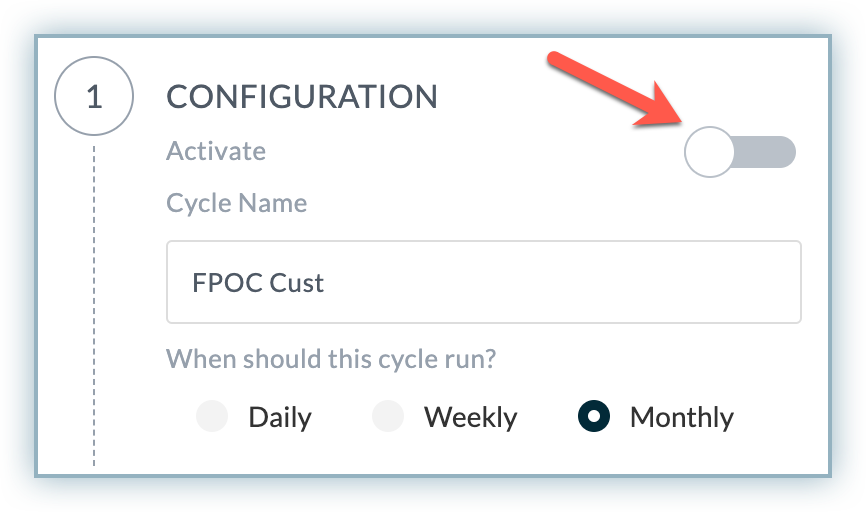
Cycle Configuration
In the Cycle Details page, you can configure the following details: Enable/Disable Cycle: You can enable/disable any cycle that is irrelevant or inactive using the toggle button. In addition, you can also enable/disable a specific engagement cycle from the Auto Engagement Cycles page. Cycle Frequency: You must select a frequency to run the cycle based on daily, weekly, and monthly frequency.
Include/Exclude Customer
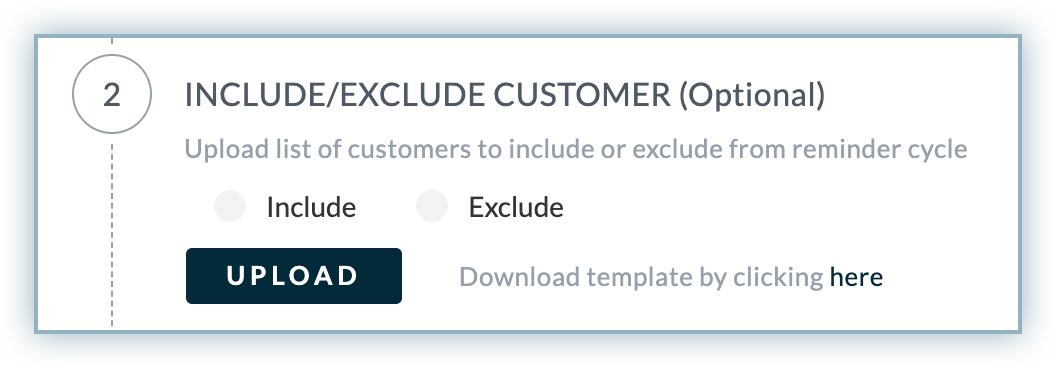
With engagement cycles, you can schedule automatic emails and SMS reminders for specific customers that reminds them about payments, overdue invoices, and other activities related to collections. You can include/exclude customers by adding them to a list and uploading the list to the reminder cycle.
Example
A total of 300 out of 2000 customers in a business assigned to a collector have paid their bills. Now collectors can use the Auto Engagement Cycle to exclude those 300 customers from a weekly reminder cycle.
To Include/exclude customer in a cycle, follow these steps:
-
Select an option from Include or Exclude.
-
In the Cycle Details page, click Download to download the template in CSV.
-
Open the CSV file and create a list of customers to be included/excluded for this particular cycle.
-
In the Cycle Details page, click Upload to upload the CSV file.
Note:
You can set user's visibility based on the customers that are applicable to be included in the cycle. For more information, see setting user's roles and visibility.
Managing Cycle Rules
Engagement cycles are a great way to gain customers and improve the customer experience in business. Receivables allows you to implement your business function and automate the customer engagement process by creating multiple rules in an engagement cycle. Cycle rules determine which customers will receive a reminder for which invoices/transactions.
You can manage all different rules and reminders in an engagement cycle by adding new rules, updating existing rules, and changing the order in which the rules are applied.
Defining Cycle Rules
Cycle rules can be defined based on two categories:
At Customer level: Cycle rules that are defined at customer level. You can define cycle rules based on the following sub-categories:
- General: Select all customers based on the primary level conditions. For example, selecting customers who have specific finance owner and sales owner.
- Amount: Select all customers based on the financial and transaction data.
- Custom Fields: Select customers based on the defined custom fields. To add new custom fields at the customer level, contact your admin.
At Document level: Cycle rules that are defined at invoice/document level. At document level, you can define cycle rules and select the conditions based on the following sub-categories:
- General: Select all documents which follows primary level conditions. For example selecting all the invoices/documents that have transaction type credit.
- Date: Select all documents based on various date attributes. You can add date(absolute) and date(relative) corresponding to every date attributes.
- Amount: Select the documents that have various amount and balance fields.
- Custom Fields: Select documents based on the defined custom fields. To add new custom fields at the document level, contact your admin.
At Payment level: Cycle rules that are defined to address payment failures and ensure that customers are promptly notified of any issues with their payments. You can define payment level rules based on the following sub-categories:
- Last Attempted Payment: Select rules to define payment level rules based on last attempted payment activities.
- Payment Methods: Define payment rules based on a particular form of payment method. You can define rules by selecting types of payment methods each for primary, backup, and masked credit card payment methods.
- Payment Terms: Define rules based on various sets of payment terms.
- Email Engagement: Select engagement rules based on the last email interaction with customers.
See also
Default Cycle Rules
Cycle rules are automatically applied to newly created cycles (at the customer and document level) in Receivables. You may edit or delete these rules at any time.
| Category | Cycle Rule |
| Customer | Outstanding is greater than 0 |
| Customers which does not have mismatch | |
| Document | Amount is greater than 0 |
| Balance is greater than 0 | |
| Document Type includes Invoice | |
| Exclude Documents paid via Payment Gateway |
To create a cycle rule, follow these steps:
-
In the Cycle Rules section, click +Add Rules.
-
On the Manage Rules page, you can add the following attributes such as:
- Categories: Select a rule category from Customer or Document.
- Subcategories: Select the following subcategory and define the value associated to it:
- General: The General subcategory includes Text and Flags options that allows you to select specific value associated to a particular category.
- Amount: Select a field to define the amount attribute based on the selected category.
- Custom Fields: The custom field has various set of options such as Text, Date(absolute), Date(Relative) and Amount that allows to select values associated to it.
- Date: Select the Date(Absolute) and Date(Relative) in each category and define the rules either based on a specific date or relative to another date. Date(absolute) defines a point of time that a condition or rule must be satisfied. It allows you to parse the condition based on particular date and month. However, Date(relative) defines a point of time relative to another date, at which a certain rule or condition must be satisfied.
-
Click Save.
The following illustration creates a cycle rule at the customer level for which overdue amount is greater than USD1000.
Note:
Contact Chargebee Receivables Support to define a new custom field at customer or document level in your AR profile.
Editing/Deleting a Cycle Rule
After defining cycle rules, you can edit or delete them with a single click. In a cycle, you can define a cycle rule in two ways:
- At cycle level
- At reminder level
You can edit/delete a cycle rule at any level by clicking on the icon appearing next to the cycle rule. To edit/delete a cycle rule, follow these steps:
- Select a cycle rule which you want to edit/delete.
- Click the Pencil icon next to the cycle rule that you want to edit. a. Select/insert an appropriate value within the cycle rule. b. Click Save. If you wish to delete the cycle rule, click the Bin icon to delete the cycle rule.
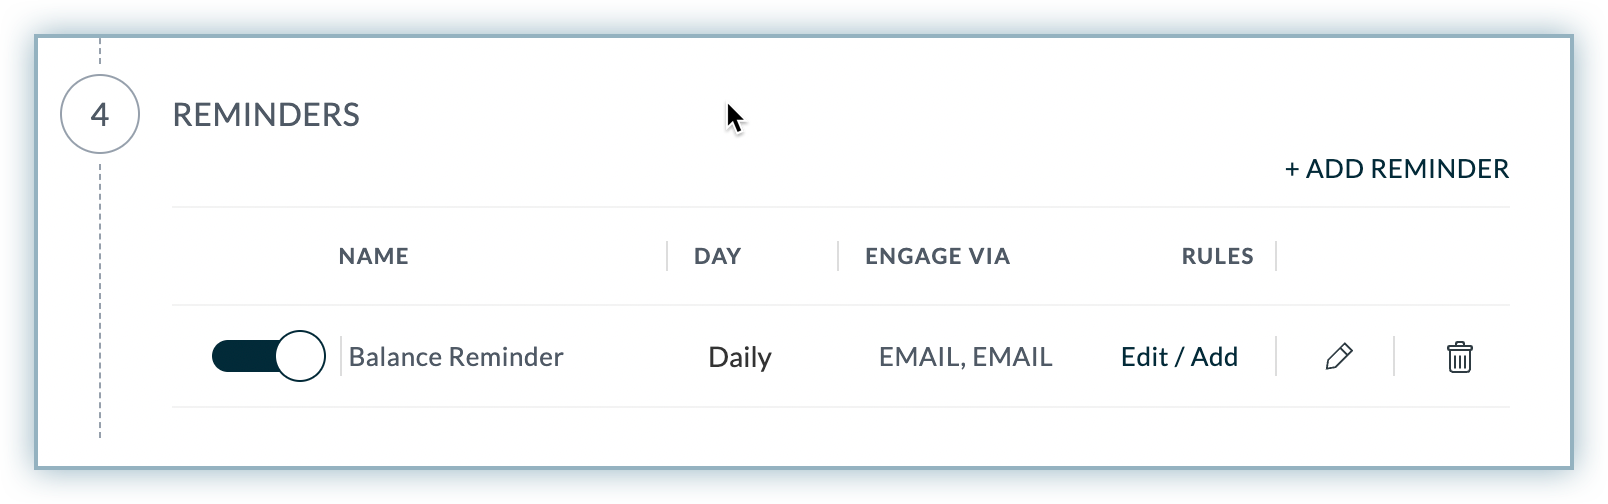
Managing Reminders
With reminders, you can automate the email and SMS reminder workflow in your collection activities. You can add as many reminder as you want in a cycle based on specific rules. reminder is always created based on the selected frequency of the cycle. For example, if you create monthly frequency cycle, you have to add a reminder that will be sent to customers on a certain date of every month.
Adding a Reminder
To add a reminder in a cycle, follow these steps:
- Under the Reminders section, click +ADD REMINDER.
- Select the desired language-specific tab to save a reminder in the desired language.
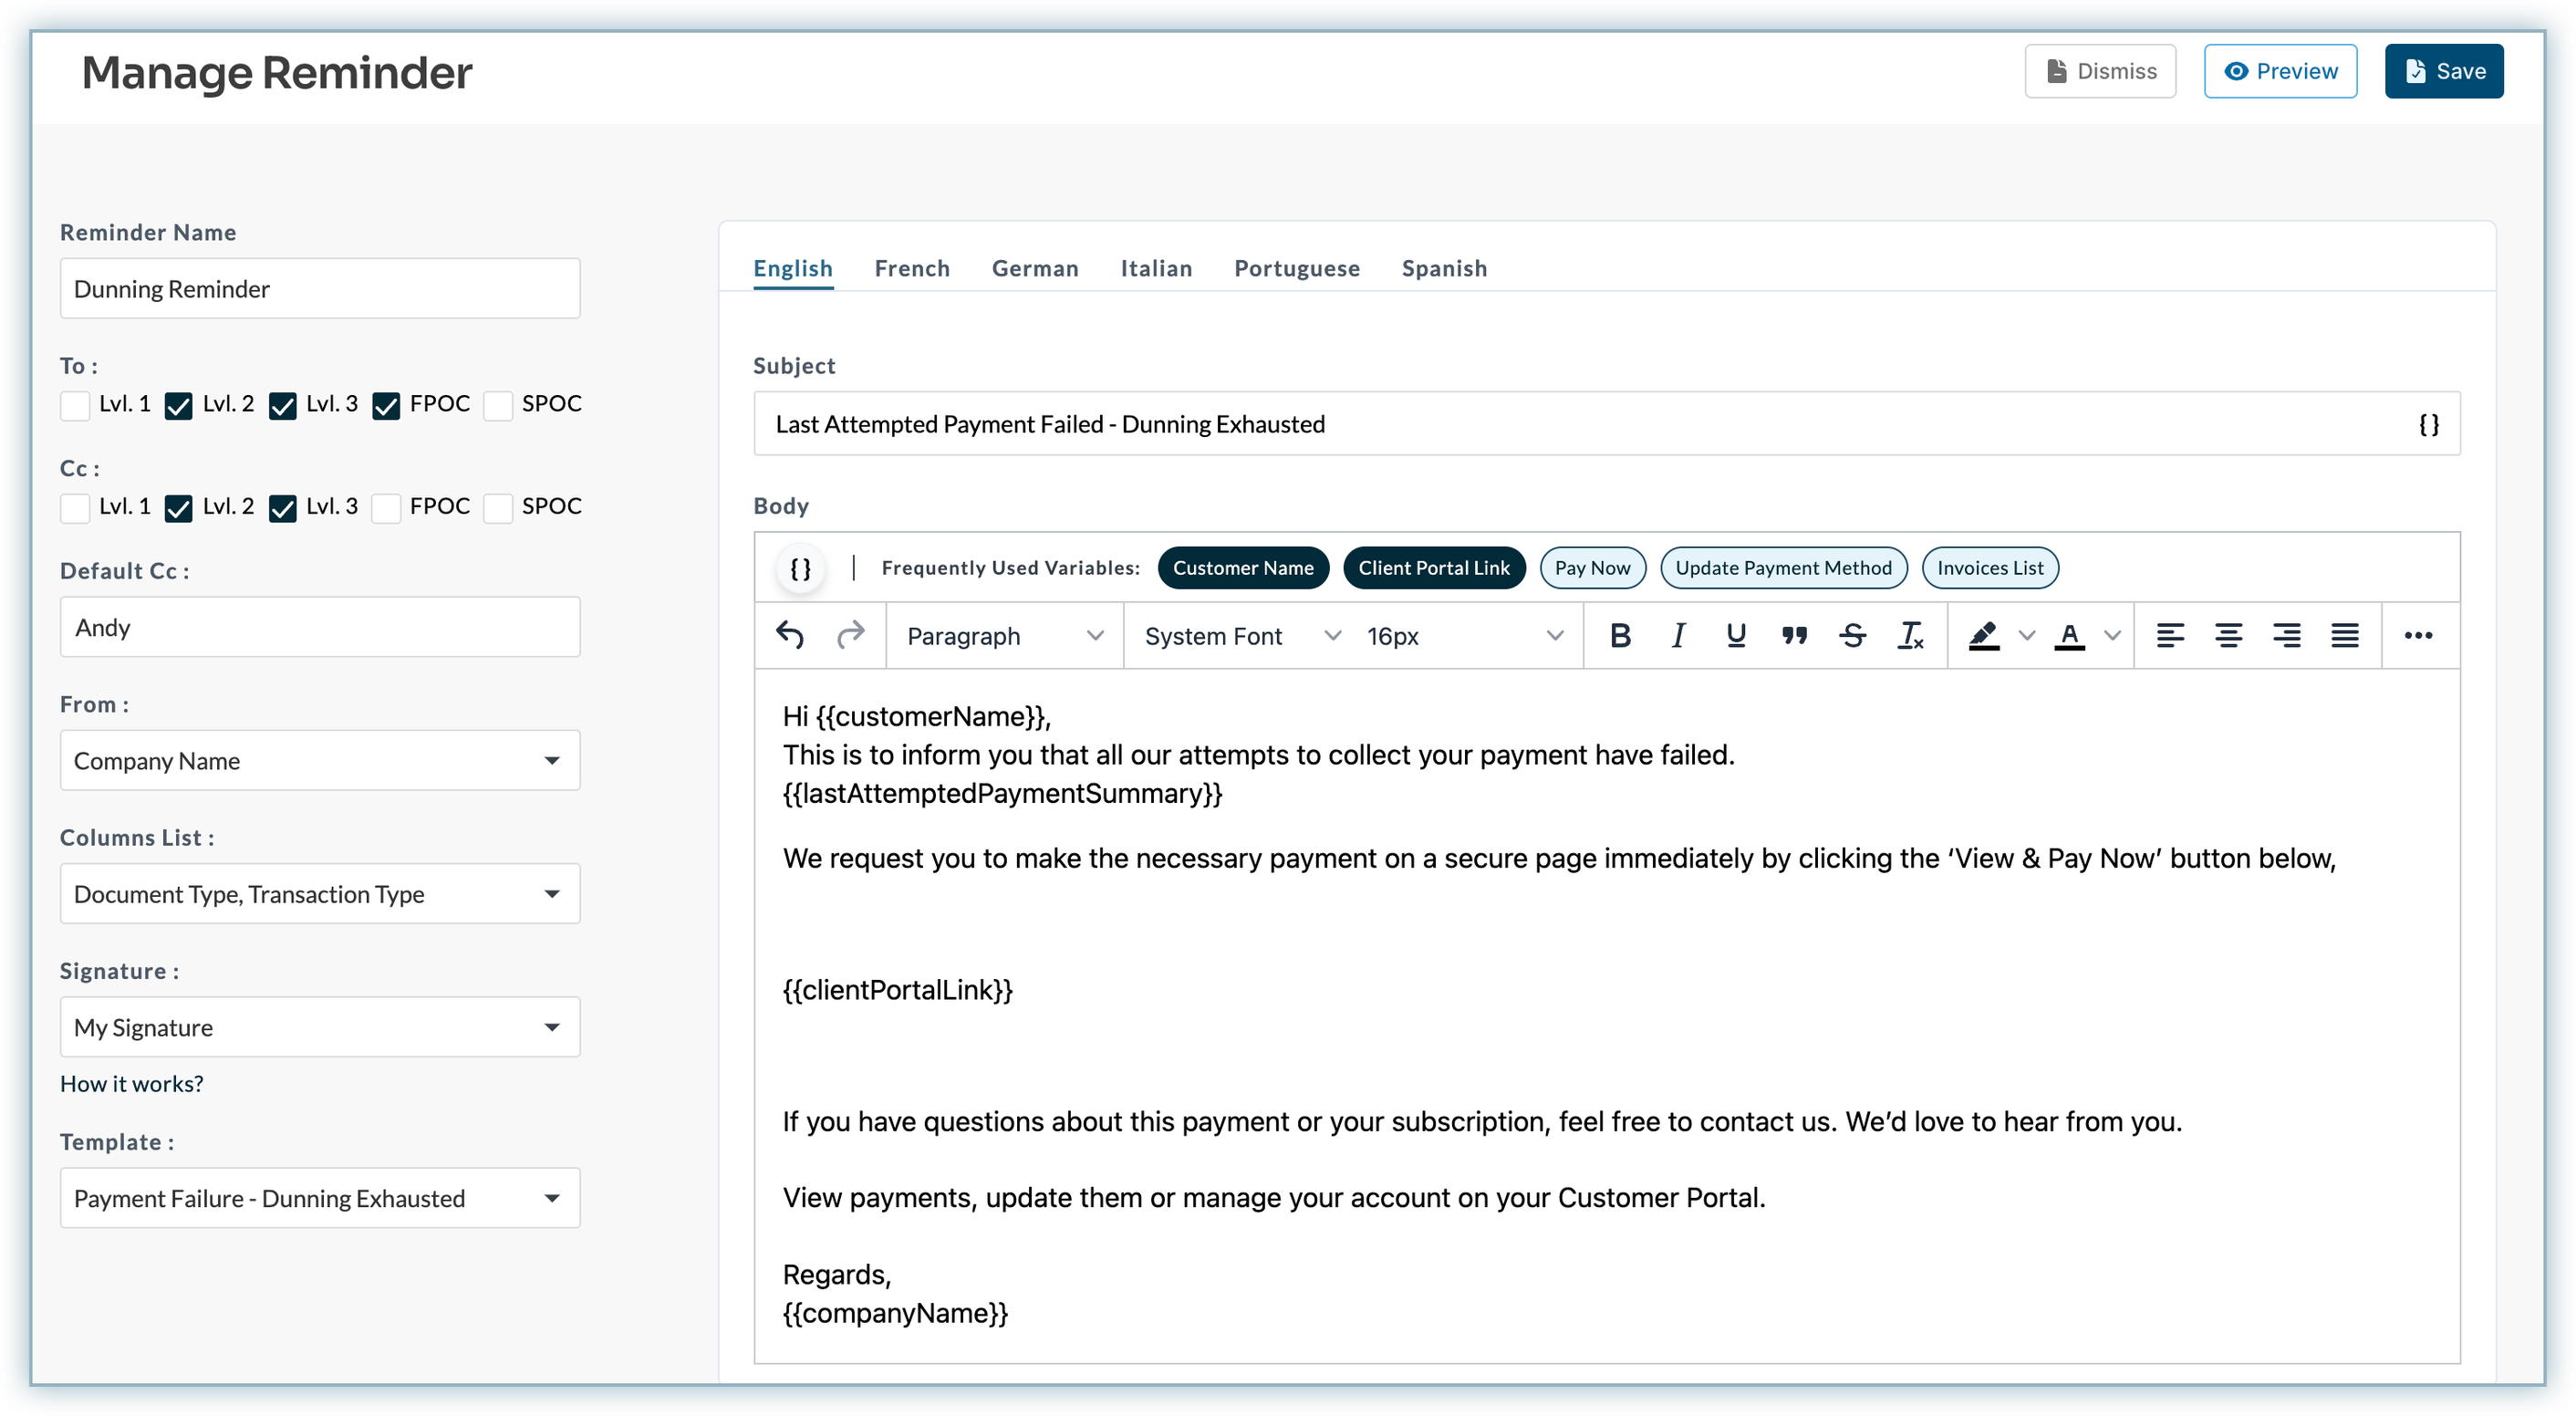
- Follow these steps to modify other parts of the reminder:
a. To and CC: Check the boxes to select the levels or other POCs.
b. Default CC: Select the user from the drop-down menu.
c. From: Select a sender from the drop-down menu. You can choose from the options - Company Name, Financial Point of Contact (FPOC), and Sales Point of Contact (SPOC)
d. Columns List: Select the column names from the available drop-down menu.
e. Signature: Select the signature from the dropdown menu. Once a specific signature is selected, you can use the
signaturetemplate variable in the email body. Learn more about template variables. f. Template: Select the template from the drop-down menu. - Modify the Subject, Body, and other parts of the reminder if required.
- Click Save.
- Click +Add SMS if you want to add SMS reminders and specify the following details:
- Select a SMS template. And add the message in the SMS reminder template.
- Click Save.
The following illustration creates an outstanding email reminder for all the customer based on the defined cycle rules, and included/excluded customer in the cycle.
Note:
With the Multi-Language functionality in place, before sending the emails, Receivables will check the customer locale and also check if the required email template is available in the customer locale. If available, it will send it in the customer locale, otherwise, it will send it in English (default language).
Adding Cycle Rules in a Reminder
By default, cycle rules include one or more reminders that run at a predetermined frequency. For specific reminders, cycle rules can be customised that allows overriding the existing cycle rules and setting up the reminders accordingly.
To add/override cycle rules in a reminder, follow these steps:
- In the Reminder section, select a particular reminder and click Add.
- In the Manage Rule window, specify the details that are described in the steps for creating the cycle rule.
Once rules are added at the reminder level, you can click View to see all the rules defined under that reminder. You can also edit/delete defined cycle rules at the reminder level.
The following illustration creates a document level cycle rule under the outstanding email reminder for which balance must be greater than USD1000.
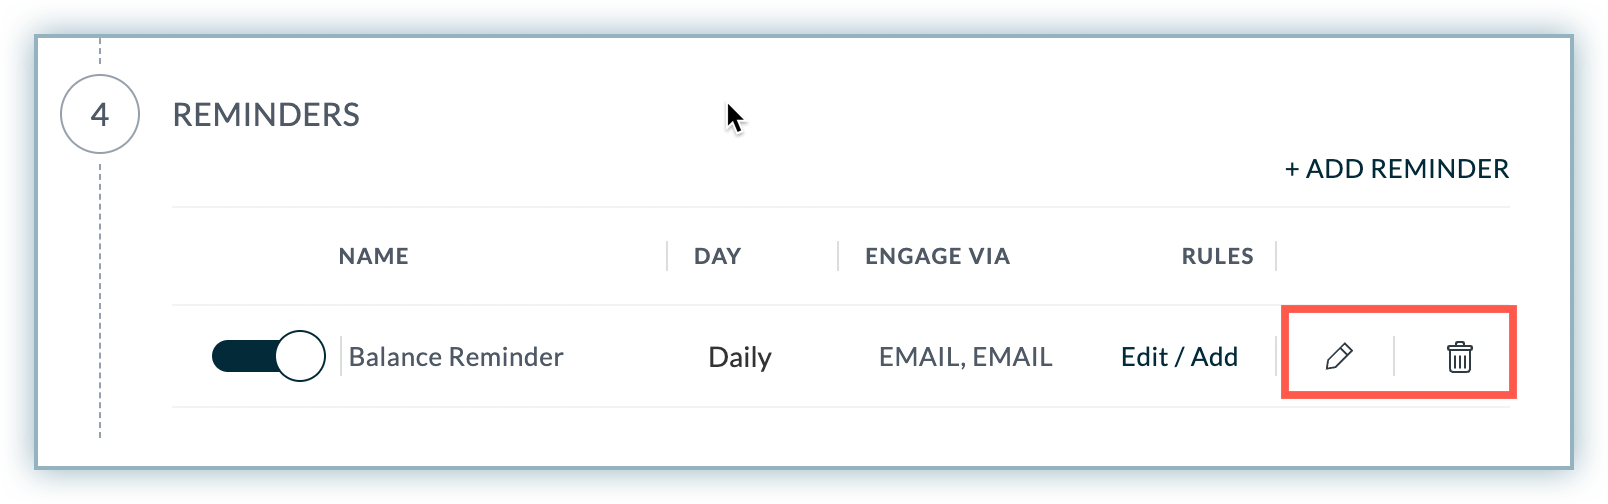
Editing/Deleting a Reminder
Once reminders are added to a cycle, you can edit/remove the reminders from it. Editing a reminder allows you to edit the name, frequency, and other reminder details.
To edit/delete a reminder, follow these steps:
- Select the reminder that you want to edit/delete.
- Click Pencil icon next to the reminder to edit the details of it.
- In the Manage Reminders page, you can edit the following details: a. Reminder Name. b. Edit the email template by adding the recipient, signature, subject template, and column variables to customize the data table in the email body.
- Click Save.
If you wish to delete the selected reminder, you can click the Bin icon next to it.
Note:
Contact Chargebee Receivables Support to define a new custom field at the customer or document level in your AR profile.
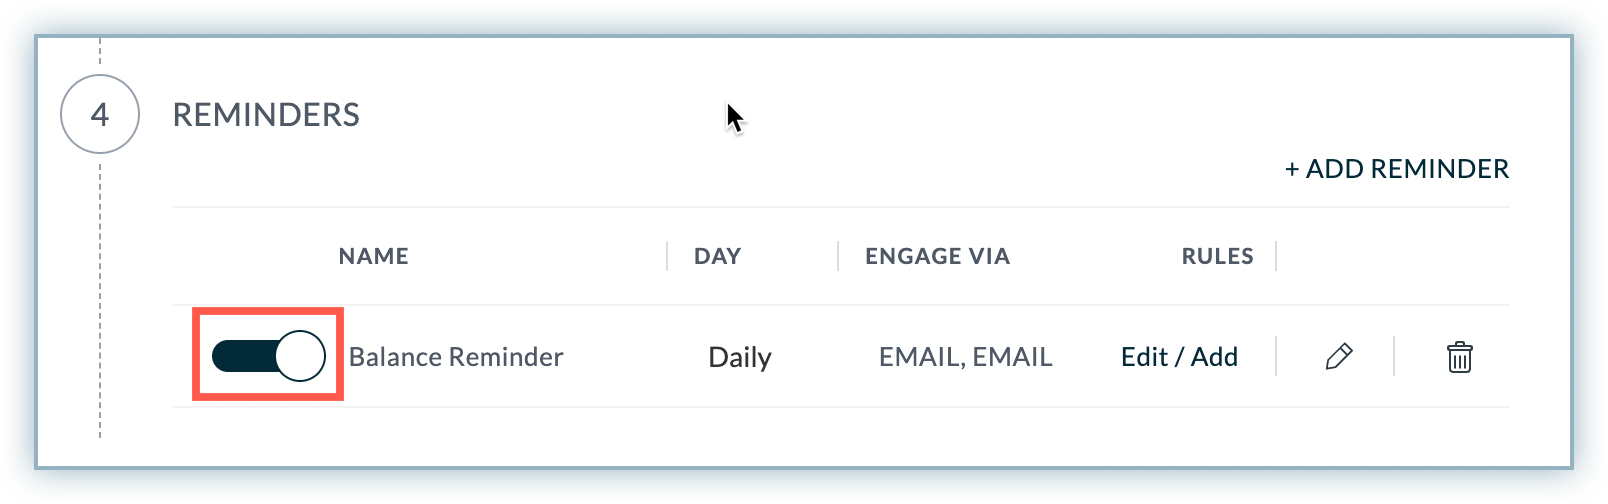
Disabling a Reminder
If you disable a reminder in a cycle, all the cycle rules associated to it will also get disabled. Once a reminder is added in a cycle, you can either activate or disable it from the Cycle Details page. To disable a reminder, follow the steps:
-
Select a specific cycle and open the Cycle Details page.
-
Under Reminders section, click toggle off button to disable the reminder.
Disabling a Cycle
Disabling a cycle will disable all the defined rules and reminders associated with it. To disable a cycle, navigate to main page or under the Cycle Details, turn off the toggle button next to the cycle.
If you decide to enable the cycle again in the future, any previously added cycle will be available unless it is not deleted.
Deleting a Cycle
Deleting a cycle will also delete the respective cycle rules and reminders. To delete a Cycle, follow these steps:
- Go to Settings > Auto Engagement Cycle.
- Select a particular cycle and click ellipsis icon next to the cycle.
- Click Delete.
Information
- You can set up multiple engagement cycle to automate the reminder process in your business. It is essential for businesses to know which cycle is driving well and getting better customer responses.
- With client engagement email and SMS report it's fairly easy to analyze the performance of all the defined cycle. You can further use the reports to analyze your customer's follow ups on reminders that helps you make better decision in managing the business cash flow.
Was this article helpful?