
# Integrate Netbanking
Netbanking is a payment method that enables customers to complete online payments using their bank credentials. It is one of the preferred online payment methods in India.
This tutorial guides you on using Chargebee.js to integrate Netbanking (mandates) on your website and creating a subscription after the user checks out.
# Gateway prerequisites
The following is the list of requirements to fulfil before starting the integration steps.
- Gateways are configured (opens new window) and Netbanking (mandates) payment must be enabled on your gateway. For enabling Razorpay, learn more (opens new window). Smart routing (opens new window) is configured to select Netbanking (mandates) for INR currency.
# Set up Chargebee.js
# Include the Chargebee.js script
To use Chargebee.js, you must include the script in your HTML page. You only need to do this once per page.
<script src="https://js.chargebee.com/v2/chargebee.js"></script>
# Initialize a Chargebee instance
After including the script, initialize Chargebee.js in your JavaScript code. The initialization creates a Chargebee instance object that you can use to access Chargebee.js features.
Initialize Chargebee.js after the page has loaded and provide your site configuration. This object is used to create components.
# Example
const chargebee = Chargebee.init({
  site: "YOUR_CHARGEBEE_BILLING_SUBDOMAIN", // Your test site.
  domain: "https://mybilling.acme.com", // Optional: custom domain.
  publishableKey: "test__"
});
2
3
4
5
WARNING
If you want to reinitialize Chargebee.js within the same session, call tearDown() to clean up before calling init() again.
# Create a Payment Intent
You should create a payment intent before submitting the form to authorize the payments.
payment_intent performs the essential function of tracking different events involved in a transaction. This includes:
Automatically changing its status based on the outcome of authorization and capture events.
Automatically refunding in case of an error post-payment.
A payment_intent can be created at your server-side using create a payment intent API (opens new window) and returned to the client side. The payment method handler uses the created payment_intent internally to perform authorization.
Here's the sample code to create a payment_intent.
TIP
This must be done from your backend to avoid exposing sensitive data.
Example:
- Curl

The above step should be initiated as a request from your front end.
Front end code:
function createPaymentIntent() {
  return fetch('/payment-intents', {
    method: 'POST',
    body: JSON.stringify({
      amount: 500,
      currency_code: 'INR',
      payment_method_type: 'netbanking_emandates'
    })
  }).then(function(response) {
    return response.json();
  }).then(function(responseJson) {
    return responseJson.payment_intent;
  });
}
2
3
4
5
6
7
8
9
10
11
12
13
14
# Authorize payment intent
Follow these steps to integrate Netbanking (mandates) on your website.
# 1. Set up Netbanking mandates
Set up Netbanking mandates using the steps below:
# a. Load Netbanking mandates integration.
load Netbanking mandates integration using cbInstance.load('netbanking_emandates').
# b. Set payment intent.
Pass the payment_intent object to netBankingHandler.setPaymentIntent(payment_intent).
# c. Fetch the list of banks
Retrieve the list of banks that are eligible for Netbanking (mandates) payment using netBankingHandler.fetchBankList. This list will be used to show bank options in the UI.
Sample code:
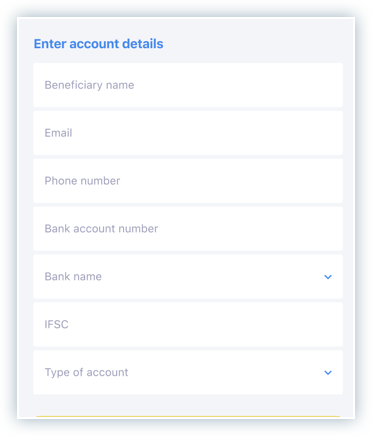
# d. Collect bank details
Create an HTML form to collect the bank account details of the beneficiary.
Example:
# 2. Handle Payment
Use netbanking_emandates and paymentInfo as the input parameter to handlePayment function, as this enables the function to handle Netbanking (mandates) payments.
Note:
Currently, Chargebee JS does not support payments via in-app browsers of Instagram, Facebook and Snapchat.
Example for promises and callbacks
Use webhooks for production
Use webhooks (opens new window) for production use, instead of making the subscription creation request from the frontend, it's more secure and reliable to respond to webhooks from Chargebee on the backend. Listen to the payment_intent_updated (opens new window) event via webhooks and create the subscription when the payment_intent.status (opens new window) is authorized.
- Promises
- Callbacks
On successful authorization, the payment_intent turns authorized, and Chargebee redirects the user back to your website (payment authorization page).
Learn more about the additional functions for netbanking.
# Create a subscription (server)
Pass the ID of the successfully authorized payment_intent to Chargebee’s create a subscription API (opens new window).
- Curl
