Automated Data Synchronization
Overview
After setting up the RevRec site for your business, it is important to bring your transaction data into RevRec for further processing. Transaction data includes your business sales, subscriptions, sales orders, commissions, and invoice records. You can bring your transaction data into RevRec in more than one way.
RevRec offers direct integration with several types of systems out of the box. You can integrate RevRec with your sales or invoicing systems to fetch the sales or billing transactions in RevRec. After setting up the integration, RevRec automatically processes your sales orders and billing data for revenue recognition. You don't have to sync data manually.
In addition to the automated data sync through direct integration, you can also do a bulk upload of data or directly enter the transaction data through the user interface as required.
Automated Data Sync
You can connect RevRec with third-party systems to enable automatic data sync. You can connect RevRec with third-party systems such as:
- Salesforce/CPQ to leverage opportunity-related data to identify the sales orders or contracts.
- Chargebee, Xero, Quickbook, NetSuite, Stripe, HubSpot, and Sage Intacct to fetch billing or invoice data.
Note
Only users with Admin role can access this feature in your RevRec site.
Follow the steps below to connect your RevRec account with third-party systems for automated data sync:
-
After logging in to your RevRec site, navigate to the and click Sync.
-
Click the Lock icon and then click the Connect to other systems icon.

-
On the Connect your data pop-up, select the type of data you'd like to connect with. You can select from the following options:
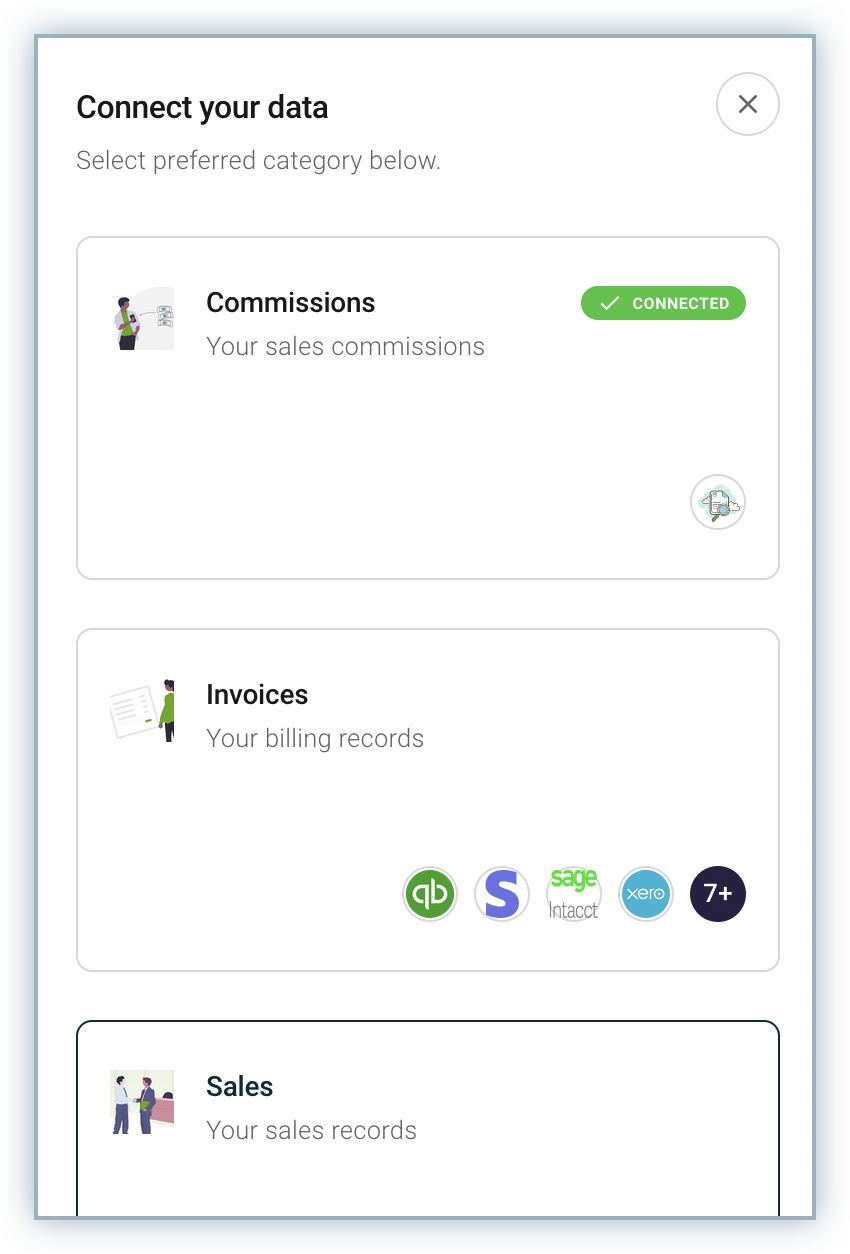
- Invoices: Select Invoices to sync your billing records into RevRec from billing systems.
- Sales: Select Sales to sync your sales records into RevRec from Salesforce or other CRMs.
-
Based on your selection, the next pop-up displays all the available systems.
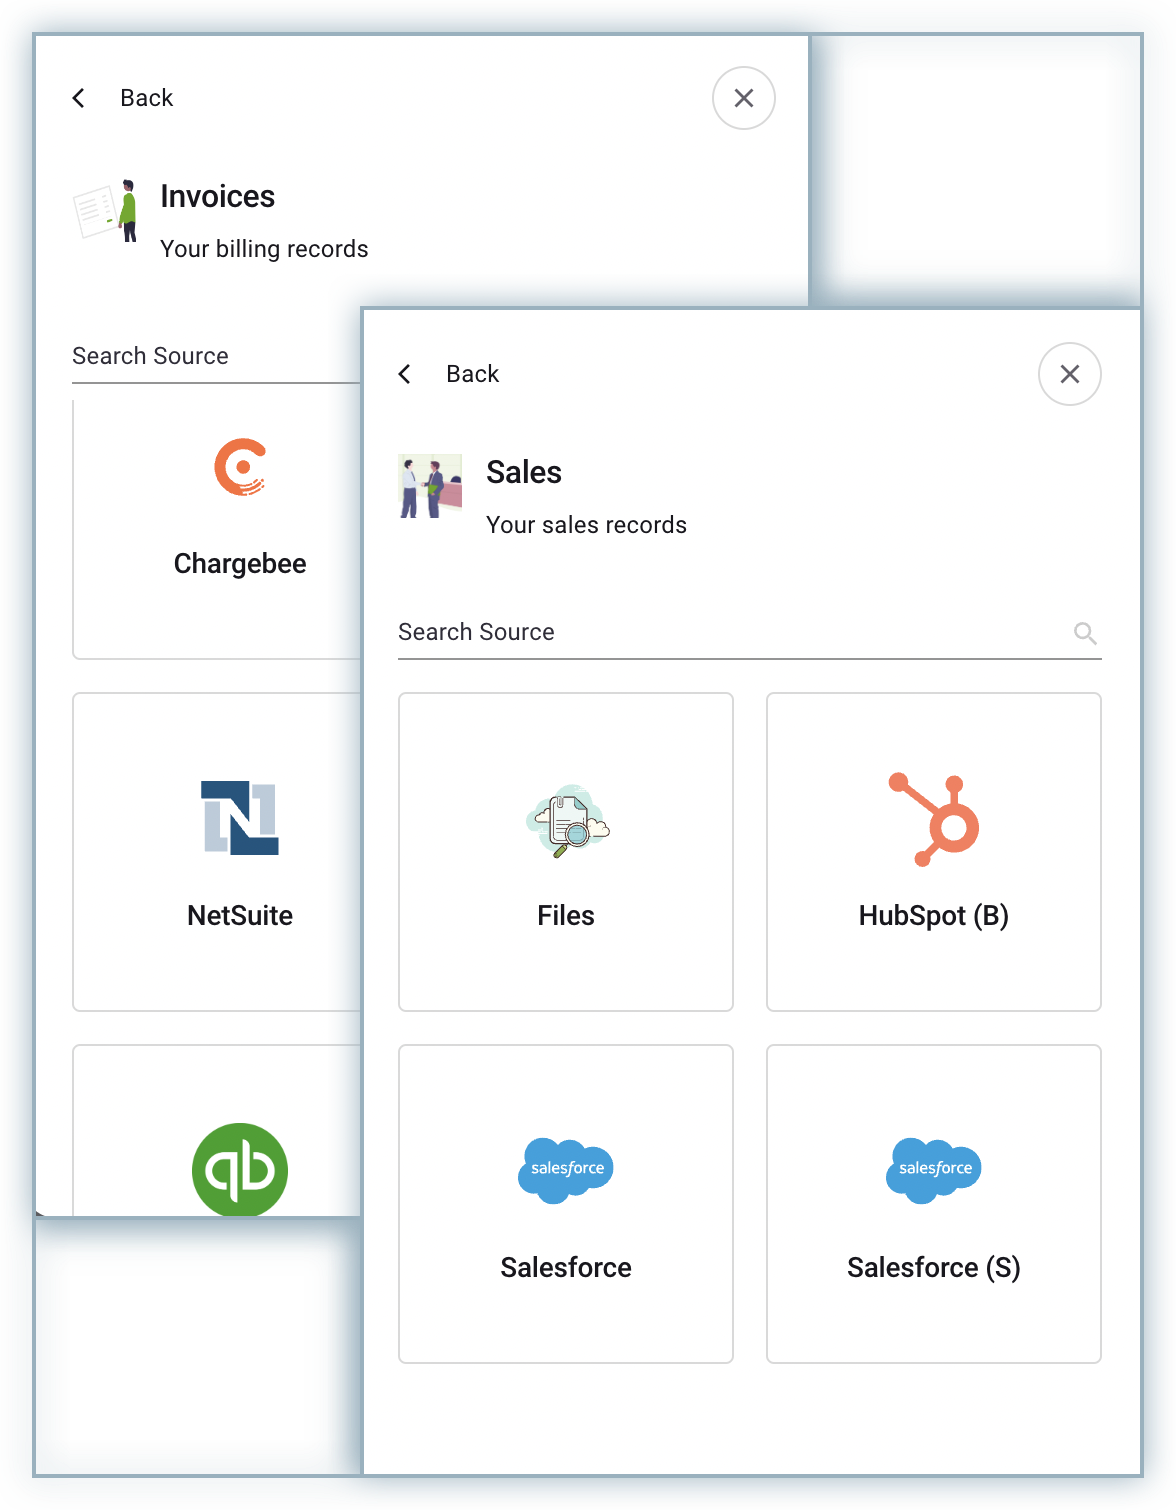
-
On the Configure App screen, specify the third-party application details and click Connect. Learn more about direct integrations by referring to documents in Integrations section.
Once connected, RevRec pulls your closed sales opportunities, or invoices data automatically as per schedule, or manually when you initiate a Run Job and does all the computations based on the revenue rules that have already been configured.
You will see a job created on the Sync UI page. Details for different jobs created are as follows:
- If you have not set any accounting period yet, then all the jobs created will show up in the Conversion Data tab. Download the file and upload it manually using the Import Data in Bulk option. The file can be downloaded either by clicking the download link or by clicking the job name and expanding the grid. Click the download icon that shows up in the right corner of the screen in front of the file name.
- If you have already set the accounting period, all the jobs created will show up in the Recent Jobs tab.
Jobs getting created after setting the accounting period will load the data automatically and you don't have to load the data manually. You can download the data file created for a specific job by clicking that job name. The grid will be expanded, and you can see the file created under the Original Input section.

The sync job created on the sync stream may identify errors that comprise data that are incomplete and need to be rectified in the source system.

It is always a good practice to review and resolve these errors in the source system. However, if it is a missing SSP or something on the RevRec side then you resolve those as a part of the closing process.
Was this article helpful?