How to invite other users to RevRec after signing up?
Scope
Sign-up & Inviting Other Users to RevRec integration
How to invite users to RevRec?
How to add roles for the users in RevRec?
Summary
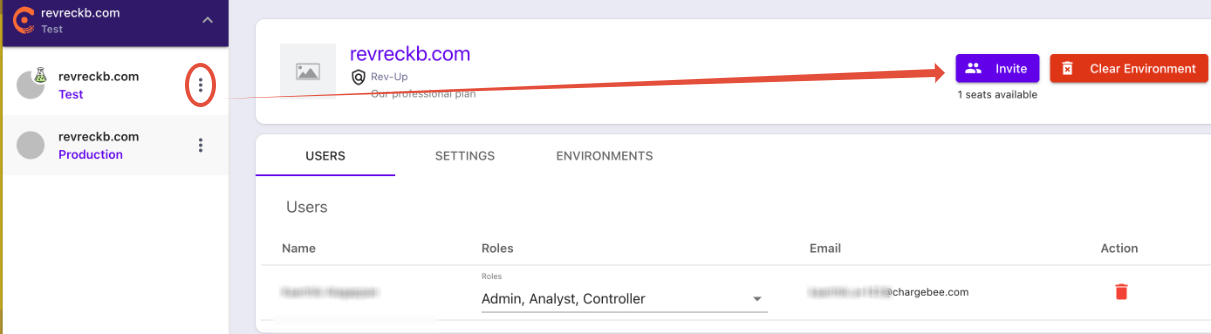
You can signup using this URL (https://app.revrec.chargebee.com/) and fill in the details using your name, email, and domain. You can invite users from domain name > Settings > Invite.
Solution
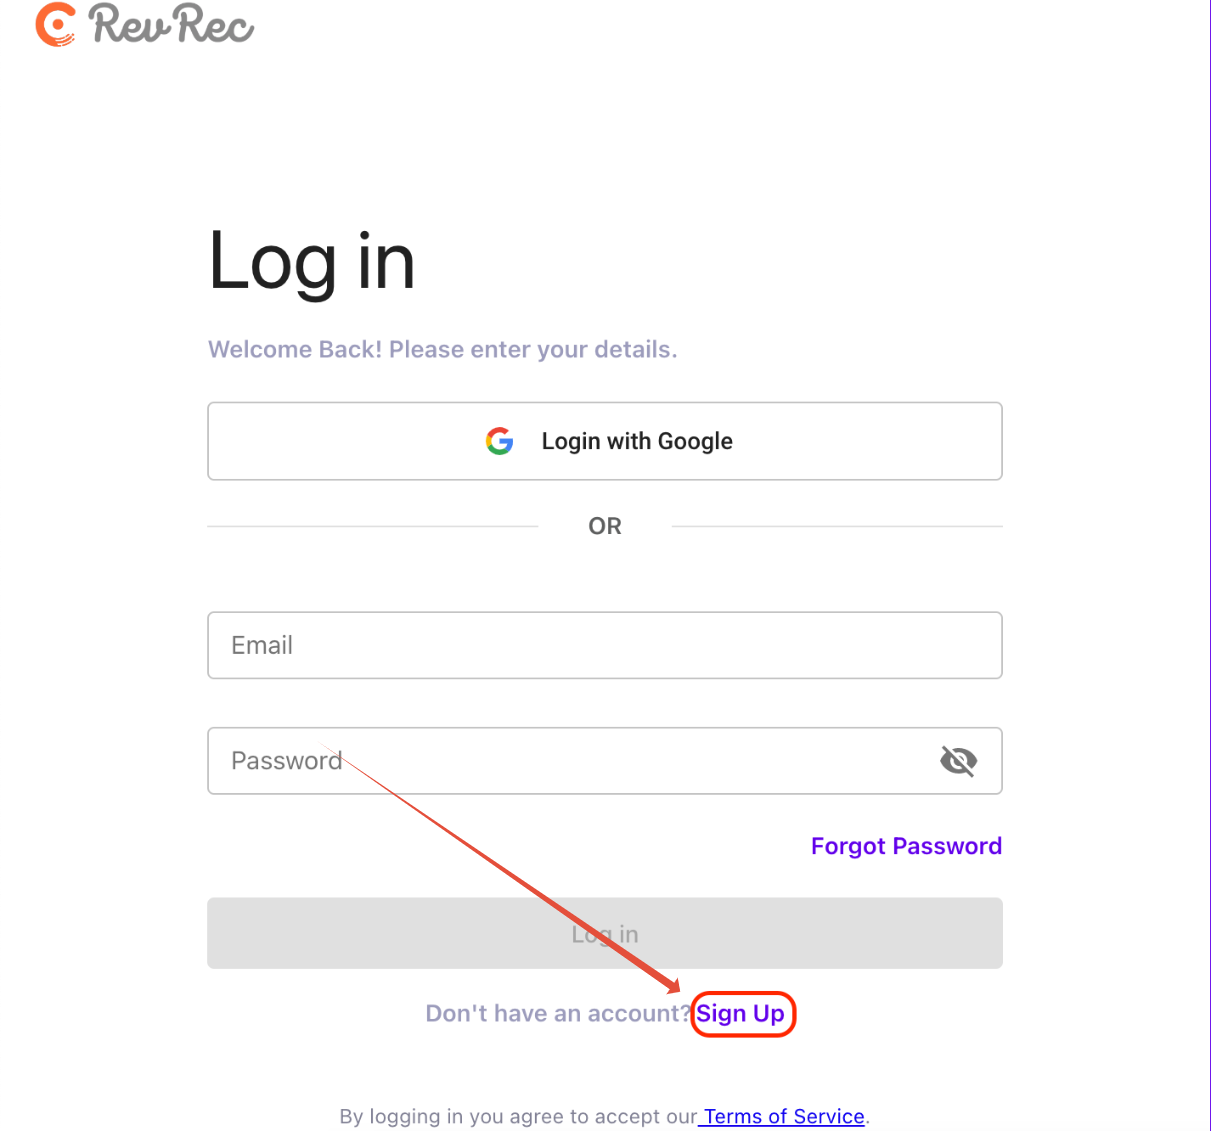
Signing-up / Inviting New User: The very first step is to sign-up for the rev-lock application to log in to the system. In order to create a new account in RevRec, open up a link for the RevRec application (https://app.revrec.chargebee.com/). You will be directed to the main sign-in page, if you already have the account then you can sign in with your credentials; if you do not have the account then you have to sign-up from this main page. Please see the step-by-step guidance on how to sign-up for the RevRec application and invite other users to join the application.
STEP 1: Click on the Sign-Up button in the top right corner of the application.
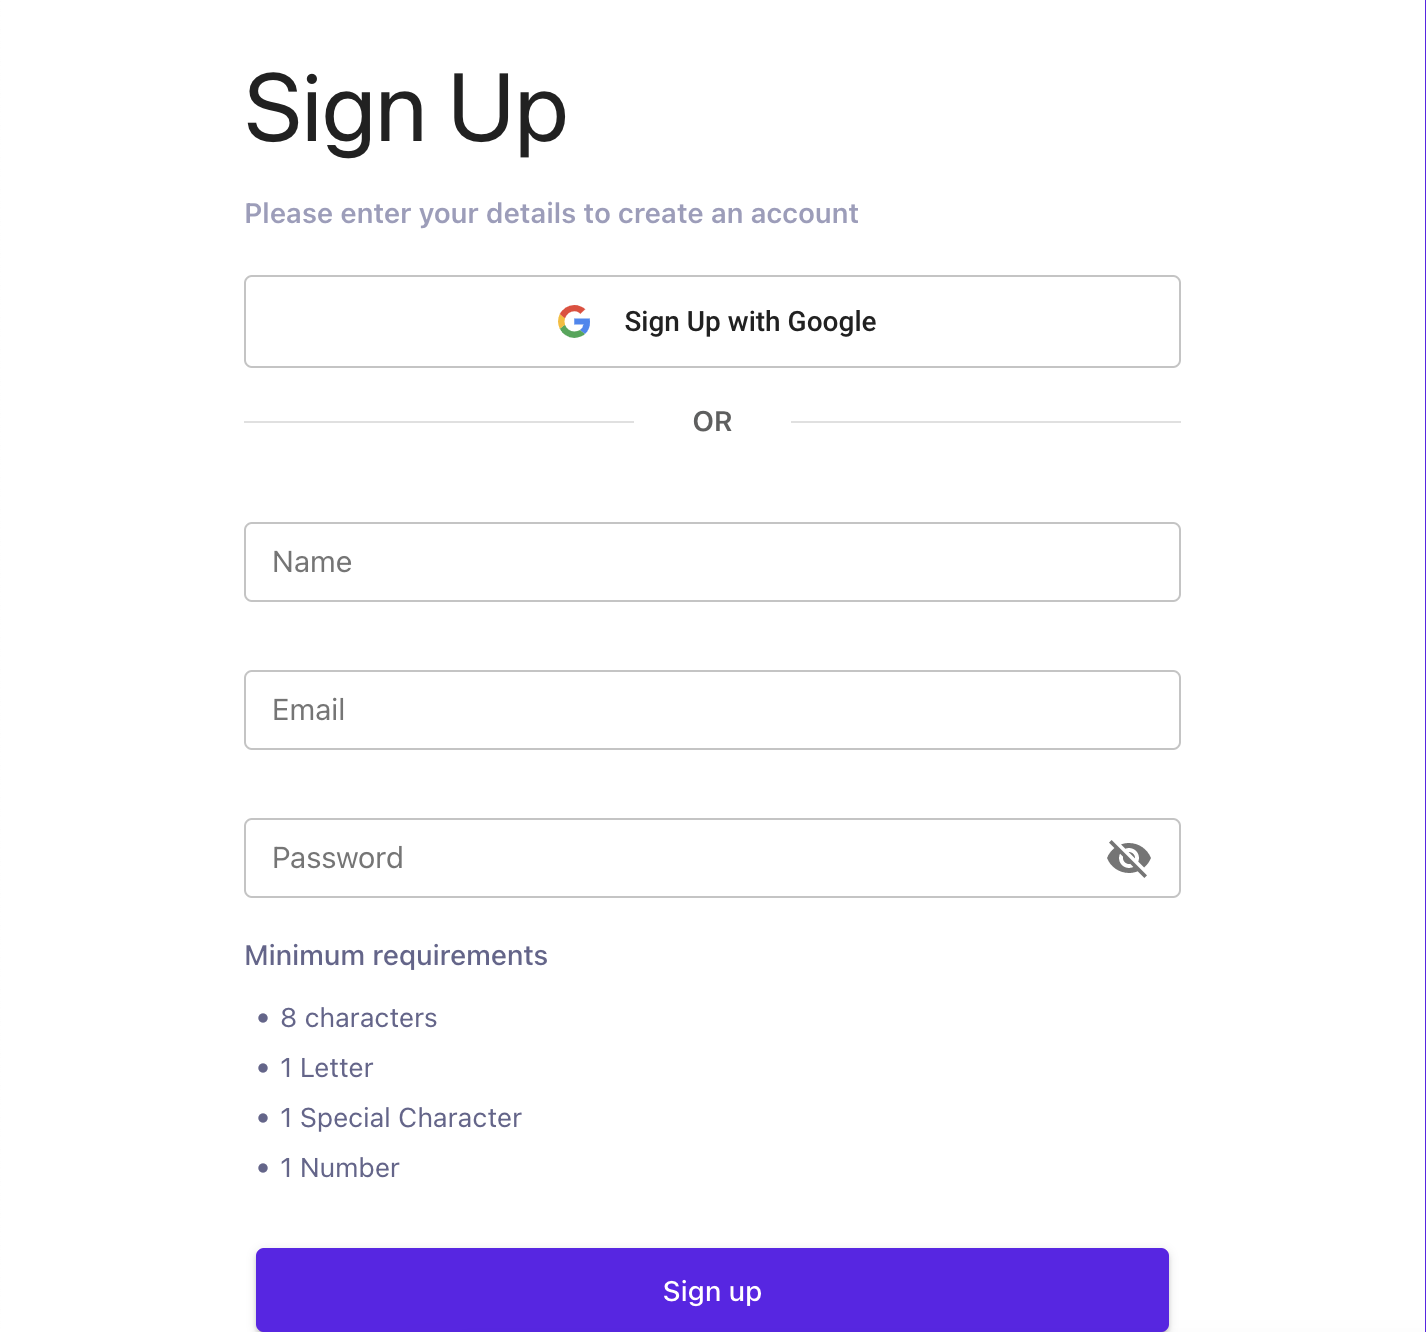
STEP 2: After Clicking on Sign-Up, you will be redirected to the credential details page. Please provide all relevant information to sign-up and click on Register.
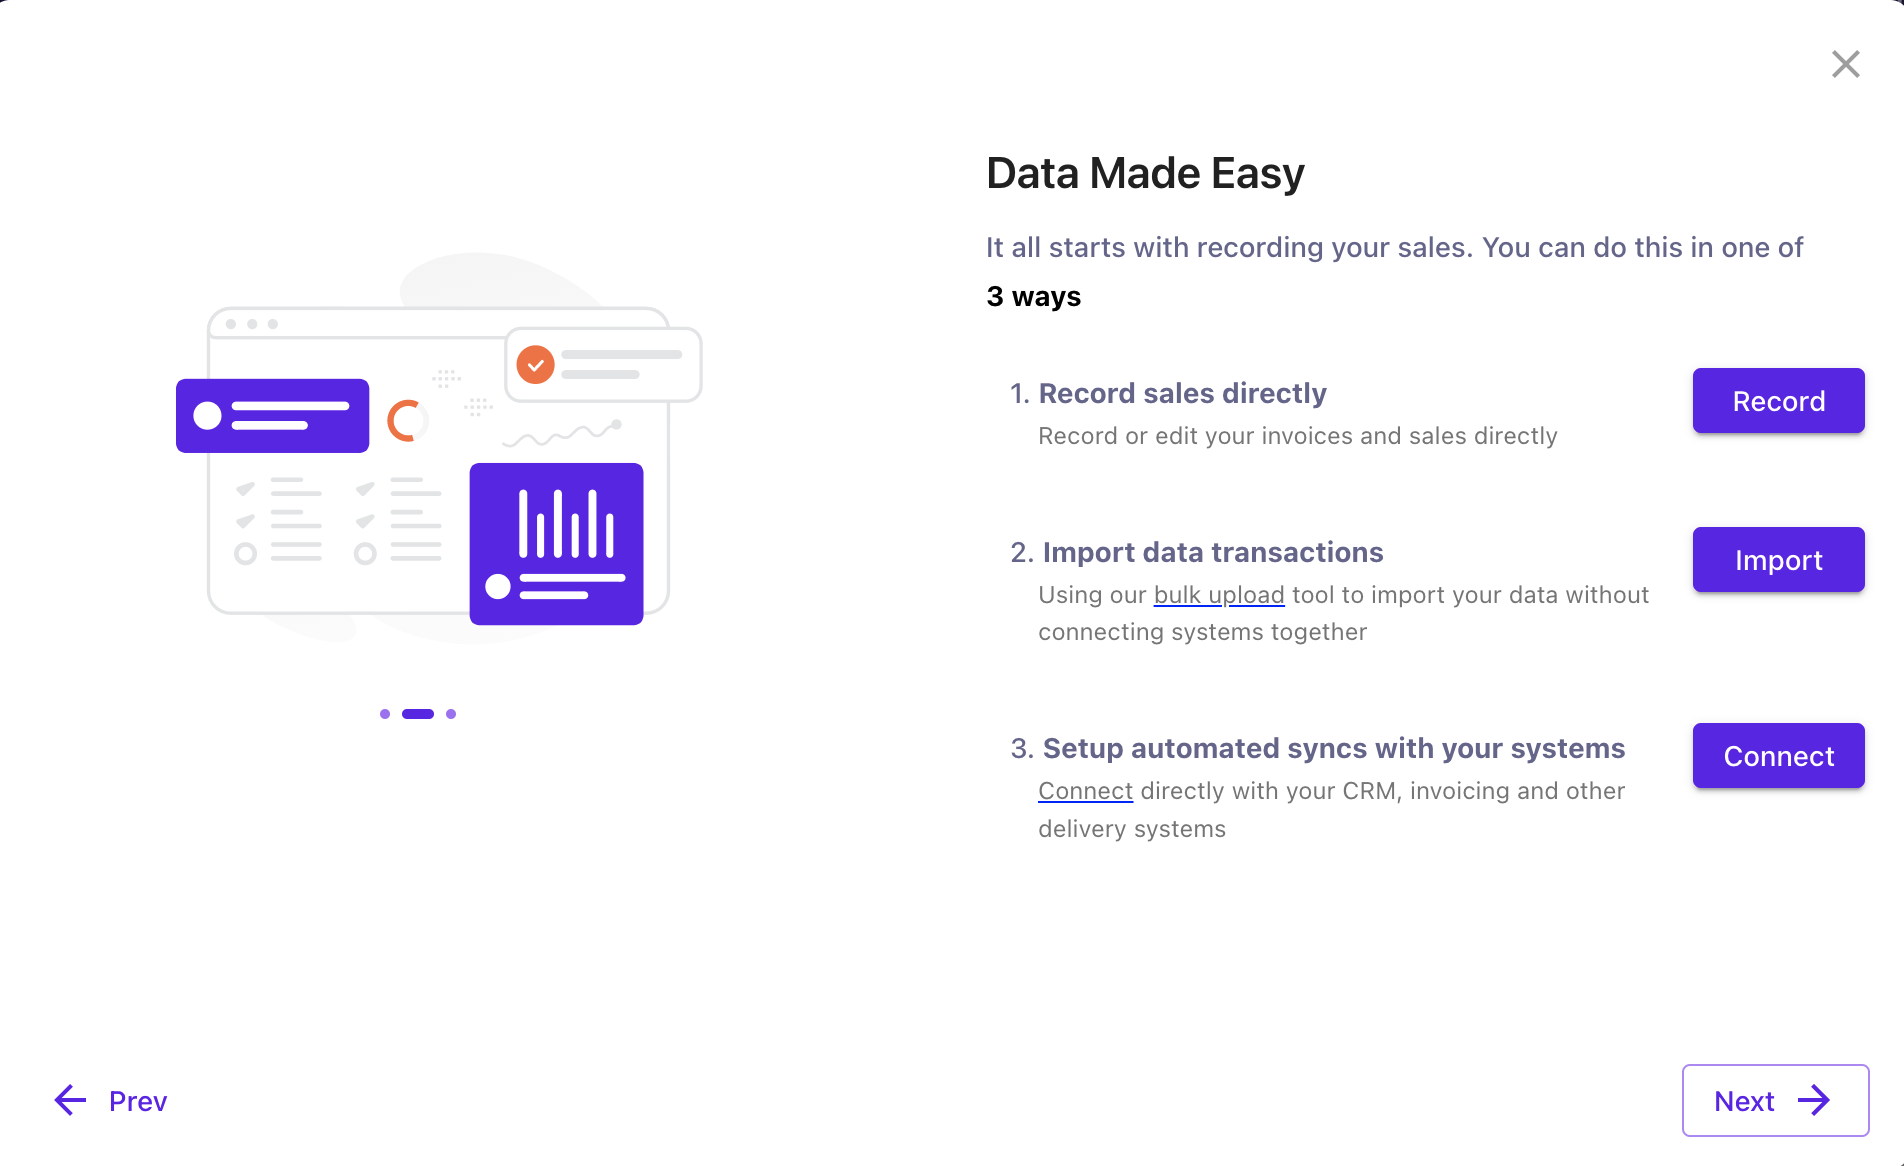
Once registered, you need to fill in your domain and upon verification, a pop-up window will appear for optional initial configuration (screenshot below).
STEP 3: Once your account is set up, you can log in to the system with your credentials. The signed-up user will have access to both test and production environments. The main user can invite other users in the RevRec application in order to use the application. You will be allowed to add a total of 4 more users based on the subscription module. Please log in to the application using your credentials from the main sign-in page and invite other users to join the application.
STEP 3 (a): When you log in to the application, you will be directed to the main dashboard page where you can see the user name with a drop-down menu. Click on your name and it will show both environments on the right-hand side of the page.
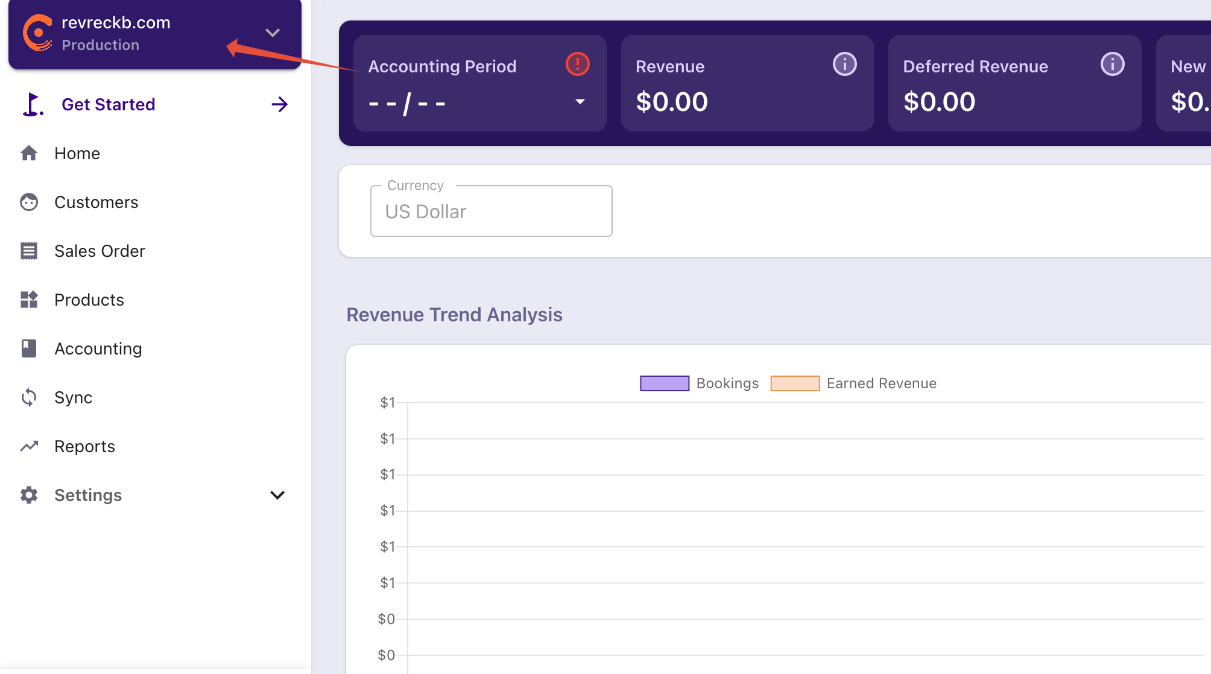
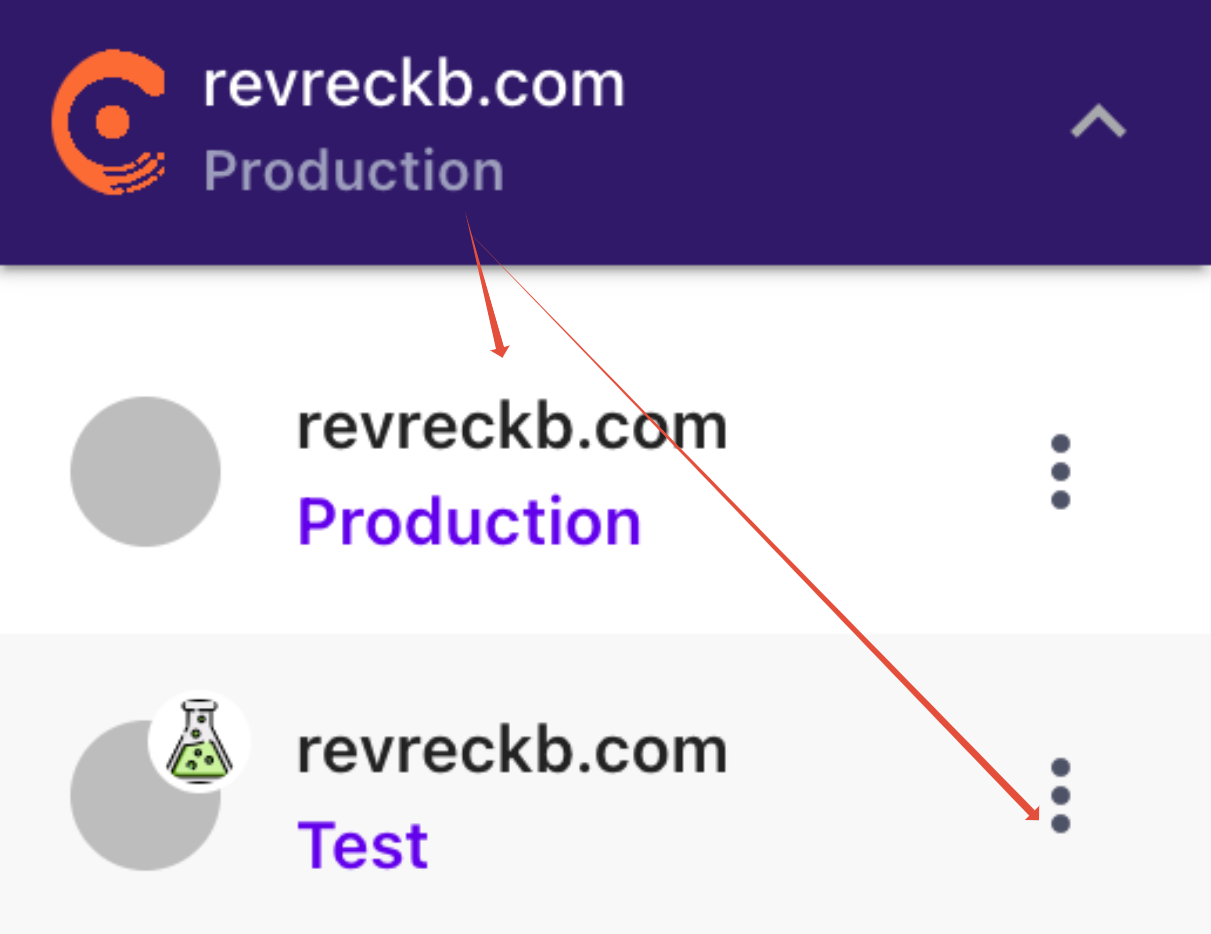
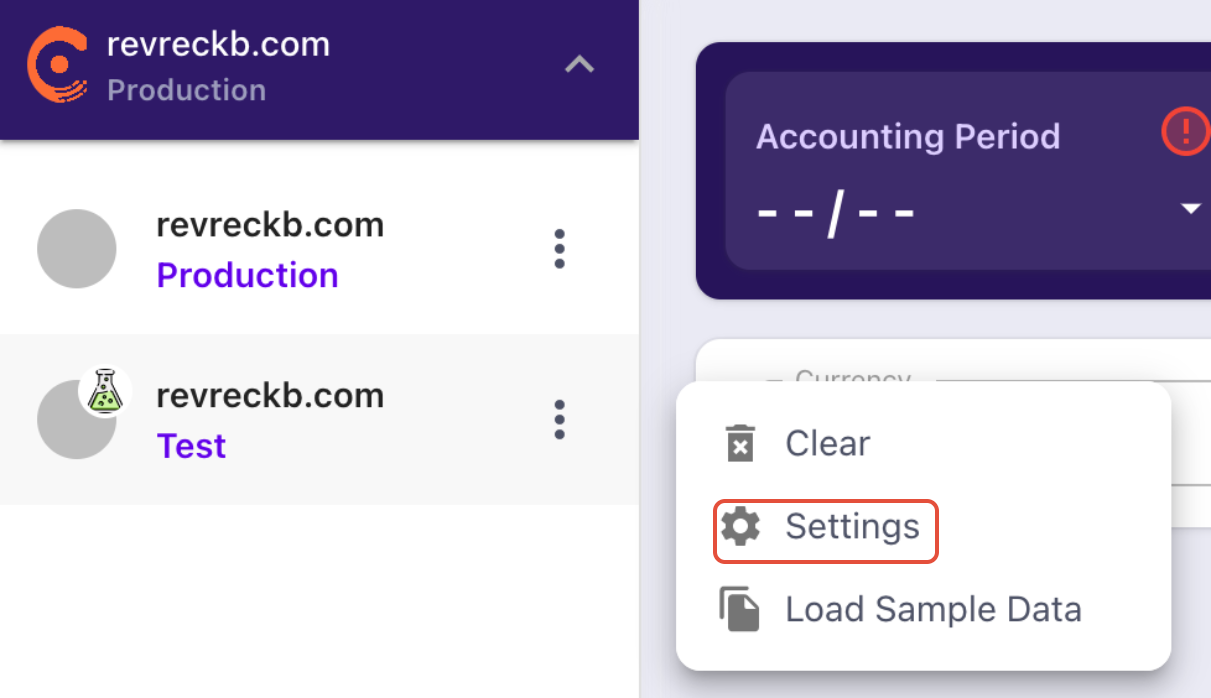
STEP 3 (b): Click on the vertical dots menu and it will show the option for Settings. Click on Settings and it will direct you to the page where you can invite more people to join the application from your organization.

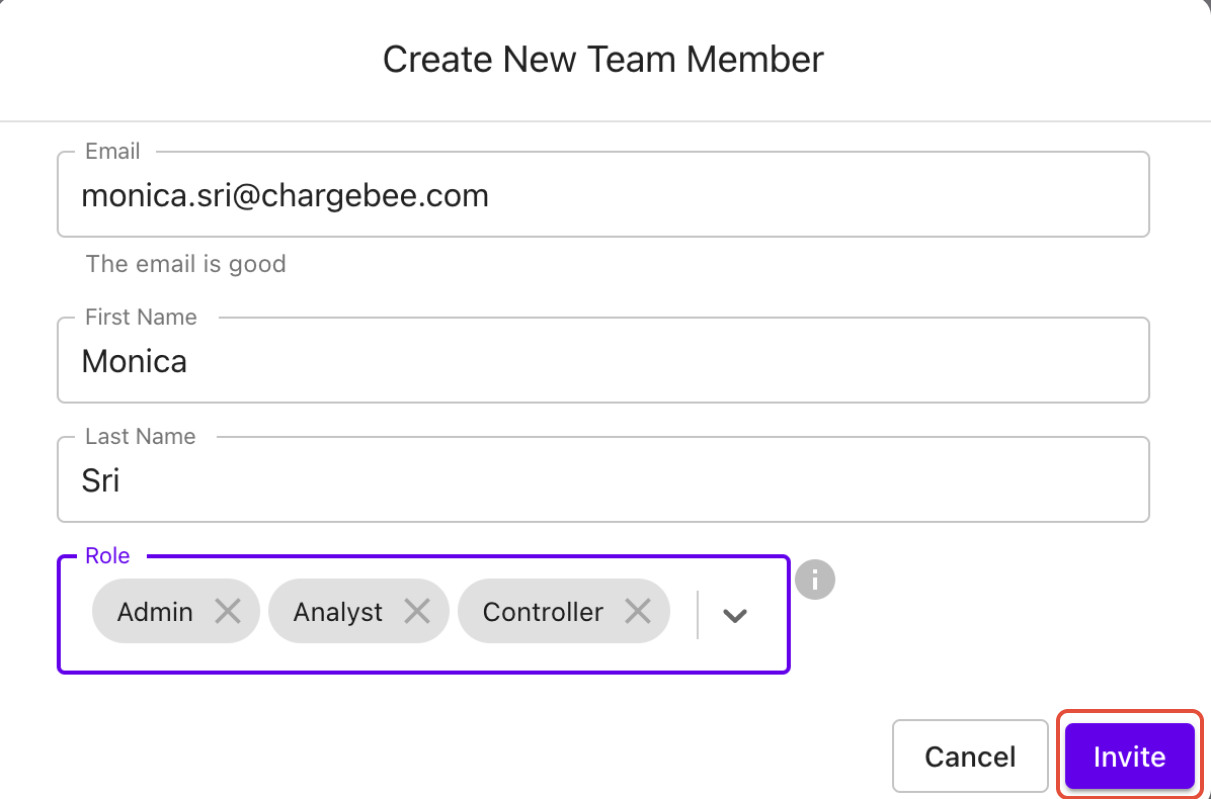
STEP 3 (c): Once you click on invite, it will open up a window that will enable you to provide the details of people you would like to add to the application. Please fill in the required details and click on the invite button.
STEP 3 (d): Once you invite the user; the user will receive an email with credentials and they can directly log in to the RevRec application using credential details from the main sign-in page. Please note the user has to create the password when log-in to the system for the first time. You are now all good to use the RevRec application. Please refer to Quick Start Guide after you completed these steps (Quick Start Guide).
Was this article helpful?