User Management
Overview
Chargebee RevRec allows you to collaborate with your colleagues from different teams within a single site. You can assign users with specific pre-defined roles. Each of these roles comes with a set of permissions/access to perform various job functions on your site. The first user who signs up for your RevRec account is automatically assigned an admin role.
Users in the Admin role can control user access within your system by assigning them specific roles. After logging in to your RevRec site, navigate to Settings > Team Members to add, modify, or remove users on your site.
Roles and Permissions
Permissions are assigned to Roles and Roles are assigned to Users. Instead of having to assign permissions to each user individually, a set of permissions are grouped and assigned to certain pre-defined roles that can be used to control who can do what in your RevRec site.
RevRec comes with the following pre-defined roles that you can assign to your users:
- Admin
- Controller
- Analyst
The following table captures various permissions granted for each pre-defined Role in RevRec.
| Features | Admin | Controller | Analyst |
|---|---|---|---|
| Dashboard - Review Results | Yes | Yes | Yes |
| Dashboard - Manually Close Accounting Period | Yes | Yes | No |
| Customers (Search, Review/Edit, Reprocess) | Yes | Yes | Yes |
| Sales Orders (Search, Review/Edit, Reprocess) | Yes | Yes | Yes |
| Products (Search, Review/Edit, Reprocess) | Yes | Yes | Yes |
| Accounting (Configure Journal Accounts, Journal Accounts Mapping) | Yes | Yes | Yes |
| Sync (Configure Third-party Systems) | Yes | Yes | Yes |
| Sync (Upload Data) | Yes | Yes | Yes |
| Reporting Package | Yes | Yes | Yes |
| Setting (Configure Accounting Rules/Re-open Accounting Period) | Yes | Yes | No |
| Setting (Add and Remove Users) | Yes | No | No |
| Setting (Clear Environment/Reset Data) | Yes | No | No |
| Setting (Others) | Yes | Yes | Yes |
Adding Users
You can easily invite additional users into your account in your test or production environments.
Note
The RevRec Performance license includes five seats, and the Enterprise license has ten seats. Merchants can purchase additional seats if required.
To add a new user to your RevRec site, follow these steps:
-
After logging in to your RevRec site, navigate to the environment to which you are adding the user.
-
Click Settings > Team Members > Invite Members.

-
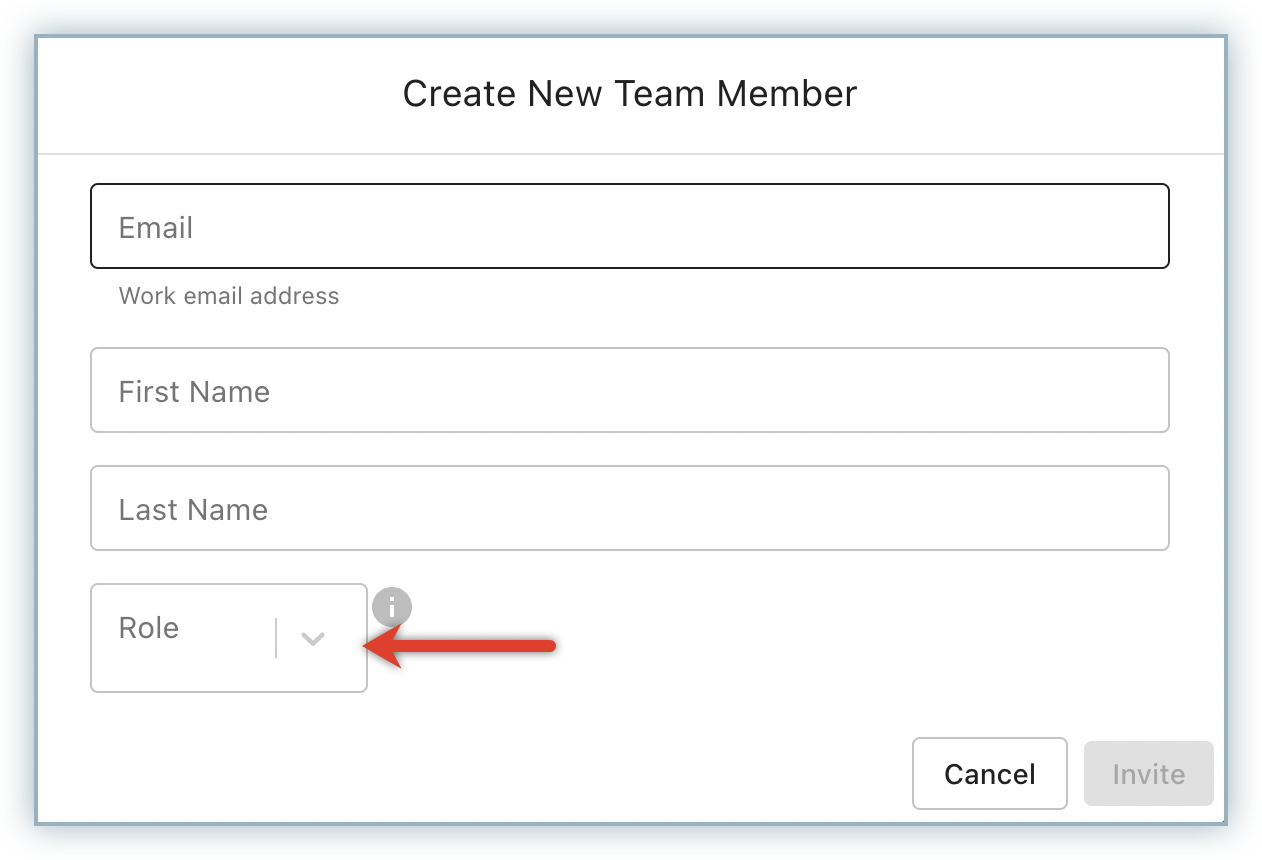
On the Create New Team Member pop-up, specify the user's email address, First Name, and Last Name.
-
Click the Role drop-down and select the role that you want to assign to the user. You can select one or more roles from the available options as follows:
- Admin
- Controller
- Analyst
-
Click Invite.
Now, you have successfully invited a new user to your RevRec site.
The user receives an email notification with an invitation to your RevRec site. The user can click the invite link to create an account using the same email address and gain access immediately.
Modifying User Permissions
Users with an Admin role can modify the roles that are assigned to existing users. To modify the roles assigned to an existing user, follow these steps:
-
After logging in to your RevRec site, navigate to the environment where you are modifying/removing the user.
-
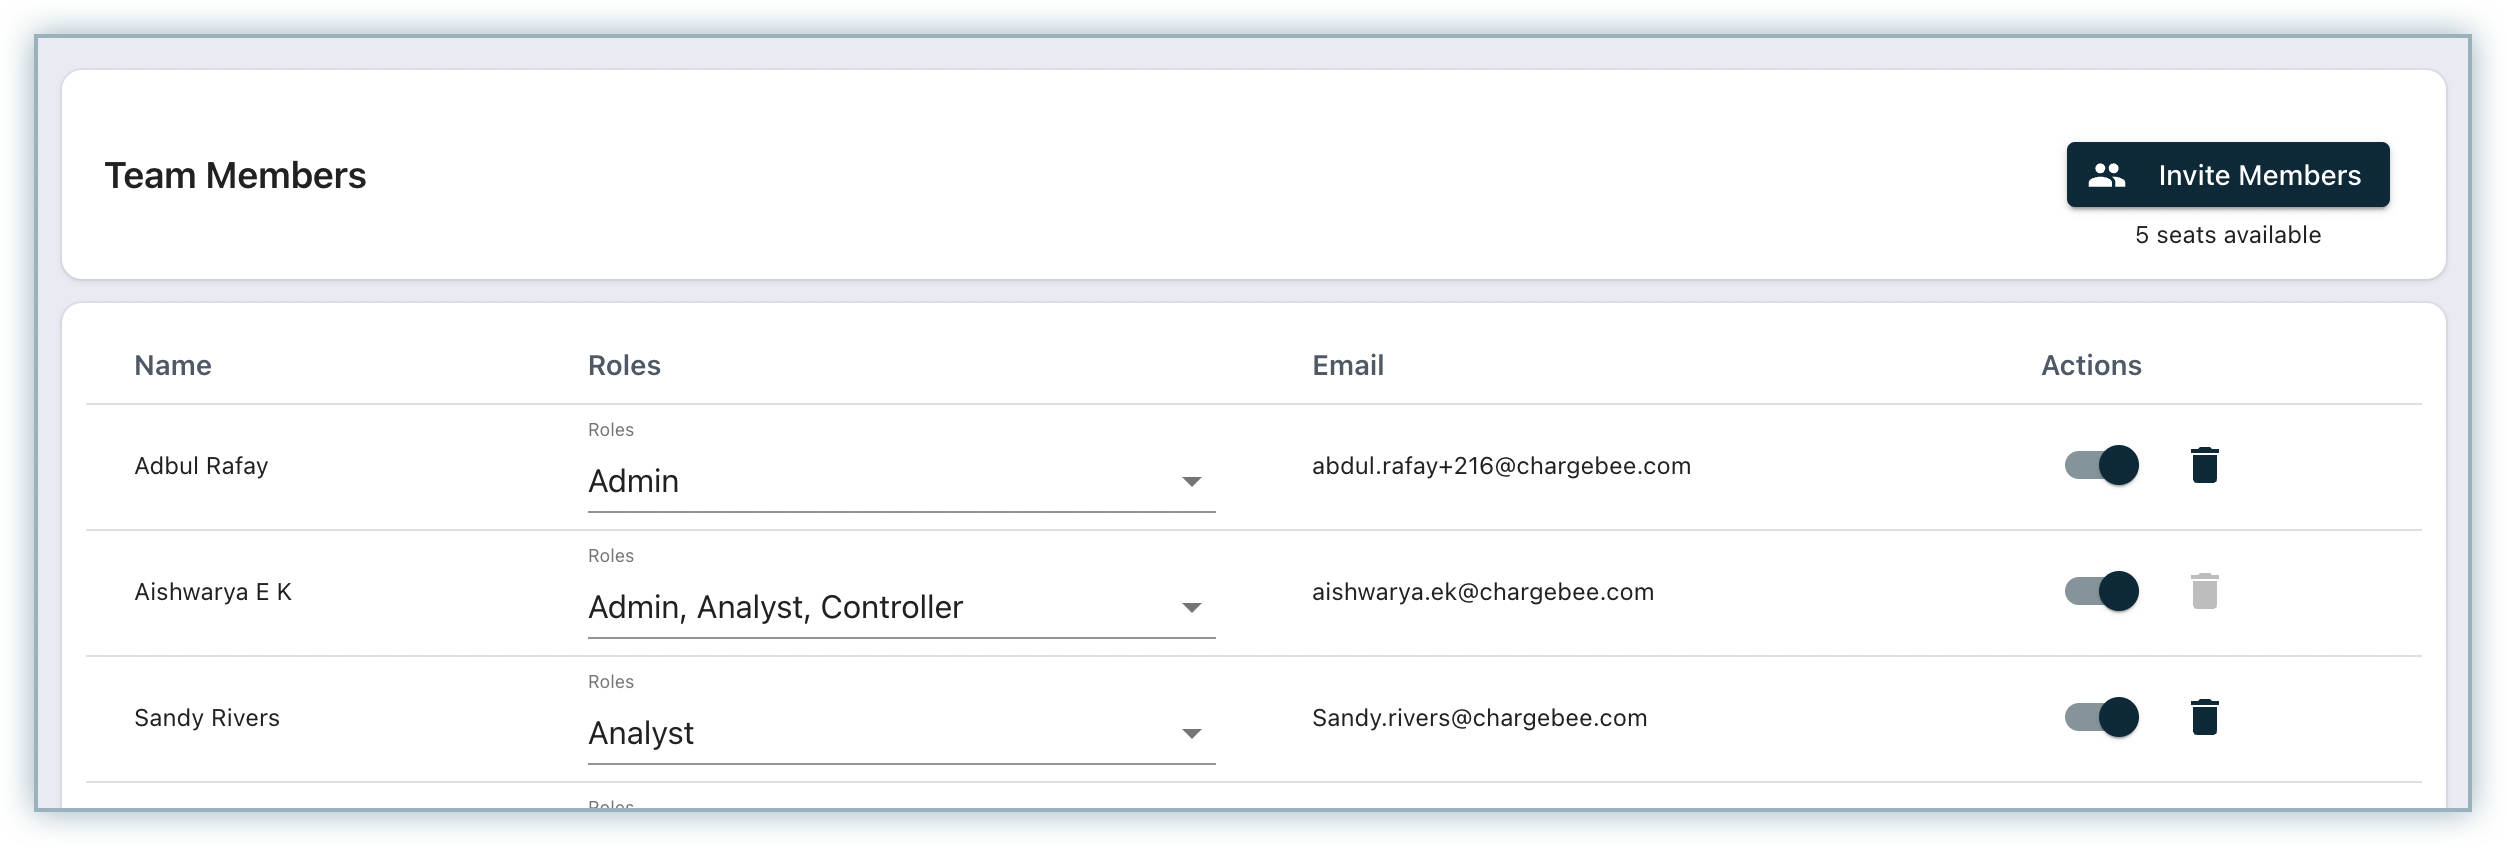
Click Settings > Team Members.
-
The user details of all users currently invited to your site are listed.
-
Click the Role drop-down to modify the roles provisioned to the user.

Removing Users
Users with an Admin role can remove any existing users from your RevRec site. To remove an existing user, follow these steps:
-
After logging in to your RevRec site, navigate to the environment where you are modifying/removing the user.
-
Click Settings > Team Members.
-
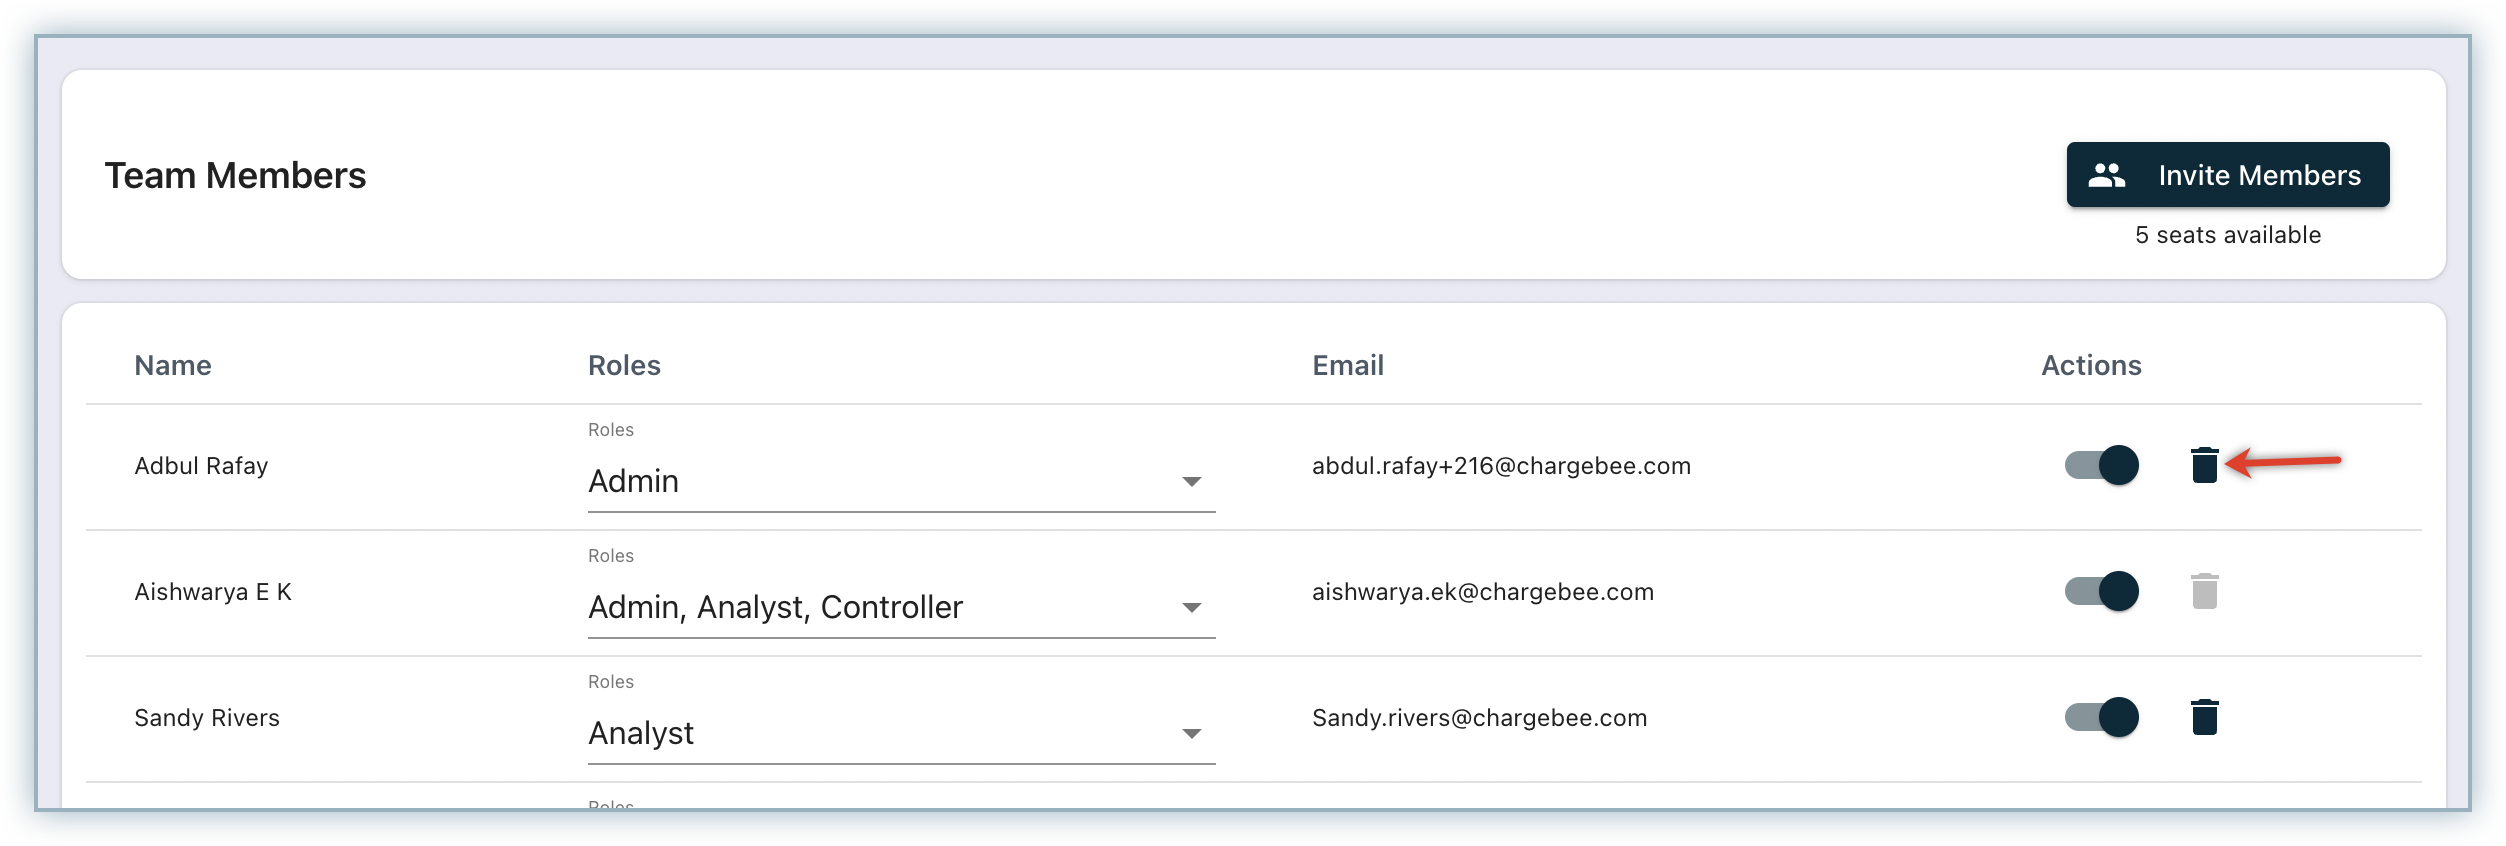
The user details of all users currently invited to your site are listed.
-
Click the delete icon under Action, to remove the user from your organization's RevRec account, and click Ok to confirm.
Now the user is successfully removed from your site.
Was this article helpful?