Configuring Fields and Labels
Here you can customize the elements of Chargebee's Single Page Checkout and Customer Portal: show/hide fields, customize their behavior, edit Info and Alerts, Field Configuration, Text Configuration, and more.
Field Configuration
To configure your fields, go to Settings > Configure Chargebee > Checkout & Self-Serve Portal > Field Configurations. You can decide which fields to show or hide on the Hosted Checkout Pages and Customer Portal, and specify whether fields should be mandatory or optional. You can choose from pre-configured profiles or manually configure the fields needed in Single Page Checkout.
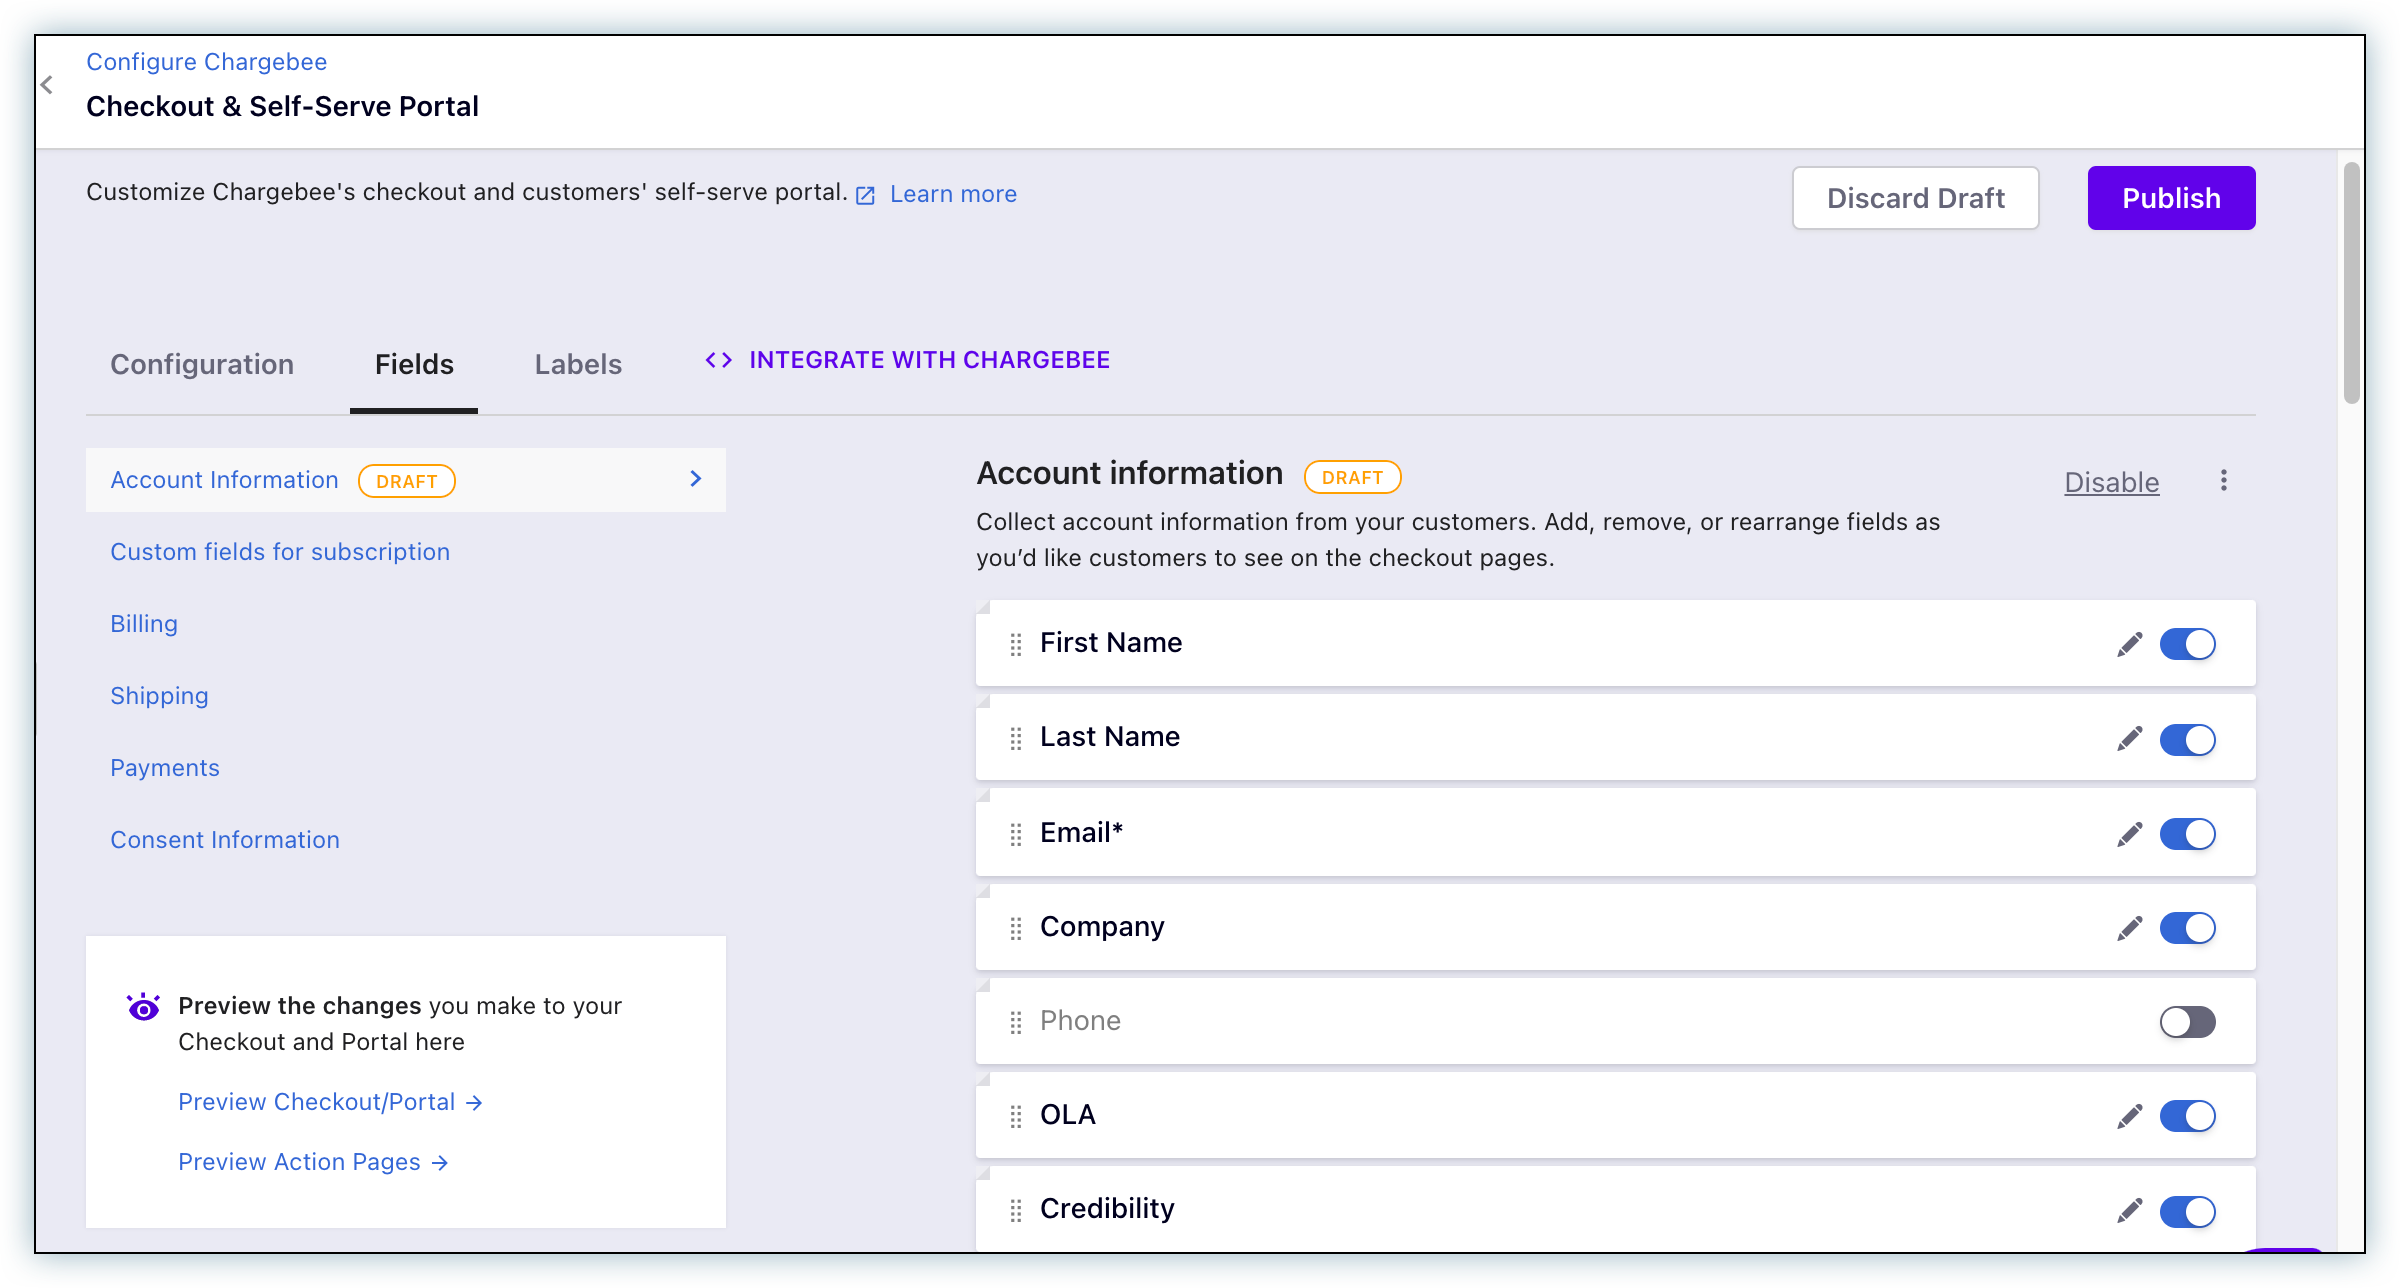
Account Information
You can customize the behavior of all fields under the Account Information section. This can be specified for both Single Page Checkout and Customer Portal.
The options for the Single Page checkout are:
Requested – The field is shown on the hosted page. Not Requested – The field is not shown on the hosted page.
Hidden Parameter – The field will not be shown, but you can pass values as parameters.
Copied from billing – The field will not be shown, but the field content will be copied from the corresponding field in the billing address section. If a particular field is configured to be copied from billing, the corresponding field in the billing address section should be enabled.
Copied from shipping – The field content will be copied from the corresponding field in the shipping address section. If a particular field is configured to be copied from shipping, the corresponding field in the shipping address section should be enabled.
The options for the Customer Portal are:
Hidden – The field will not be shown on the customer portal. Read Only – The field will be visible, but content cannot be edited. Editable – The field content can be updated.
Note
If you are using EU VAT for your taxes, you need to enable the VAT Number field in the field configurations. If you do not enable this field, it will not be shown on the hosted pages.
Add Custom Fields
You can also add Custom Fields on your checkout pages, Update Card page, and Customer Portal. Customize the field behavior of the available Custom Fields as shown below:
The possible options are:
Requested – The field is shown on the hosted page. Not Requested – The field is not shown on the hosted page. Hidden Parameter – Fields will be hidden on the hosted page, but you can pass a value for this field during sign up. The possible options for the Customer Portal are the same as the fields in the Account Information section above. You can also specify the sequence in which the Custom Fields will appear on your hosted pages, using the reorder buttons:
Zip code Validation
By default, zip code validation is not enabled because some countries do not have a zip code. You can specify whether or not to validate the zip code entered by the subscriber. If validation is enabled and the zip code is entered by the subscriber, it will be validated based on the country selected. Enabling zip code validation also makes the zip code field mandatory on the hosted page.
Labels
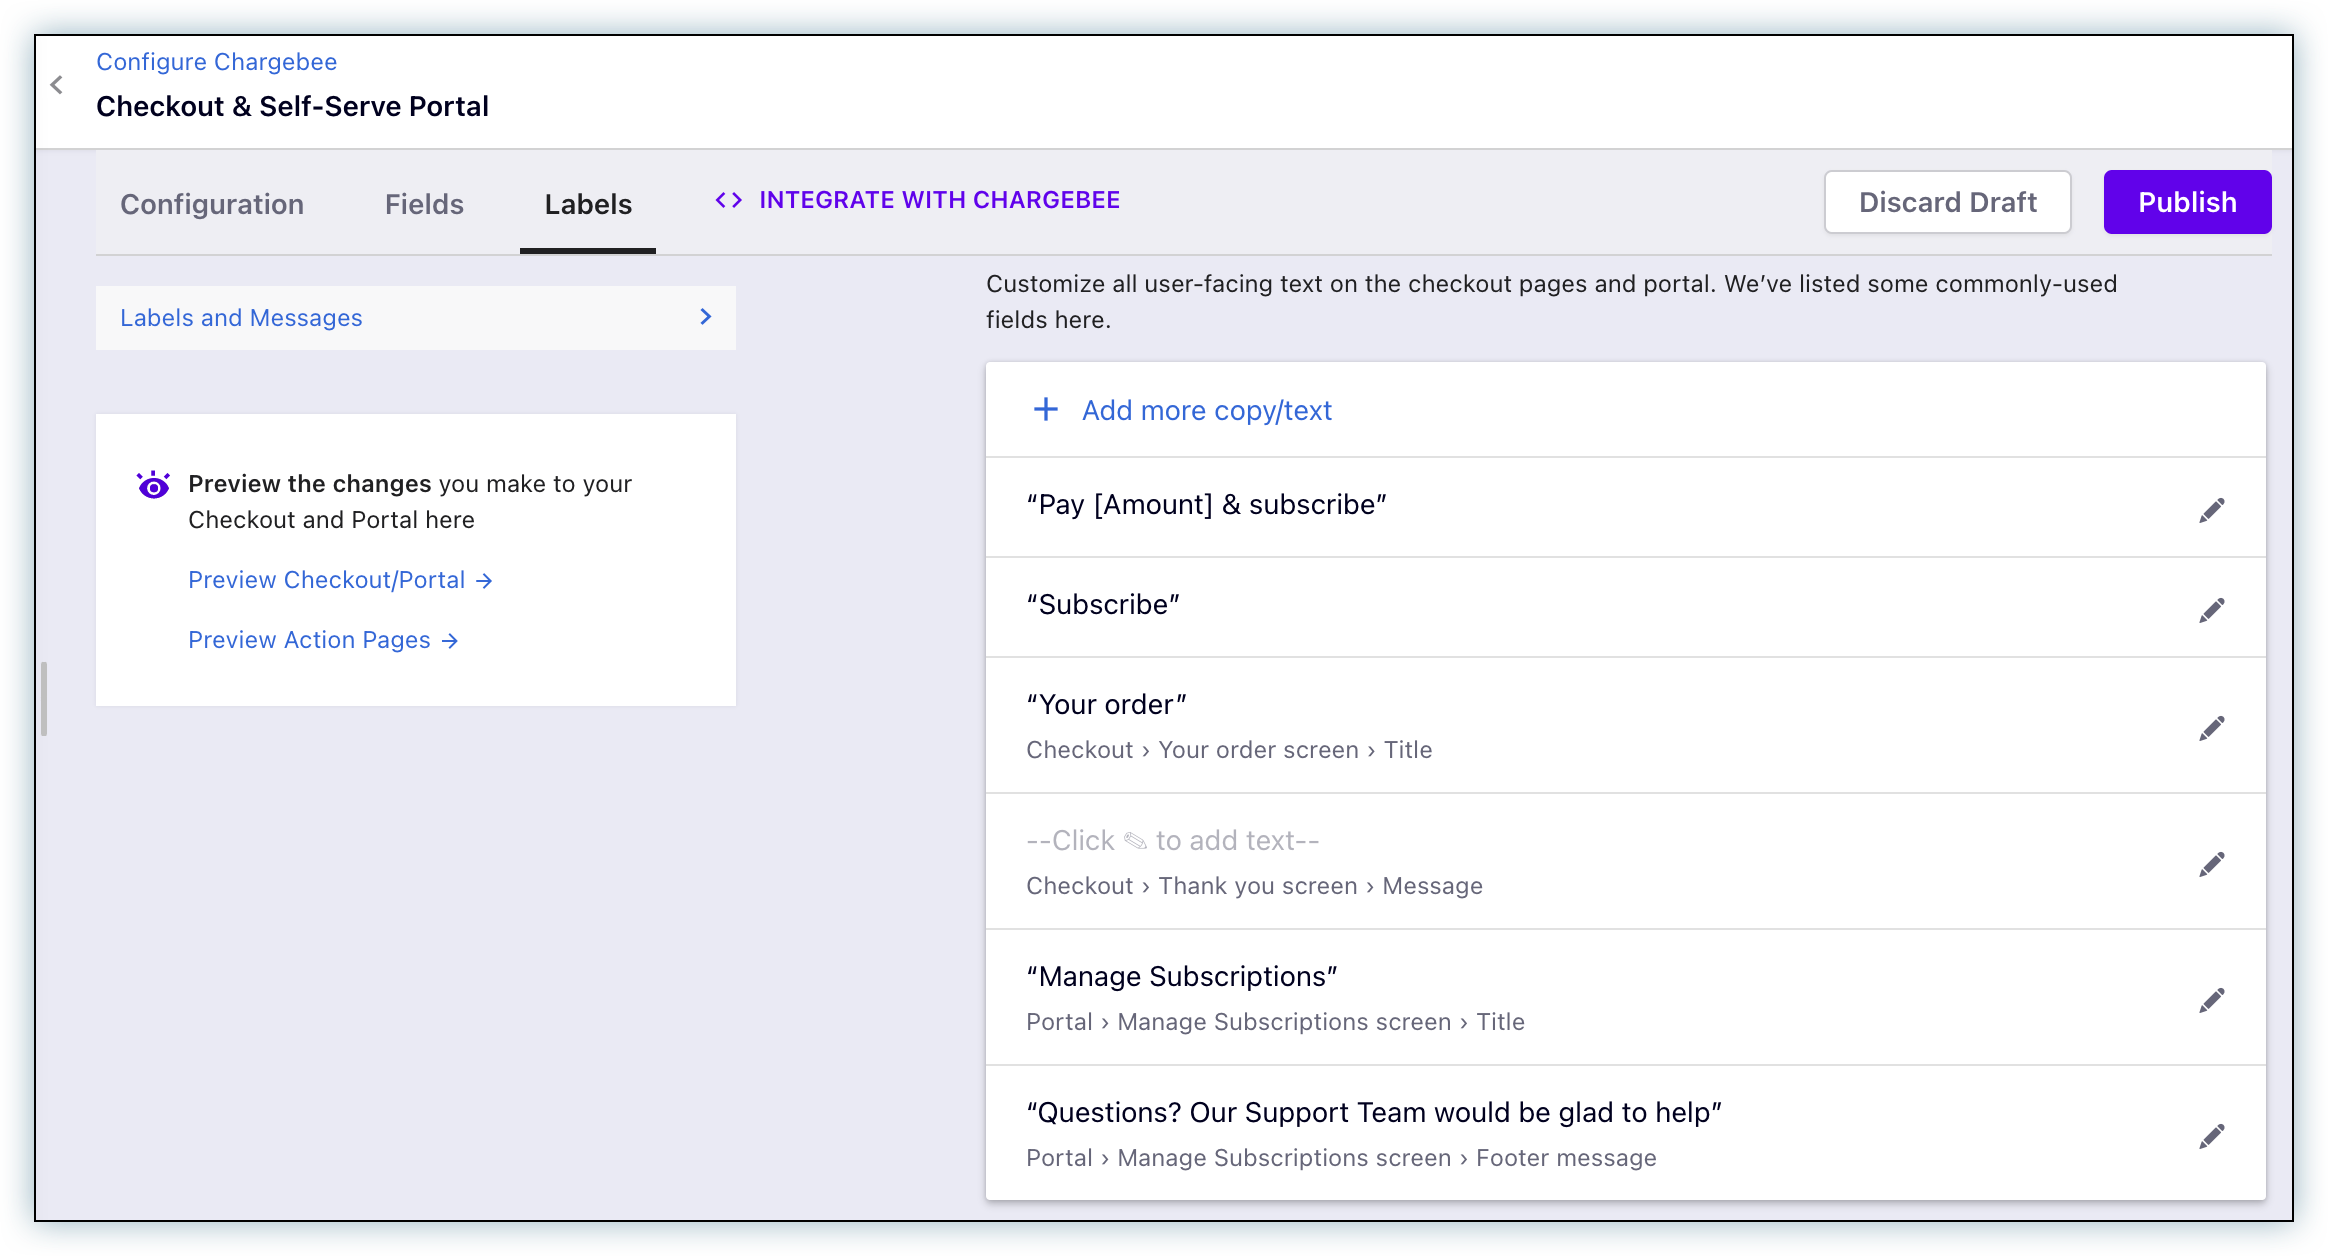
These are the messages and alerts that are shown to your customers in the Customer Portal for different scenarios. You can configure the content that needs to be shown. We also support using merge fields here, and you can add the fields you need to automatically populate those fields with data. To configure, go to Settings > Configure Chargebee > Checkout & Self-Serve Portal > Labels.
Labels and messages
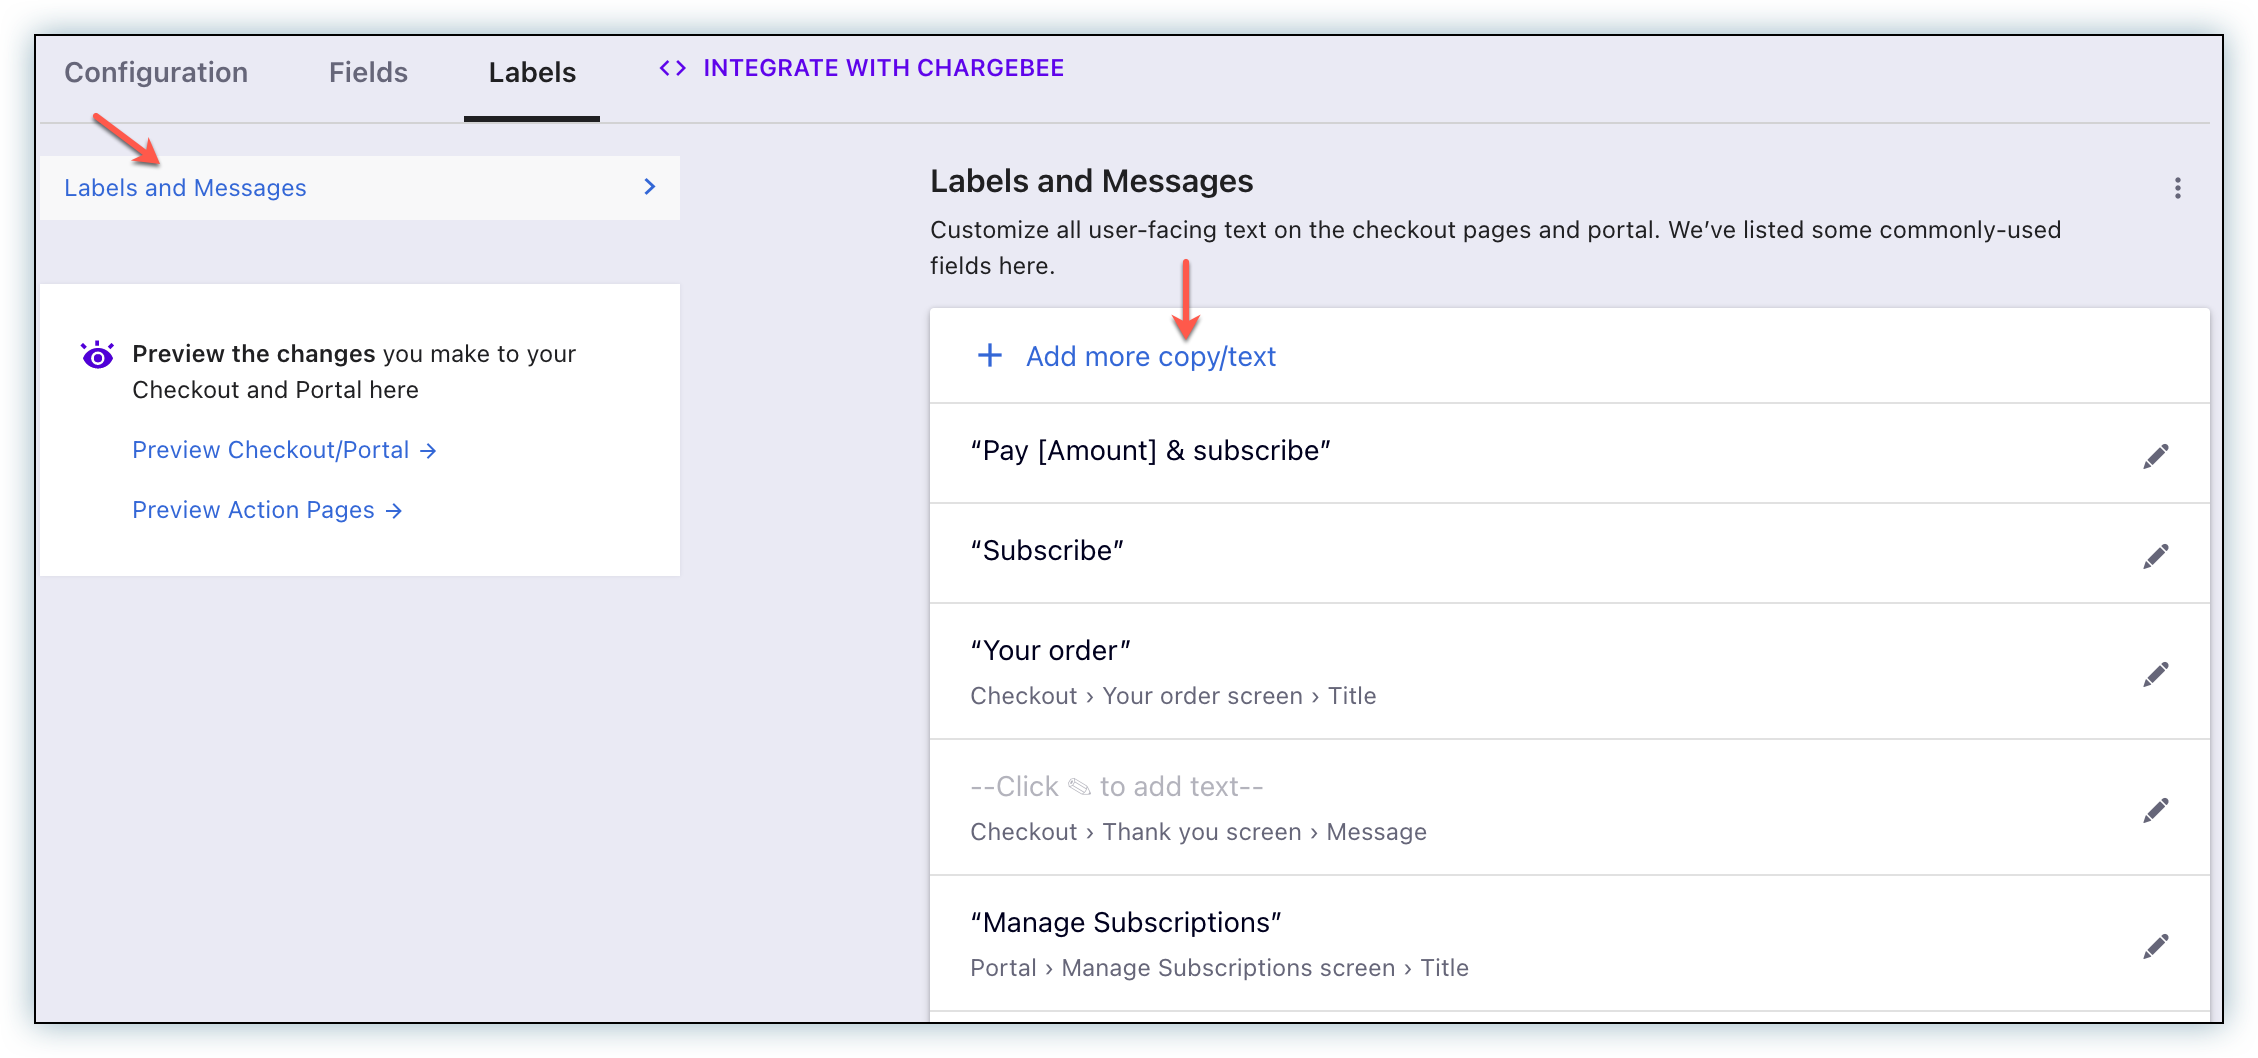
Enter the label text for all the fields to be shown on the Hosted Pages, Update Card Pages, and Customer Portal. To configure, go to Settings > Configure Chargebee > Checkout & Self-Serve Portal > Labels > Labels and Messages.
This includes text for:
- Field labels
- Titles
- Prefix and suffix
- Buttons
For example, you can change the text of the Subscribe button to Submit on the checkout page by using the edit option available in the Subscribe labels as shown in the above screenshot. The changes will appear on the checkout page.
Note
The Custom Domain feature allows you to white label your own subdomain and use it in the Hosted page URLs. So by default, the URL will be example.chargebee.com and you can choose to set the URL as checkout.example.com. If you'd like this feature enabled for your Chargebee site, contact support.
FAQ
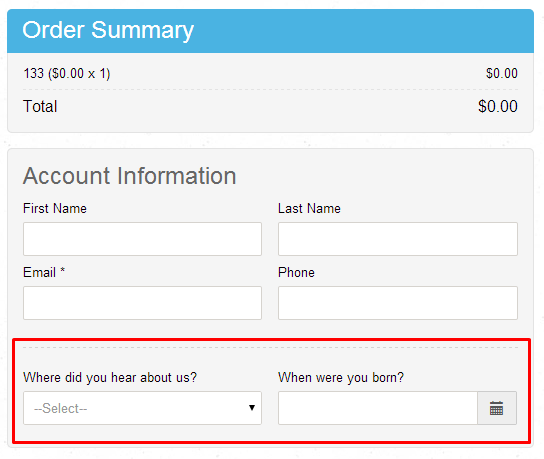
1. Where are Customer & Subscription specific custom fields shown in Single Page checkout?
Custom Fields for Customers, if configured, will be available in the Account Information section:
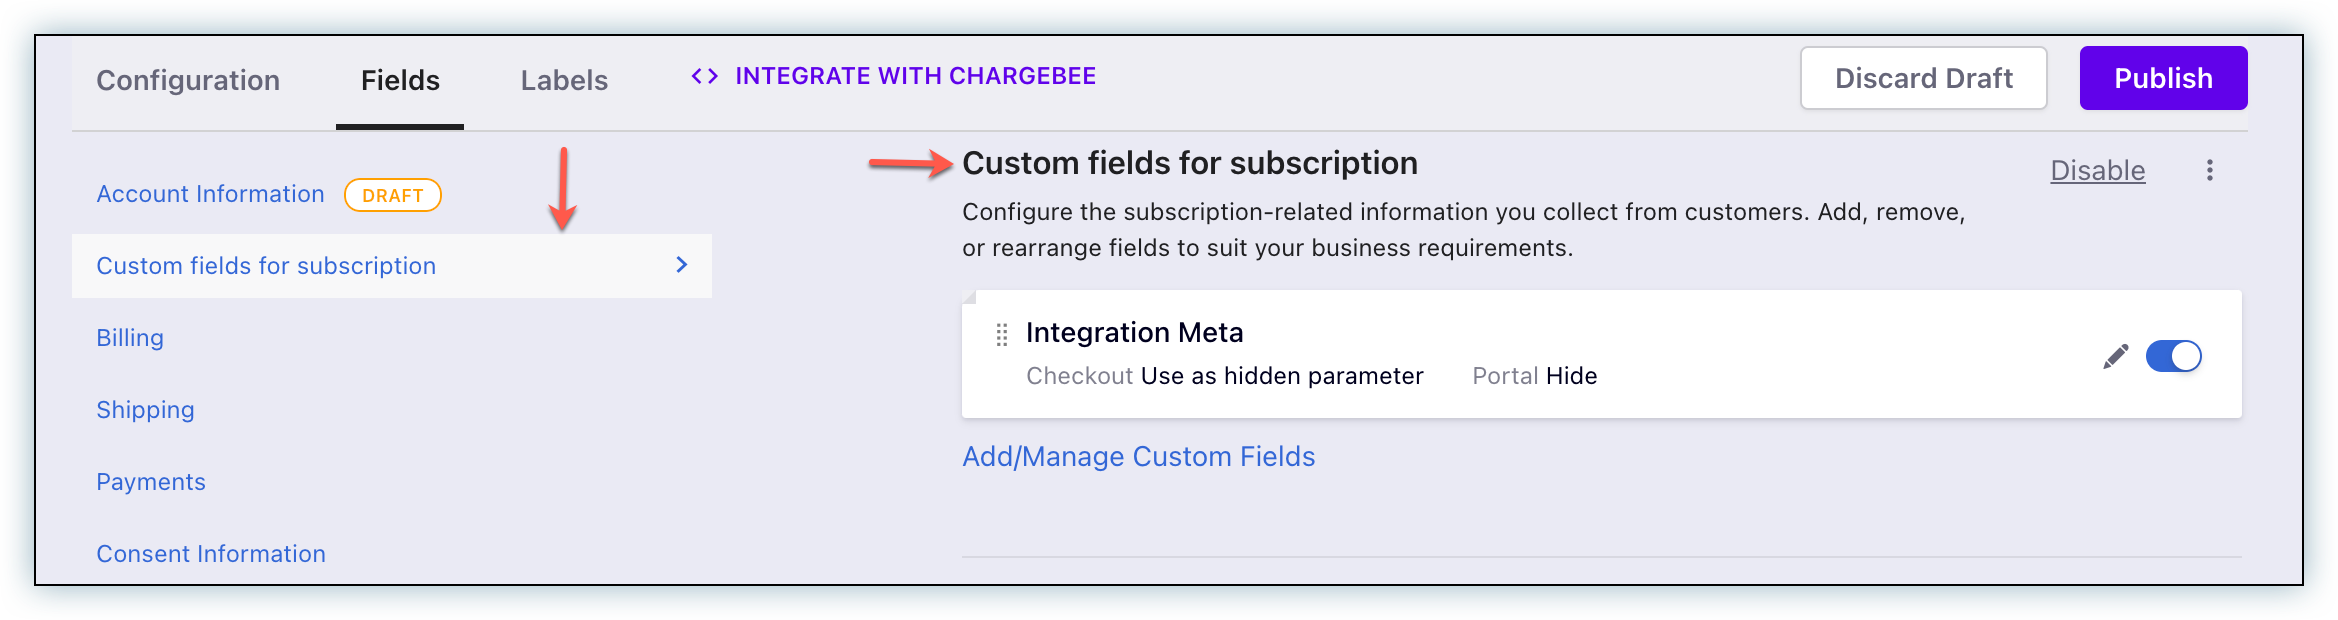
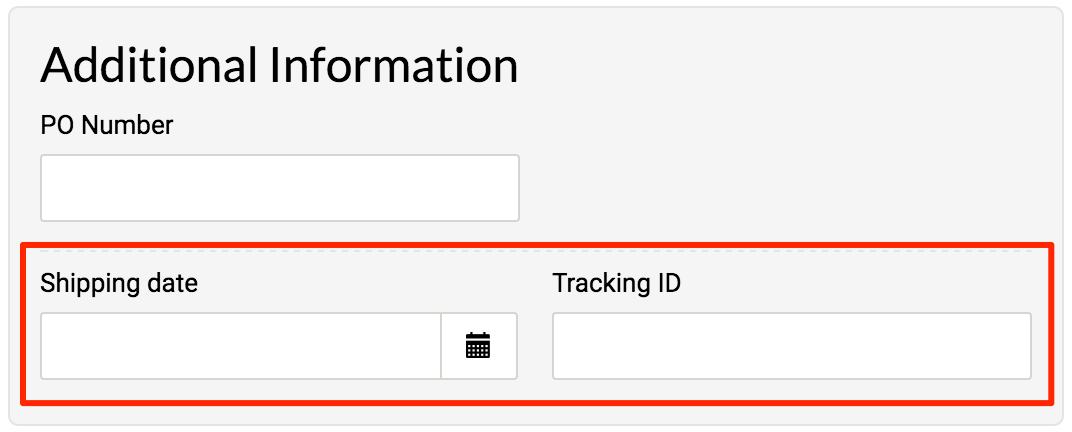
Custom Fields for Subscriptions, if configured, will be shown in the Additional Information section:
2. How can I hide "Powered by Chargebee" that is visible in the Checkout page?
The Powered by Chargebee message on the invoice/customer portal, etc. can be removed by unchecking the Hide Chargebee Branding under Settings > Configure Chargebee > Billing LogIQ.

You can hide ‘Powered by Chargebee’ only if you have activated your LIVE site; however, it cannot be hidden from Test Sites.
3. How to display the Plan description on the Single Page checkout?
You can use Chargebee's Labels and Messages field under Labels. This option allows you to display a plan description on checkout pages, at the bottom in the Order Summary section.
Here's how you can accomplish this: Go to Settings > Configure Chargebee > Checkout & Self-Serve Portal > Labels section. Scroll down to the Checkout section, select the Show checkbox next to Trial Information. Enter the plan description for different plans in the following format:
 `#plan.id= plan-id1`
   Plan 1 description
 `/plan.id= plan-id1`
 `#plan.id= plan-id2`
   Plan 2 description
 `/plan.id= plan-id2`

Note
Using the Plan ID is preferable so you can display content specific to each plan. Feel free to be creative with other MergeVars that suit your needs.
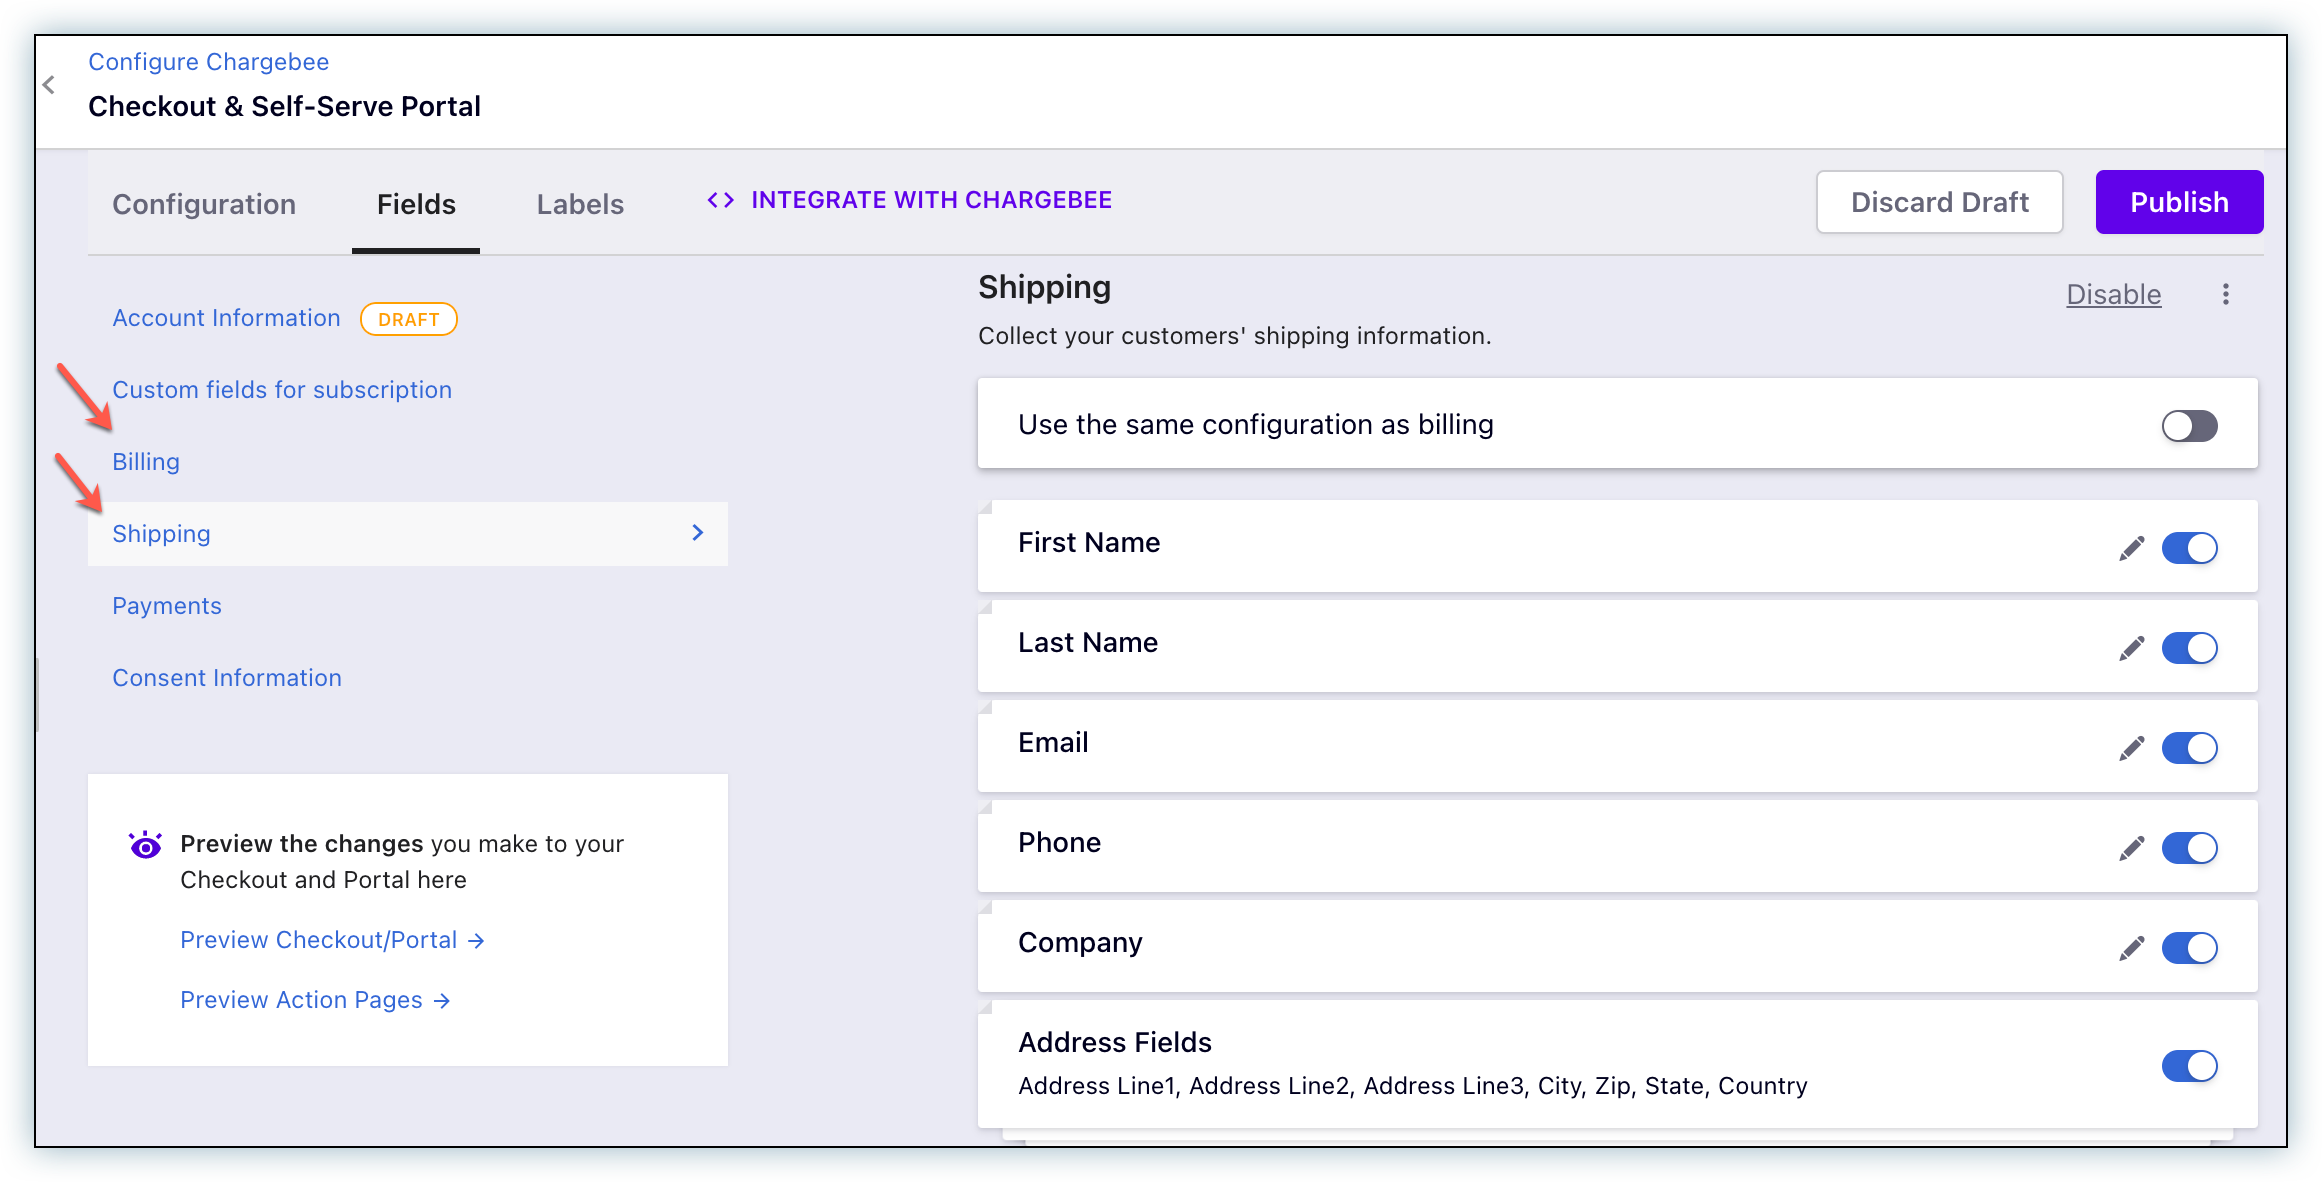
4. How can I modify/disable the shipping/billing address fields on the checkout pages?
To edit the shipping address fields on the checkout page, click Settings > Configure Chargebee > Checkout & Self-Serve Portal > Fields > Shipping/Billing. You can modify or disable the fields as required.
Note
These fields can still be populated in the background via the checkout page URL/API.
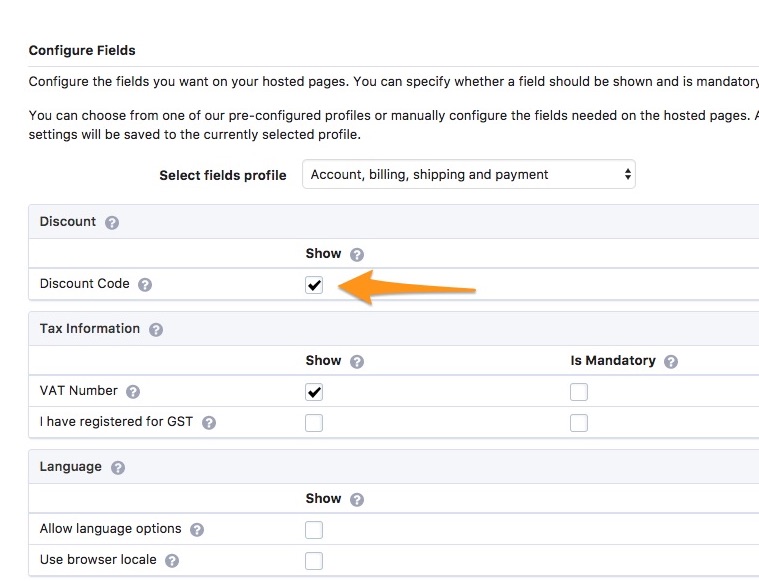
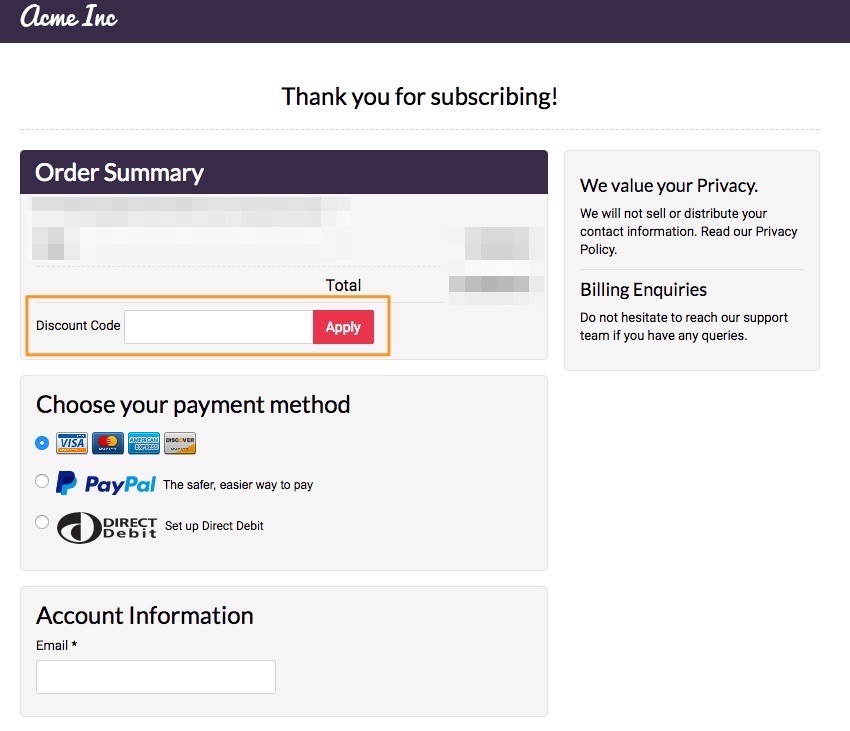
5. How do I include the field for coupon code in my Single Page checkout?
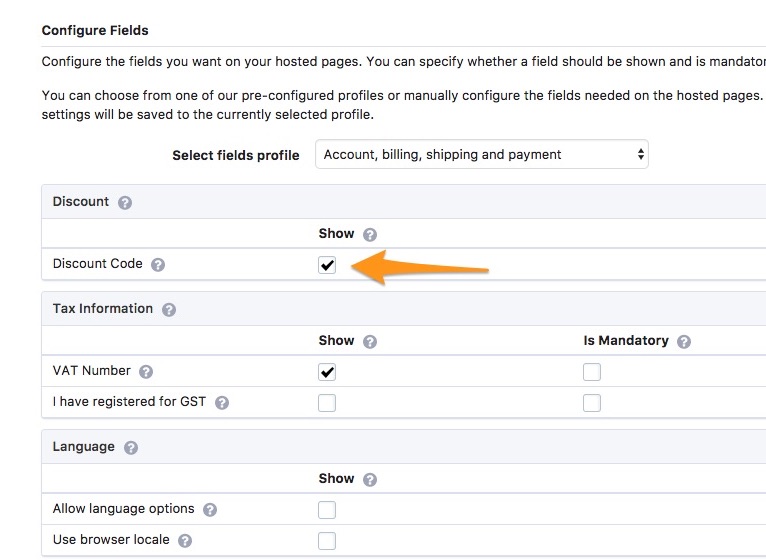
To add the Coupon code field to your Single Page checkout, log in to your Chargebee site and navigate to Settings > Configure Chargebee > Checkout & Self-Serve Portal > Fields.
Here you will find the checkbox that will add the Coupon field to your hosted checkout page.
After checking the option, click Update at the bottom of the Settings page.
Once added, this is how the field will look on your hosted checkout page:
6. How do I include the field for coupon code in my Single Page checkout?
To add the Coupon code field to your Single Page checkout, log in to your Chargebee site and navigate to Settings > Configure Chargebee > Checkout & Self-Serve Portal > Fields.
Here you will find the checkbox that will add the Coupon field to your Single Page checkout.
After checking the option, click Update at the bottom of the Settings page.
Once added, this is how the field will look on your Single Page checkout:

Was this article helpful?