You are viewing:
Product Catalog 1.0
Upgrade and Migration Guide
This page provides step-wise instructions, troubleshooting tips, best practices recommendations, and offers tools for a successful upgrade.
Note:
- Available for Lightning and Classic.
Upgrade Process
The entire upgrade process can be divided into two main steps:
- Install package
- Migrate preferences
Installing Package
Upgrading the package has certain implications that are detailed in the release notes. Refer the detailed release notes to learn what has changed.
Note It is highly recommended that you perform the upgrade during non-business hours.
Prerequisites
Before you start with the upgrade, ensure that the following requirements are met:
- Minimum requirement: Version 1.36
- User role: System administrator
- Enable improved caching of the schema
Ensure Critical Update
Upgrading the package improves Chargebee's critical internal systems that define and cache org schema including standard objects, custom objects and their fields. It also resolves known issues with version-specific object and field handling such as "Unable to progress ahead of opportunity page". Therefore, in order to avoid running into potential errors, ensure that the critical update "Enable improved caching of org schema" is enabled for your Salesforce org.
To enable the critical update, follow these steps:
- Click Setup>Company Setting>Critical Updates
- Look for Enable improved caching of org schema on the critical update page.
- If not activated, click Get Started.
- If the setting is not already activated, click Activate.
Upgrade Steps
Note:
It is highly recommended that you do the following before performing the upgrade:
-
Backup your Data Perform a full data backup if possible and turn off any triggers temporarily until the upgrade and migration completes.
-
Test the new upgrades on your Sandbox Test out the new version on your sandbox (which would also be on an older version) before installing it on the live site. The integration does not support downgrading to the older version of the Chargebee app.
-
Turn off auto-sync
The upgrade steps are explained below:
-
Login to Salesforce.org
-
Reach out to Chargebee support to obtain the new package link. The link initiates the upgrade process which is the same as the first time installation. See how to install for the relevant user profiles.
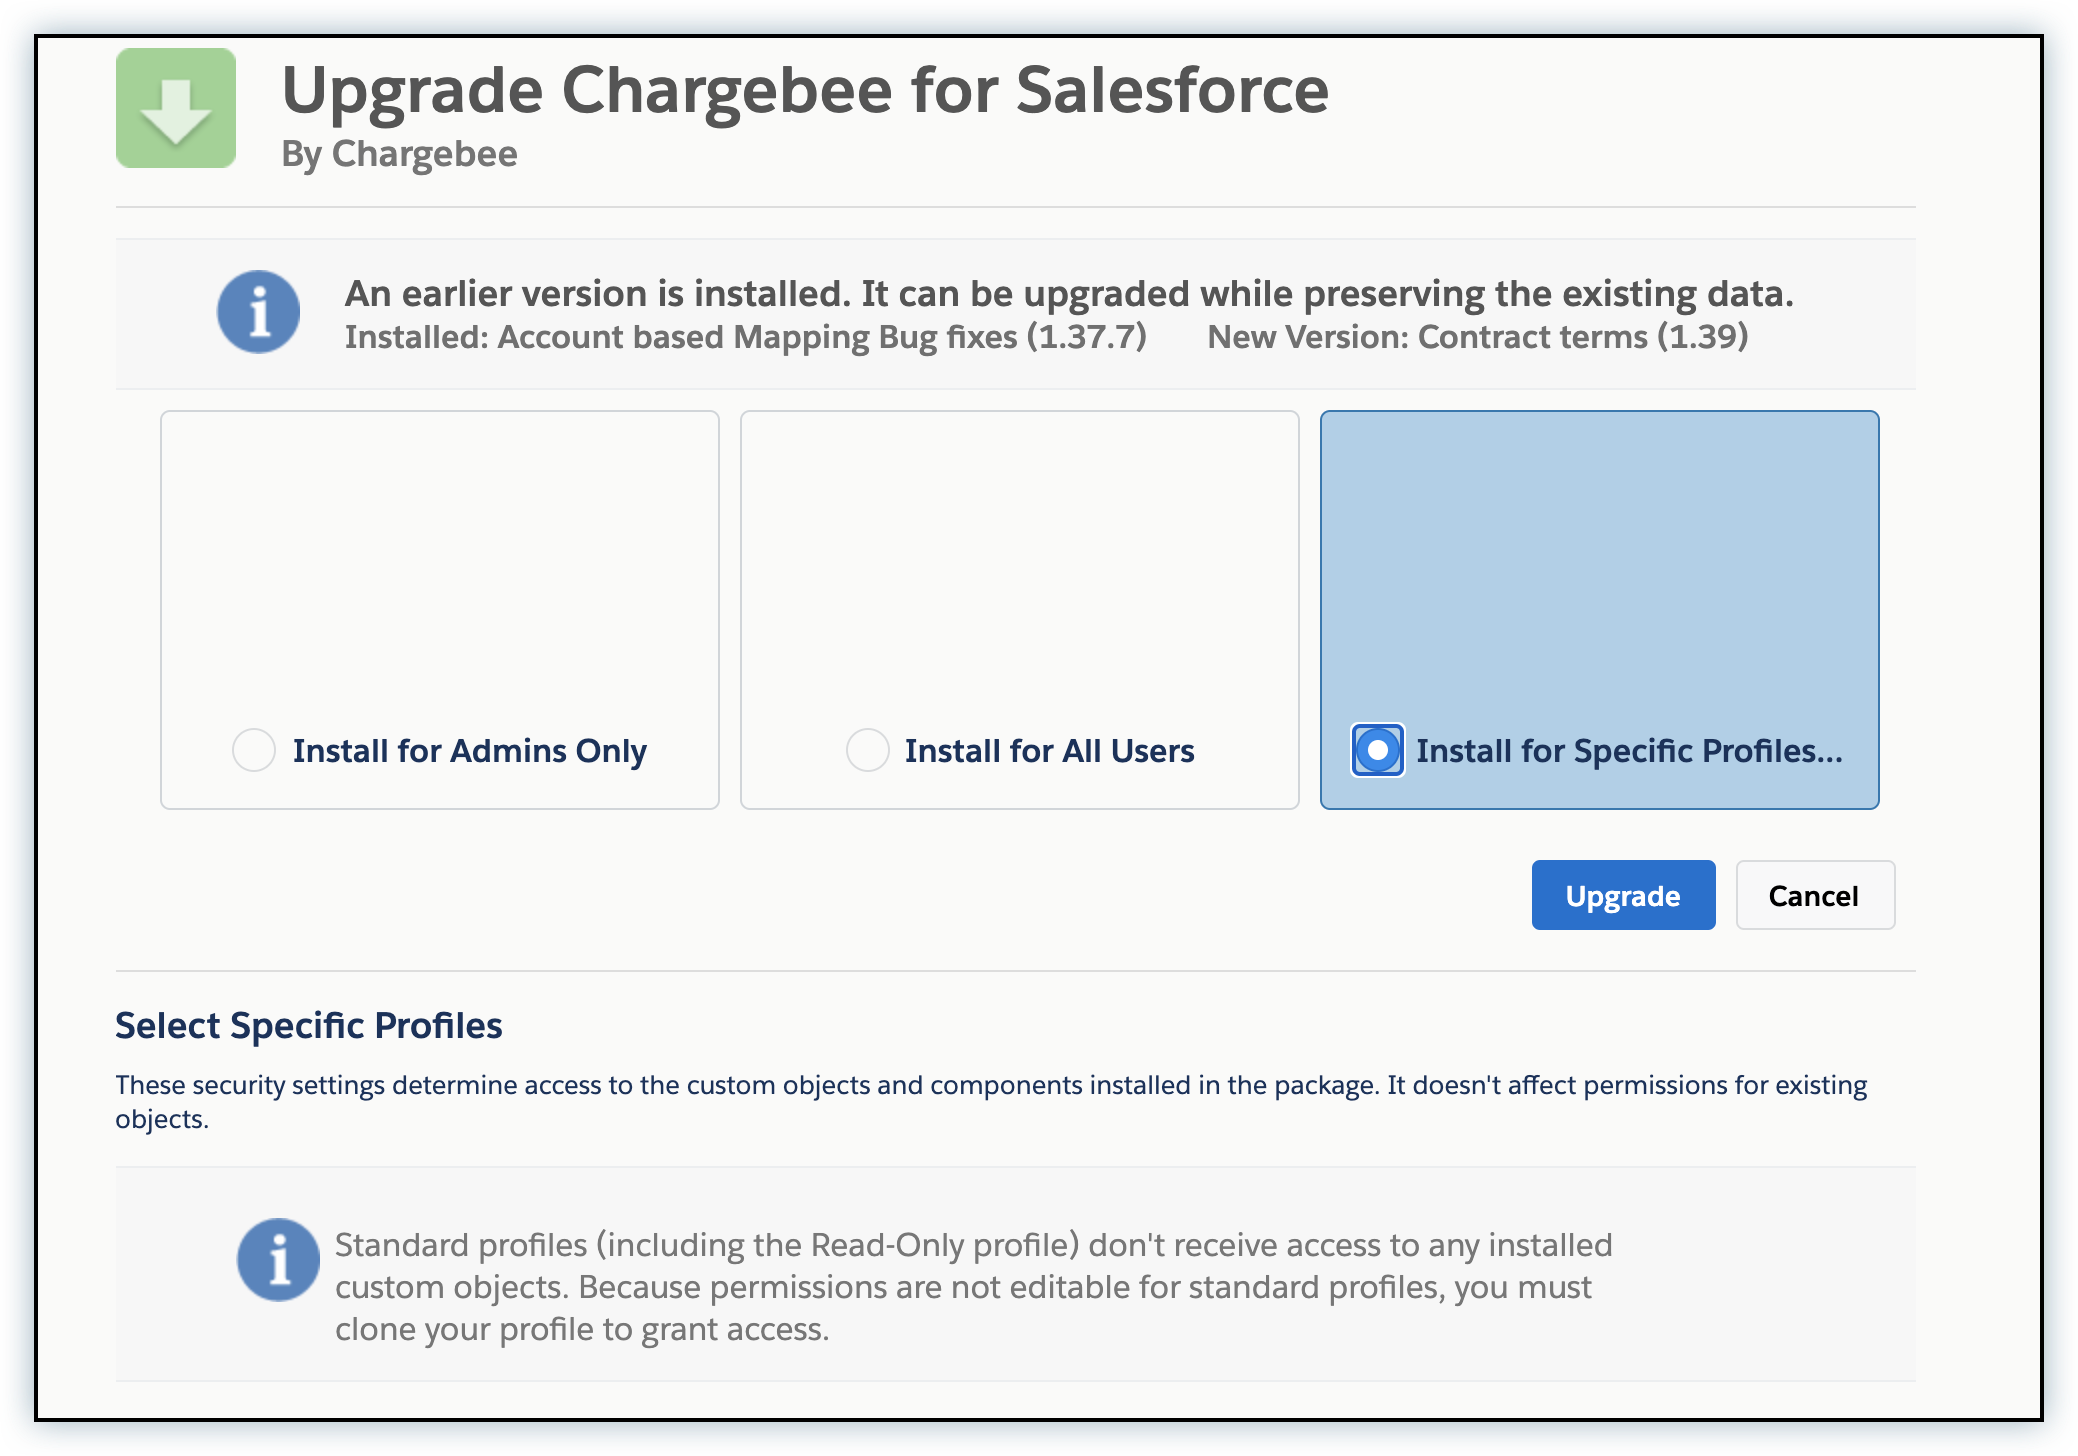
After the upgrade is successful, proceed to the next step.
Migrating Your Data
Note:
Estimated time required: 1-2 hours
Chargebee carefully moves your site settings, field mapping, sync preferences, configurations and data from the old version instead of manually migrating the settings. Once the settings have been migrated, data from Chargebee is fully resynchronized into Salesforce. This includes setup data (product catalog) and transactional data such as customers, subscriptions, invoices and so on.
Note:
Ensure that your sites are added as a remote site in the Remote Site Settings page.
User Permission
To perform the migration, the user who had connected the integration and is managing it needs to be assigned with the ChargebeeForSalesforceAdminUser permission set. Learn how to assign permission set to a user
Steps
-
On Salesforce dashboard, go to Chargebee Integration, from the app switcher. This redirects you to migration screen.
-
Click on Start Migration.
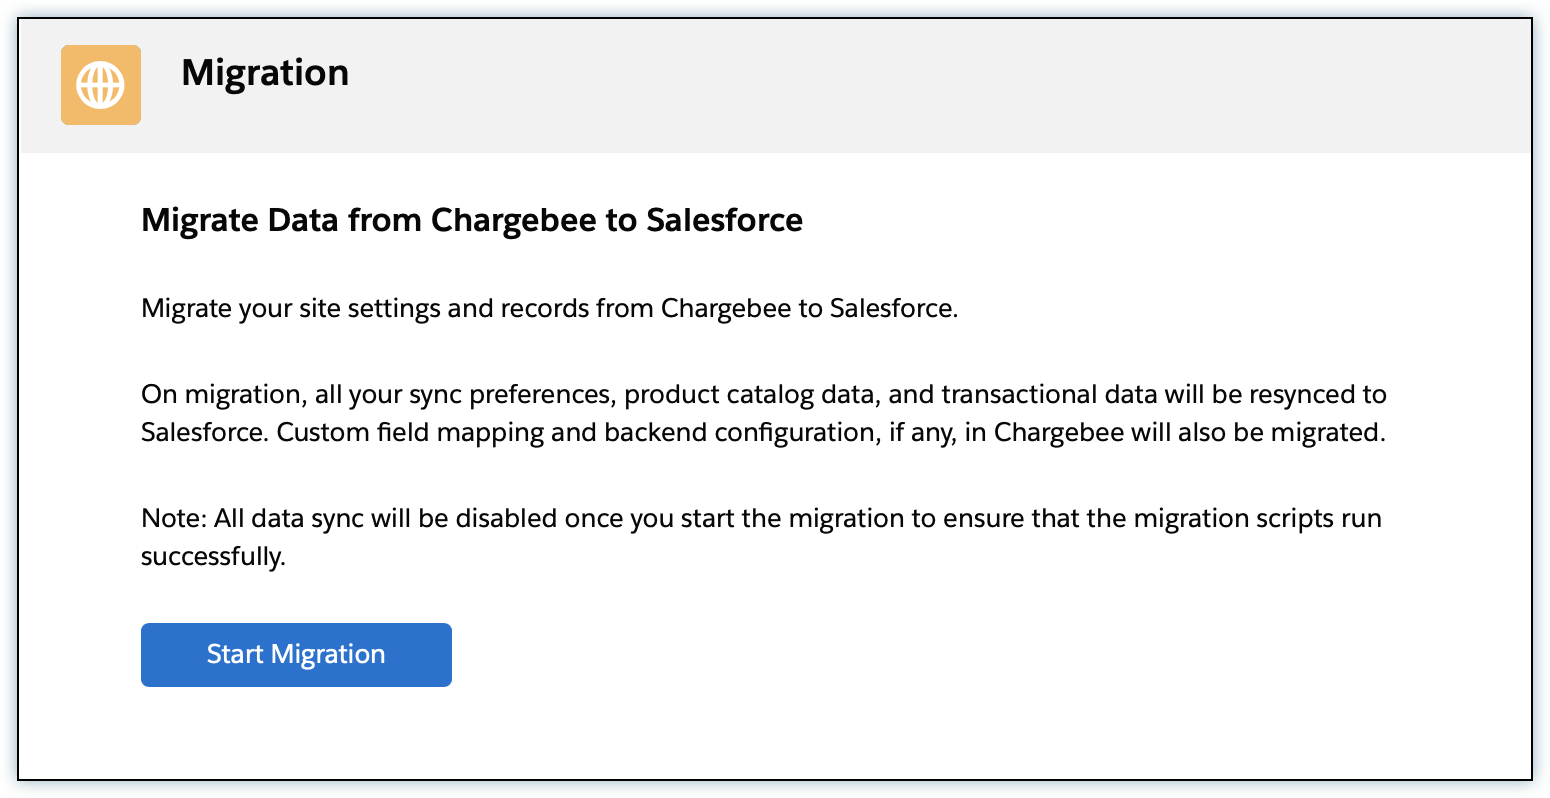
Once your settings are migrated for your package, you can monitor the sync health from the dashboard.
Note:
Turning on the auto-sync It is highly recommended that you review all the sync rules for errors in the Chargebee Settings tab before you enable auto-sync. If all the sync errors are reviewed and resolved, and you are satisfied with the migration, you may turn on the Enable auto sync.
To enable auto sync:
-
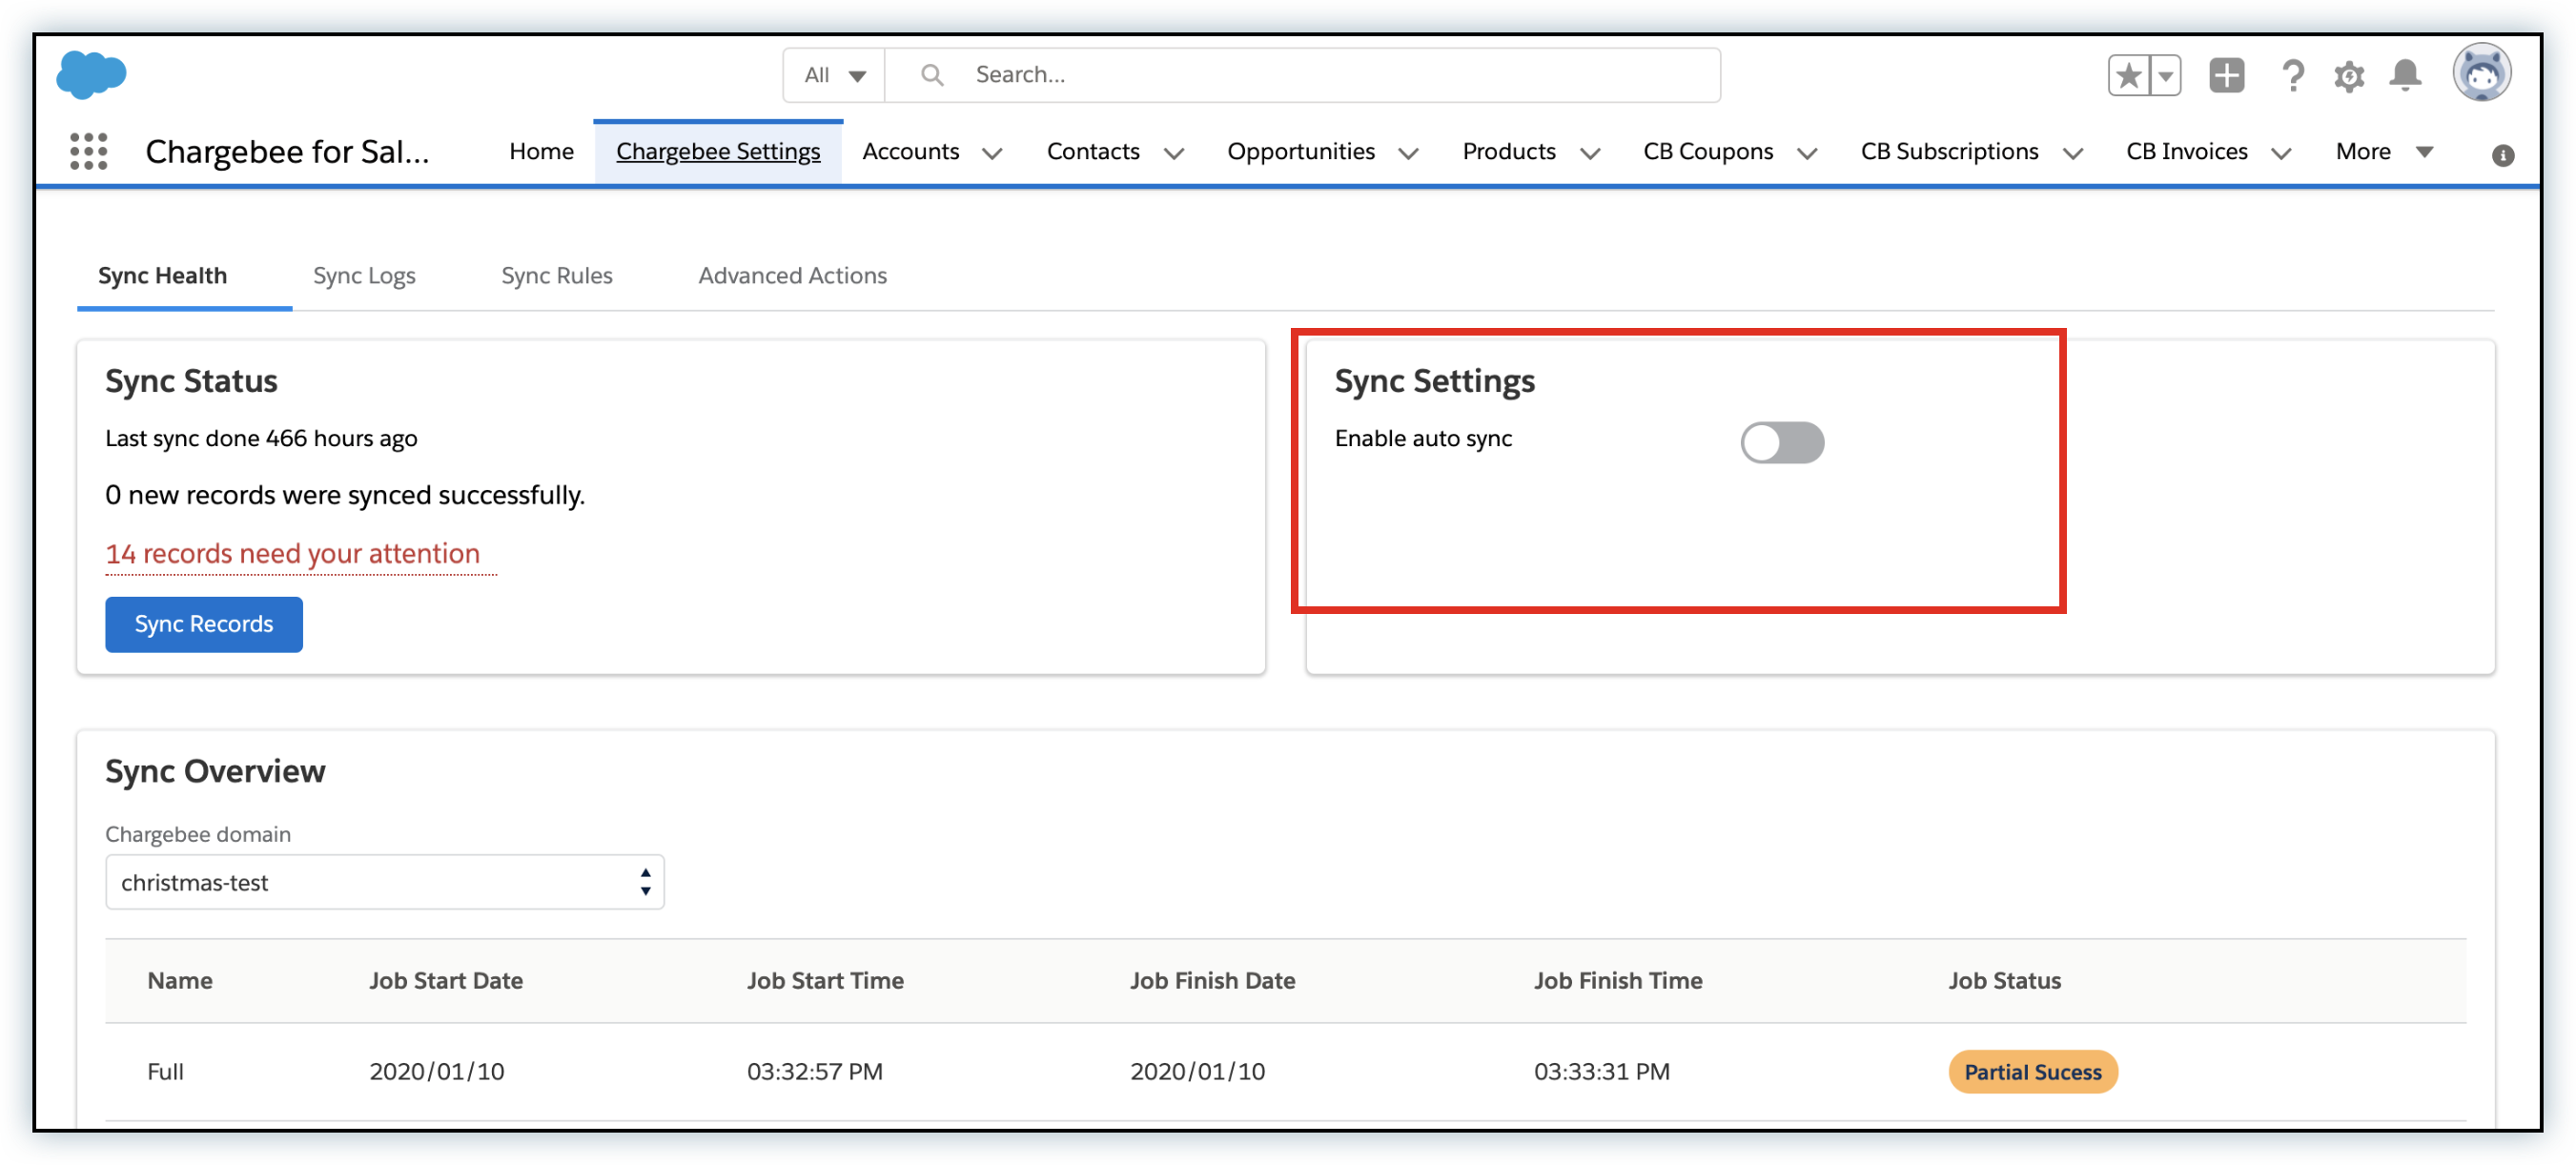
Navigate to Chargebee for Salesforce app > Chargebee Integration tab.
-
Click Sync health.
-
Under the Sync Settings card, turn on the Enable auto sync option.
If the migration is still failing for any reason, reach out to Chargebee Support before turning on auto sync. (You can include a screenshot of the error screen for better assistance from the team)
Reach out to support
Though the Salesforce for Chargebee app provides detailed description of the errors and their resolutions, if you are having trouble upgrading, reach out to support. You may also need to grant access to the support team in order for them to guide you better.
Steps to grant access to support
In Salesforce Lightning
-
Click on the profile avatar and go to Settings.
-
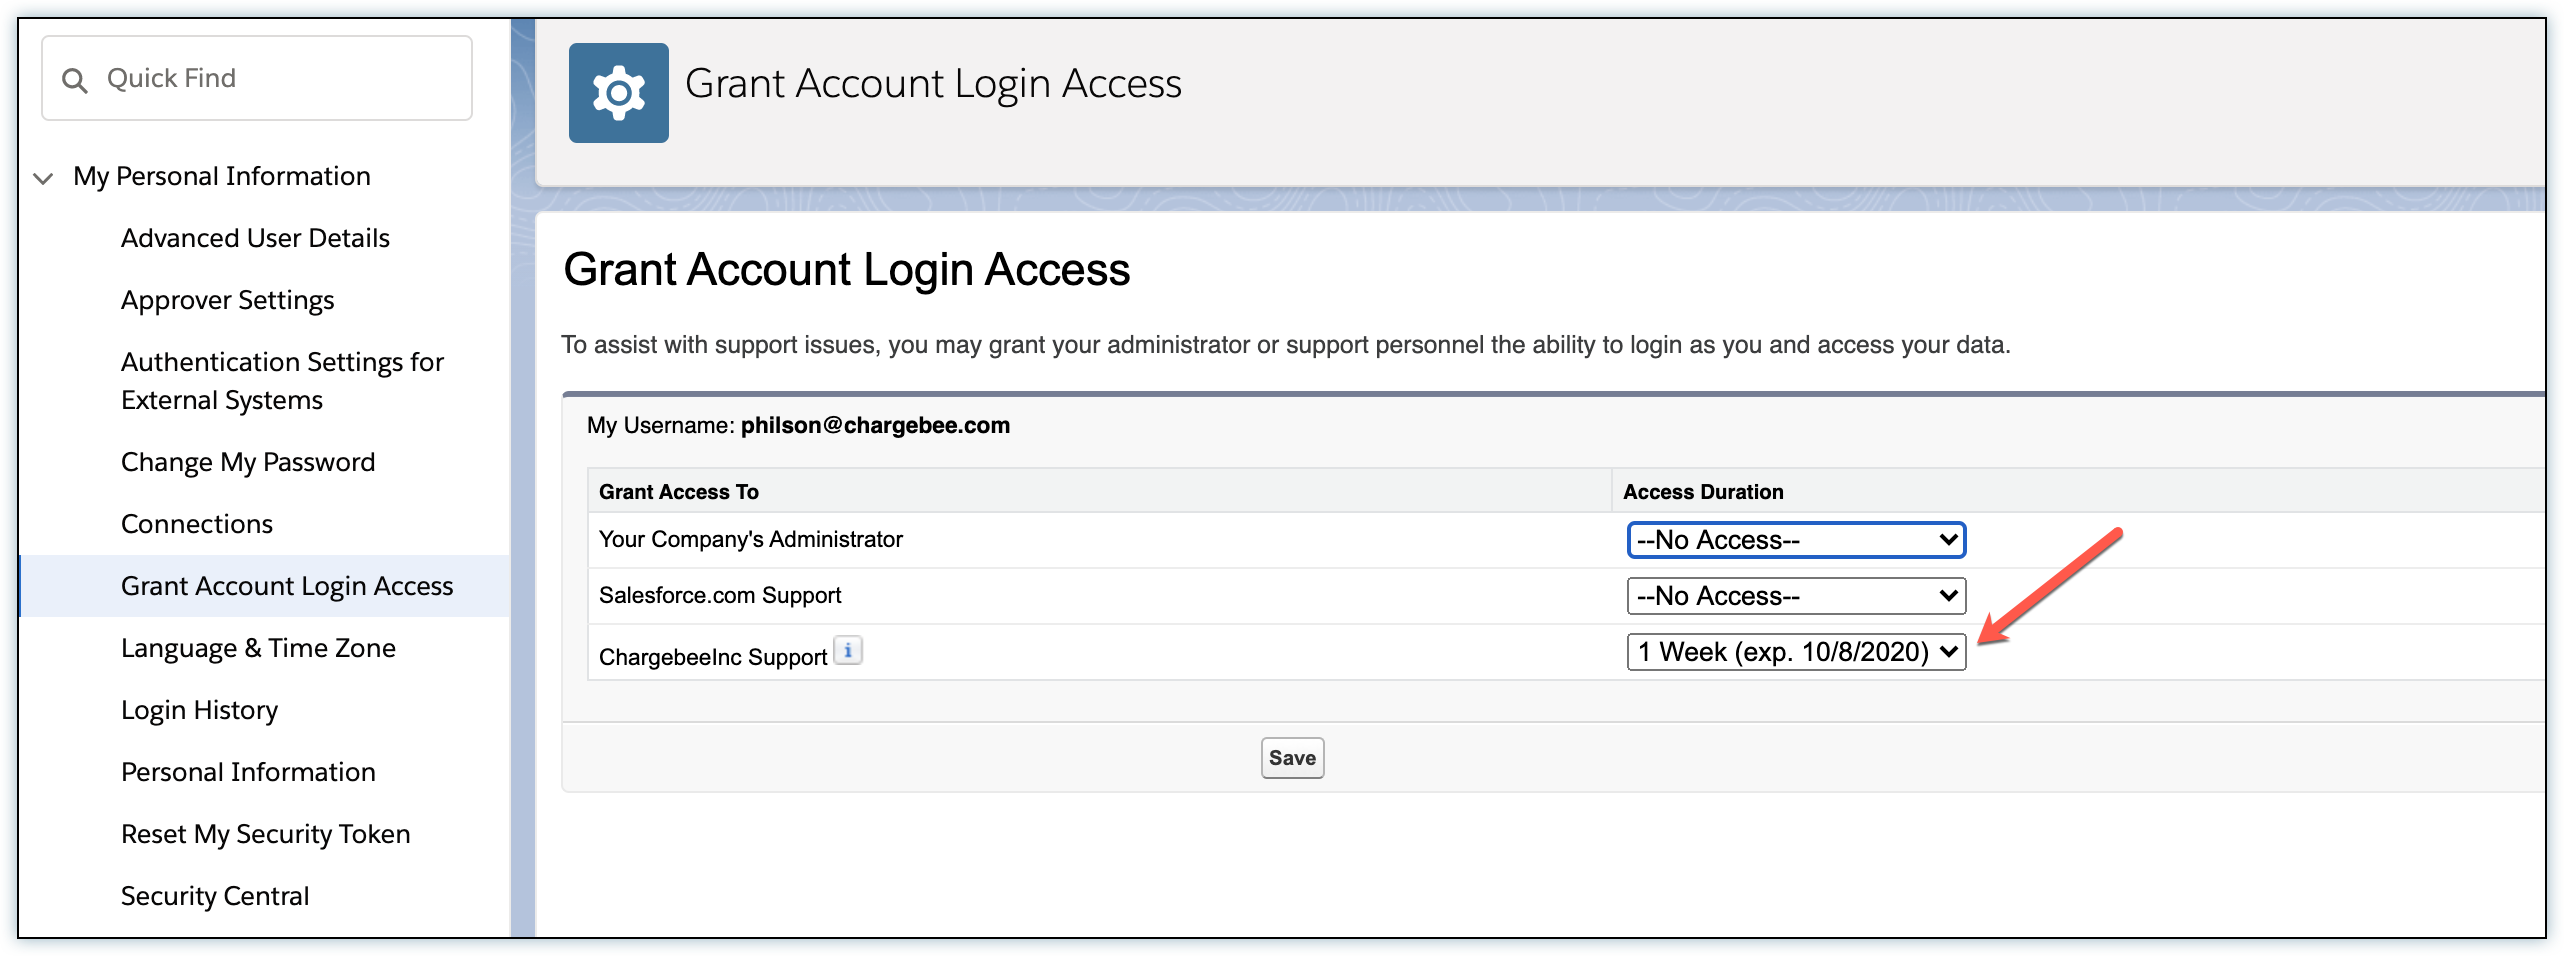
Search for Grant Login Access from the search box.
-
Set the Access Duration to 3-7 days for ChargebeeInc Support.
-
Click Save.
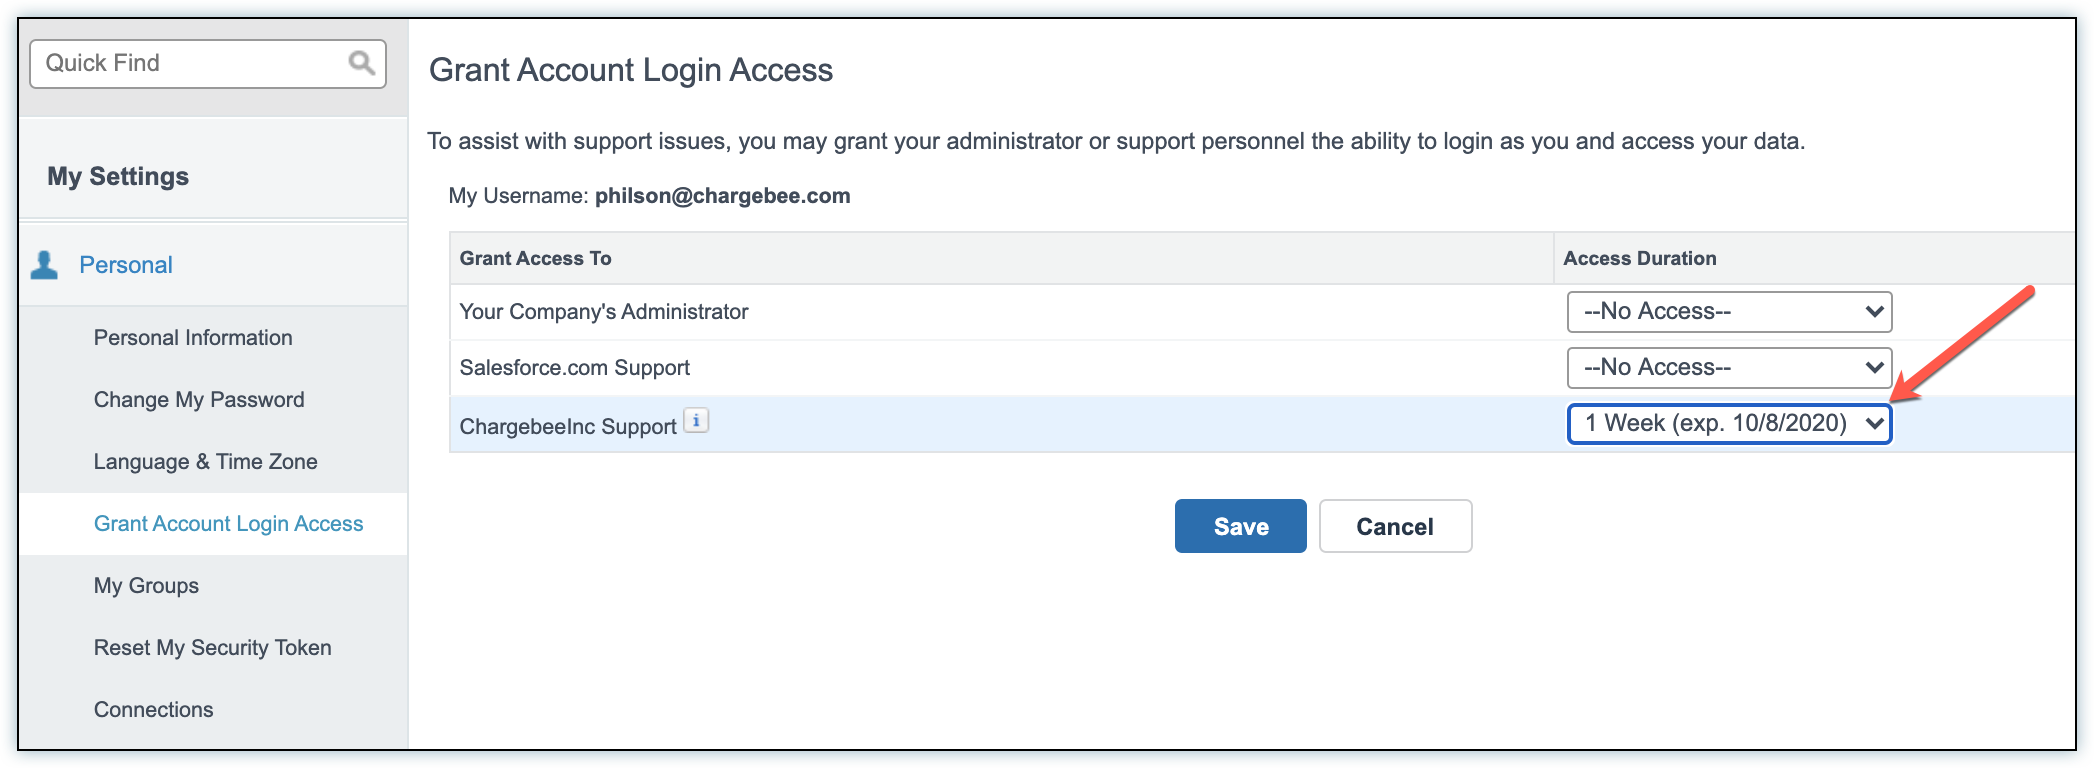
In Salesforce Classic
-
Click on the profile name.
-
Click on My settings → Personal
-
Set the Access Duration to 3-7 day for ChargebeeInc Support.
-
Click on Save.
See also
Other pages for Salesforce:
Was this article helpful?