AvaTax for Communications
AvaTax for Communications integration is exclusively built for communication service providers offering VoIP, IoT or Streaming services, and a few other telecom services. Integrate your AvaTax for Communications account with Chargebee and have communication taxes applied on your invoices automatically.
Note:
- To avoid unnecessary API calls to the tax system for zero-value invoices, and to optimize your usage and reduce associated fees. Reach out to support@chargebee.com for assistance.
- To know more about the availability of this feature, visit our plans and pricing page.
This integration has the following limitations:
- The AvaTax for Communications integration is currently limited to clients in telecom space such as those offering over-the-top (OTT) media services via the internet(the streaming media services), and other telecom services.
- Only T/S (Transaction/Service) pairs that require input type Amount are currently supported in the AvaTax for Communications integration. If you're looking for other T/S pairs, contact support to add your request to the feature roadmap.
- This integration does not support inclusive pricing.
- The hosted pages theme "Rhapsody" does not support Avalara integration.
- When Avalara integration has been enabled (or disabled), the next billing amount is not recalculated for the existing subscriptions until the subscription is renewed or updated. This is to avoid the sudden surge of API calls that would be made to Avalara since Avalara charges are based on the number of API calls.
- Enabling Invoice amount rounding in Chargebee will result in a total amount mismatch between Avalara and Chargebee.
- While using third-party integrations for taxation in the EU region, note that the value for ‘isTaxed' field will be false in the invoices(unlike how it would be true with manual taxation) for reverse charge scenario, even when reverse charges are applied in the invoice as applicable.
Prerequisites
Chargebee
1. Organization Address
Avalara requires your business' address to calculate tax for an invoice. The Organization Address you provide in your Chargebee site will be used by Avalara for this purpose, and will also be stored as the Origin Address in Avalara. In order to use the Avalara integration, the Organization Address in Chargebee should have at least the Country, State, and Postal Code filled.
The Organization Address can be configured for your site under Settings > Configure Chargebee > Business Profile.
2. Address for Tax Determination
Chargebee will use your customer's shipping address to calculate tax. If the shipping address is unavailable, then the billing address would be used for the same.
Note:
If you're using Hosted Pages, ensure that:
- The Shipping/Billing Address field has been enabled. This can be done under Settings > Configure Chargebee > Checkout & Portal > Fields.
- The Zip Code, Country, and State fields are made mandatory in the hosted pages.
3. Plan and Addon Details
Given that the taxes are subject to each type of charges that are added in an invoice, it is required of you to add some additional details about your Plans(active and archived) and Addons for Avalara to calculate tax accordingly. Right after you configure the Avalara integration in your Chargebee site, you will be prompted to fill in some additional details about your Plans(active and archived) and Addons such as Sale type, Transaction type and Service type.
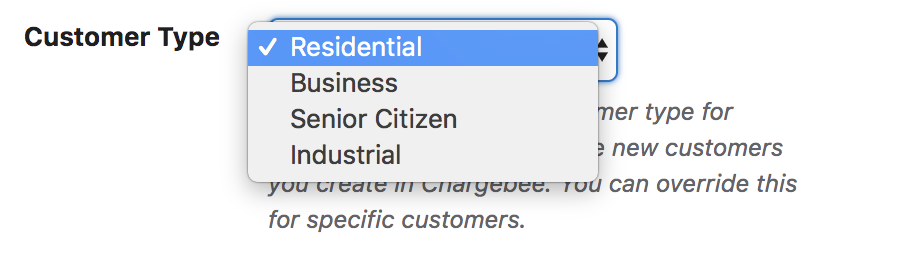
4. Customer Type
The type of your customer or buyer is yet another crucial information that is required for tax calculation by Avalara. You can choose from the four types such as
- Residential - When the purchase is made by a customer for home use
- Business - When the purchase is made at a place of business
- Senior Citizen - When the purchase is made by a customer who meets the jurisdiction requirements to be considered a senior citizen and qualifies for senior citizen tax breaks
- Industrial - When the purchase is made by an industrial business
Taxes are unique to each of these customer types which is why it is important to specify the same for accurate calculation. Knowing which kind of buyers you majorly deal with for your business, you can set a default customer type for all customer records that are created in your Chargebee site while setting up the integration. However, you can override this default option from the individual customer records whenever necessary.
Avalara
1. Nexus Jurisdictions
When your business has 'nexus' in a tax jurisdiction, it has a physical presence and connection in that jurisdiction and is thereby obligated to collect and remit taxes to the State. Configure nexus jurisdictions in your Avalara AvaTax account to let Avalara know where to tax. Country, regional, and local jurisdictions can be added for this purpose. While configuring nexus jurisdictions, you will be prompted to add the 'begin' and 'end' dates. Avalara requires these dates to determine when to process transactions.
Read more about nexus jurisdictions.
Configuration
To have Avalara apply taxes on your Chargebee Invoices automatically involves 4 major steps.
Step 1: Connecting Avalara account with your Chargebee site
To integrate Avalara with your Chargebee site,
- Navigate to Apps > Go to Marketplace > Tax Management > Avalara.
- In the Avalara configuration page, if you have an Avalara account, click Get Started or if you don't have one already, click Sign up to create your Avalara account and continue.
- Choose the AvaTax Type to be AvaTax for Communications.
- Enter your Avalara credentials - Username, Password, Client ID and Client Profile ID, and click Connect.
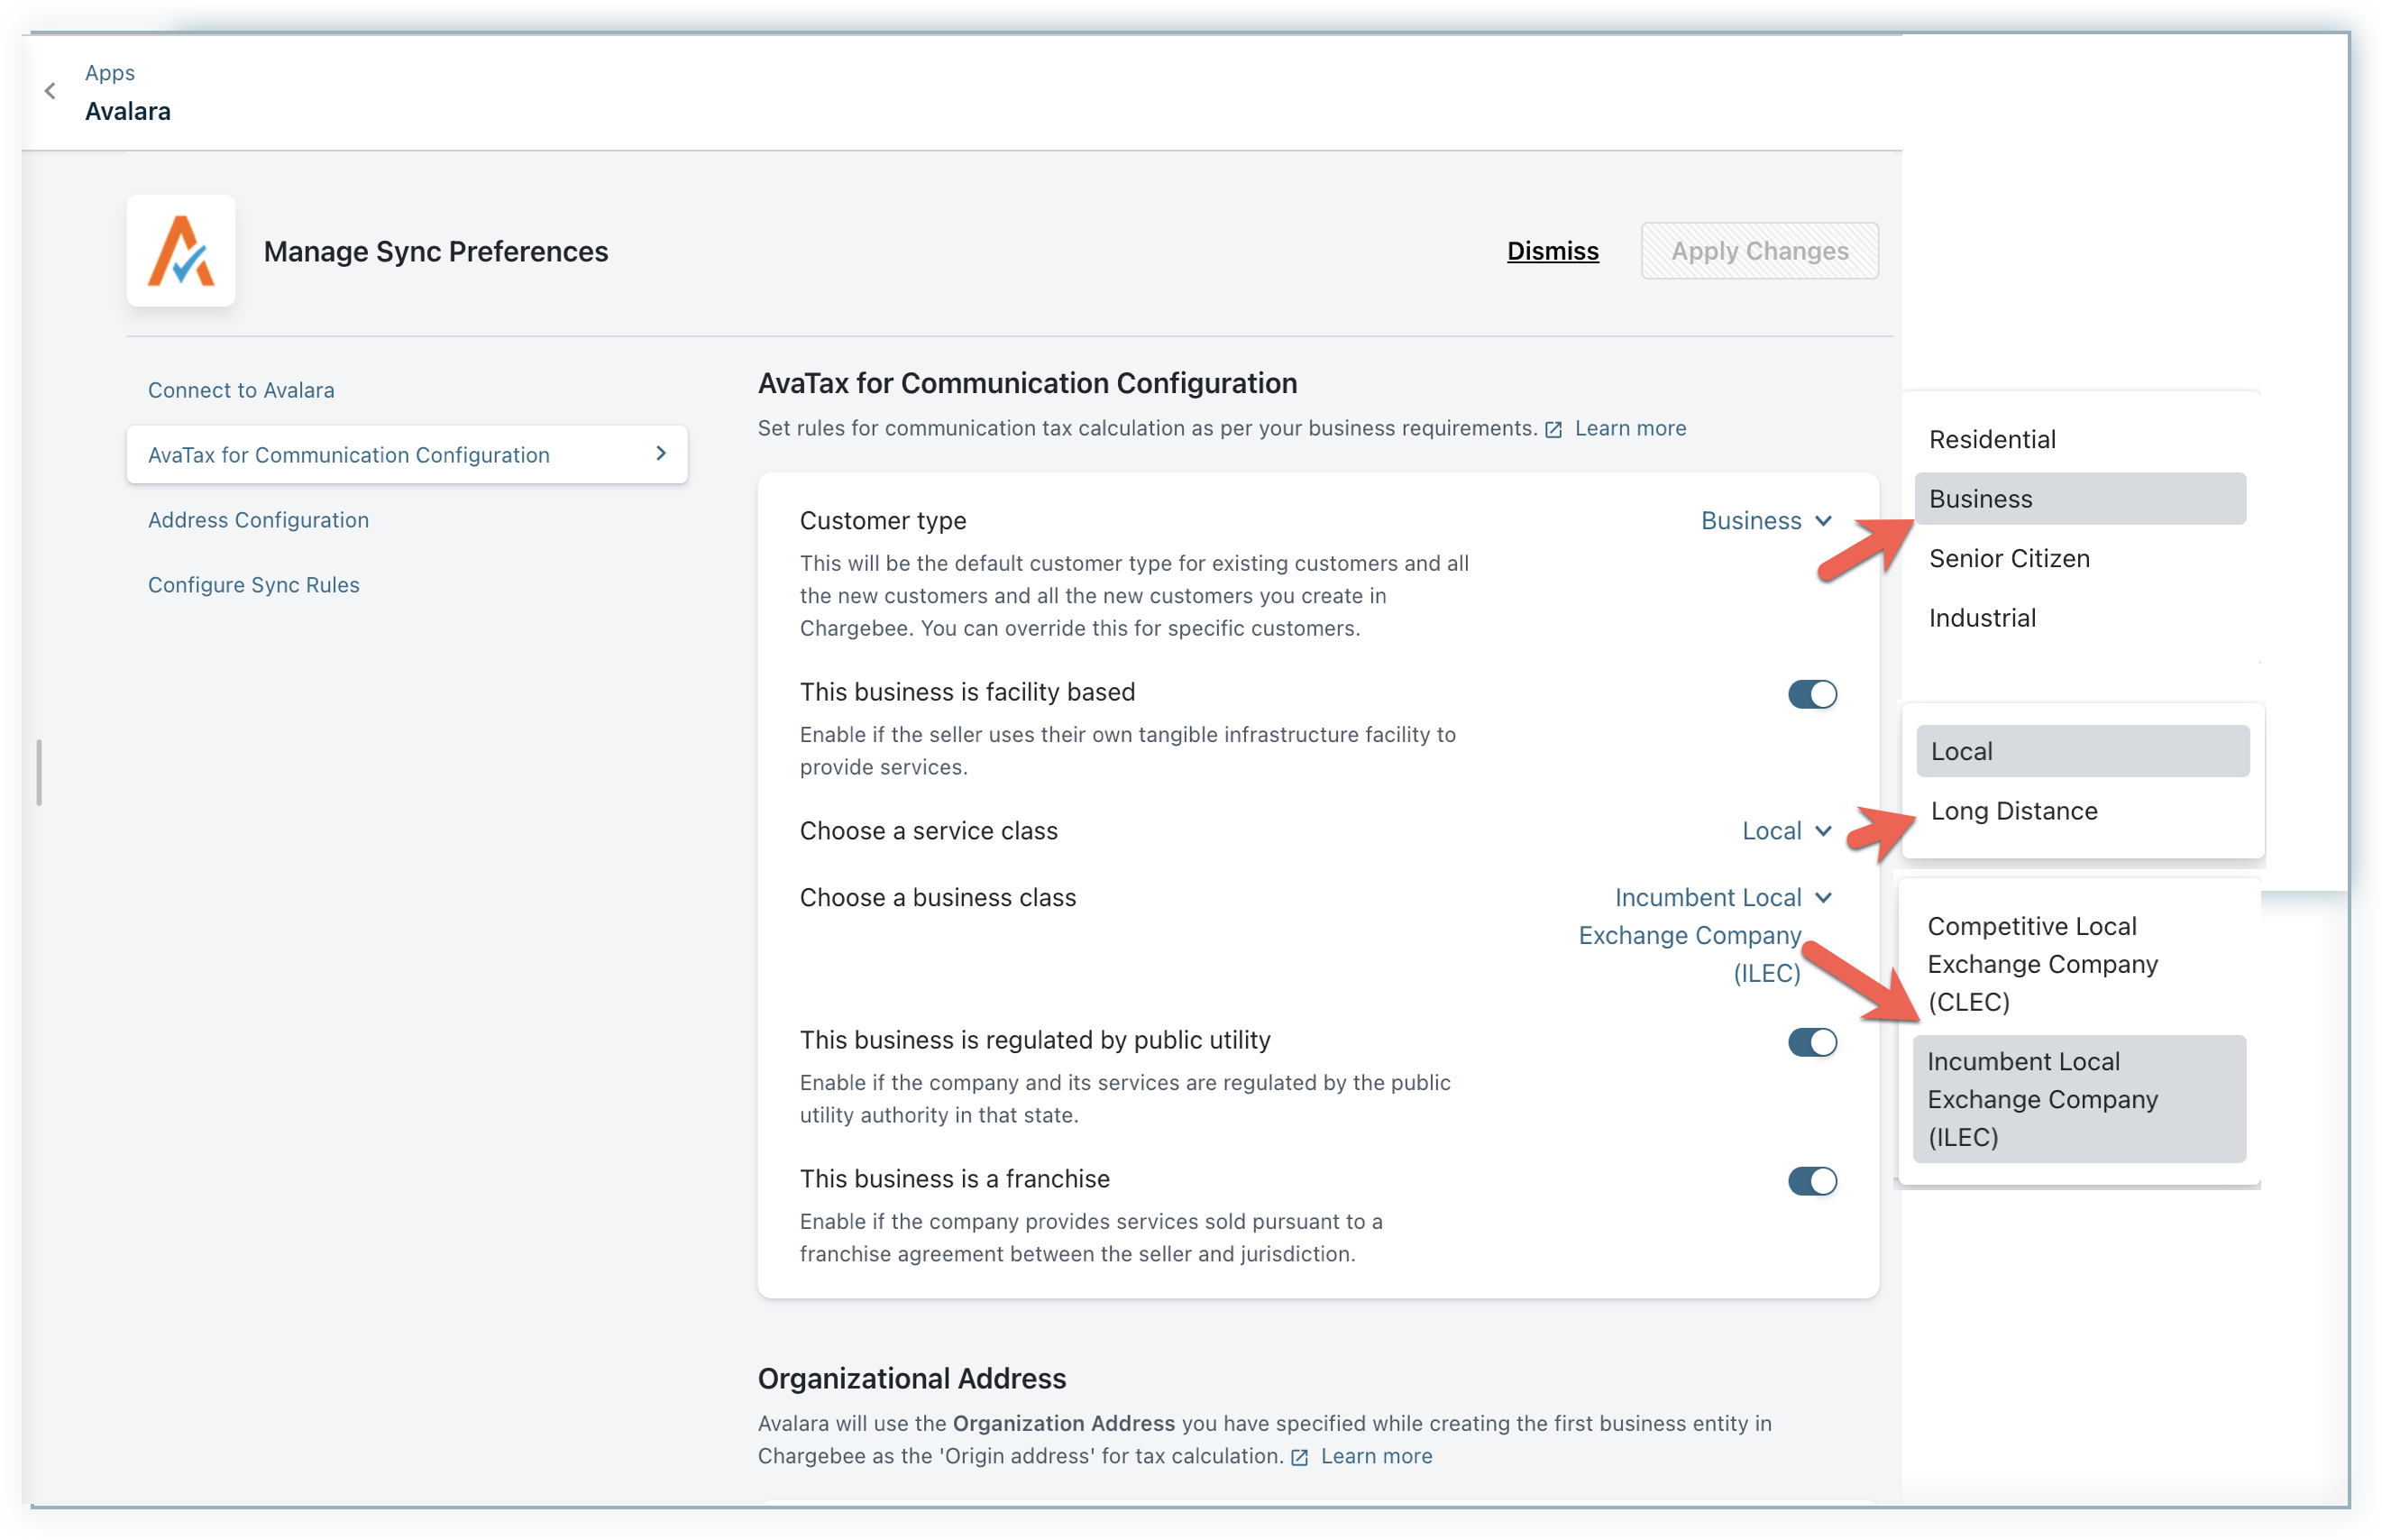
- Under AvaTax for Communications Configuration,
- choose a default Customer Type for all your existing customers and new customers that you create in Chargebee. You can override this default option from the individual customer records.
- enable Facilities-based, if your business controls and sells over tangible facilities. In some jurisdictions, tax outcomes vary depending on whether the service is delivered over infrastructure controlled by the seller.
- in Service Class, select
- Local - if you offer services with over 50% of the gross business activities in local service revenue.
- Long distance - if you offer services with over 50% of the gross business activities in long distance revenue.
- in Business Class, specify whether you are
- Competitive Local Exchange Company - selling services competing with an incumbent provider, or;
- Incumbent Local Exchange Company - selling services over company-owned lines and equipments.
- enable This business is regulated by Public Utility if your company and services are regulated by the regulatory commission in the state of the service.
- enable This business is a Franchise, if your company sells services sold pursuant to a franchisee agreement between the seller and the jurisdiction.
Click Proceed.
- Under Address Configuration, enter/confirm your organization address, without which you will not be able to proceed. Chargebee will populate the address that is specified in your settings, you can change this if you'd like to or click Proceed.
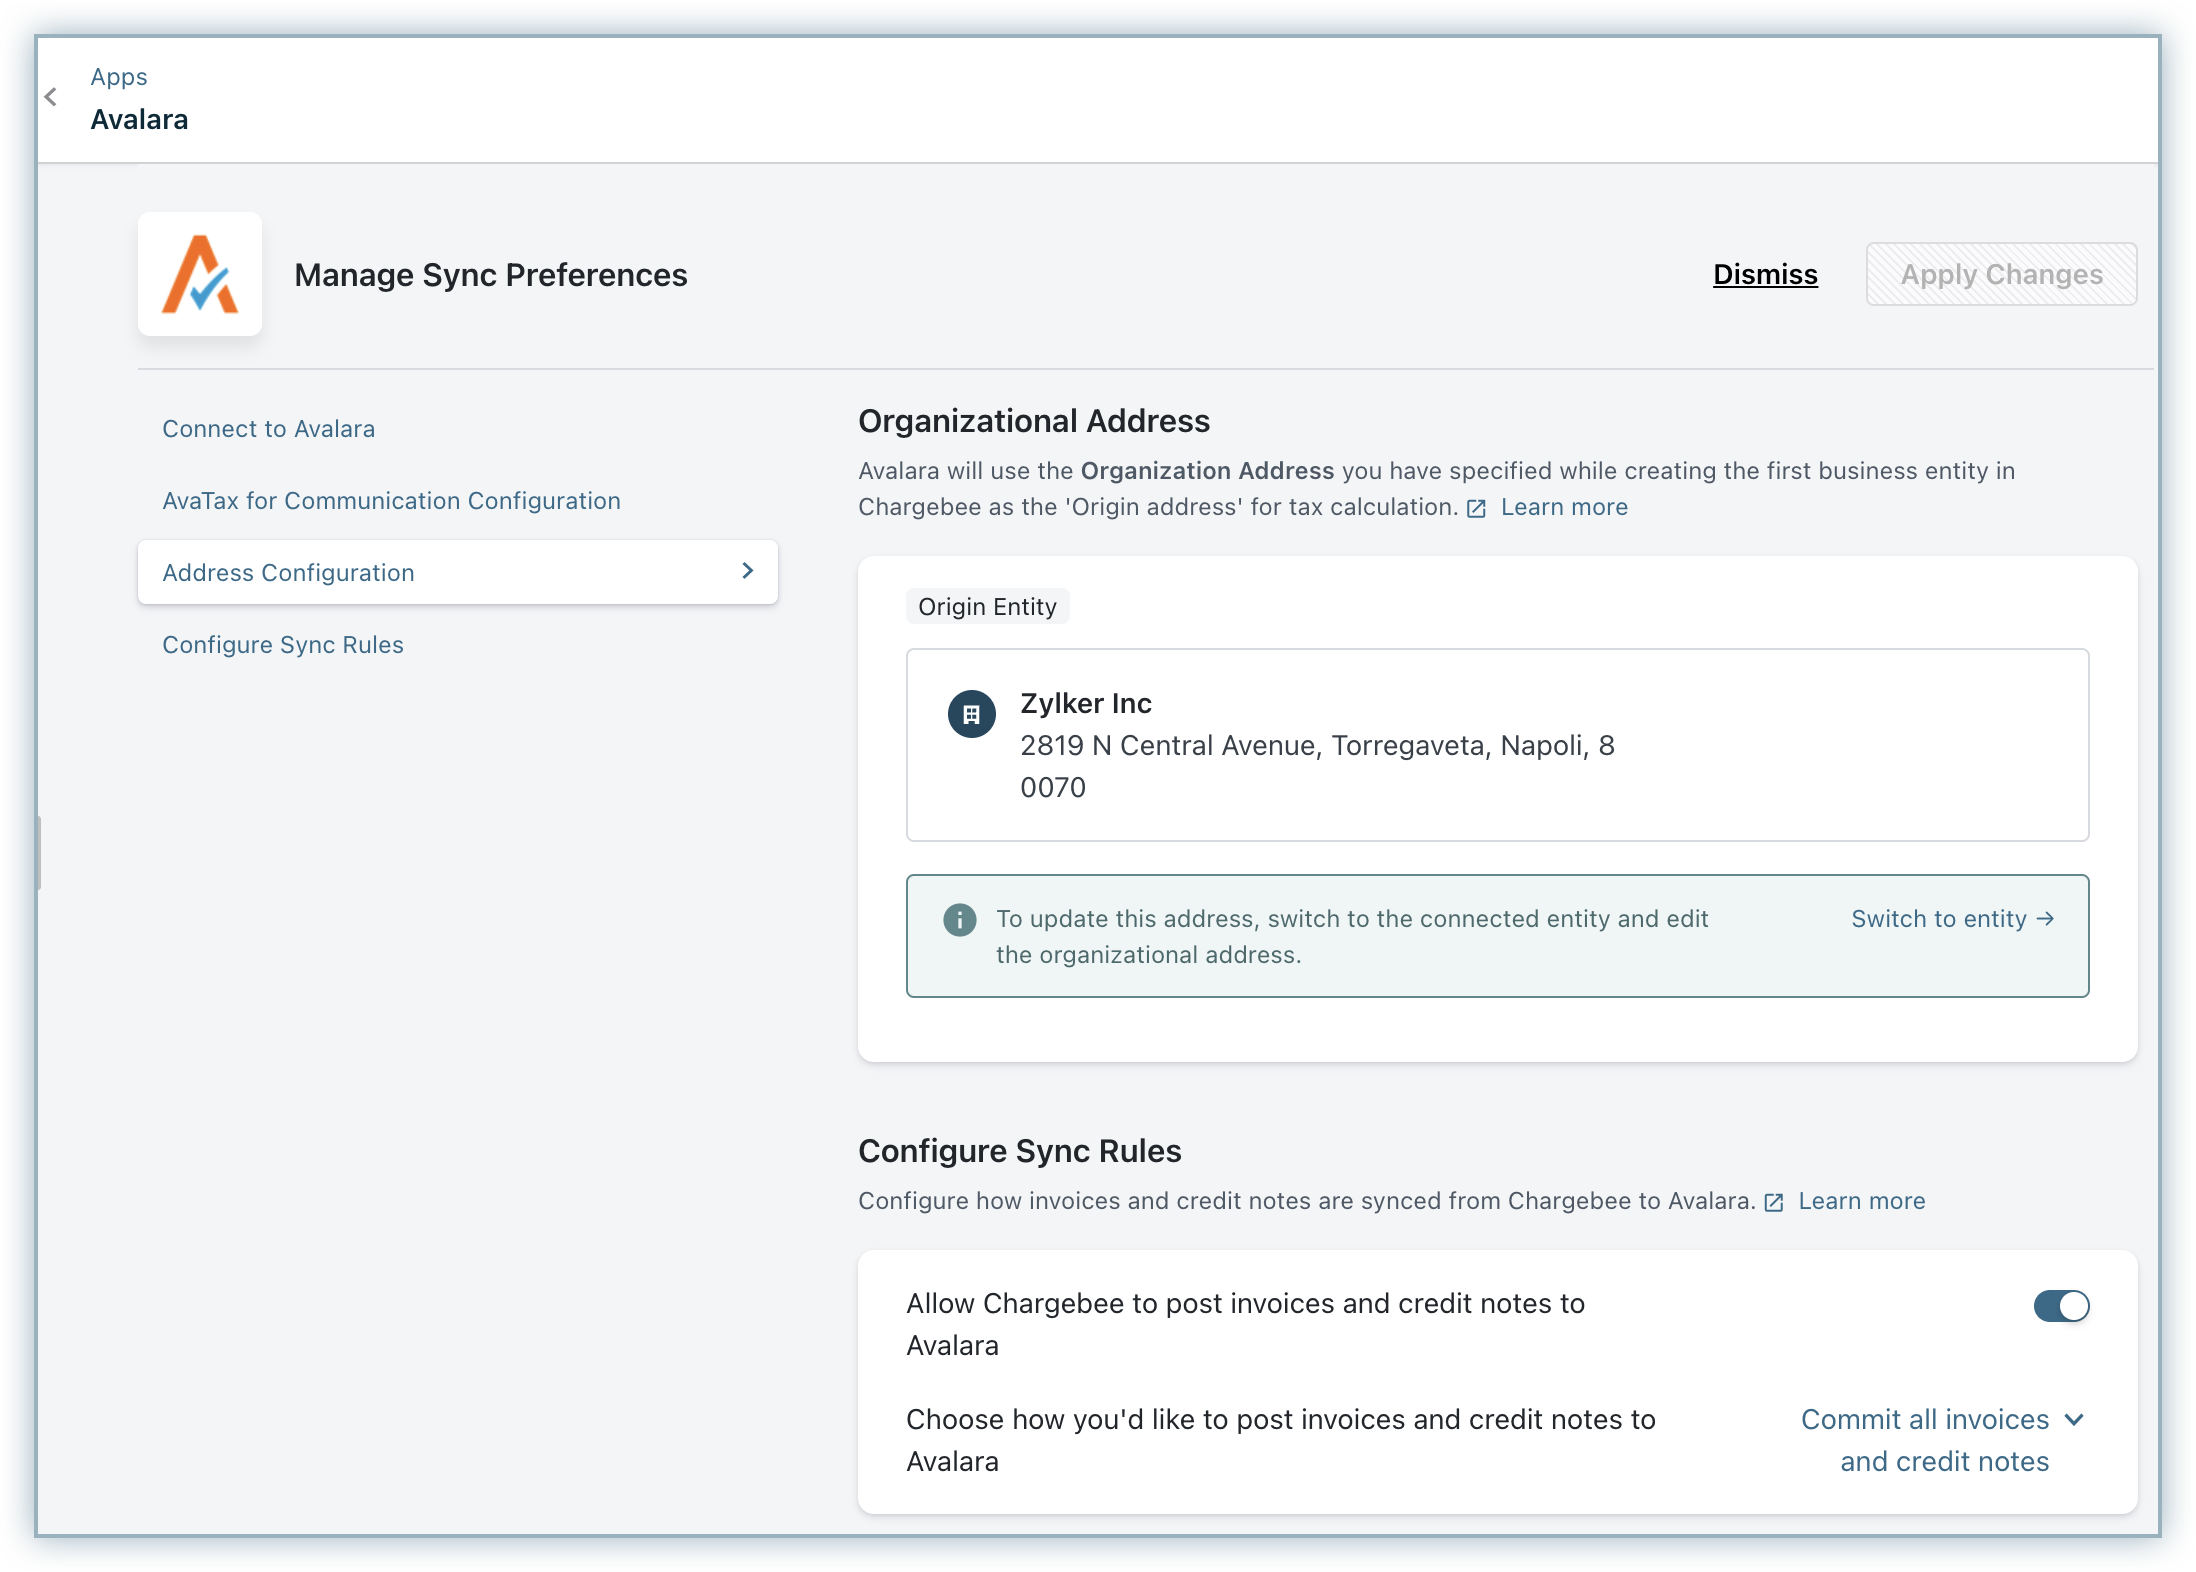
- Lastly under Configure Sync Rules you can,
- turn the toggle on to allow Chargebee to post invoices and credit notes to Avalara.
- choose how you'd want the invoices and credit notes posted to Avalara. You
can choose to
- commit all invoices and credit notes - all your invoices and credit notes will be sent to Avalara as Committed.
- commit only paid invoices and adjusted/refunded credit notes - only paid invoices and adjusted/refunded credit notes will be sent to Avalara as 'Committed'. Remaining invoices will be sent as Uncommitted.
- don't commit - all your invoices and credit notes will be sent to Avalara as Uncommitted.
Learn more about how this works in Avalara.
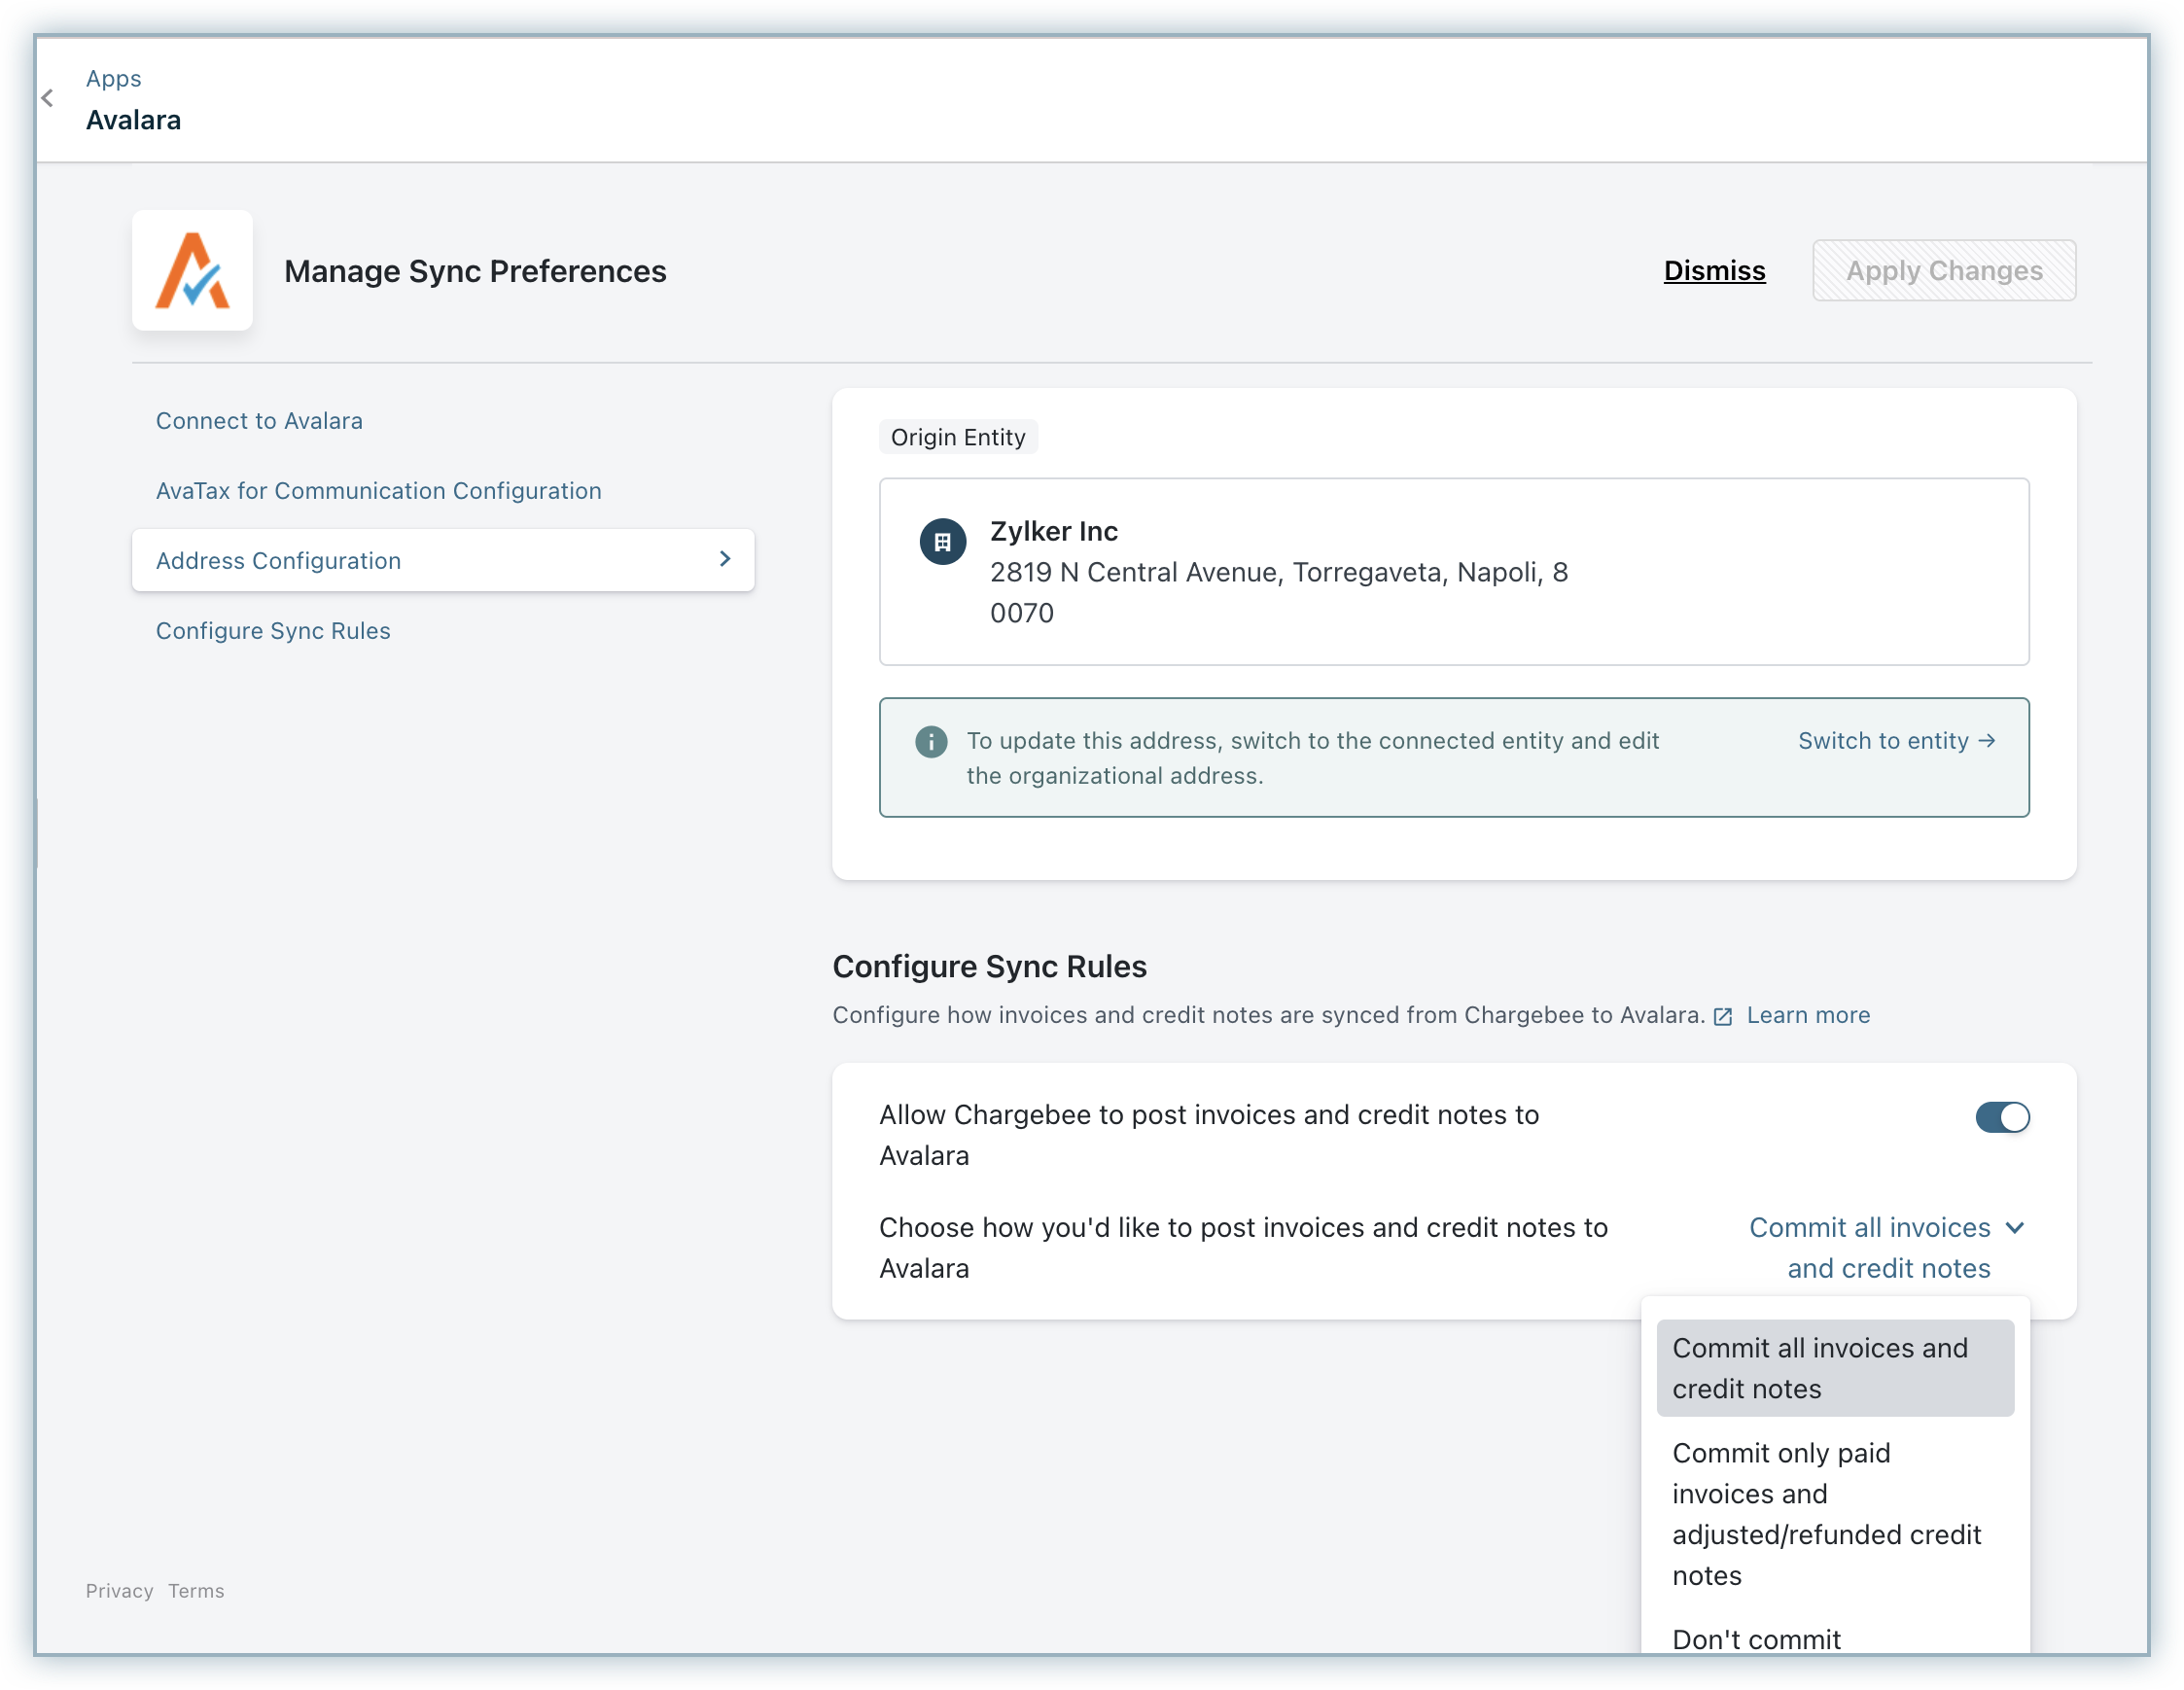
Once you are done with the settings, click Proceed.
Note:
- Ensure that the Invoice/Credit Note numbers of the documents in Chargebee that are yet to be committed, are different from the numbers used for documents that have already been committed in Avalara.
- You can make changes to the integration preferences at any point of time by going to Apps > Go to Marketplace > Tax Management > Avalara > Manage and clicking on Manage Preferences in the Avalara integration page.
Step 2: Configuring Additional details for your Plans and Addons
Avalara uses certain critical information about your plans(active and archived) and addons to calculate tax promptly. So right after you configure the AvaTax for Communications integration, go to your respective Plan and click Edit Plan. You will notice an additional section for Avalara Tax with the following three attributes :
- Sale Type
- Transaction Type
- Service Type
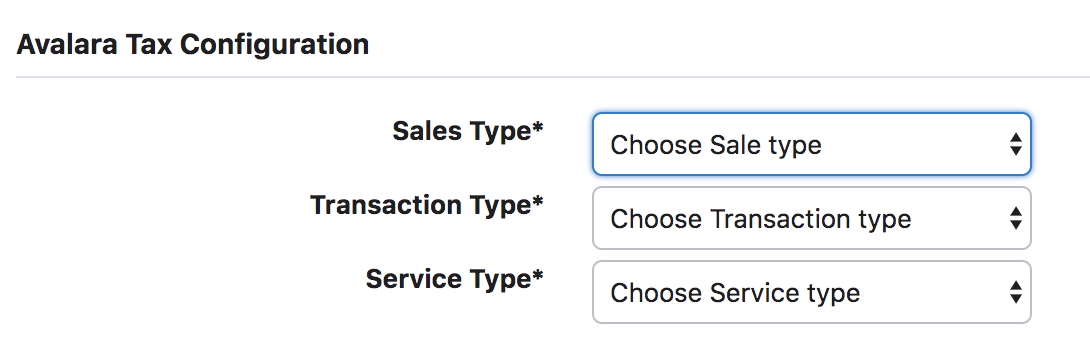
Choose the appropriate options based on your business and the respective plan or addon, and once you are done, hit Update Plan.
When you create new plans or add charges to a customer record after configuring the Avalara integration, these attributes become mandatory fields without which you can not save the plan or add the charge.
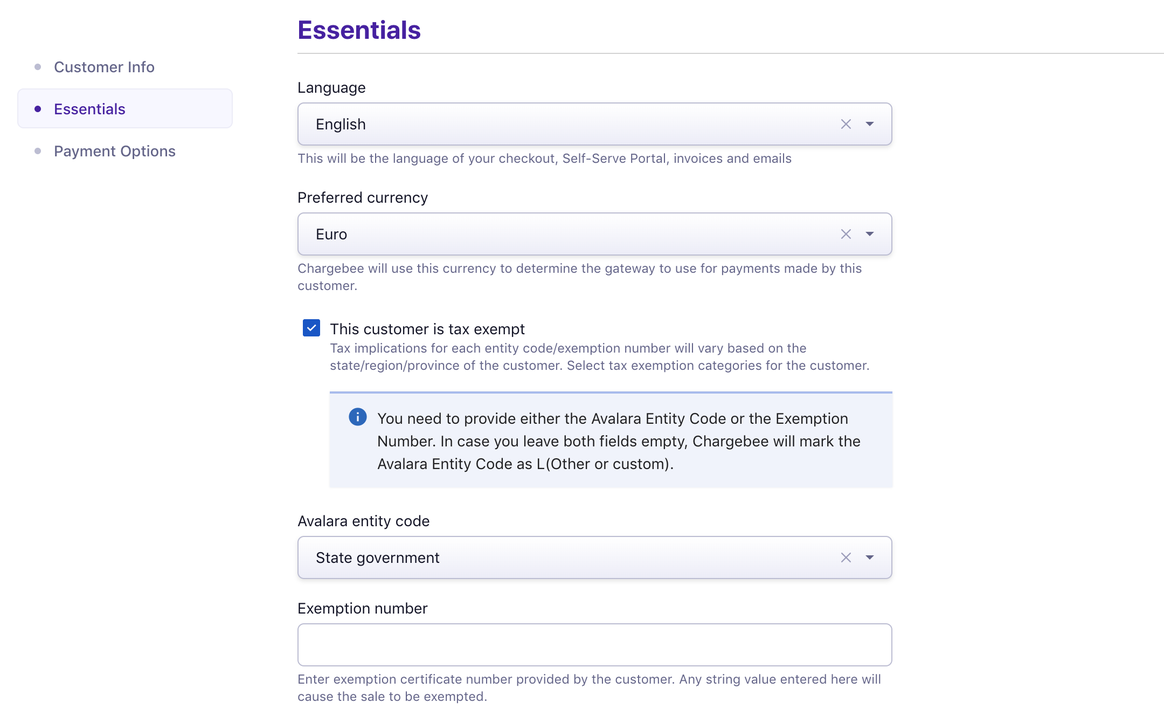
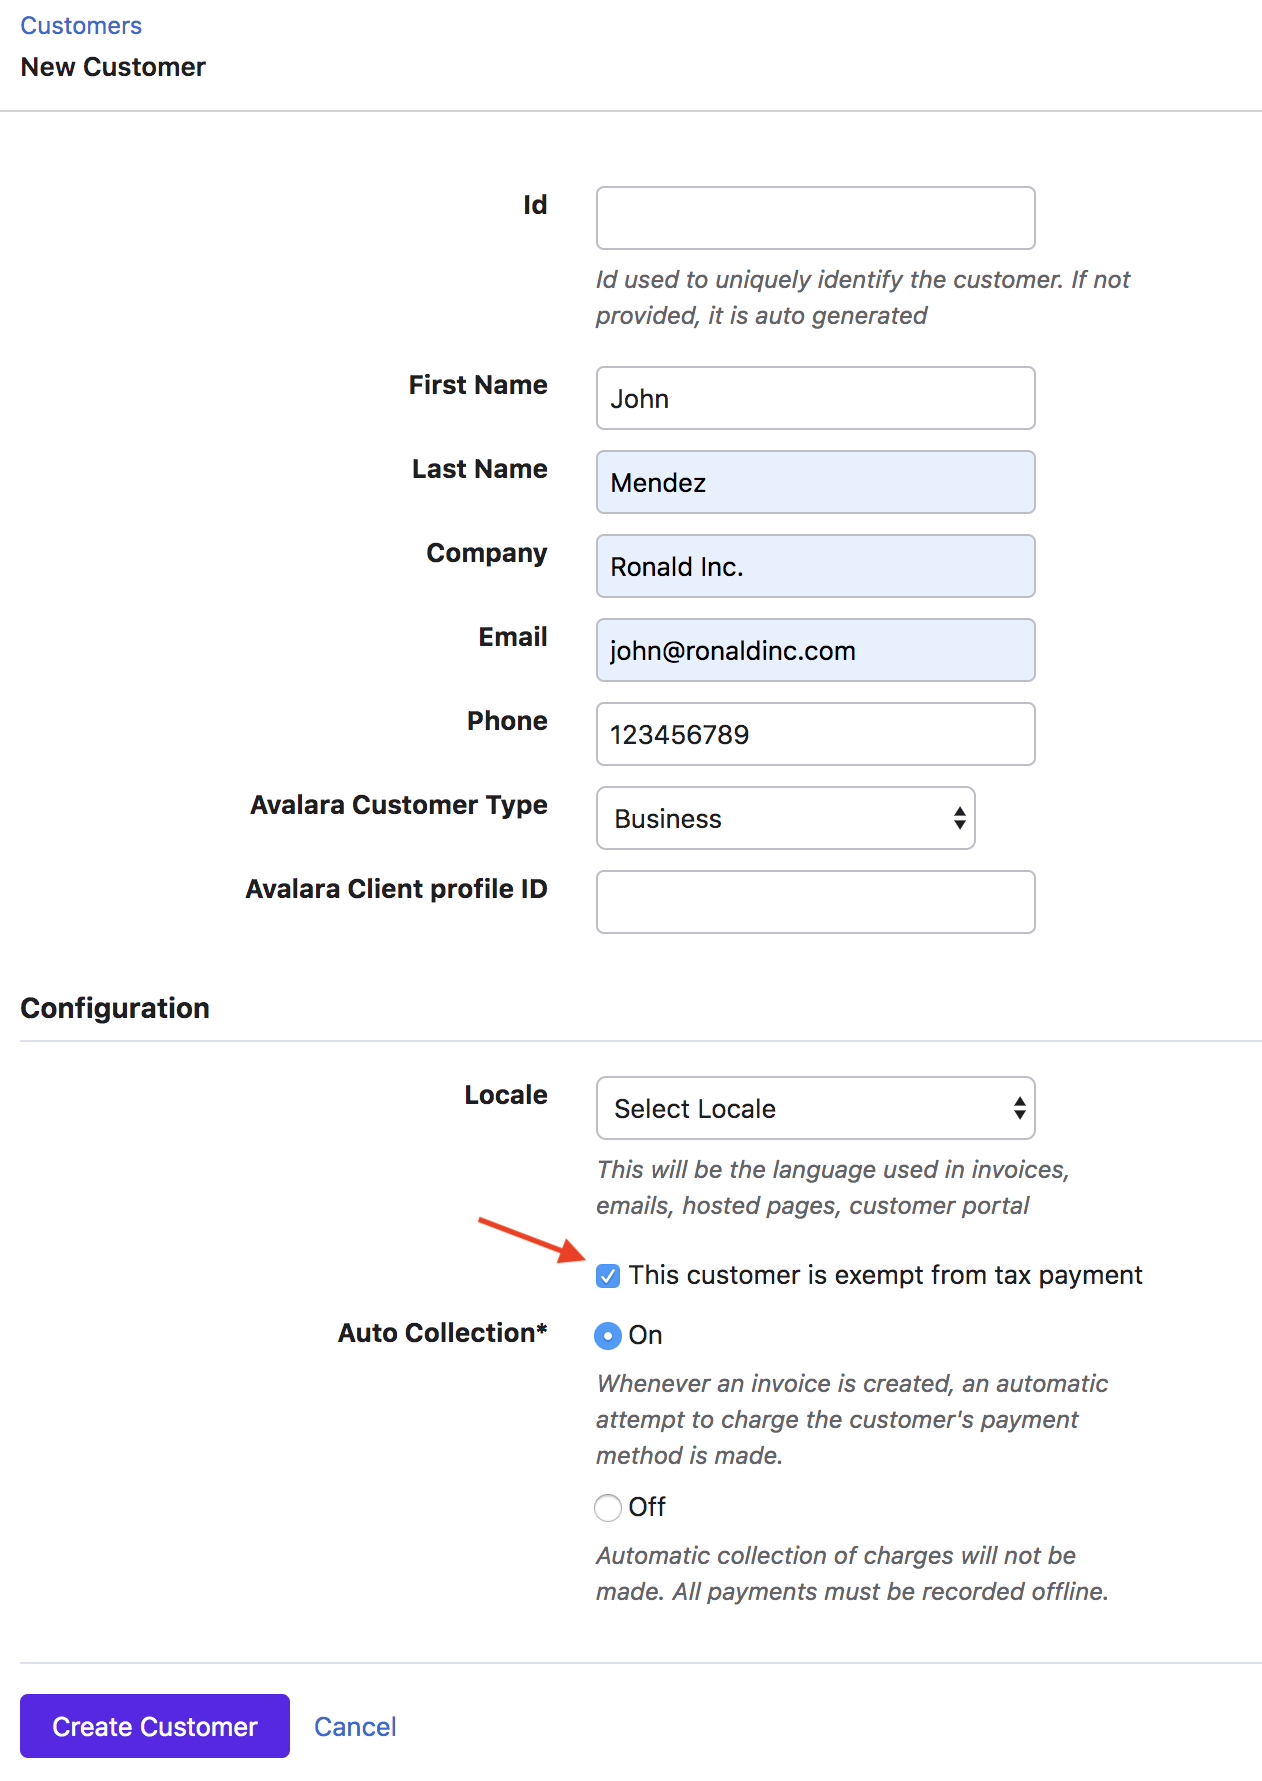
Step 3: Configuring Customer Tax Exemption
If you'd like a particular customer to be exempted from tax, you could do so while creating the customer in Chargebee by enabling the option This customer is exempted from tax payment.
You can further customize your customer tax exemption with the help of API. Tax exemption rules vary per each US State and Territory/Canadian Province. And thus tax exemption requirements under Avatax for Communications could differ based on a combination of factors such as tax types, jurisdictions, service types, etc. You as a merchant, can customize and set customer exemptions that are specific to each tax type, service provided, jurisdictions etc.
For example, Customer A could be exempted from communication services tax in Florida but still be taxable for the same tax type in Arizona. Or the same customer could be taxable for a different service in Florida itself.
Shown below is the details page of a customer with the Avalara tax fields:
Classic UI users
Here's how the tax exemption checkbox displayed in Classic UI:
Step 4: Enabling Avalara as your Mode of Tax calculation
This is the final yet most important step in the integration. Unless you execute this step, Avalara will not be used for automatic tax calculation in Chargebee.
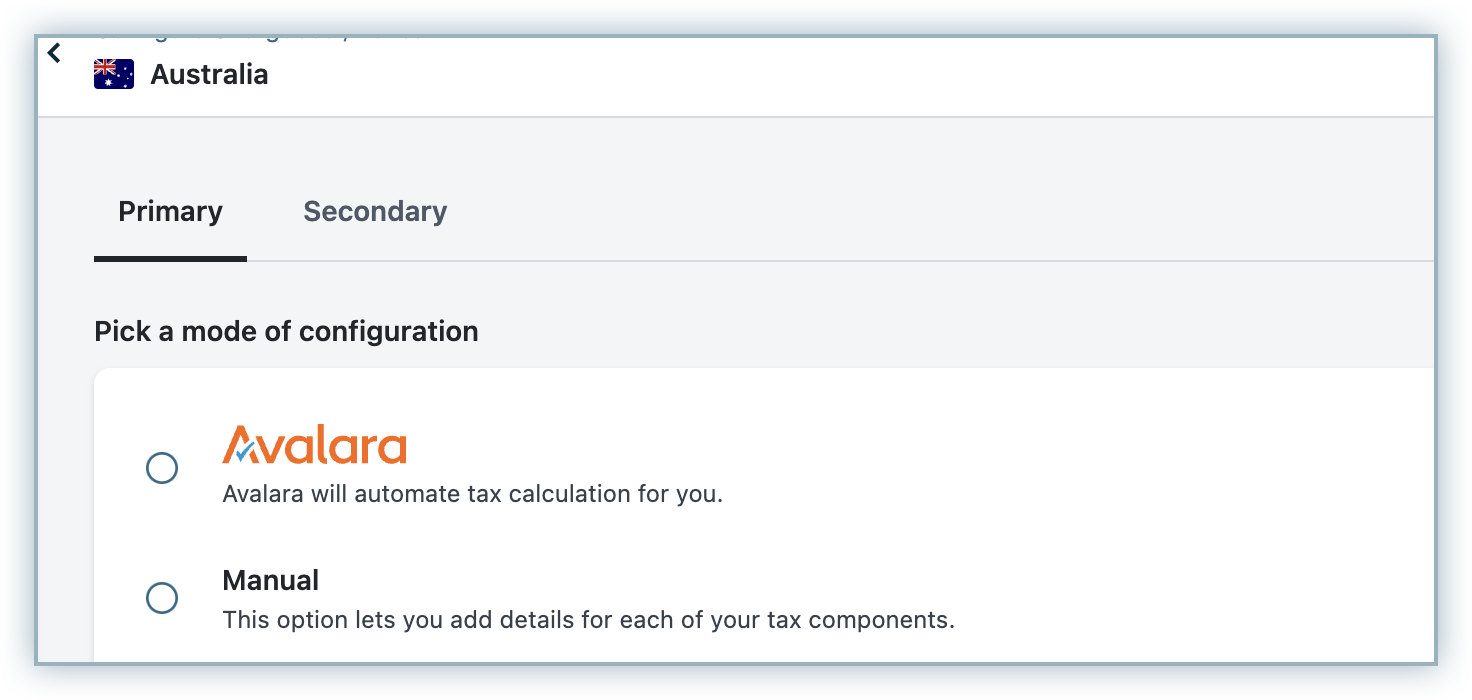
Once you are done with all the above mentioned steps, go to Settings > Configure Chargebee > Taxes. Go to the respective taxable regions and choose Avalara as your preferred mode of tax calculation. If your taxable regions are already configured with manual mode of tax calculation, you can use the Switch link in Avalara banner, to choose Avalara as your preferred mode of tax calculation.
Enabling Avalara as your Mode of Tax Calculation for EU region : While you are enabling Avalara as your preferred mode of tax calculation for EU region, you will be prompted that the Tax Registration Number specified will be displayed on your customers' Invoices.
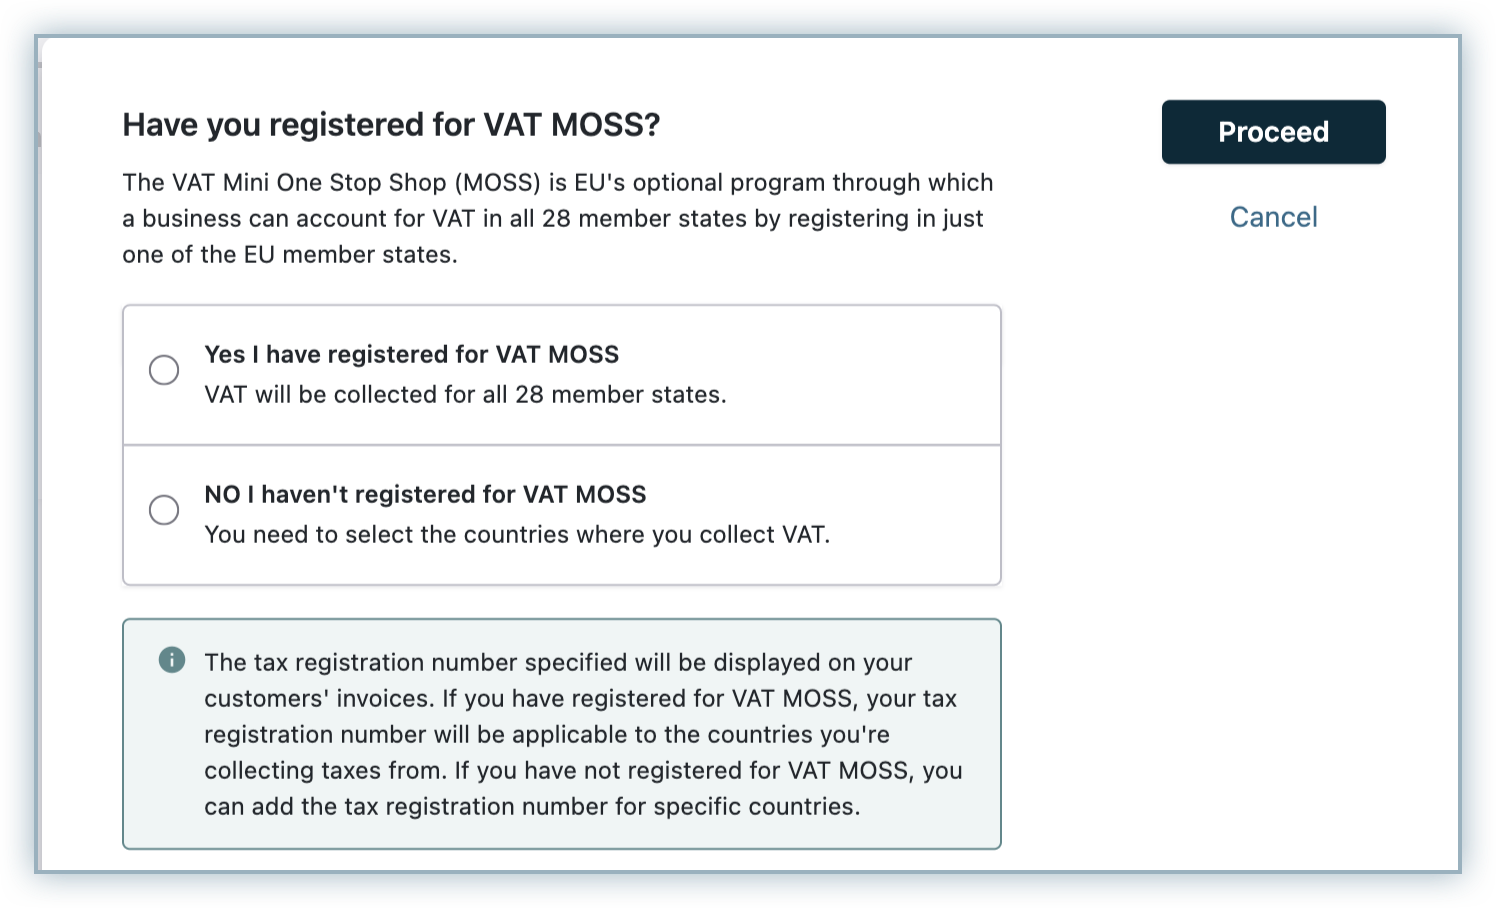
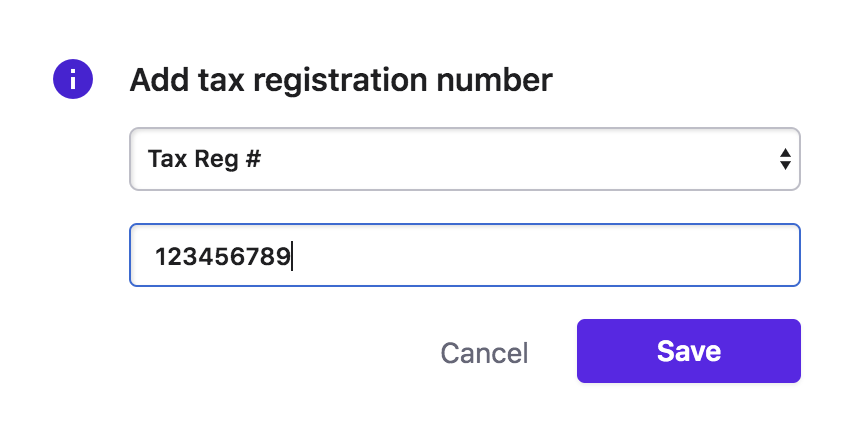
If you have registered for VAT MOSS, you can enter your registration details and click Proceed. You can even add tax registration numbers for specific countries if required.
If you have not registered for VAT MOSS, you will be prompted to add tax registration numbers manually, for countries where you have registered for VAT.
The Chargebee - AvaTax for Communication(AFC) integration extends support for VoIP service providers by supporting additional Transaction/Service (T/S) pairs such as 19/6 and 19/21. Contact support to have this enabled on your Chargebee site.
With the mapping of T/S pairs to the communication services you sell within Chargebee, you can have communication taxes applied on your invoices accurately and automatically. Basis the T/S pair applicable to your business, the tax gets calculated based on the following fields:
- 19/6: Using this T/S pair, the tax gets calculated based on only the invoice line item amount (i.e., the amount for each line item on the invoice). No other inputs shall be used.
- 19/21: Make sure that you capture the number of lines or connections using the Units field as tax gets calculated based on the number of lines for products using this T/S pair.
Taxable Measure in Invoices
Once you have integrated the AvaTax for Communications with your Chargebee site and Avalara calculates appropriate taxes for your Subscriptions, you will notice that some/all of the tax line items in your Invoices would carry an asterisk, which corresponds to information that "The amount is calculated based on the taxable amount which may vary based on the taxation laws in your country".
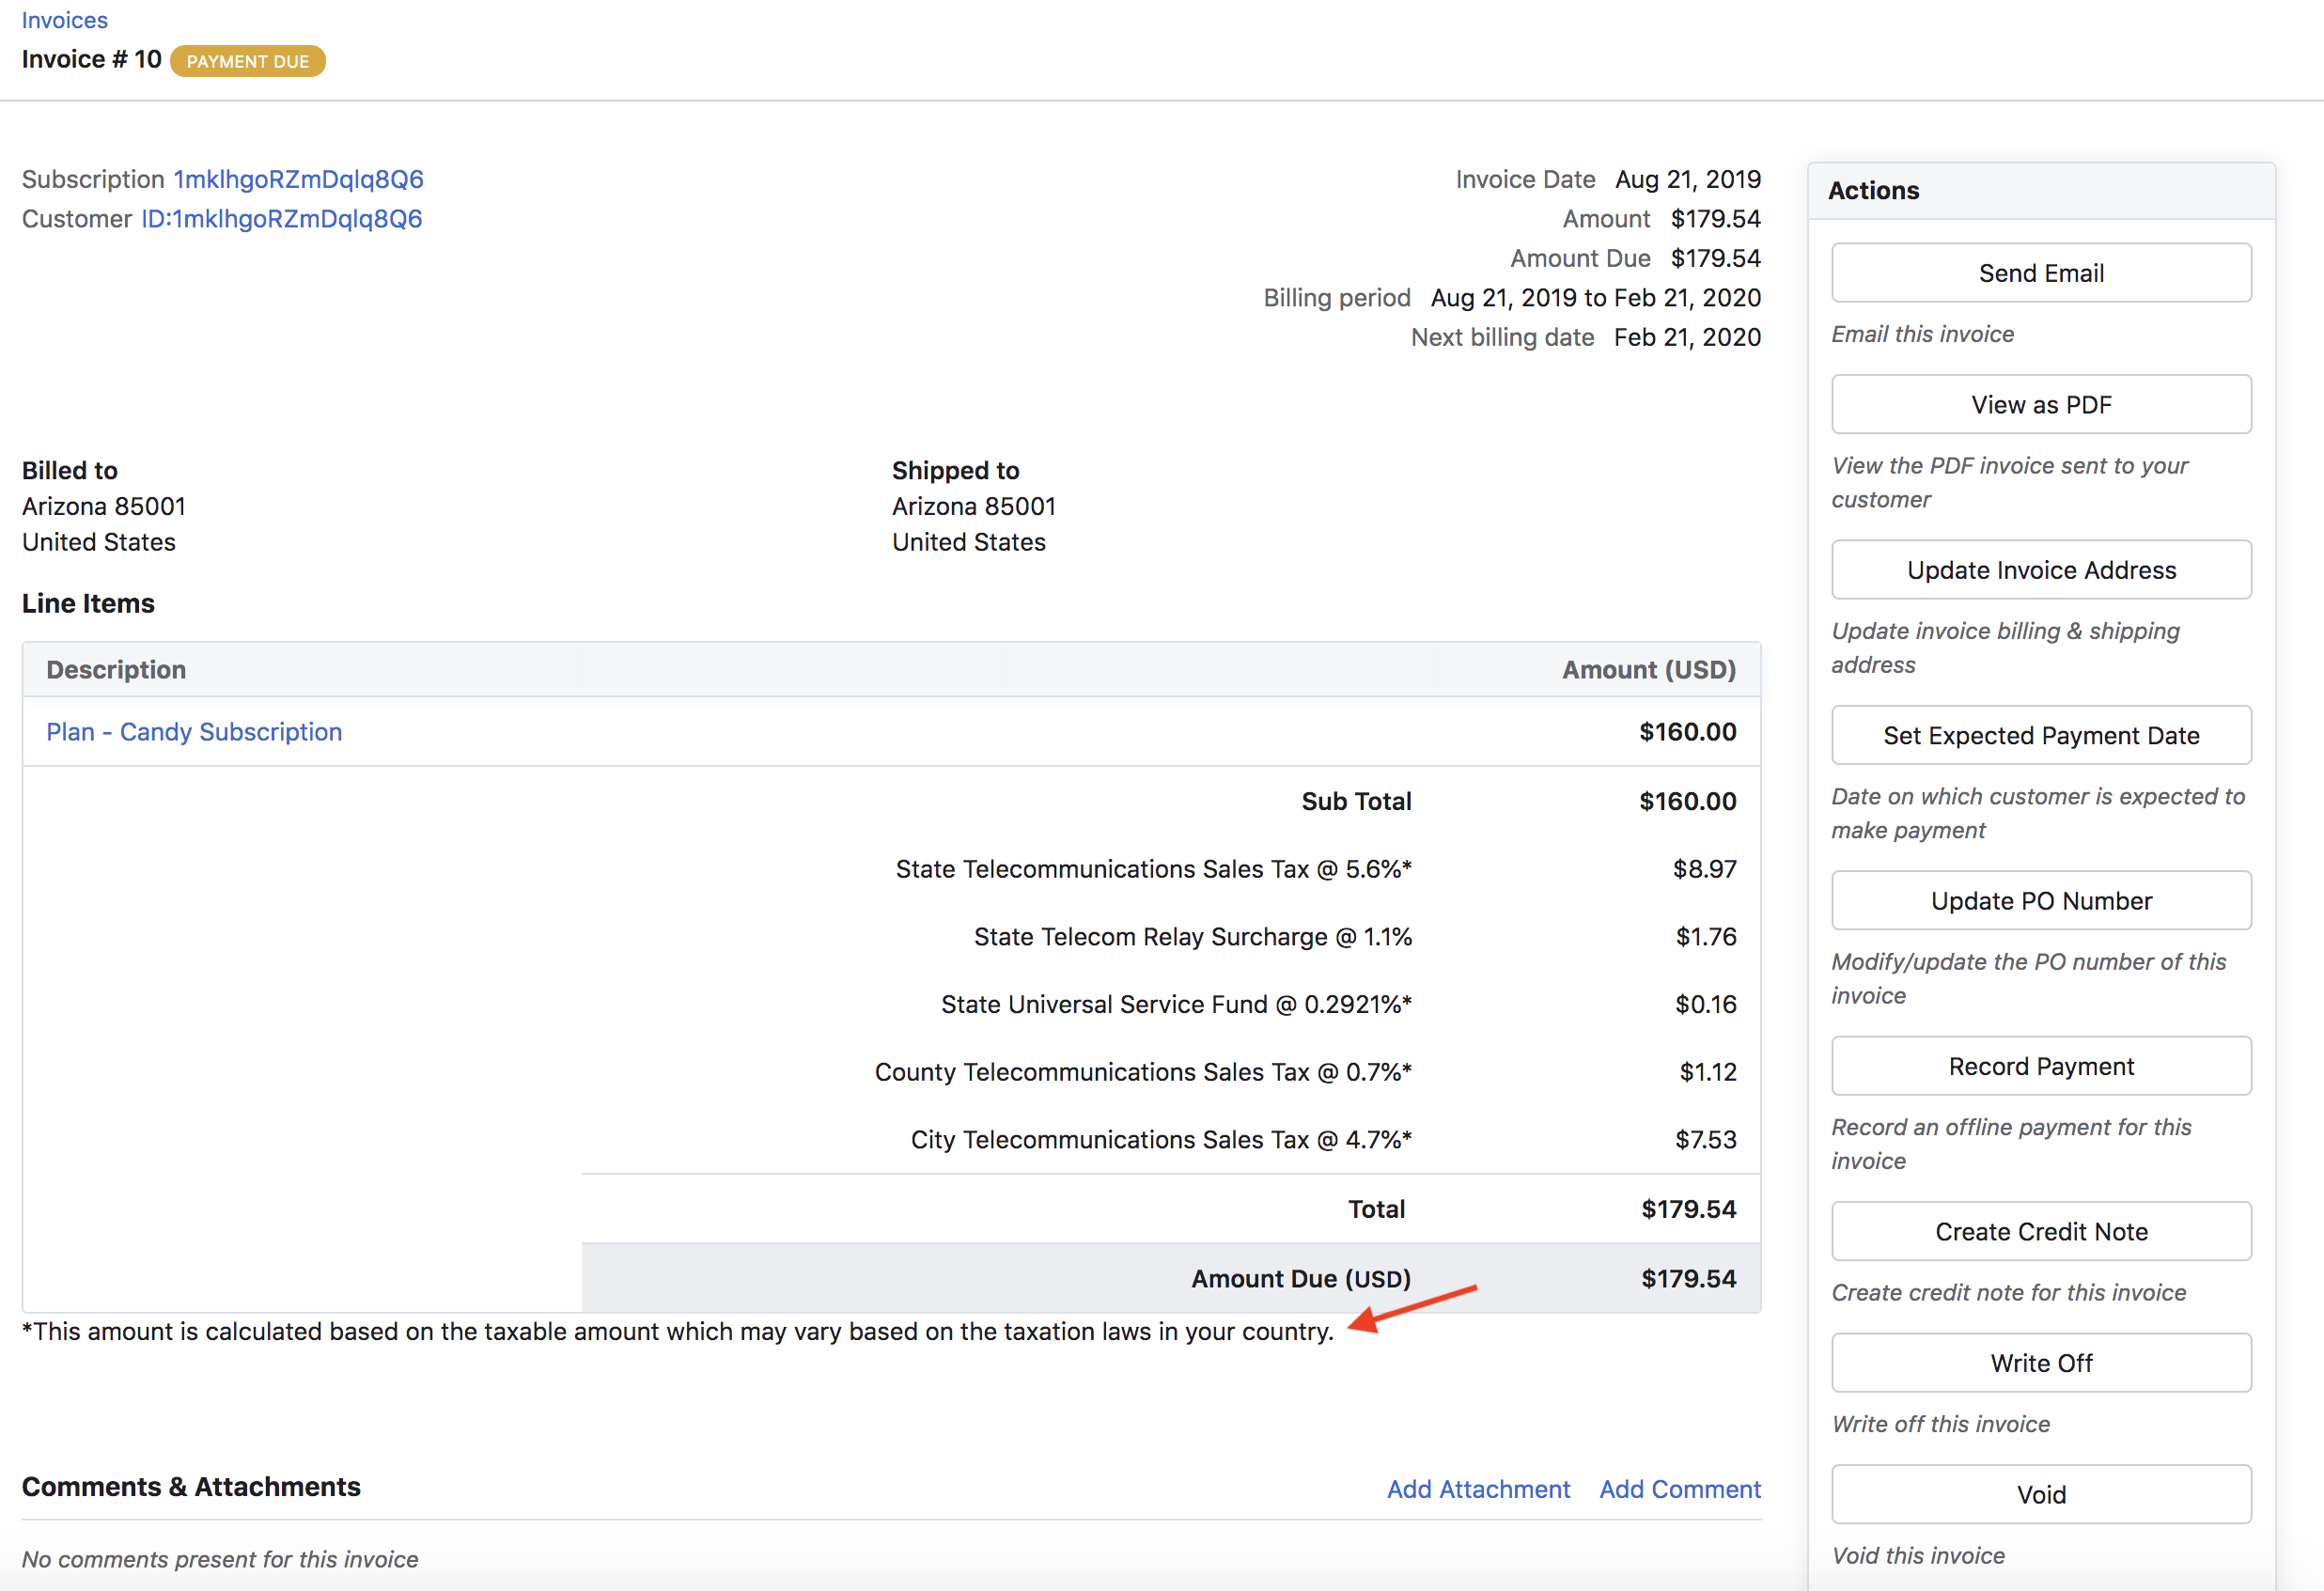
This denotes taxable measure, the basis for calculation of rate-based taxes. For more information, please refer to this Avalara document.
Automatic Retries for Renewals and Activations
When Avalara Credentials are invalid
Chargebee will notify you via email if the Avalara credentials are invalid, and will prevent sign ups.
Chargebee will set off retry attempts for renewals and activation as follows:
| Retry | Time |
|---|---|
| 1 | 20 hours after the initial failure |
| 2 | 40 hours after the previous retry |
| 3 | 60 hours after the previous retry |
When Avalara's server is down
If Avalara's server goes down, Chargebee will prevent sign ups, and will set off retry attempts for renewals and activations as follows:
| Retry | Time |
|---|---|
| 1 | 30 minutes after the initial failure |
| 2 | 60 minutes after the previous retry |
| 3 | 120 minutes after the previous retry |
You can check Avalara's status here
Handling Refunds Made Through Chargebee
When a payment is refunded to the customer, Chargebee will create a Credit Note for the refunded amount. This Credit Note will then be pushed to Avalara and be displayed as a "Returned Amount".
Handling Deleted/Voided Invoices
When an invoice is voided/deleted in Chargebee, it's status will be marked accordingly in Avalara. However, going forward (from October 2019), when an invoice is voided/deleted in Chargebee, it will be voided and never deleted in Avalara.
Things to check before you start using the Avalara integration
Here's a checklist you could use to integrate Avalara with your Chargebee site:
- Ensure that your site's Organization address is filled out accurately in both Avalara and Chargebee.
- If you're using Hosted Pages, ensure that the shipping/billing address field has been enabled and the Zip Code, Country, and State fields are made mandatory.
- Configure Nexus jurisdictions in your Avalara AvaTax account.
- If you're an API user, ensure that the address is passed in the estimate API only if you want tax to be calculated. If the address is present, you will be charged for the tax estimate lookup.
- Test the integration in your sandbox site.
- Enable Avalara for your Chargebee live site.
Limitations
This integration has the following limitations:
- The AvaTax for Communications integration is currently limited to clients in telecom space such as those offering over-the-top (OTT) media services via the internet(the streaming media services), and other telecom services that do not require minutes or lines for tax calculation.
- Only T/S (Transaction/Service) pairs that require input type None, Location, or Charge are currently supported in the AvaTax for Communications integration. If you're looking for other T/S pairs, contact support to add your request to the feature roadmap.
- This integration does not support inclusive pricing.
- The hosted pages theme "Rhapsody" does not support Avalara integration
- When Avalara integration has been enabled (or disabled), the next billing amount is not recalculated for the existing subscriptions until the subscription is renewed or updated. This is to avoid the sudden surge of API calls that would be made to Avalara since Avalara charges are based on the number of API calls.
- Enabling Invoice amount rounding in Chargebee will result in a total amount mismatch between Avalara and Chargebee.
Unlink Avalara Integration
If you ever want to unlink the Avalara integration from your Chargebee account,
- Go to Settings > Configure Chargebee > Taxes and switch from Avalara to your preferred mode of tax calculation from all the regions where you have chosen Avalara by clicking Change.
- Next, go to Apps > Go to Marketplace > Tax Management > Avalara and click Unlink integration.
Was this article helpful?