MailChimp
Introduction
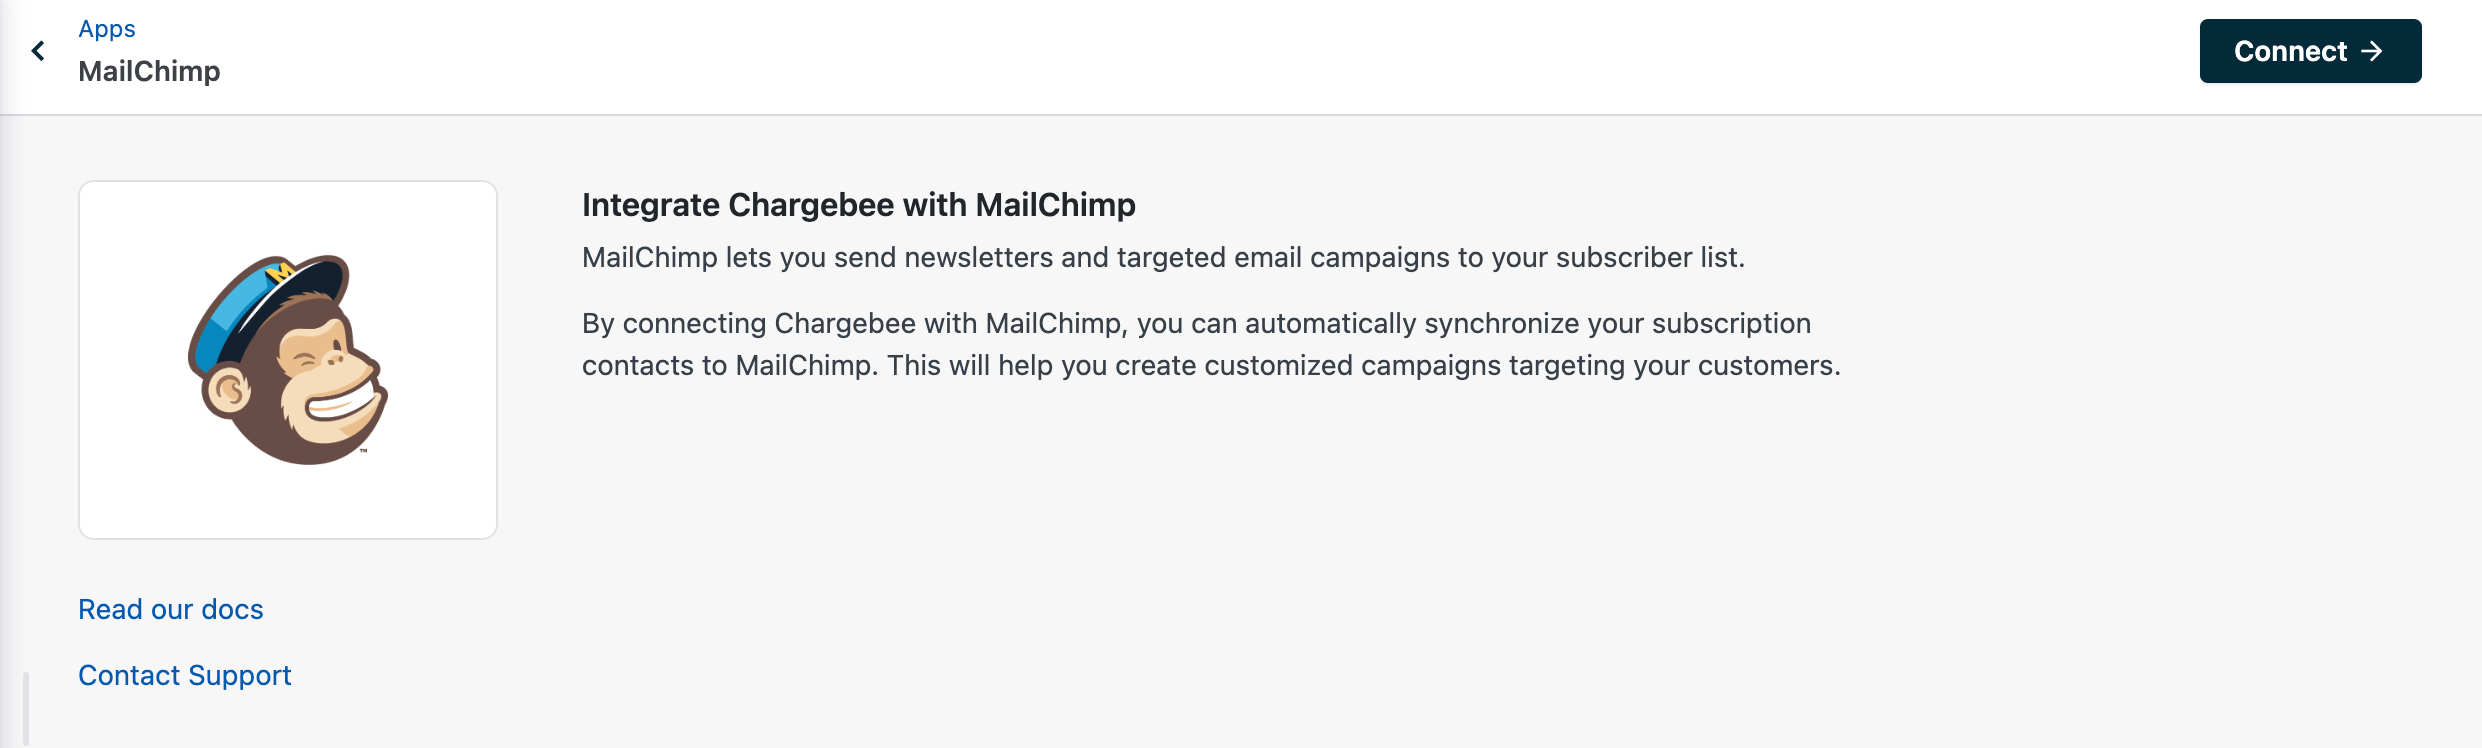
MailChimp lets you send newsletters and targeted email campaigns to your subscriber list.
With Chargebee, you can automatically synchronize your subscription contacts to MailChimp. Once synchronized, you can send customized campaigns to your customers without the need of manually syncing the contact information between both the systems.
Note
-
This is a one-way sync (Subscription information will be synced from Chargebee to MailChimp).
-
We have upgraded Chargebee's integration with MailChimp API v1 to v3. Learn more about MailChimp API v3.
Data Sync details
The following data will be synchronized to MailChimp:
-
Customer Information
- Email Address
- First Name
- Last Name
- MRR
-
Subscription Information
- Subscription handle
- Plan Code
- Plan Name
- Subscription Created At
- Subscription Status
- Trial End Date
- Cancellation Reason
Sync Rules:
-
Customer/subscription information will be synced to MailChimp.
-
If a customer has two subscriptions and the same email address is used for both the subscriptions, the details of the latest subscription will be added to the contact list.
-
Customers with active subscriptions will only be synced to MailChimp, if customers alone are created in Chargebee, they will not be synced.
-
Chargebee automatically creates additional fields required to synchronize data to MailChimp if they are not already available in MailChimp.
-
When information is updated in Chargebee, the information will be updated in MailChimp as part of the next sync. When Customer/Subscription is deleted in Chargebee, you can choose to update the status or remove the records in MailChimp as preferred, refer the integration steps below for more details.
Connecting MailChimp with Chargebee
Follow the steps below to integrate your MailChimp account with Chargebee:
Step 1: Connect with MailChimp
Having a MailChimp account would be a basic prerequisite to set up MailChimp with Chargebee. Sign up for an account here.
Then login to your Chargebee site and navigate to Apps > Go to Marketplace > MailChimp and click Connect.
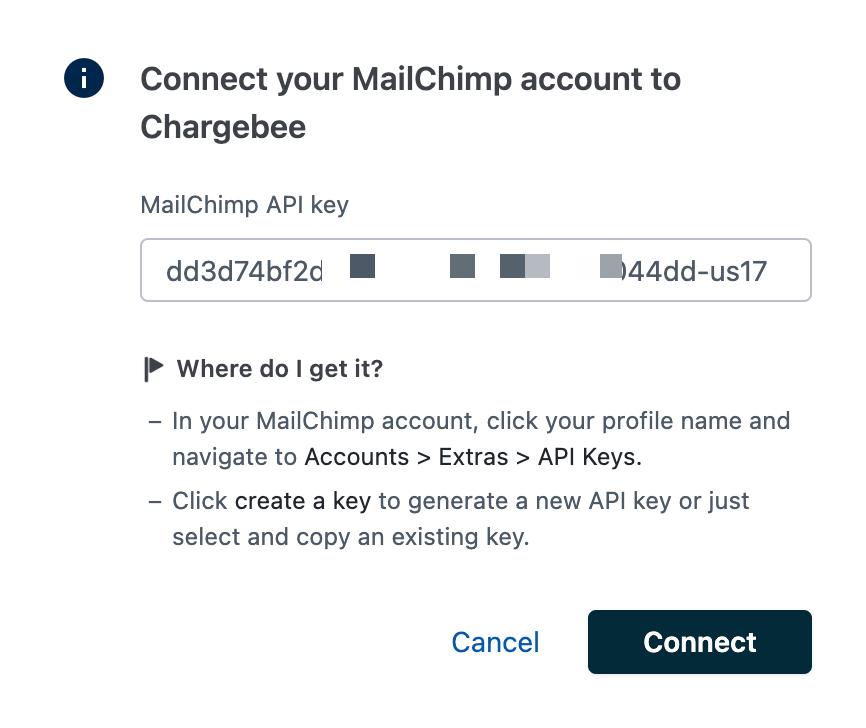
Step 2: Enter MailChimp API key
-
To find the key, log in to your MailChimp account, click your profile name, navigate to Account & billing > Extras > API keys.
-
Click Create A Key to generate a new API key or just select and copy an existing key.
-
Once you've copied the API key, paste the API key and click Connect.
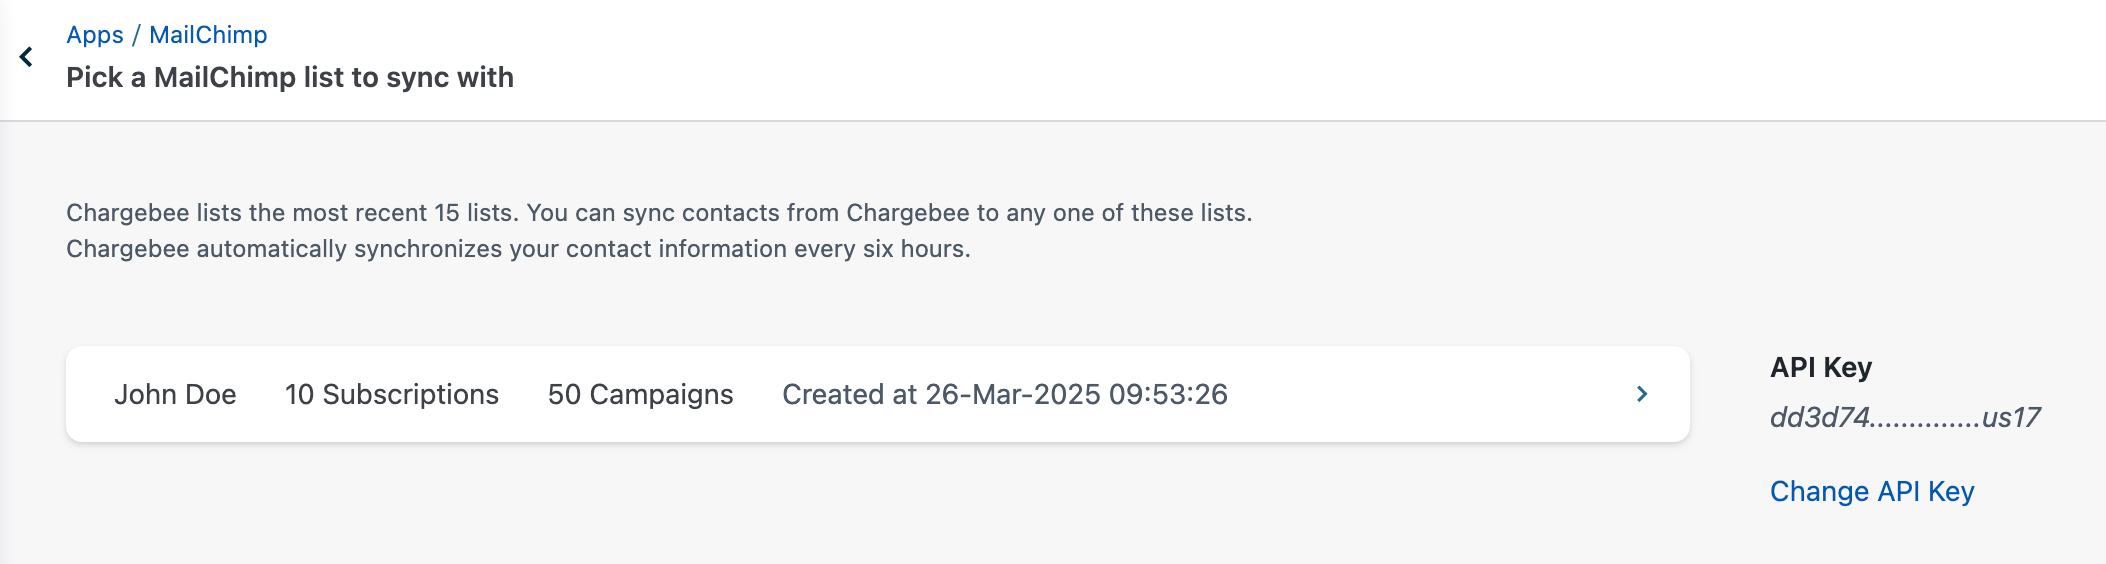
Step 3: Choose a List
A list in MailChimp is a collection of all the email IDs of your subscribers.
Once your MailChimp account is connected, you will be able to see the most recent lists from MailChimp, you can choose any one list and proceed.
Step 4: Configure sync rules to follow during deletion/cancellation
Chargebee supports configuring rules to refer when a customer or subscription is deleted or cancelled in Chargebee.
If a customer in Chargebee - is deleted, then you can choose to
- Mark the status of the customer in MailChimp as Cleaned
- Or remove the customer from MailChimp
If a subscription in Chargebee - is deleted, then you can choose to
- Mark the subscription status as Deleted
- Or remove the subscription from MailChimp
If a subscription in Chargebee - is cancelled, then you can choose to
- Mark the subscription status as Cancelled
- Or do not sync the subscription to MailChimp
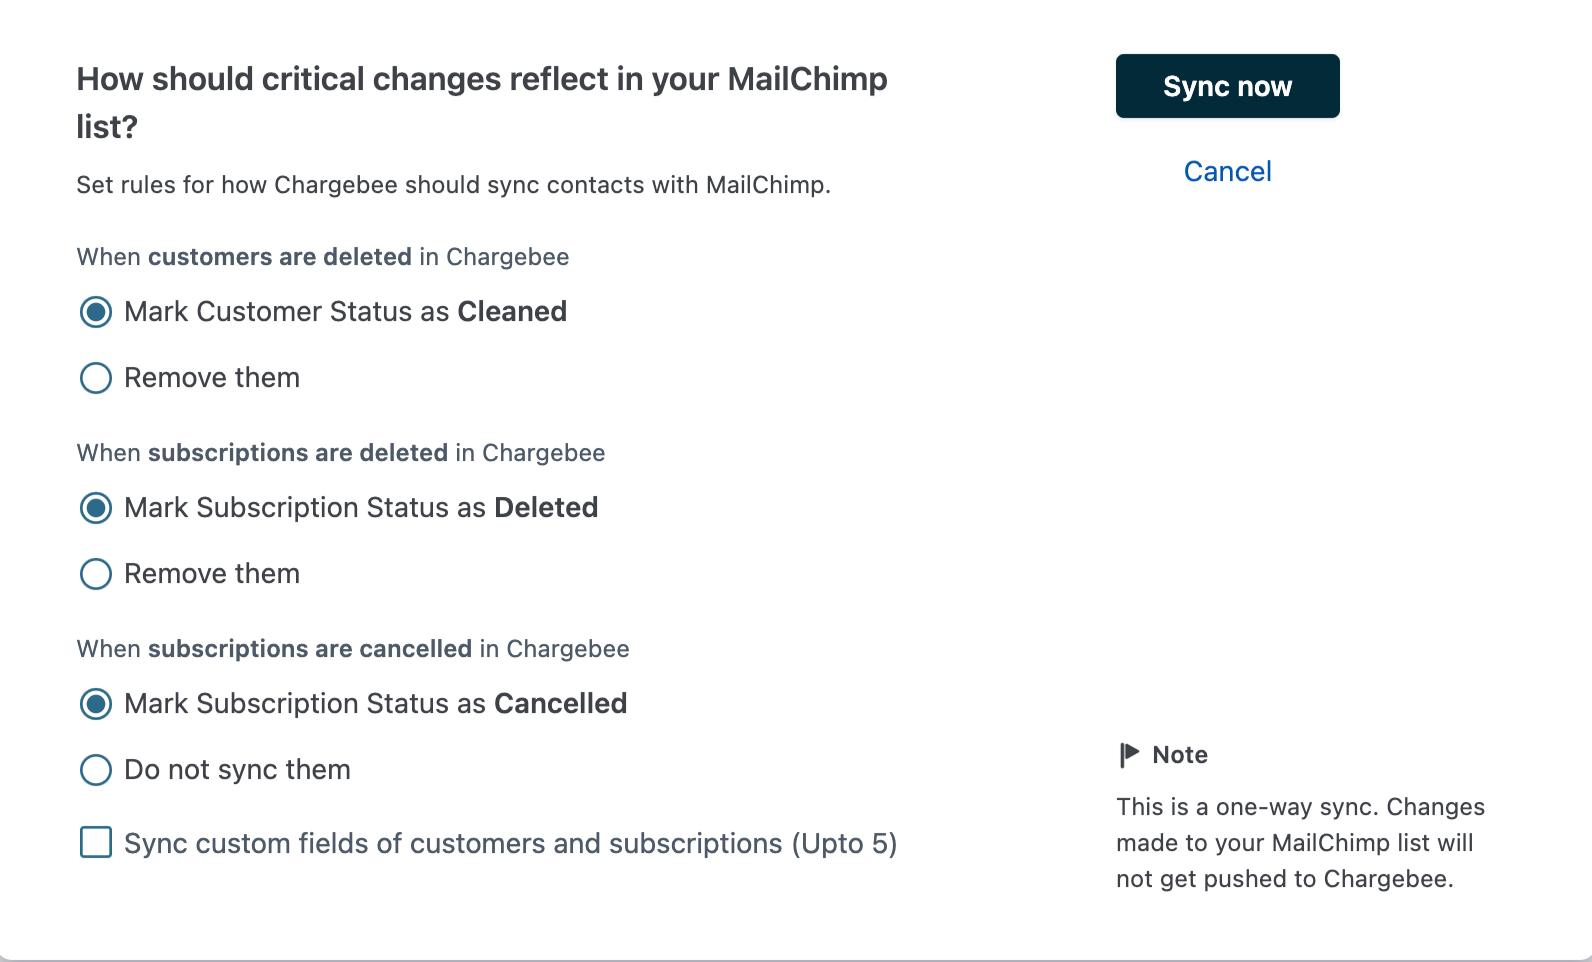
Select Custom Fields to be synced:
This option allows you to select five custom fields which can be synced to MailChimp. These can be Customer or Subscription related custom fields.
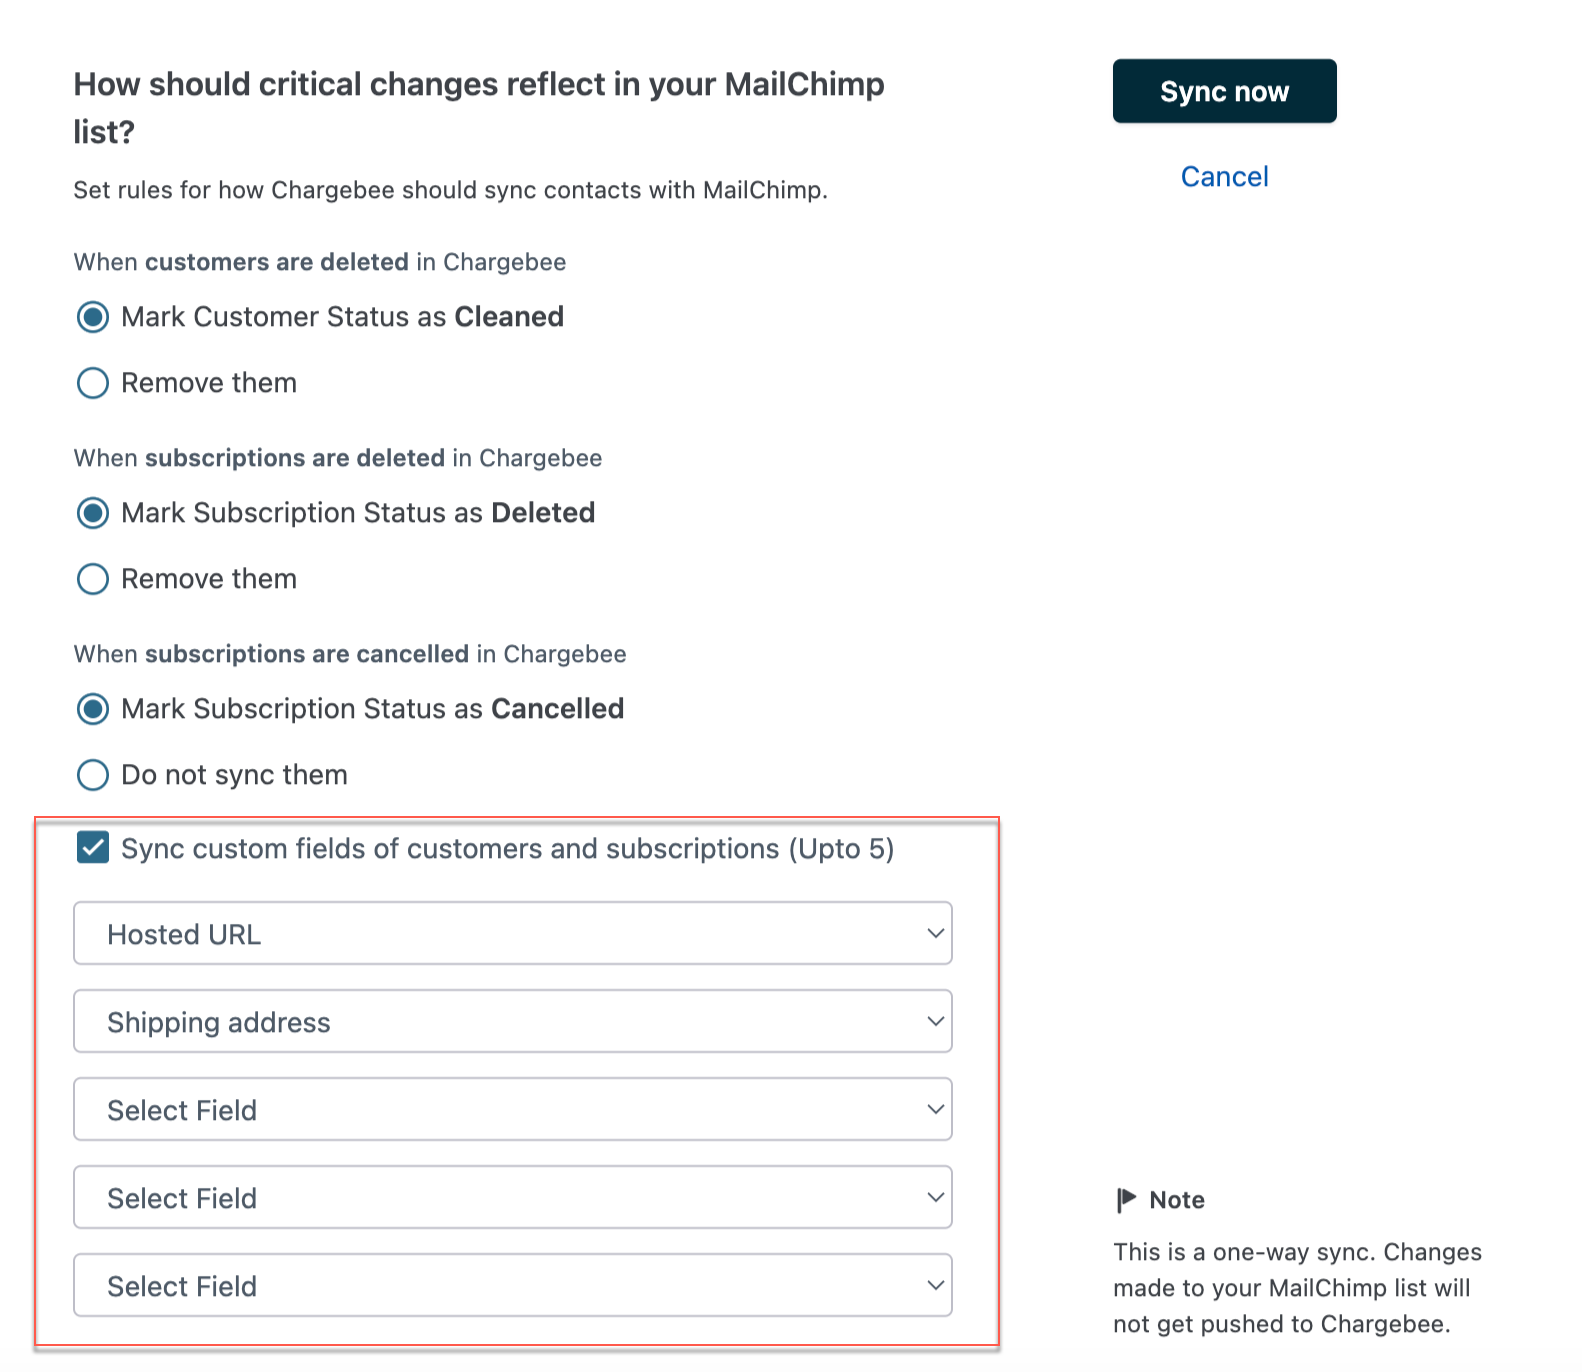
Once the preferences are provided, click Sync Now to start the sync process.
Sync configuration is now complete.
Manage Sync Preferences
After your configuration is complete, the MailChimp page will allow you to view and manage:

- Sync details
- When the next sync is scheduled to run
Manage Integration
Use this option to
-
Update the mailing List which was selected while setting up the integration.
-
Update the API keys, if required
Remove
You can choose to stop customer and subscription information from being synced to MailChimp. Once you click Remove, Chargebee will stop syncing data to MailChimp.
Manage Preferences
You can update the preferences configured when a customer or subscription is deleted in Chargebee.
Auto-sync
You can enable or disable auto-sync.
If Auto-sync is enabled, Chargebee will send Customer and subscription information, every six hours to MailChimp.
When information is updated in Chargebee, the modifications will be synced to MailChimp during the next scheduled sync.
Sync Now (on-demand sync)
You can choose to perform on-demand sync, in case you want to view the customer and subscription information in MailChimp immediately.
FAQ
How to setup Segmentation in MailChimp after Chargebee has synchronized customer subscription details?
Segmentation in MailChimp lets you send newsletters to specific people. Say, the information to be sent to your Product's Paid subscribers should be different from the mail you want to send to your Product's Trial users. Segmenting lets you achieve this.
You can segment your list to include only paying customers. You can do this by specifying the criteria as "Subscription Status" › "is" › "Active".
Create more segments by referring to other fields in the mail merge fields list.
Articles & FAQs
Was this article helpful?