SEPA payments via Checkout.com
Introduction
The Single Euro Payments Area (SEPA) is a European Union initiative to enable direct debit Euro payments across all member countries. Chargebee allows you to configure SEPA Direct Debit payments using Checkout.com.
Note
- Chargebee only supports SEPA Core Direct Debit with Checkout.com.
- SEPA is applicable only for payments made using the Euro currency.
- You can perform SEPA payments via Checkout.com through Chargebee's In-app layout of Checkout, Full page layout of Checkout, Self-Serve Portal, APIs, and Chargebee.js SDKs.
- There is a plan-based limitation for configuring SEPA in multiple gateways. To know more, visit our plans and pricing page.
Prerequisites
You must complete the following prerequisites before configuring SEPA Direct Debit via Checkout.com in your Chargebee site:
- To accept SEPA payments using Chargebee, you must have a bank account linked with Checkout.com.
- Enable SEPA Direct Debit payment in your Checkout.com account. Learn more about this.
- Configure the Checkout.com gateway in Chargebee. Learn more about this.
Configure SEPA payments via Checkout.com
Complete the steps below to configure your Chargebee account to accept SEPA Direct Debit payments using Checkout.com:
- Log in to your Chargebee site.
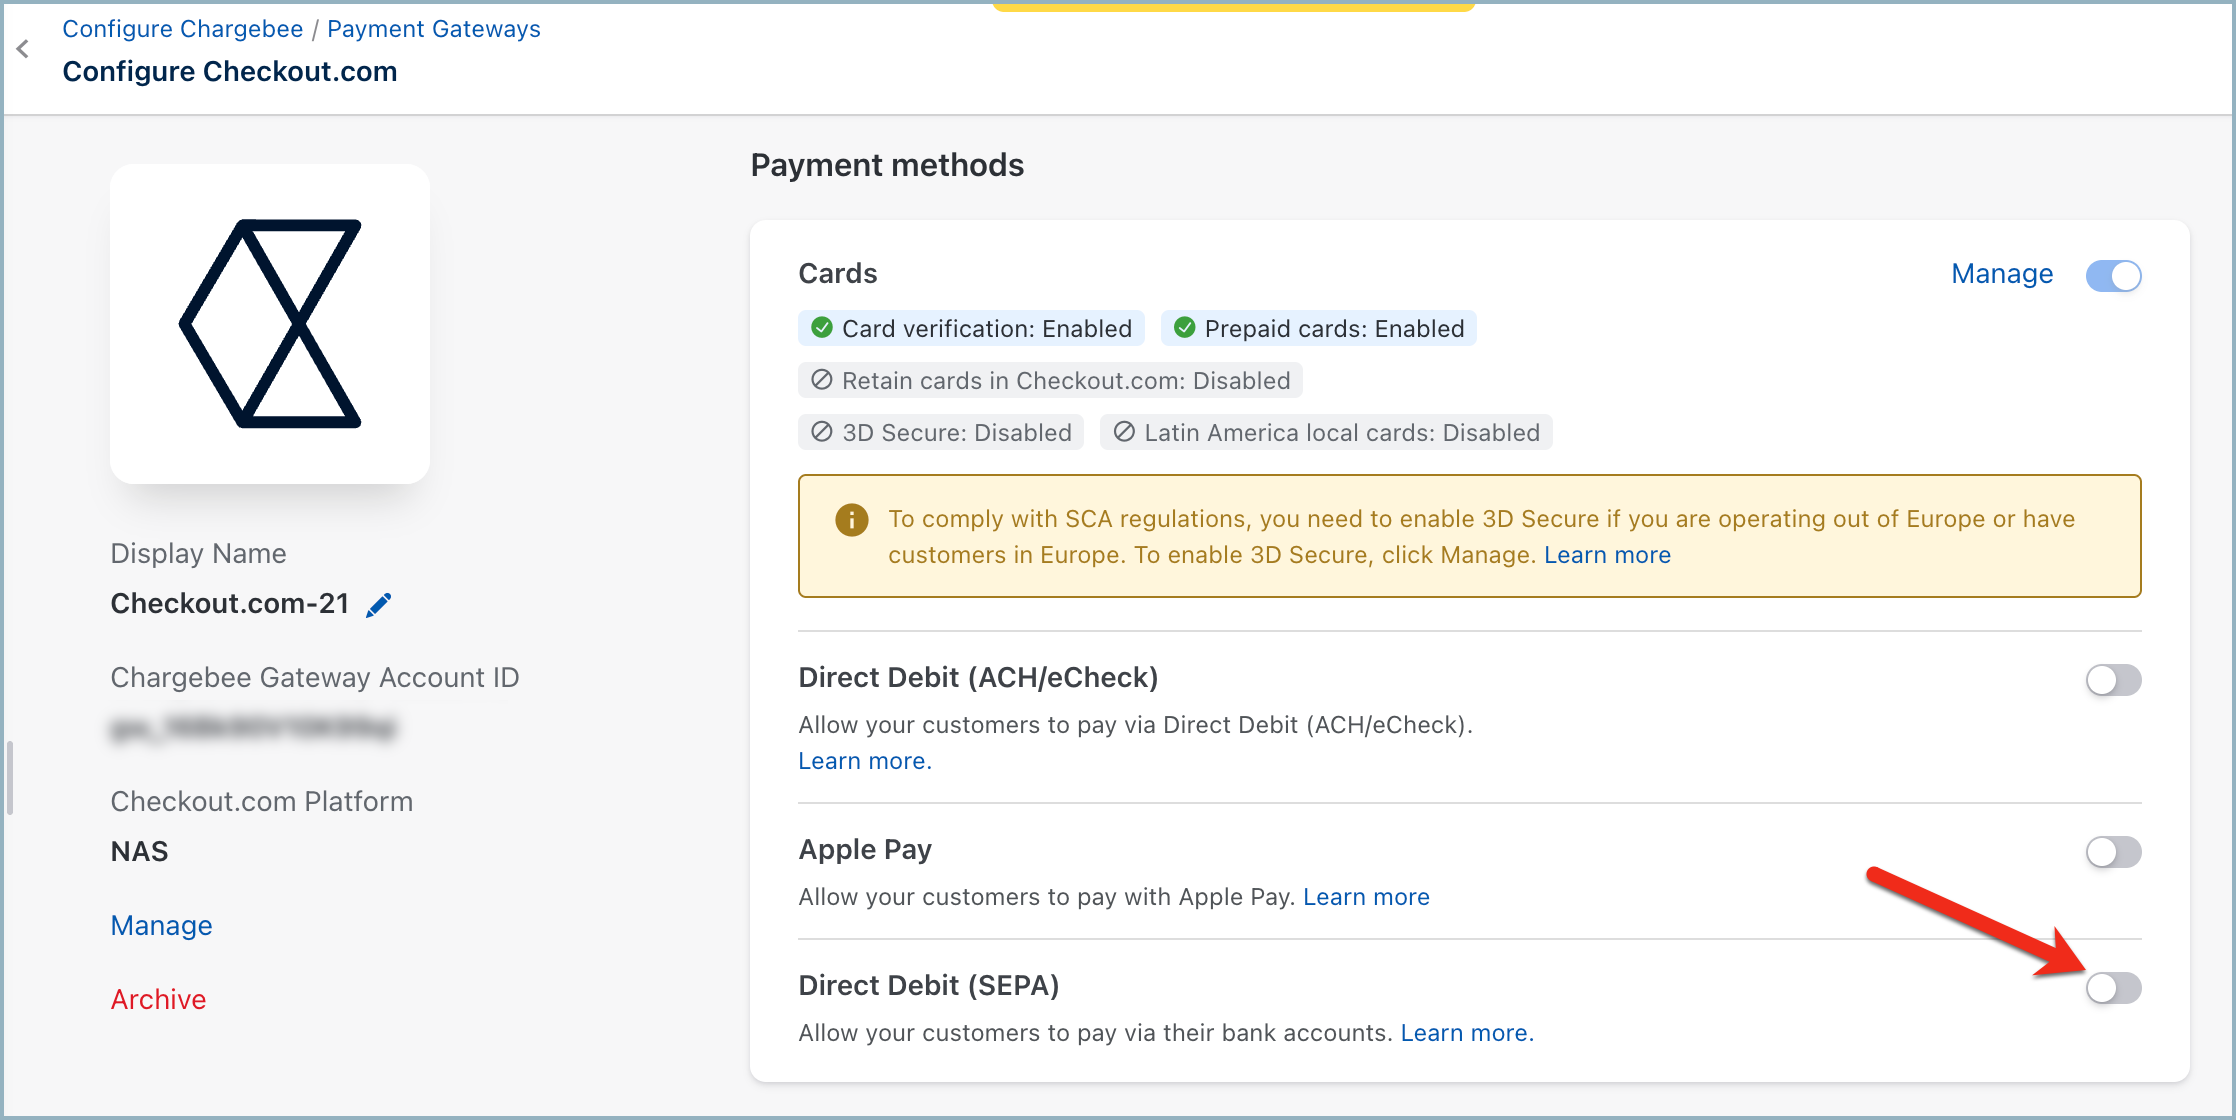
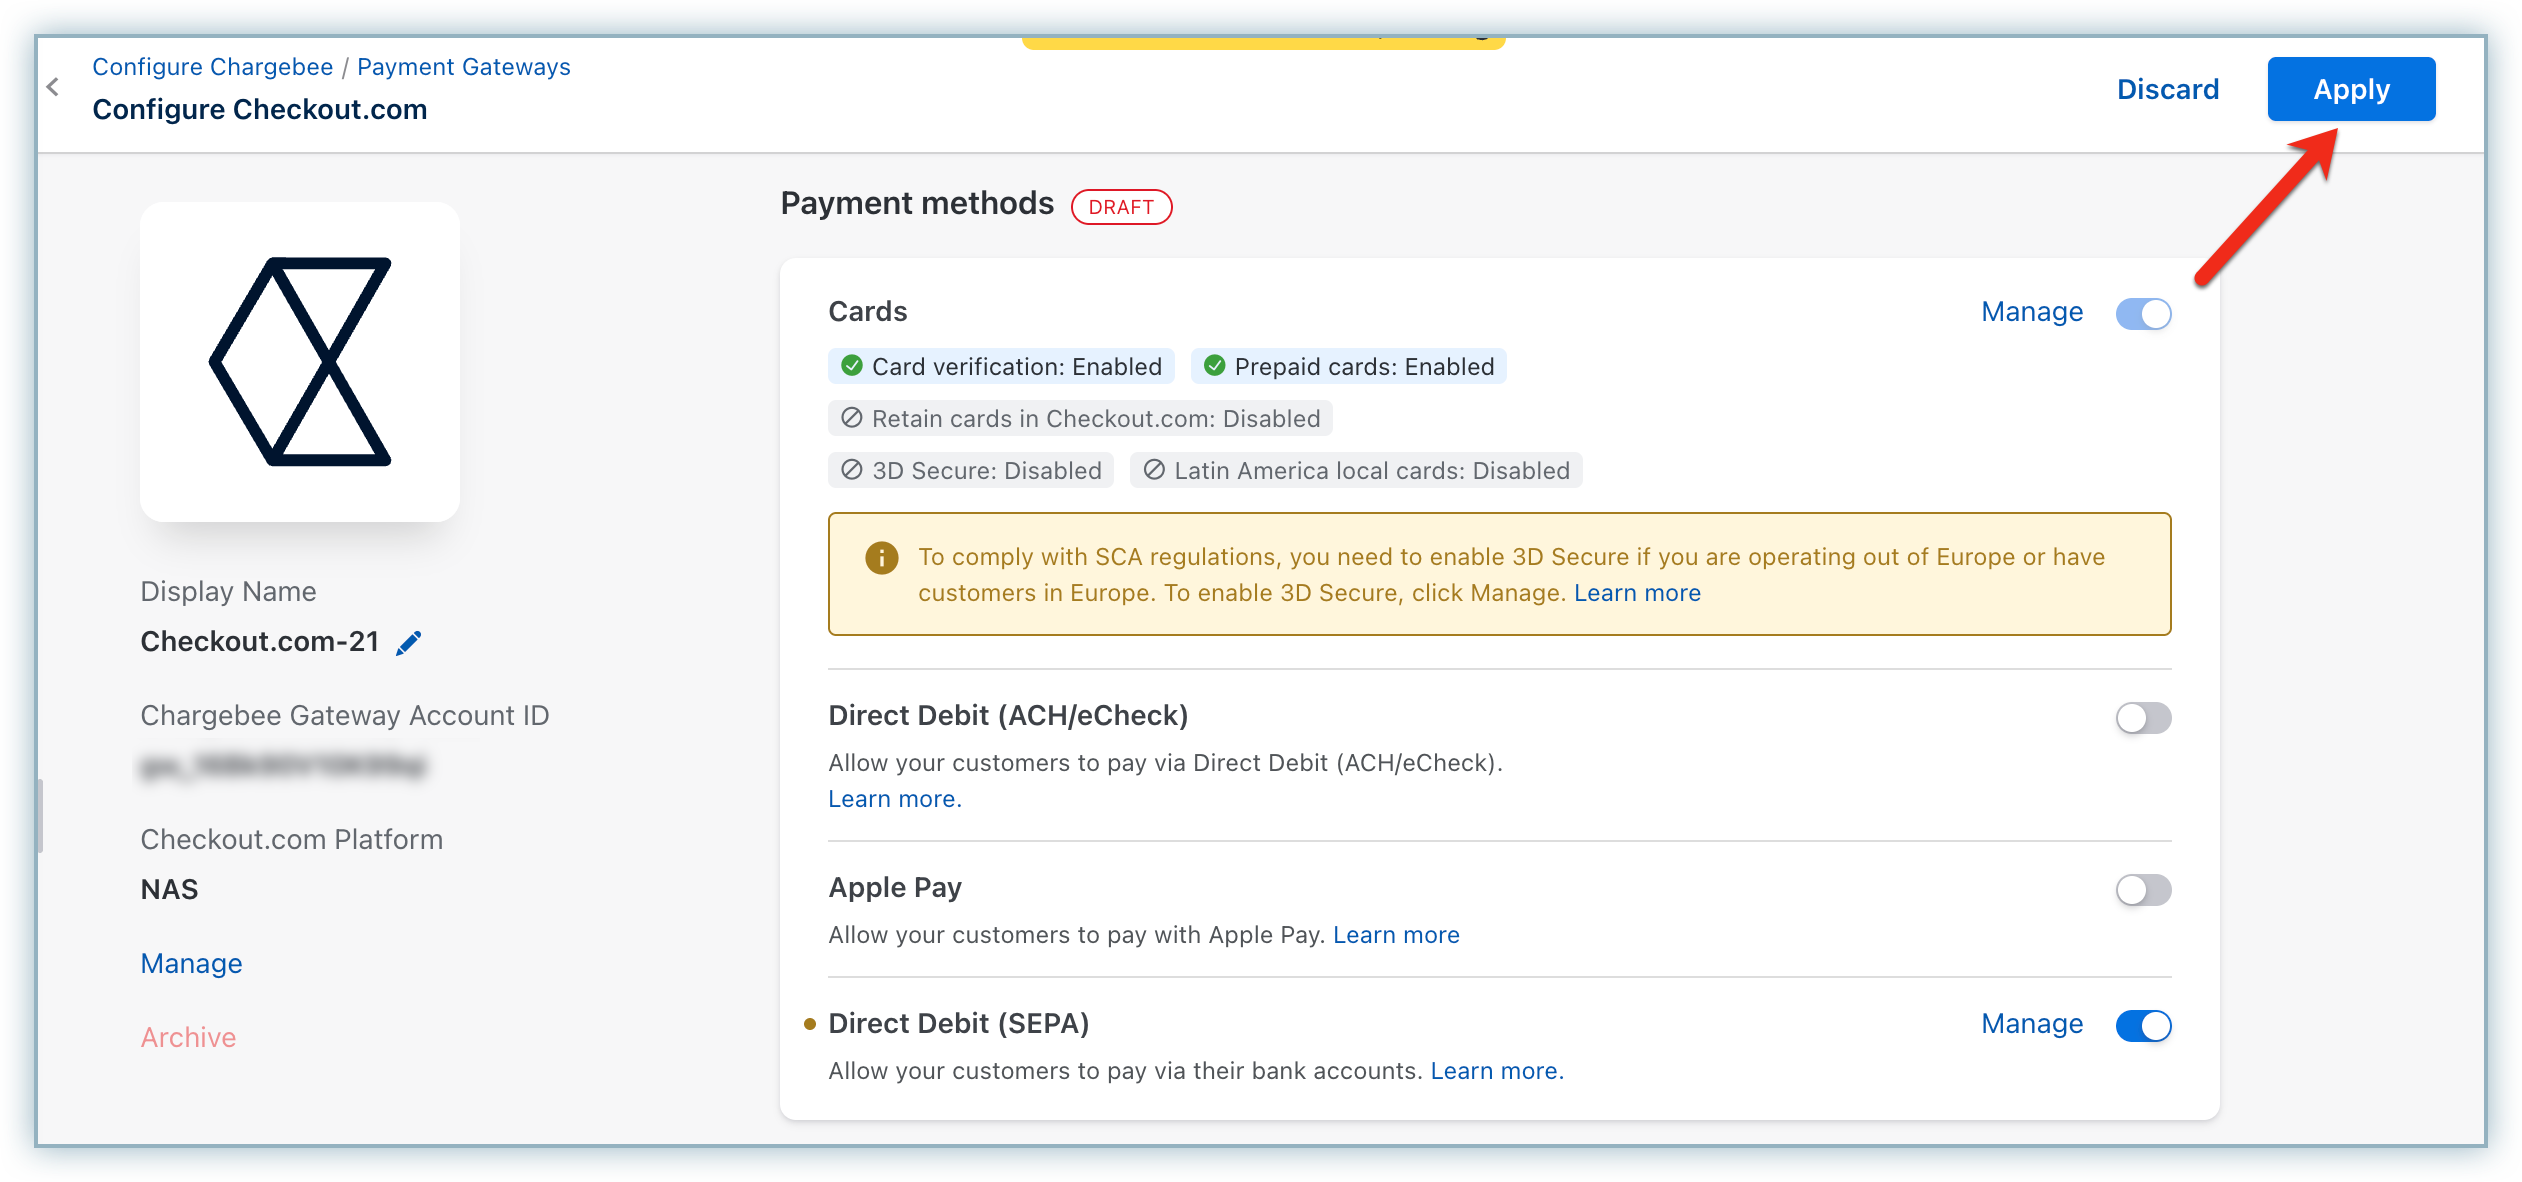
- Go to Settings > Configure Chargebee > Payment Gateway and select Checkout.com from the list of configured gateways.
- On the Configure Checkout.com page, enable Direct Debit (SEPA) to configure Direct Debit payments for European customers.
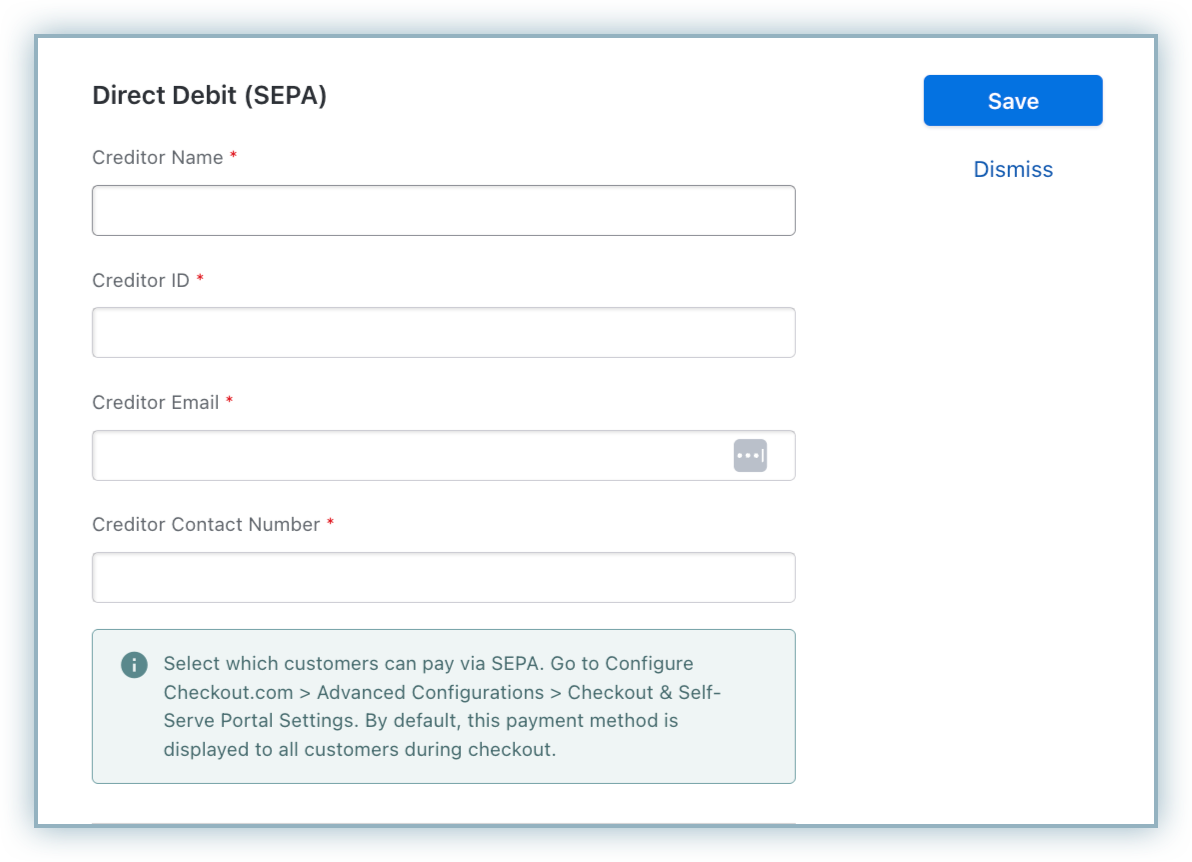
- Enter the following details on the SEPA Configuration page shown below:
- Enter the Creditor name, Creditor ID, Creditor Email, and Phone number. The Creditor name and Creditor ID are necessary to create an authorization agreement. An authorization agreement authorizes the biller to collect funds from the customer's bank account. If you wish to use Checkout.com's Creditor ID, please contact Checkout.com directly.
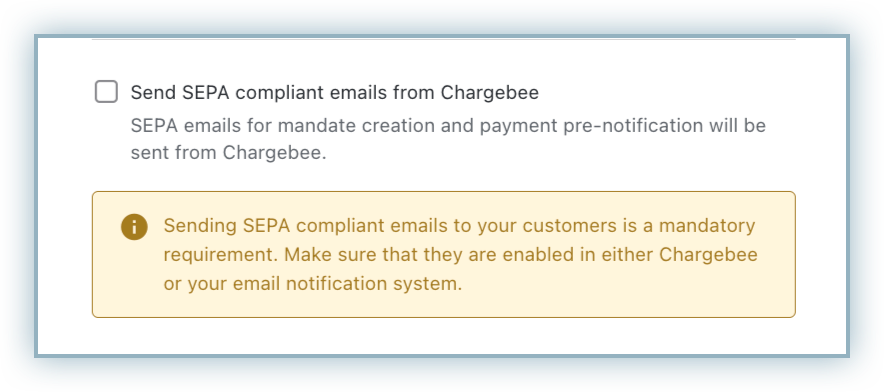
- Select Send SEPA compliant emails from Chargebee to send emails from Chargebee. It is the regulatory compliance of the SEPA scheme to send emails to customers regarding mandate creation and payment pre-notification. The advantage of sending this email from Chargebee is that it allows you to configure elements such as your company logo and signature.
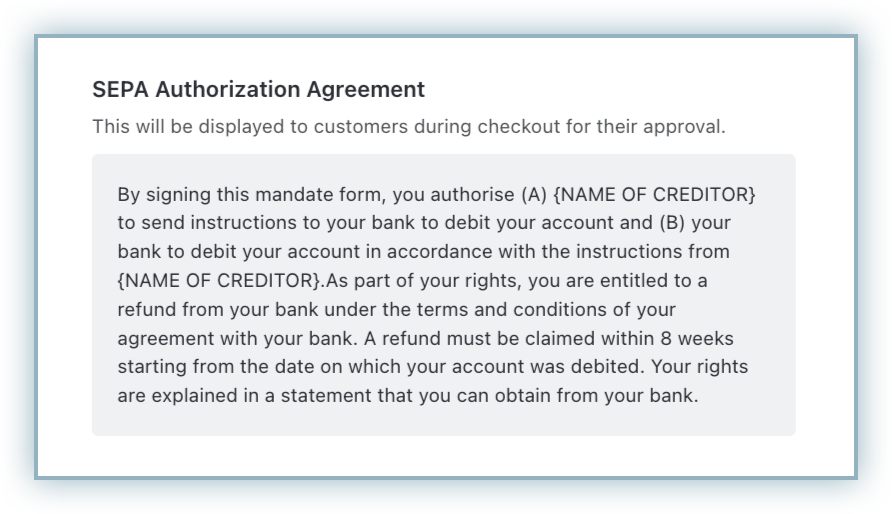
- According to the European Payment Council, when you enable SEPA Direct Debit payments for customers, an authorization agreement should be available for the customer to view and confirm the mandate. Read more on this.
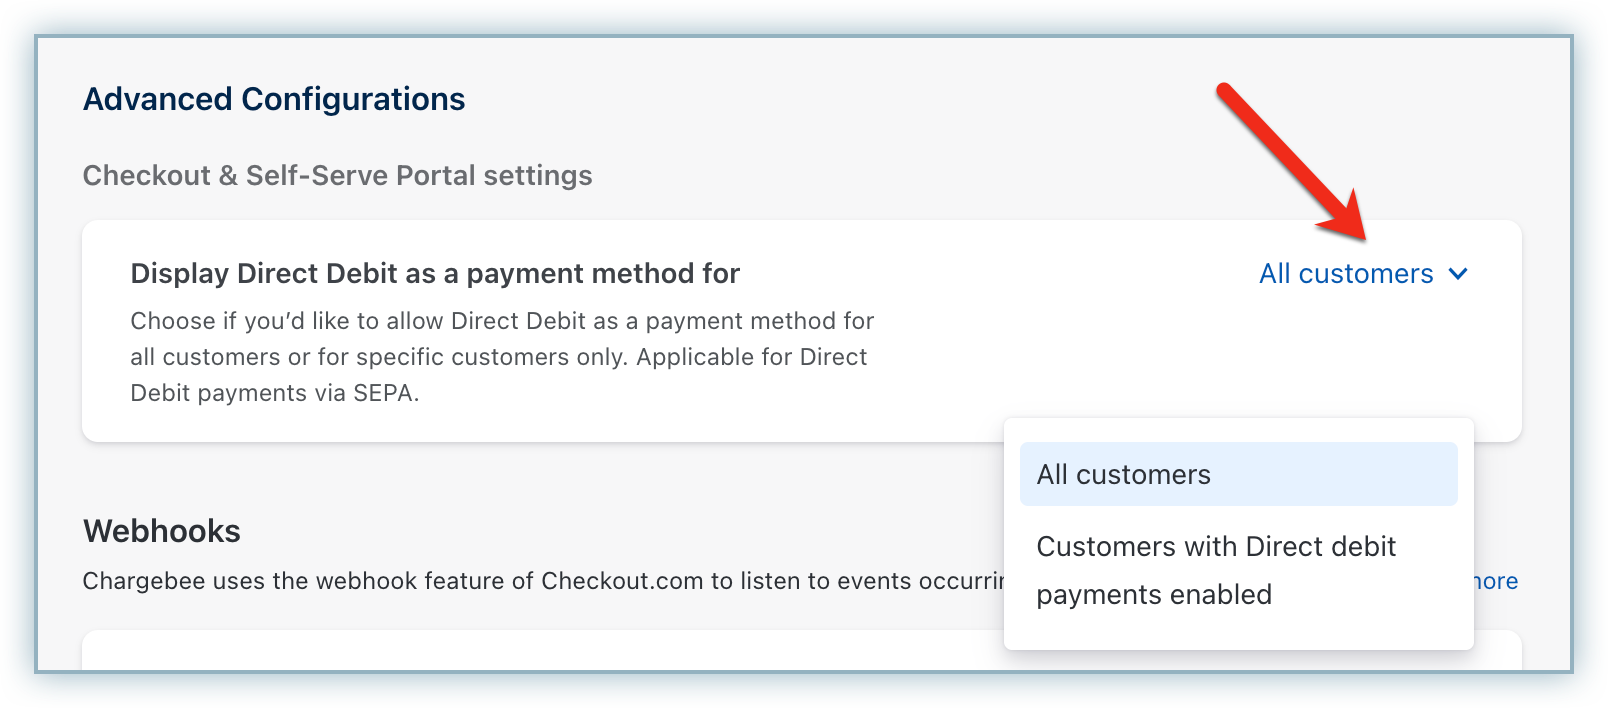
- Select customers to whom you wish to display the direct debit payment method in the Checkout and self-serve portal. Select the necessary option from the Display Direct Debit as a payment method drop-down list. Available options are:
- All your customers - This option allows all your customers (including new customers) to pay via SEPA, irrespective of whether the 'Allow this customer to pay via their bank account' option is enabled on the customer's details page.
- Customers with Direct Debit payments enabled
- Click Apply to save your changes.
Note
If there are three consecutive payment failures using the direct debit payment method, Chargebee will mark it as invalid. In such cases, you should remove the existing payment method and ask your customer to add a new one.
Configuring Webhooks
Webhooks are indispensable to a smooth SEPA workflow; they notify Chargebee of any changes made to the transaction on Checkout.com, so that Chargebee can keep you updated on the status of your payment.
Copy the Notification URL from your Checkout.com configuration page on the Chargebee site.
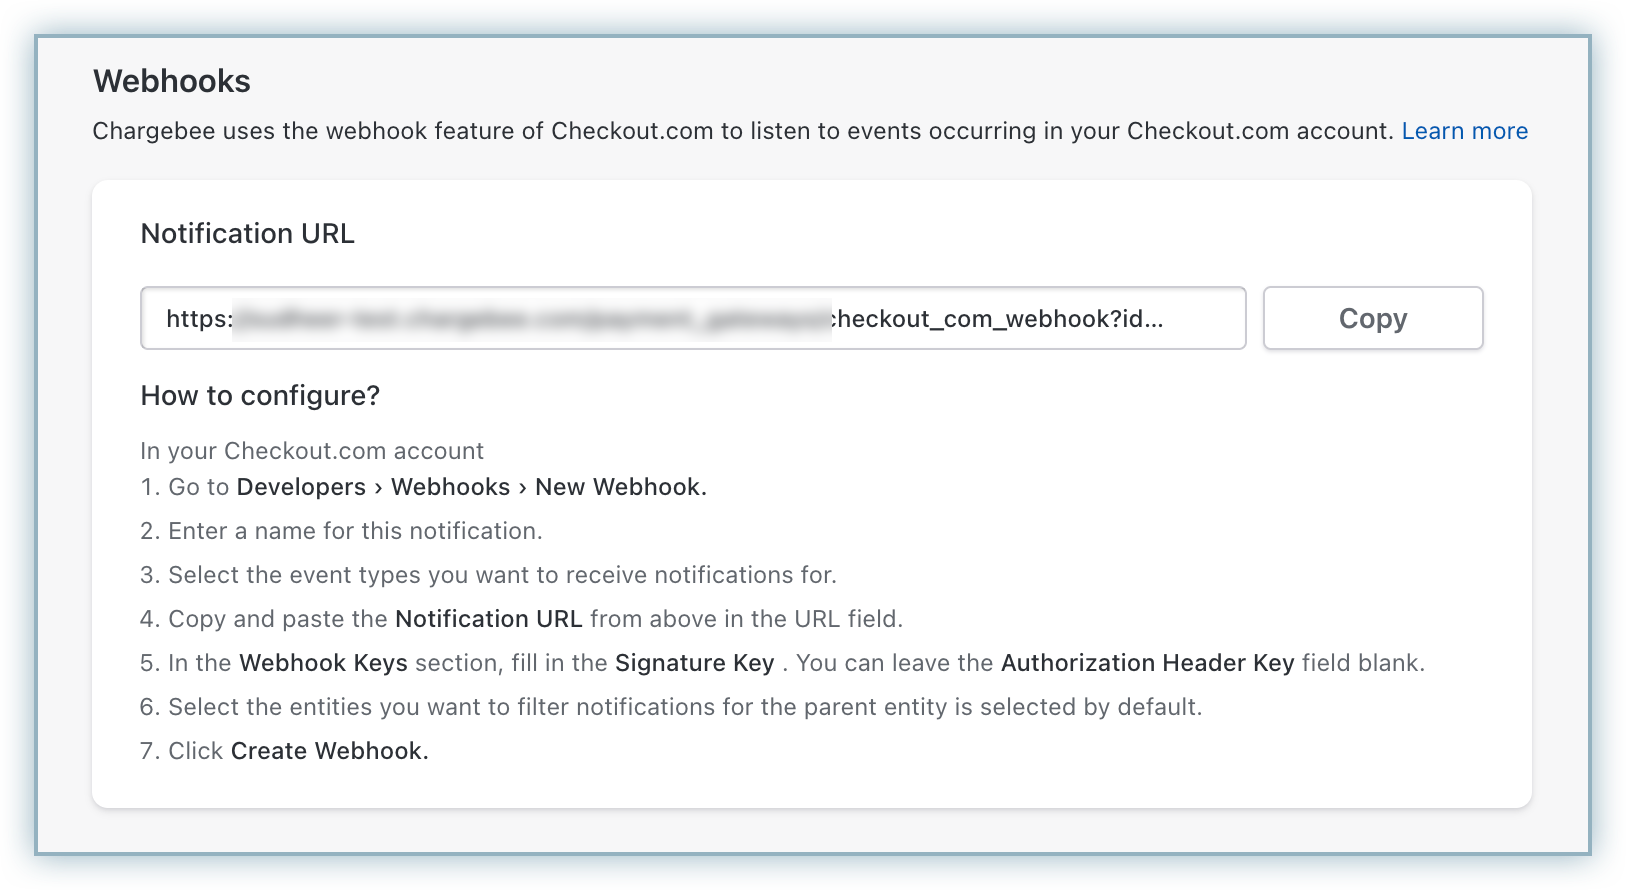
Follow the steps below to configure the webhook in your Checkout.com account:
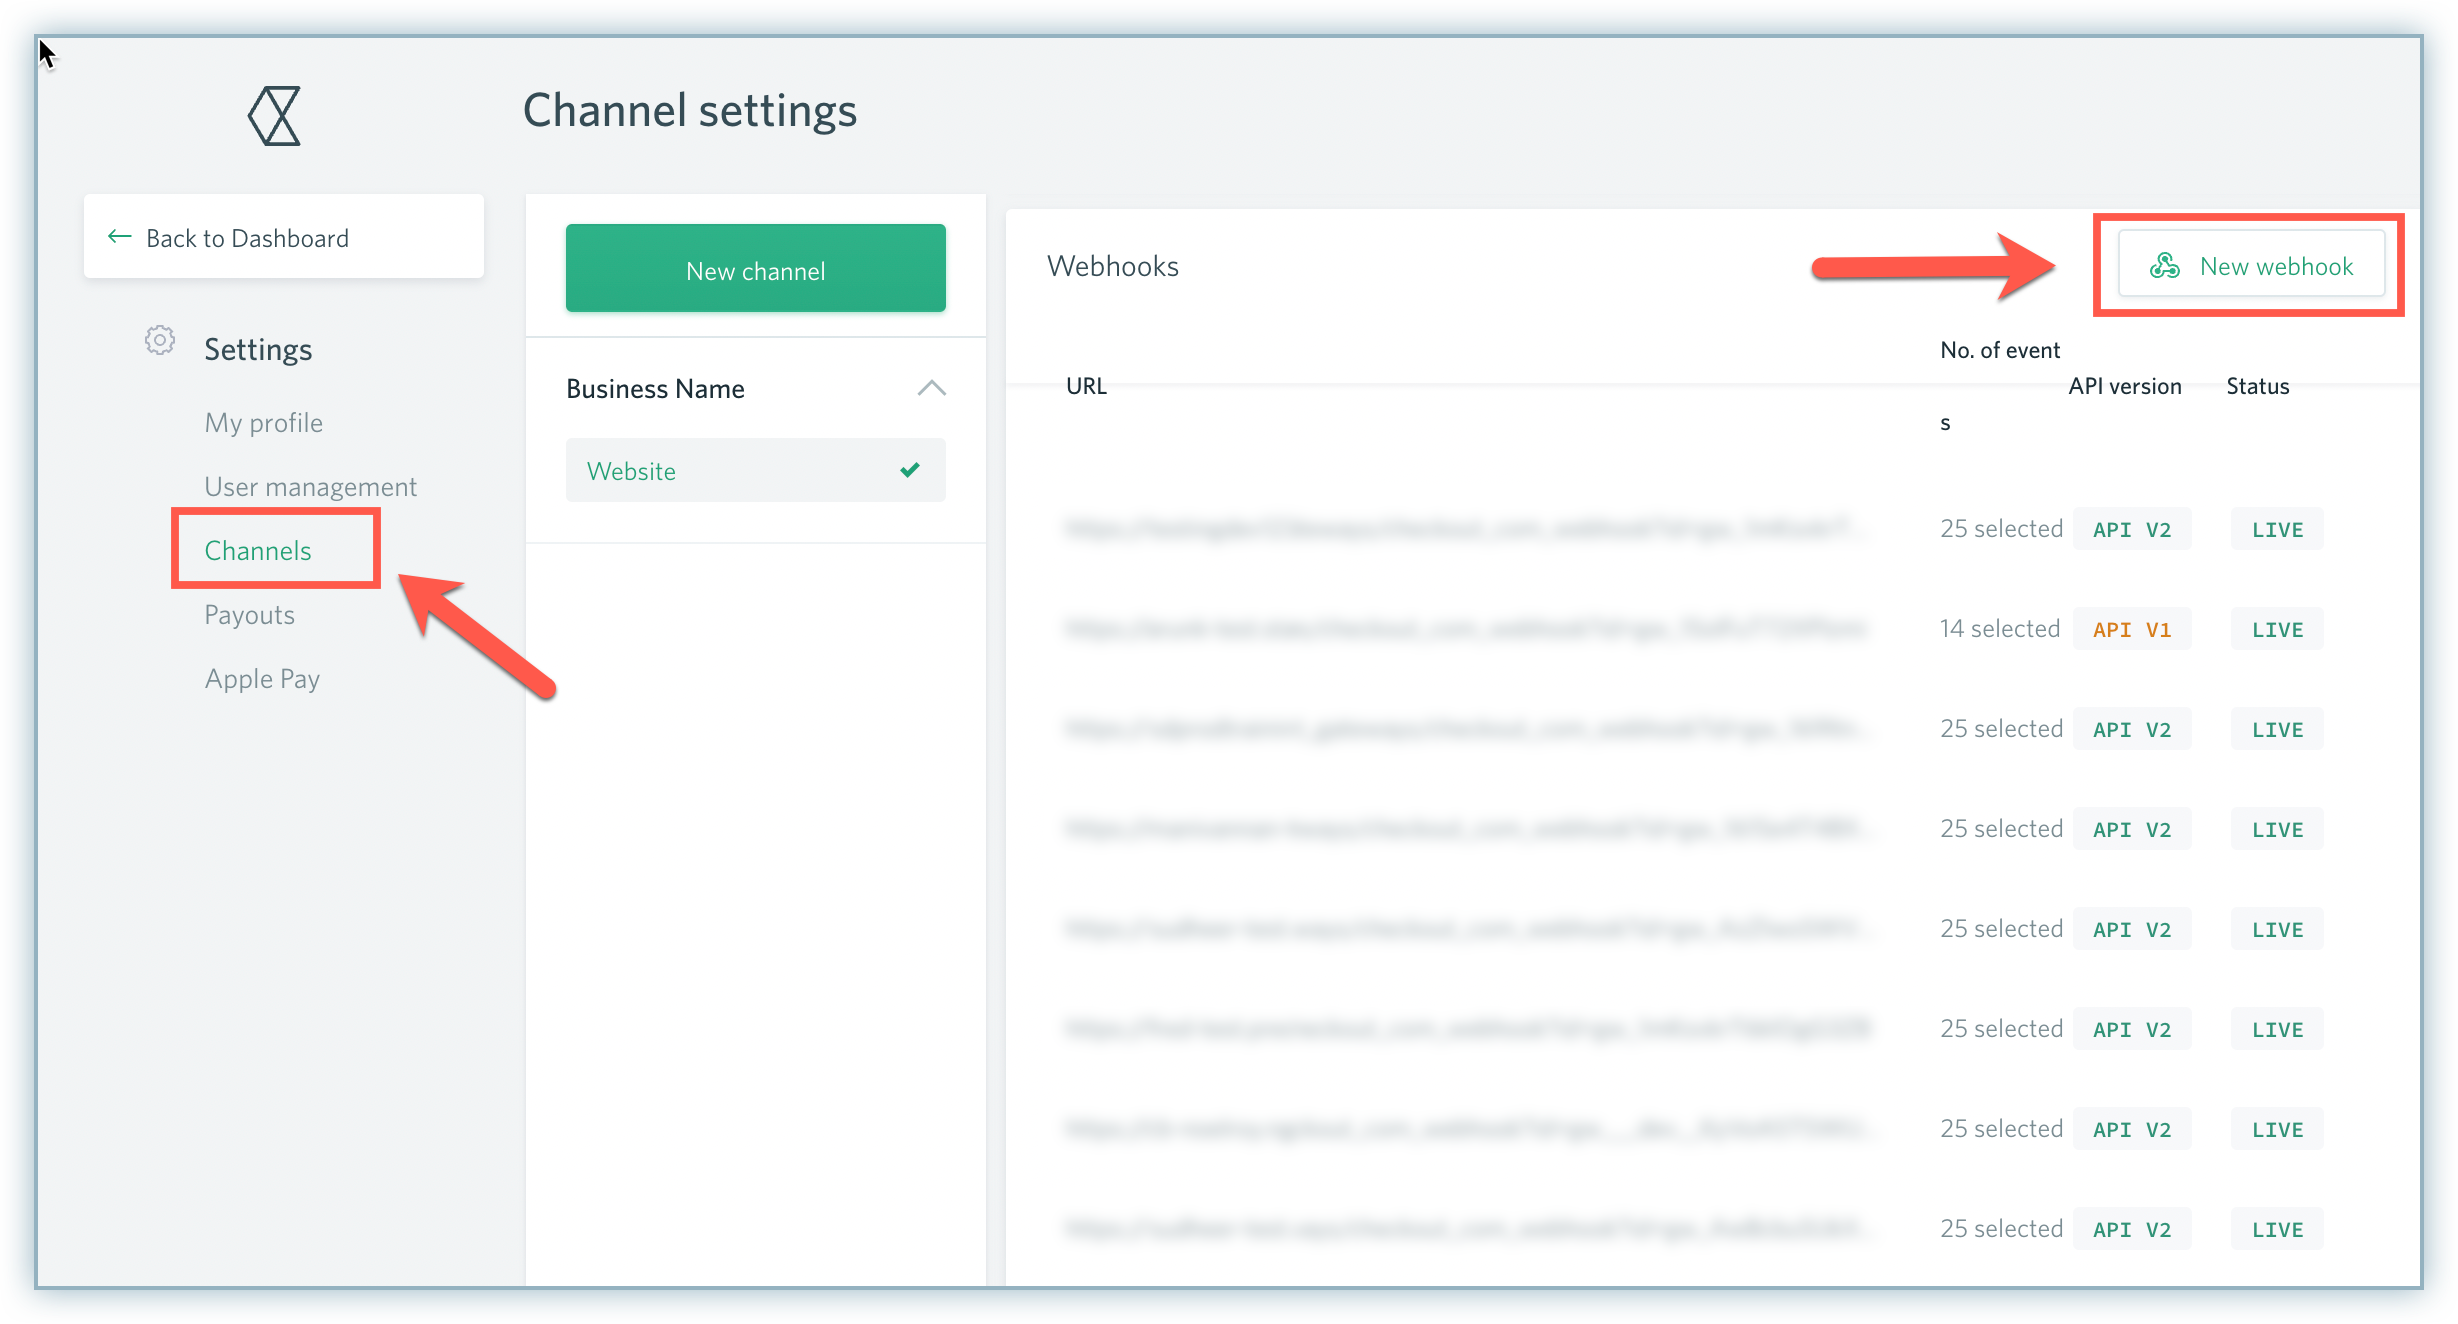
- Select Settings from the left navigation menu.
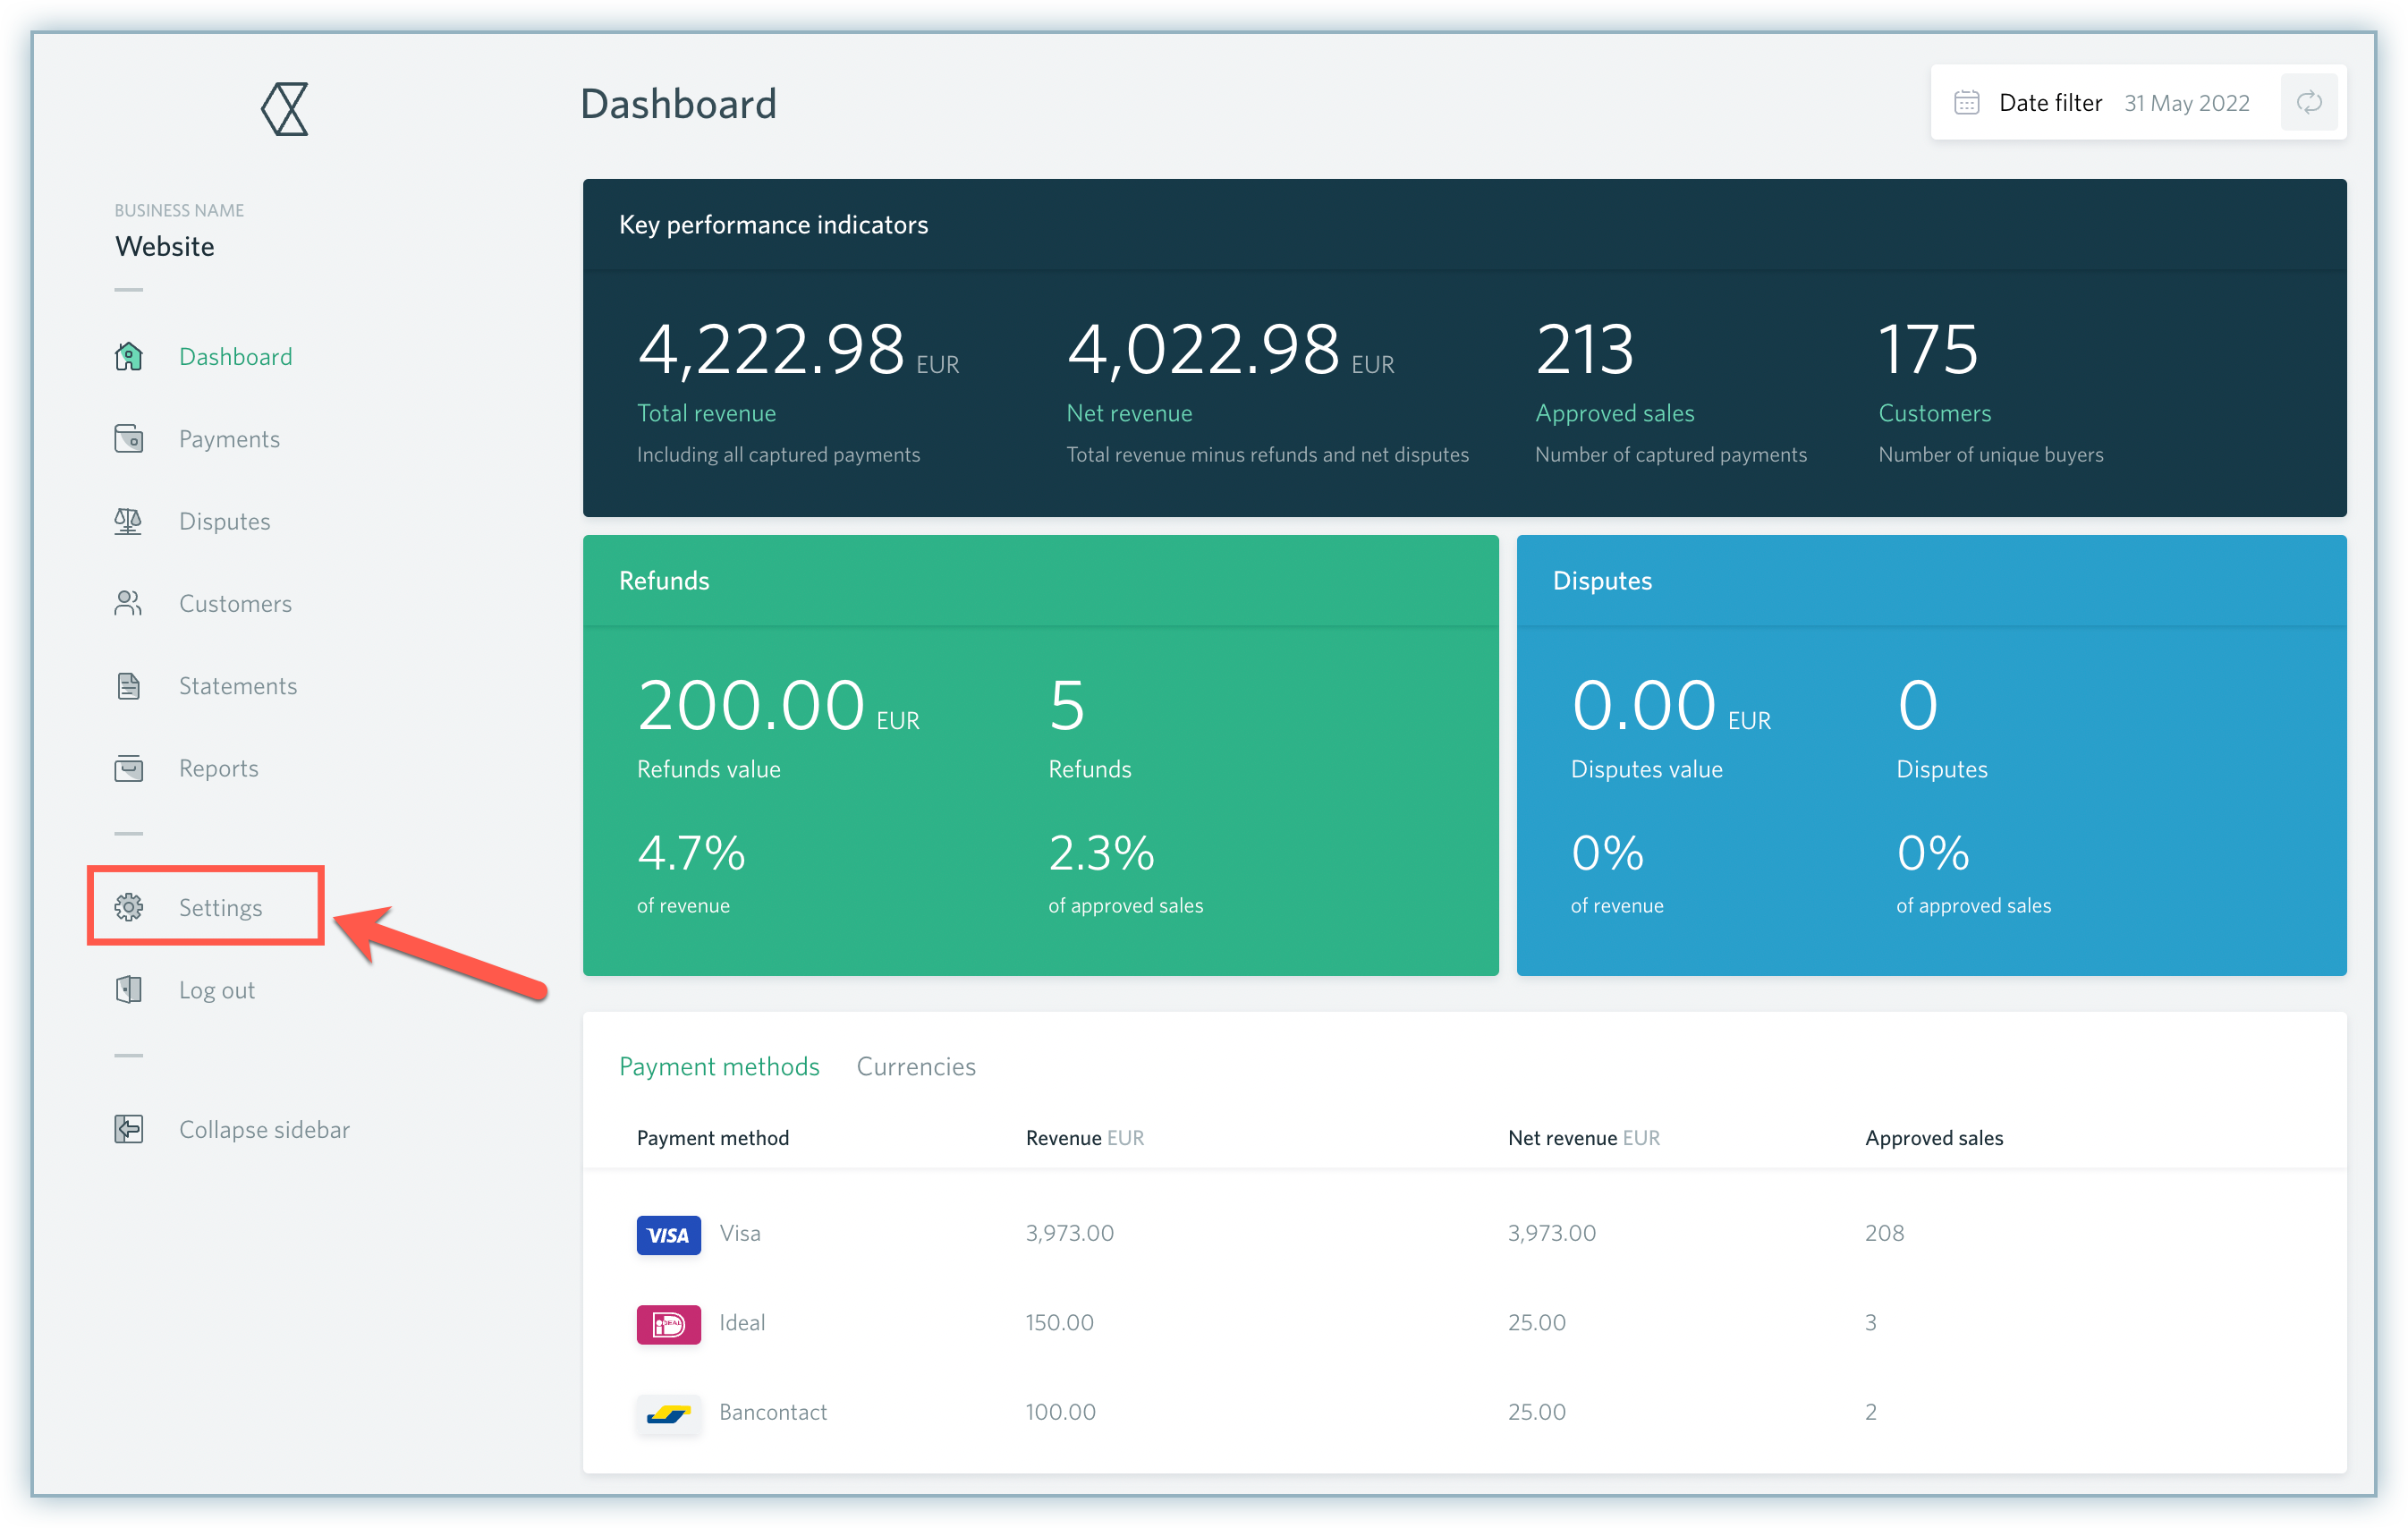
- Select Channels and click New Webhook under the Webhooks section.
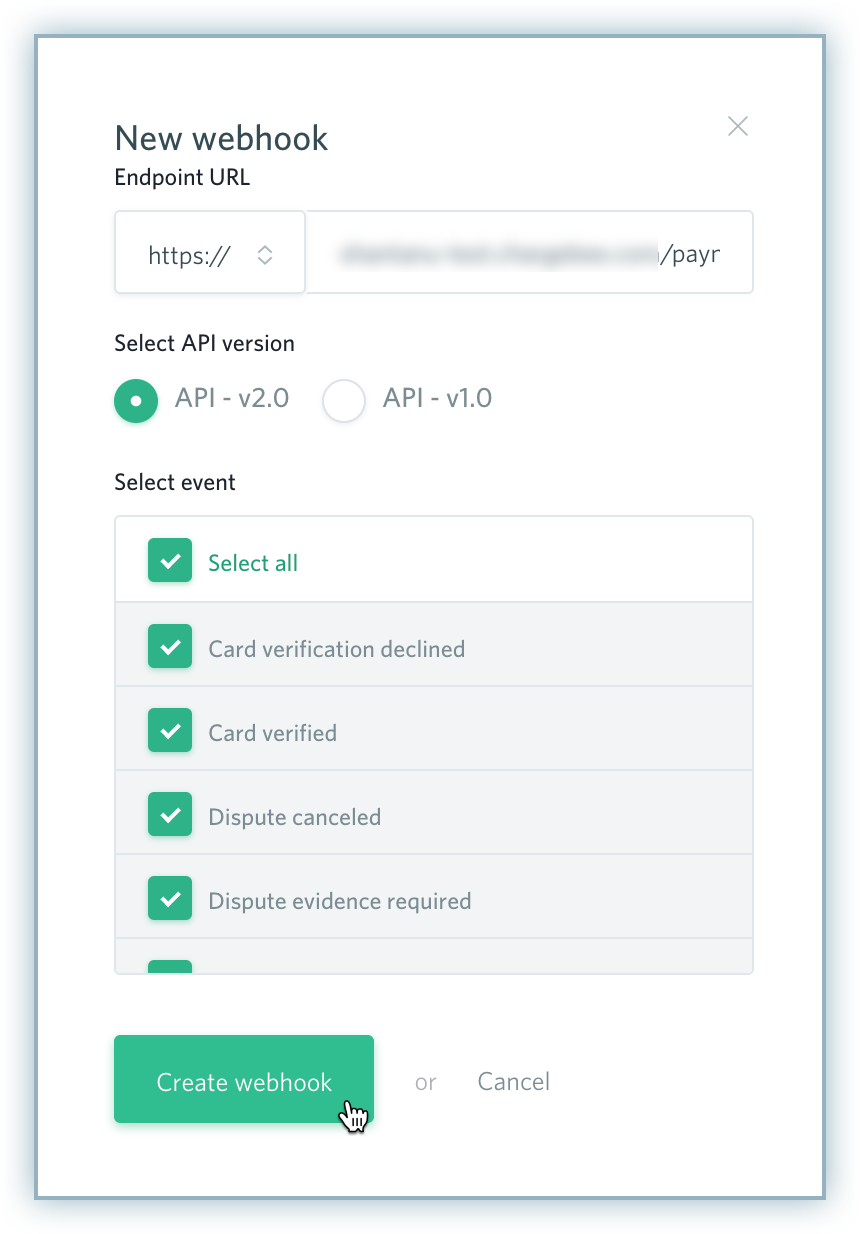
- Paste the Notification URL in the Endpoint URL field.
- Select the relevant API Version.
- Select the relevant events from the list. However, we recommend selecting all the events for Webhooks.
- Click Create webhook.
Was this article helpful?