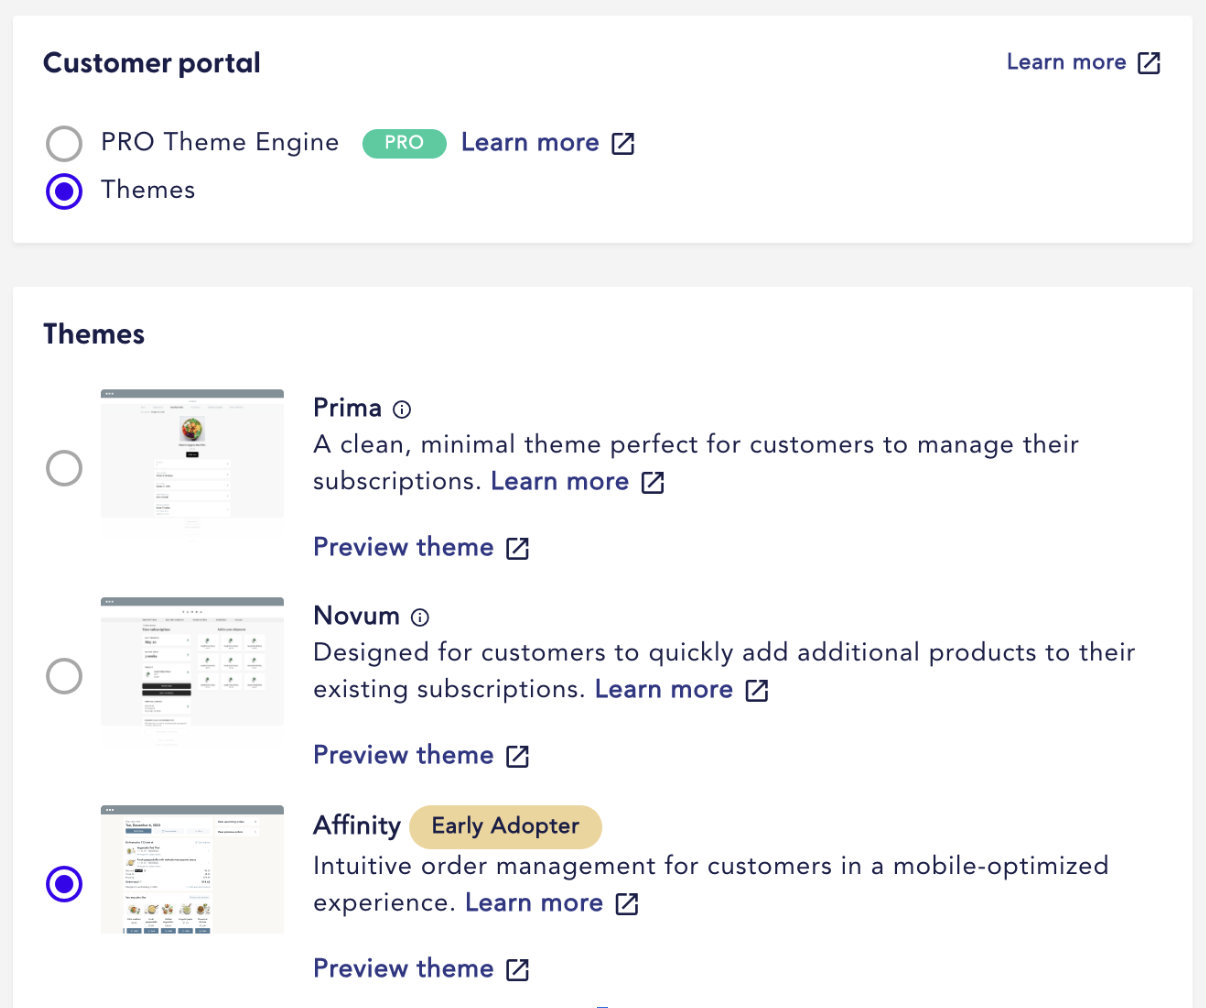
Adding Chargebee Retention to ReCharge's Affinity Theme
Integrating Chargebee Retention with ReCharge's Affinity theme is as easy as a quick copy and paste. No need to edit HTML or bulky themes.
Step 1: Create an API key for Chargebee Retention in ReCharge and add it to the Chargebee Retention integrations settings.
The first step to get Chargebee Retention integrated with Recharge is to generate an API key in your Recharge App and connect it to Chargebee Retention. To do so, navigate to Recharge > Apps > API Tokens.
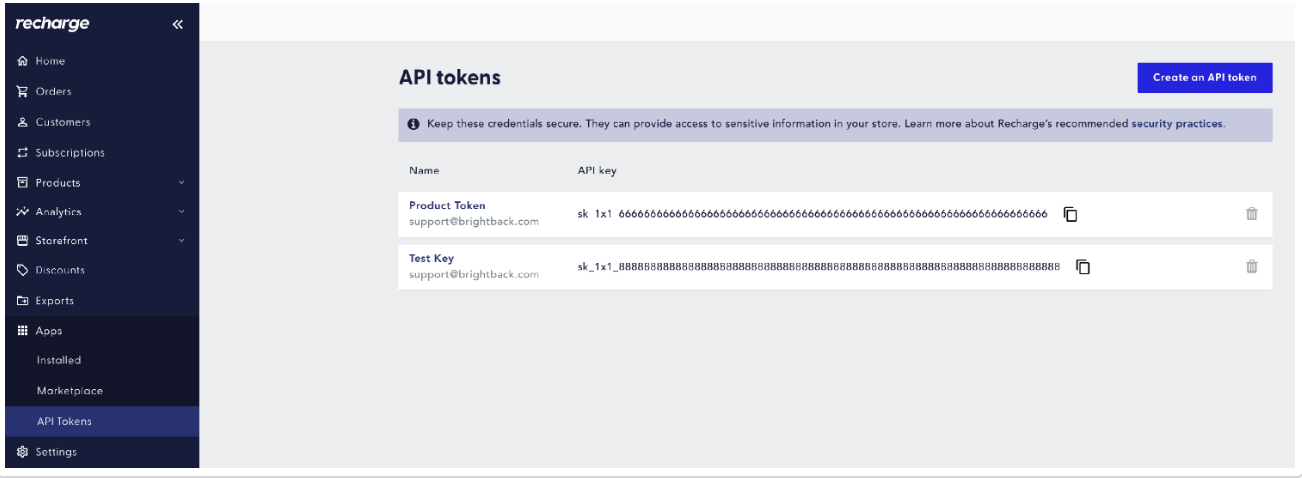
Here you will have the option to Create an API token. Be sure to give it the following Permission Scope's to ensure all of the Chargebee Retention features work.
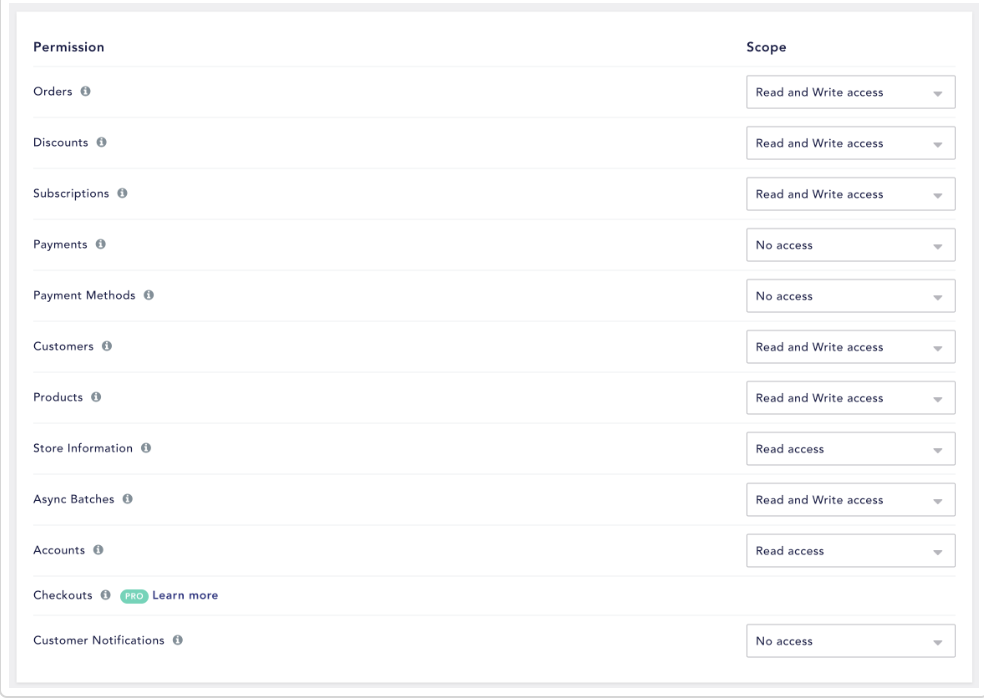
This will allow us to Enrich sessions with customer data, process cancels and process offers in billing. It will also enable the future Revenue Impact reporting features that will be coming down the road. Once you have your keys generated, copy them and head over to the Chargebee Retention App to connect the Integration via Settings > Integrations > Billing Integrations
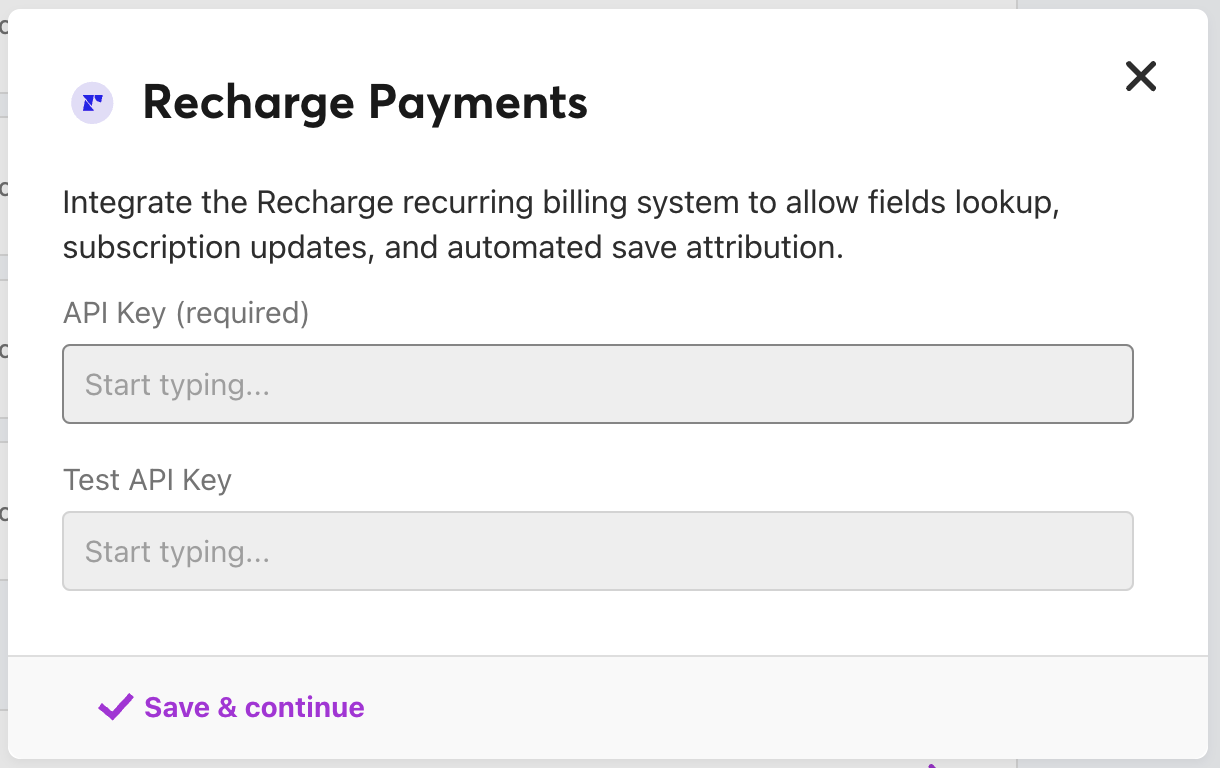
Here we give you the option to plug in a live key and a test key. We recommend linking your test key to a test billing site that can be used with the Sample Session generator to test the Manage Cancels and Manage Offer features of your integration. We cover this in more detail in this article.
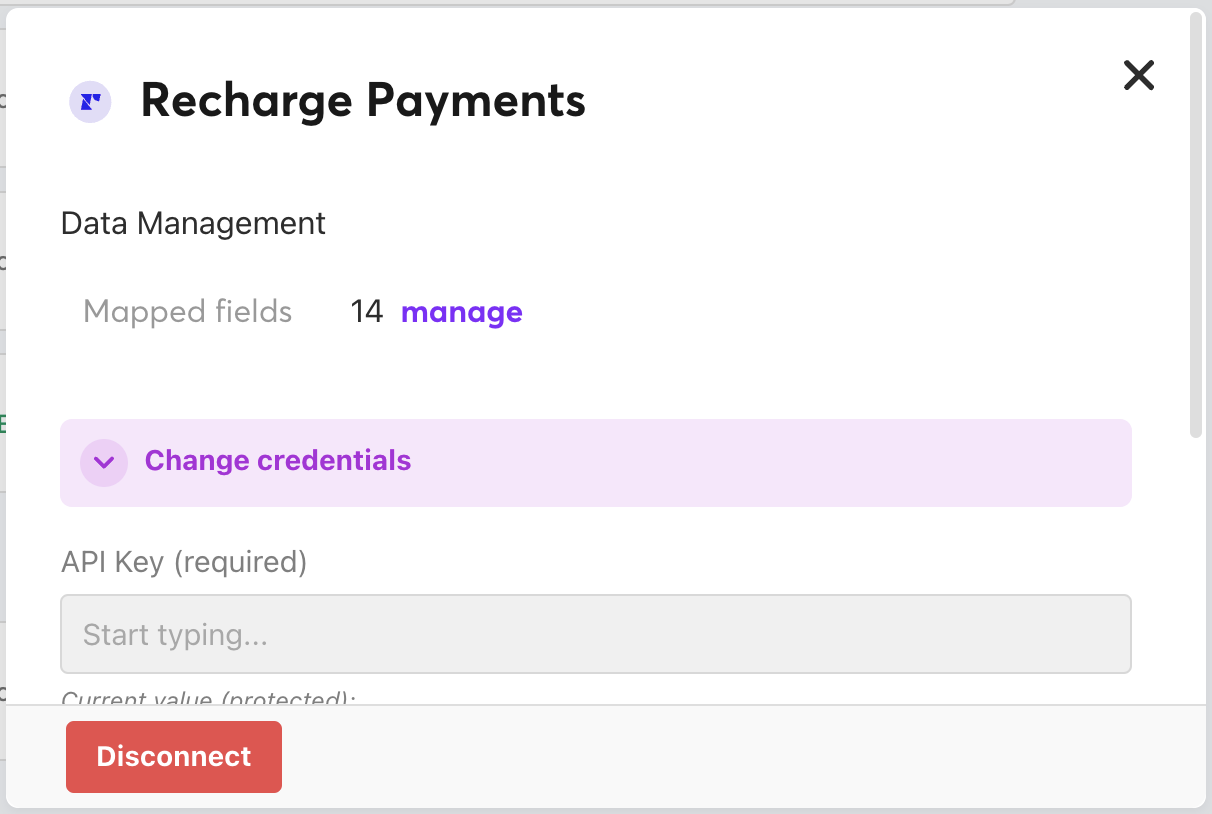
Once you have connected the API keys you will see that fields have been mapped and you can now "Manage the integration." You are now ready to setup Enrichment, Manage Cancels and Manage Offers.
Step 2: Set up your Chargebee Retention experiences with your dedicated Integration Consultant. You'll want to
- Enable offer and cancel management
- Create or edit the messaging you would like display to your cancellers
- Provide offers such as Discounts, Pauses and Free gifts
- Create target audiences and an initial test.
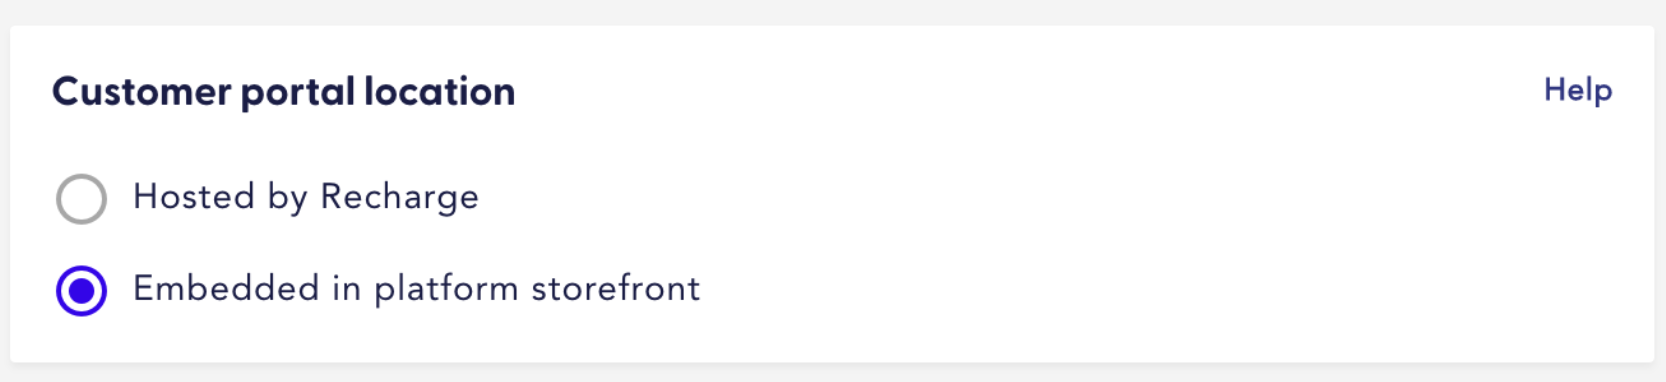
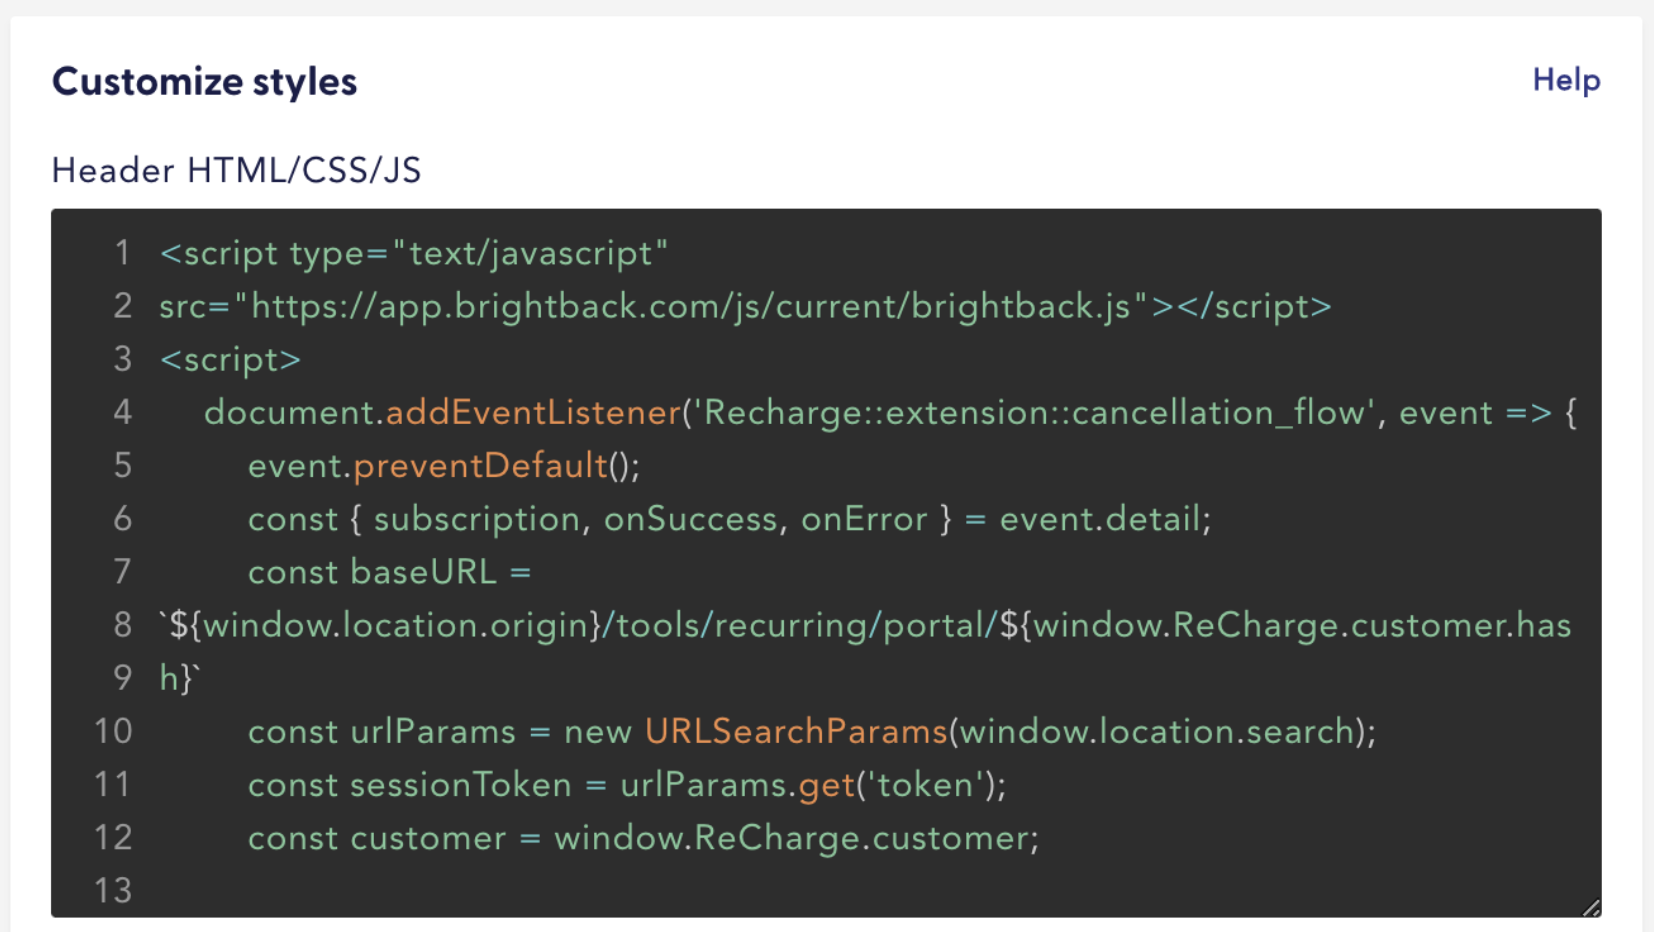
Step 3: Copy the Chargebee Retention Code snippet and add it to the ReCharge Customer Portal.
In ReCharge, Navigate to Storefront > Customer Portal and select the following options.
Be sure to select "Embedded in platform storefront" or you'll be sure to get an error message.
Next copy and paste the code snippet with your Chargebee Retention app id into the "Header" or "Footer section" of the Customer Portal settings.
Step 4: The final step is to simply click "Save". Cancellers will now be redirected to Chargebee Retention.

Sample snippet
The following code snippet is provided as an example that can be used with an updated Chargebee Retention app_id and can be customized if desired.
<pre><code><script type="text/javascript" src="https://app.brightback.com/js/current/brightback.js"></script>
<script>
document.addEventListener('Recharge::extension::cancellation_flow', event => {
 event.preventDefault();
 const { subscription, onSuccess, onError } = event.detail;
 const baseURL = `${window.location.origin}/tools/recurring/portal/${window.ReCharge.customer.hash}`
 const urlParams = new URLSearchParams(window.location.search);
 const sessionToken = urlParams.get('token');
 const customer = window.ReCharge.customer;

 window.Brightback.handleDataPromise({
  app_id: 'RETENTION_APP_ID',
  subscription_id: subscription.id,
  save_return_url: `${baseURL}/overview?token=${sessionToken}`,
  cancel_confirmation_url: `${baseURL}/overview?token=${sessionToken}`
}).then(result => {
  if (result.valid) {
   window.location = result.url;
   } else {
     onError();
   }
  });
});
</script>
</code></pre>
Was this article helpful?