Connect Play Store with Chargebee
This document guides you through the process of connecting your Google Play Store app with Chargebee. To connect Google Play Store with Chargebee, you must provide permissions to Chargebee through a service account. This permission allows Chargebee to connect to Google on behalf of your app and manage your subscriptions too. Establishing this connection offer you the following benefits:
- Validate in-app purchase token with Google server.
- Sync all In-App Purchase (IAP) subscriptions to Chargebee.
- Single source of truth for subscriptions across web and App.
- Derive insights by linking play Store transactions to existing customer data.
- Leverage on Chargebee's expertise to manage IAP subscriptions.
Retrieving App information from Google Play Store
Chargebee requires the following information to connect to Google on behalf of your app:
- App Name
- Package Name
- Service Account Credentials JSON
App Name and Package Name
To retrieve your App Name and App Package Name, follow these steps:
-
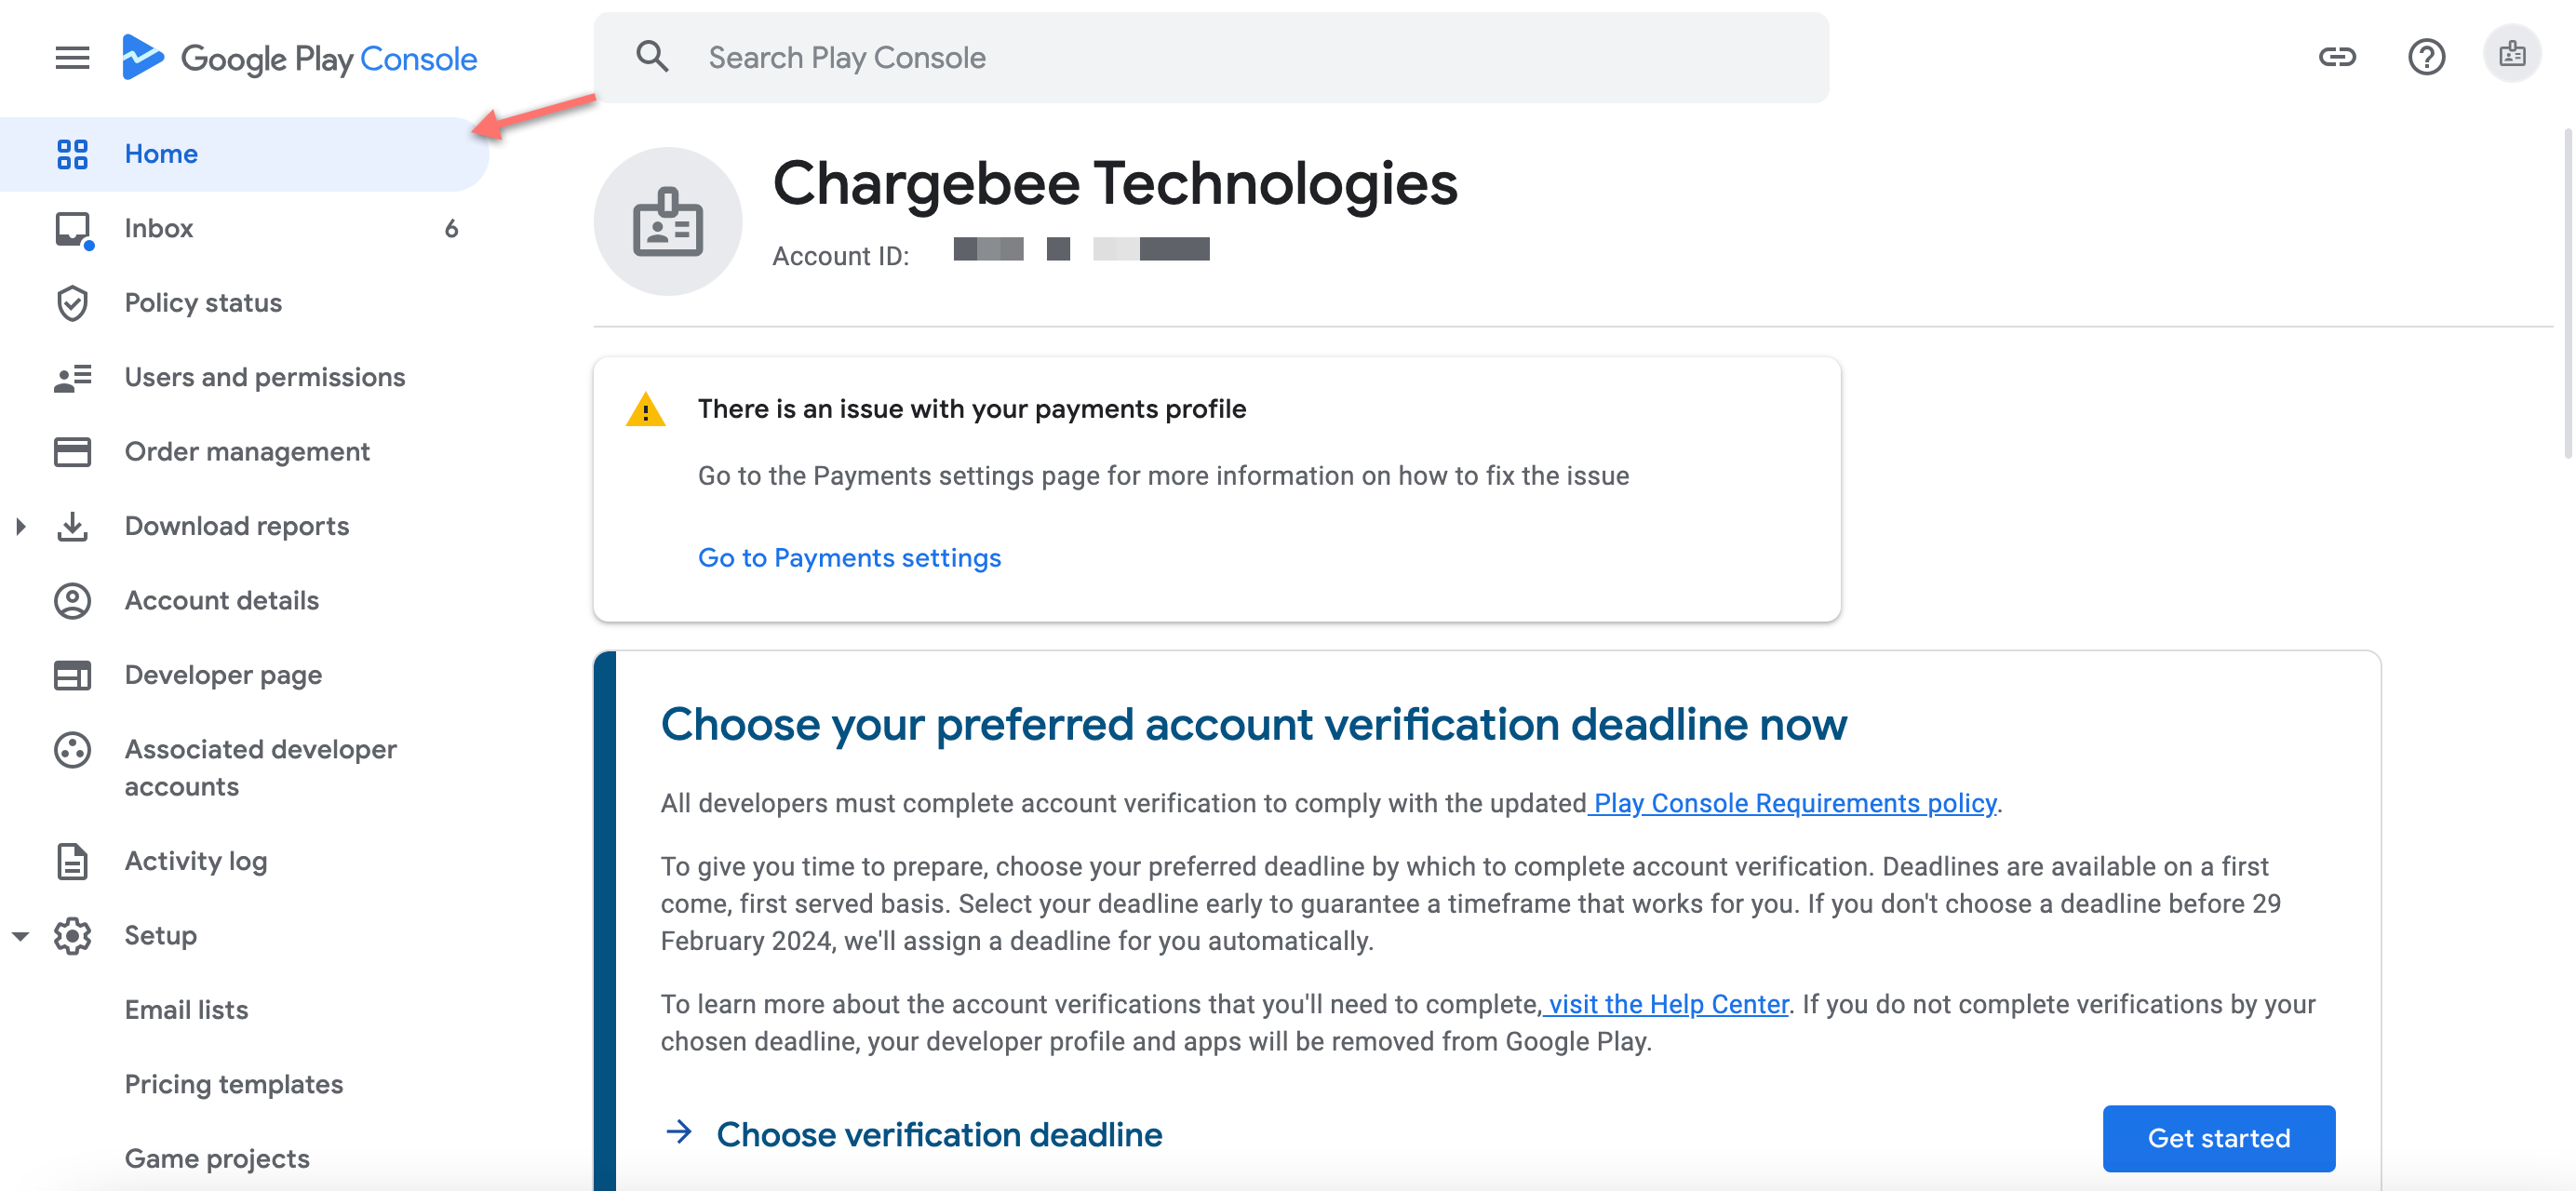
Login to your Google Play Store Console.
-
Click Home from the main menu.
-
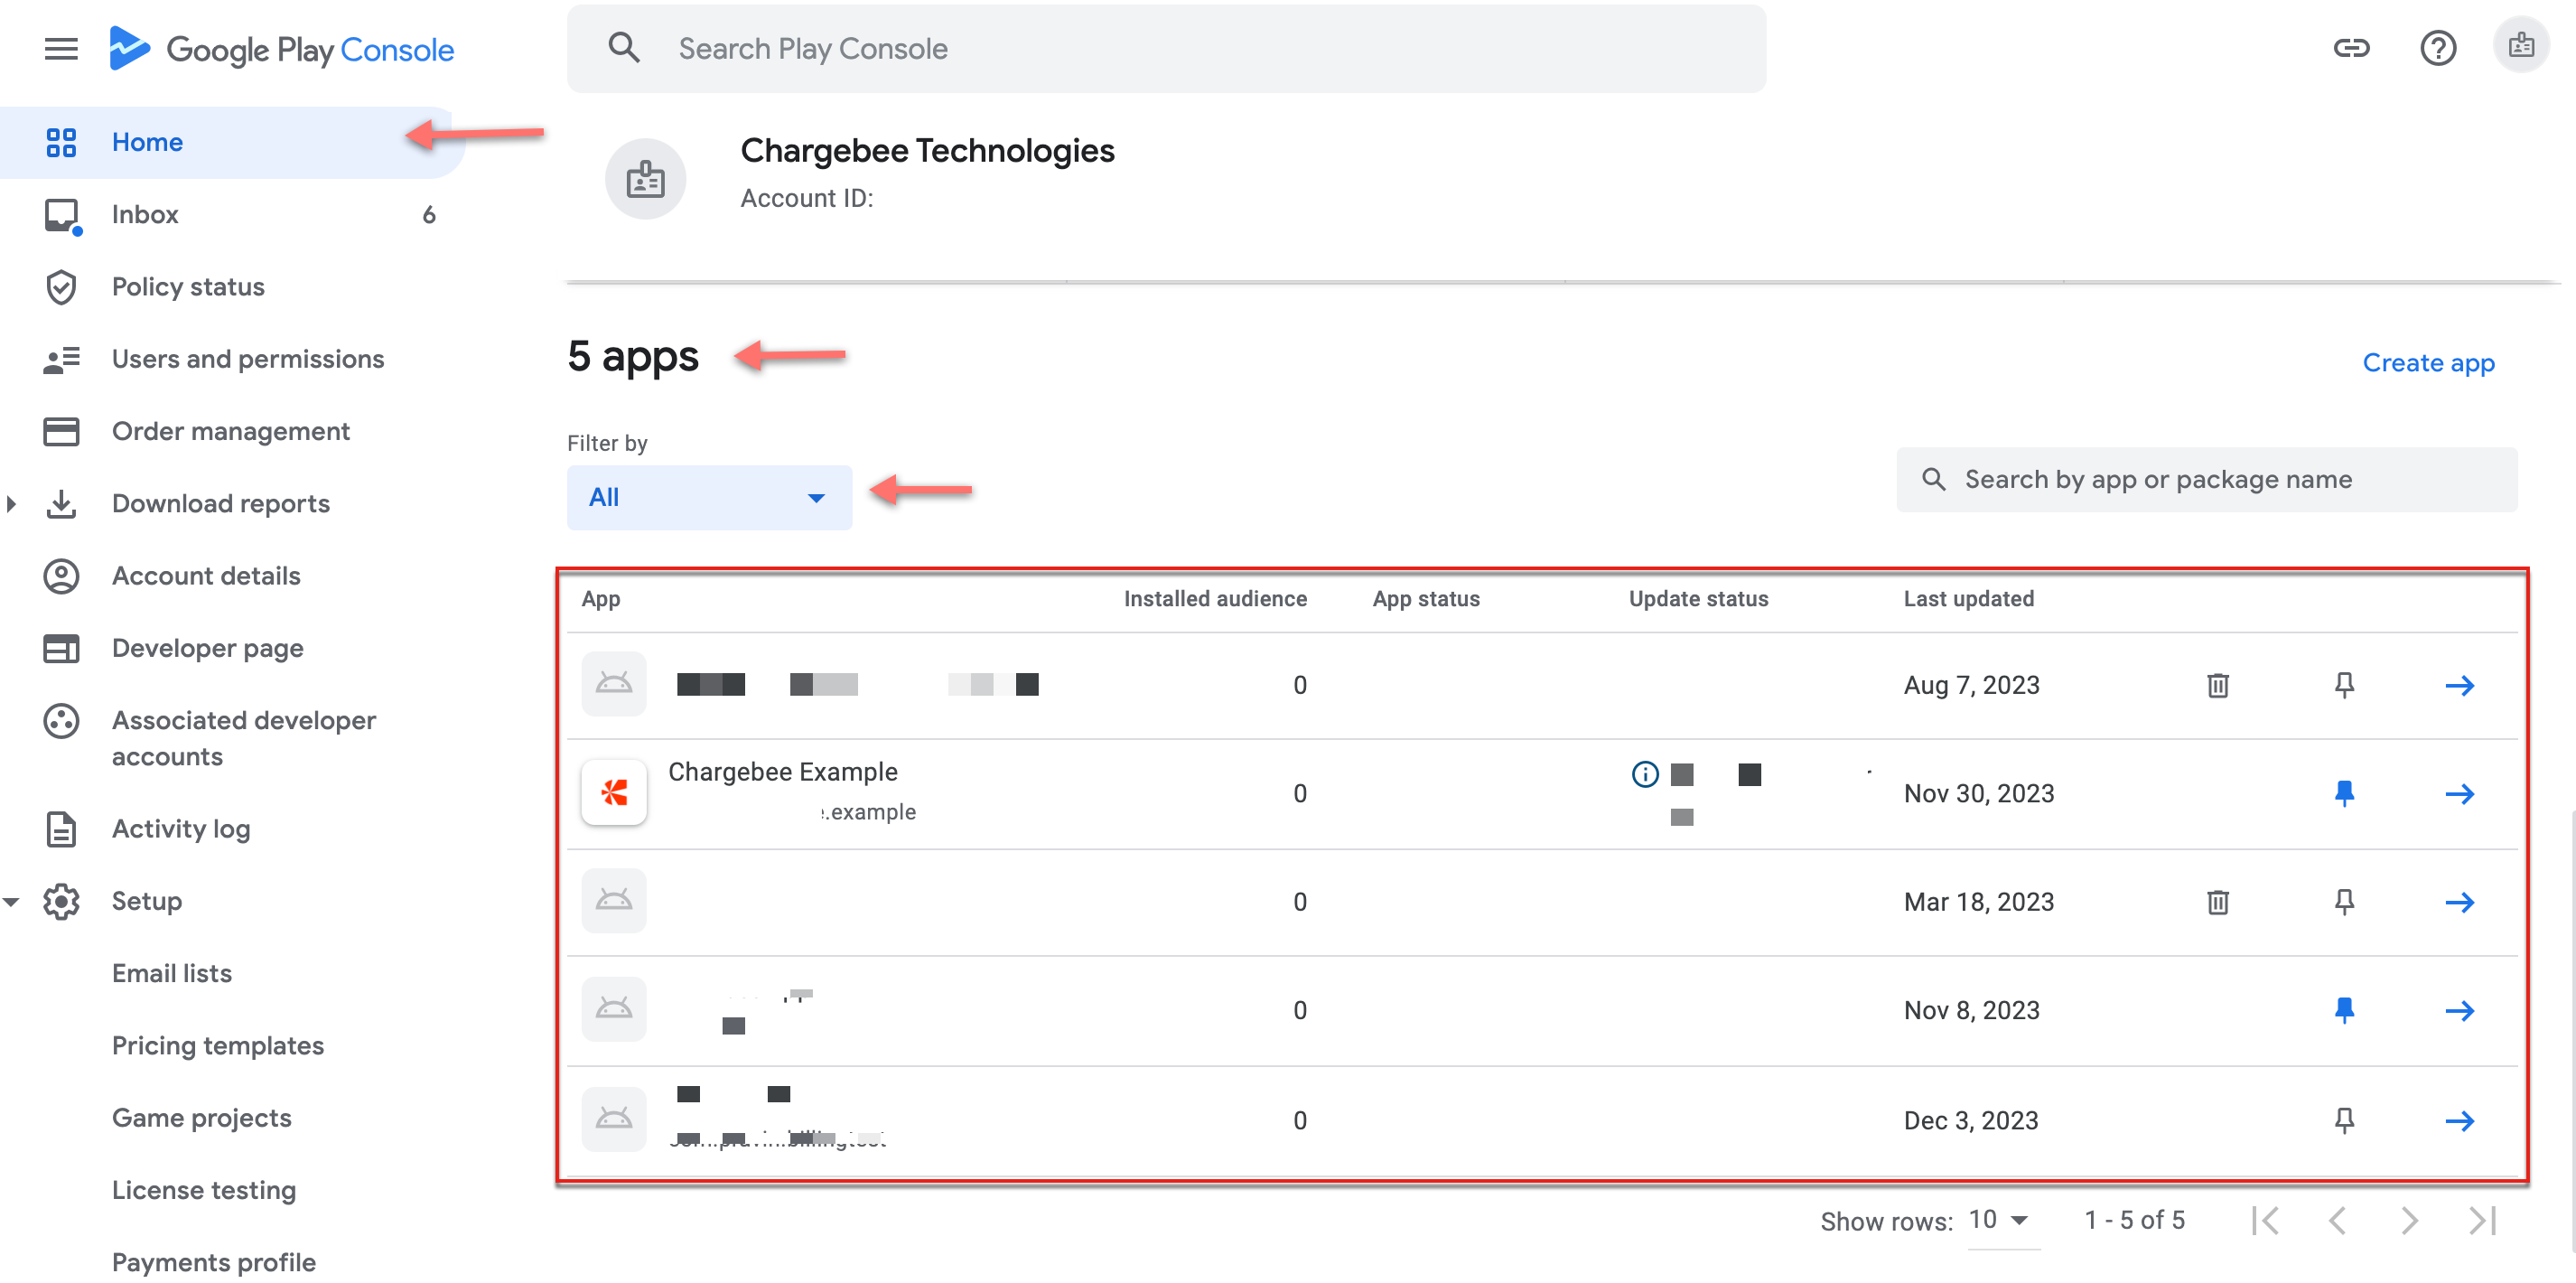
Review the list of apps present in your Google Play Console.
-
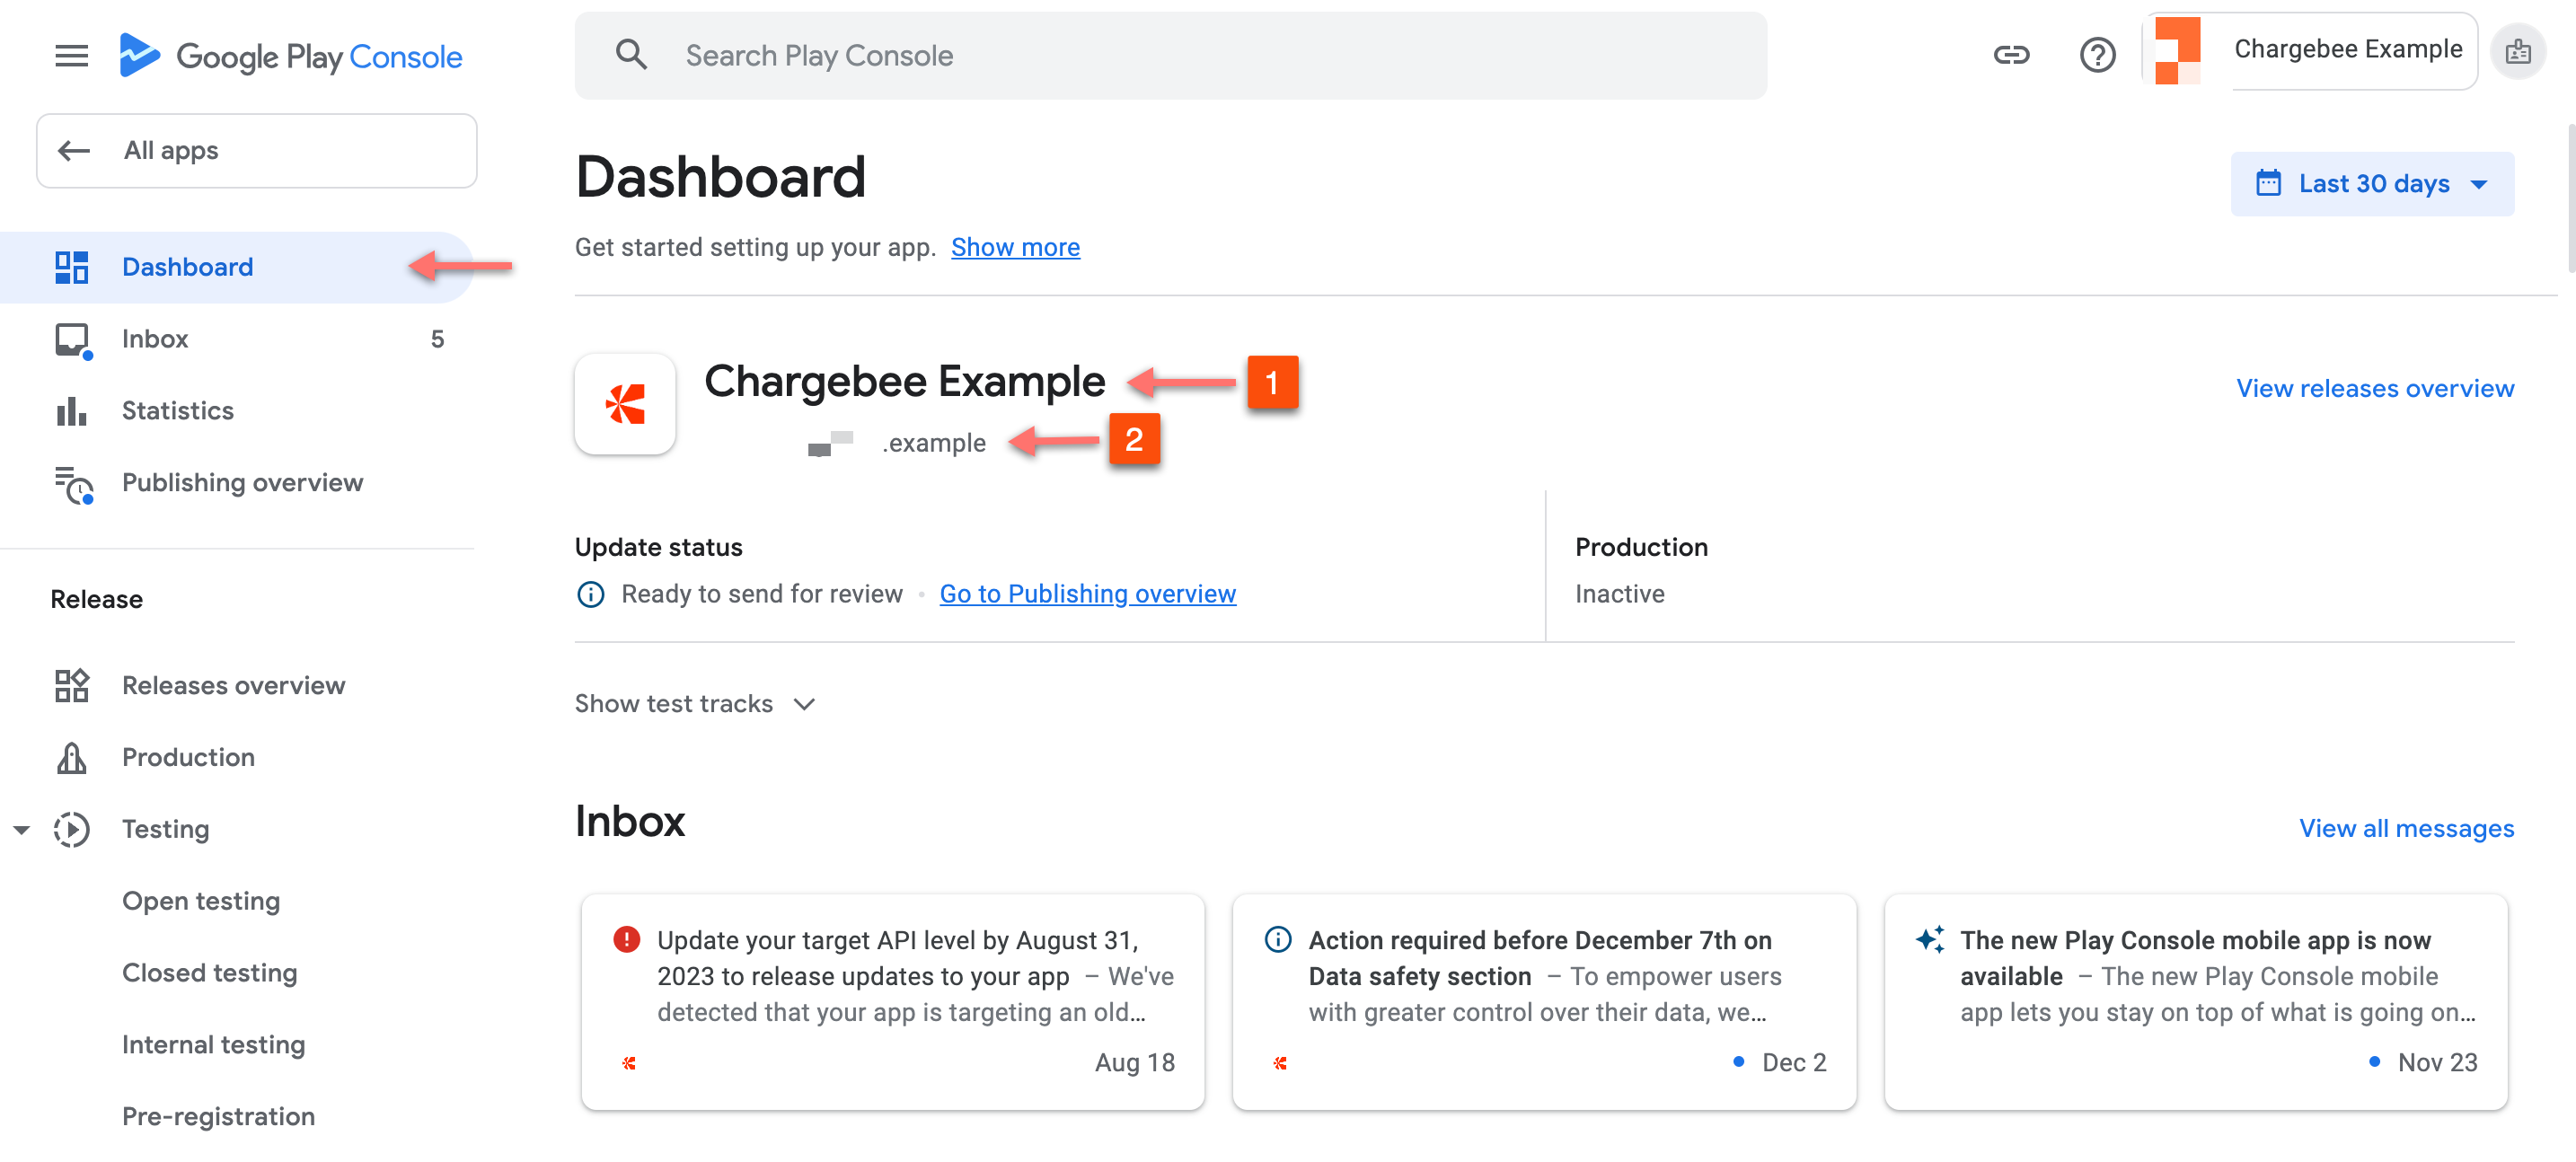
Click the specific App from the list and navigate to Dashboard to check the App Name and App Package Name.
- App Name
- App Package Name
-
Take a note of the App Name and App Package Name that you want to connect with your Chargebee account.
Generate Service Account Credentials JSON File
To enable Chargebee servers to communicate with Google on behalf of your app, you need to provide service credentials by generating a service account credentials JSON file. Follow the steps carefully to generate this file.
Note:
Google Play Service Credentials might require up to 36 hours to become fully operational with the Google Play Android Developer API.
Step 1: Enable Google Developer and Reporting APIs
These APIs have to be enabled to manage your app in the Google Play Store and consume the data from Google Play Console for reporting.
To enable Google Play Android Developer API and Google Play Developer Reporting API, follow these steps:
-
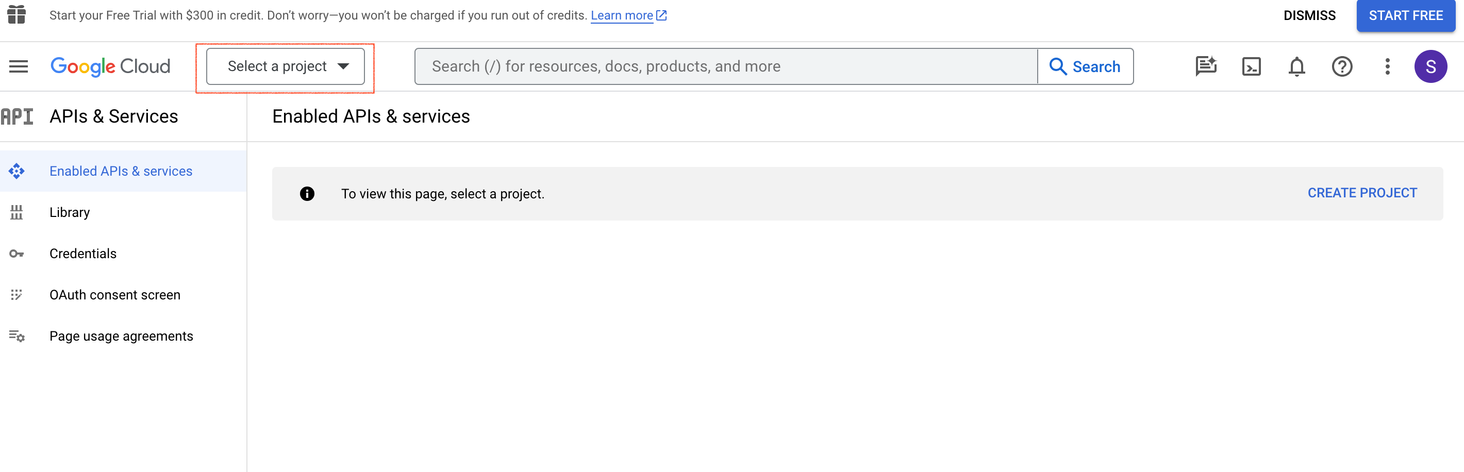
Login to your Google Cloud Console.
-
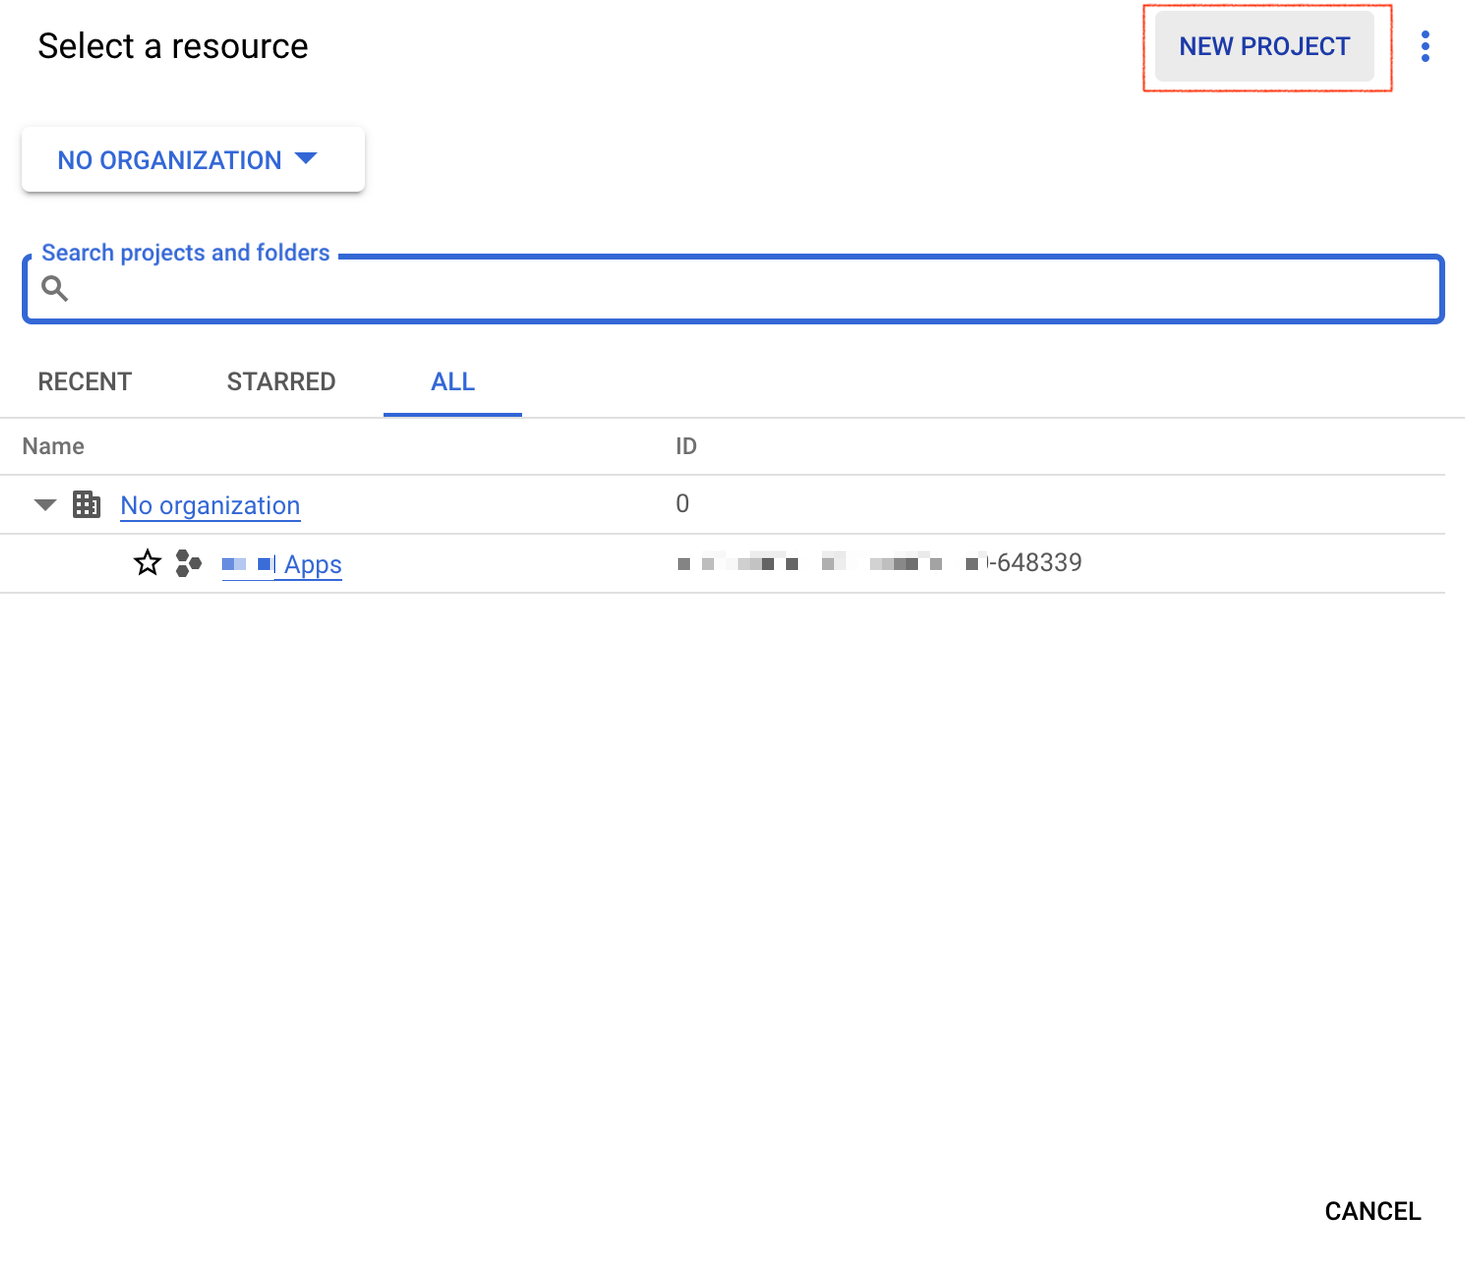
Select a project from the dropdown list.
-
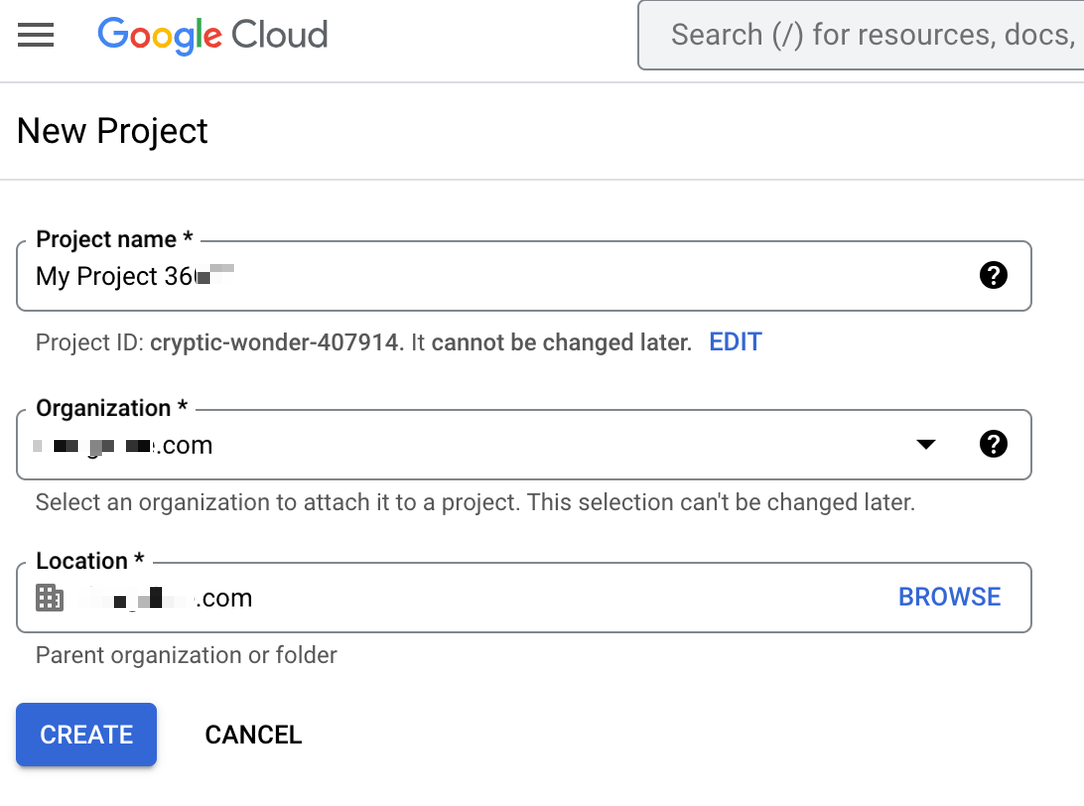
Optional: Click NEW PROJECT to create a new project if you do not have an existing project.
- Enter the Project name, Organization, and Location to create a new project and click CREATE.
- Enter the Project name, Organization, and Location to create a new project and click CREATE.
-
Navigate to APIs & Services > Enable APIs & services. Click + ENABLE APIS AND SERVICES.

-
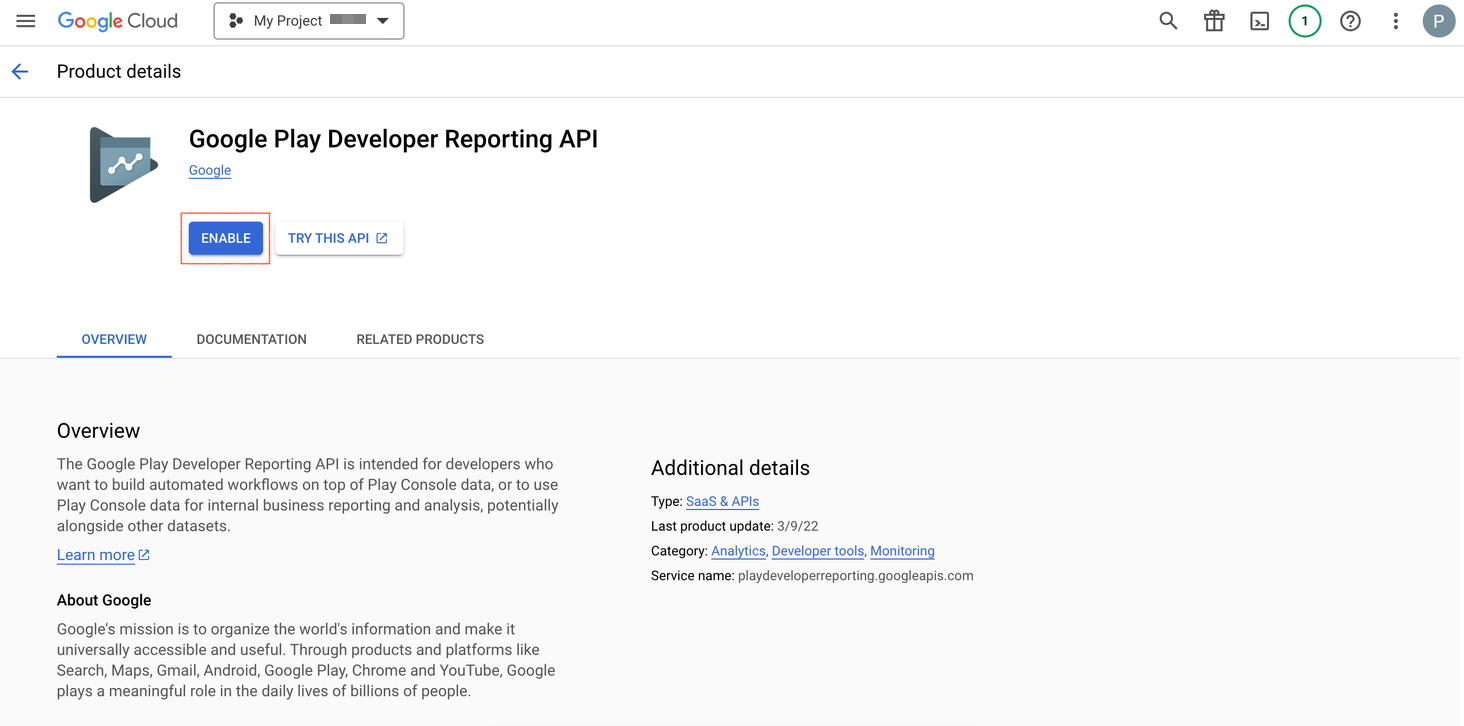
Search Google Play Android Developer API and Google Play Developer Reporting API.
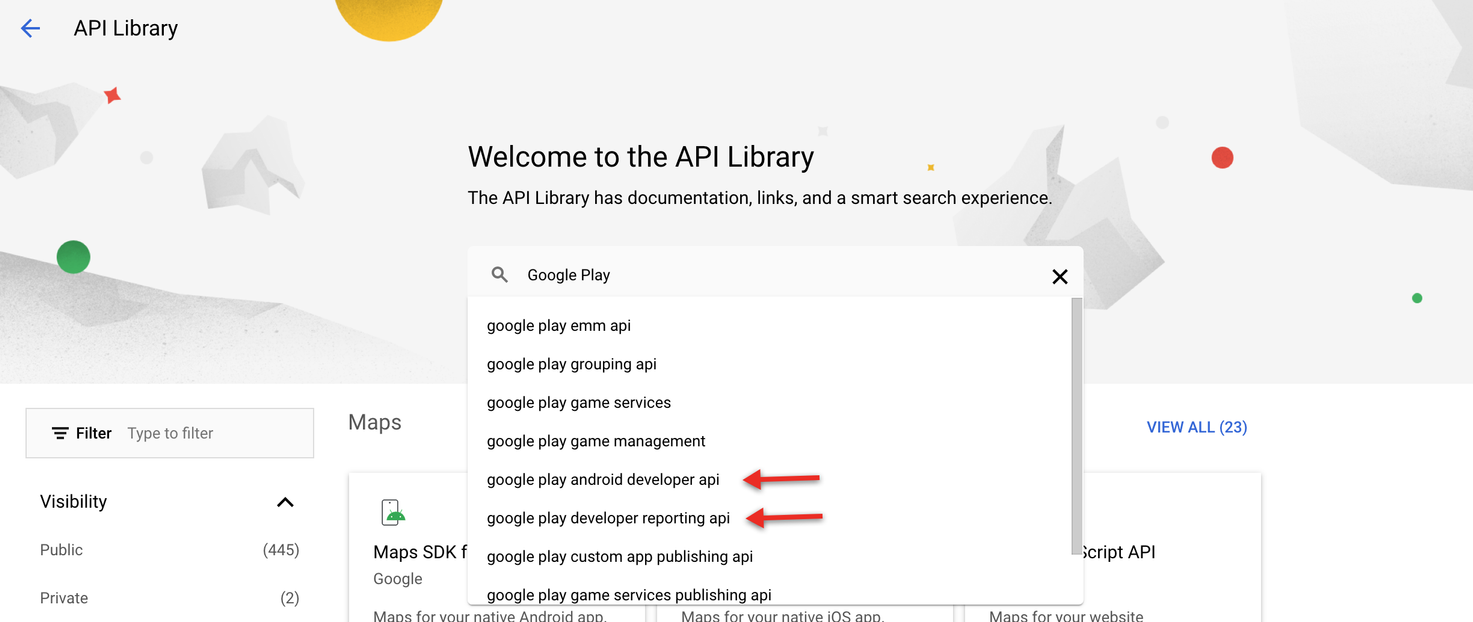
-
Enable both APIs.
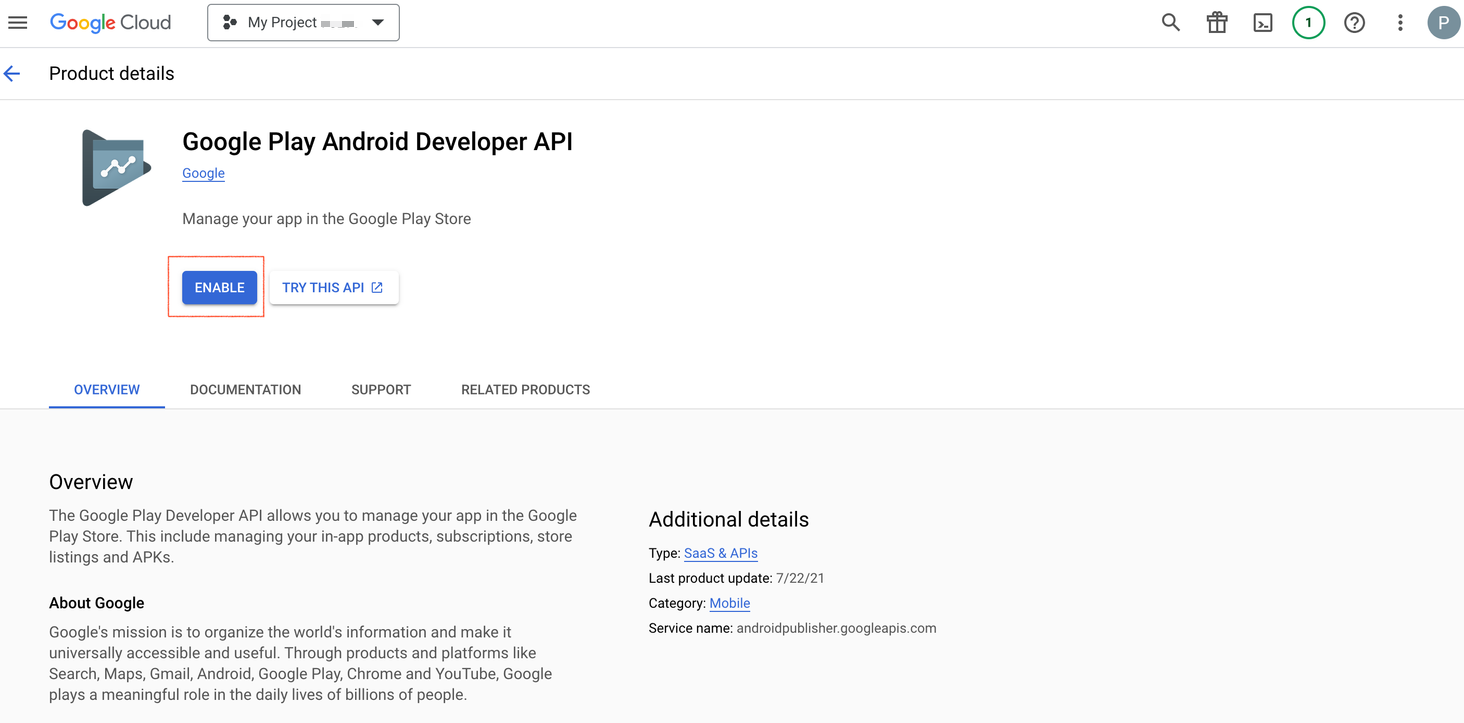
-
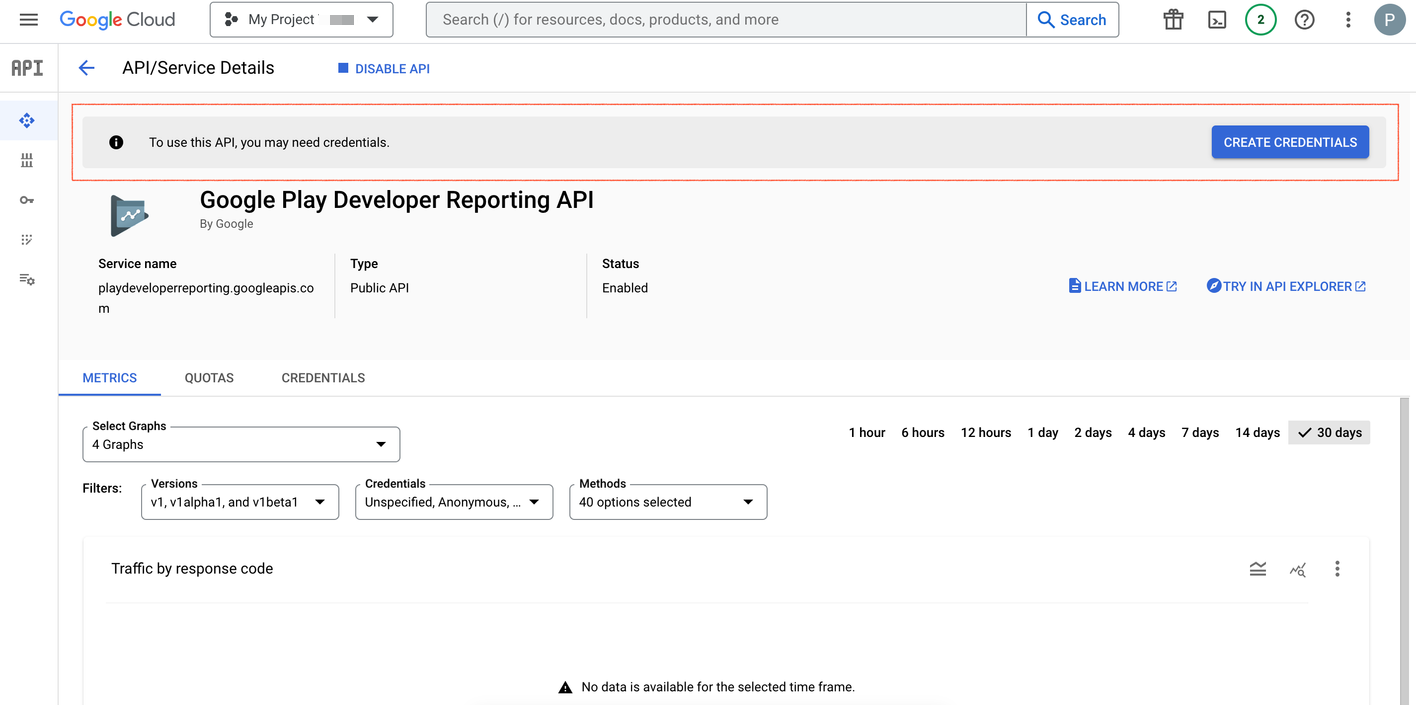
Post enabling these APIs, you'll be redirected to the Google Cloud API page. If you already have credentials to access this API then proceed to Step 2. If you don't have credentials to access these APIs, then follow below two steps
- Click Create Credentials.
- In the Credential Type screen, the API will be auto-selected for which you are going to create credentials. What data will you be accessing? option,select the Application data as Chargebee only needs the application data, and click Next.

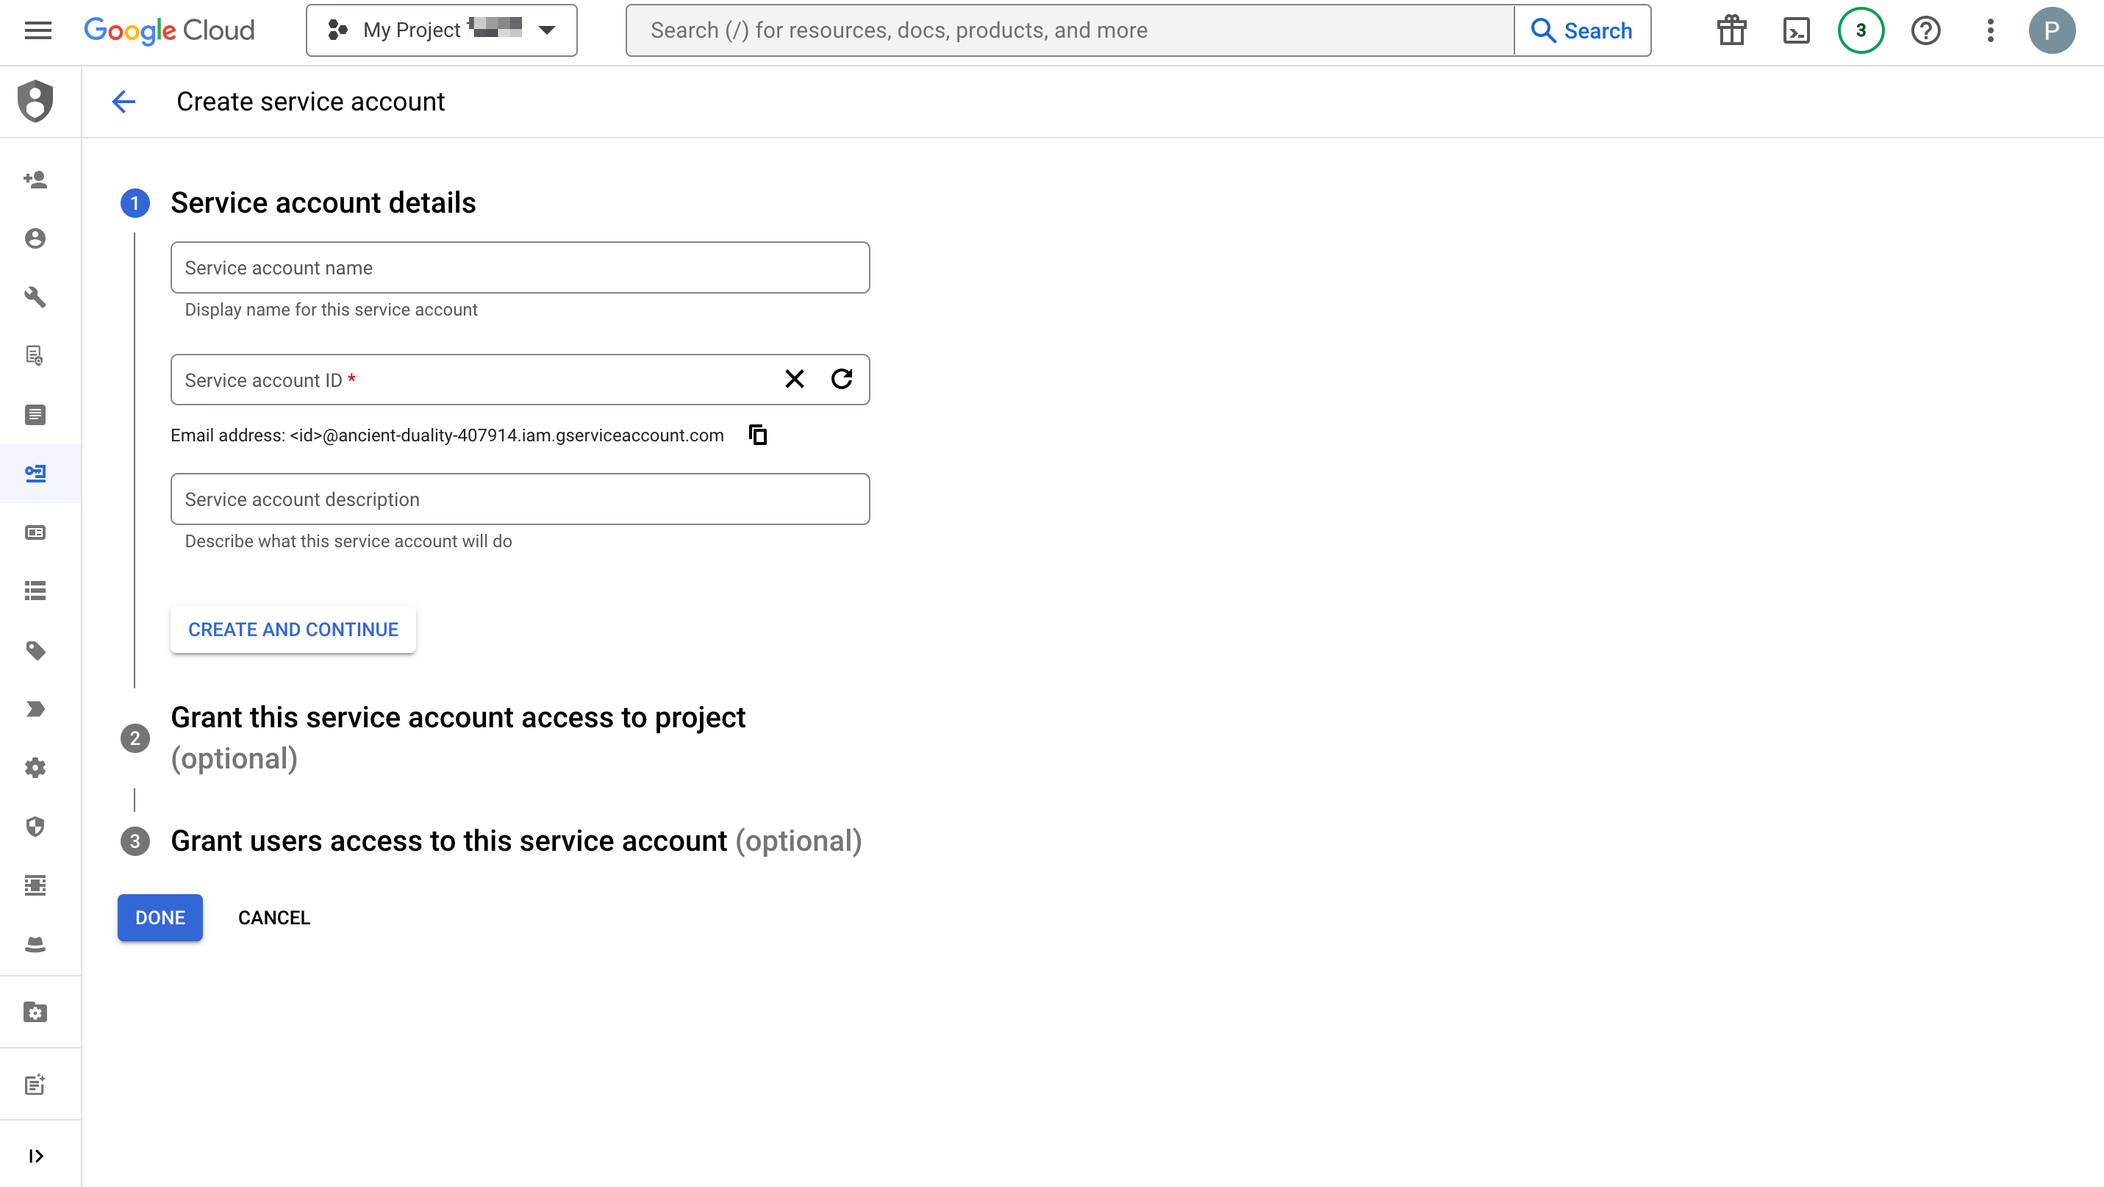
- In the Service account details screen, enter the Service account name, Service account ID, and Service account description. To create a service account follow Step 2 and click CREATE AND CONTINUE > DONE.
- If you have just created credentials, a message will appear - To use this API, you may need credentials. This message appears because Google takes some time to validate credentials.
- Click Create Credentials.
Step 2: Create a service account and download the service account credentials JSON file
You need to create a service account for Chargebee to make authorized API calls for your app.
To create a service account, follow these steps
-
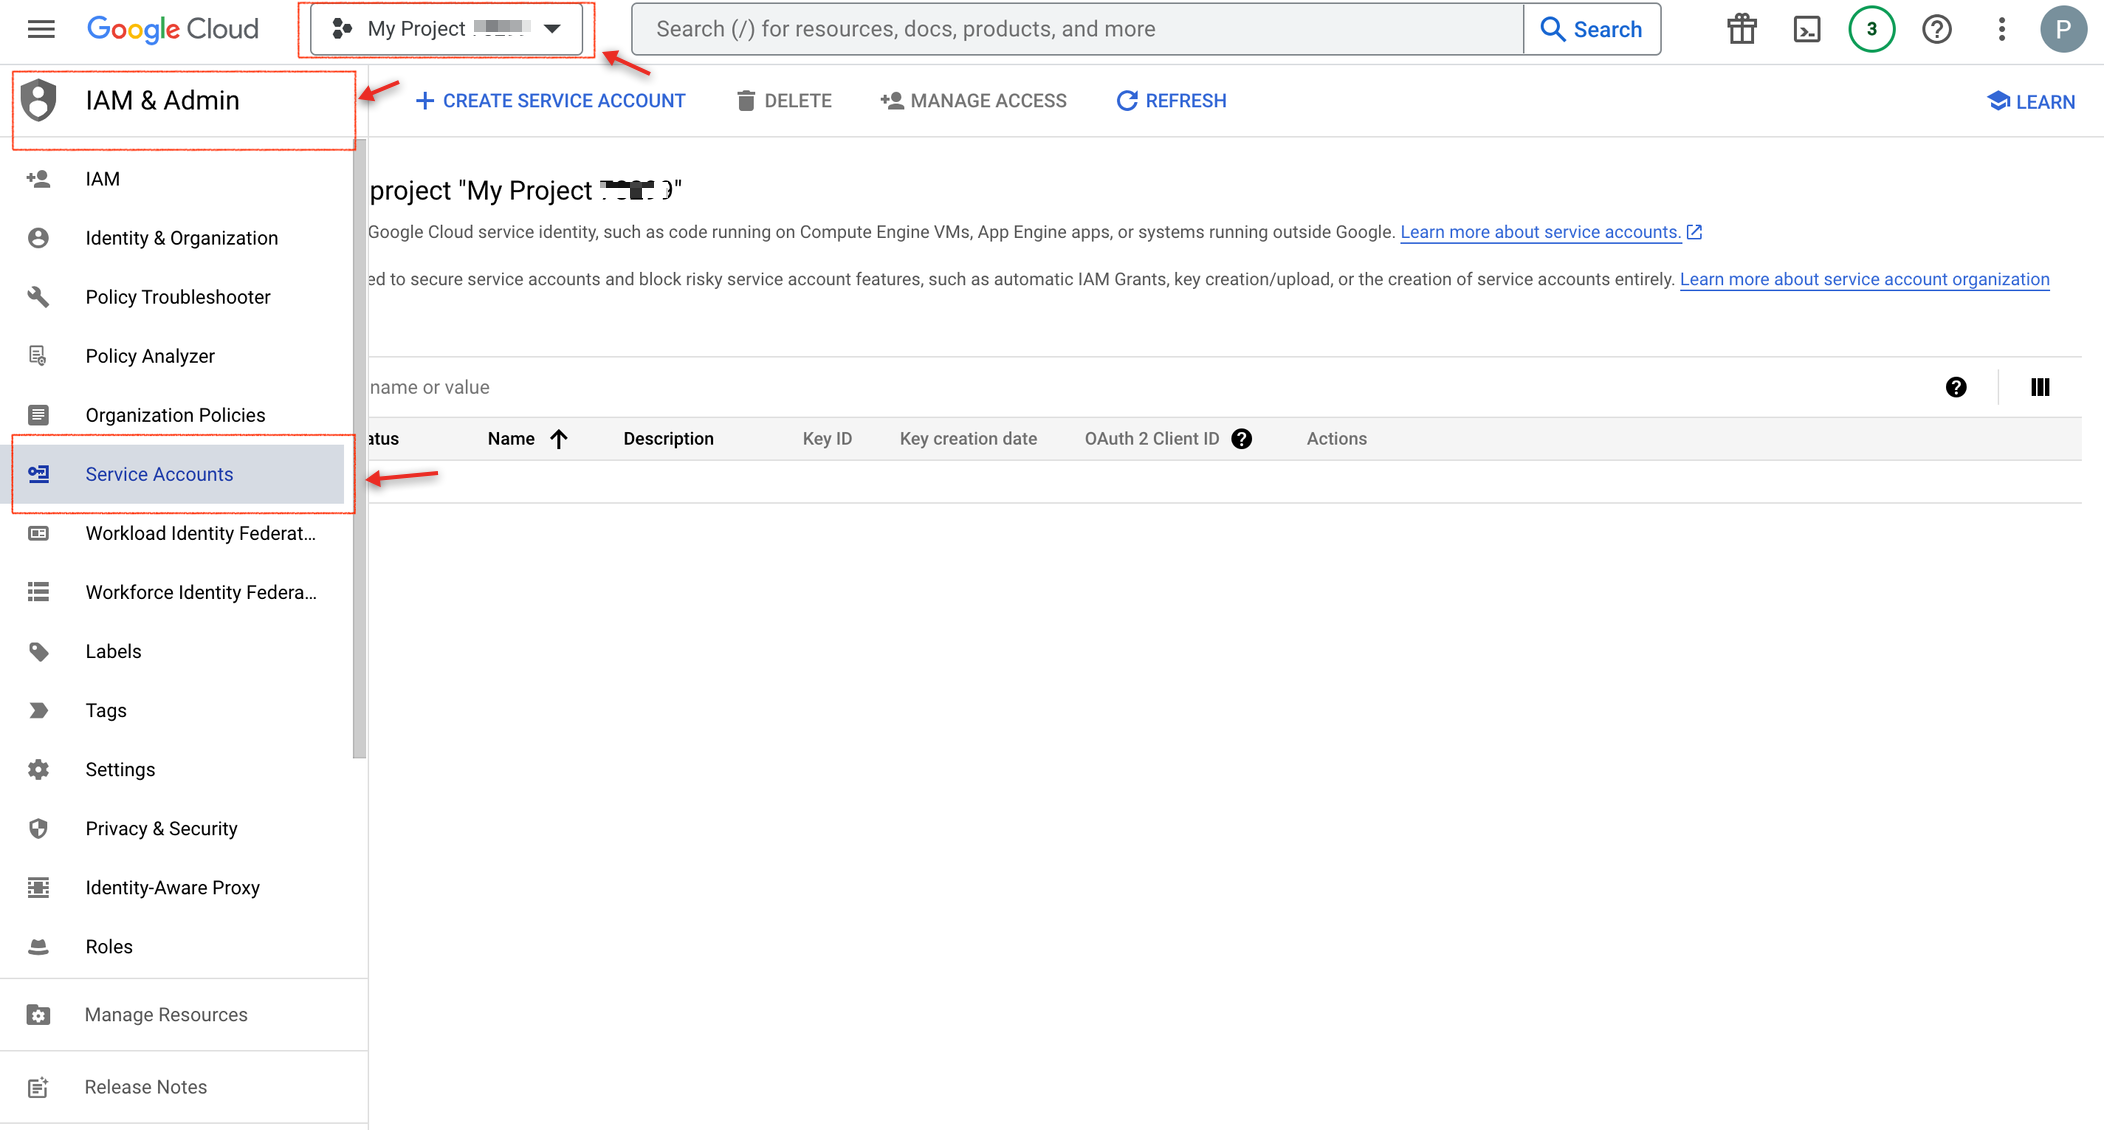
Navigate to IAM & Admin > Service Account in the Google Cloud Console. Ensure that the project for which the service account needs to be created is selected. Ideally, it is the same as the one selected in the previous step.
-
Click Create Service Account.
-
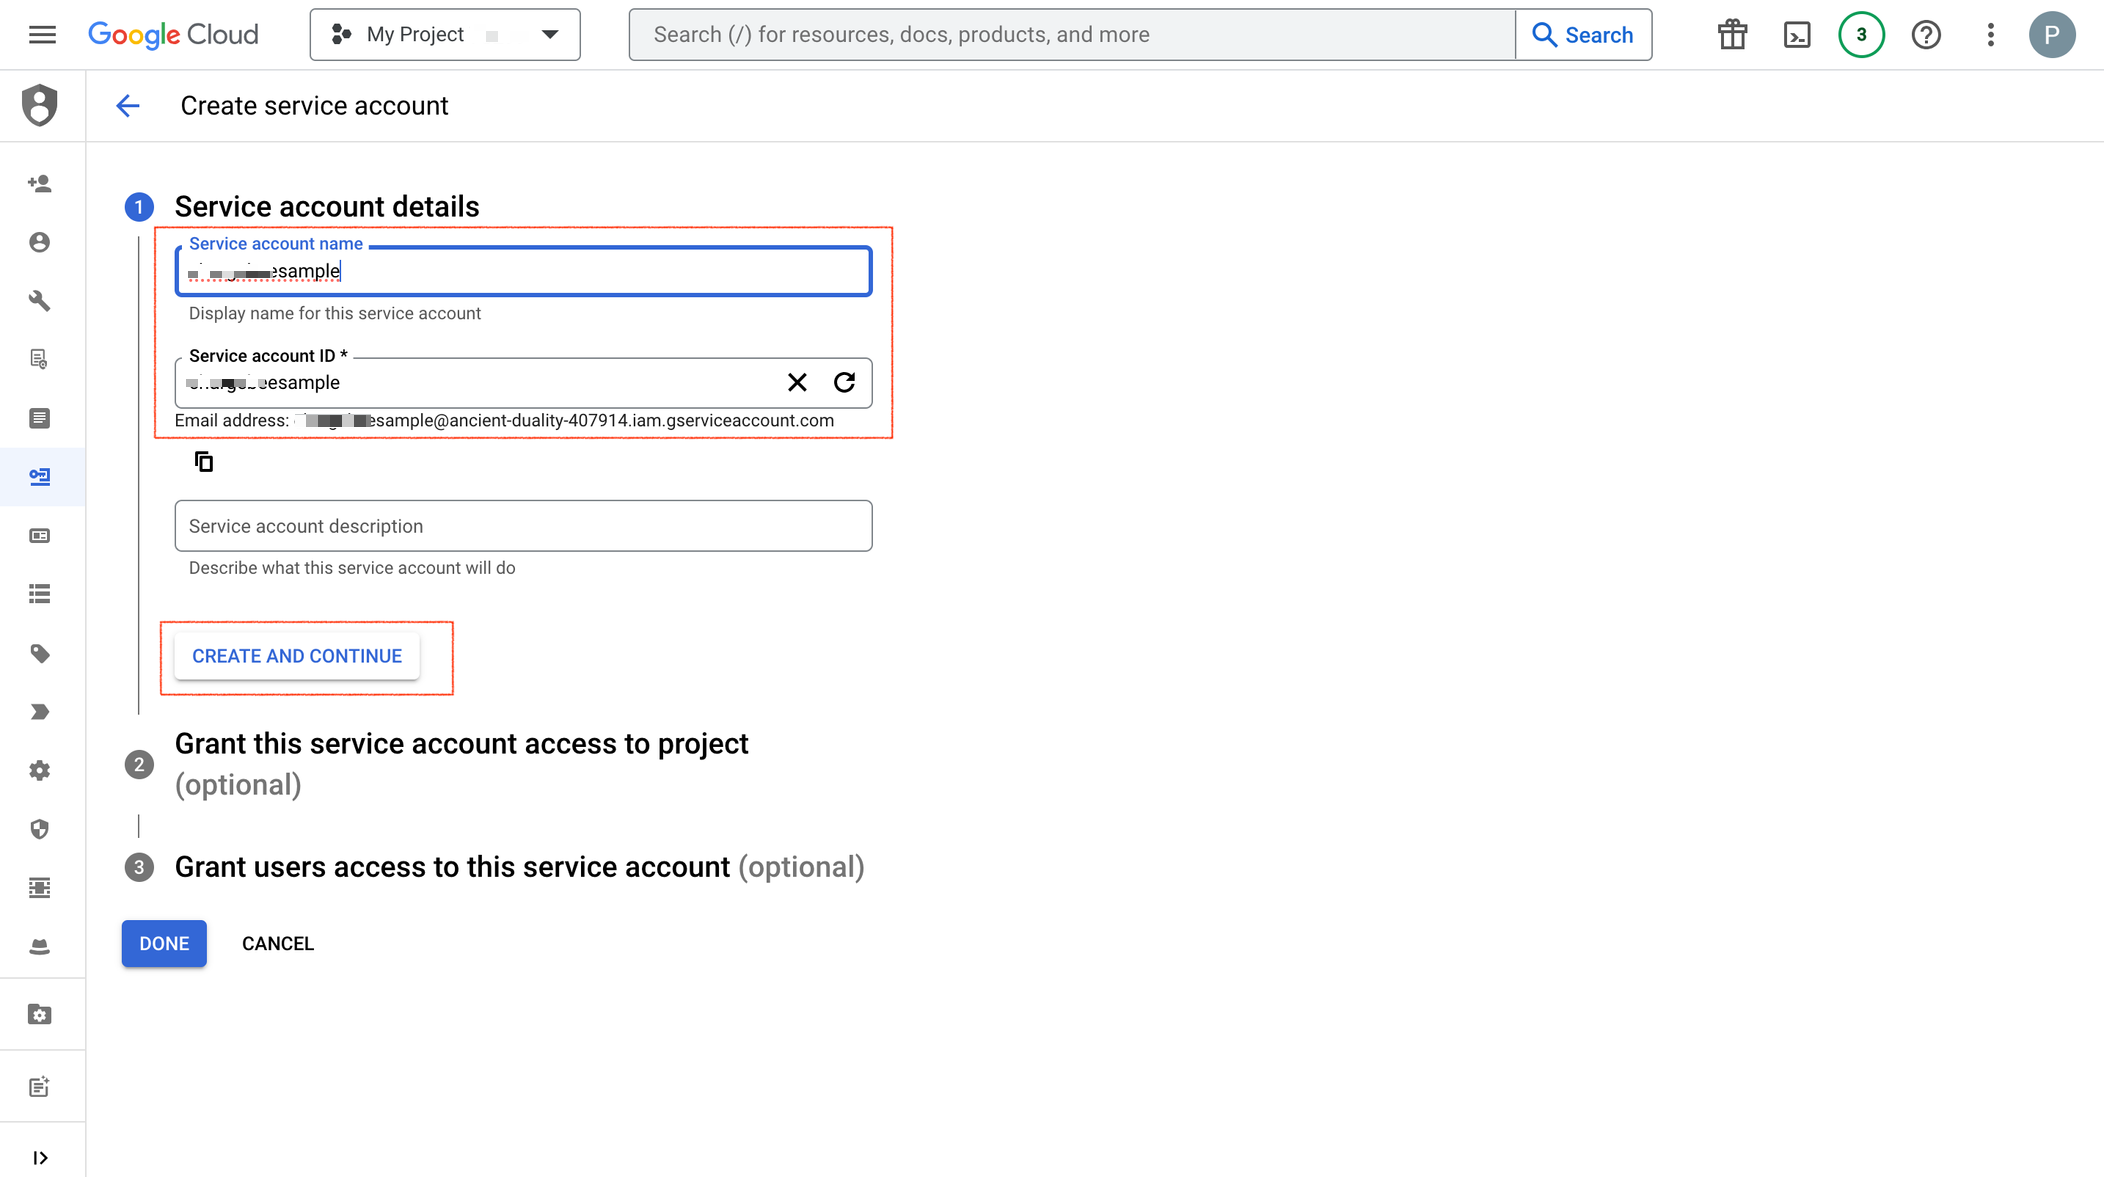
In the Service account details step, enter the Service account name, Service account ID, and Service account description, and click Create And Continue.
-
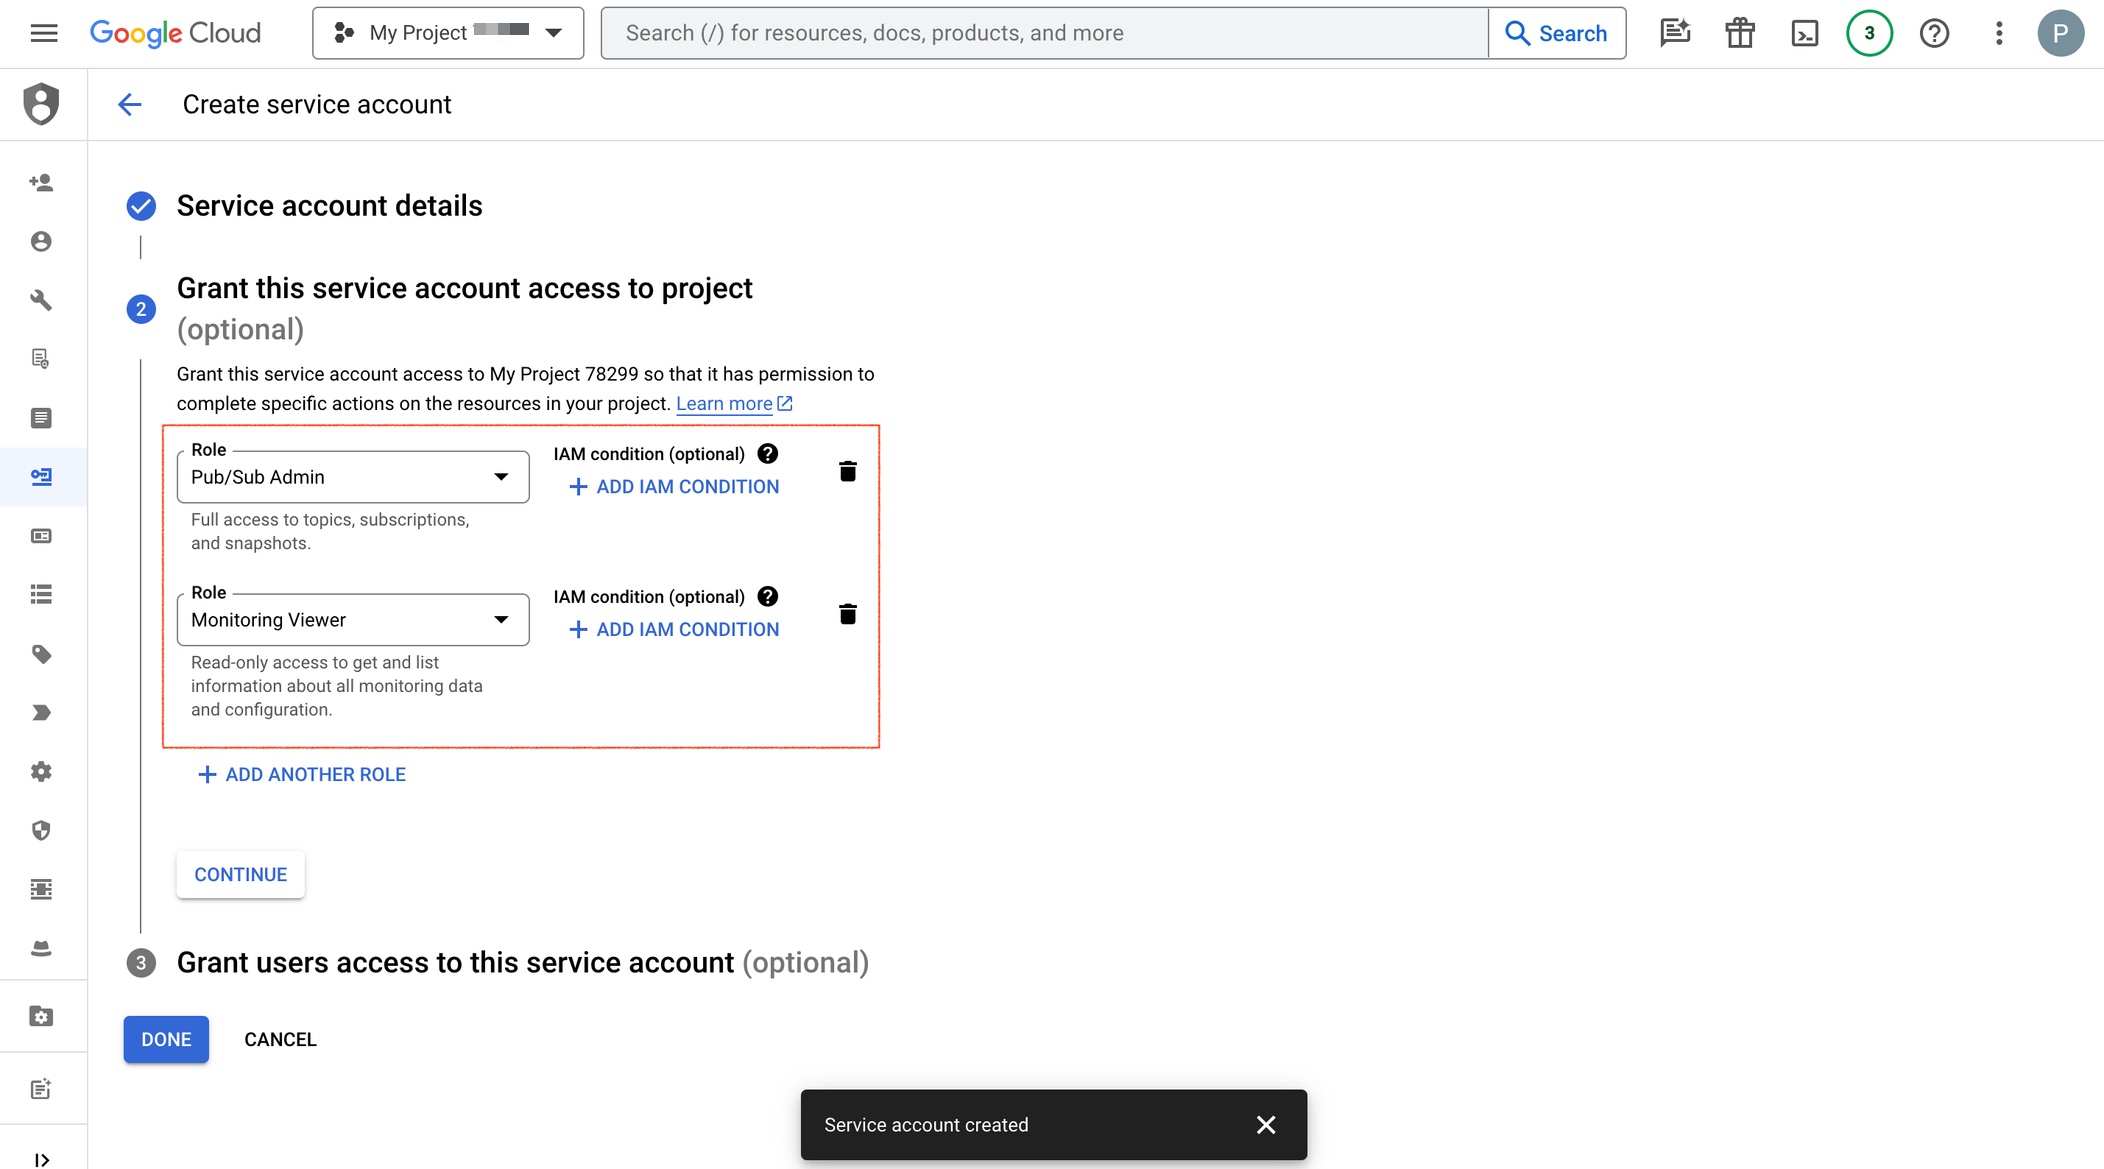
In the Grant this service account access to project step, select the Role as Pub/Sub Admin and Monitoring Viewer, and click Continue. These roles enable receiving Google platform server notifications and monitoring the notification queue. You can skip the third step Grant users access to this service account and click DONE.
-
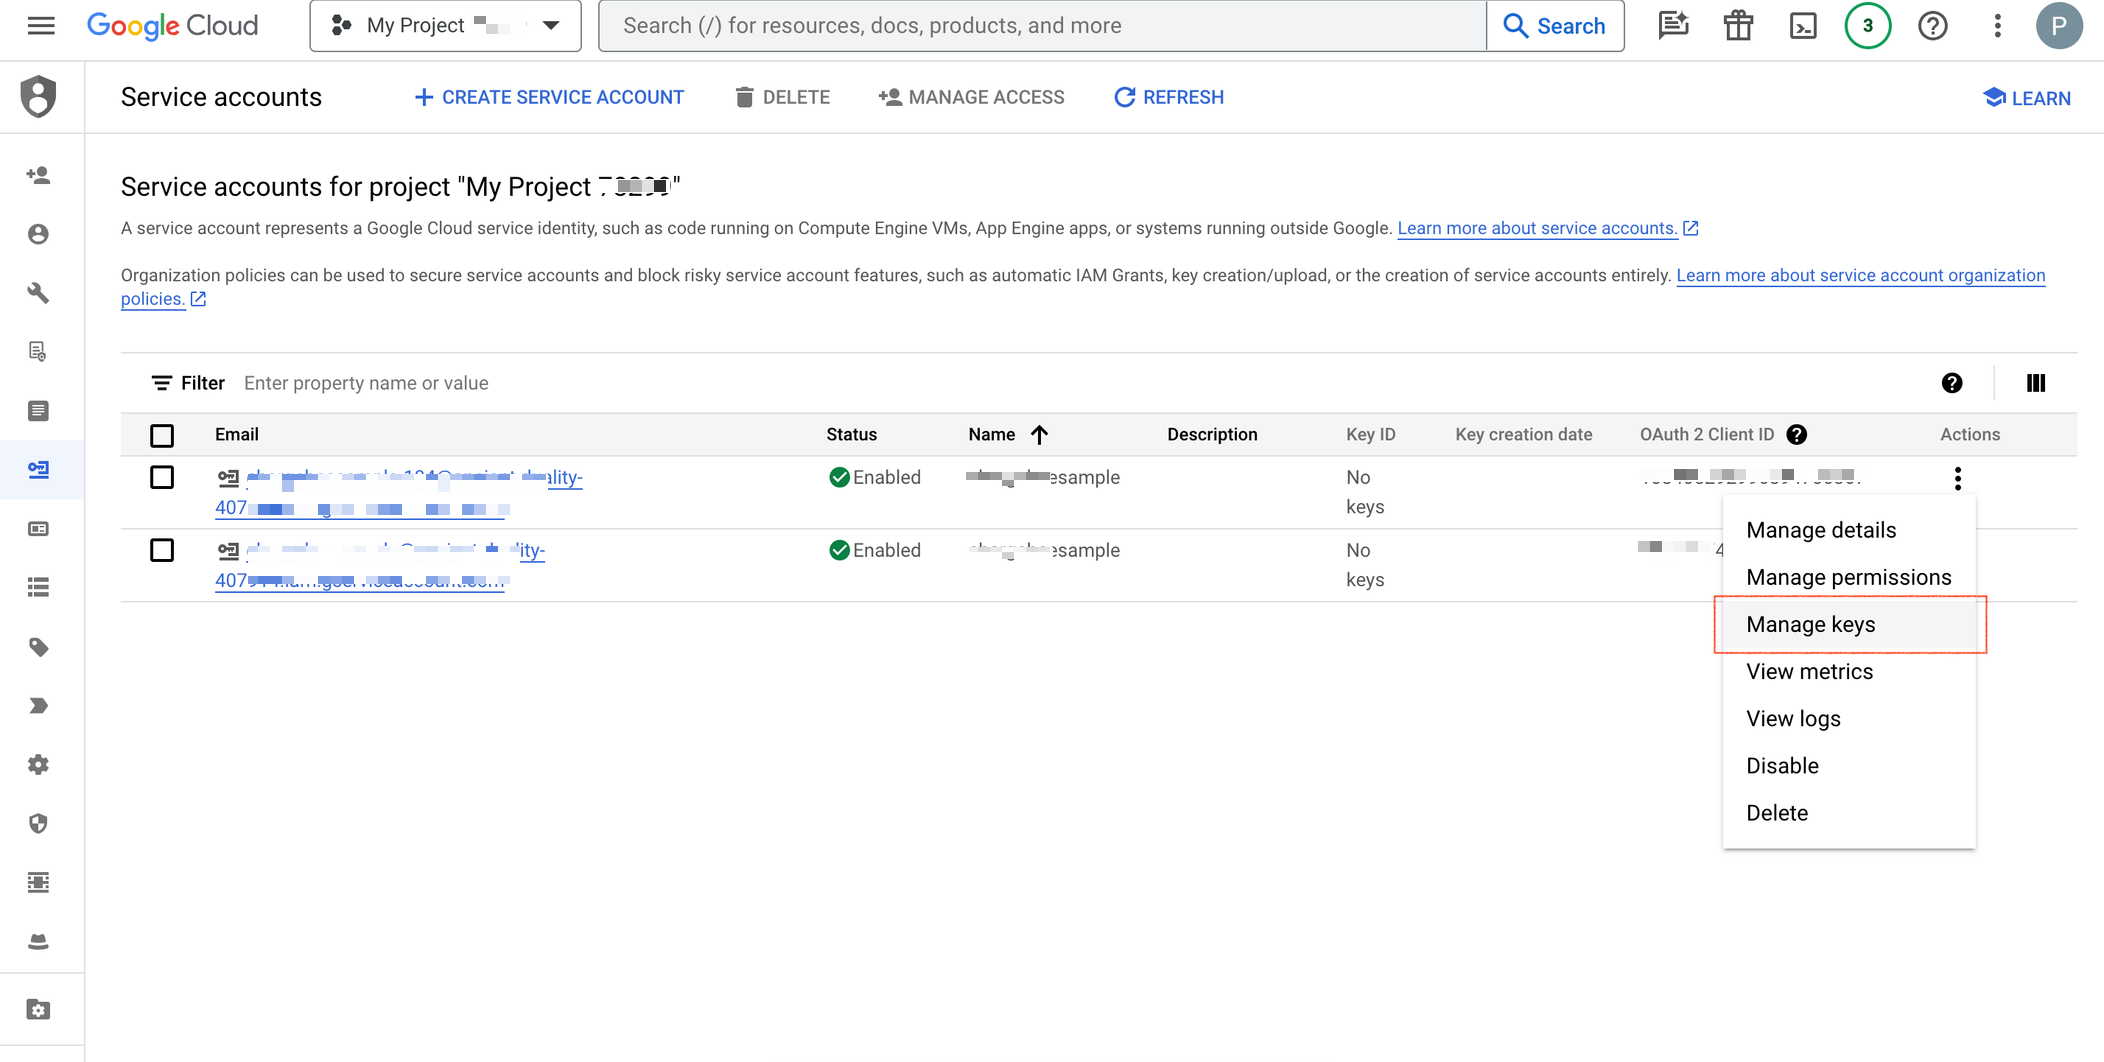
In the Service accounts for screen, identify the recently created service account and click the ⋮ icon > Manage keys.
-
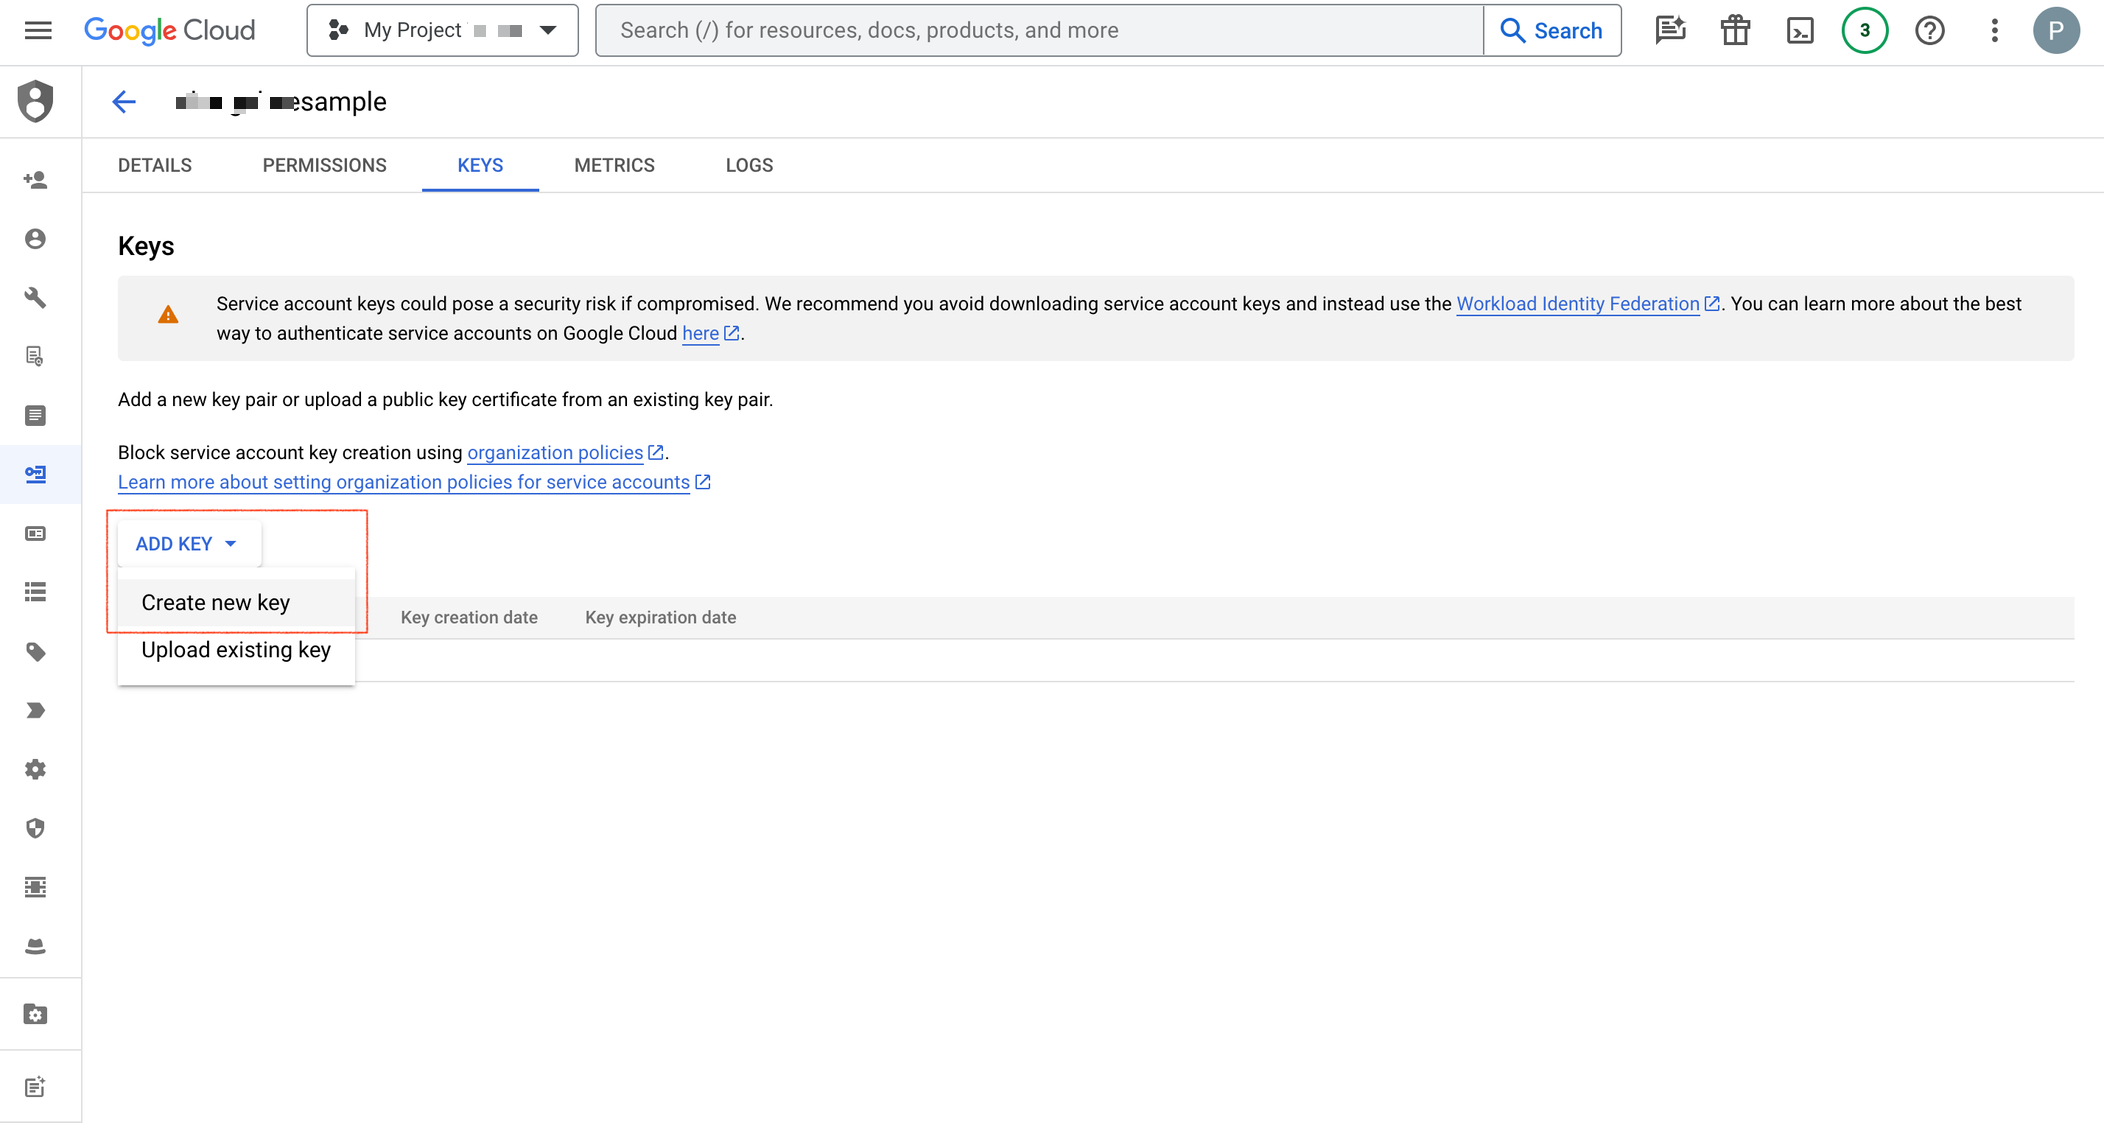
In the Keys tab, click Add Key and create a new key.
-
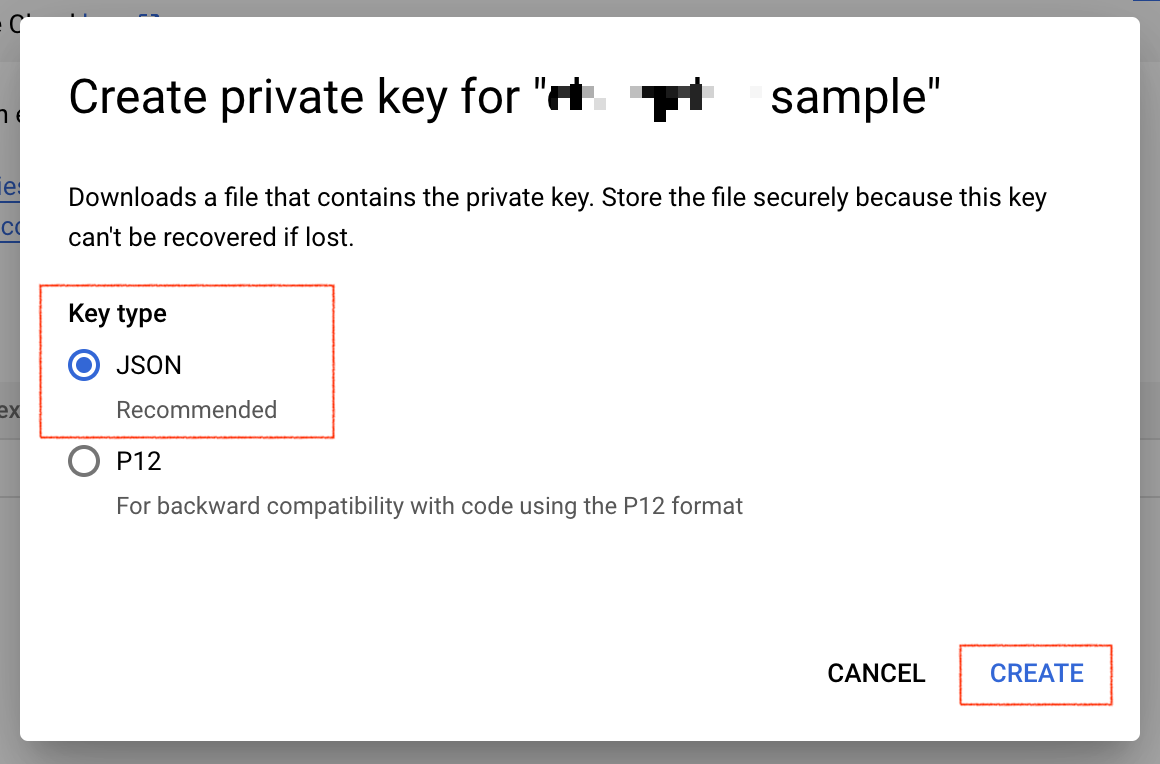
In the Key type, select JSON to create a private key for your associated service account and click CREATE to download the key.
-
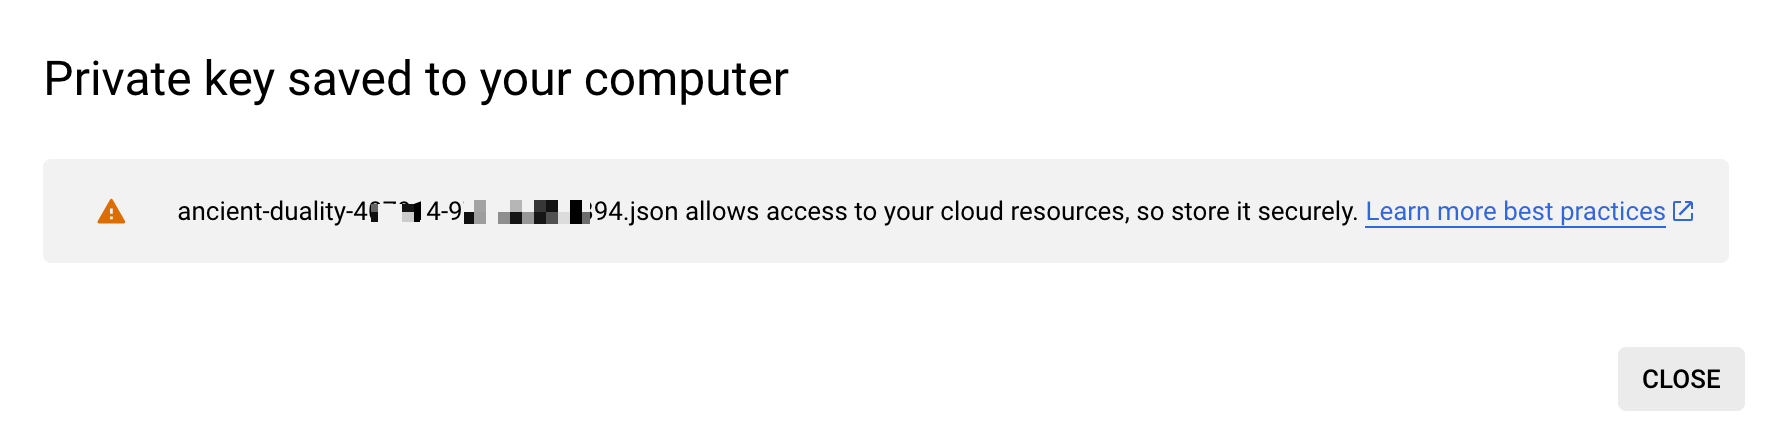
Save the downloaded key and click CLOSE. Note: This service account credentials JSON file needs to be uploaded to Chargebee while integrating your Android App. So please make sure that it is saved securely.
Step 3: Invite service account and grant access permissions
In order to manage the subscriptions with the notifications received from the Google Store and retrieve the financial data with the service account, you need to invite the service account as a user and grant the needed permissions in the Google Play Console.
To invite the service account as a user and grant the needed permissions, follow these steps:
-
Open Google Play Console and login using your Google developer account credentials.
-
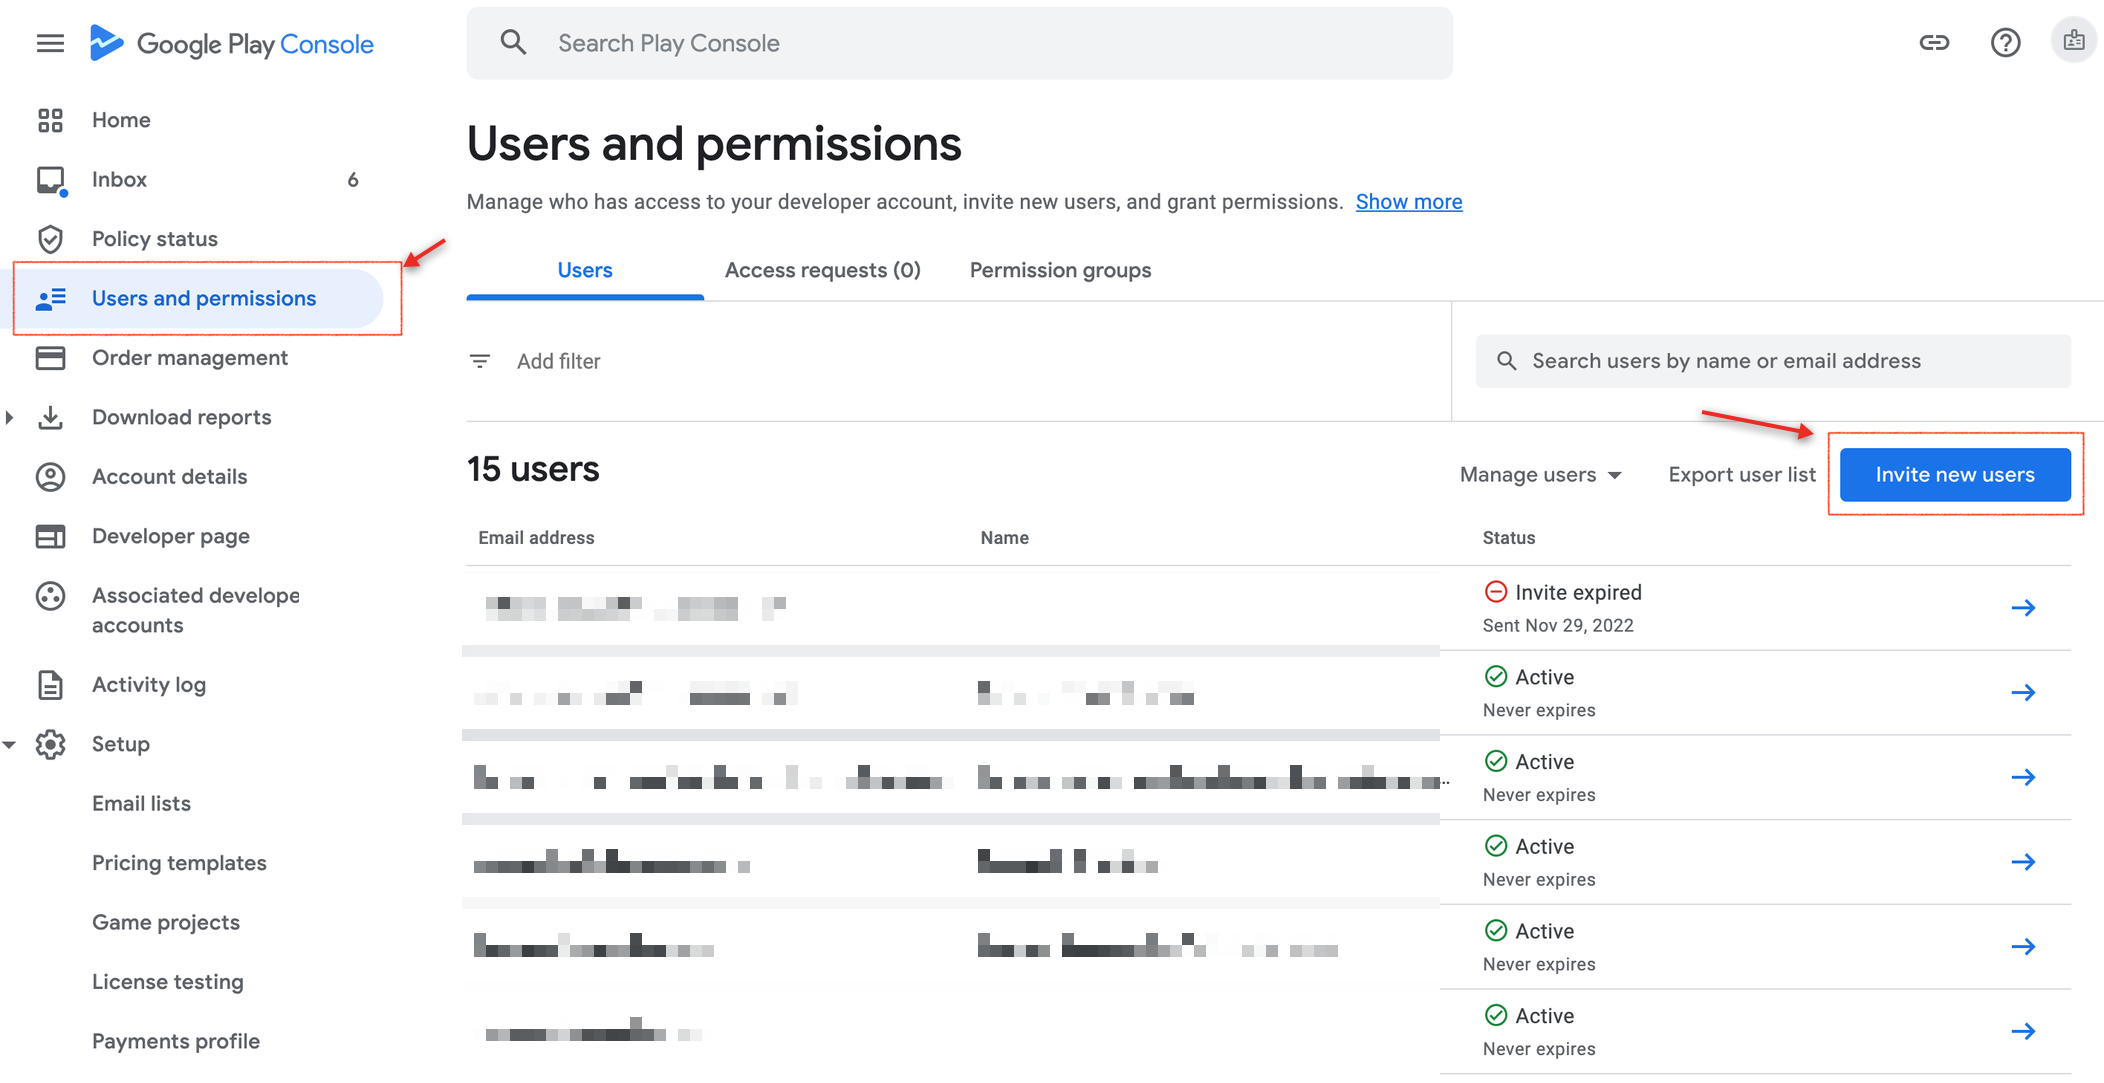
Navigate to Users and permissions and click Invite new users to invite the service account created in Step 2.
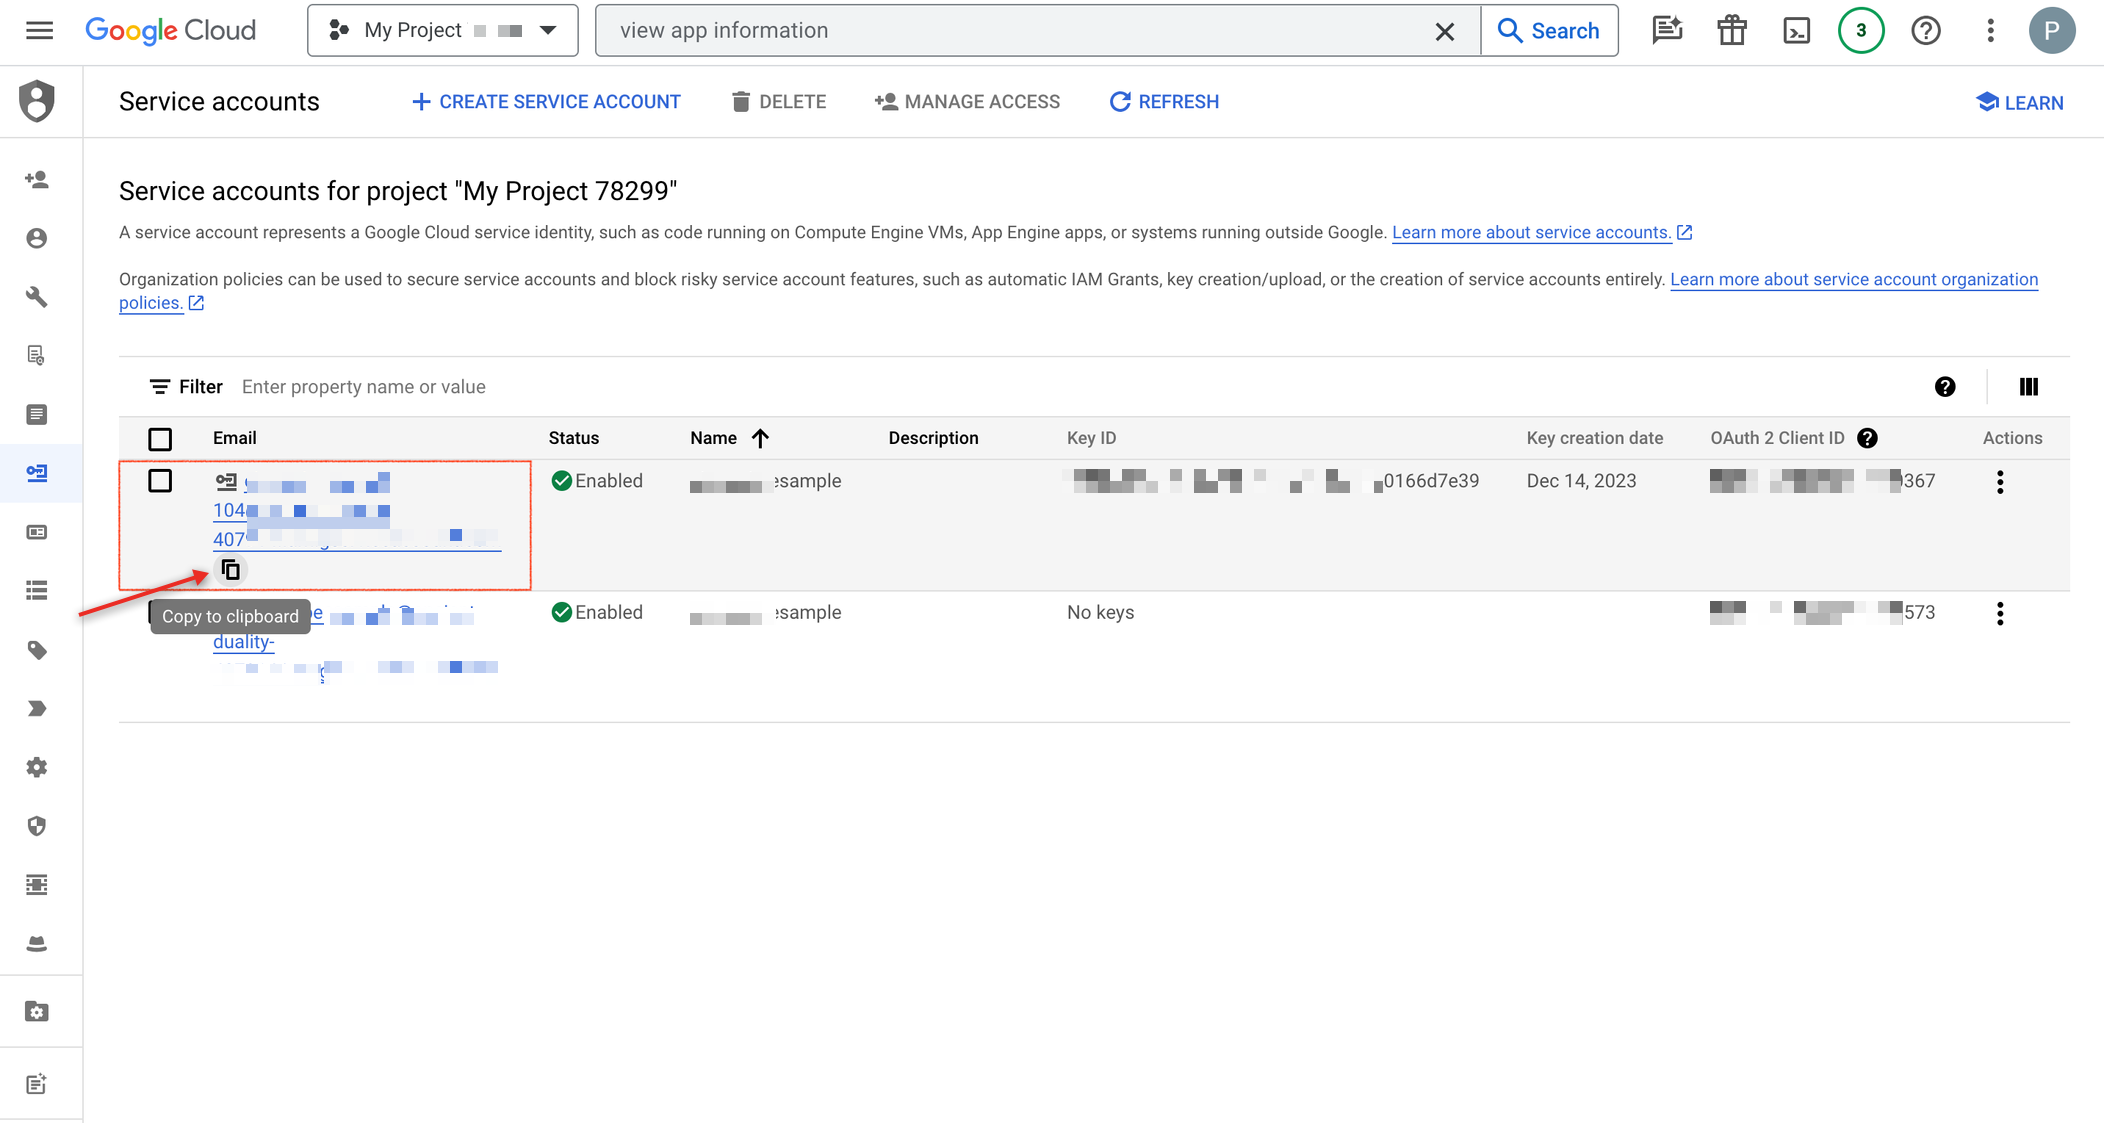
- Go to the Service accounts section in the Google Cloud Console and copy the service account that was created in Step 2.
- Go to the Service accounts section in the Google Cloud Console and copy the service account that was created in Step 2.
-
In the Invite user screen, paste this service account in the Email address field.
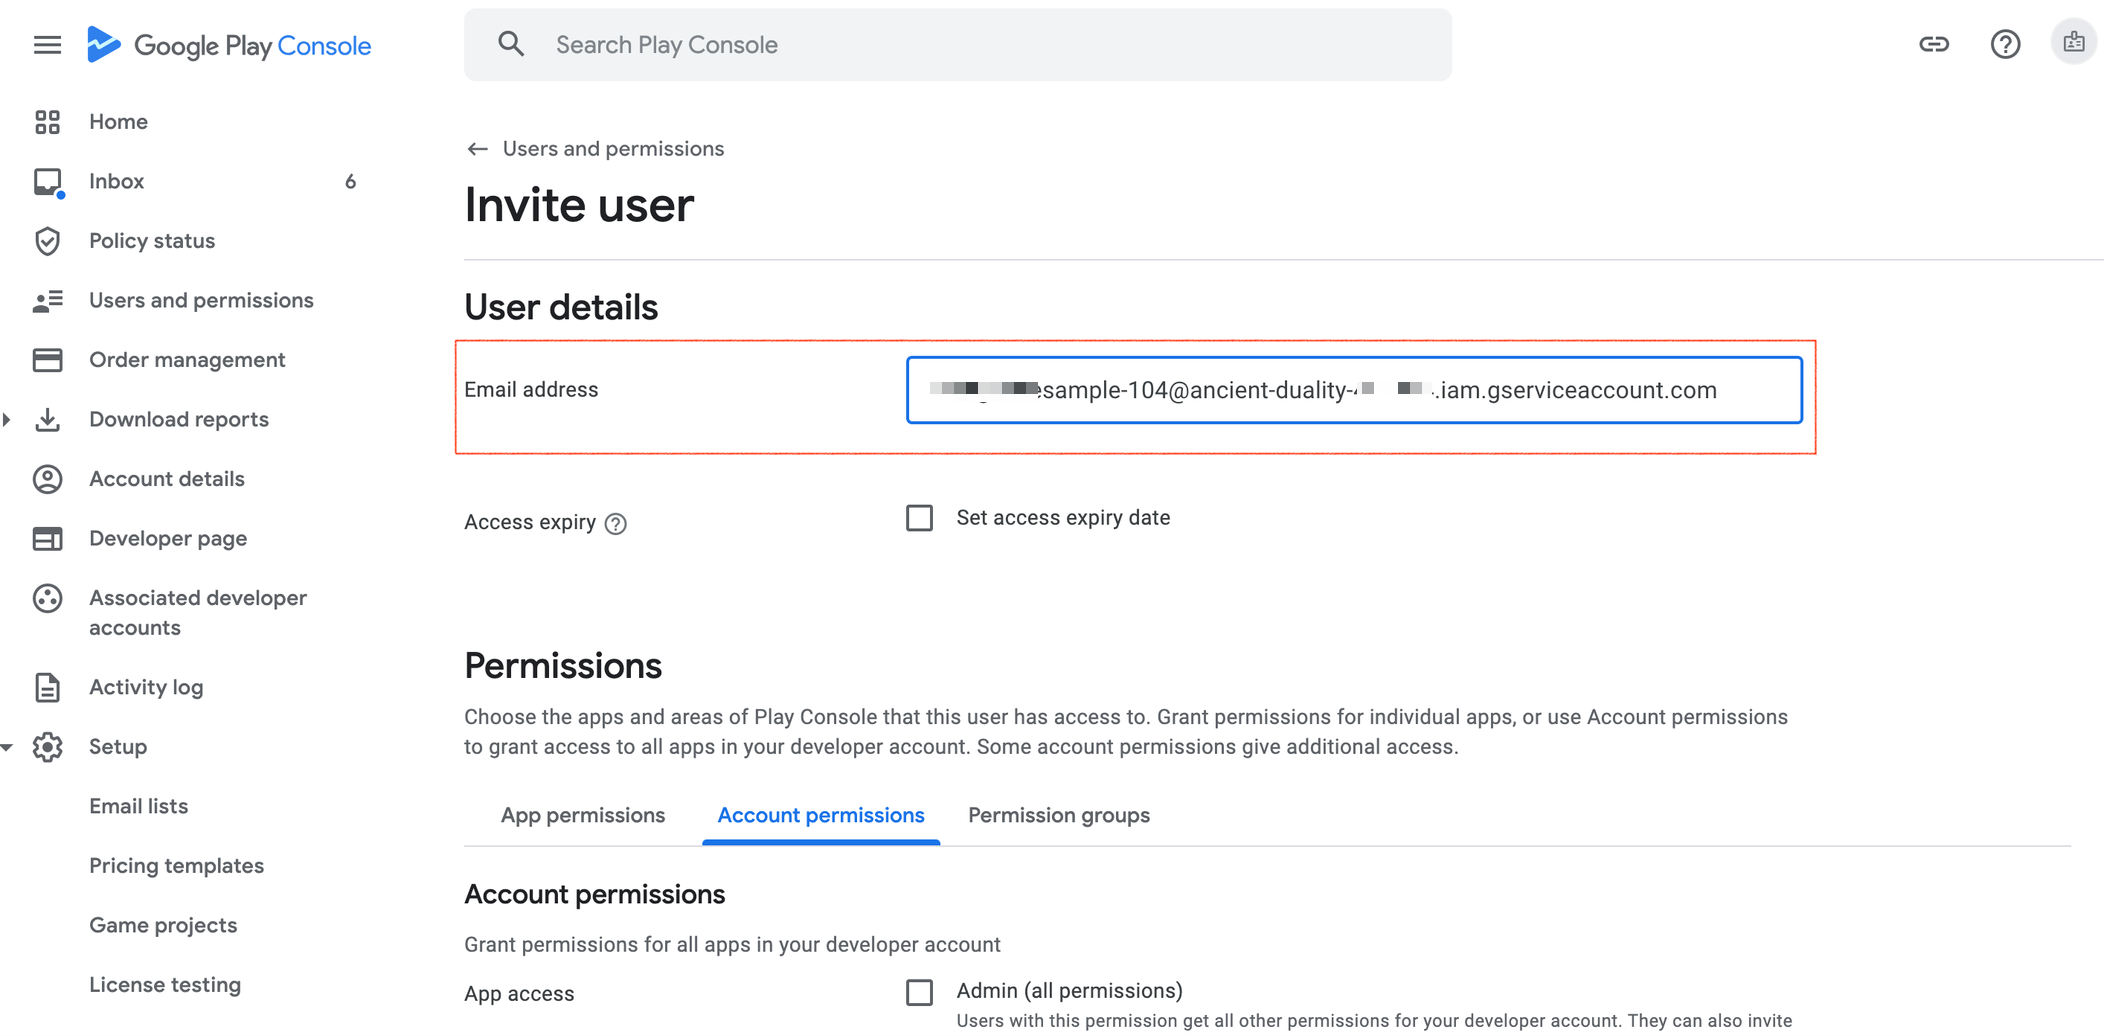
- Go to Permissions > Account permissions, add the following permissions to the service account, and click Invite user.
- View app information and download bulk reports: To view apps and download the reports
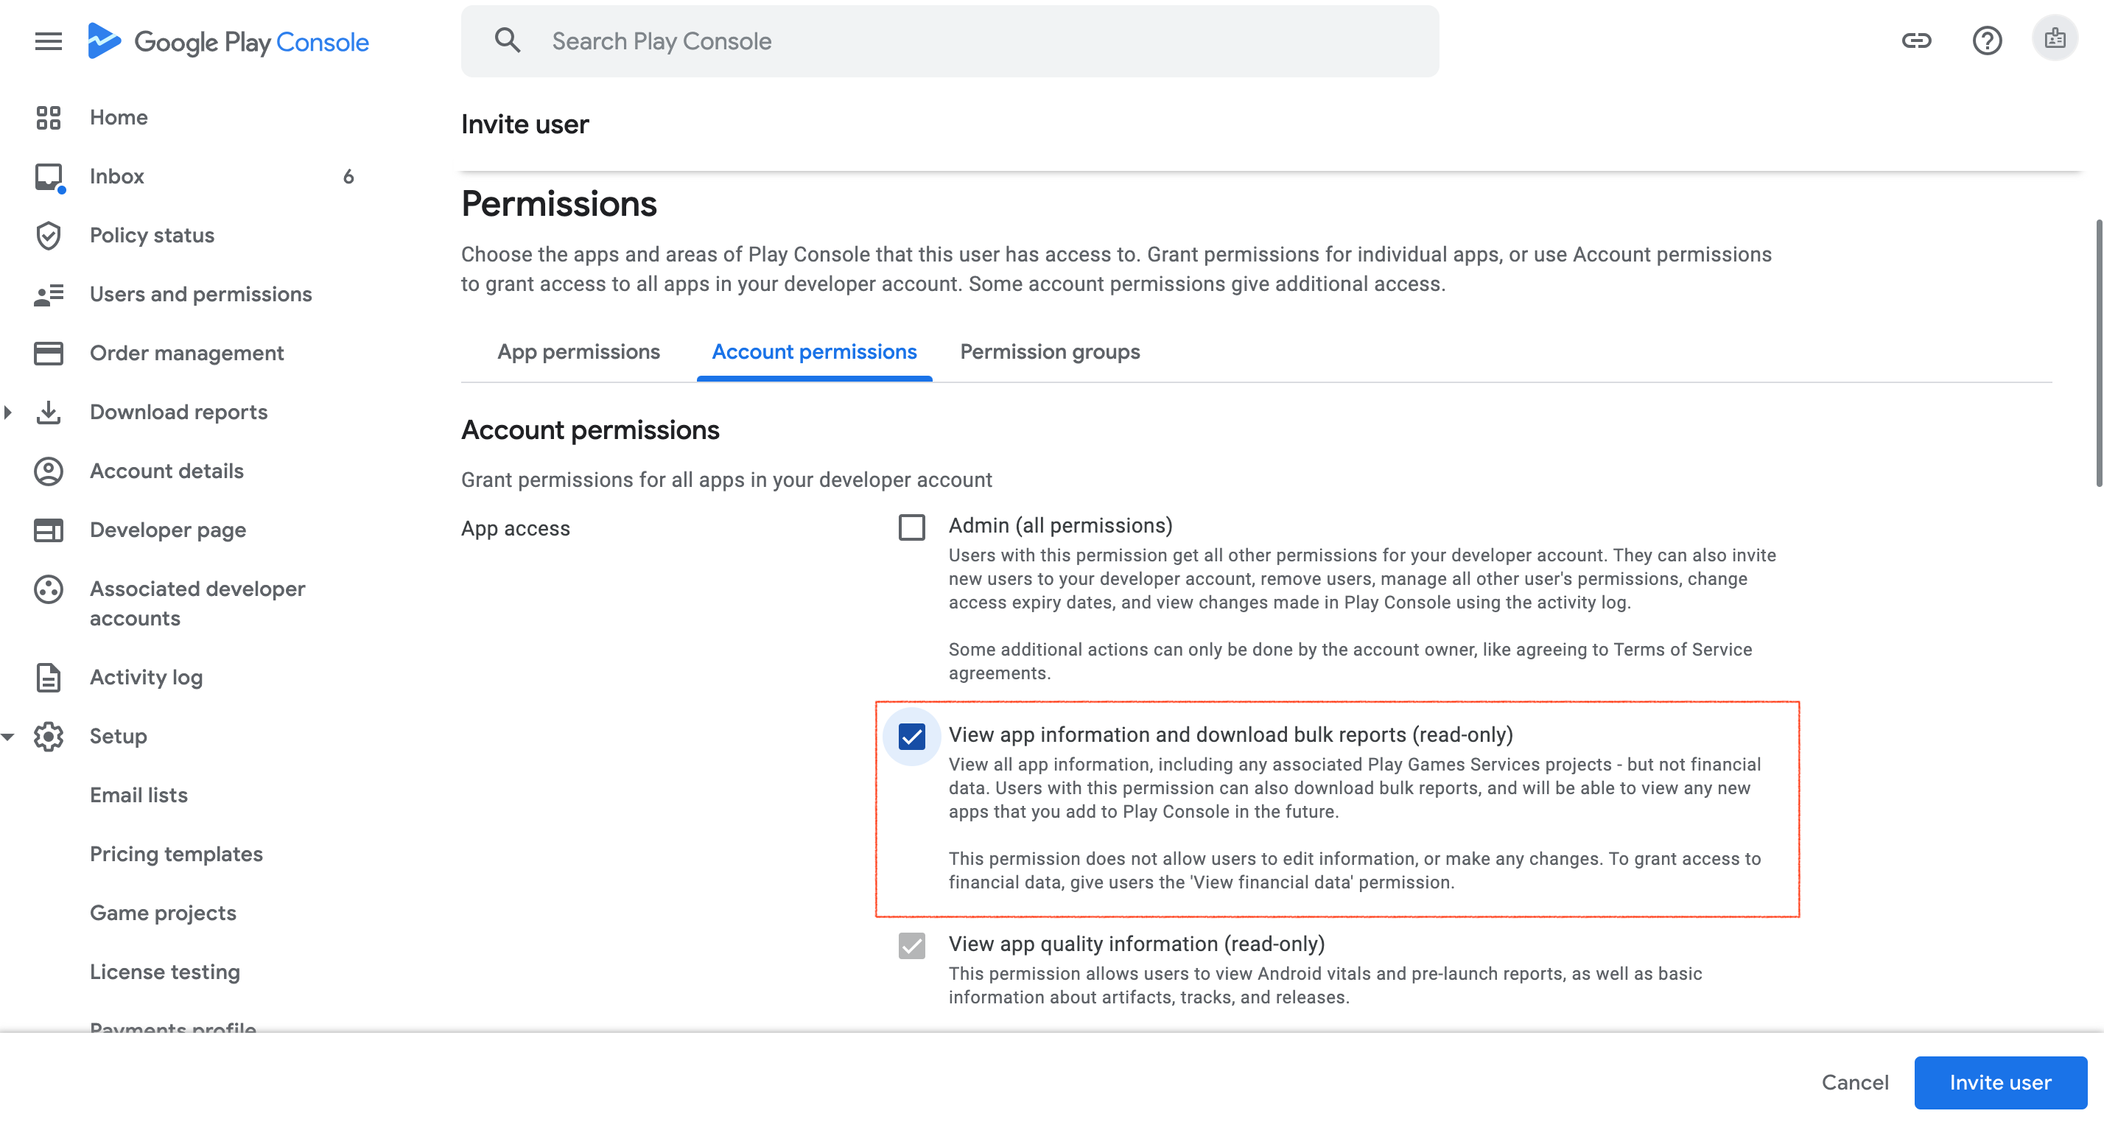
- View financial data, orders, and cancellation survey responses: To view financial data related to purchases
- Manage orders and subscriptions: To view and refund orders

- View app information and download bulk reports: To view apps and download the reports
- Go to Permissions > Account permissions, add the following permissions to the service account, and click Invite user.
-
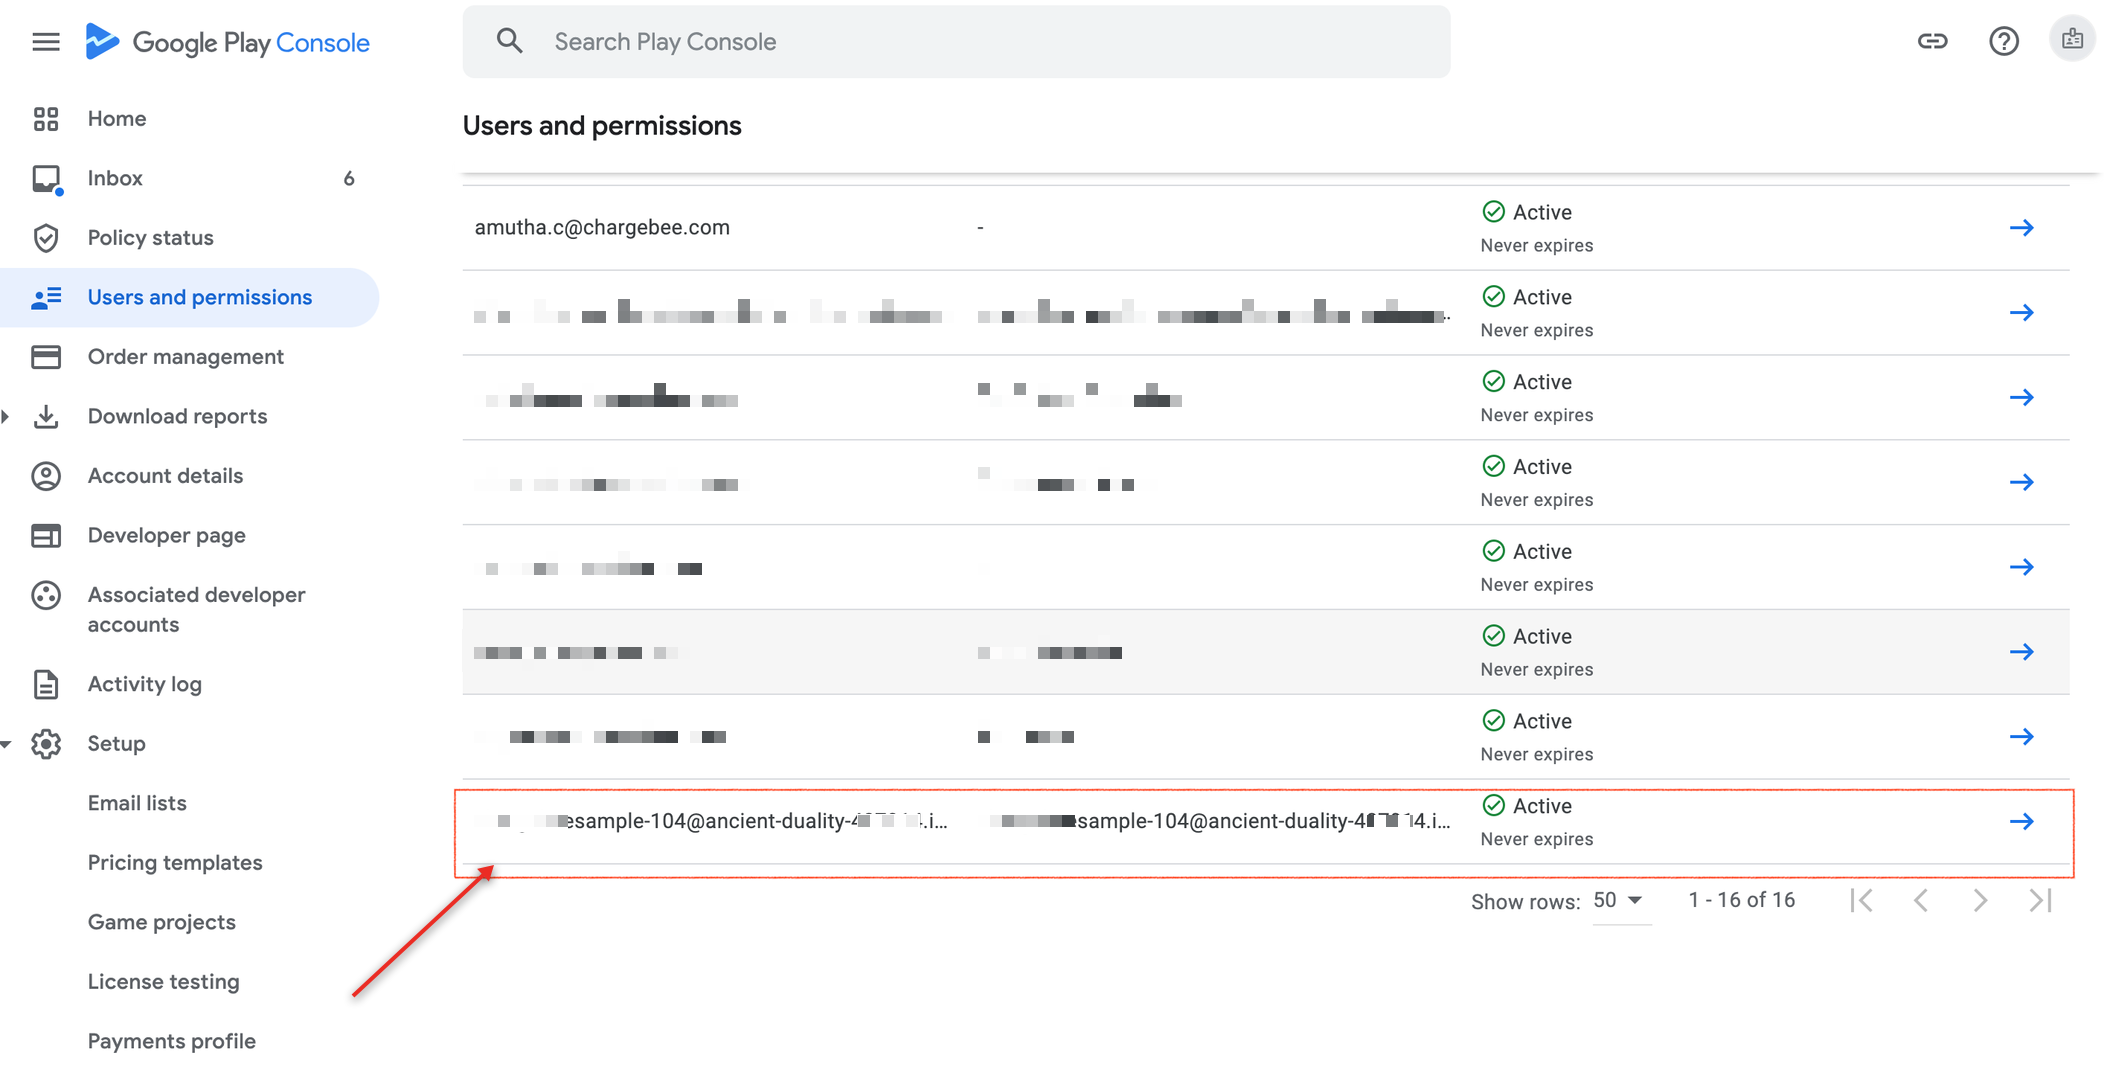
In the Users and permissions screen verify the invitation. You can see the newly created account as Active.
Link Play Store with Chargebee
Follow the steps below to configure your Play Store app with Chargebee:
-
Login to your Chargebee site and click Apps in the left nav.
-
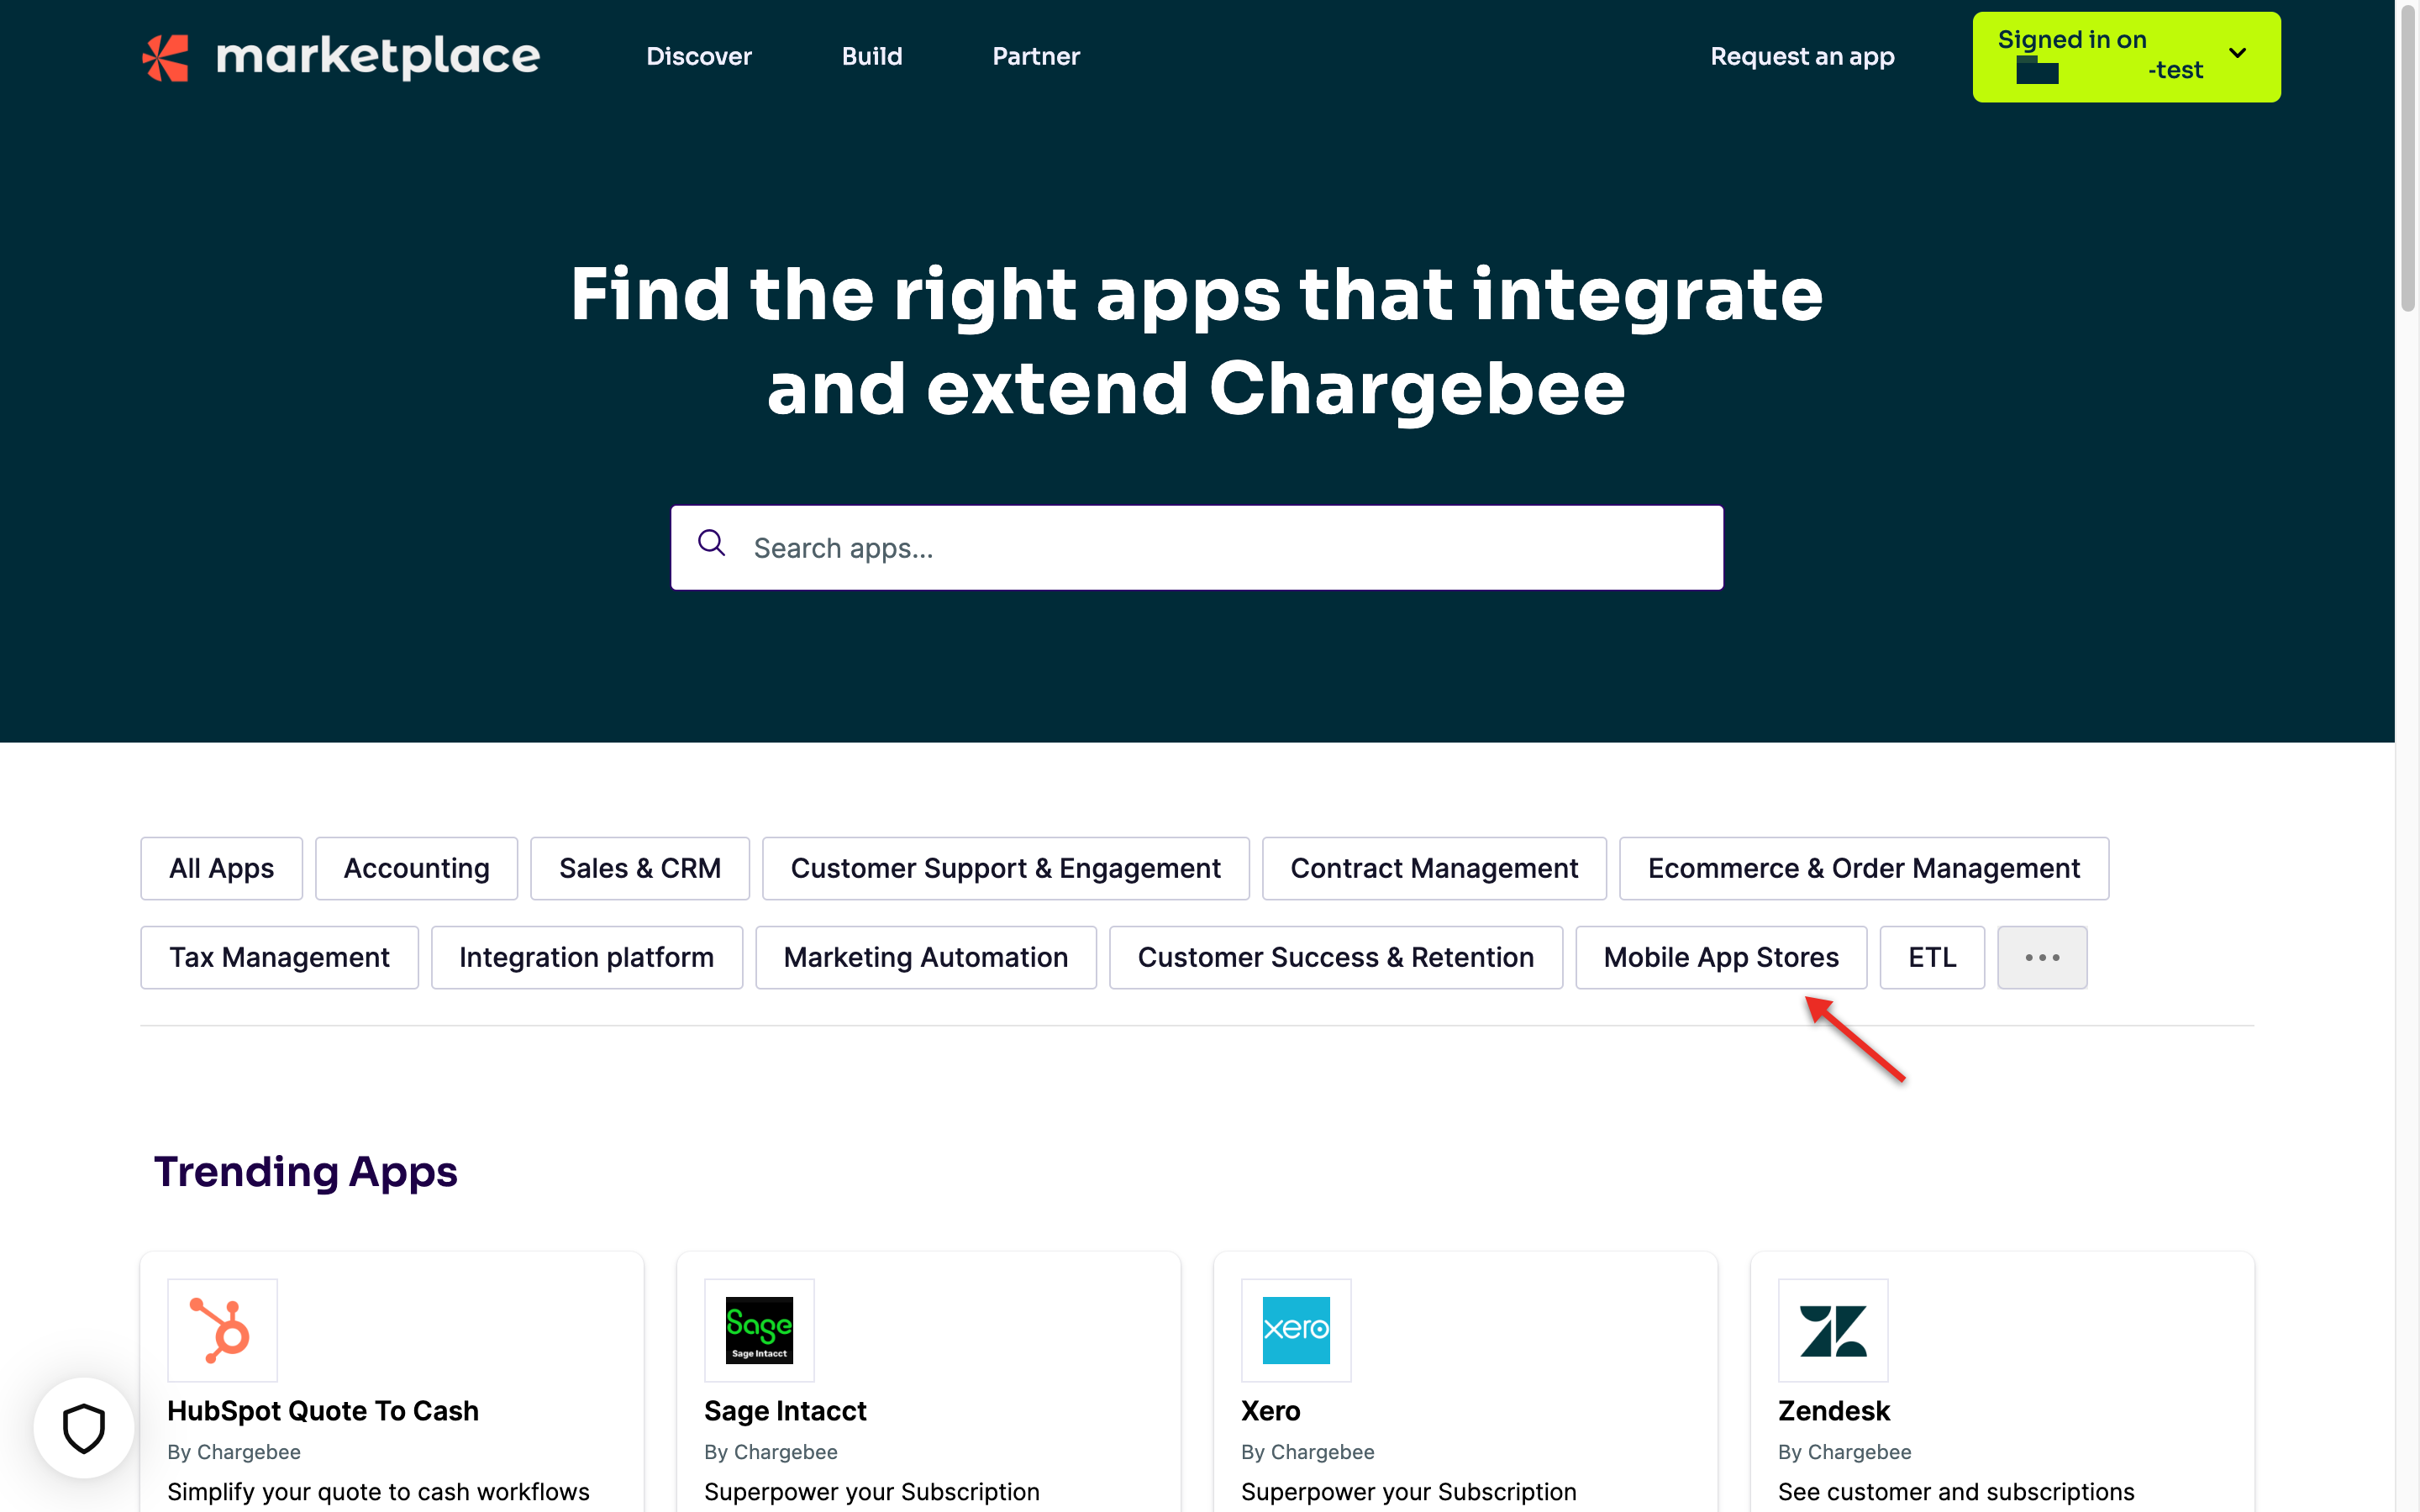
Click Go to Marketplace.
-
Click Mobile App Store.
-
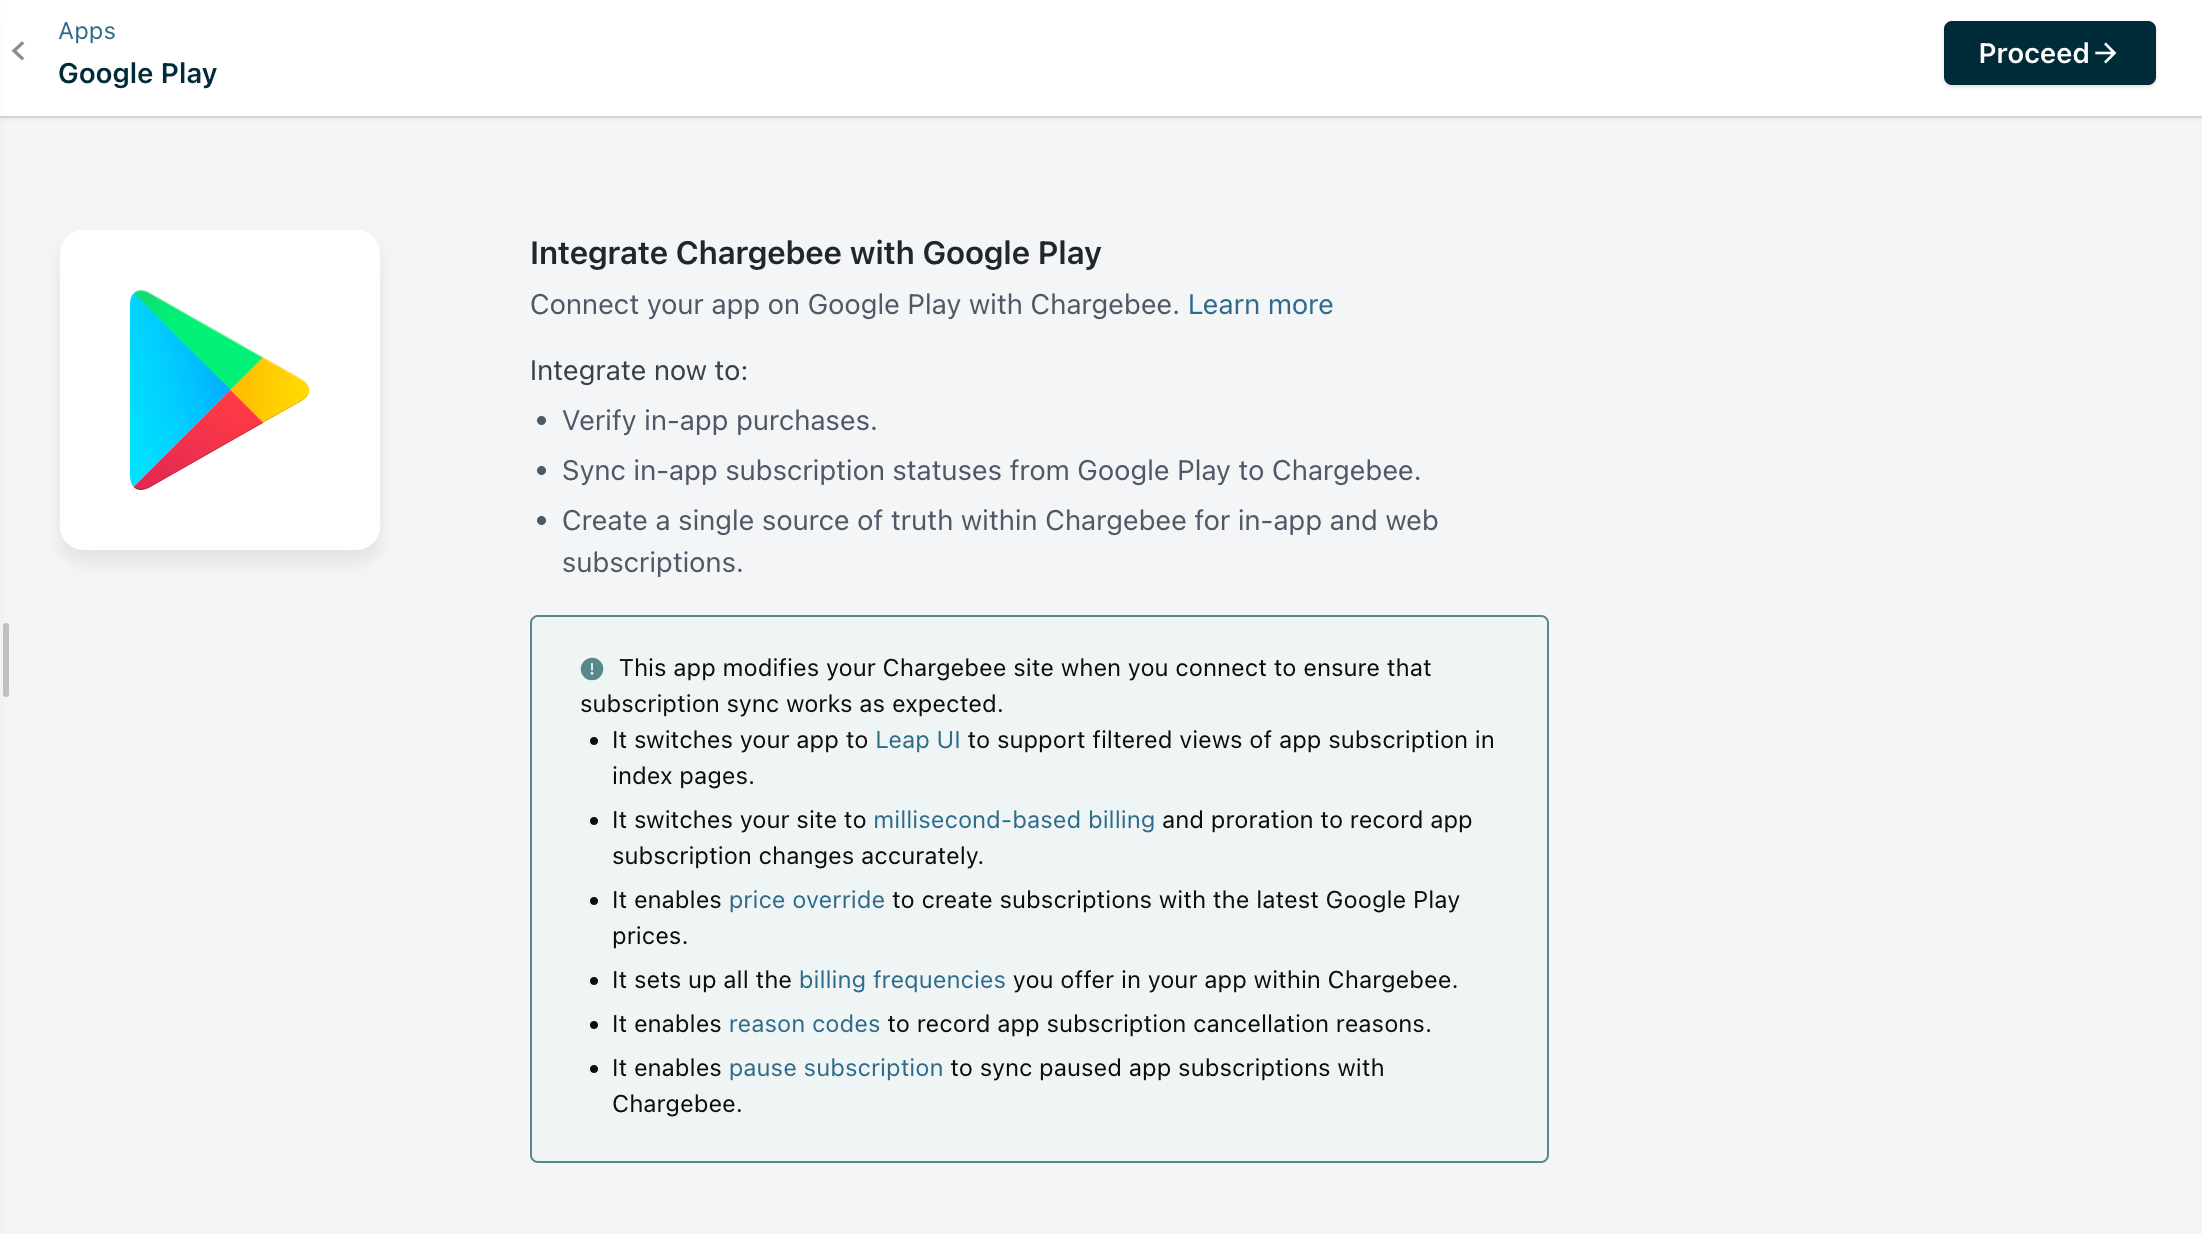
Click Google Play Store card and click Connect on the Google Play Store page in marketplace.

-
Click Proceed to initiate the connection of your Play Store app with Chargebee.
-
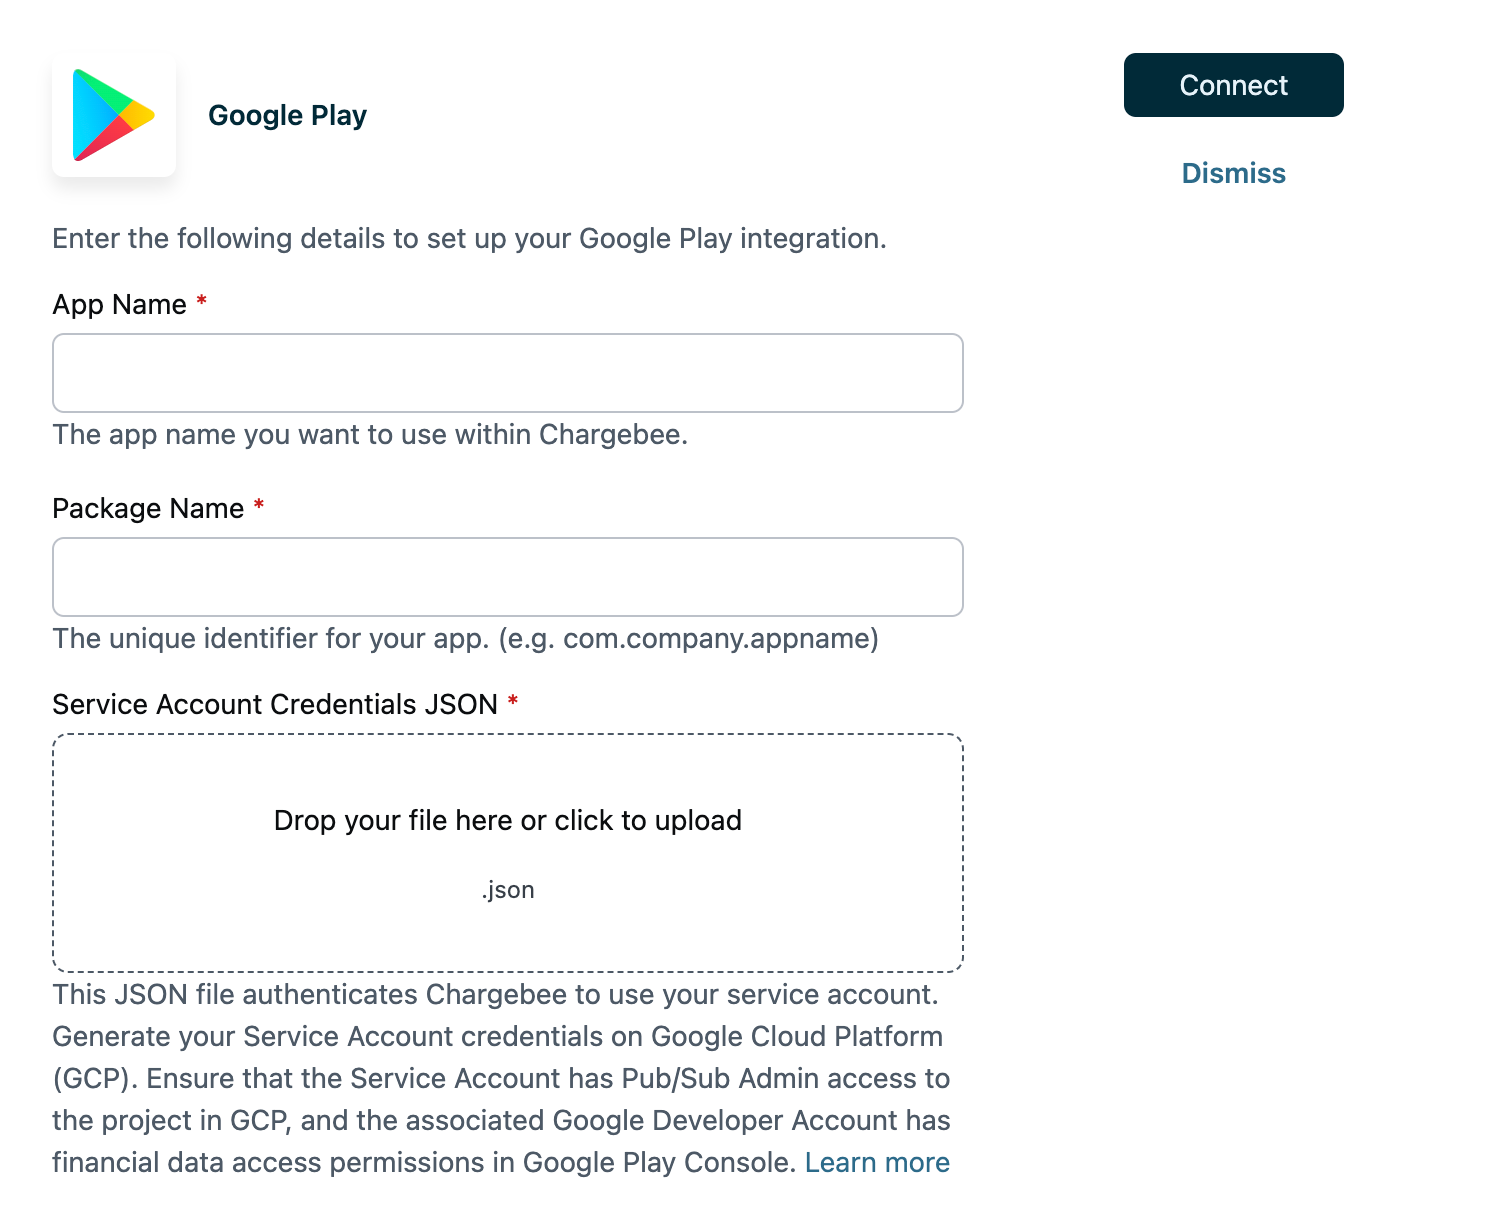
Type the name of the app and package name retrieved from the Play Store Console in the App Name and Package Name field.
-
Click Browse or use the drag-and-drop function to upload the JSON file saved on your system during the creation of the service account in Step 2. Note: All three fields are mandatory to connect your Play Store app with Chargebee.
-
Click Connect to complete the integration process.
Was this article helpful?