WordPress
WordPress allows you to create websites, blogs, and share content, services, and products with users on the web. With content being generated daily, such as research reports, courses, and online tutorials, you can monetize your content by setting up a paywall on your website.
A paywall gates your site's premium content on a subscription basis.
With Chargebee's plugin for WordPress, you can implement a paywall on your site and charge users on a subscription basis. It allows you to restrict content based on the subscription your customers have signed up for.
Note
- The plugin is available only on Chargebee support. We will send you the WordPress plugin zip file for installation.
- Test the plugin on your Chargebee Test site before enabling it on your Live site.
- Customers must sign in to your website before checkout. For more information, see why sign-in is mandatory.
Prerequisites
Ensure you use these tools and their respective versions to set up the plugin:
- WordPress version 4.5.0 or later
- PHP version 5.5.9 or later
- MySQL version 5.6 or later, or MariaDB version 10.0 or later
Plugin Overview
Chargebee's plugin creates the following in WordPress. These are required to set up content restriction on your site:
Products:
- Chargebee creates "Product" as a custom object in WordPress.
- Plans in Chargebee are created as Products.
Levels:
- "Level" is a custom object in WordPress.
- You can map a Product to a Level to restrict content.
- You can also map multiple Products to a Level.
Set up the WordPress plugin
- Go to WordPress dashboard > Plugins > Add New, and select Upload Plugin.
- Upload the Chargebee plugin and select Activate Plugin.
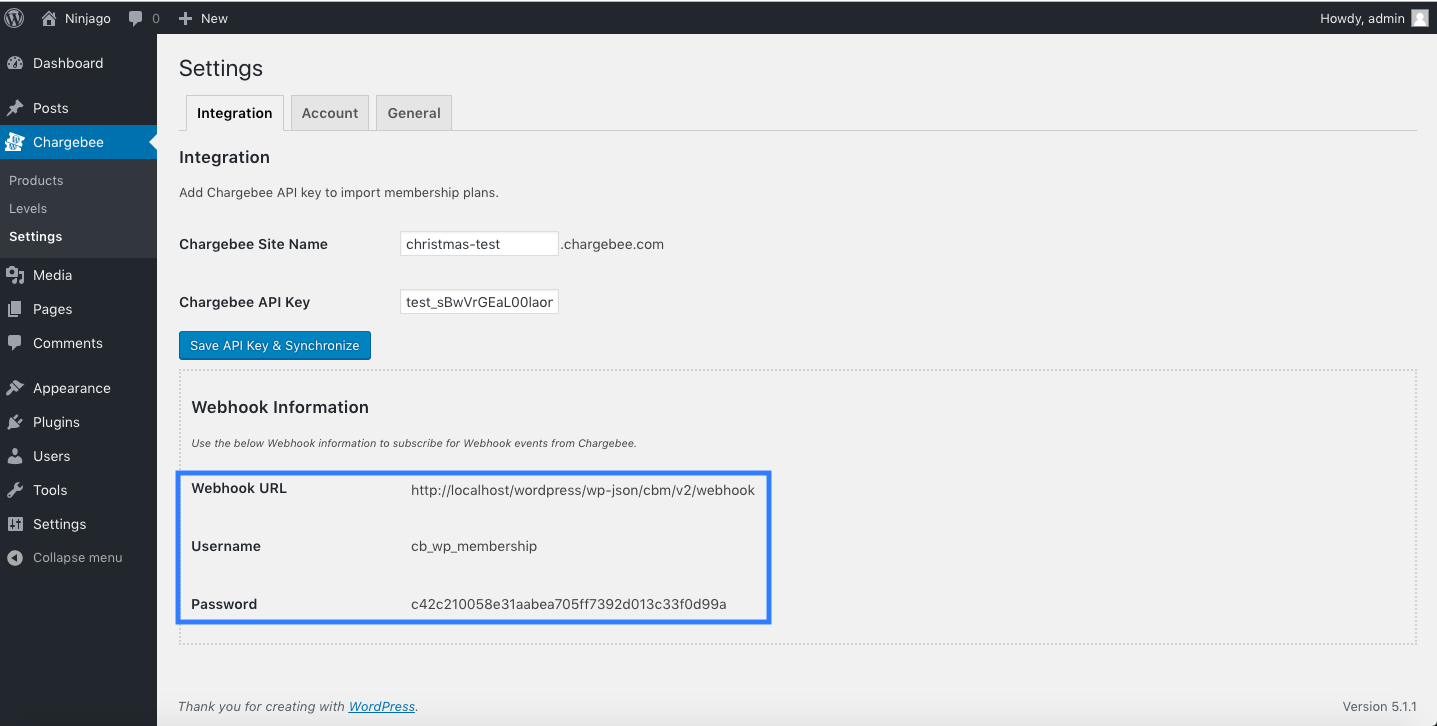
- Go to Chargebee tab > Settings > Integration settings, and enter your Chargebee site name and API key. If your Chargebee site URL is https://acme.chargebee.com, enter "acme" as the site name.
- Select Save API Key and Synchronize. Plans from Chargebee will now appear under WordPress dashboard > Chargebee tab > Products.
- Copy the Webhook URL, Username, and Password from your WordPress site.
- In your Chargebee User Interface, go to Settings > Configure Chargebee > API Keys and Webhooks, and switch to the Webhooks tab. Select Add Webhook.
- Enable the Protect webhook URL with basic authentication option, and paste the Webhook URL, Username, and Password in the respective fields. Select Create.
- In your Chargebee User Interface, go to Settings > Configure Chargebee > Checkout & Self-Serve Portal > Configuration > Portal, and from the Self-serve portal access drop-down, choose via Single Sign-On API.
Set up levels in WordPress
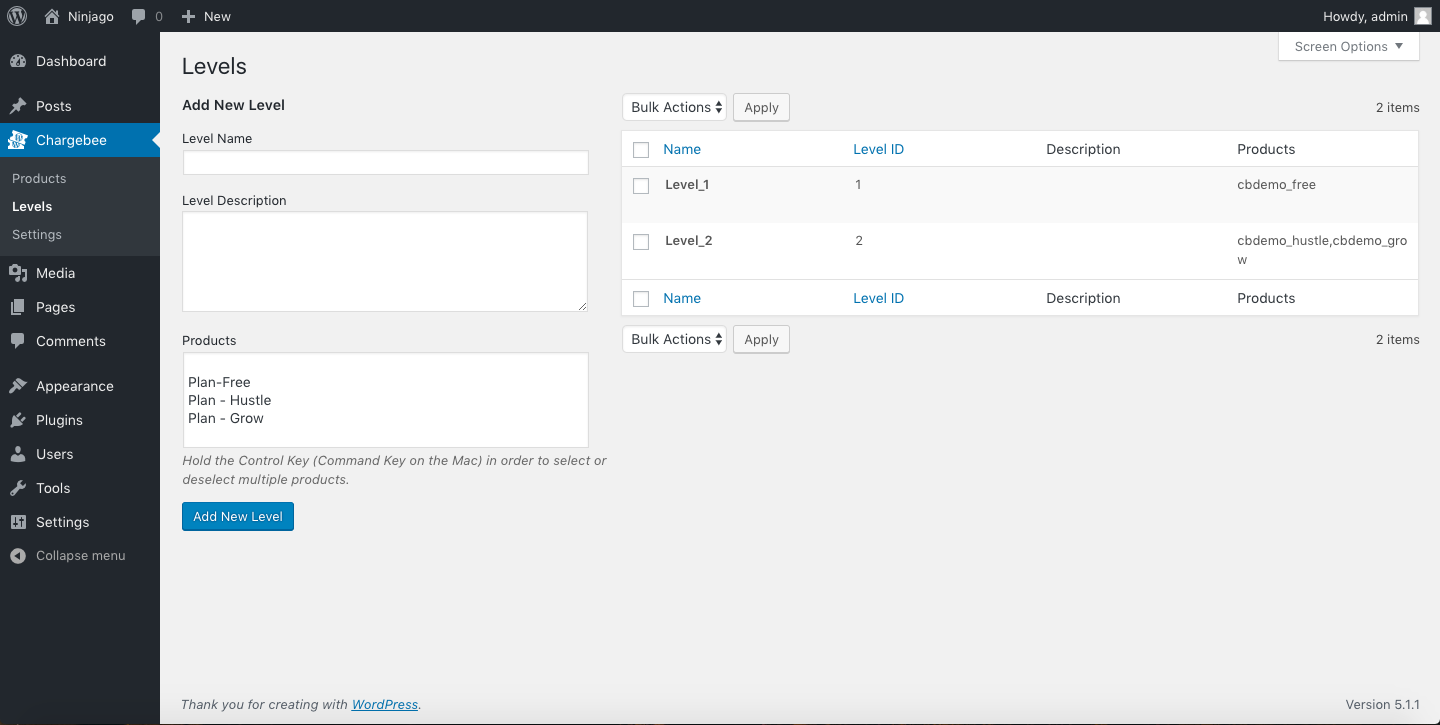
Once the plugin is installed, Chargebee will create Levels in WordPress. You can create restrictions as follows:
- In your WordPress dashboard, go to Chargebee tab > Levels. Enter the Level name and description.
- Select the Chargebee plan to associate with each Level. You can associate more than one plan with a Level.
Set up content restrictions
Chargebee's plugin allows you to set up a content restriction mechanism. You can set restrictions for your pages/posts as follows:
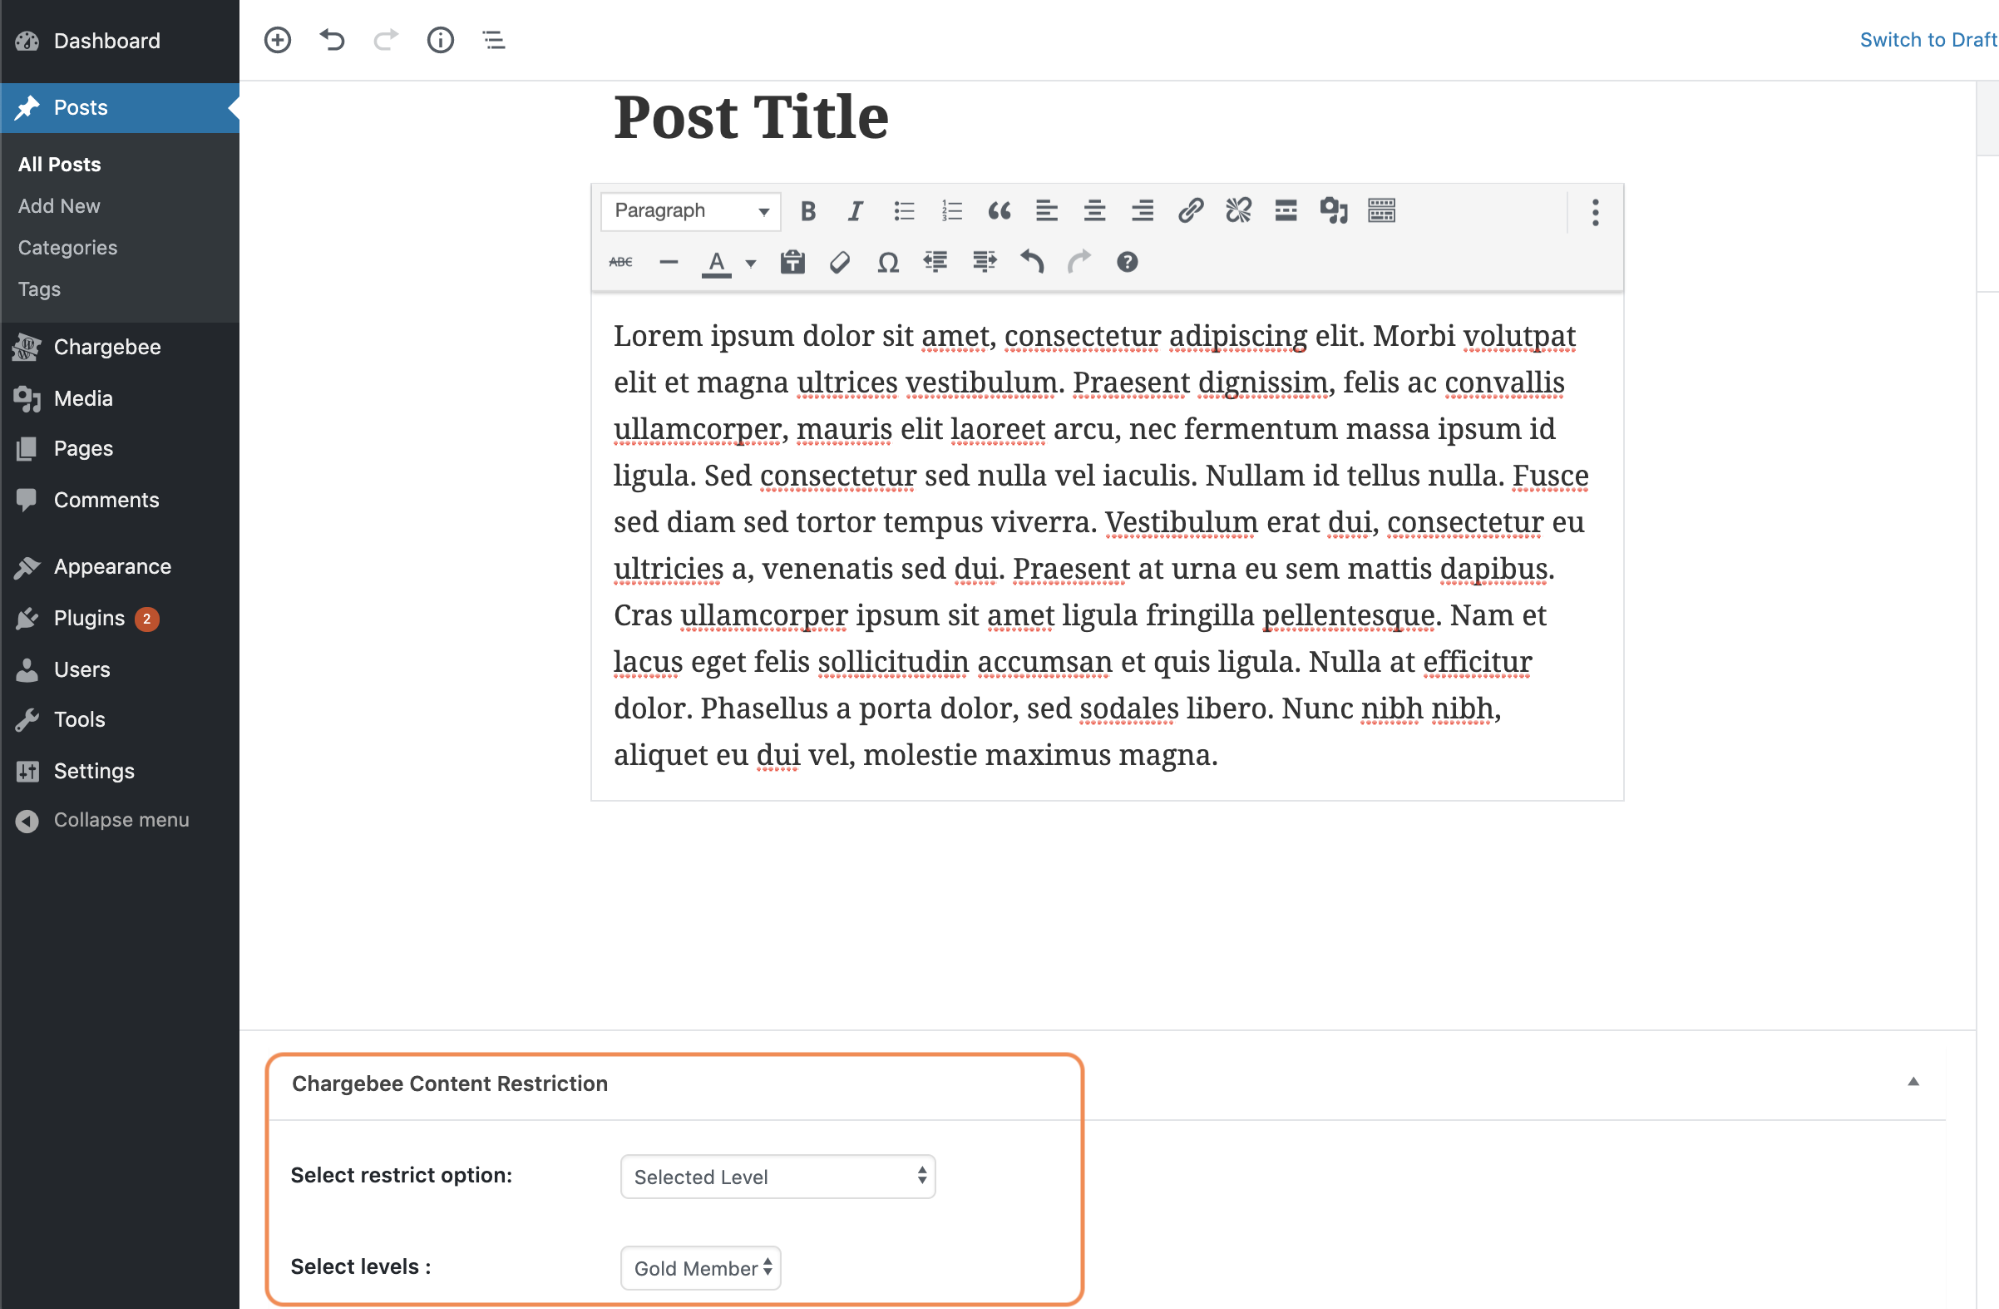
Everyone: All viewers can access the content.
Select Level: Only viewers on a specific Level can access the content. Once this option is selected, you can choose a Level.
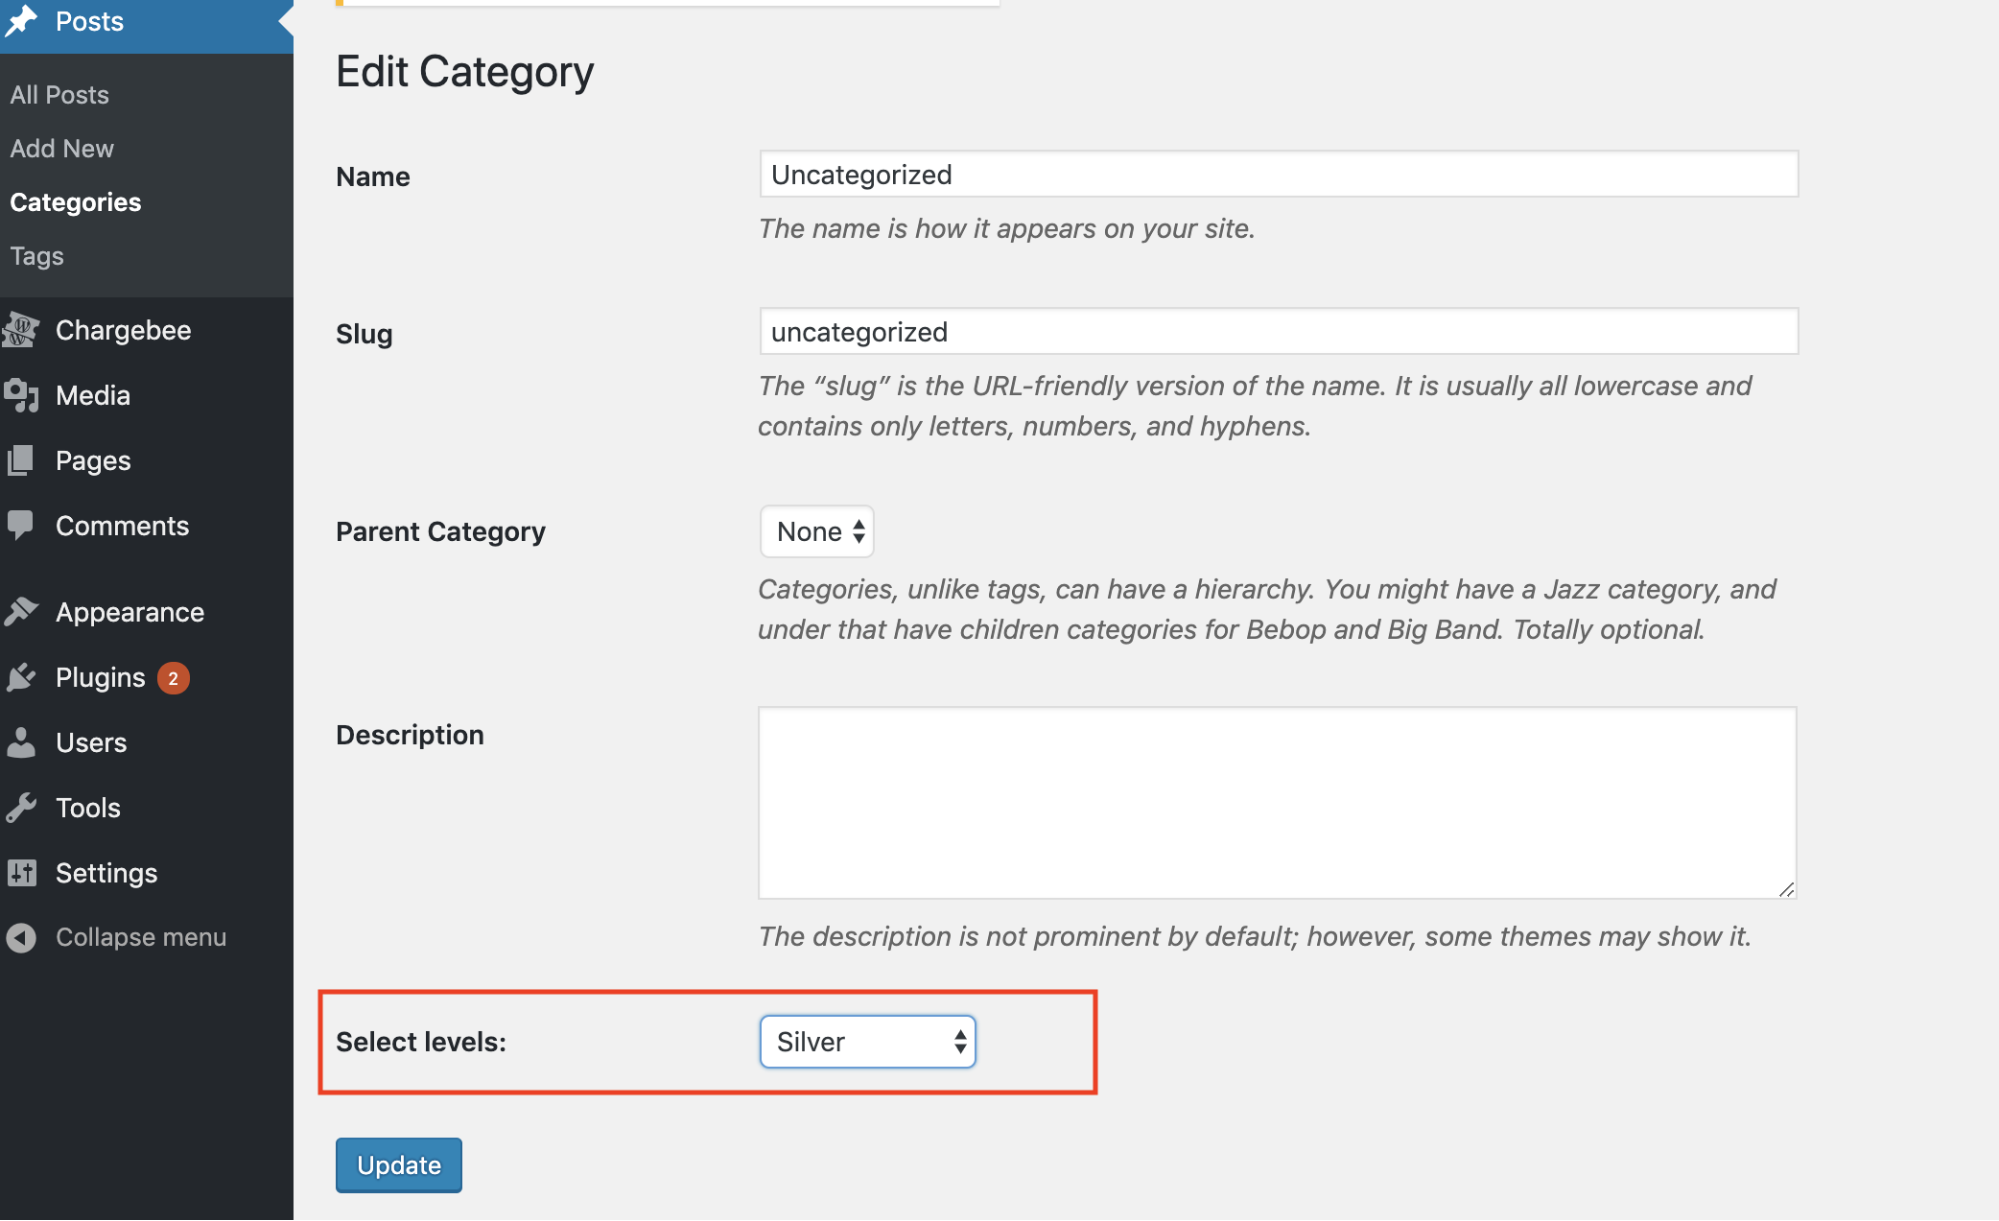
As restricted at Category level: Set a Level at the Category level, which applies to all posts/pages in the Category.
As per content shortcodes: Restrict content based on the shortcode used on the page or post. Supported shortcodes are listed below:
Shortcode Usage
Use these shortcodes in your posts/pages to set up restrictions or guide users to sign up:
| Action | Shortcode | Description |
|---|---|---|
| Show content | [cb_content_show level="level_id"] Your content [/cb_content_show] | Displays content to users on the plan associated with the specified Level ID. |
| Hide content | [cb_content_hide level="level_id"] Your content [/cb_content_hide] | Hides content from users on the plan associated with the specified Level ID. |
| Checkout subscription | [cb_product_subscribe_hosted class="btn" product_id="plan_id"] Subscribe [/cb_product_subscribe_hosted] | Allows users to subscribe by loading Chargebee's in-app checkout. |
| Manage subscription | [cb_account_portal class="btn"] Manage Subscription [/cb_account_portal] | Allows users to manage their subscription via Chargebee's self-serve portal. |
| Display subscription | [cb_display_subscription] | Displays subscription details to users. |
| Show content (guest users) | [cb_not_logged_in] Your content [/cb_not_logged_in] | Displays content to users who are not logged in. |
| Show content (paid) | [cb_paid_subscription] Your content [/cb_paid_subscription] | Displays content to users on paid plans. |
| Show content (free) | [cb_free_subscription] Your content [/cb_free_subscription] | Displays content to users on free plans. |
-
Replace "Product ID" in the Product Subscribe shortcode with the Product ID of the plan to represent. The Product ID of a plan is similar to the Plan ID in your Chargebee site.
-
Replace the "level_id" placeholder with an actual Level ID when using shortcodes. If "level_id" is not specified for the [cb_content_show] shortcode, the content will be shown to all users. Similarly, if "level_id" is not specified for the [cb_content_hide] shortcode, the content will be hidden from all users.
Limitations
- Addons are not synced from Chargebee to WordPress.
- Pricing tables are not supported. To display multiple plans on a single page, use the Subscribe shortcode for each plan. Customers can check out directly from one page.
- Multisite in WordPress is not supported.
FAQ
1. How do I migrate to the new version of the WordPress plugin by Chargebee?
Uninstall the plugin and install the new version. Contact support to get the latest file for installation. Refer to the new set of shortcodes.
2. How do I assign a default plan for new sign-ups?
To assign a free plan as the default subscription for all new sign-ups, go to WordPress site > Chargebee > Settings > General and choose an option from the Default Membership Product dropdown. Only "free plans" (zero-dollar plans) can be assigned as a default plan for new sign-ups.
3. How do I change the Content Restriction Message?
Set a custom message for guests or free plan users accessing gated content. Go to WordPress site > Chargebee > Settings > General and enter a custom restriction message in the text box provided.
4. What are the deprecated shortcodes?
The following shortcodes are deprecated:
cb_login_formcb_registration_formcb_account_linkcb_update_payment_method_formcb_product_subscribe
5. Plans from Chargebee are not imported. What should I do?
If plans from Chargebee are not imported, try updating the Plan ID in your Chargebee site and sync again.
6. If a customer's subscription changes in my Chargebee site, will it reflect on the WordPress site?
Yes, it will reflect on your WordPress site. The customer will now see content according to their new plan.
7. How does data flow between WordPress and Chargebee in Product Catalog 2.0?
From WordPress to Chargebee:
Data flows automatically from WordPress to Chargebee-no webhook setup is needed.
Once the Chargebee plugin is installed:
- Go to Users > Add New and create a new user.
- In the Role dropdown, select Chargebee Member.
- After the user is created, edit the user.
- The Chargebee Customer Information section will now be visible.
- Click the Create CB Account button to create a corresponding customer in Chargebee.
From Chargebee to WordPress:
To enable data flow from Chargebee to WordPress, you must configure webhooks in your Chargebee site. Once configured, the following events are supported:
- subscription_created
- subscription_changed
- subscription_deleted
- subscription_cancelled
- item_price_created
- item_price_deleted
- item_price_updated
- customer_created
Was this article helpful?