How to setup Chargebee checkout with BigCommerce store?
Scope
How to set up Chargebee Checkout with BigCommerce Store?
Summary
You can extract the zip file provided and use the sample code by following the instructions below to set up Chargebee checkout with the Bigcommerce store.
Solution
Setting basic Chargebee checkout in BigCommerce Theme
-
Download the custom theme from this link
-
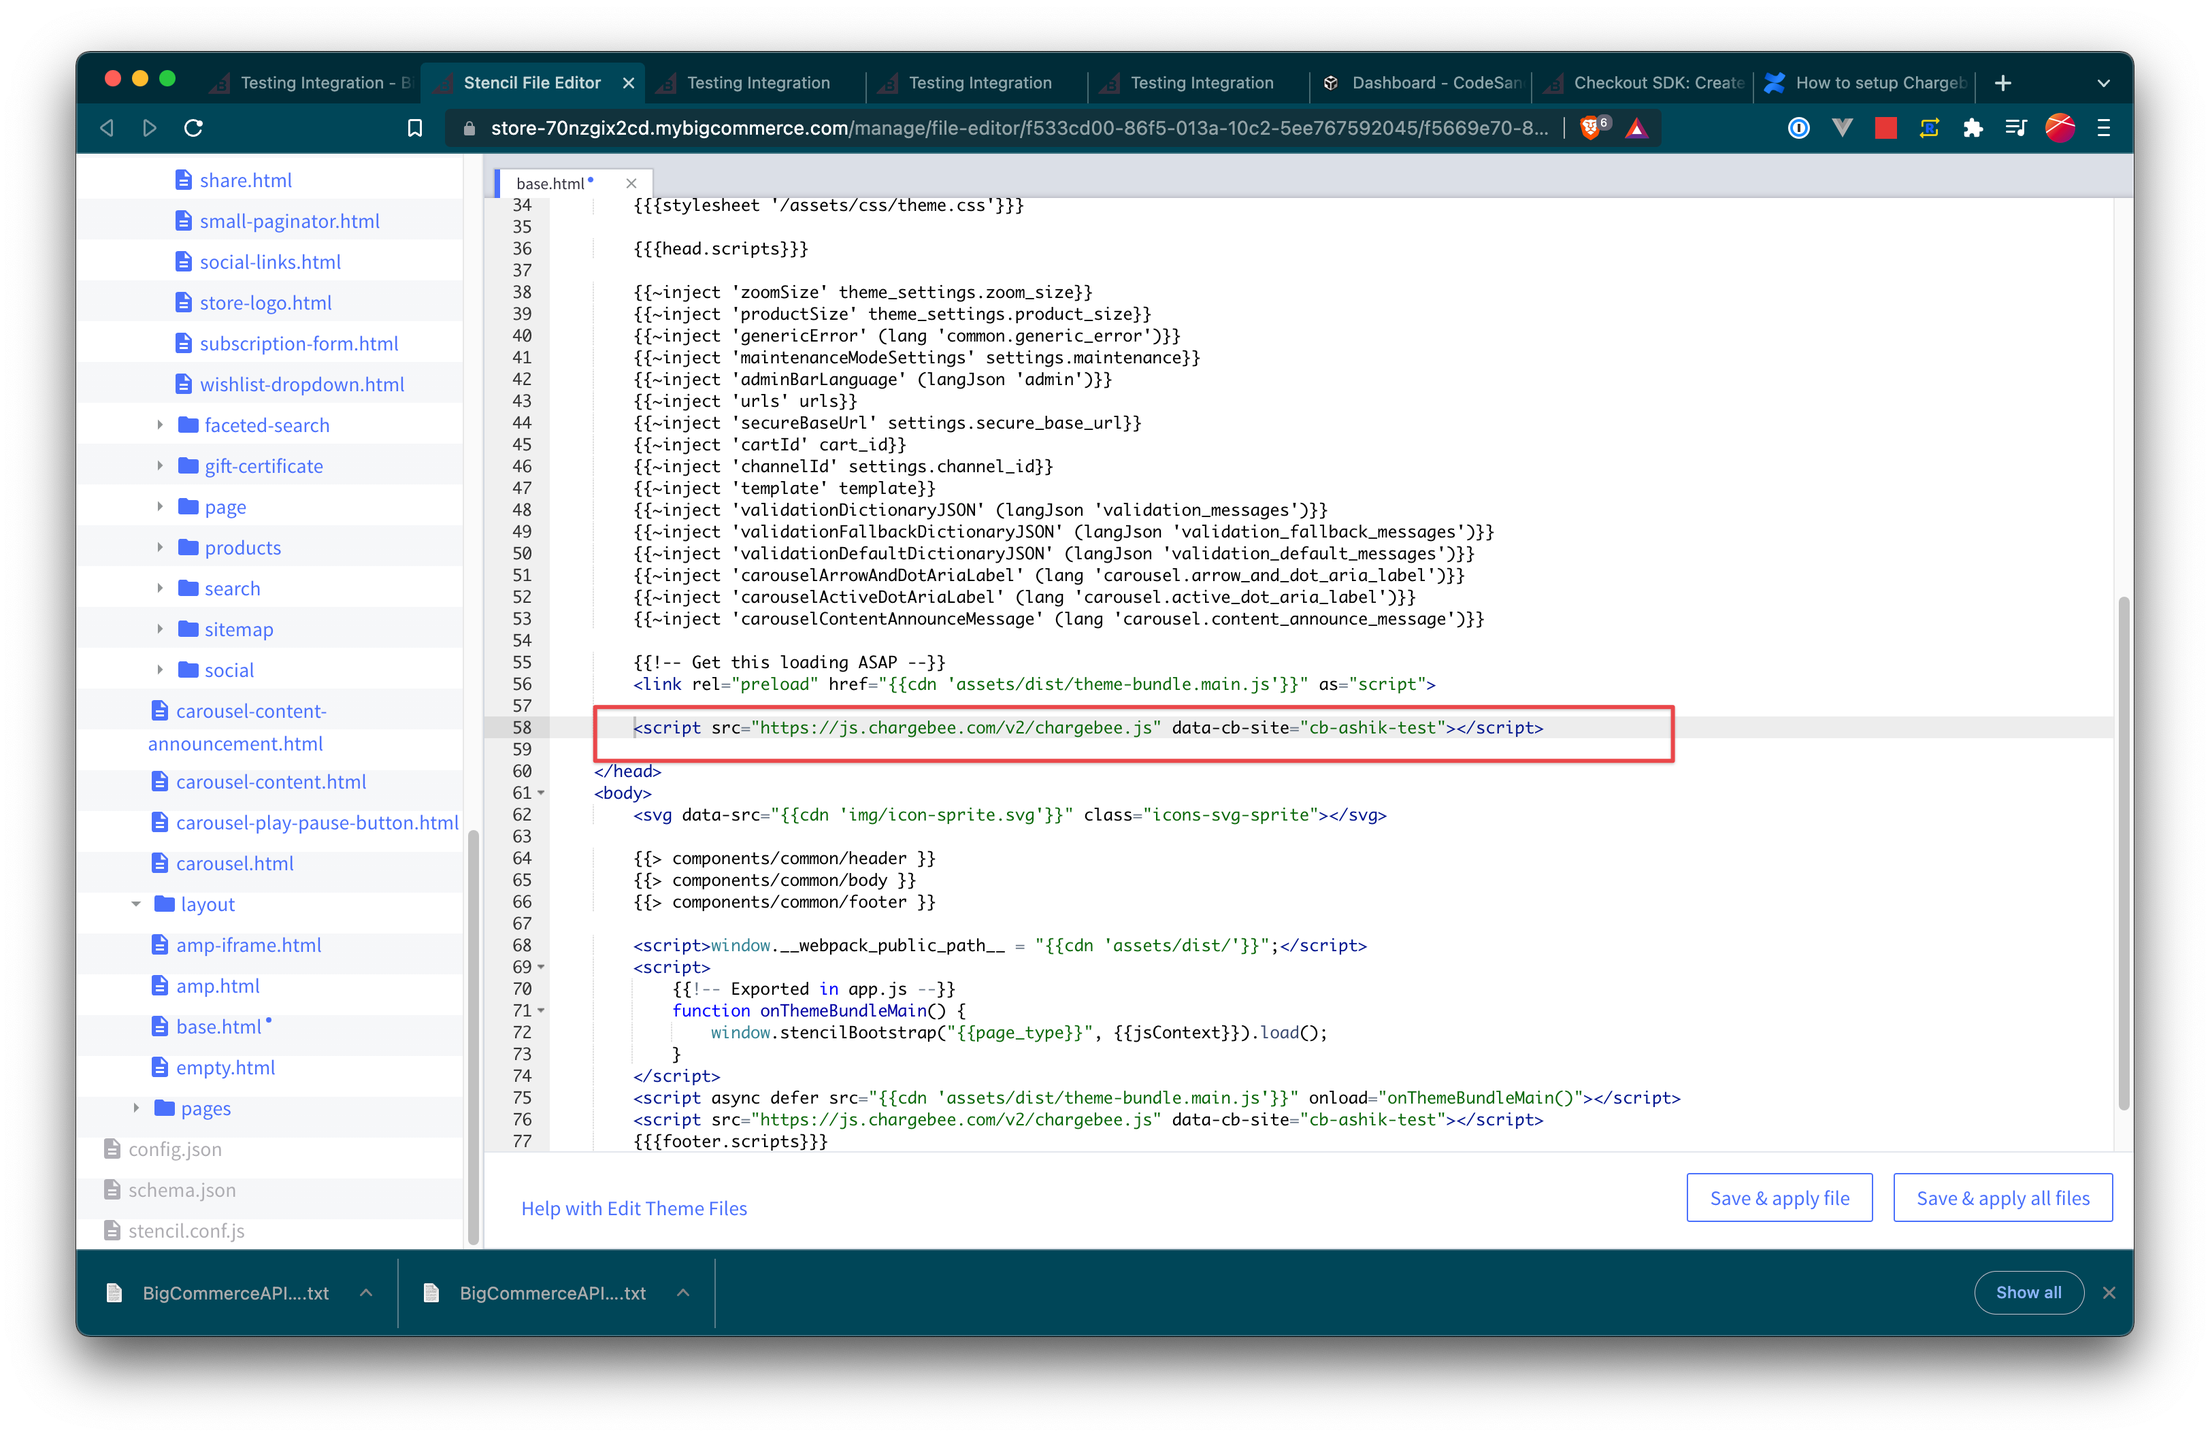
Extract it and then change the site name in
templates/layout/base.html -
Replace
data-cb-site="cb-ashik-test"todata-cb-site="example-test" -
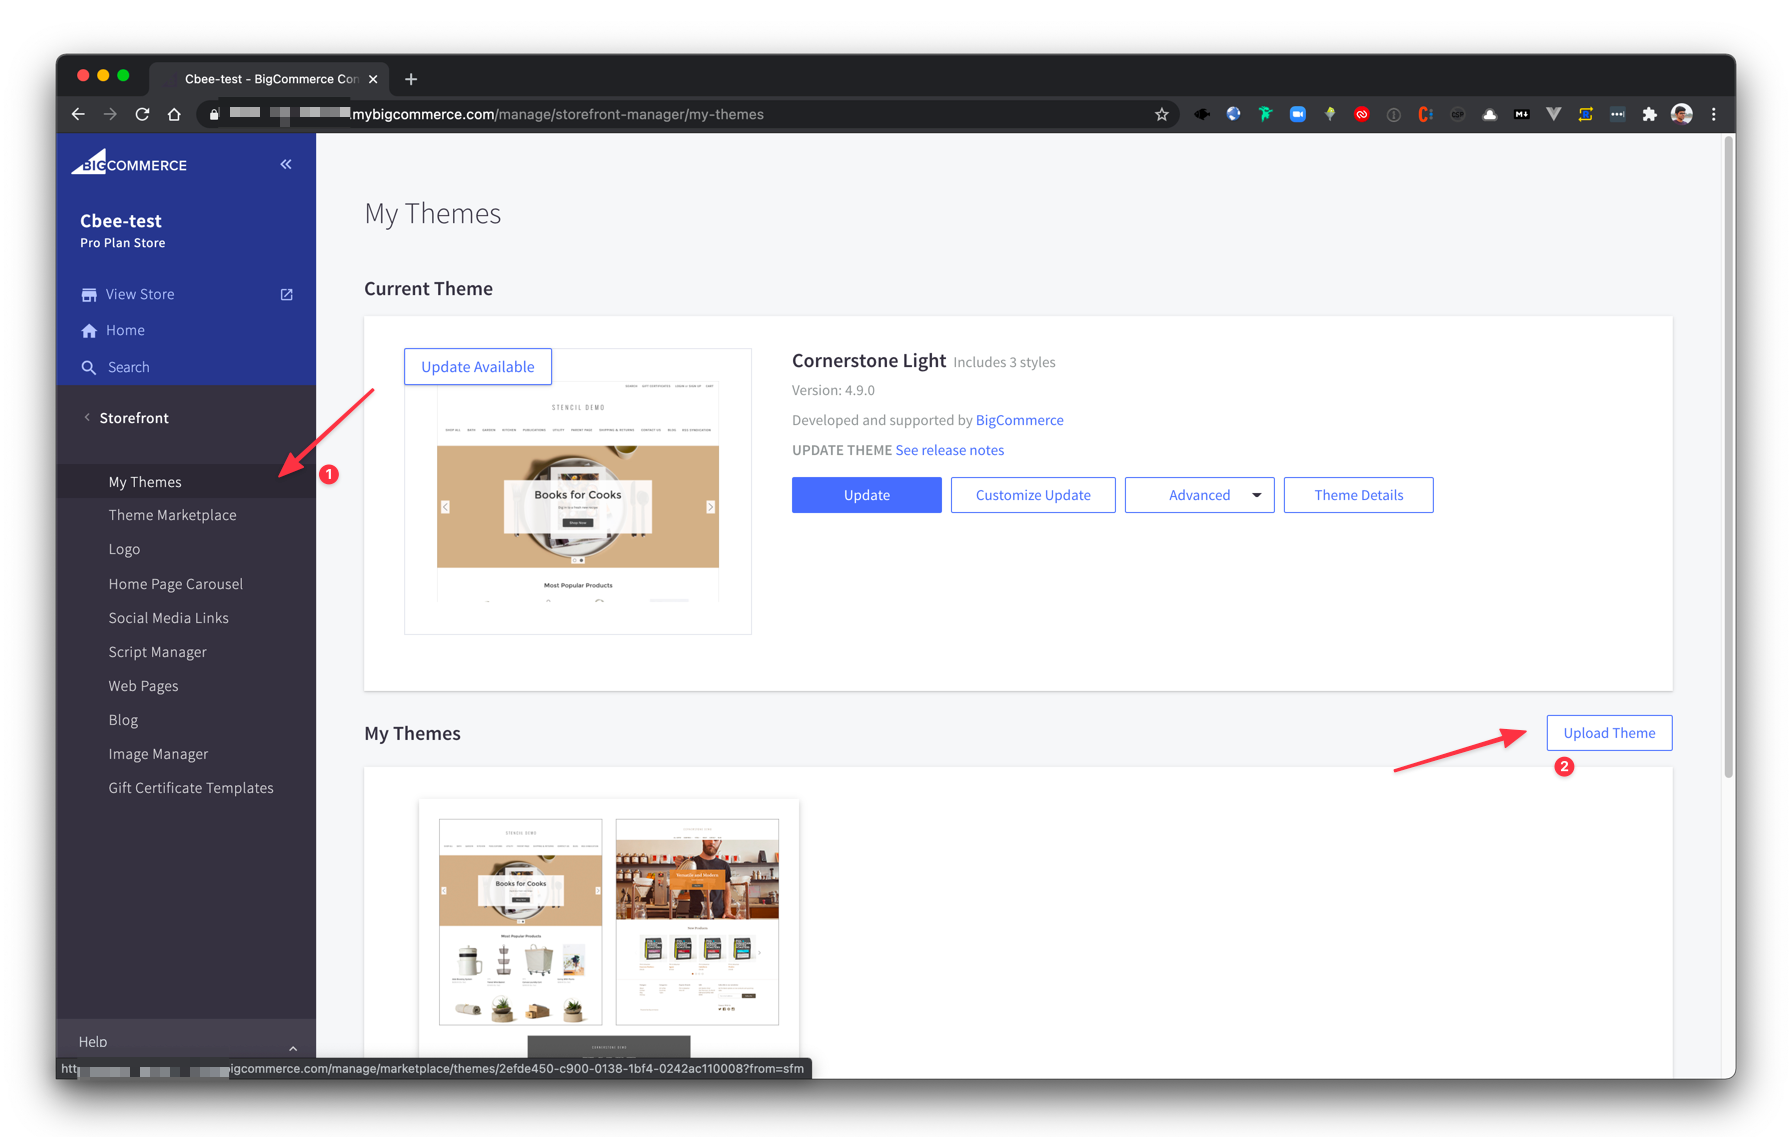
Zip it and upload it to BigCommerce by navigating to Storefront > Theme > Upload theme (If you have an existing theme, delete it and upload)
-
Our theme does not get updated automatically, seems like some cache. To get the latest update just edit any file and save it. Refer to Cache clearing using Edit Theme Files video instructions on how to do that.
Refer to this link for video instructions
Cache clearing using Edit Theme Files
Go to Themes > Edit theme files then leave space and Save and Apply file.
Refer to this link for video instructions.
What we've done
Assumptions
For this example, we'll be using the Cornerstone-5.1.0 theme (light) however the same thing can be done for other themes also. We just need to do these configs in their equivalent files
Configure Drop-in Script
Get the drop-in script from the Chargebee Admin console and include it intemplates/base.htmlthe file of the theme file
https://www.chargebee.com/checkout-portal-docs/drop-in-tutorial.html#implementation
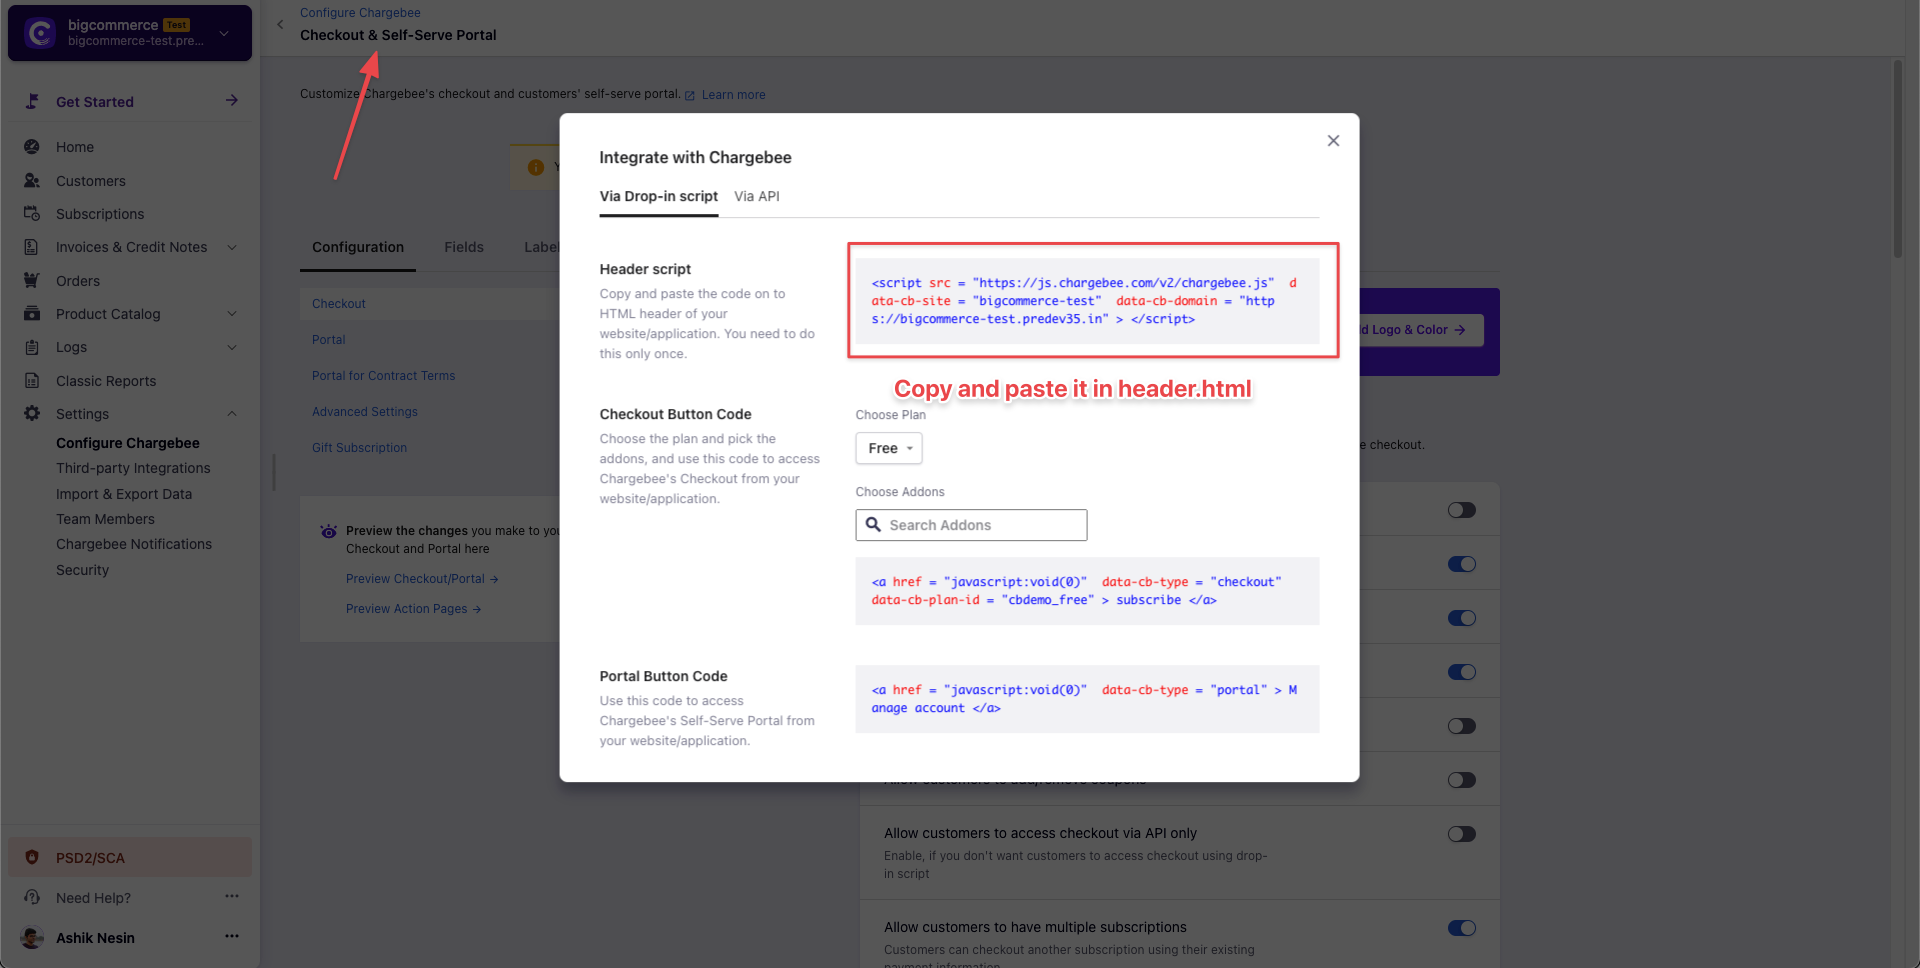
The sample code will look something like this:
<script src="https://js.chargebee.com/v2/chargebee.js" data-cb-site="bc-demo-test"></script>
<!-- replace bc-demo-test with your site name -->
Create custom fields in your product
Create custom fields in your BigCommerce product that we can use to map the associated Chargebee product id.
In our example, we'll be using chargebee_plan_id (we can name it whatever we want, but make sure to make necessary changes in code also
Product details page
Add this intemplates/components/products/add-to-cart.html page. It'll check if we've chargebee_plan_id custom field for that particular product if so it'll use Chargebee checkout if not then the BigCommerce cart will kick in.
The following details are sent from the product details page.
-
plan Id
-
plan quantity (reactive)
{{inject 'product' product}}

<script>
    var bcJsContext = JSON.parse({{ jsContext }});
</script>

<script>
    function cbCheckoutInit(event) {
        let cbInstance = Chargebee.getInstance();
        let cart = cbInstance.getCart();
        let [planIdCustomField] = bcJsContext.product.custom_fields.filter(field => field.name === "chargebee_plan_id");
        if (planIdCustomField) {
            document.getElementById("form-action-addToCart").value = 'Subscribe';
        }
        document.getElementById("form-action-addToCart").addEventListener("click", function (event) {
            if (planIdCustomField) {
                event.preventDefault();
                let productQty = document.querySelector('.form-input--incrementTotal').value;
                let product = cbInstance.initializeProduct(planIdCustomField.value);
                product.isItemsModel = true; // Set this flag to true only if the site is Latest Product Catalog
                product.setPlanQuantity(productQty);
                cart.replaceProduct(product);
                cart.proceedToCheckout();
            }
        });
    }

    let cbInitCheckerIntervalId;
    cbInitCheckerIntervalId = setInterval(() => {
        if (Chargebee && Chargebee.inited) {
            clearInterval(cbInitCheckerIntervalId);
            cbCheckoutInit();
        }
    }, 100);
</script>

Listing
card.html
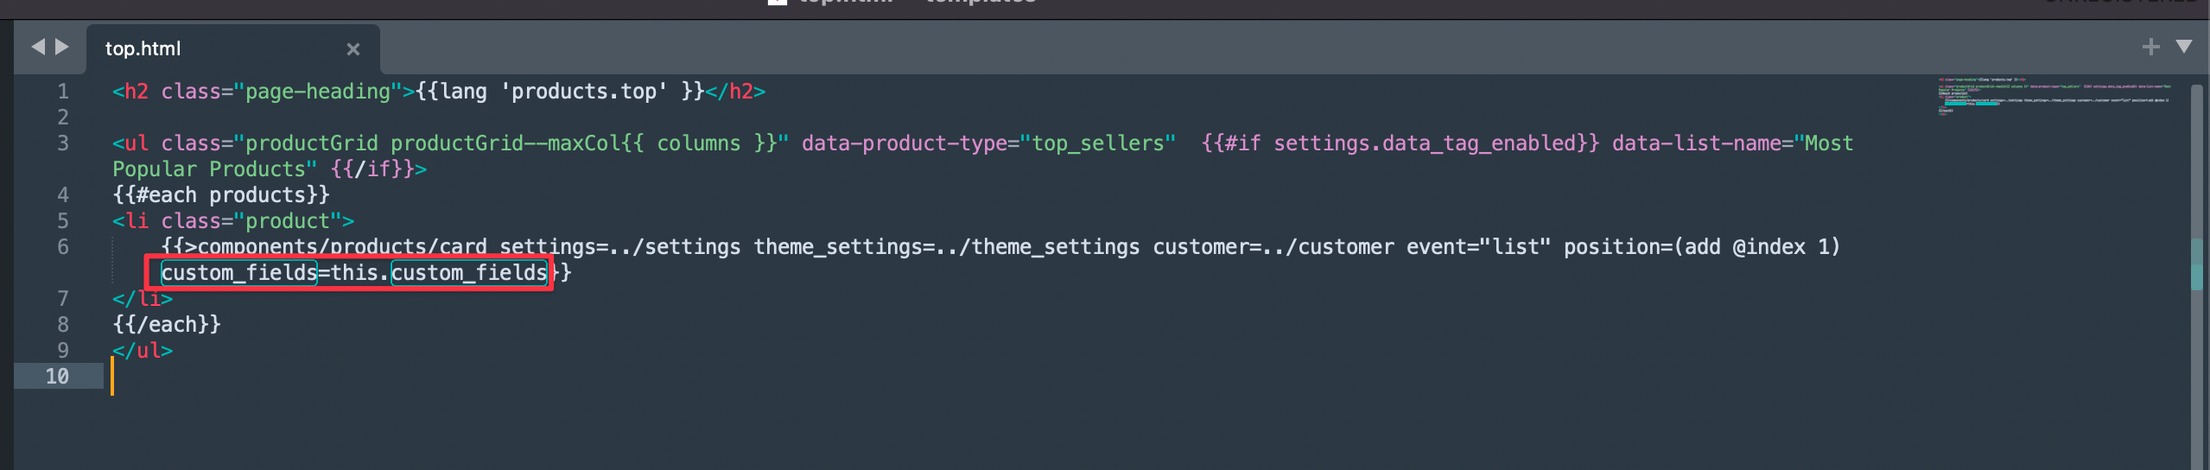
Pass custom_fields property of product to the card from where ever it's called
Like this:
// top.html
  {{>components/products/card settings=../settings theme_settings=../theme_settings customer=../customer event="list" position=(add @index 1) custom_fields=this.custom_fields}}
// Do the same in featured.html, grid.html, related.html, carousel.html as well.
top.html
Refer to this link for video instructions
Similarly, do it for
-
components/products/featured.html -
components/products/grid.html -
components/products/related.html -
components/products/carousel.html
Card.html
In card.html, replace the #if add_to_cart_url block with the following sample code.
Legacy Product Catalog
  {{#each custom_fields}}
    {{#if this.name '===' 'chargebee_plan_id'}}
        {{assignVar "chargebeePlanId" this.value}}
        <a href="javascript:void(0)"
           data-cb-type="checkout"
           data-cb-plan-id="{{this.value}}"
           class="button button--small card-figcaption-button">
            Subscribe
        </a>
    {{else}}
        {{#if add_to_cart_url}}
            <a href="{{add_to_cart_url}}"
               data-event-type="product-click"
               data-button-type="add-cart"
               class="button button--small card-figcaption-button">
                {{lang 'products.add_to_cart'}}
            </a>
            <span class="product-status-message aria-description--hidden">
                {{lang 'category.add_cart_announcement'}}
            </span>
        {{/if}}
    {{/if}}
{{/each}}

{{#unless custom_fields}}
    {{#if add_to_cart_url}}
        <a href="{{add_to_cart_url}}"
           data-event-type="product-click"
           data-button-type="add-cart"
           class="button button--small card-figcaption-button">
            {{lang 'products.add_to_cart'}}
        </a>
        <span class="product-status-message aria-description--hidden">
            {{lang 'category.add_cart_announcement'}}
        </span>
    {{/if}}
{{/unless}}
Latest Product Catalog
The only change here we're replacing data-cb-plan-id with data-cb-item-0
{{#each custom_fields}}
    {{#if this.name '===' 'chargebee_plan_id'}}
        {{assignVar "chargebeePlanId" this.value}}
        <a href="javascript:void(0)"
           data-cb-type="checkout"
           data-cb-item-0="{{this.value}}"
           class="button button--small card-figcaption-button">
           Subscribe
        </a>
    {{else}}
        {{#if add_to_cart_url}}
            <a href="{{add_to_cart_url}}"
               data-event-type="product-click"
               data-button-type="add-cart"
               class="button button--small card-figcaption-button">
               {{lang 'products.add_to_cart'}}
            </a>
            <span class="product-status-message aria-description--hidden">
                {{lang 'category.add_cart_announcement'}}
            </span>
        {{/if}}
    {{/if}}
{{/each}}

{{#unless custom_fields}}
    {{#if add_to_cart_url}}
        <a href="{{add_to_cart_url}}"
           data-event-type="product-click"
           data-button-type="add-cart"
           class="button button--small card-figcaption-button">
           {{lang 'products.add_to_cart'}}
        </a>
        <span class="product-status-message aria-description--hidden">
            {{lang 'category.add_cart_announcement'}}
        </span>
    {{/if}}
{{/unless}}
Refer to this link for video instructions
Applying theme
And make sure to apply the uploaded theme. Alternatively, if you're using Stencil based theme then you can use CLI to easily upload the theme and the development work locally
https://developer.bigcommerce.com/docs/storefront/stencil
Limitations
-
We do not support Multi subscription support yet hence the end user will be able to subscribe to only one product (subscription) at a time.
-
This customization is not straightforward and needs a developer to make these changes.
References
Related Articles
Was this article helpful?