How to send an email notification with a link to update the billing address?
Scope
Link to change the billing address
Summary
At this moment, in Chargebee, we do not have a default email notification to collect billing addresses however, we can use a Custom email to collect billing addresses. You can send Custom emails from 'Email Customers' available on the 'Customer Index Page'.
Solution
Navigate from Settings > Configure Chargebee > Email Notifications > Custom Email > Add Notification > Customer Index Page
Each Index page can have up to 2 custom emails.
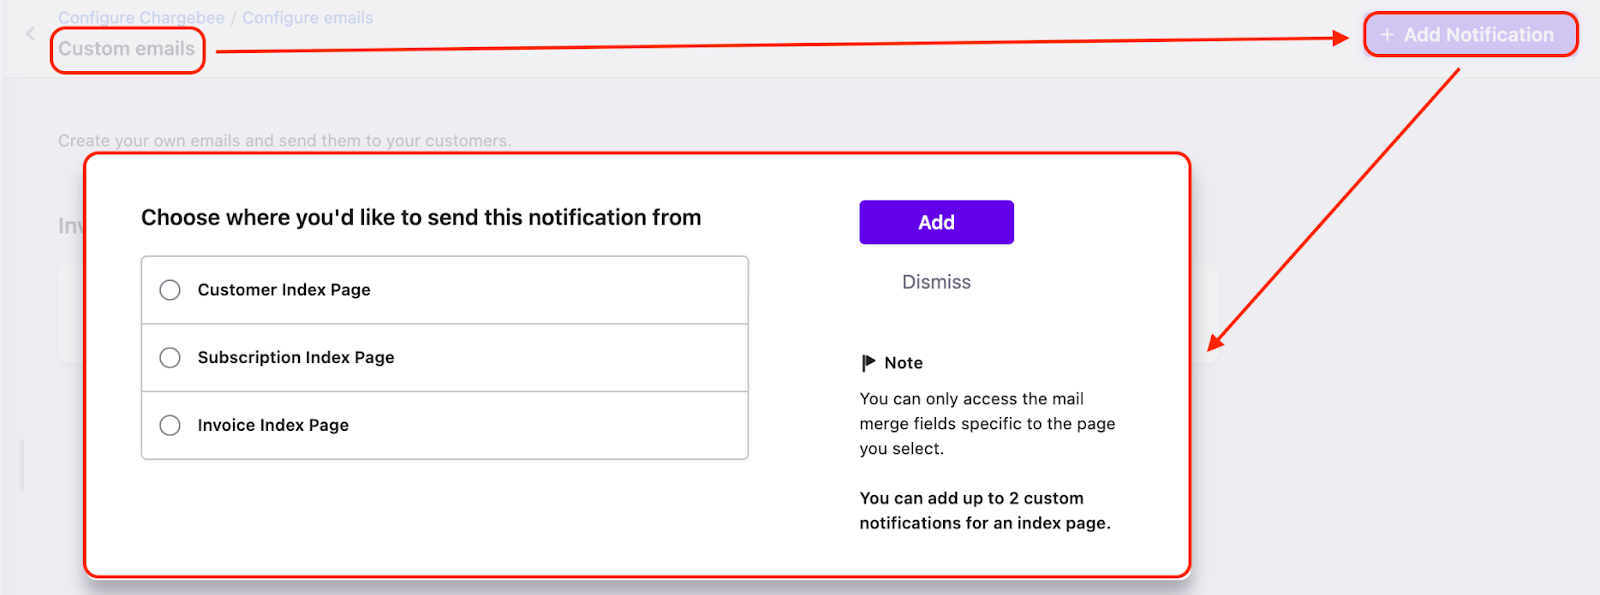
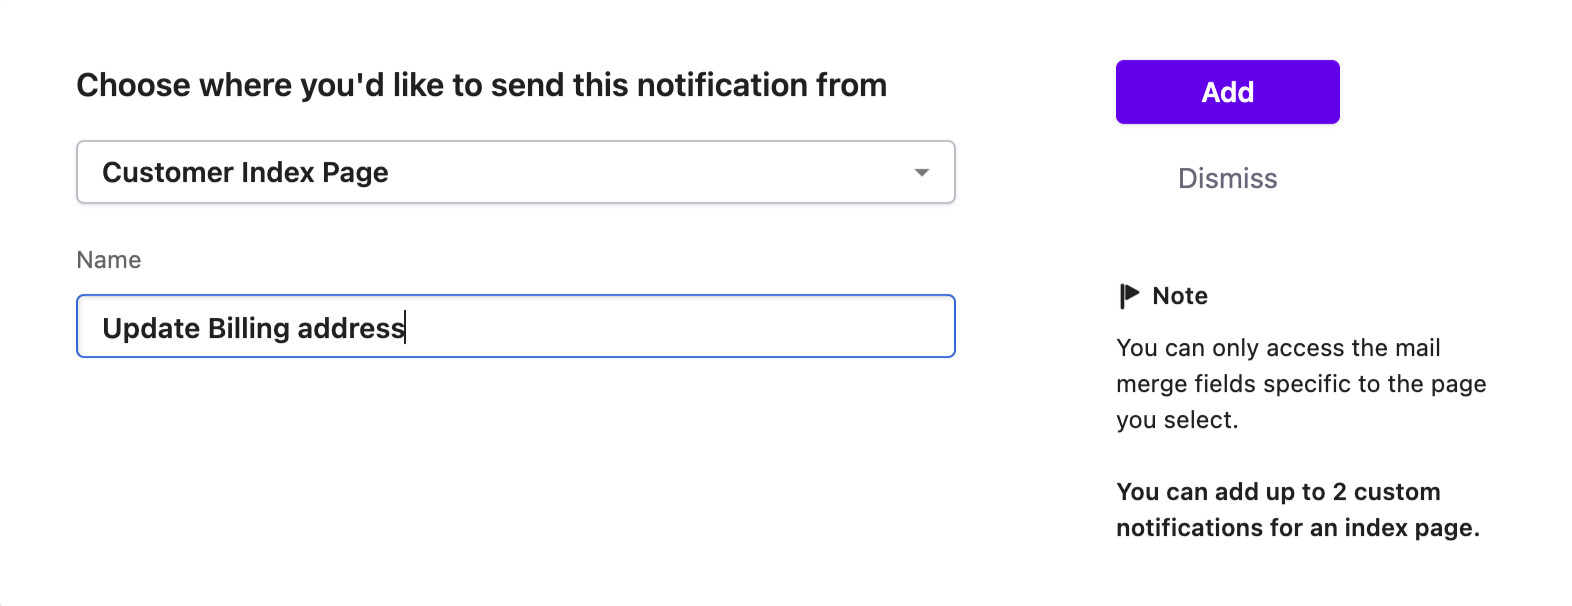
Select Customer Index Page and use the email title as per your business requirement and click 'Add'
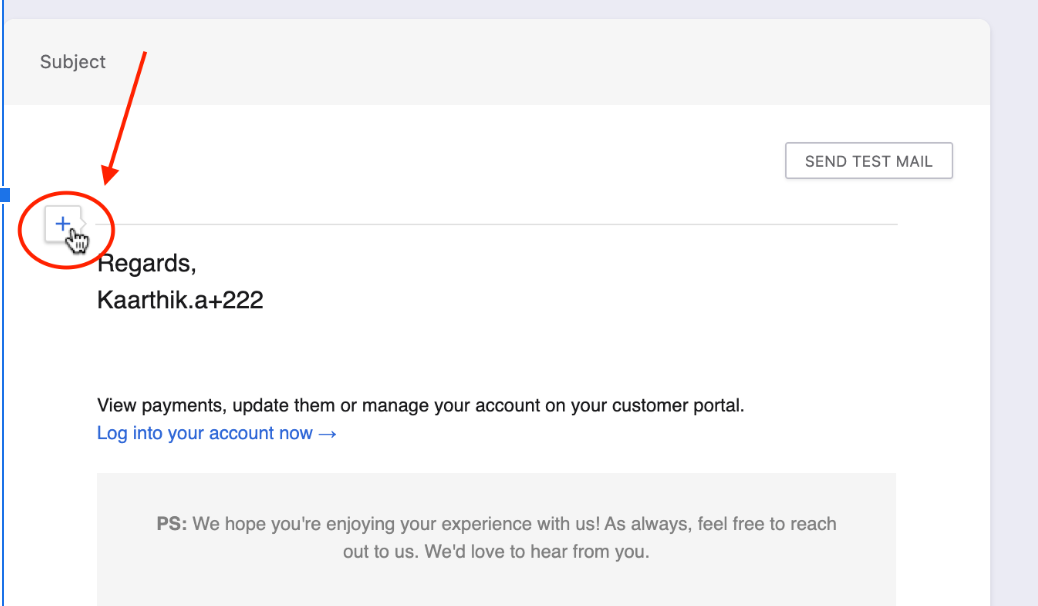
Once you have created a custom email, you will be redirected to the 'Edit' section on this email to customize your email notification.
For our use case, you can add a 'Button' and link the button to the Self-Serve portal to update their billing/shipping address.
Click on the (+) icon that is right above your signature.
Then, you will get a drop-down list and choose Add Button > Custom button
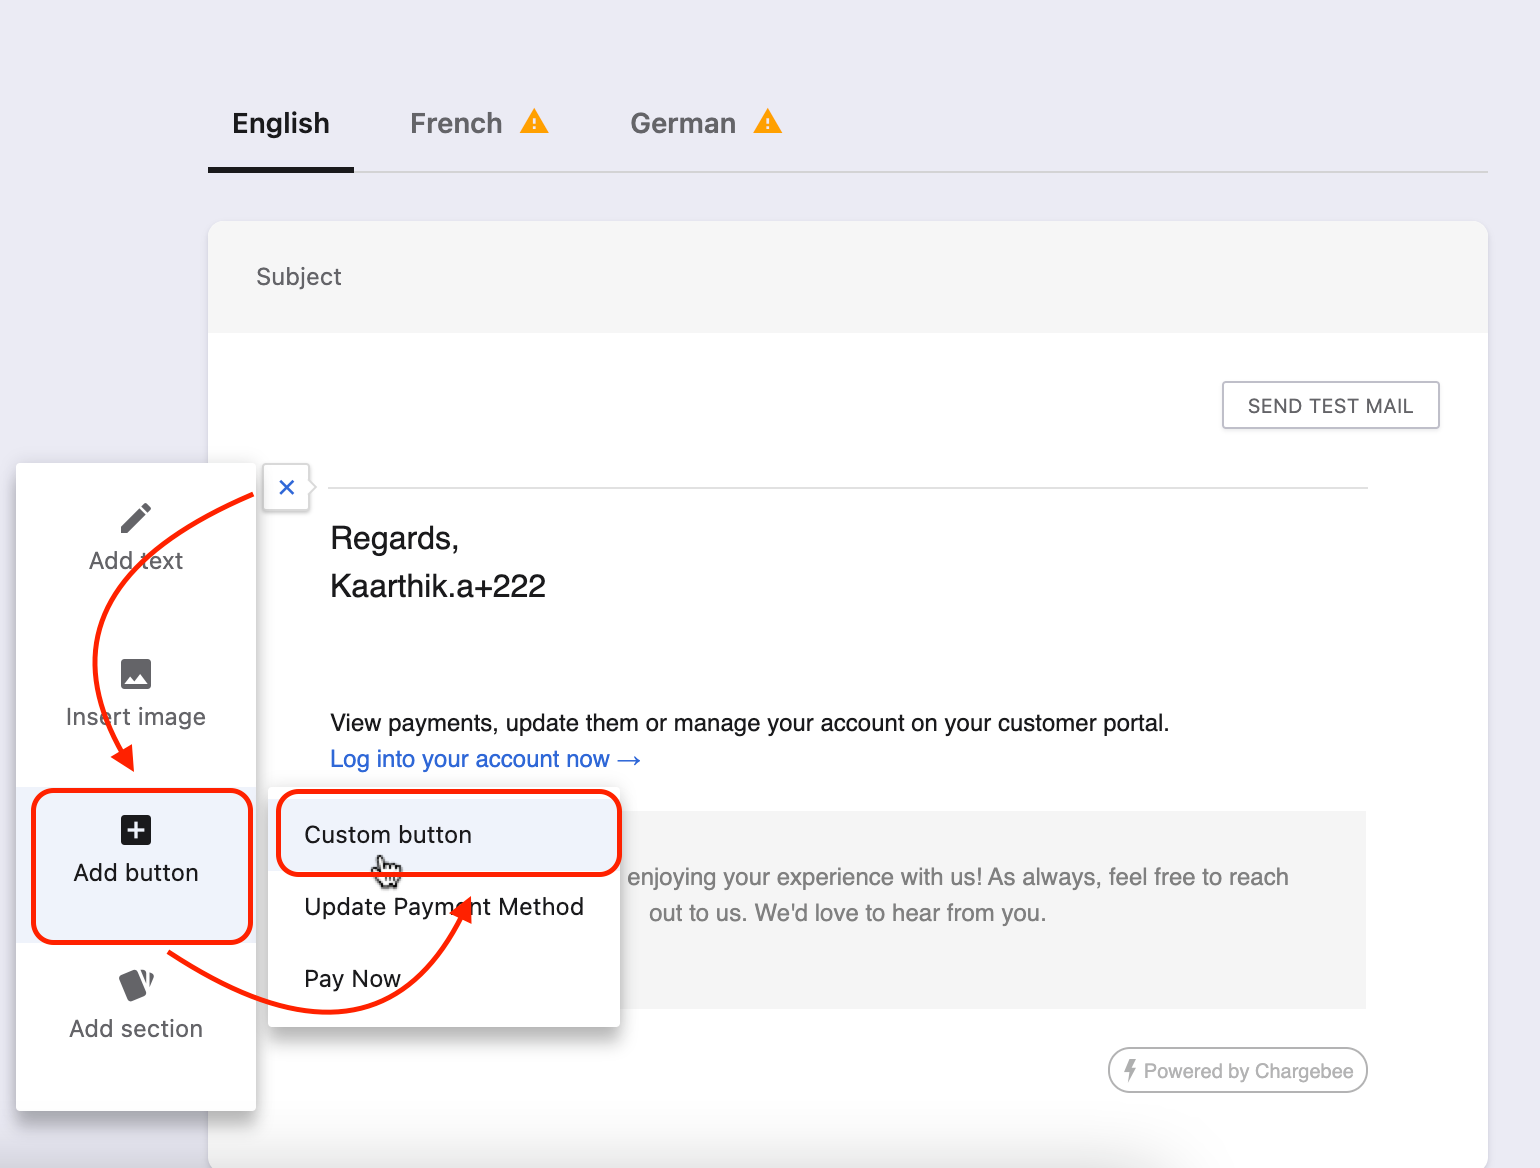
Once the button is added, add a name and link to the button. To direct customers to update their billing/shipping addresses, we need to add the Self-Serve Portal link. By default, the self-serve portal link is https://yoursite.chargebeeportal.com.
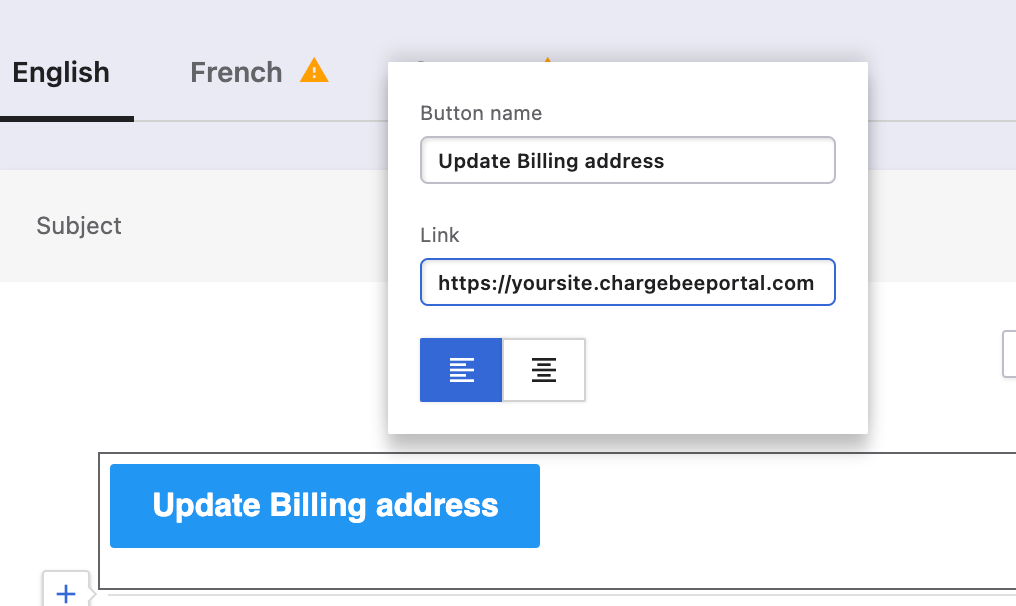
Once configured, you can use the other options such as Add Section, Add Image, Add text as per your requirements and then click 'Publish'.
You can add email content using Smart Section, Mail Merge Usage, and Import HTML. Kindly refer to this link Add Notification for more details.
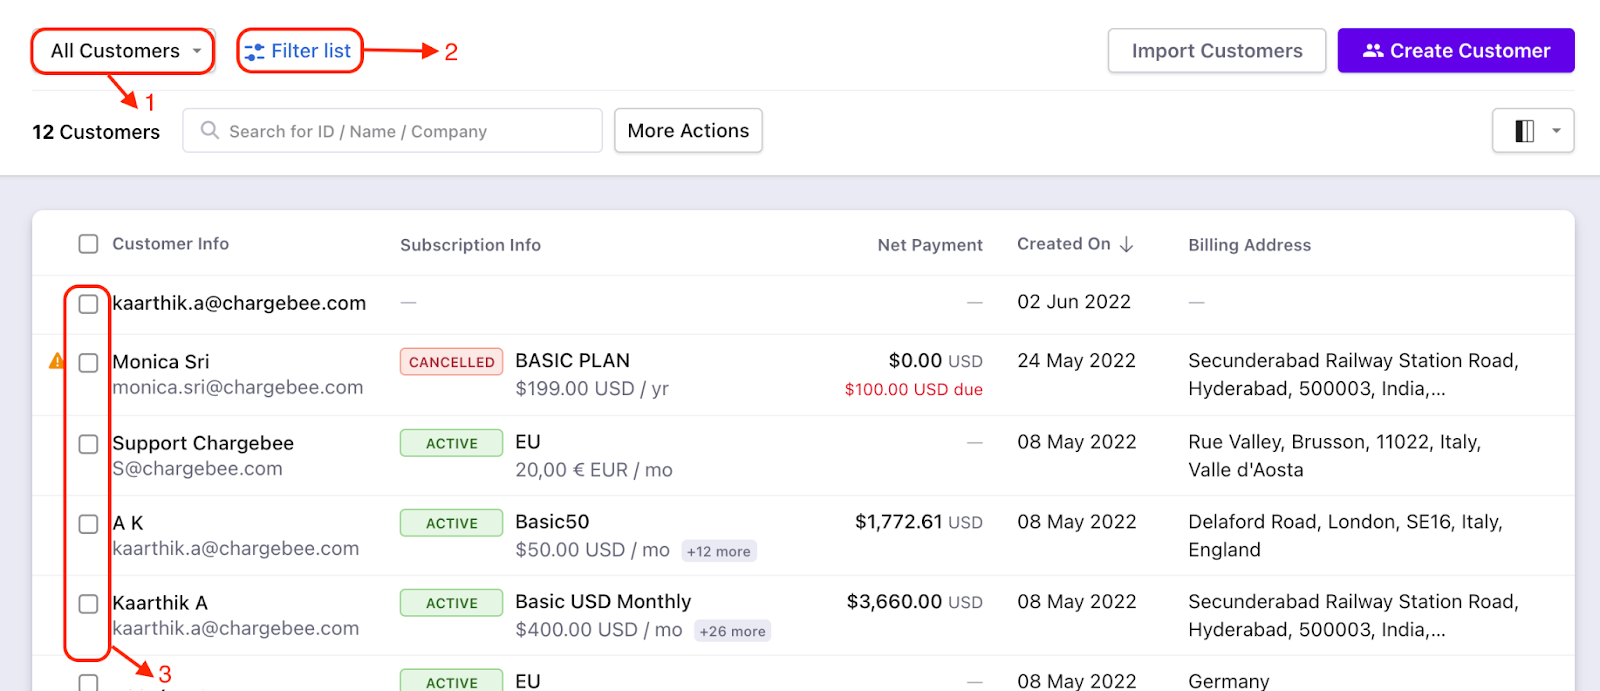
Now, since we have created a custom email for the Customer Index page, we have to navigate to the Customer Index Page and choose filter as per your requirements.
-
If you prefer to send it to all customers, You can choose the filter as 'All Customers'.
-
You can also use Advanced filter options to filter specific audiences.
-
If you need to send it to specific audiences, you can either select the check-box available for each customer under Customer Info
Note
On the recent UI enhancement you On the recent UI enhancement you can now scroll the index pages - Customers, Subscriptions, Invoices, and Credit Notes vertically. Earlier, the pages will be paginated which may prolong your search however with the new enhancement as you scroll down the list it will load all other data in a single page as highlighted below on the screenshot. Refer to this link for more information.
Once we have selected the list of customers, click on 'More Option > Email Customers'

Then, you will be directed to a pop-up window that displays the default and custom email list. Choose the 'Custom email' from the list that was recently created then click 'Proceed'.
If you require to add additional content, you can update it from here using the 'Edit' option (or) you can send the email by clicking on the 'Send email' button.
Related Articles
Was this article helpful?