Configuring Single Page Checkout
Single Page Checkout allows your customers to enter all their details on a single page. When your users click Checkout or Subscribe on your website, they are redirected to a new URL where they can review their order and enter their account and payment details.
To configure Single Page Checkout, click Settings > Configure Chargebee > Customer-facing Essentials > Checkout and Self-serve Portal. Configure the following two pages to get started:
- Checkout Page (for all your customers to enter their accounting information and payment method details to sign up or subscribe for your plans)
- Payment Method Page (for your existing subscribers to update their payment method details)
Configure Checkout Page
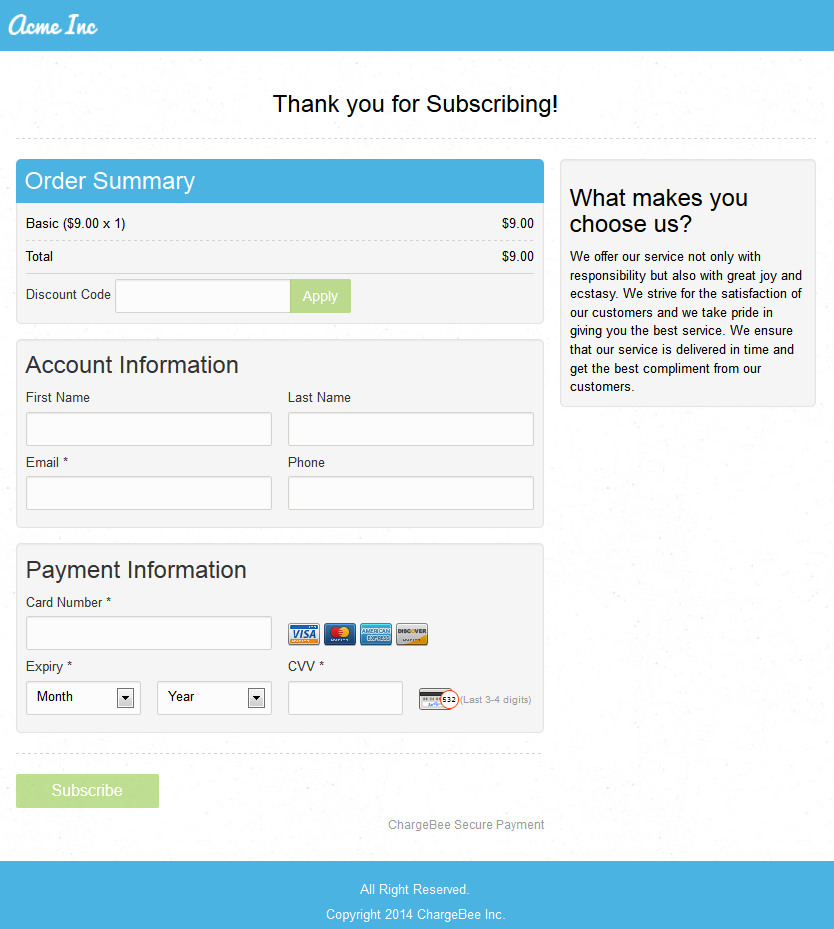
The checkout page can be generated either by accessing the plan-specific hosted page URL or by using the Hosted Pages API. To configure the settings for your checkout page in your Chargebee site, click Checkout Page in Hosted Pages Settings.

The option to allow checkout using the plan-specific hosted page URL will be enabled by default.
You can also configure a redirect URL, cancel option, and add legal information to provide a complete checkout experience to your users. Here is a sample checkout page:
Configure Redirect URL
Upon successful checkout, your subscribers will be redirected to the URL that you specify in this setting. When integrating with hosted pages using the API, you can configure the redirect URL using the same option. Click here to learn more.
If you are integrating using the plan-specific hosted pages, the redirect URL needs to be configured for each plan.
Configure Cancel URL
When this URL is configured, a Cancel option will appear on the checkout page. Users can click this to cancel their sign-up.
Information
The Redirect and Cancel URL can also be passed using the Checkout New / Checkout Existing API. In such cases, the URL configured under Hosted Pages settings will be overridden.
Configure Legal Information
You can include URLs for Privacy Policy and Terms of Service on your checkout page. You can also choose to include a consent option on the checkout page, and specify the text for it in the Agreement label text box.
Use the Quick Preview to see how your agreement label and URLs will appear on the checkout page.
Once you are done, click Update.
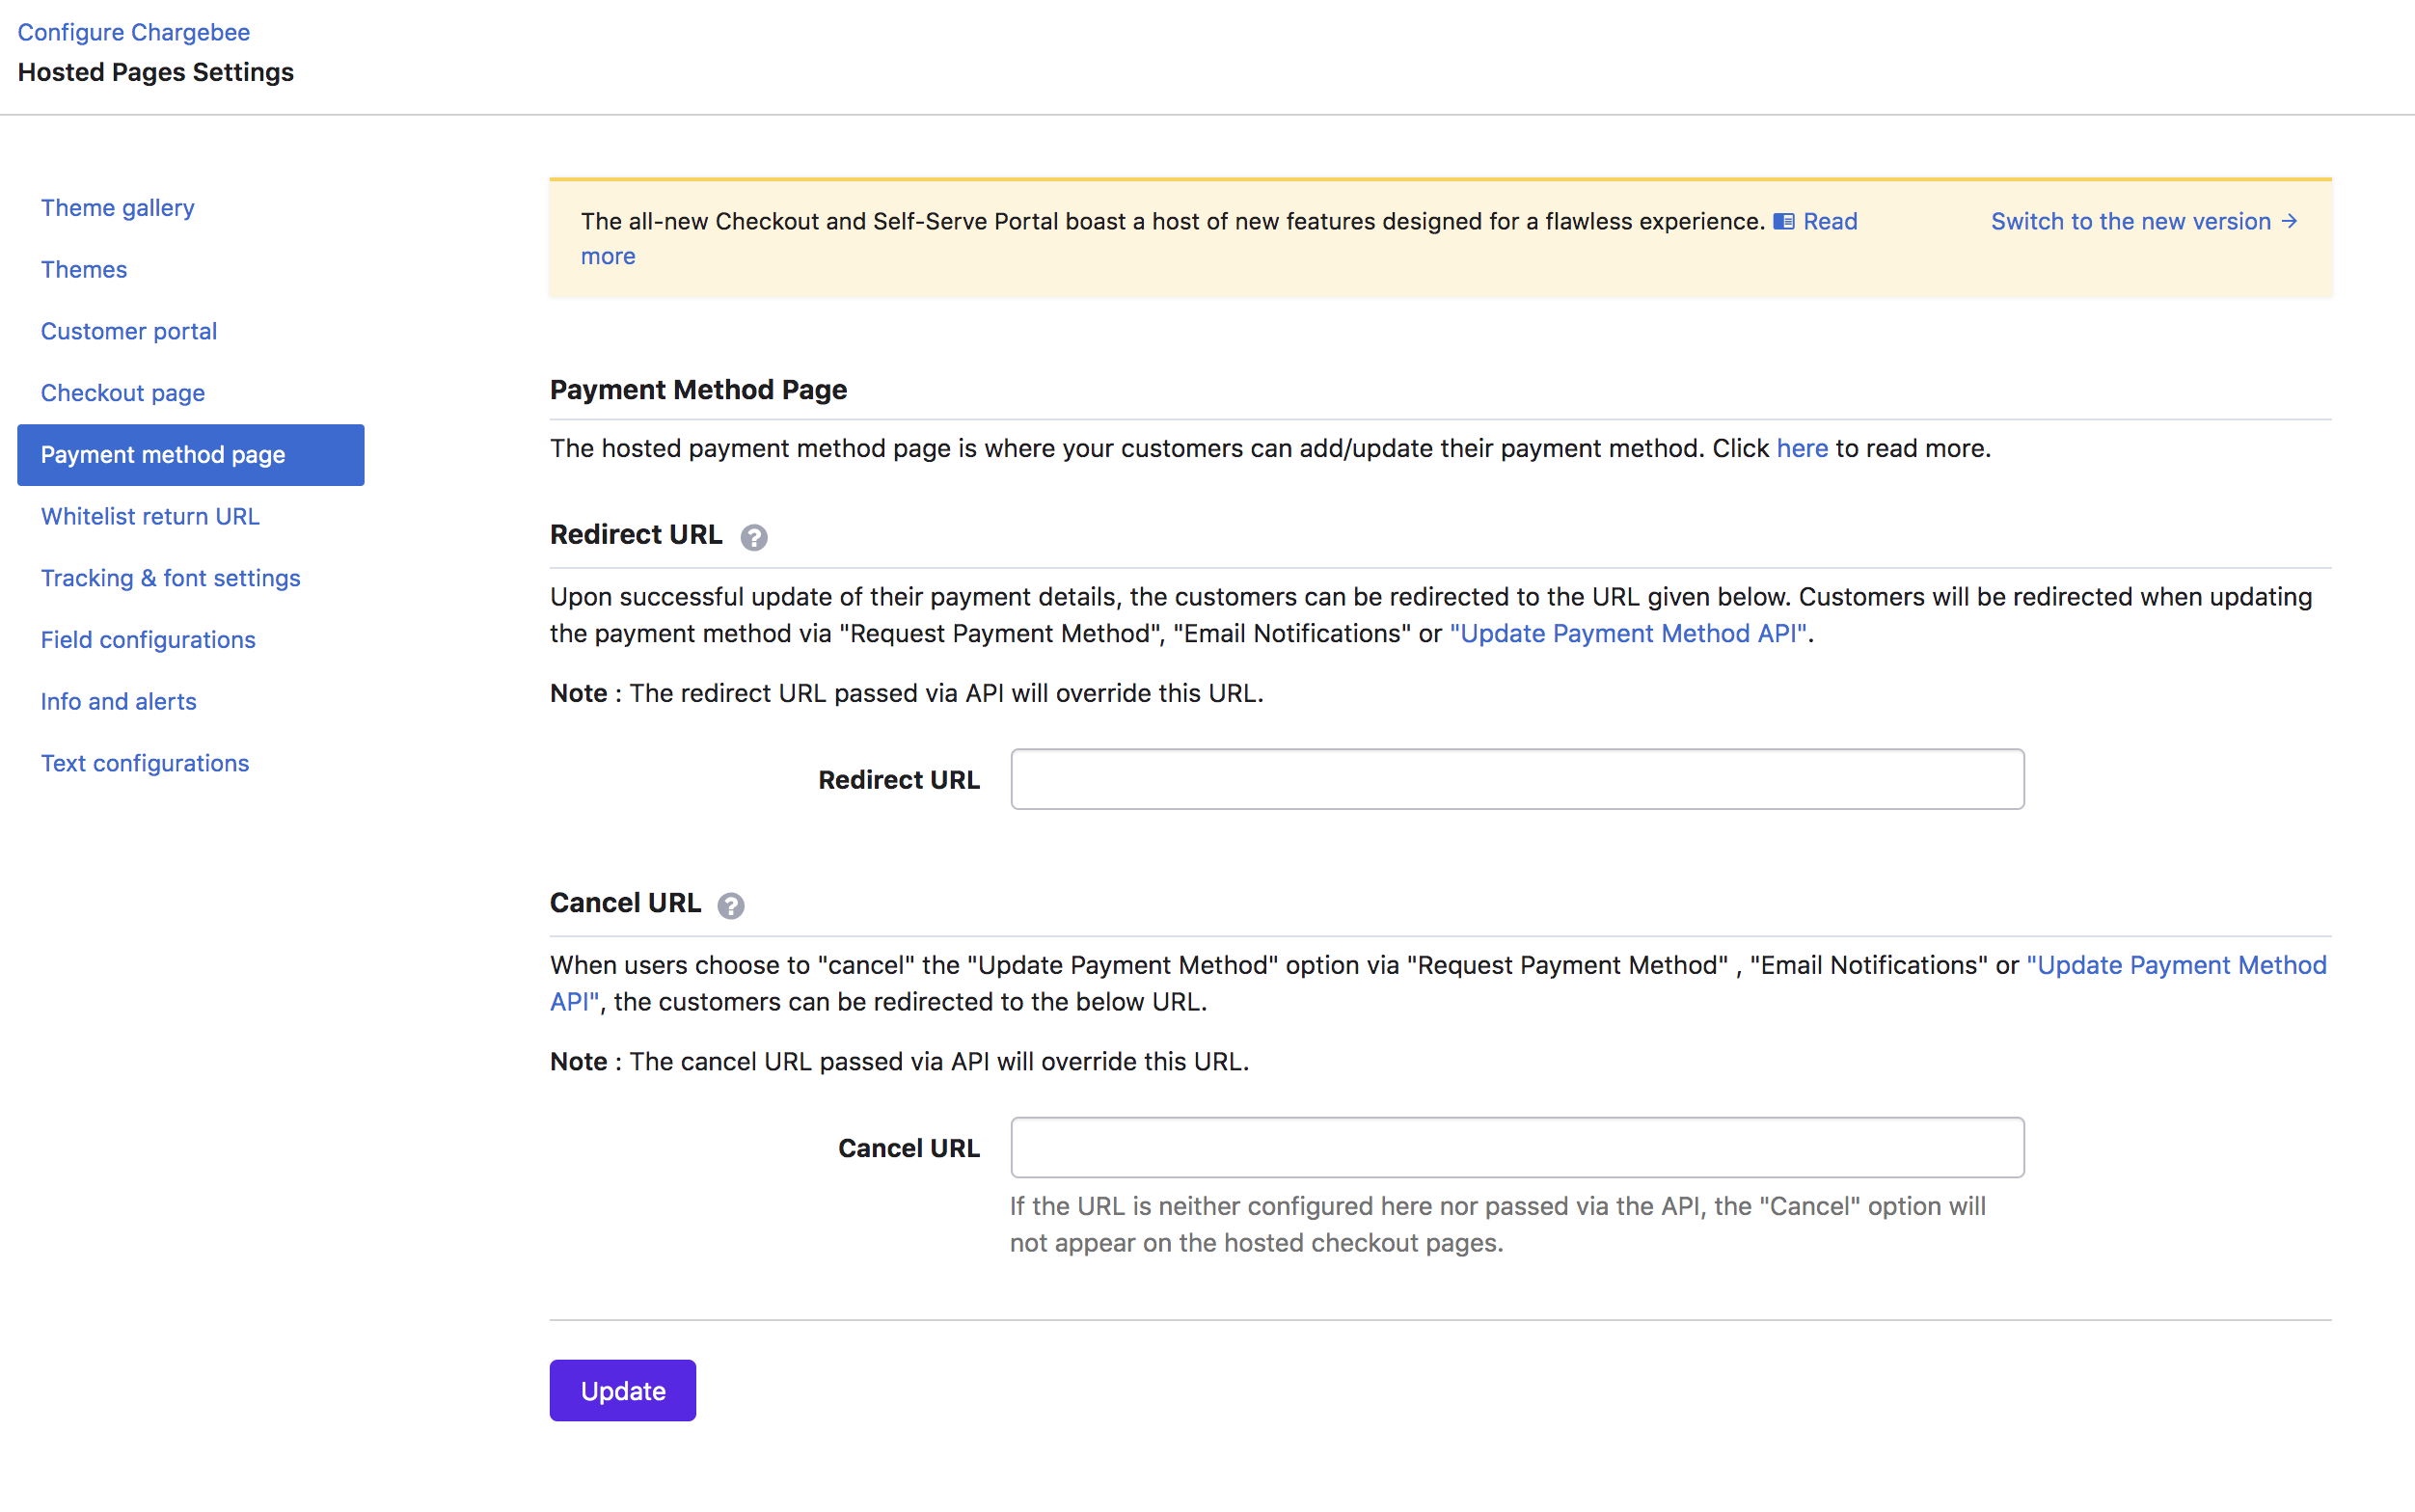
Configure Payment Method Page
To configure the settings for your update payment method page in your Chargebee site, click Payment Method Page in Hosted Pages Settings.
A link for the update payment method page can be generated by using the Update Payment Method API or when a user clicks the Request Payment Method Details option. This option is available in the subscription details page and, when clicked, notifies the subscriber along with the link to update their payment method details.
The update payment method function is used in both Email Notifications V1 and Email Notifications V2. In Email Notifications V1, the mail merge field customer.payment_method_update_url is used. It will auto-generate a link for payment, and the link is included in the email sent to the customer. When your customers click the link, they are redirected to the page where they can update their payment method.
In Email Notifications V2, Update Payment Method will appear as a button. When users click the option, the URL will be auto-generated and customers will be redirected to the page to update the payment method.
Configure Redirect URL
This URL is where subscribers will be redirected once they successfully update their payment method details.
Configure Cancel URL
Configure this URL to enable a Cancel option on the update payment method page. Your users can click this option to cancel the update operation.
Click Update to save your configuration.
Customize Single Page Checkout
You can customize the look of your hosted pages using themes. To get started, navigate to Themes in Hosted Pages Settings.
Click here to learn more.
Information
- The Redirect and Cancel URL can also be passed via the Update Payment Method API. In such cases, the URL configured under Hosted Pages Settings will be overridden.
- The Custom Domain feature lets you white label your own subdomain and use it in the hosted pages' URLs. If you'd like this feature enabled for your Chargebee site, contact support.
FAQ
Can I see how, say, an addon/plan with tiered pricing looks like on Chargebee Checkout and Self-serve Portal?
Yes, see this FAQ.
Was this article helpful?