Integration
There are two ways to integrate Chargebee's Single Page Checkout with your application or website. You can choose the method that works best for you.
1. Plan URL Integration
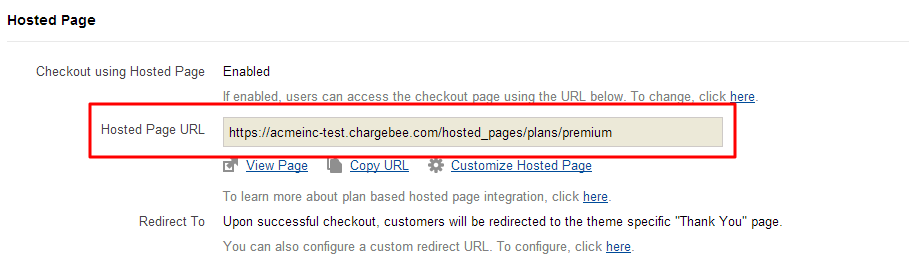
With Chargebee's plan-specific hosted page URL integration, it's quick and easy to allow users to sign up using our hosted checkout pages. Simply copy the plan-specific hosted page URL that is automatically generated every time you create a new plan, and link it to your product page or sign-up button. When the buyer clicks the link, a unique URL is generated and they are redirected to a hosted checkout page. The buyer then enters their details and completes the sign-up.
To get the plan-specific hosted page URL, click on a plan name and open it in the web interface. You will find the URL at the bottom of the page.
Redirection
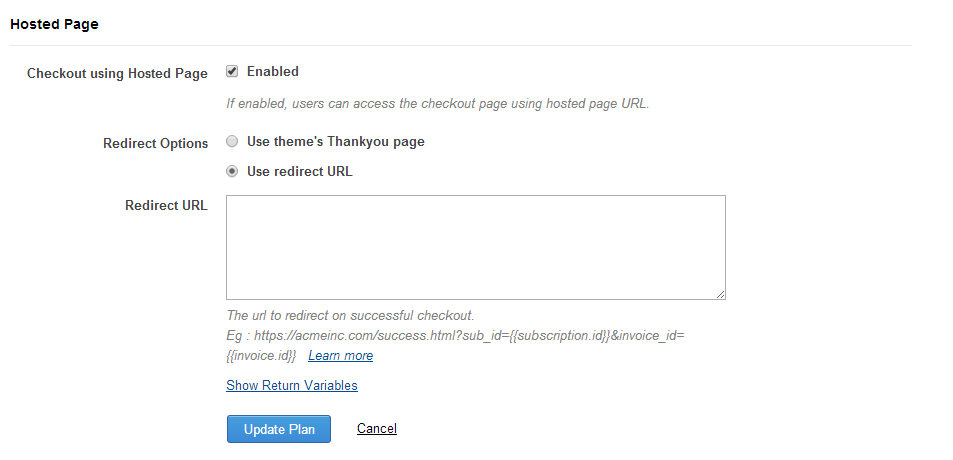
Once they have submitted their details and the checkout is successful, they should be forwarded to a "Sign Up Successful" or "Thank You" page. For this, you can either use Chargebee's default "Thank You" page included in our hosted page themes or configure a custom URL. This can be done during plan creation or by editing an existing plan.
Note
The redirect option must be configured separately for each plan you create. By default, Chargebee uses the "Thank You" page unless you specify a custom redirect URL.
FAQ for Plan URL Integration
1) Can I specify plan quantity or include addons during sign up through the hosted pages?
By default, the quantity is 1 for plans. You can specify a different plan quantity by passing parameters to the hosted page URL. You can also include addons by passing them as parameters to the hosted page URL when sending users to the hosted checkout page. Click here to learn more.
2) How do I return subscription details in the redirect URL?
When a customer is taken to the configured redirect URL after a successful checkout, you can get the subscription details from the redirect URL and display them to your customer.
Click here to learn more.
How do I customize my hosted page? You can change the way your hosted pages look based on your needs. Click here to learn more.
3) How do I customize my hosted page?
You can change the way your hosted pages look based on your needs. Click here to learn more.
4) Can I change the appearance of hosted page to match my website?
Absolutely! This can be done using our themes feature for hosted pages.
5) How do I test my hosted page?
In your test site, you can configure Chargebee and run tests on your hosted pages. You can get your hosted page URL from your plans as shown above.. Once you've opened a hosted page using the URL from the plan, you can use the test credit card numbers that appear in the box to your right and simulate a checkout.
2. Hosted Page Integration via API
Note
Check out our sample tutorials here.
Using the API integration method for hosted pages, you can create a new subscription, update an existing subscription, and update a card.
Redirect URLs
This is where users will be forwarded after a successful checkout. When integrating with hosted pages using the API, the redirect URL needs to be configured in the web interface.
Configure the redirect URL for hosted checkout pages under Settings > Configure Chargebee > Hosted Page Settings > Checkout Page.

The Update Card Page URL is the page users will be redirected to after they add or update their card details. This is also used when you send your customers the email to update their card details. Click here to learn more about requesting card details.
To configure the redirect URL, go to Settings > Configure Chargebee > Hosted Page Settings > Hosted Update Card Page.
Click here to learn more about hosted page integration via API.
Can I keep the hosted page inside my website/application?
Yes, if you are using the hosted page API integration method. Most often, you wouldn't want your customers to be routed to a different website just to enter their card details. You can keep customers on your page by embedding the hosted page on your website. This is done by setting the embed value as 'true' through the API.
You need to make sure that you use SSL on all your payment pages. Also, the payment page will appear inside an HTML iFrame element, so you need to be careful when setting the height and width of the frame.
Was this article helpful?