Creating Journal Entries
Overview
RevRec Premium creates journal entries based on your journal account mappings, including any advanced mappings. For example, if you use an advanced journal mapping with product type, RevRec Premium will assign transactions with different product types to different accounts.
Journal entries in RevRec Premium are aggregated accounting records. They are generated from billing events such as invoices, payments, and credit notes, and revenue recognition activities. While individual events trigger line-level accounting entries, journals group these into structured batches for review, export, and posting to your accounting system.
Prerequisites
Before generating journals, ensure the following:
- The Chart of Accounts is fully configured.
- The Journal Mapping Rules are defined for all account types.
- The Journal Aggregation is defined, i.e., Customer Id, Product Id, or Custom Field.
- All Custom Fields used in mapping or reporting are marked as Include in Journal Posting.
- The Data Validation Report has no unresolved errors, which could block or corrupt journal creation.
Creating Journal Entries in RevRec Premium
You can create journal entries automatically or manually in RevRec Premium. The following sections explain each of these methods in detail.
Automatic Generation of Journal Entries
You can configure automatic journal creation using the Journal Posting Frequency setting on your RevRec Premium site. By default, journals are created daily at midnight, according to the time zone defined in your site settings. To customize the frequency of journal creation and posting, follow these steps:
- Log in to your RevRec Premium site.
- Navigate to Settings > Accounting > Journal Posting > Frequency.
- Under Journal Creation Schedule, use the drop-down to select your preferred frequency from the following options:
- Daily: Specify time of day.
- Weekly: Choose a day and time.
- Monthly: Select day of month and time.
- Manual: Journals are created only when triggered manually.
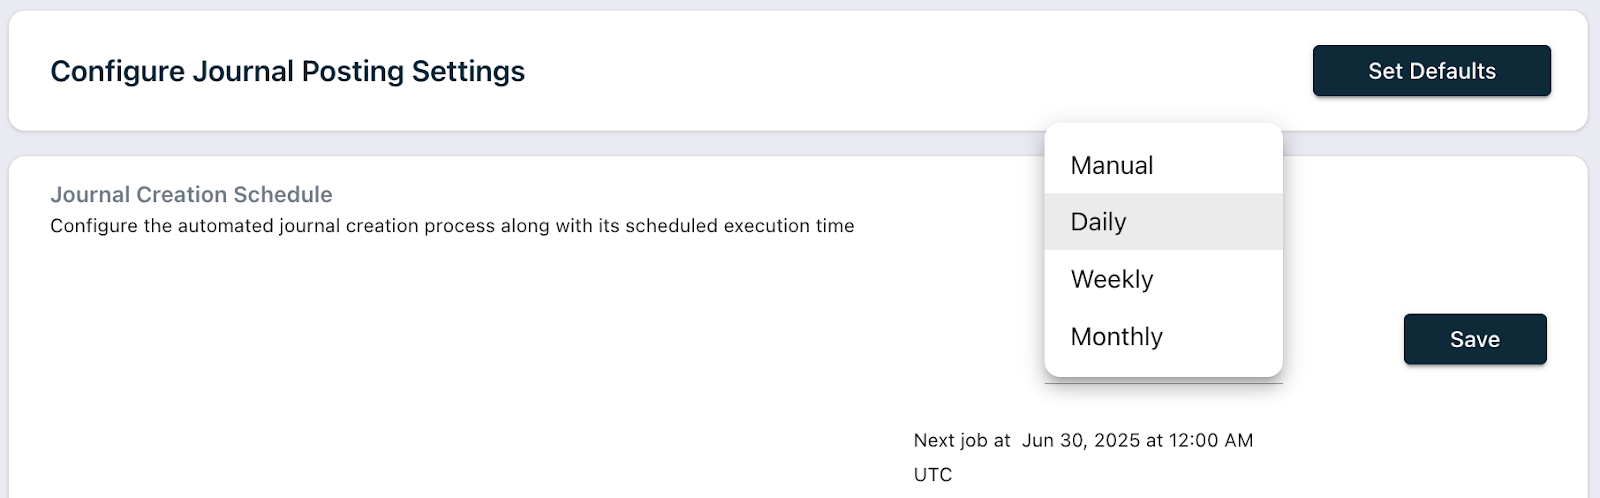
- Click Save.
Manual Generation of Journal Entries
RevRec Premium also provides you with the option to start the journal entry generation process manually. The ability to review journal entries before closing an accounting period is very useful when dealing with a more complex accounting operation. You can generate the journal entries first, review and analyze the results, make data changes, and re-run the journal entries if required, before closing the accounting period.
Follow the steps below to generate Journal Entries manually on your RevRec Premium site:
- Navigate to the Monthly Close > Post Journals from the left menu.
- Click the Create Journal icon to start the journal entry process.
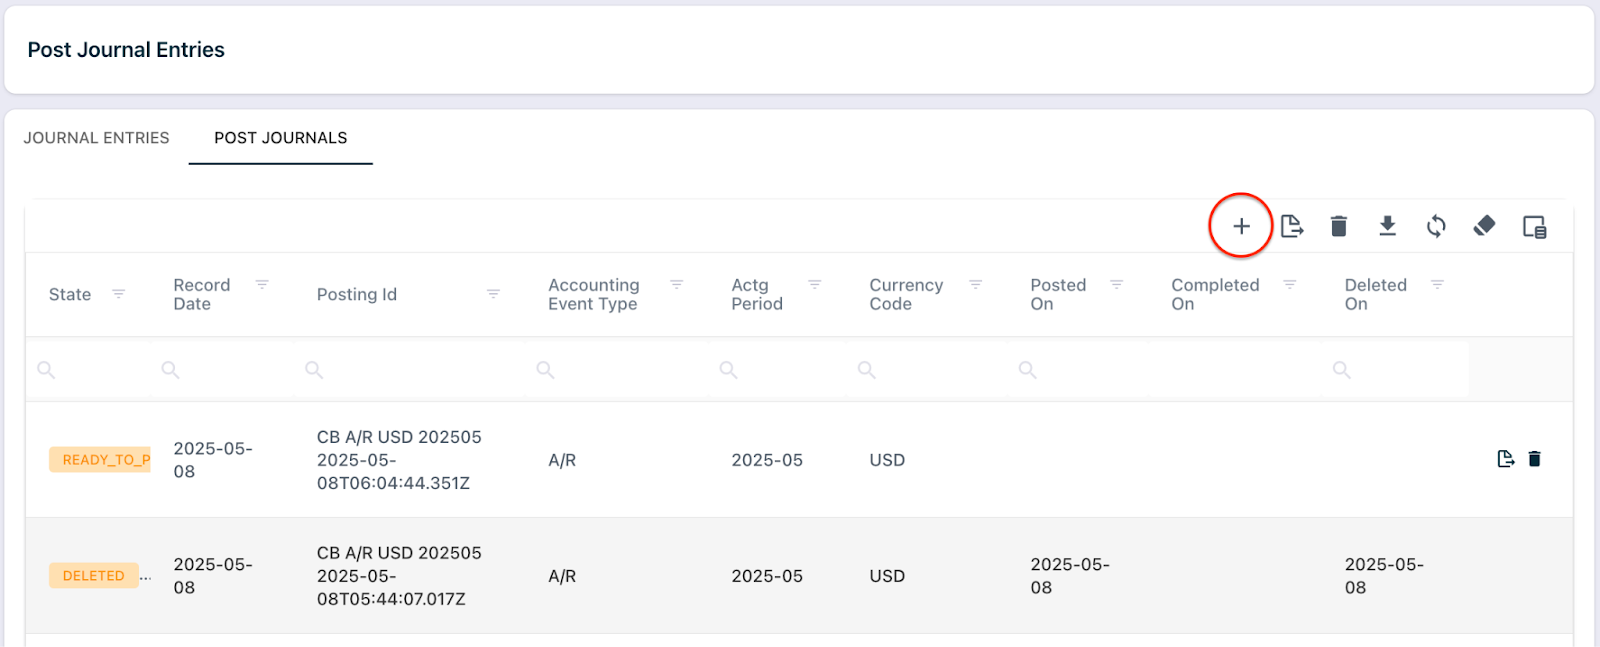
- Select the accounting period(s) for generating the journal entries. You can select either one accounting period or multiple accounting periods as long as they are still open and are not in the future.
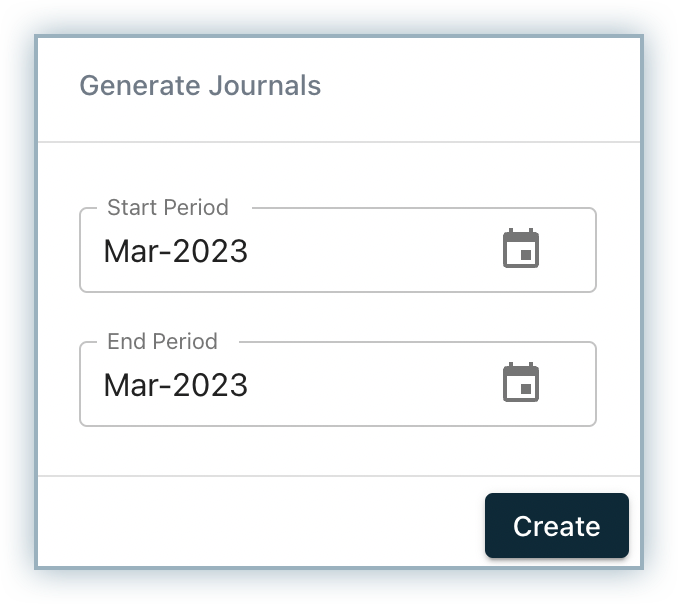
- Click Create to begin the journal entry process. This could take a minute or two to complete.
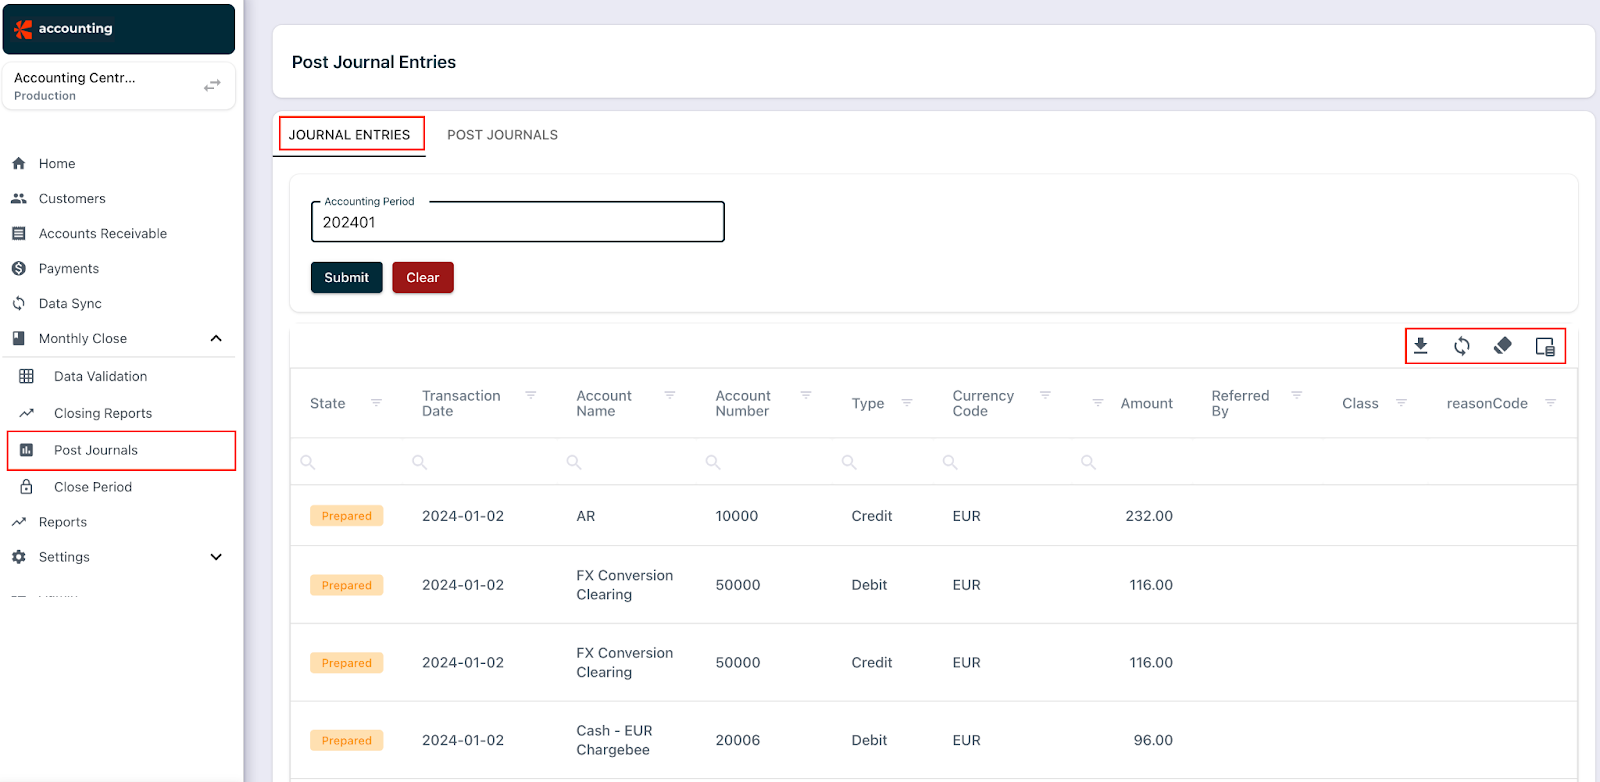
- Once the process is completed, click the Journal Entries tab and review the journal entry results.
Note
RevRec Premium creates journal entries only for selected periods that do not already have entries. To regenerate, delete the existing journal entry from the Post Journals page, then click Create New Journal.
Troubleshooting Journal Creation Failures
If journal creation fails:
- Check for errors by navigating to Monthly Close > Data Validation.
- Resolve any unmapped accounts or overlapping GL mappings.
- Ensure default GL accounts are configured for each account type.
- Use the Delete option to clear stale or resolved validation errors (requires Controller role).
Reviewing Journal Entries
Once journals are generated, follow these steps to review journal entries:
- Navigate to Monthly Close > Post Journals > Journal Entries.
- On the Journal Entries page, you can:
- Filter by Accounting Event Type (Revenue, Payment, etc.)
- Add fields like custom attributes via the Column Chooser.
- Download journal details for further review.
Note
To show a custom field in journal exports, navigate to Settings > Site Settings > Custom Fields and mark the field with Include in Journal Posting.

Understanding the Journal Statuses
The following flow diagrams illustrate the different statuses of journal postings.
- When a connection to the accounting system is created for automated posting.
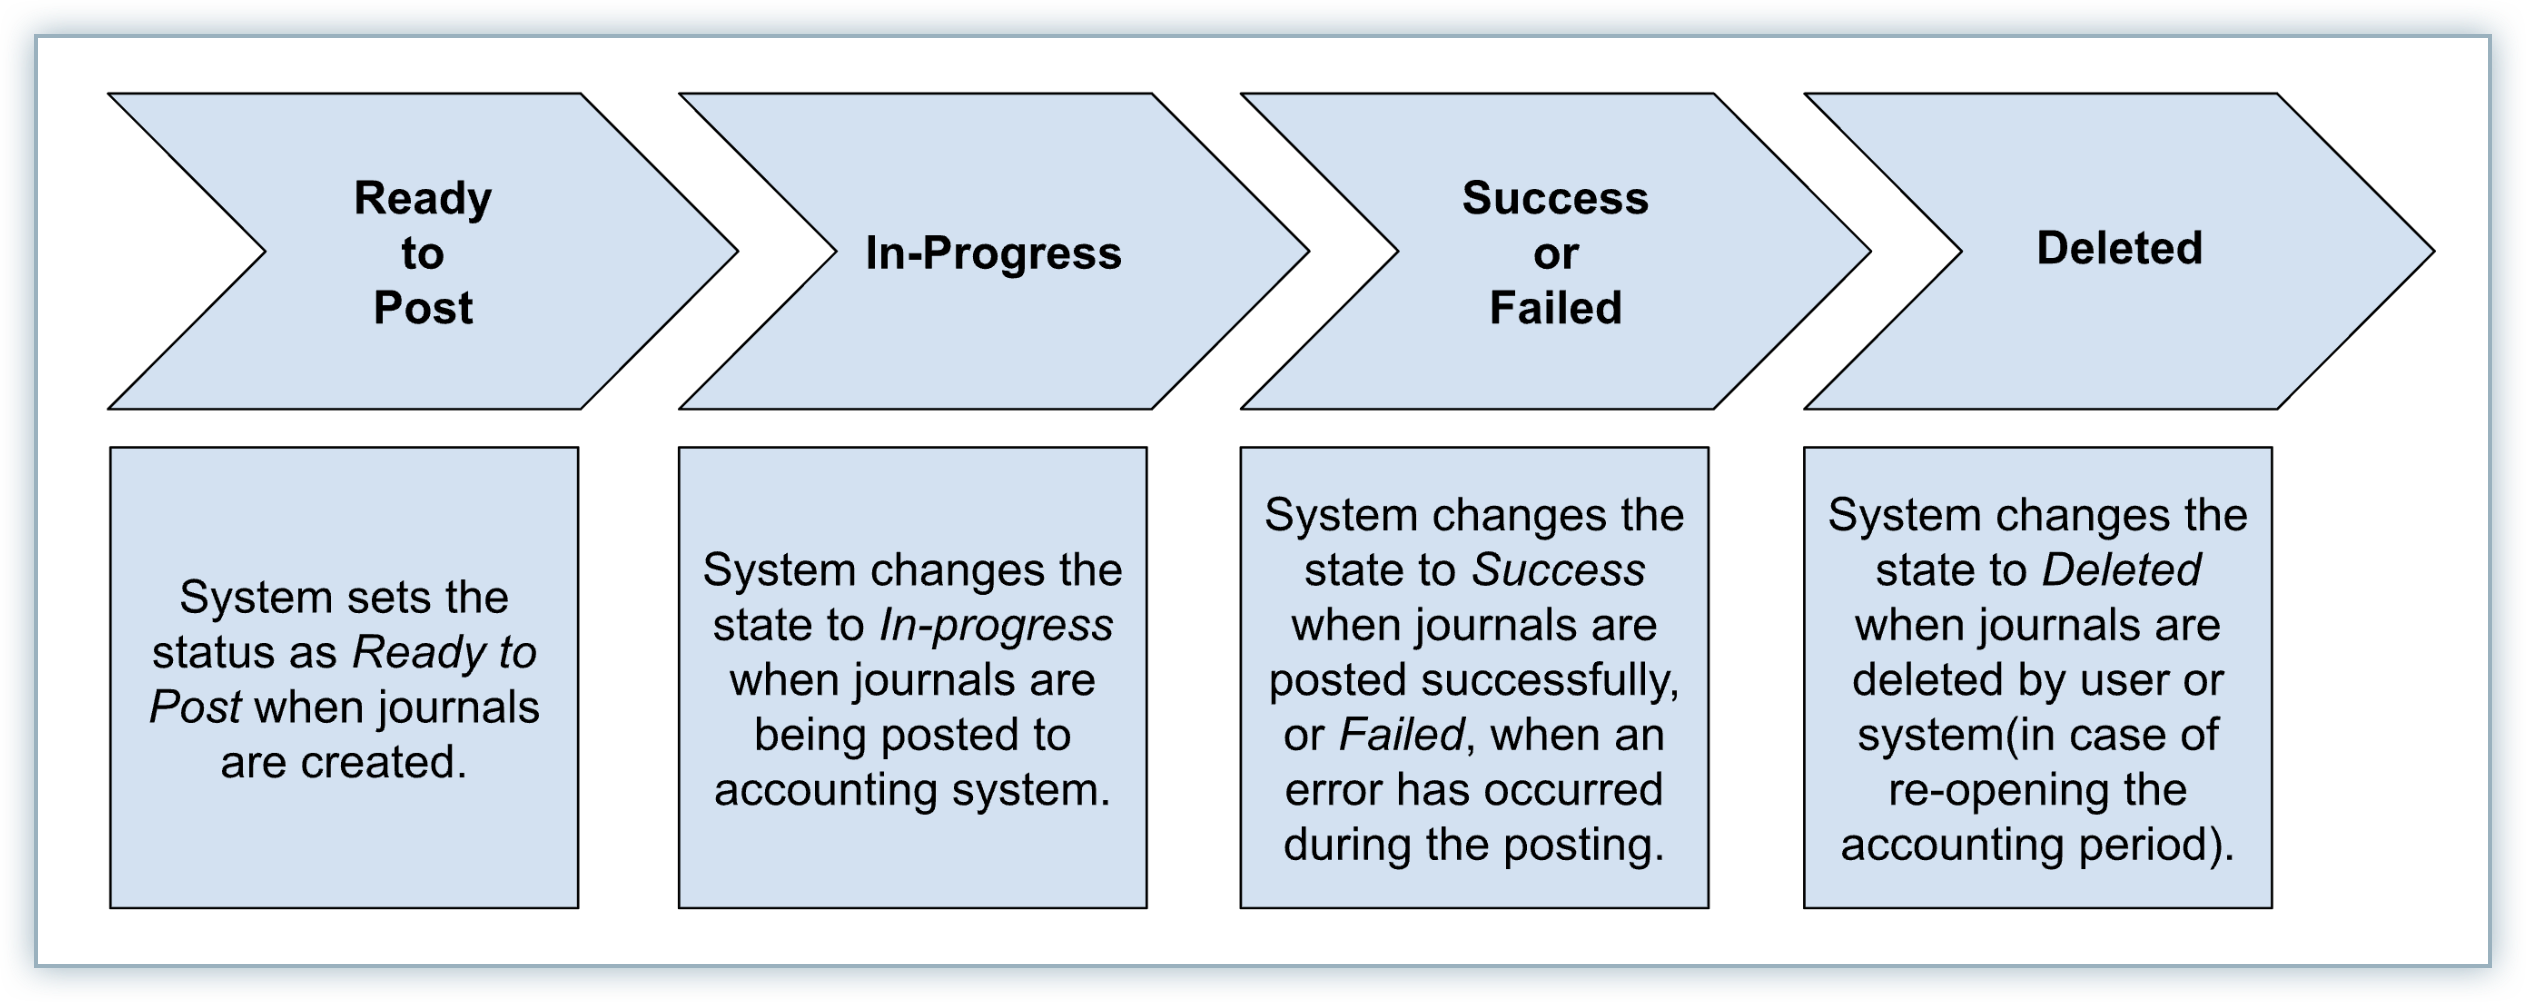
- If no connection is configured, journal posting must be performed manually.
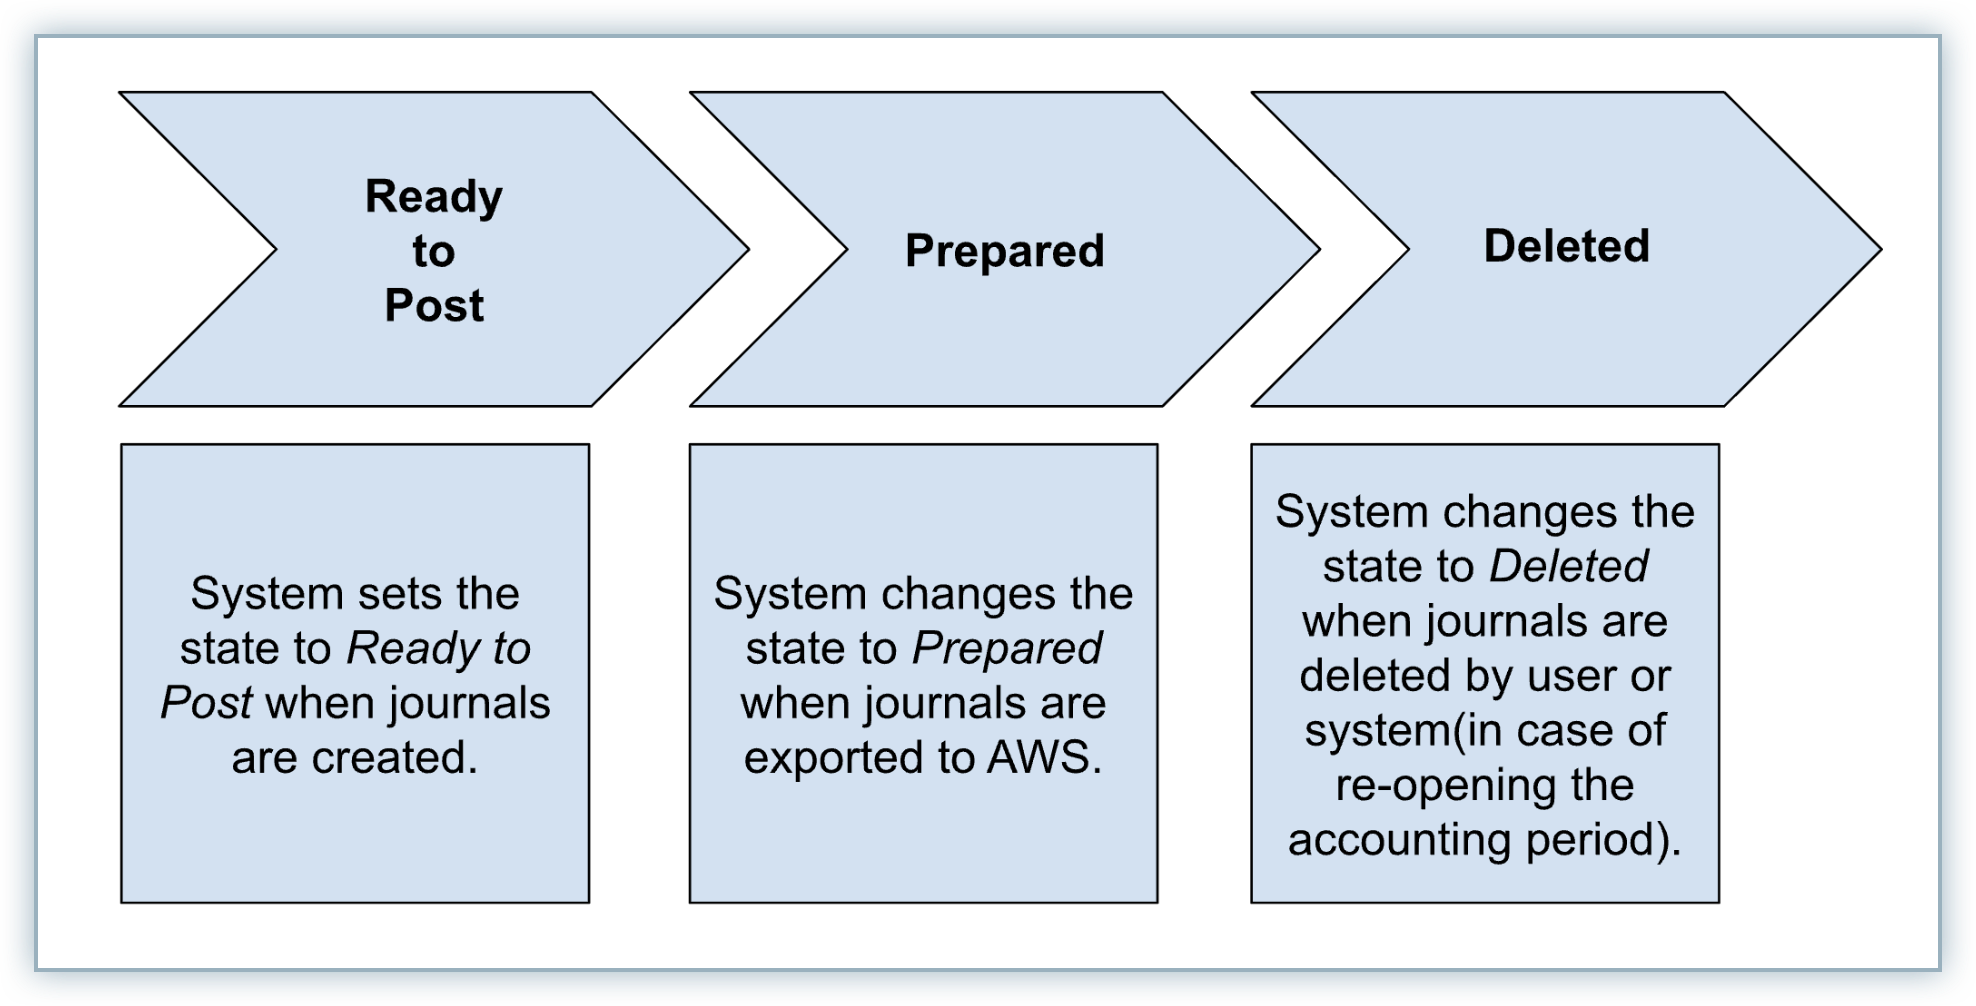
Note
RevRec Premium uses an internal process to export journals to AWS. If automatic journal posting is enabled, the system posts the journals to the connected accounting platform after creation.
Was this article helpful?