NetSuite
Introduction
RevRec Premium seamlessly integrates with NetSuite to automate the posting of journal entries. All you have to do is connect the two systems using the configuration flow based on your business needs. Once connected, journals generated in RevRec Premium can be pushed directly into your NetSuite ledger, ensuring accuracy and reducing manual effort.
Sync Overview
When RevRec Premium is connected with NetSuite, journal entries generated during the monthly close are automatically pushed into your NetSuite ledger. This eliminates the need for manual uploads and ensures your accounting system always reflects the latest activity.
RevRec Premium supports two posting options:
-
Automated Posting: Journals are pushed to NetSuite at the frequency you configure.
-
On-Demand Posting: You can trigger postings manually from the Post Journals page whenever needed.
Once journals are posted, their status is updated in RevRec Premium, and you can verify the entries directly in NetSuite under the Journal Entries section. This provides end-to-end visibility and control over the posting process.
Prerequisites
Before enabling the posting flow, ensure that:
-
Journal account mappings are set up in RevRec Premium. This guarantees that journals are routed correctly to your NetSuite accounts.
-
The NetSuite user role used for integration has the Make Journal Entry permission. To confirm:
- Log in to NetSuite.
- Navigate to Permissions > Transactions.
- Ensure the role assigned has Make Journal Entry enabled.
-
To publish Journal Entries with custom fields in NetSuite, ensure the NetSuite user role has access to that field (e.g., access to the Department page for Department-based postings).
Connecting RevRec Premium with NetSuite
Note
Only users with the Controller role can connect your RevRec Premium site with NetSuite.
Follow these steps to integrate the two systems:
- Log in to your RevRec Premium site and select the environment where you want to integrate NetSuite.
- Navigate to Settings > Accounting.
- On the Accounting page, click the Connect icon.
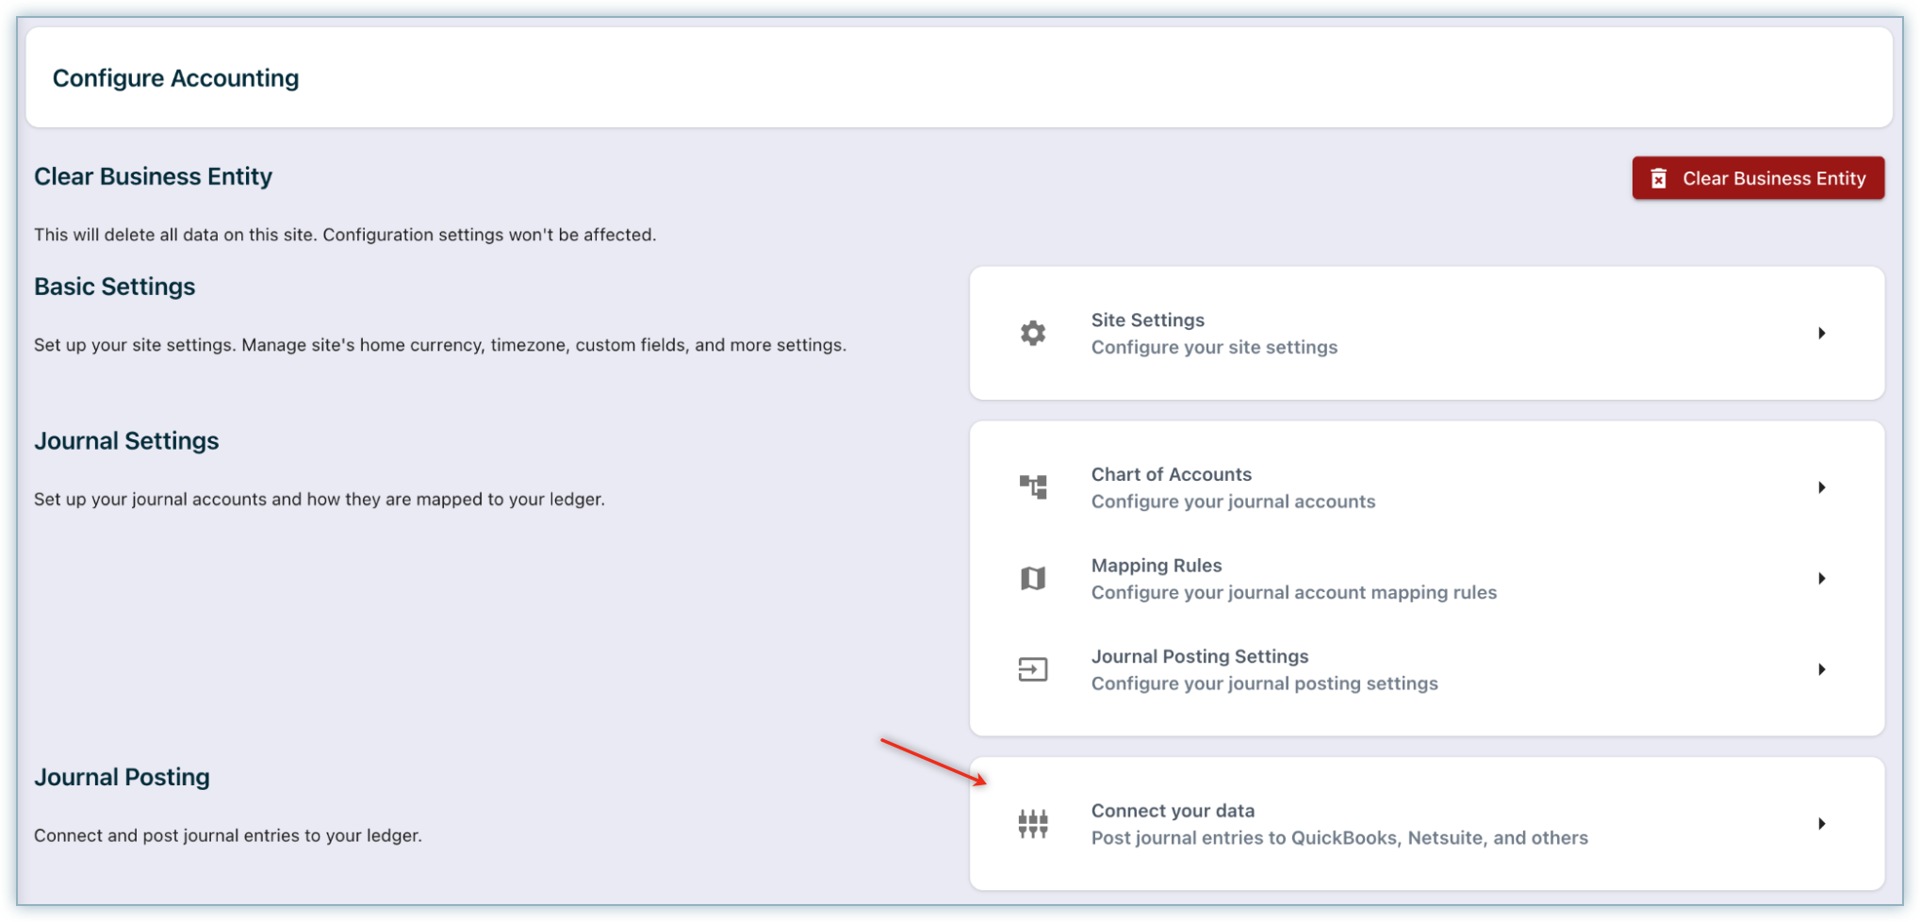
- In the Connect Your Data pop-up, select AC Journal Posting.
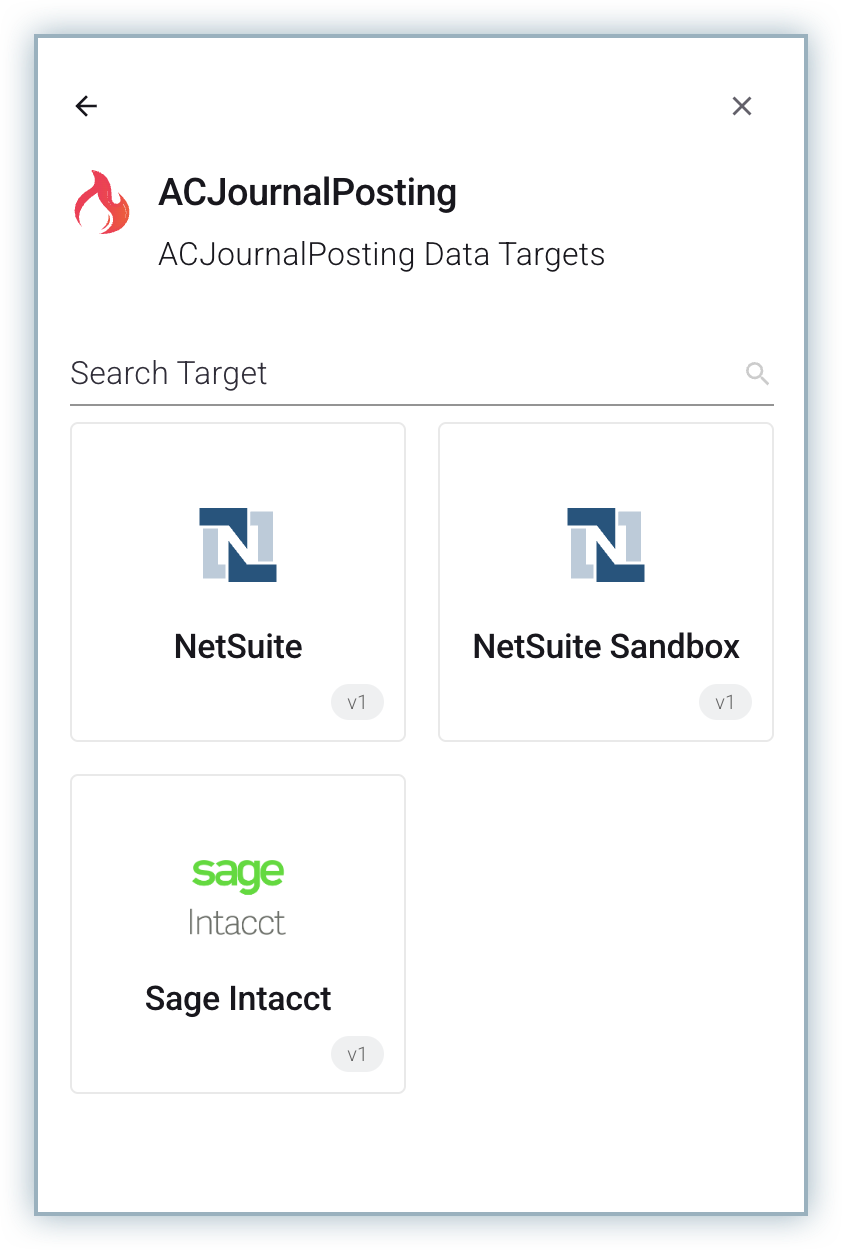
- The Journal Posting pop-up displays all the available accounting systems for integration. Click NetSuite.
- On the Connect NetSuite screen, provide the following required connection parameters:
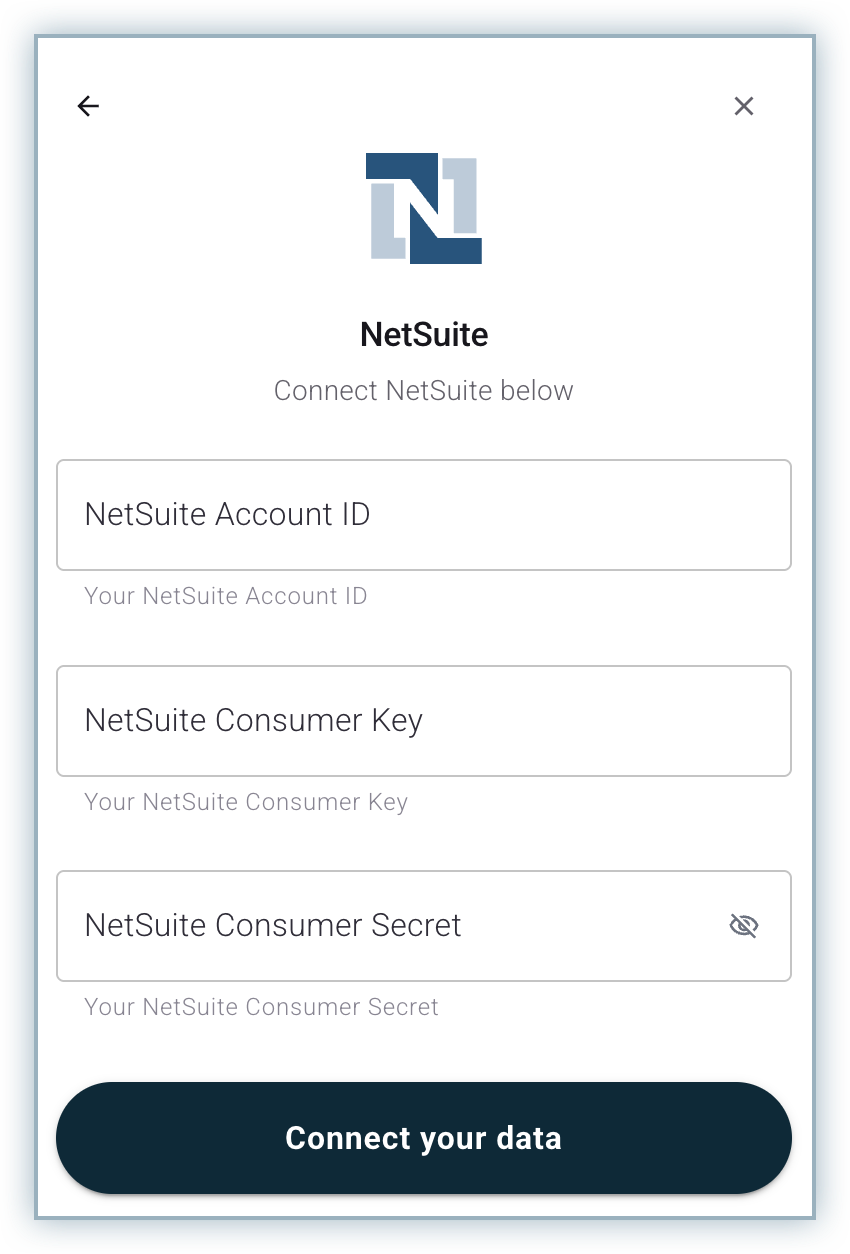
- NetSuite Account ID: Found at the beginning of your NetSuite account URL (For example, example from https://example.app.netsuite.com/).
- Consumer Key & Consumer Secret: Generated in NetSuite under Setup > Integration > Manage Integrations.
- Token ID & Token Secret: Generated under Setup > Users/Roles > Access Tokens > New Access Token.
- Click Connect Your Data, then enter your NetSuite login details.
Once connected, RevRec Premium automatically publishes journal entries created during the close process to NetSuite.
Publishing Journal Entries with Custom Fields
RevRec Premium supports posting journal entries based on NetSuite custom fields such as Location, Department, and Class.
- To use a custom field, ensure the NetSuite user role has access to that field (e.g., access to the Department page for Department-based postings).
- At least one Class custom field is required for journal posting.
Adding Custom Fields
To post journal entries to NetSuite, you will need to add the Class custom field to your site and include it in journal posting. Follow these steps to add the custom fields:
- Navigate to Settings > Accounting > Site Settings > Custom Fields.
- Click the + Add icon to add a new field.

- Specify the following:
- API Name (e.g., Name)
- Label (display name)
- Source (Customer, Product, or Subscription)
- Click Save to save the field.
- Mark the Class custom fields with Include in Journal Posting. You can follow the same steps to add more custom fields.
Tax Mapping
The Tax Mapping feature allows RevRec to pass detailed tax attributes to NetSuite during journal posting, rather than creating a separate Sales Tax Liability line within RevRec. When enabled, tax-related information such as Tax Code, Tax Rate, and Tax Account is included in the journal entry, and NetSuite automatically calculates and posts the tax liability based on its tax configuration. For more information on how tax codes are defined and managed in NetSuite, refer to NetSuite’s documentation on Tax Codes.
Journal Entry Behavior
Default Behavior (Without Tax Mapping)
In the standard revenue recognition setup, RevRec creates a separate journal line for Sales Tax Liability. Example: Invoice = $110 (including $10 tax)
| Account | Debit | Credit |
|---|---|---|
| Accounts Receivable | $110 | |
| Deferred Revenue | $100 | |
| Sales Tax Liability | $10 |
In this case:
- Tax is explicitly posted from RevRec.
- NetSuite receives only the aggregated tax amount.
- No tax code-level detail is passed.
With Tax Mapping
When Tax Mapping is enabled, RevRec does not create a separate Sales Tax Liability line. Instead, additional tax-related columns are included in the journal entry. Using the same example, the journal entry will appear as follows:
| Account | Debit | Credit | Tax Code | Tax Rate | Debit Tax | Credit Tax | Tax Account |
|---|---|---|---|---|---|---|---|
| Accounts Receivable | $110 | ||||||
| Deferred Revenue | $100 | ||||||
| Dallas@10% | 10% | $0 | $10 | Sales Tax Liability |
In this case:
- Tax Code (e.g., Dallas_10%) is included.
- Tax Rate is passed as 10 (10%).
- Tax Credit is populated with $10 (for invoice).
- Tax Account reflects the mapped Sales Tax Liability account.
- NetSuite calculates and posts the Sales Tax Liability internally. This approach provides detailed tax-level information within NetSuite and supports reporting by tax code, rate, and jurisdiction.
Configure Tax Mapping
To configure Tax Mapping:
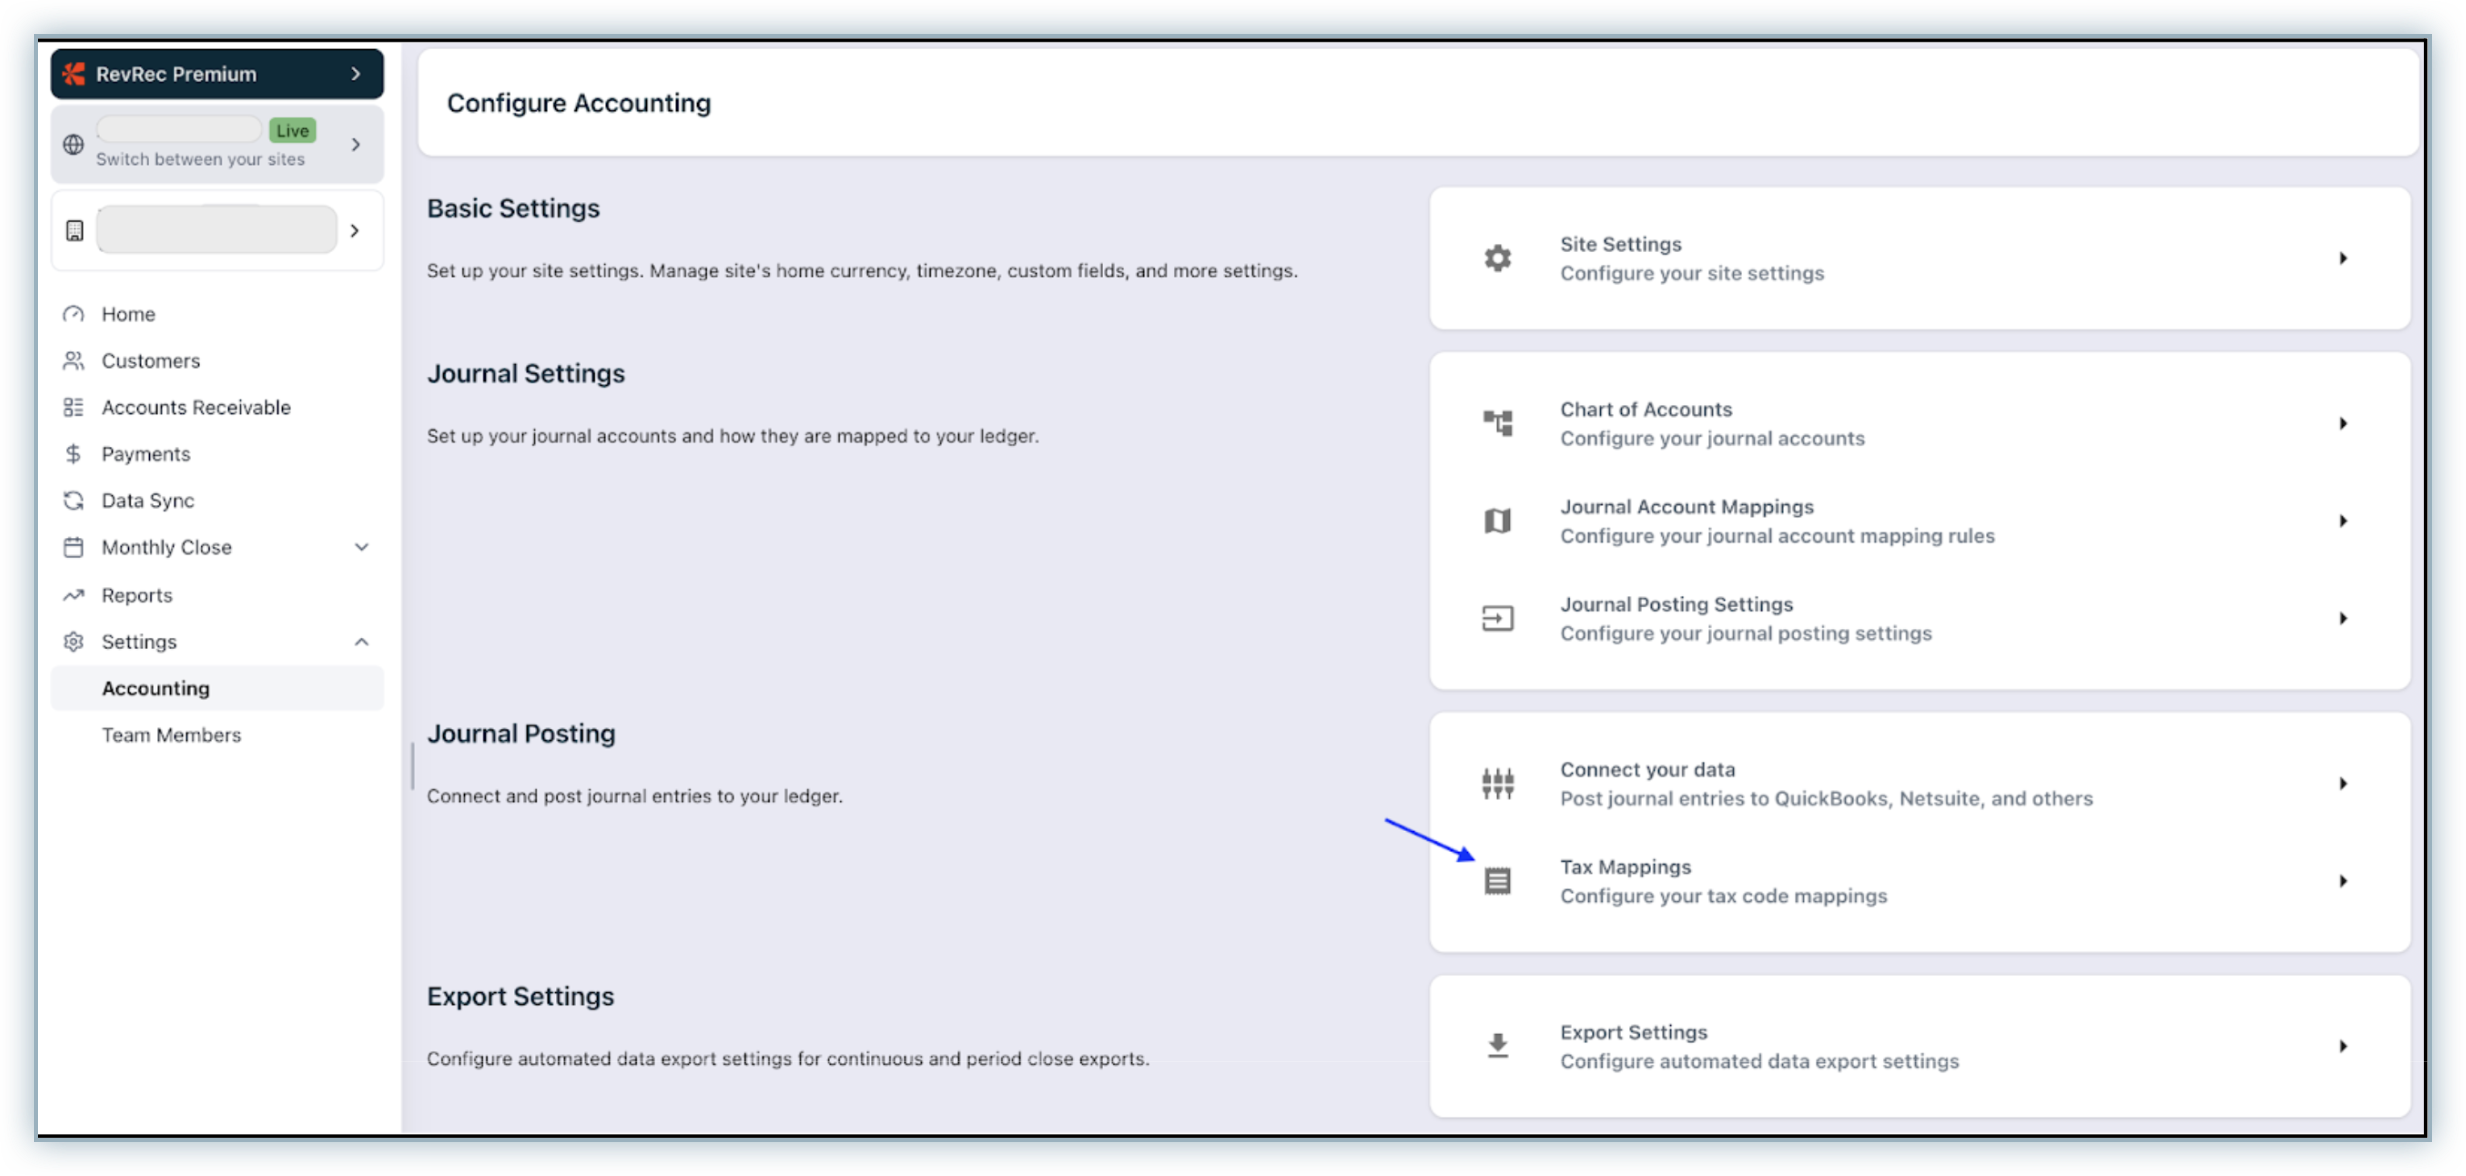
- Go to Accounting > General Posting > Tax Mapping
- Enable the toggle available at the top-right corner
- Ensure the Tax Code (and Tax Group Code, if used) already exists in NetSuite and is configured with the required tax posting accounts.
Once enabled, two tabs are visible:
- Tax Mapping
- Tax Group
Note
Tax Mapping is available only when journals are posted in the transaction currency.
Tax Mapping Tab
The Tax Mapping tab allows you to define Tax Codes for specific tax combinations.
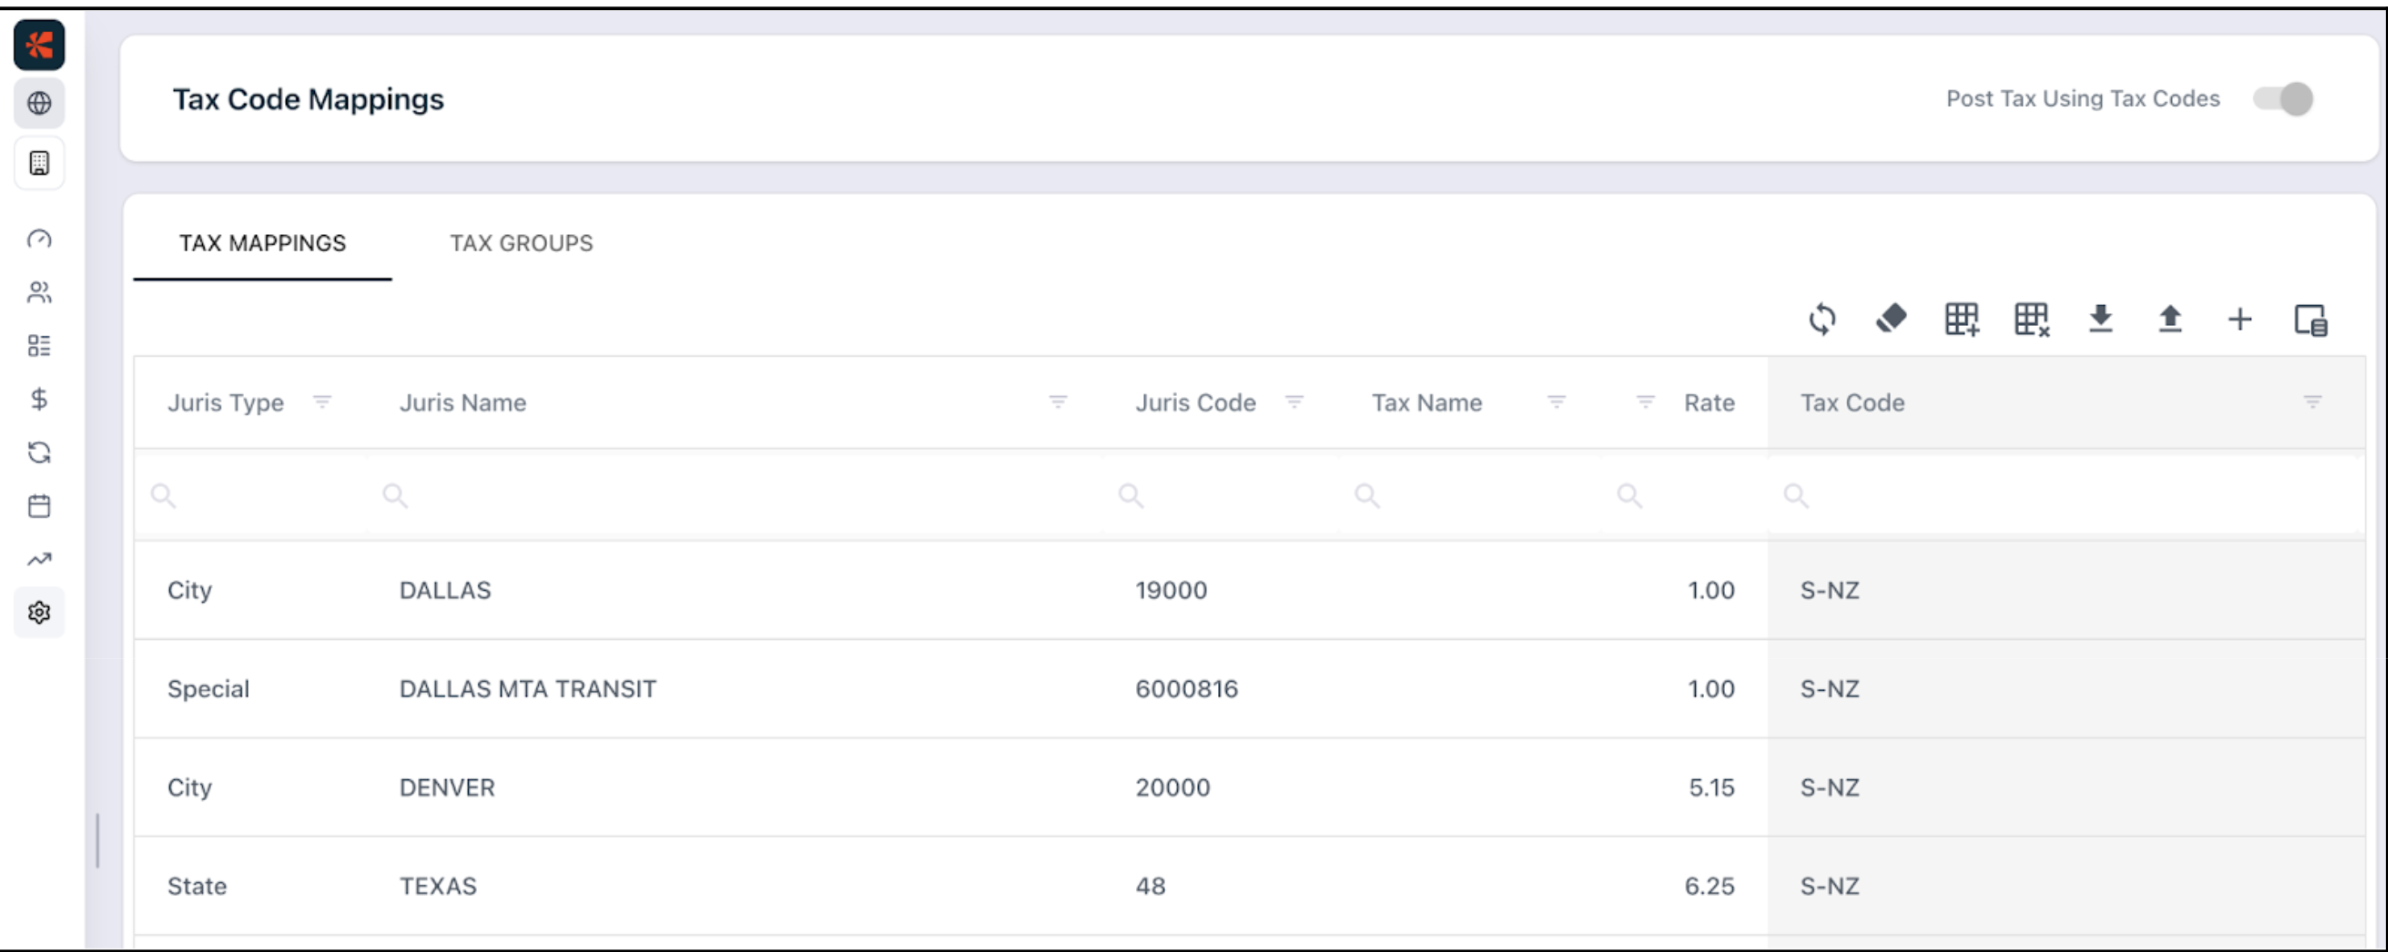
Each mapping row is created using:
- Jurisdiction Type (City, State, Country, County)
- Jurisdiction Name
- Jurisdiction Code
- Tax Name
- Tax Rate These values are automatically fetched from the billing application based on invoice data. The Tax Code field is system-generated but can be updated to match the Tax Code configured in NetSuite. Users may either:
- Use the generated tax code and configure the same in NetSuite, or
- Enter existing NetSuite tax codes against each combination.
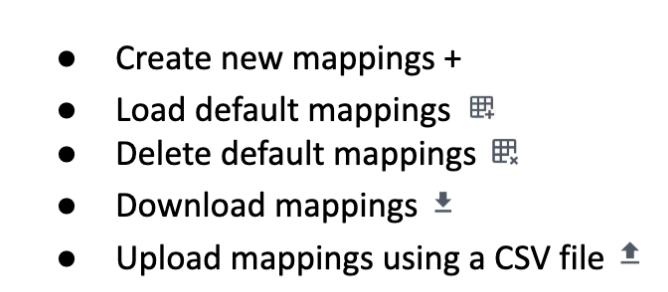
Available actions on this page:

Tax Group Tab
The Tax Group tab is used when multiple taxes apply to a single invoice line item.
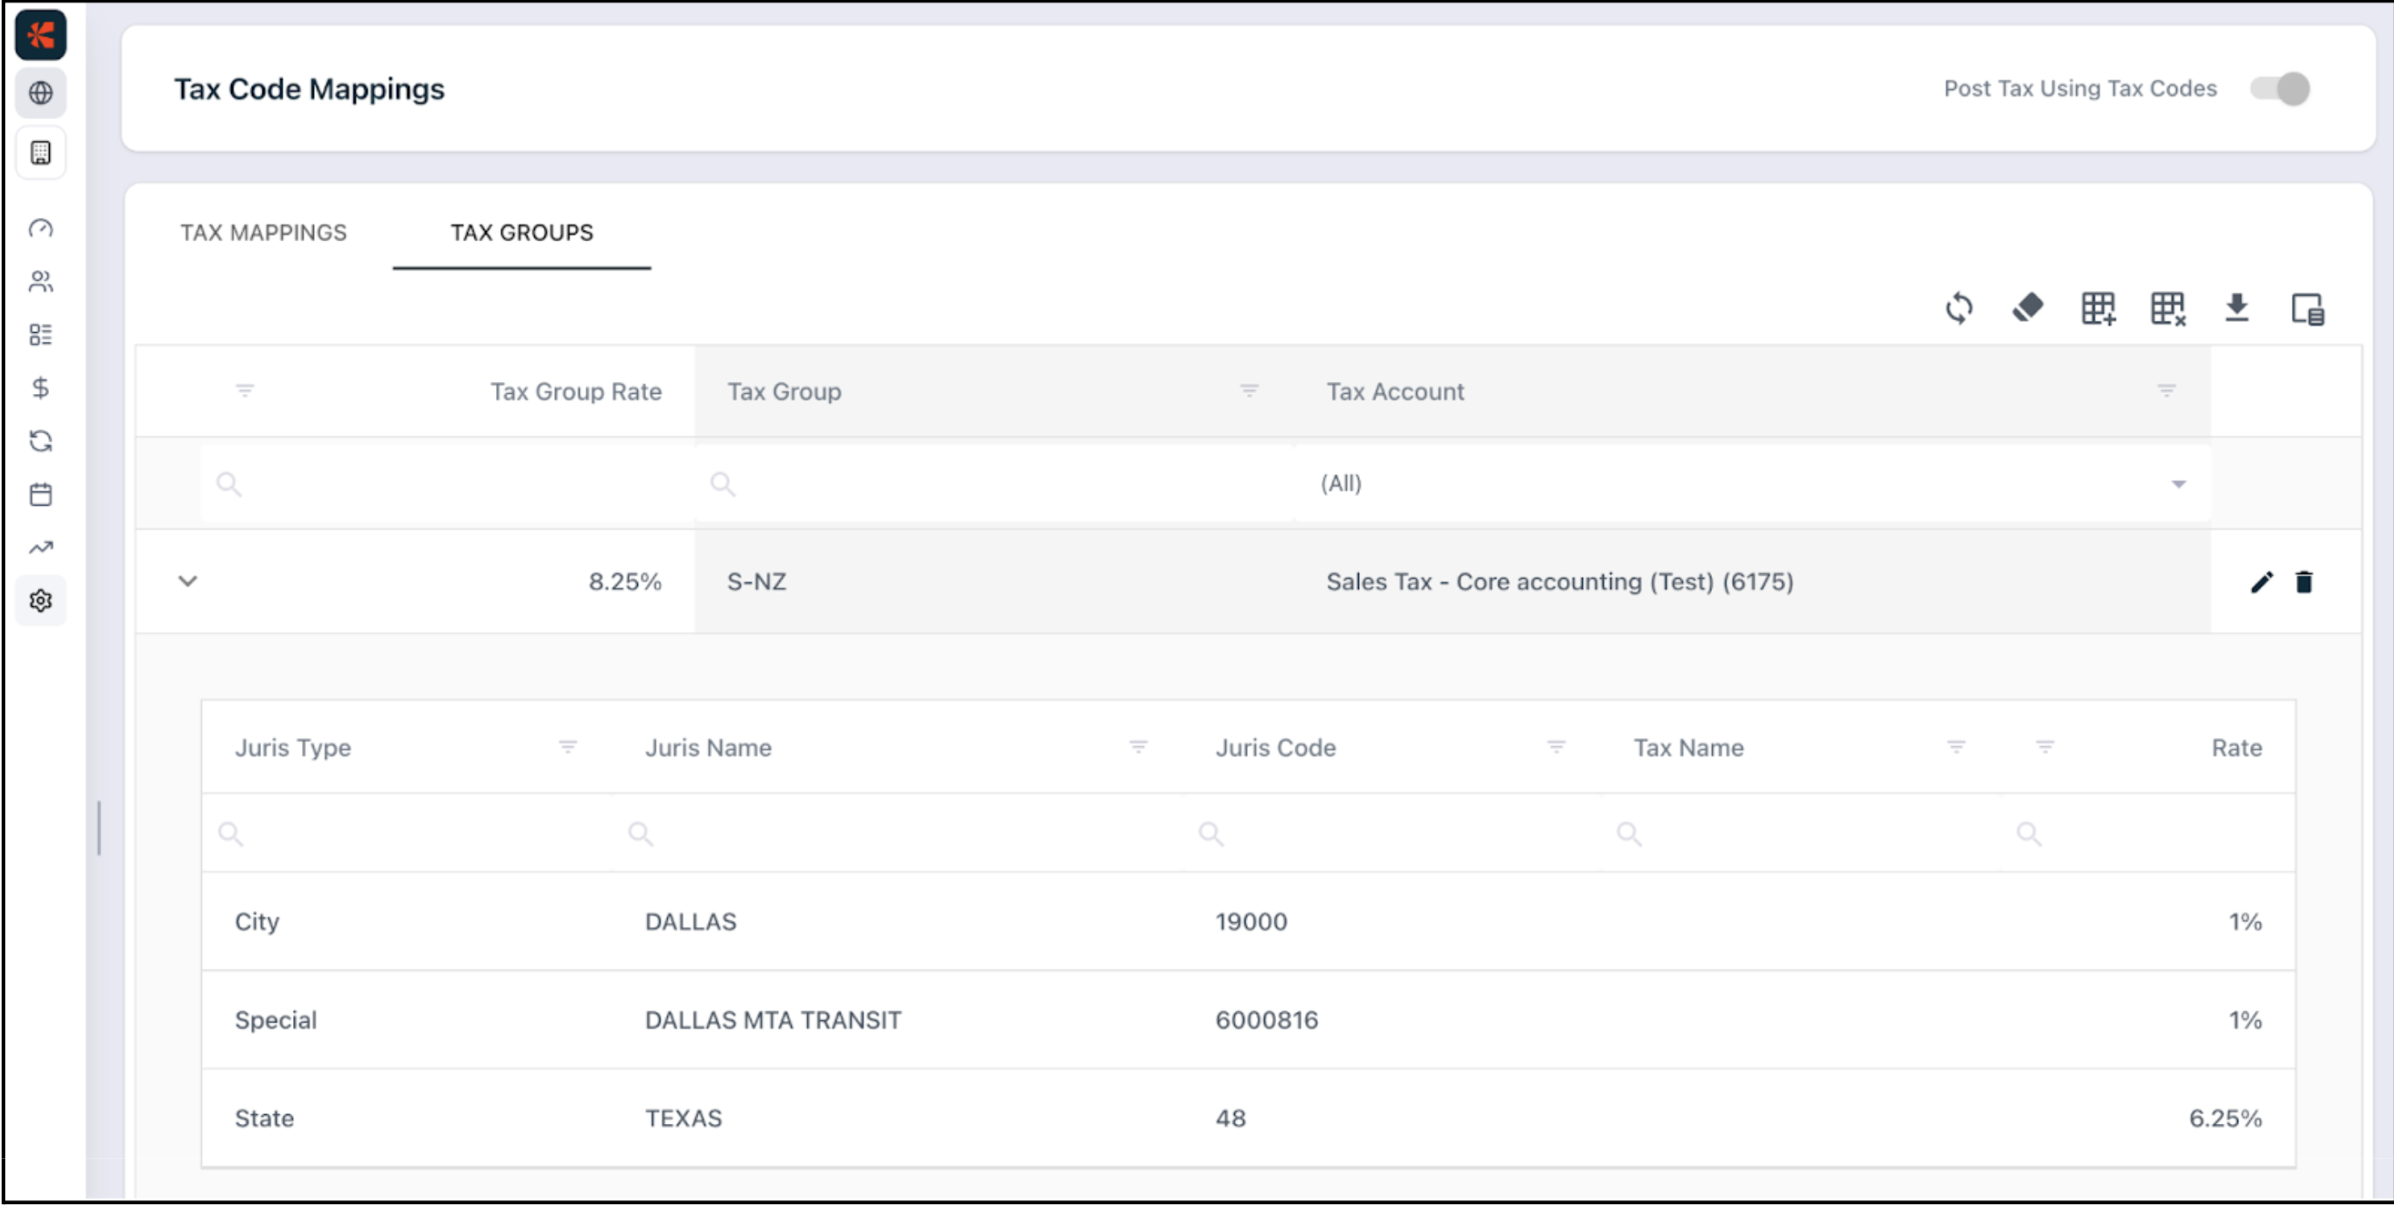
Since only one tax code can be sent per journal line to NetSuite, multiple taxes (e.g., State + County + City) must be grouped into a Tax Group. A Tax Group:
- Aggregates multiple taxes
- Has its own Tax Group Code
- Must also exist in NetSuite
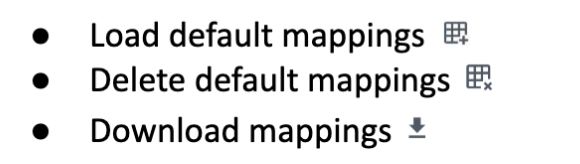
- Is used during journal posting instead of individual tax codes On this tab, you can:

Edit Tax Mapping
Tax mappings can be updated either directly from the UI or through bulk upload. Tax Group mappings can be updated only from the UI.
Edit Tax Code (Individual Tax Mapping)
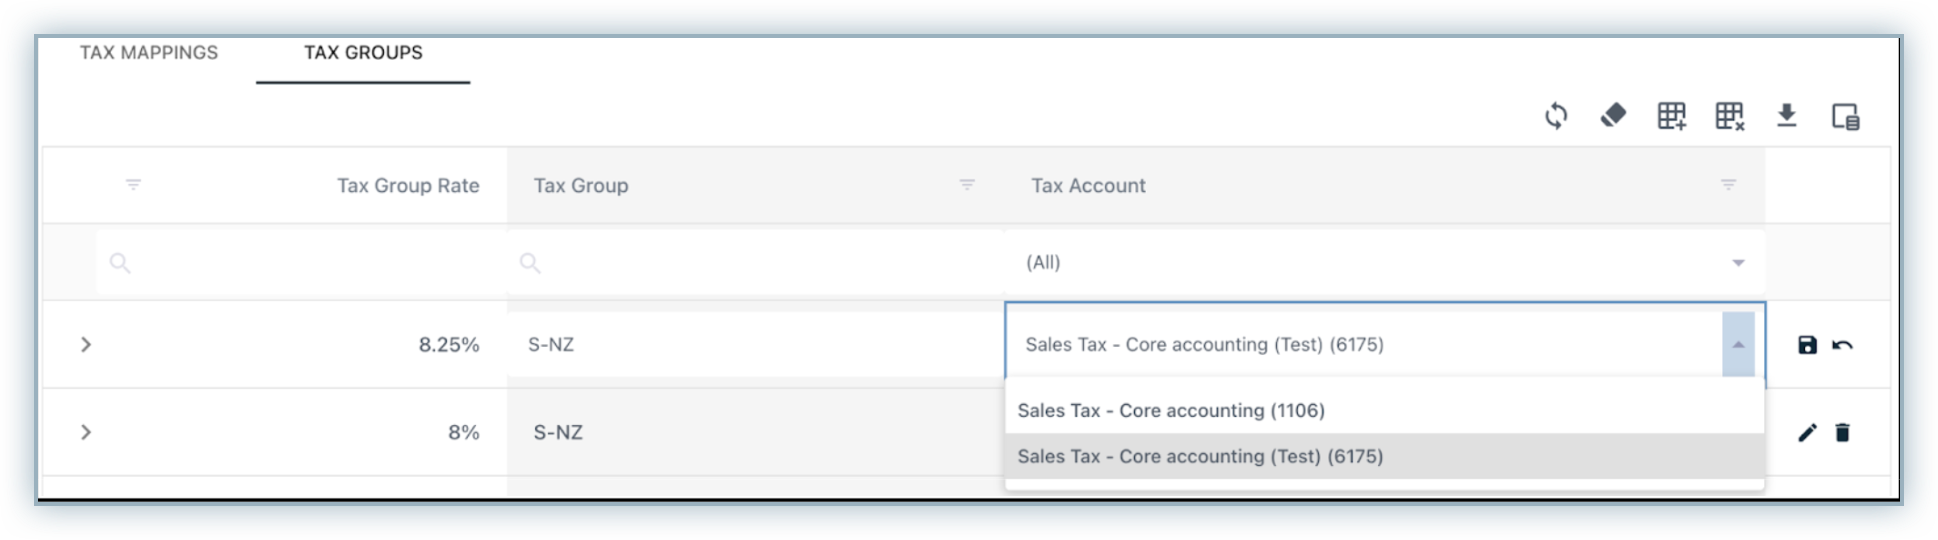
You can update Tax Codes and Tax Accounts in two ways:
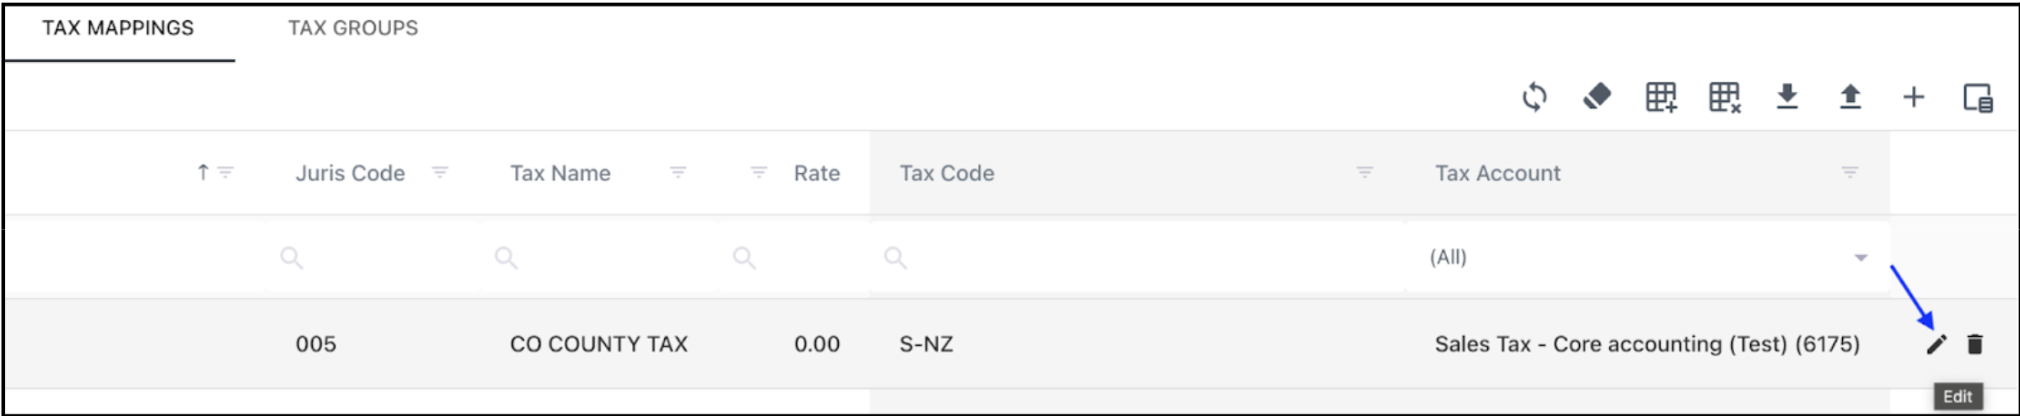
- From the UI
- Go to the Tax Mapping tab.
- Scroll to the right side of the grid.
- Click the edit icon next to the mapping you want to edit.
- Update the Tax Code if required.
- Select the appropriate Tax Account from the dropdown (accounts available from the Chart of Accounts).
- Click Save.
- Upload Tax Mapping (Bulk Update via CSV) Tax mappings can be uploaded in bulk using a CSV file. To upload mappings:
- In the Tax Mapping tab, either:
- Download the existing mappings and update them, or
- Click Upload Tax Mapping and use the available link to download the template (if no mappings exist).
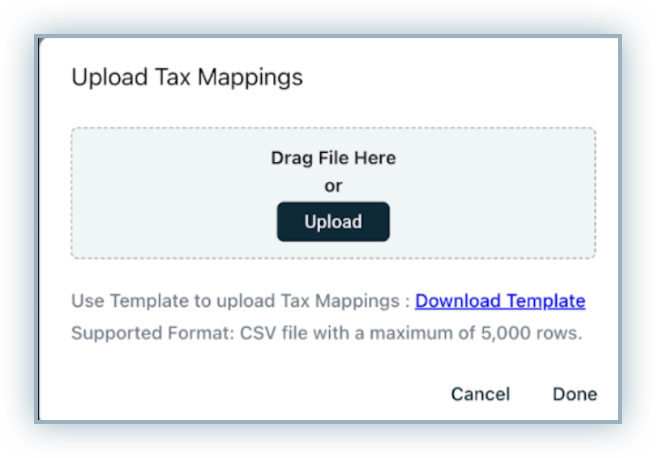
- Add or update your mappings in the CSV file.

- Click Upload Tax Mapping and select the file.
- Click Done to start processing.
Note
- Only CSV files are supported.
- A maximum of 5,000 mappings can be uploaded per file.
- File Validation Process After uploading the file, the system performs a validation check and displays a summary.
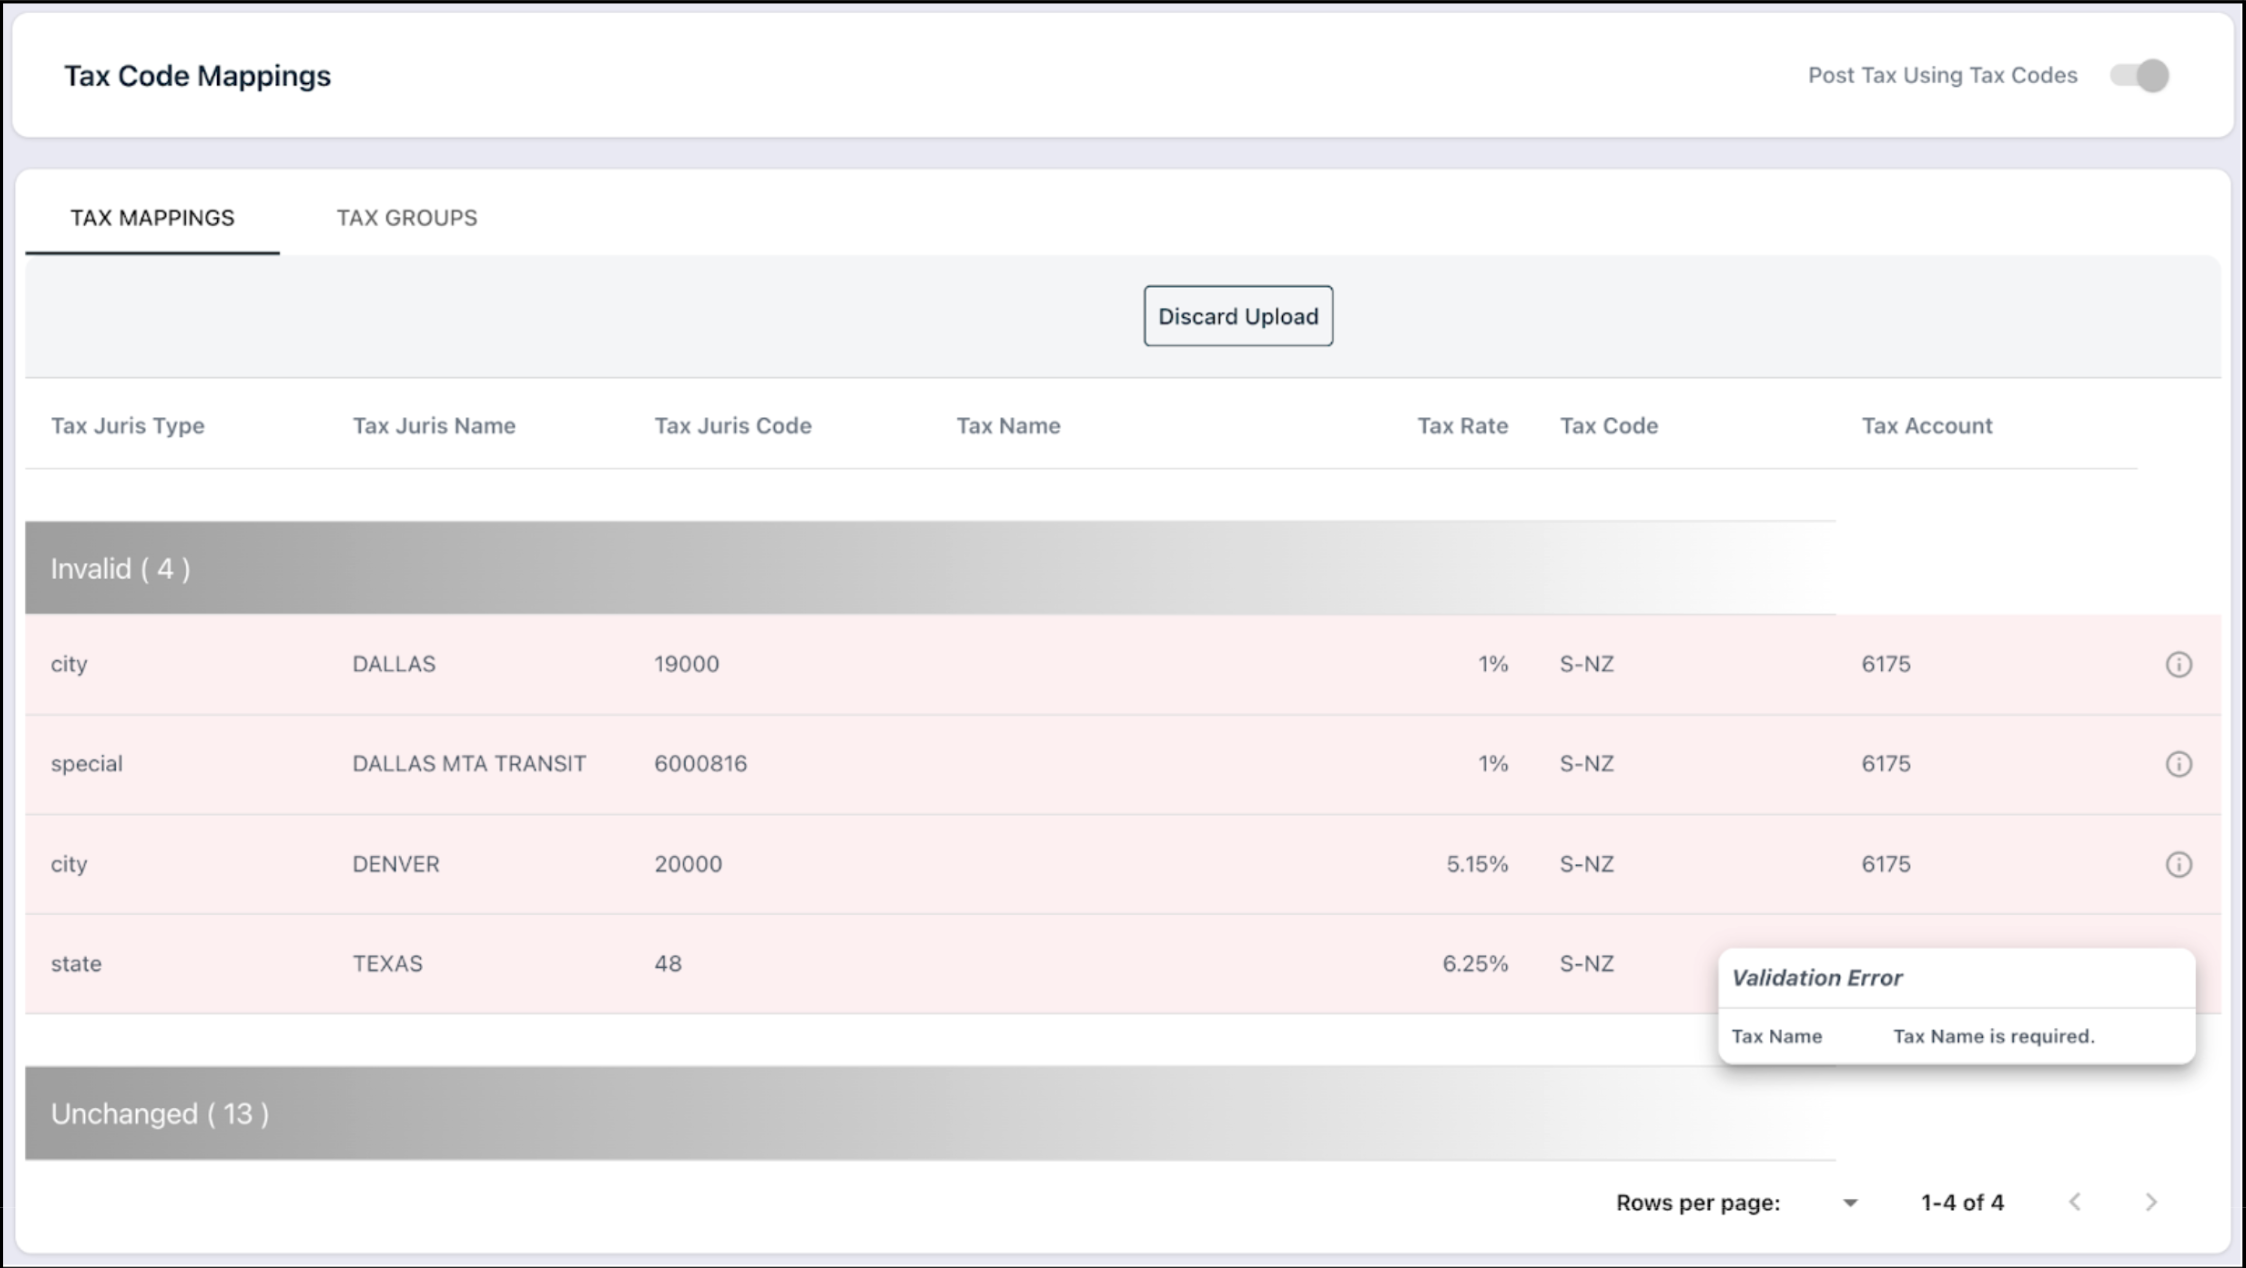
If issues are found:
- The records are categorized as:
- Invalid
- Unchanged
- Click the information icon next to a record to view validation errors.
- Fix the errors in your CSV file.
- Click Discard, then re-upload the corrected file.
- Final Confirmation If the file passes validation:
- Records are categorized as:
- New
- Updated
- Unchanged
- Review the summary.
- Click Confirm and Save to apply the changes.
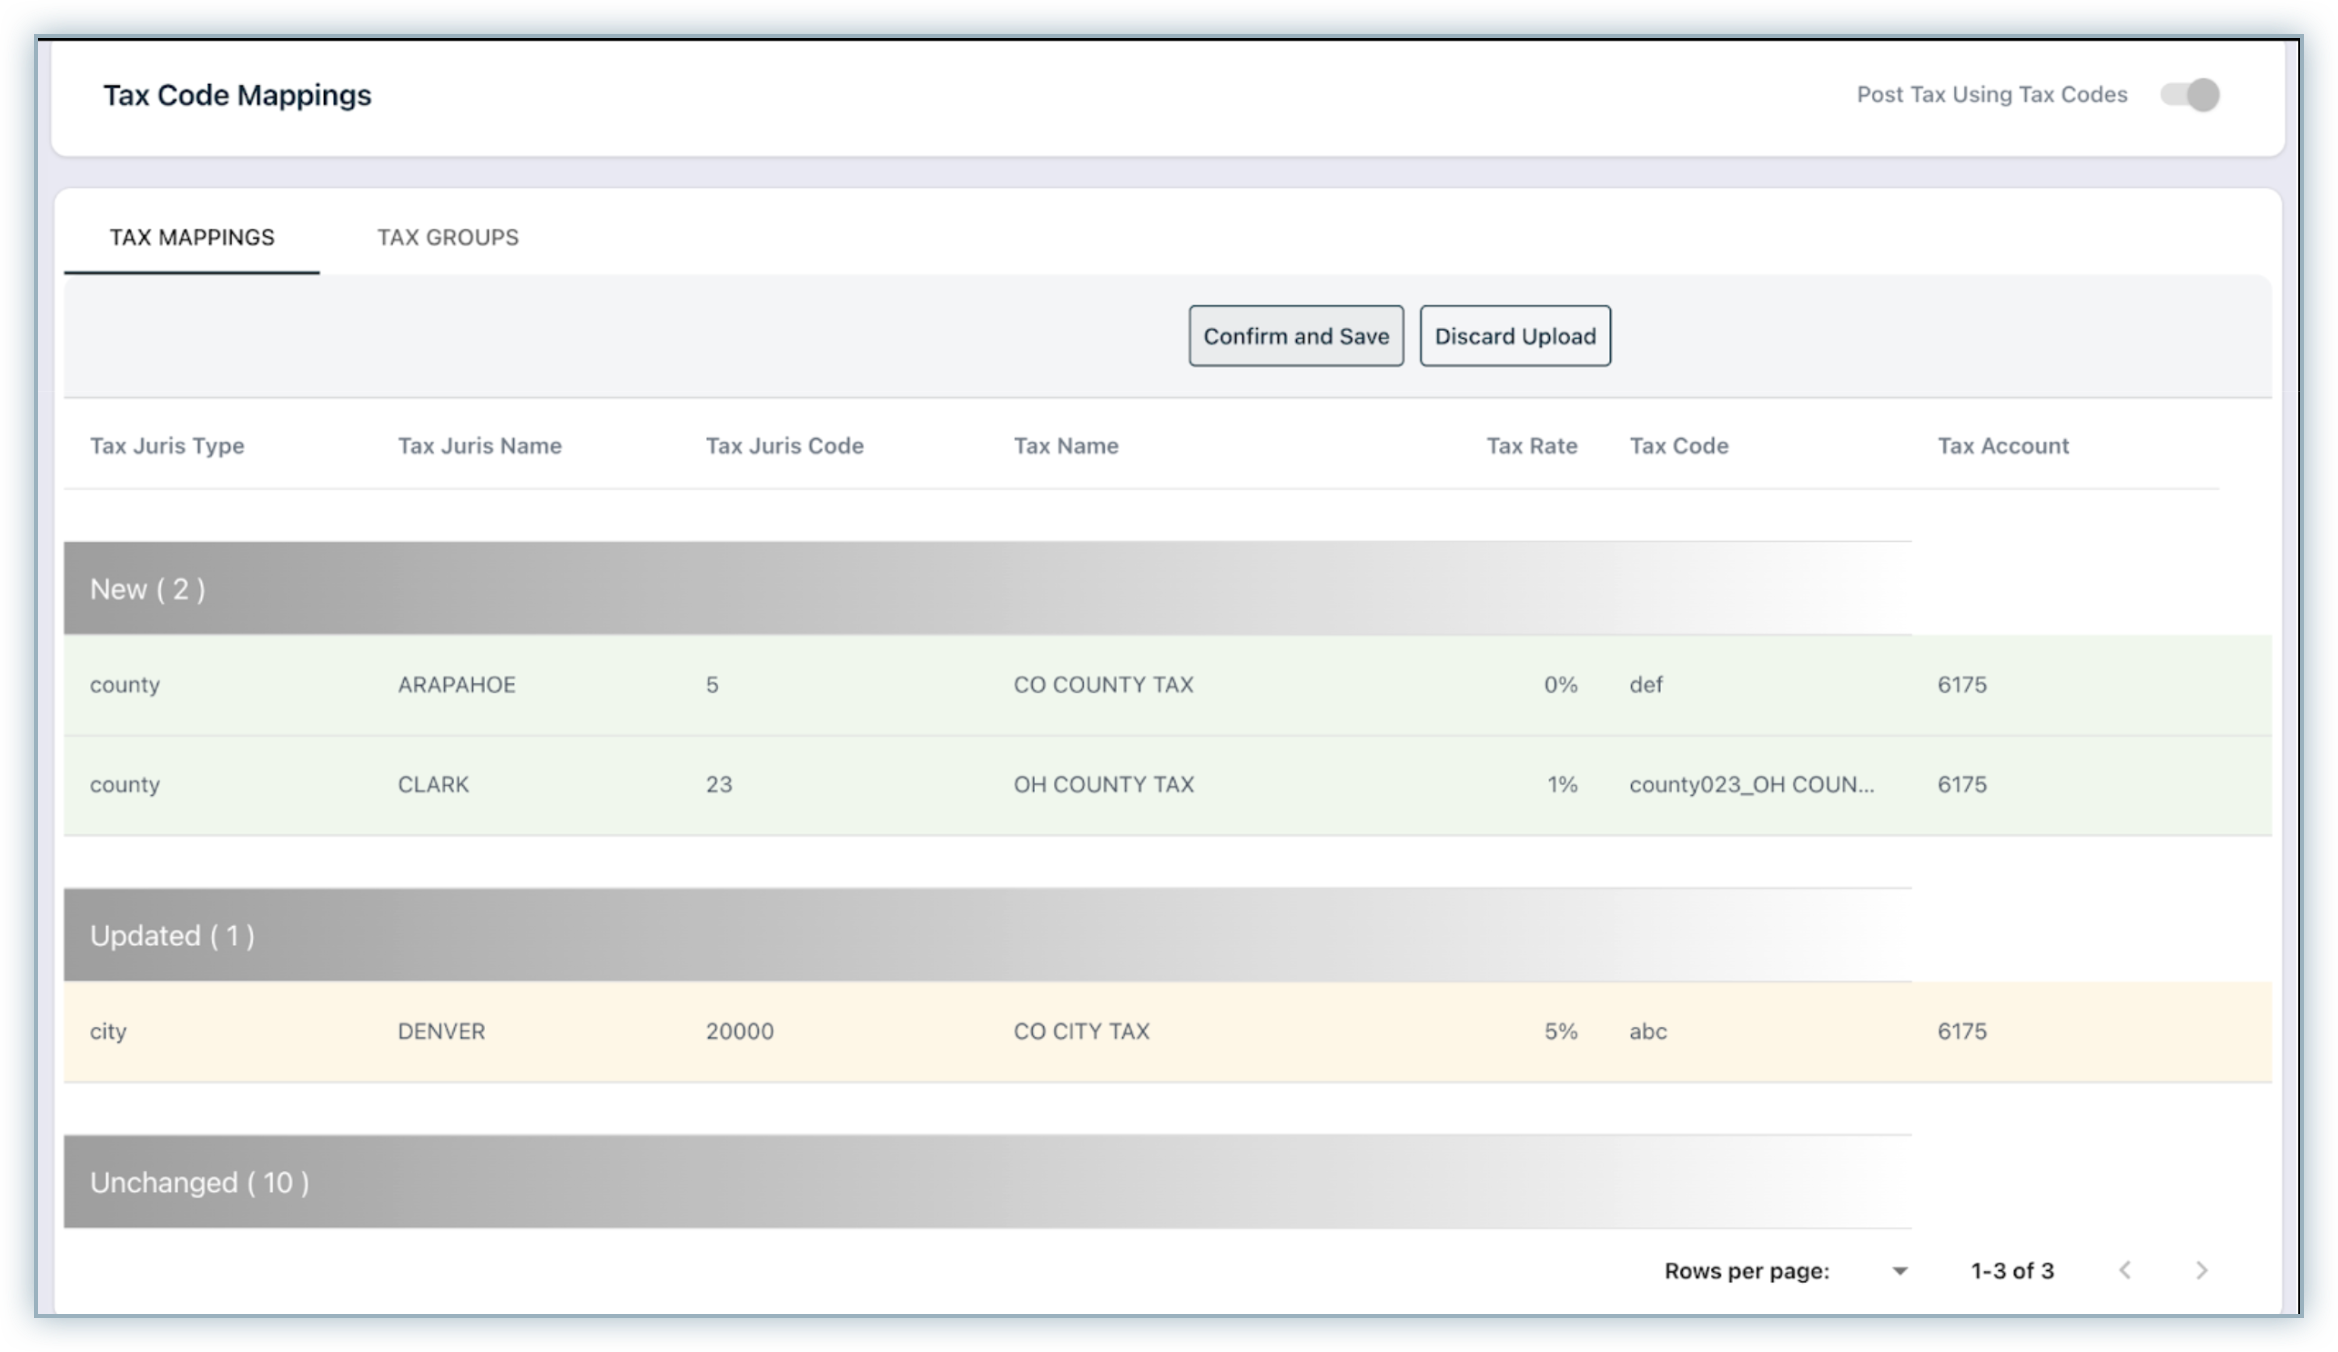
Once confirmed, the updated Tax mappings will be saved successfully.
Edit Tax Group Mapping
Tax Group mappings can only be updated from the UI.
- Navigate to the Tax Group tab.
- Click the edit icon for the mapping you want to modify.
- Update the Tax Group Code if required.
- Select the appropriate account from the dropdown.
- Click Save.
Using Internal Account ID for Posting
By default, RevRec Premium uses the Account Number from your chart of accounts while creating aggregated journals for posting. You can configure the system to post using Internal Account IDs instead.
Enabling Internal Account ID Posting
Follow these steps to enable Internal Account ID for posting:
- Navigate to Settings > Accounting > Journal Posting Settings.
- Turn on the toggle for Use Internal Account ID for Journal Posting.
- Click Save.
Note
The Internal Account ID is permanent and cannot be updated once the account is created.
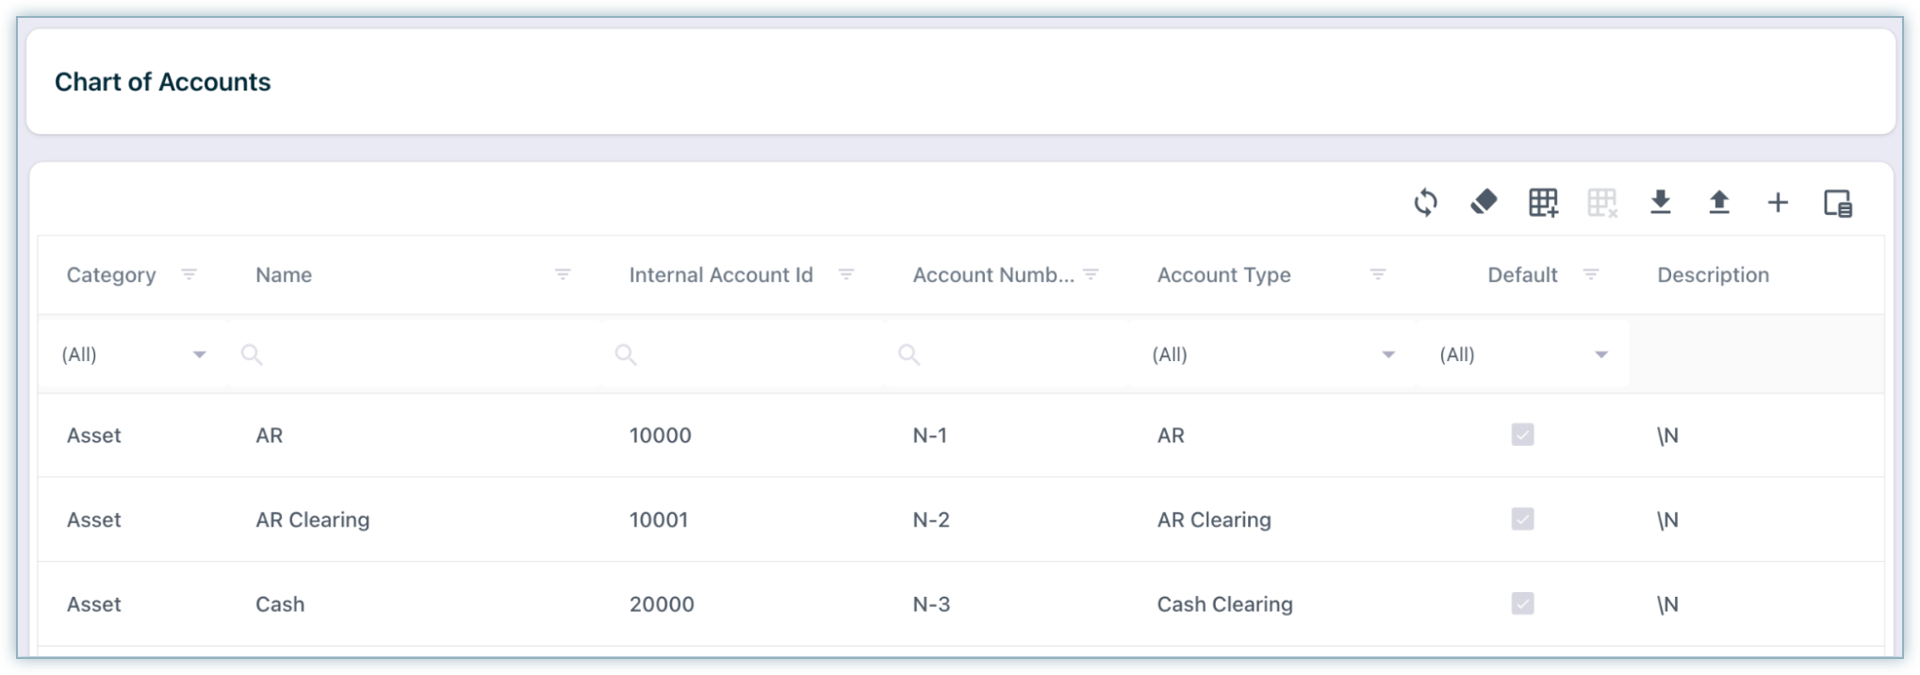
Once enabled, an additional column called Internal Account ID column appears in your Chart of Accounts, alongside the standard account number. This column is used when creating journals for posting to NetSuite, ensuring consistent and accurate mapping between your RevRec Premium and NetSuite accounts.
Executing Journal Posting
You can post journals in NetSuite in two ways:
- Automatic Posting: Based on your journal frequency configuration.
- Manual Posting: From the Post Journal page, click Post Journals.

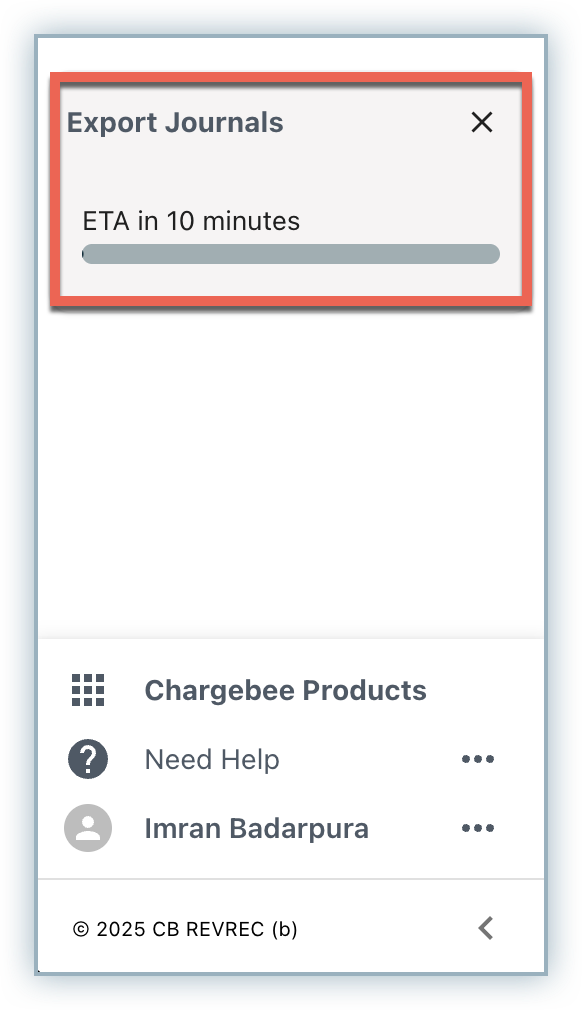
During the initiation of Journal Entries posting, an Export Journals widget appears on the left menu.
After posting:
- The journal status is updated in RevRec Premium as Success.
- The journal entries can be viewed in NetSuite under the Journal Entries page.
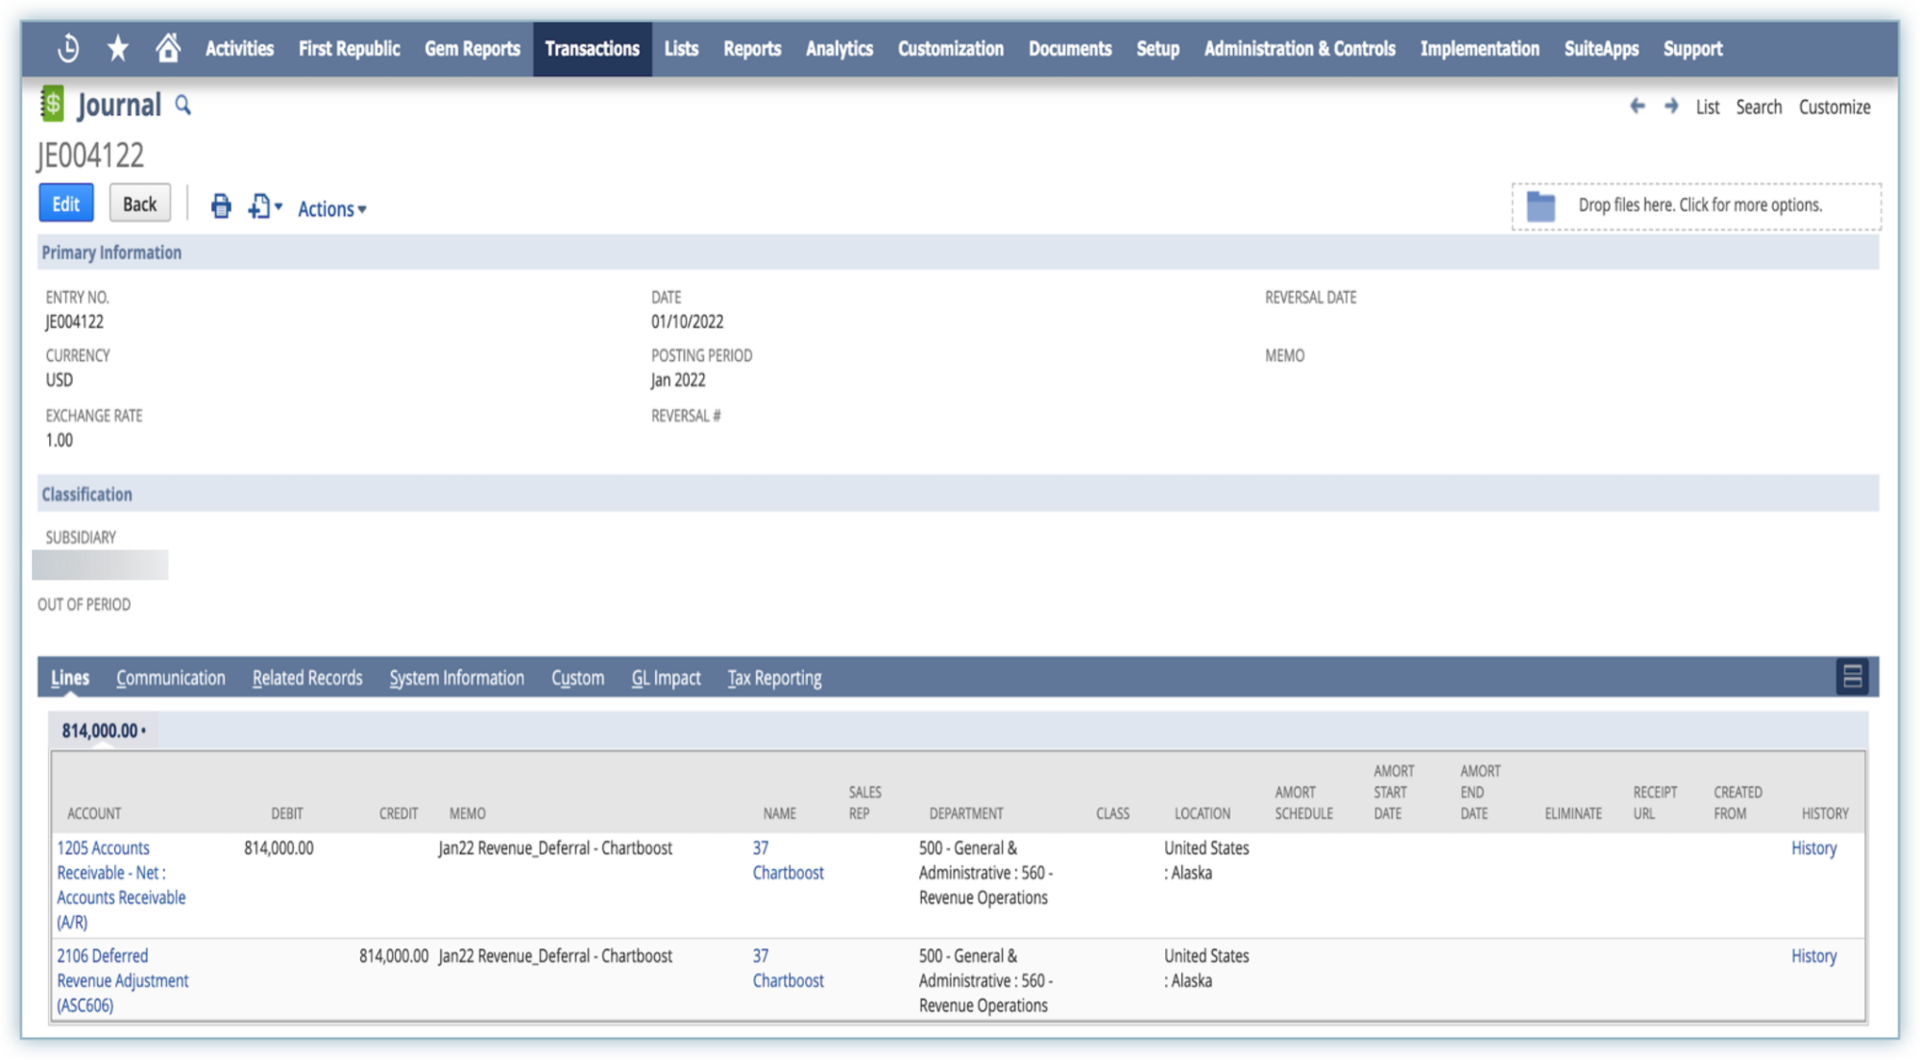
For easier tracking, add the External ID field to your NetSuite Journal Entries view. This lets you quickly reference the RevRec Premium Posting ID.
Was this article helpful?