Xero
Introduction
The RevRec Premium – Xero integration enables seamless synchronization of your journal entries between RevRec Premium and Xero. Once connected, RevRec Premium automatically posts journal entries to your Xero ledger based on your configured journal posting flow.
Sync Overview
You can integrate your RevRec Premium site with Xero for journal posting. Linking RevRec Premium with Xero automatically pushes journal entries to the Xero ledger.
RevRec Premium supports two posting options:
-
Automated Posting: Journals are pushed to Xero at the frequency you configure.
-
On-Demand Posting: You can trigger postings manually from the Post Journals page whenever needed.
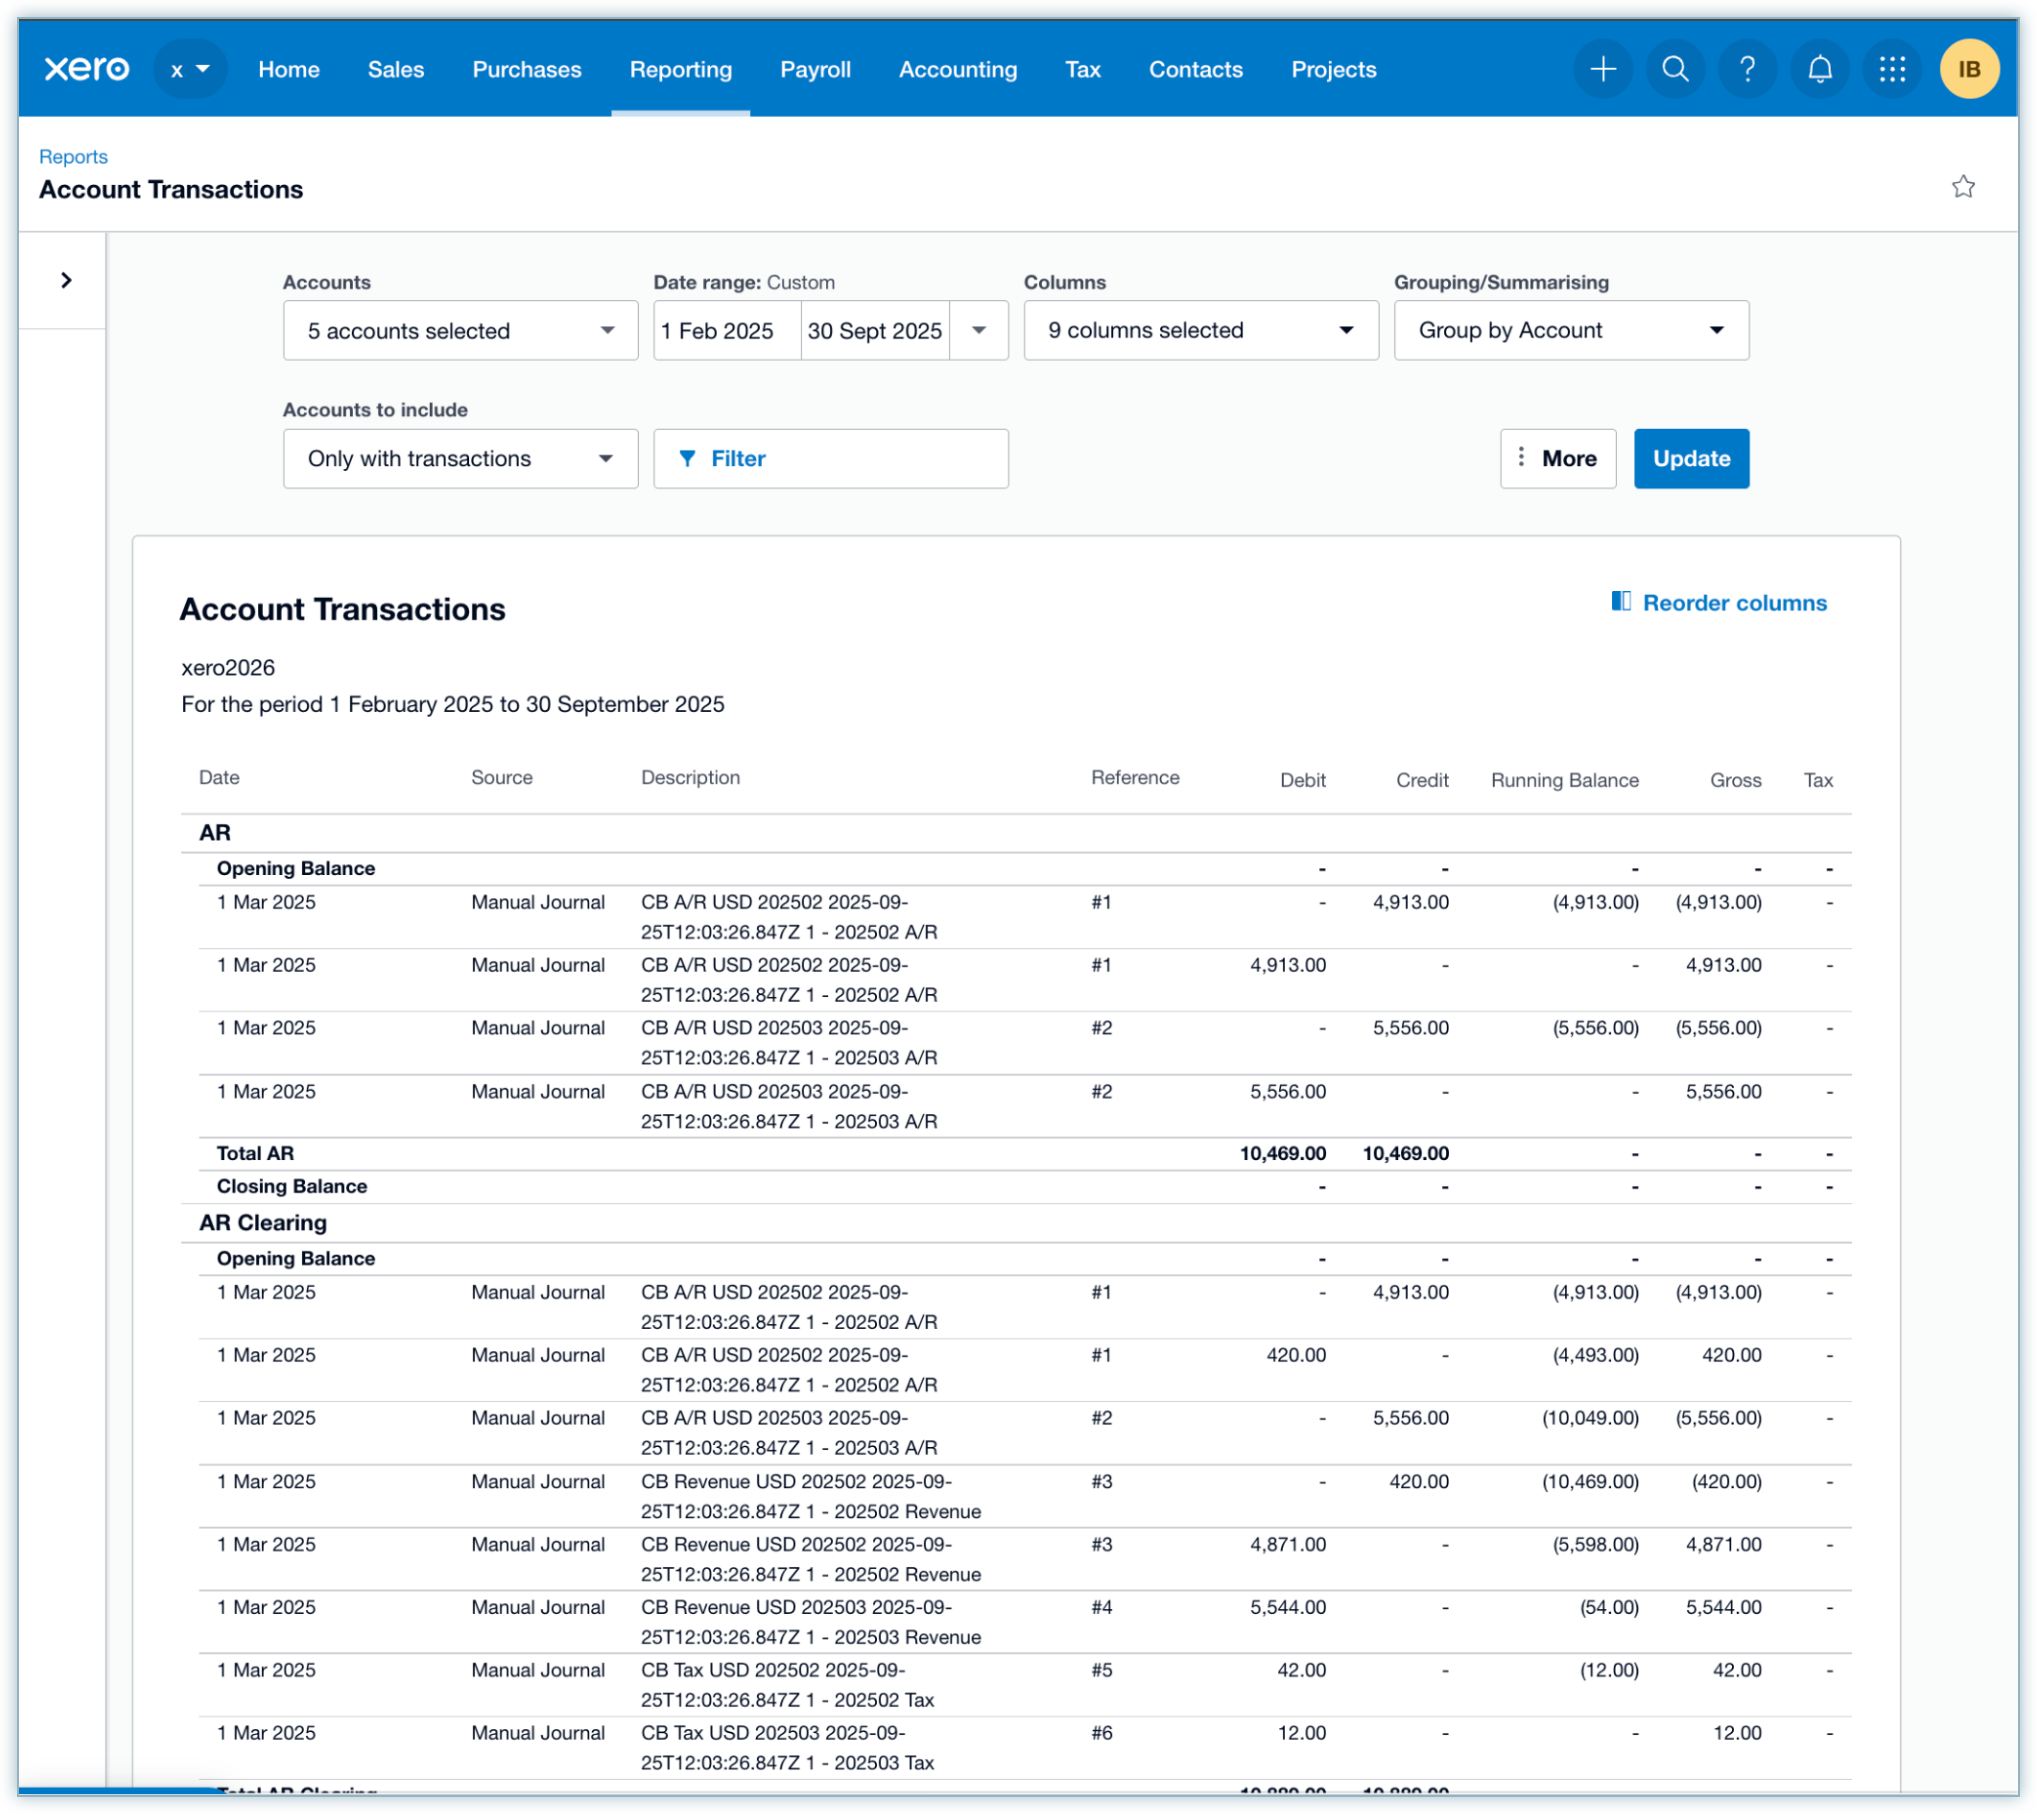
Once journals are posted, their status is updated in RevRec Premium, and you can verify the entries directly in Xero under the Journal Entries section. This provides end-to-end visibility and control over the posting process.
Prerequisites
Before enabling the posting flow, ensure that journal account mappings are set up in RevRec Premium. This guarantees that journals are routed correctly to your Xero accounts.
Connecting RevRec Premium with Xero
Note
Only users with the Controller role can connect your RevRec Premium site with Xero.
Follow these steps to connect your RevRec Premium site to Xero:
- Log in to your RevRec Premium site.
- Navigate to the environment you want to integrate with Xero.
- Go to Settings > Accounting.
- On the Accounting page, click the Connect icon.
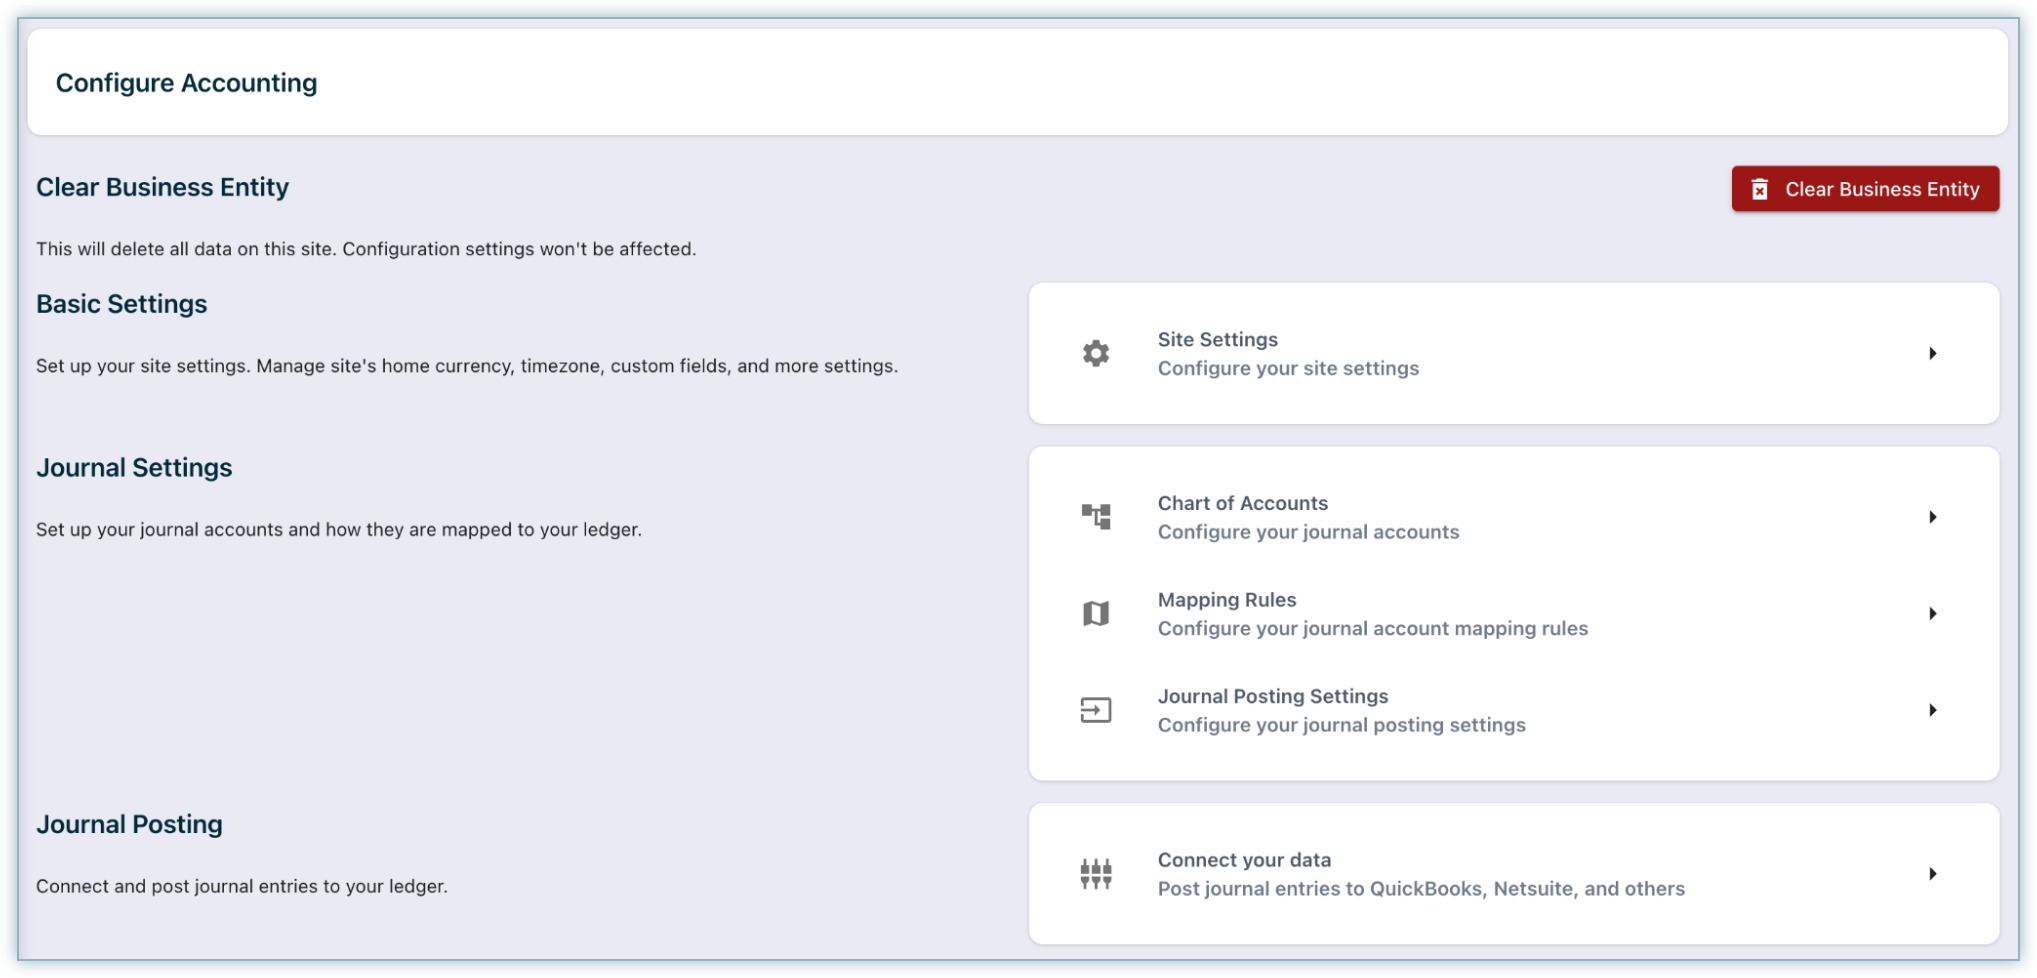
- In the Connect your data pop-up, select ACJournal Posting.
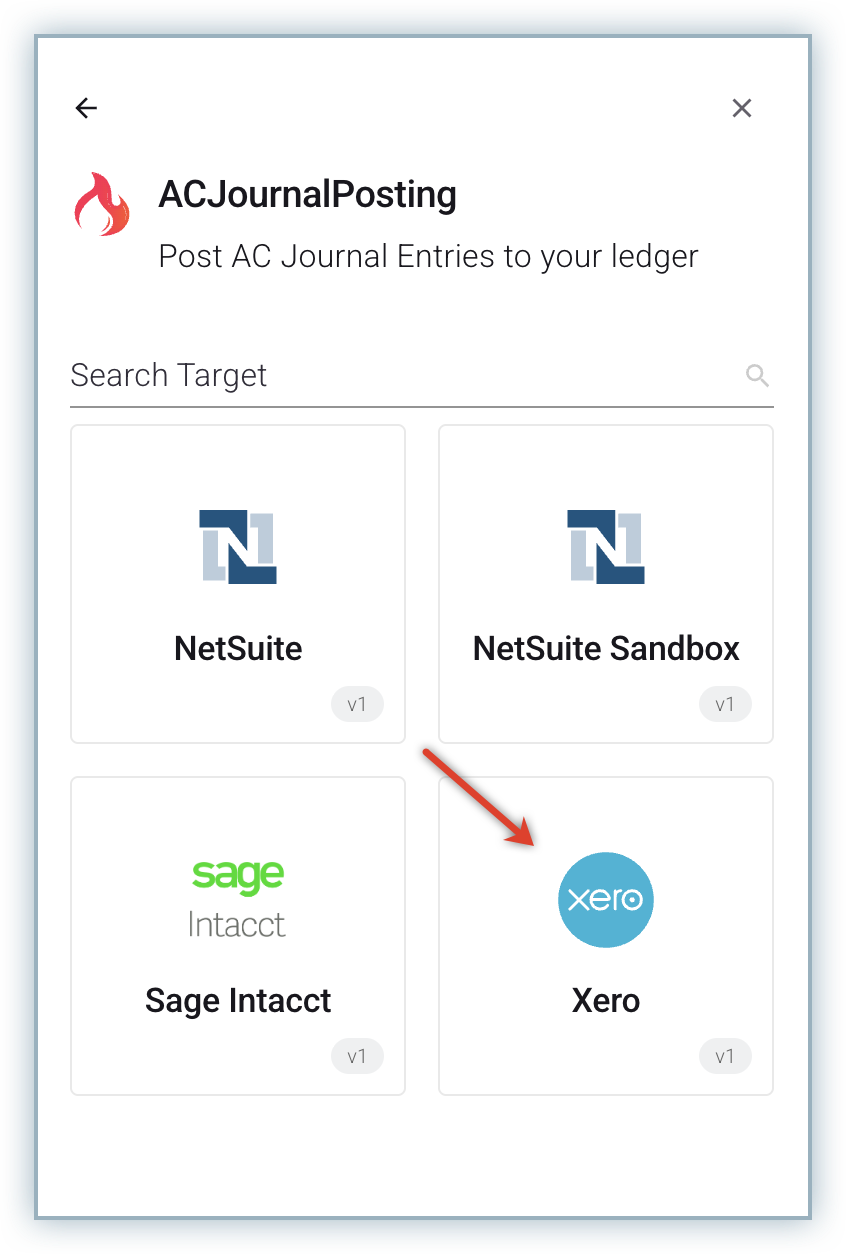
- In the Journal Posting pop-up, choose Xero as your accounting system.
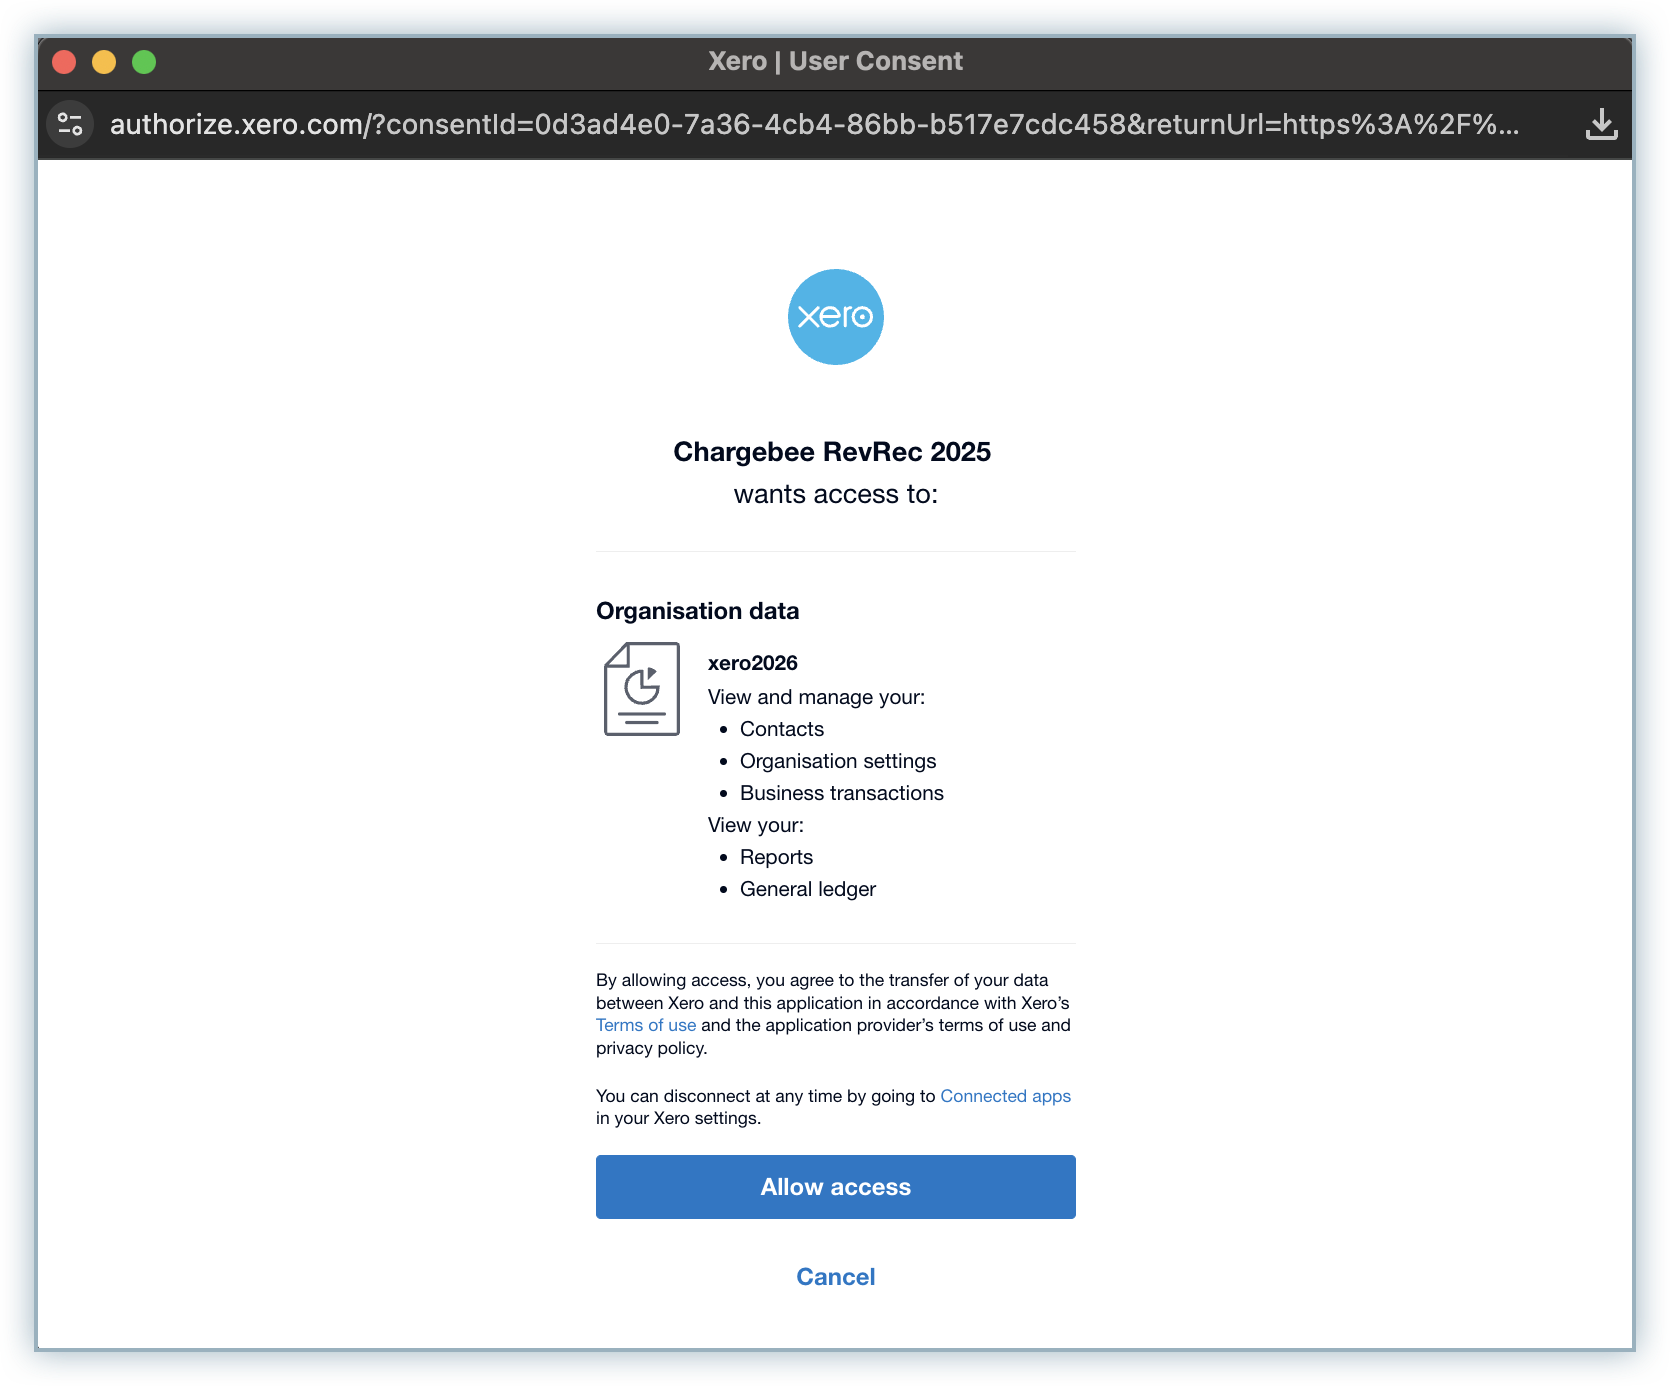
- Click Connect your data. A pop-up window will appear prompting you to authorize the connection.
- Click Allow Access to grant RevRec Premium permission to access your Xero site.
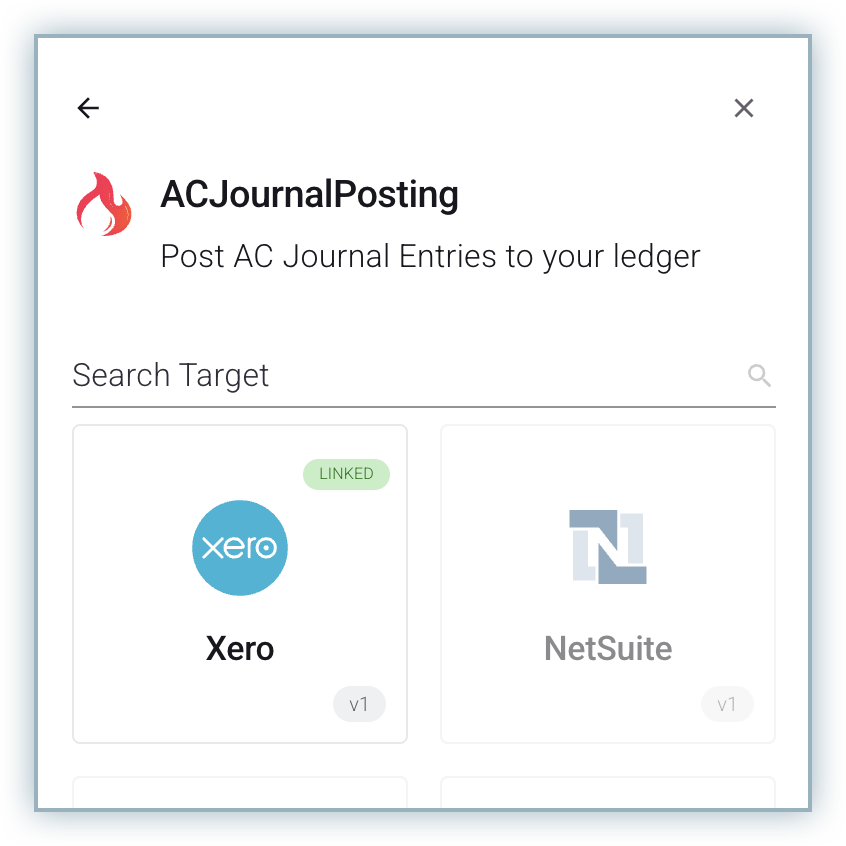
- Close and reopen the connection widget. You will now see Xero listed as Linked.
Once connected, RevRec Premium automatically publishes journal entries to Xero when you close an accounting period.
Configuring the Journal Posting Flow
You can configure the journal posting flow to automatically post journal entries to Xero.
Before enabling journal posting, ensure that your journal account mapping is correctly set up under Settings > Accounting.
Publishing Journal Entries Using Custom Fields
RevRec Premium supports publishing journal entries to Xero based on custom fields defined in your configuration. You can use custom fields such as Location, Department, or Class to categorize and post entries.
Adding Custom Fields
To post journal entries to Xero, you must add the Class custom field and mark it for inclusion in journal posting. To add custom fields:
- Navigate to Settings > Accounting > Site Settings.
- Scroll to the Custom Fields section and click the + icon to add a new record.

- Enter details for the new custom field:
- API Name: Name
- Display Name: Enter the desired label.
- Source: Select the source for the custom field - Customer, Product, or Subscription.
- Click Save on the right side of the row.
- Click Save again at the top-right corner of the grid to confirm changes.
- Mark the Class custom field as Include in Journal Posting.
You can repeat these steps to add and include more custom fields as required.
Executing Journal Posting
RevRec Premium offers two ways to execute journal posting:
- Automatic Posting: Journal entries are posted automatically based on the journal frequency configuration.
- Manual Posting: You can manually initiate journal posting by navigating to the Post Journal page and clicking Post Journals.

During posting, the Export Journals widget appears in the left navigation menu to track the process.
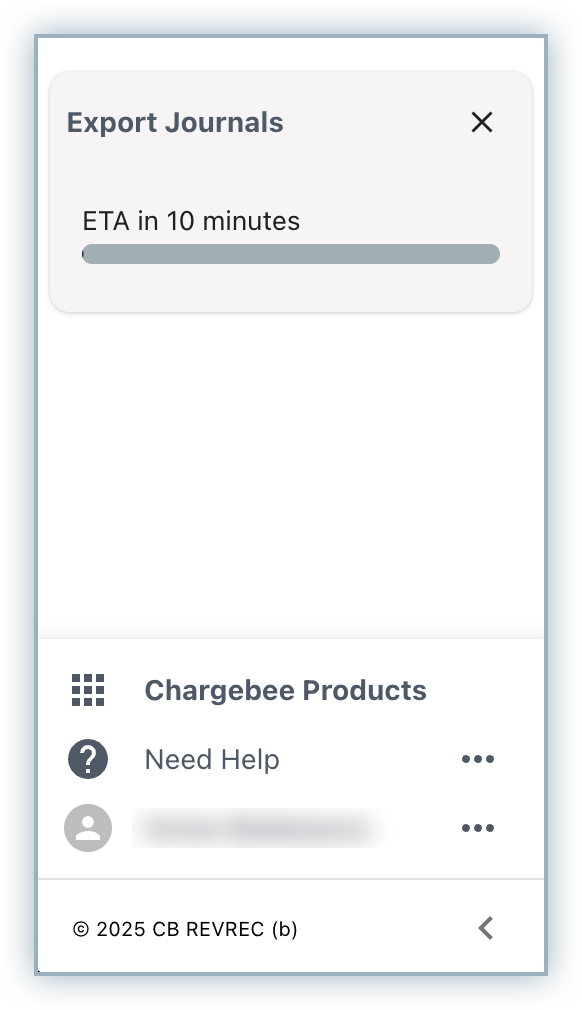
Once the posting is complete:
- The journal status in RevRec Premium will update to Success.
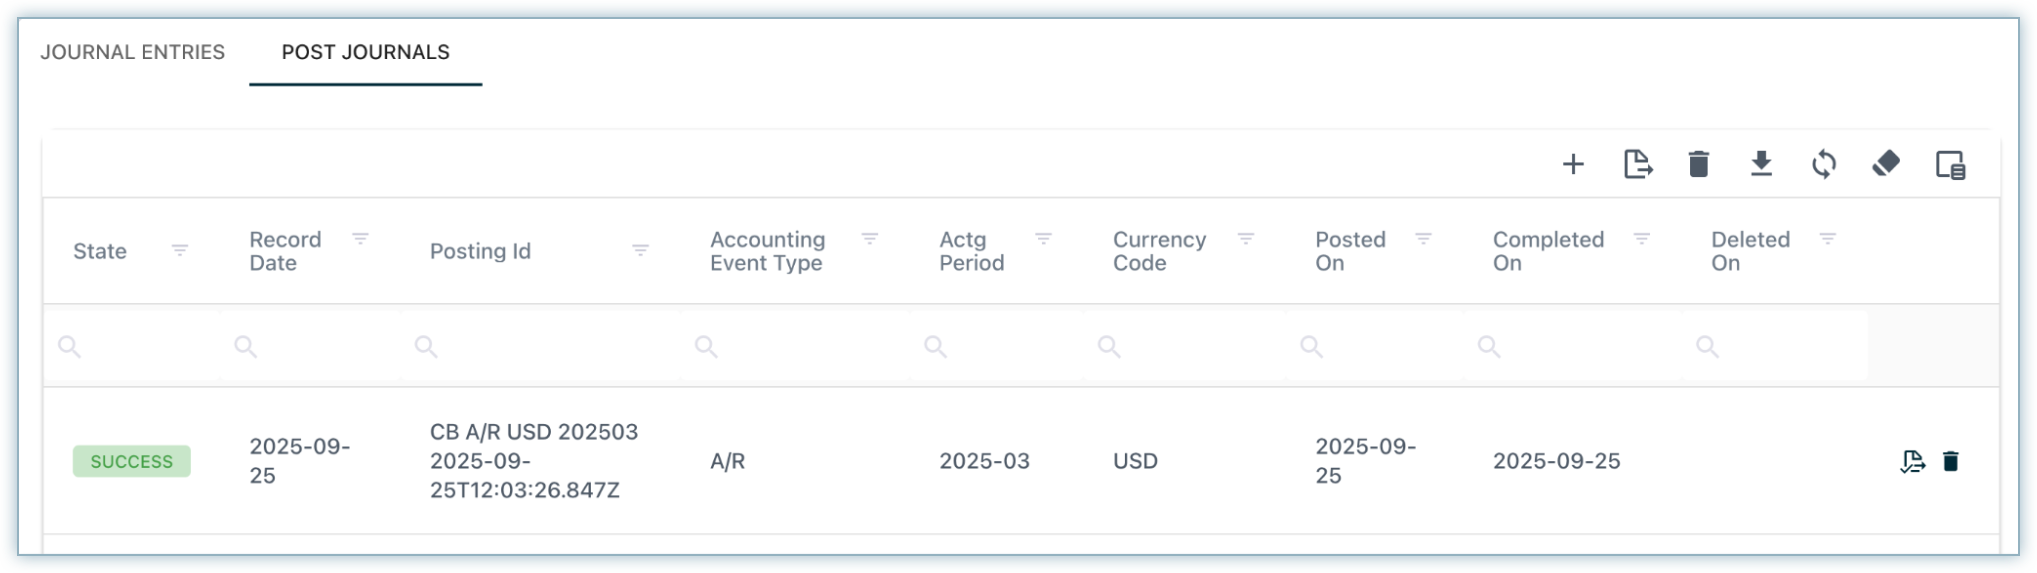
- You can view the posted journal entries in Xero under the Accounts Transaction report.
Was this article helpful?