RevRec Premium - Site Settings
Introduction
Setting up your RevRec Premium site correctly is essential to ensure accurate accounting, data synchronization, and reporting. This guide explains how to configure your site settings, including currency, time zone, data migration, and business entity management.
Linking RevRec Premium to a RevRec Site
To link your RevRec Premium site with a RevRec site for synchronized data processing:
- Navigate to Settings > Accounting > Site Settings.
- Under Corresponding RevRec Site, select the RevRec site you want to link.

Once linked, revenue data from RevRec will automatically synchronize during the accounting period close.
Setting up Home Currency
To define your company’s home currency:
- Go to Settings > Accounting > Site Settings > Home Currency.

- Select the desired currency and click Save.
Note
The home currency cannot be changed after data is synced to the site.
To set the home currency for a specific business entity, refer to the Configuring Business Entities section.
Configuring Time Zone
Configuring your site’s time zone ensures that customer data such as invoice and credit note dates uses the correct local time. The same time zone is used to calculate the site’s accounting period start and end dates, so invoices and credit notes are placed in the correct accounting period that ensures accurate revenue recognition.
To configure the time zone on your RevRec Premium site:
- Go to Settings > Accounting > Site Settings.
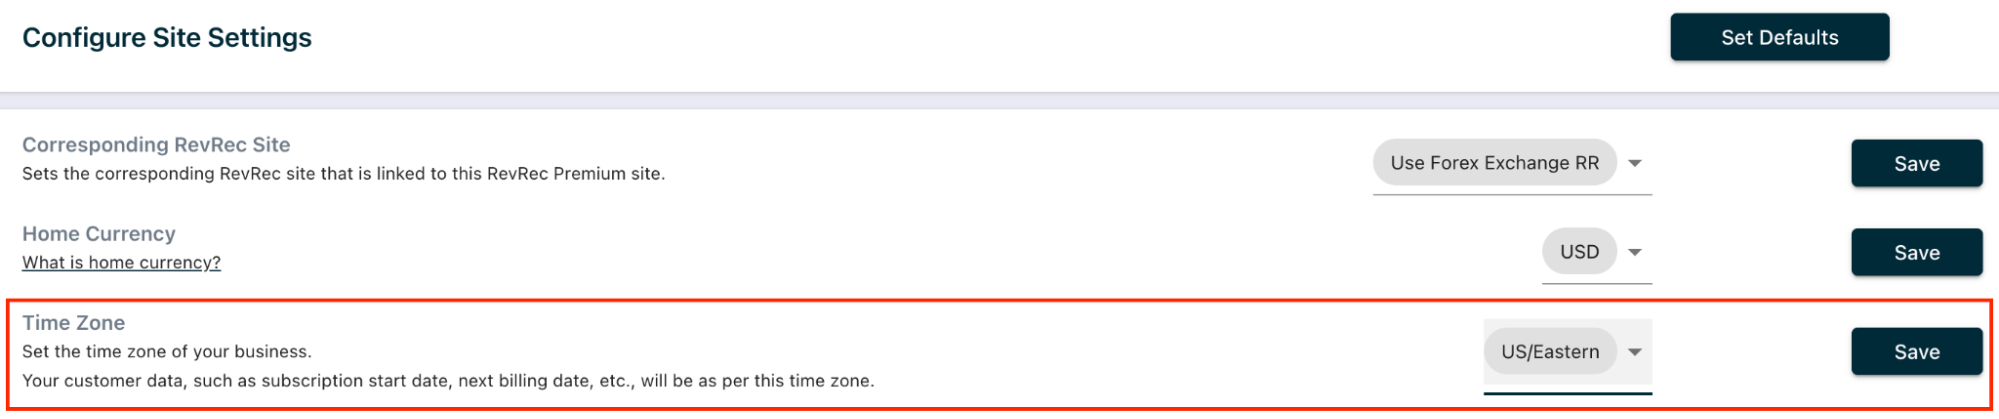
- Under Time Zone, select the appropriate option from the dropdown and click Save.
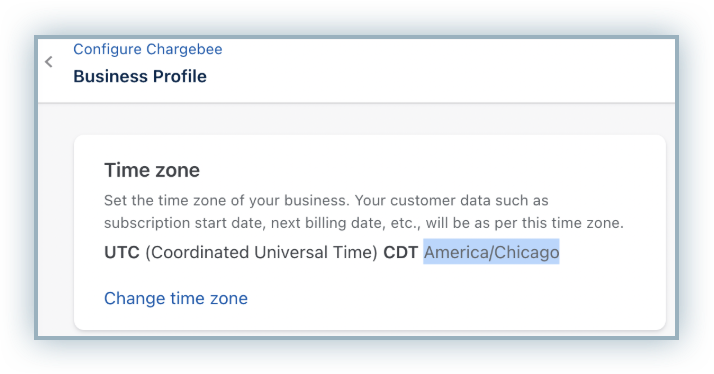
Note
Your RevRec Premium site’s time zone should match the time zone of your billing site. To verify your billing site time zone, navigate to Configure Chargebee > Business Profile > Time Zone.
Configuring Transaction Date for Payment
You can define how payment transactions are recorded either by payment date or payment settlement date.
By default, the payment settlement date is used. Follow these steps to use the payment date instead:
- Navigate to Settings > Accounting > Site Settings.

- Turn off the Use Payment Settlement Date toggle.
- Click Save.
Configuring Data Migration Settings
Accounting Period Configuration
RevRec Premium allows you to determine how accounting periods are assigned to historical data based on the creation date or the transaction date.
Creation Date: The creation date is useful in cases where a back-dated invoice exists, and you want to use the creation date instead of the invoice date. This is useful for handling backdated invoices or when payments are applied later.
Transaction Date: You can use this option if you want accounting to follow the transaction event, where the payment is added to the billing site but applied to the invoice on a different date, and you want to use the applied date as the creation date rather than the payment date.
By default, RevRec Premium uses the creation date to determine the accounting for the customer data. To switch to transaction date-based accounting, turn off the corresponding toggle and click Save.

Setting up Conversion Date
The conversion date allows you to exclude completed historical transactions from being synced to RevRec Premium from the Billing site.
A transaction is considered complete if:
- The invoice is paid and both the invoice date and payment date are before the conversion date.
- The credit note is refunded or adjusted, and its date is before the conversion date.
Here is the list of conversion scenarios with how they will be handled by the system.
| # | Conversion Scenario | System Behavior |
|---|---|---|
| 1 | Invoice paid via a payment before conversion. | Skip the invoice and payment. |
| 2 | Invoice date is before conversion and payment date is after conversion. | Process invoice and payment. |
| 3 | Invoice adjusted via a credit note before conversion. | Skip the invoice and credit note. |
| 4 | Invoice date is before conversion and credit note date is after conversion. | Process invoice and credit note. |
| 5 | Invoice paid/adjusted via a payment and credit note before conversion. | Skip the invoice, credit note, and payment. |
| 6 | Invoice paid/adjusted via a payment and credit note. Payment is before conversion and credit note is after conversion or vice versa. | Process invoice, credit note, and payment. |
| 7 | Invoice paid/adjusted via multiple payments and credit notes before conversion. | Skip the invoice, credit note, and payments. |
| 8 | Invoice paid via a payment but there is some unused amount before conversion. | Skip the invoice and payments and only process the unapplied payment (i.e., unused) to Business Transaction. |
| 9 | Invoice paid via a payment before conversion but there is some unused amount which is refunded after conversion. | Process the unapplied payment (i.e., unused) and its related refund transaction to Business Transaction. |
| 10 | Invoice adjusted via a credit note but there is some unused amount before conversion. | Skip the invoice and payments and only process the refundable/unadjusted credit note amount to Business Transaction. |
| 11 | Invoice adjusted via a credit note before conversion but there is some unused amount which applied to another invoice after the conversion. | Process the unadjusted credit note amount (i.e., unused) and its related invoice transaction to Business Transaction. |
| 12 | Credit note issued against the paid invoice but not refunded or adjusted before conversion. | Process the refundable/unadjusted credit note amount to Business Transaction. |
| 13 | Credit note issued against the paid invoice before conversion but refunded after the conversion. | Process the unrefunded credit note amount (i.e., unused) and its related refund transaction to Business Transaction. |
| 14 | Payments with no linked invoices or credit notes before conversion. | Process the payments to Business Transaction table. |
| 15 | Payment was reversed/refunded due to disputes or chargebacks before the conversion. | Skip the initial payment and its refund. You can identify this type of transaction using the Refund transaction status of Payment Reversal. |
| 16 | Payment date is before conversion date and it was reversed/refunded due to dispute or chargebacks after the conversion. | Process the initial payment and its refund. |
| 17 | A credit note is allocated to two invoices. The credit note date and one invoice is before conversion date and 2nd invoice is after conversion. | Process the credit note with the amount allocated for the 2nd invoice and process the 2nd invoice. Skip the 1st invoice. |
| 18 | A payment is allocated to two invoices. The payment date and one invoice is before conversion date and 2nd invoice is after conversion. | Process the payment with the amount allocated for the 2nd invoice and process the 2nd invoice. Skip the 1st invoice. |
Note
This conversion logic differs from the standard RevRec process. You may need to make manual adjustments in your accounting system for pre-conversion invoices and subscriptions. These adjustments ensure deferred revenue balances align correctly in RevRec Premium.
Configuring Custom Fields
You can configure custom fields for Customers, Products, and Subscriptions. After configuration, these fields sync from the Billing site and can be used for journal account mapping and aggregating journal entries before posting to your accounting system.

To configure custom fields:
-
Navigate to Settings > Accounting > Site Settings > Custom Field.
-
Click + to add a new record.
-
Enter the following details:
- Name: API name of the field
- Label: Display name
- Source: Choose Customer or Product
-
Enable the checkbox Include in Journal Posting if you want to use this field in journal mapping or aggregation.
-
Click Save on both the row and the top-right corner of the grid.
You can configure up to 25 custom fields.
Note
- The API Name and Display Name must match those defined in your billing site for data to sync correctly.
- If data flows from RevRec (via revenue export after period close), ensure reconciliation with RevRec records.
Configuring Business Entities
RevRec Premium allows you to organize and manage data across multiple business entities, similar to how they are defined in the Chargebee Billing site. Business entities help you separate financial data, configure entity-specific currencies and time zones, and ensure accurate accounting across regions or subsidiaries.
Enabling Business Entities
To enable the business entities,
- Navigate to Settings > Site Settings > Business Entities.
- Enable the toggle and click Save.
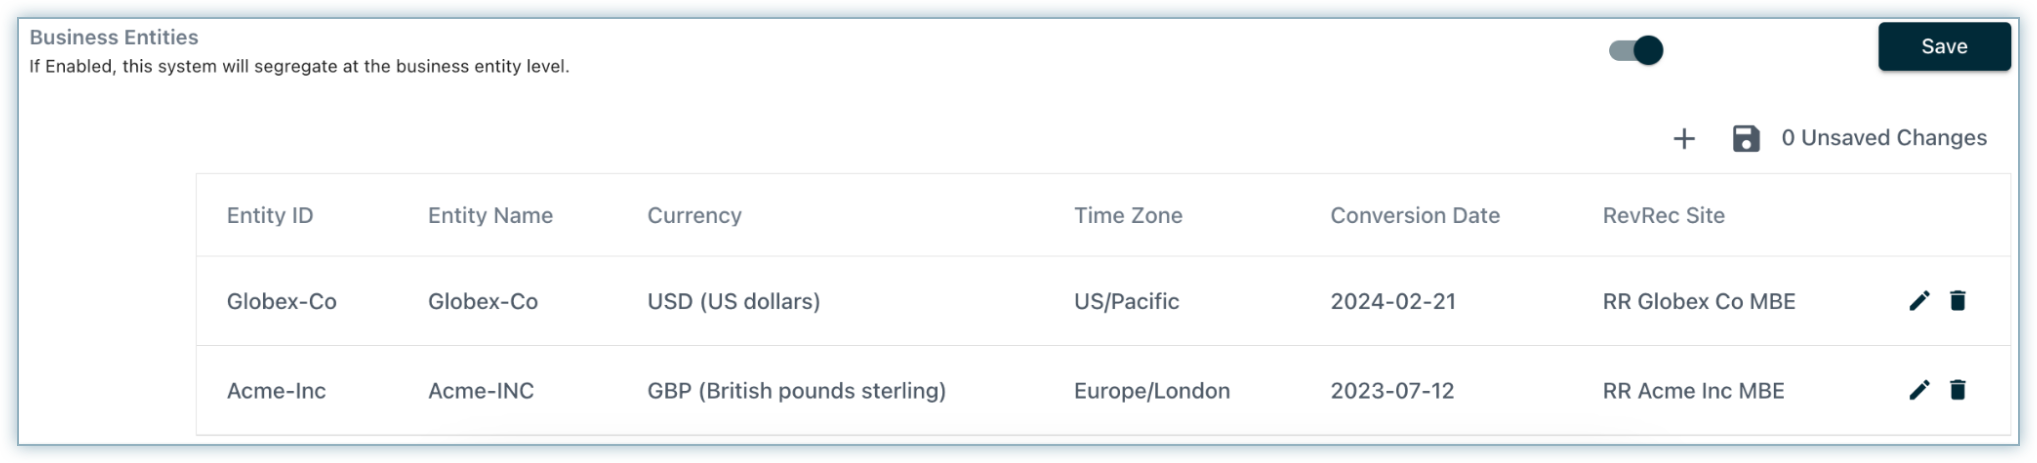
Populating Entity Details
If Multi-Business Entities (MBE) is enabled, you must populate the following fields in the Business Entities grid for every entity that will be in use:
| Field Name | Description |
|---|---|
| Entity Id | This is the ID of the entity defined in the Billing site. This must reconcile with the Entity ID in Billing. Note: This is a case-sensitive field. Ensure the value matches exactly with what is defined in Billing. |
| Entity Name | You can assign any descriptive name to the entity. This does not need to match the Billing system name. |
| Currency | Define the home currency for the entity. Each entity can have its own base currency for reporting. |
| Time Zone | Define the time zone for the entity. This is used to determine period boundaries and ensure transactions are allocated correctly. |
| Conversion Date | Specify the conversion date for the entity. |
| RevRec Site | Map the entity to its corresponding RevRec site. |
Differentiating Revenue Business Events by Entity
To differentiate the revenue business events by entity,
- Add a custom field in the Custom Field grid.
- Select the Business Entity ID? checkbox.
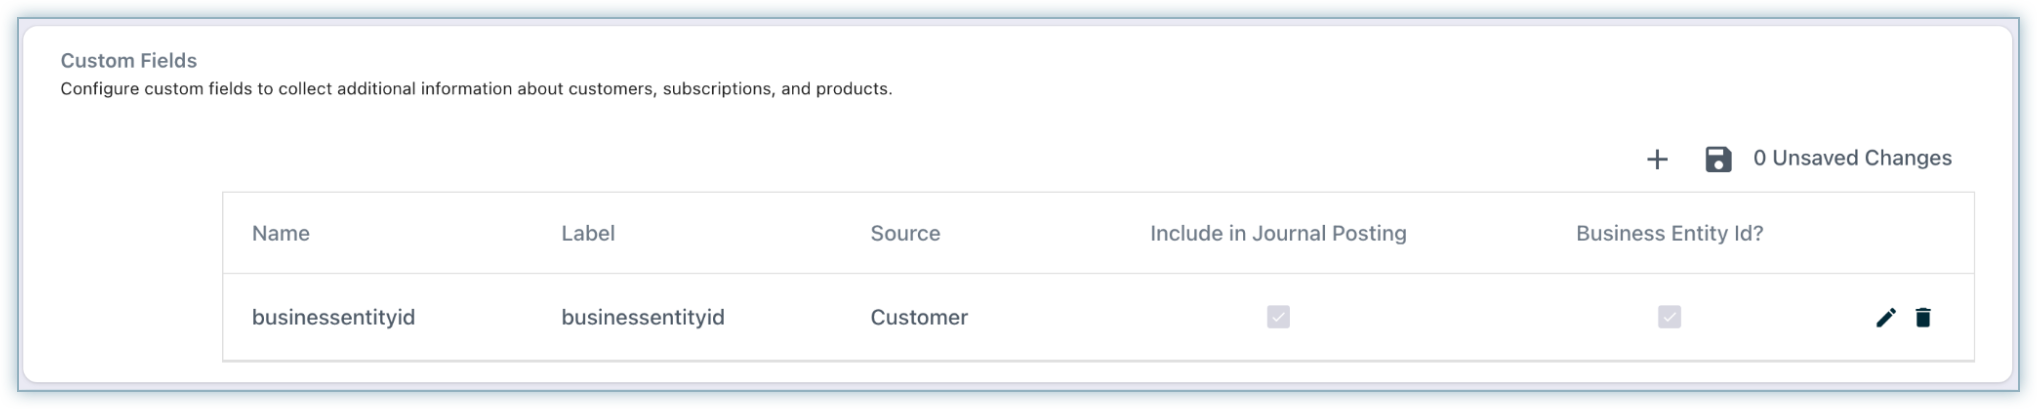
Note
The custom field name must match the API Name in the RevRec tenant to ensure proper entity tagging.
Clearing Business Entity Data
RevRec Premium provides flexibility to clear data at either the entity level or across all entities in the tenant.
To clear data for a specific entity:
- Navigate to Settings > Accounting.
- Click Clear Business Entity.
- Confirm the action by entering the entity name.

To Clear data across all entities:
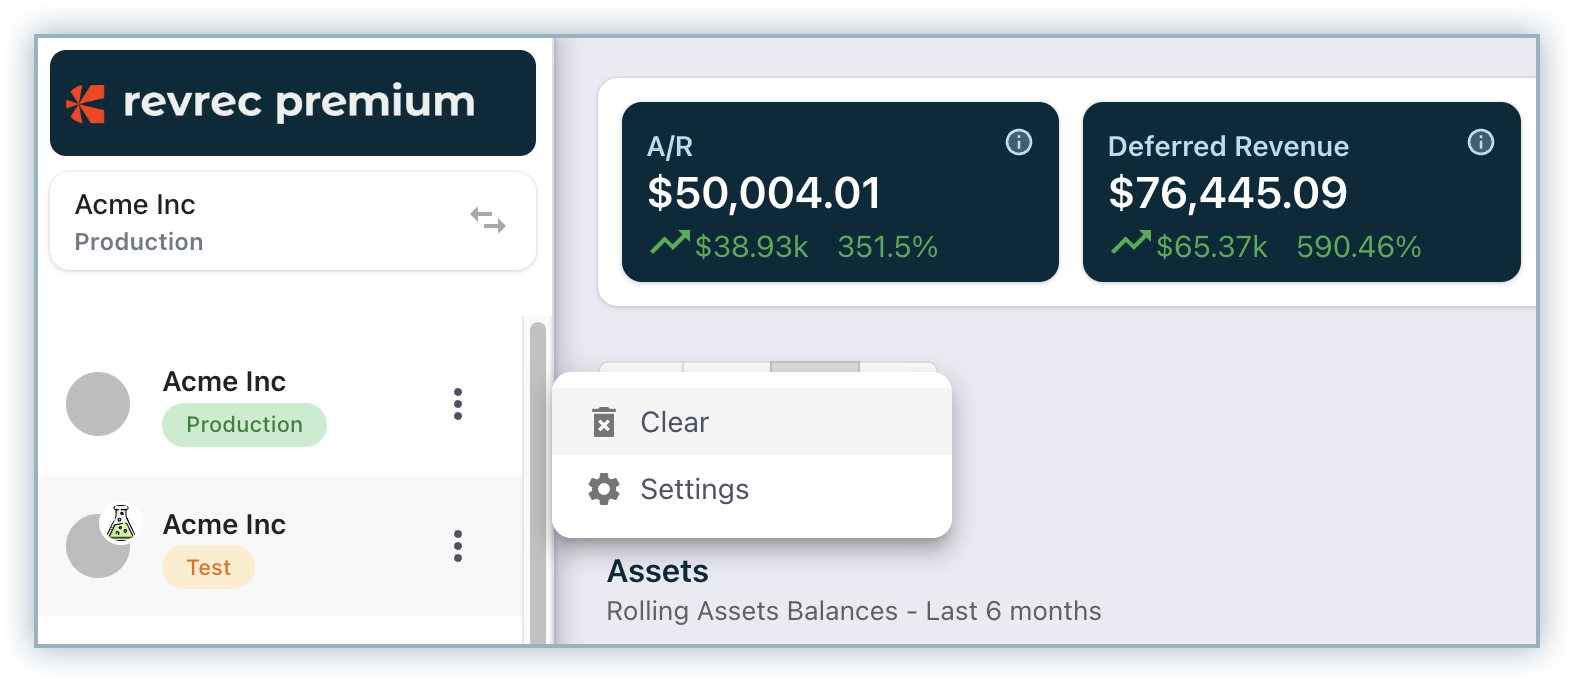
Use the tenant-wide clear option available on the same page.
Warning
Clearing data is irreversible. Always ensure that all backups and reconciliations are complete before performing this action.
Was this article helpful?