Setting Up and Managing Sandbox Sites
Overview
The Multi-Sandbox feature allows you to create and manage additional sandbox sites beyond your primary test site. These additional sandboxes offer a safe and flexible environment for experimenting with new features and configurations before deploying them to your live site.
You can use additional sandboxes to:
- Try out new or beta features.
- Safely test one-way settings (e.g., multi-entity, multi-decimal) that cannot be reversed once enabled.
- Run Time Machine without impacting your main staging or production environments.
Most customers use their main test site as a staging environment, keeping its configuration aligned with the live site. This limits opportunities to explore new functionality or perform risk-free testing. The Multi-Sandbox feature removes this constraint by providing dedicated, isolated environments for experimentation and adoption.
By providing more flexibility to test and adopt new capabilities, this feature helps reduce risk while supporting continuous improvement. Customers who regularly explore and enable new features tend to have better retention and lower churn rates.
How to Create a Sandbox Site
You can create a new sandbox site in multiple ways, depending on where you are in the Chargebee application.
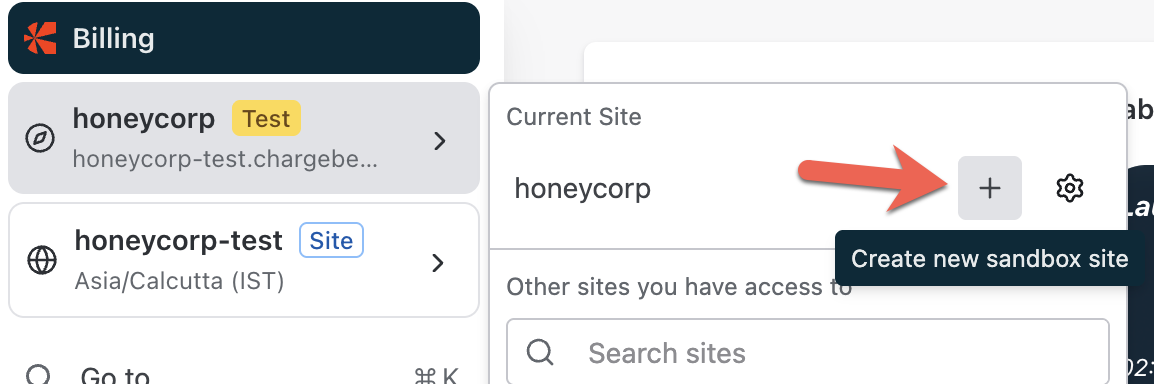
Option 1: From the Left Navigation Bar
- In the left navigation panel, locate the Sandbox section.
- Click + Create new sandbox site to create a new sandbox.
Option 2: From Feature Settings Pages
Some settings — such as Multi-entity or Multi-decimal support— cannot be turned off once they are enabled. On these feature pages, a "Try it in a New Site" card appears on the right-hand side.
- Click Create Sandbox from this card to open the sandbox creation page.
- Proceed with setup to safely test the feature before enabling it on your main site.

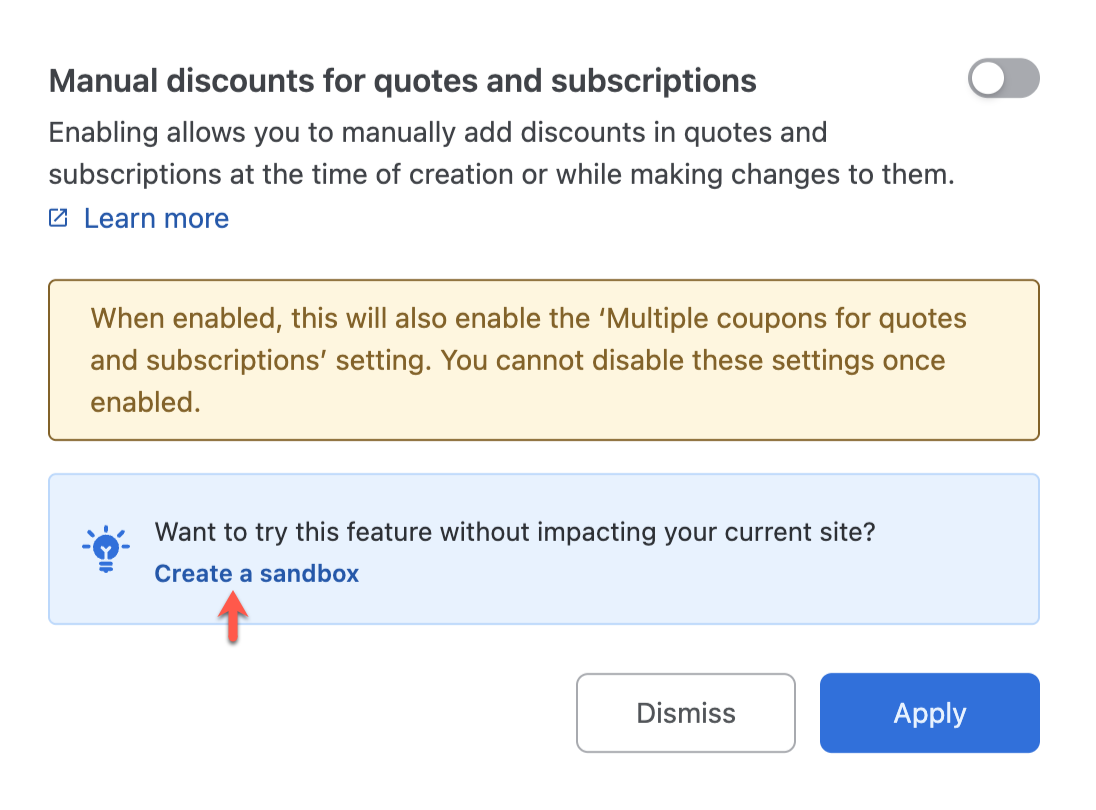
Option 3: From Feature Pop-ups
For settings that do not have a dedicated page, a pop-up will display the option to create a sandbox before enabling the feature.
In the pop-up, click Create a Sandbox to generate a new sandbox environment for testing.
Steps to Create a Sandbox Site
Once you've opened the sandbox creation screen, follow these steps:
-
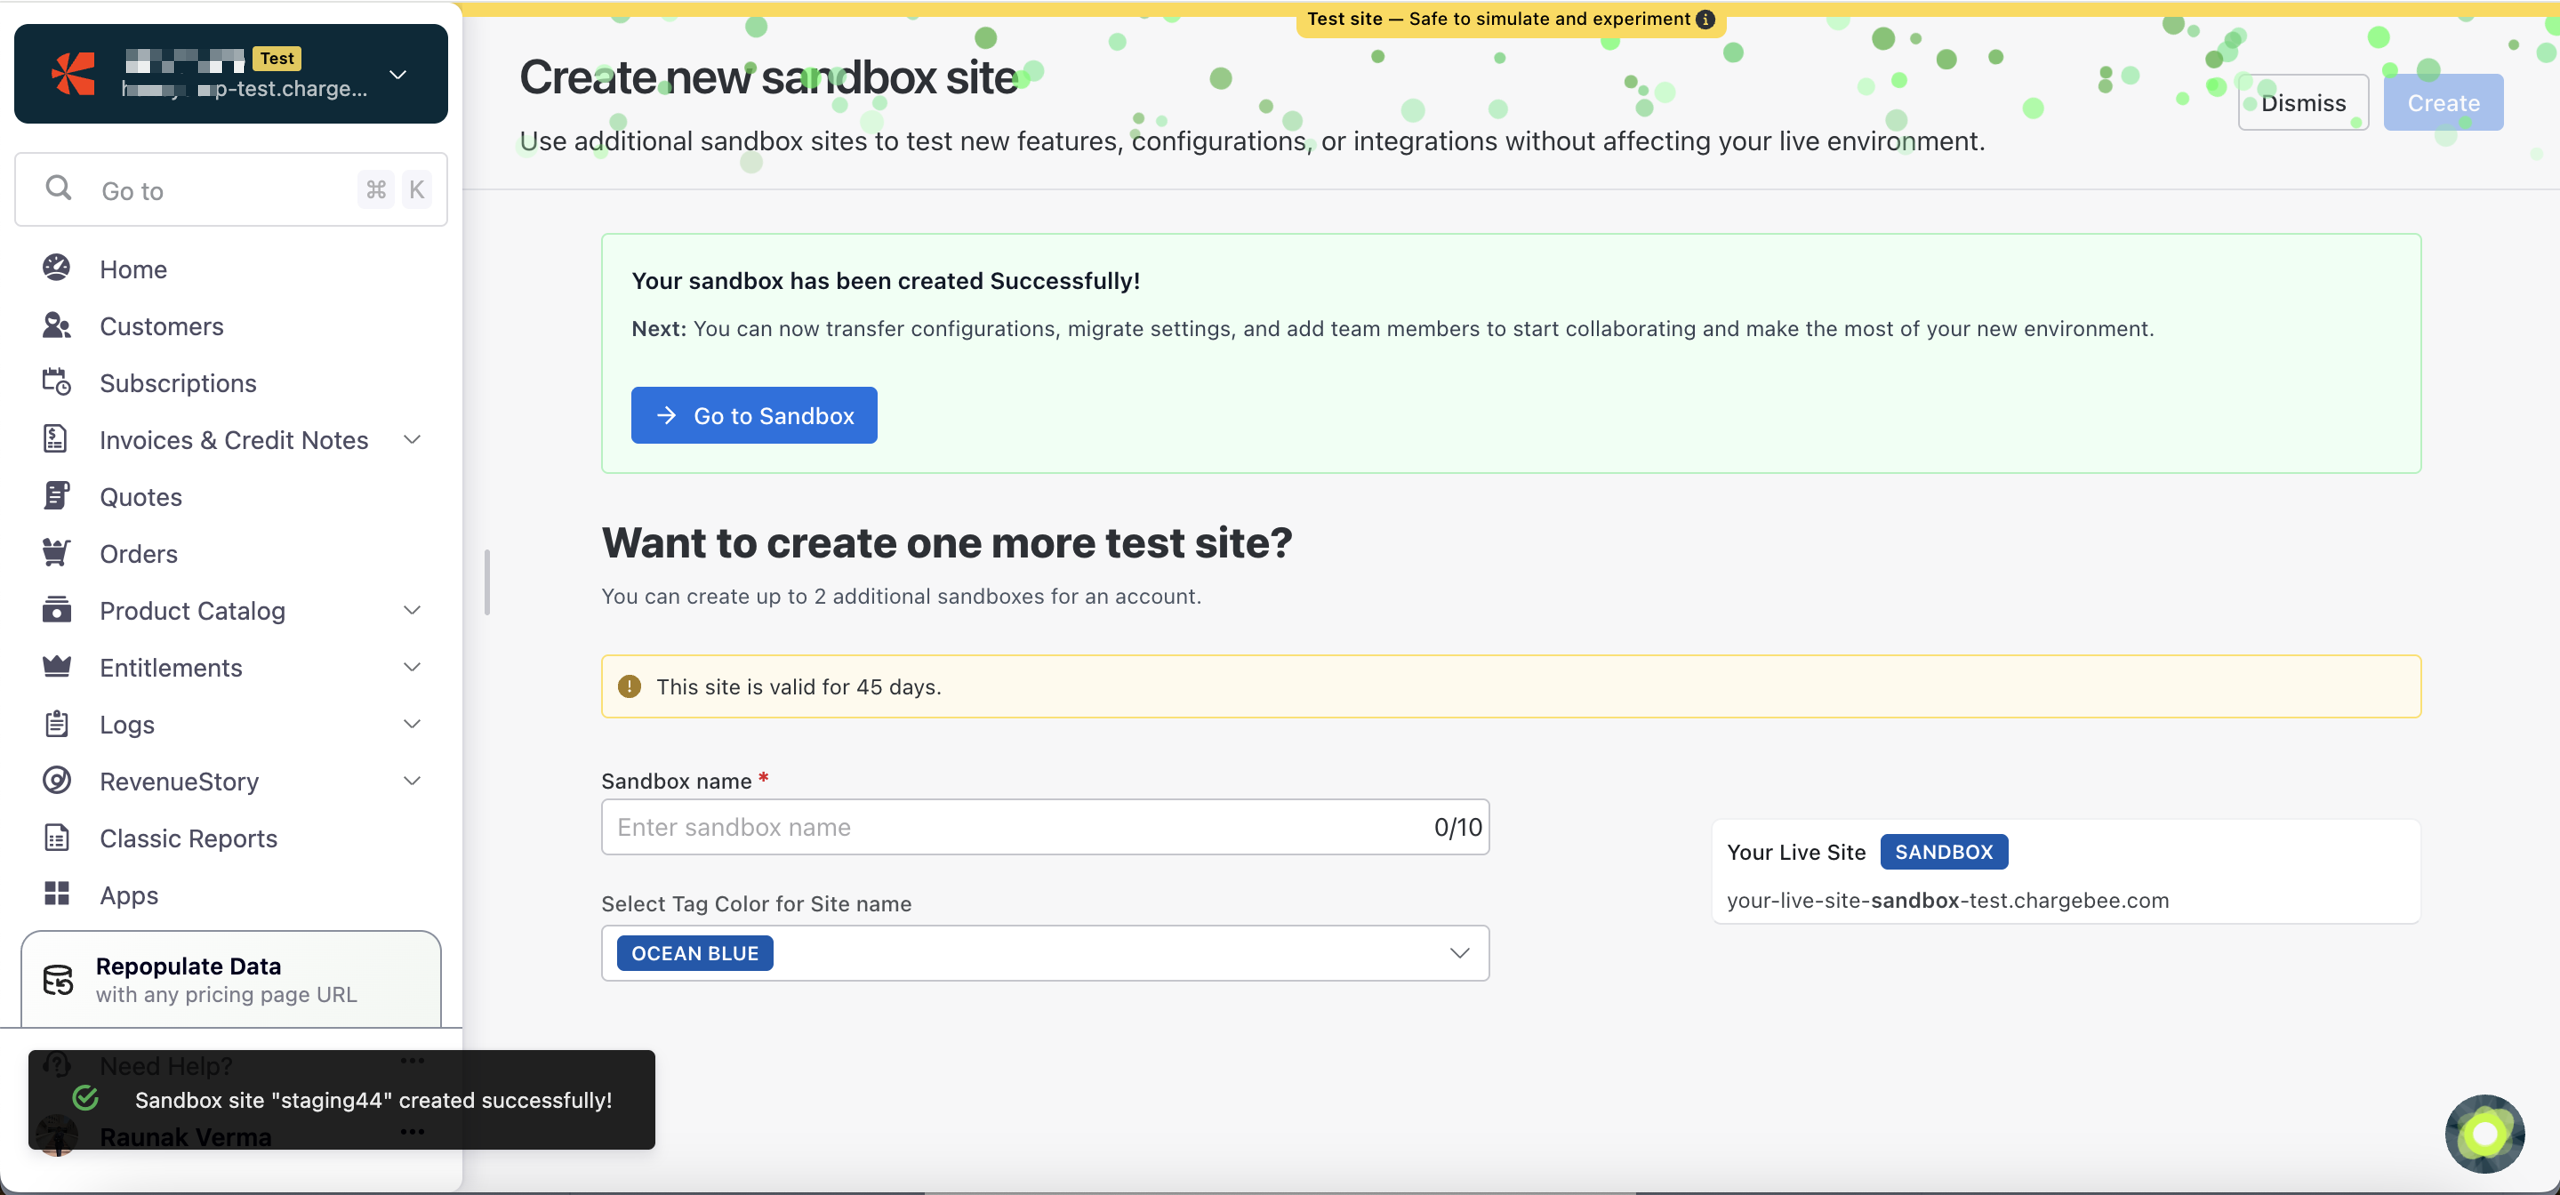
Enter Sandbox Details
-
Enter a Sandbox name (up to 10 characters).
-
Choose a Tag Color for easy visual identification.
-
The sandbox URL will follow this format:
<site-name>-<sandbox-name>-test.chargebee.comExample:
honeycorp-staging44-test.chargebee.com

-
-
Create the Sandbox
- Click Create to generate your sandbox.
- Once complete, a success message confirms creation.
-
Access the Sandbox
- Click Go to Sandbox to open your new site.
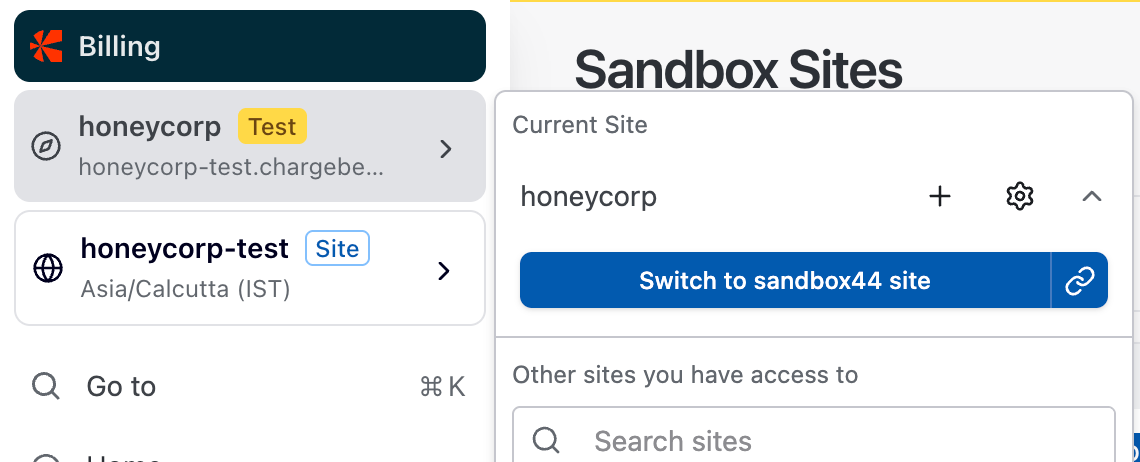
- You can also switch between sandboxes using the Go to [Sandbox Name] buttons in the navigation bar.
-
Manage Existing Sandboxes
- Click Manage Sandbox Site to view all active and expired sandboxes.

- The list shows:
- Sandbox name and URL
- Creator's email
- Expiry (45 days remaining for free sandboxes)
- Date created

- Click Manage Sandbox Site to view all active and expired sandboxes.
Note
- Each sandbox functions like a test site, with full configuration and testing capabilities.
- You can create up to two additional sandboxes per account.
- Each sandbox remains valid for 45 days and can be renewed or recreated as needed.
Limitations
Sandbox sites are designed for lightweight experimentation and testing. As such, certain usage and data limits apply to maintain optimal performance.
The following limits currently apply to the free version of sandboxes:
| Category | Limit |
|---|---|
| Customers | 2,500 |
| Subscriptions | 2,500 |
| Invoices, Credit Notes, etc. | 5,000 |
| Product Families | 10 |
| Plans, Addons, Coupons, Entitlements, Item Prices | 50 each |
| Team Members (Invited Users) | 3 |
| Webhooks | 3 |
| Active Sandboxes per Account | 2 |
Feature Restrictions
The following feature limitations apply to additional sandbox sites created using the Multi-Sandbox feature:
- To copy configurations (including custom fields) from another site, use Transfer Configuration.
Expiry
- Each sandbox site remains active for 45 days from creation.
- Once expired, you can recreate a new sandbox site using the same process.
- Expired sandboxes move to the Expired tab under Manage Sandbox Site for your reference.
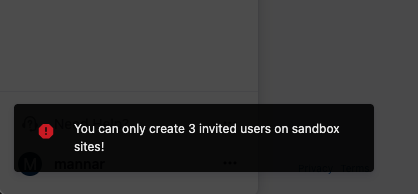
Error Messages
When you reach a sandbox limit, you'll see an on-screen error notification.
Examples:
You can only create three invited users on sandbox sites!
You can only create three webhooks on sandbox sites!

Note
- Sandbox environments are intended for testing and evaluation only.
- Some advanced integrations or production-level API volumes may not be supported.
- Data from sandbox sites does not carry over automatically to live environments.
SAML Single Sign-On
New sandboxes do not inherit SAML Single Sign-On from your existing test or live sites. When you create an additional sandbox, you must configure SAML Single Sign-On for that sandbox separately, following the same process used for your test and live sites.
Was this article helpful?