How to enable Net-D for invoices?
Problem Statement
You want to know how to enable net-d for invoices.
Solution
Scope
Configure payment terms/ Net-D for invoices
Enable Net-D for one-time invoices
Can we have invoices created with Payment Terms or Net D with "Auto collection" status as "On"?
How can I configure custom Net D in Chargebee?
How to display Payment terms in Invoice?
Summary
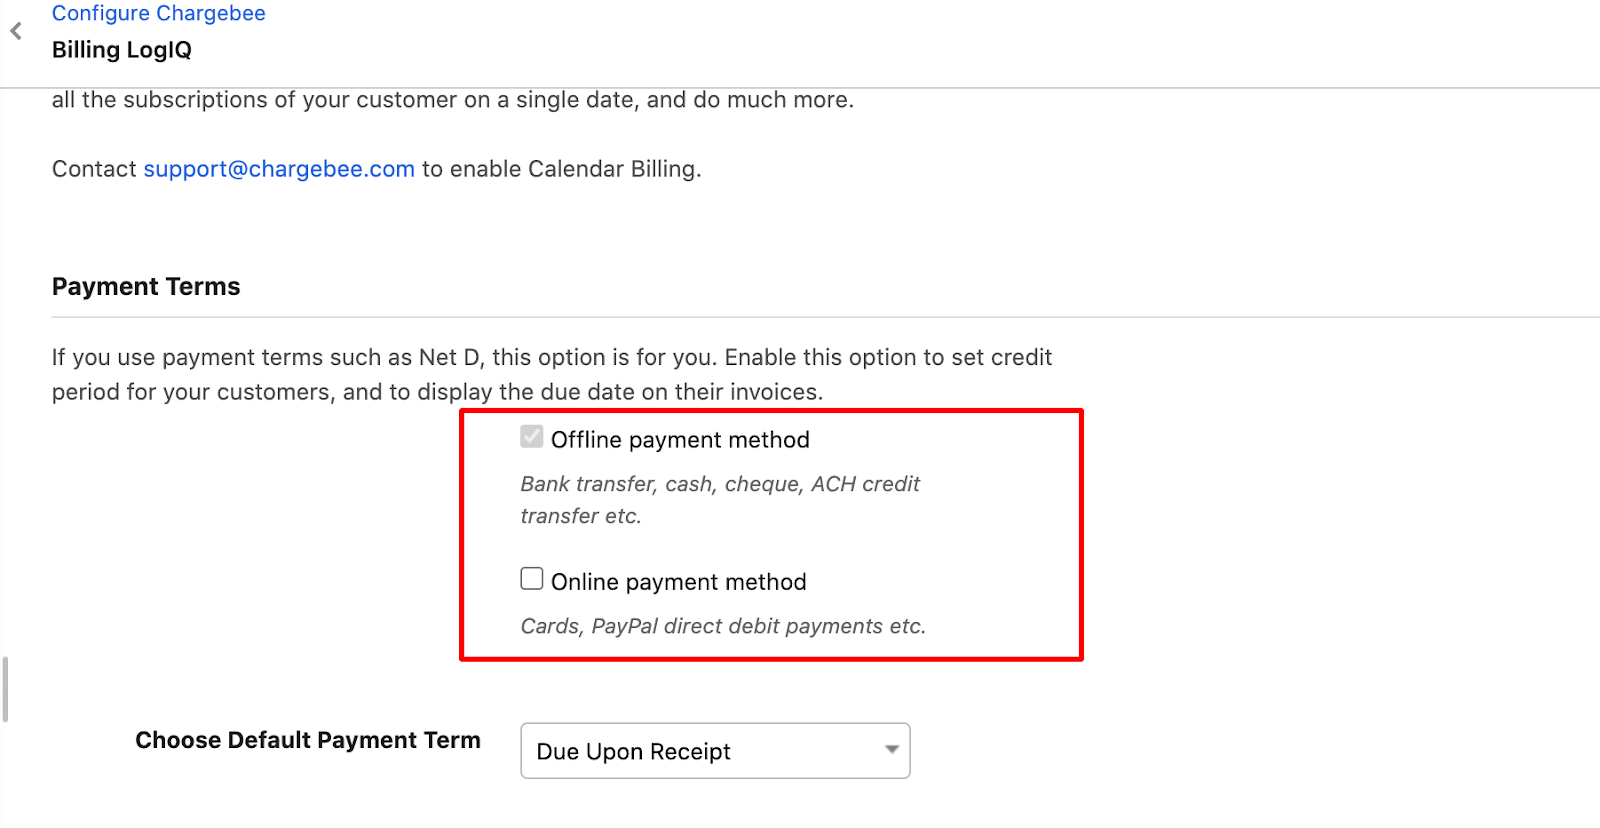
By default, the payment terms feature is available for the Offline payment method (auto collection OFF) at the site Settings > Configure Chargebee > Billing LogIQ > Payment Terms. Please Contact Chargebee Support to enable the payment terms for the online payment methods as well (auto collection 'ON').
Note
Payment terms (Net-D) - This feature is currently available on specific plans. Please refer to the plans and pricing page.
To display the Payment Term and Due Date in the Invoice PDF, go to Settings > Configure Chargebee > Invoices & Credit Notes > 'Invoices' tab > Enable 'Payment Terms & Due Date' > Apply Changes.
Note: Net-D can be setup for one-time invoices as well. If you are an existing user, Contact support to get this enabled for your Chargebee site.
Enable Net D for Chargebee Invoices
To include Net D as a payment term in your invoices,
-
Navigate to Settings > Configure Chargebee > Billing LogIQ > Payment Terms and click Enable Payment Terms for Online and Offline payment methods
-
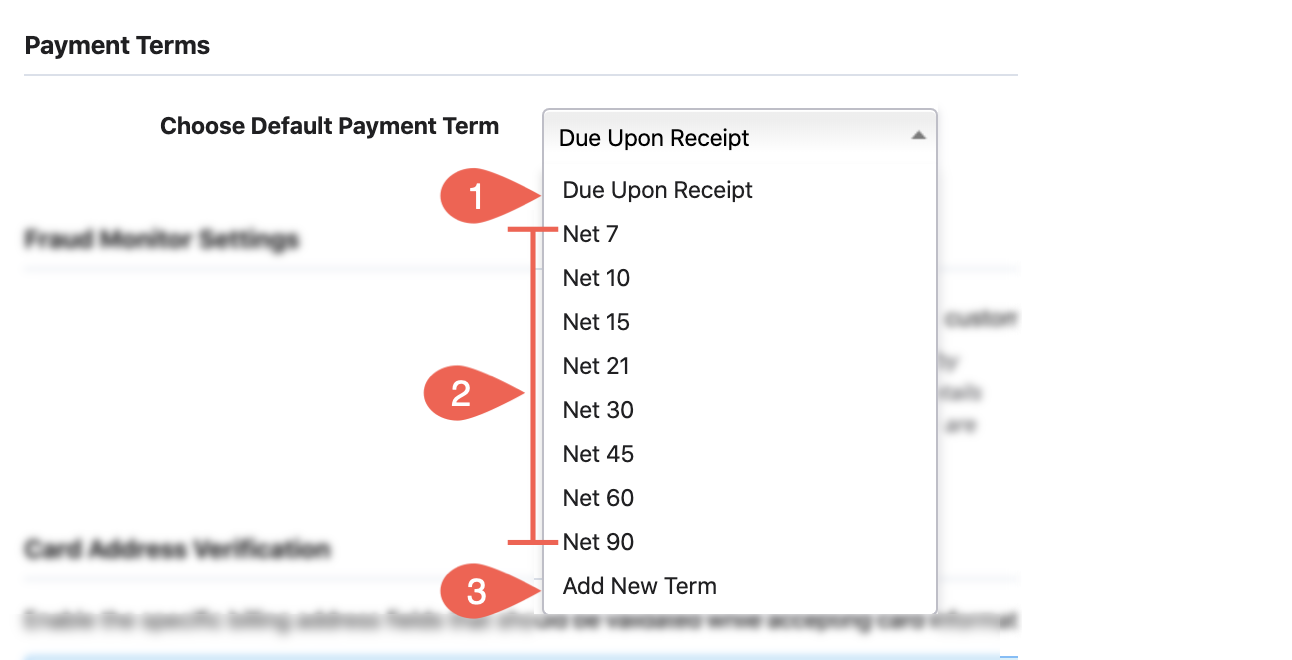
Set a default payment term for the site using Choose Default Payment Term.
-
The options are as shown in the screenshot above:
- (1) Due Upon Receipt: Use this if you don't want to use any specific payment terms.
- (2) Net 7 to Net 90: Those are the payment terms available out-of-the-box in Chargebee.
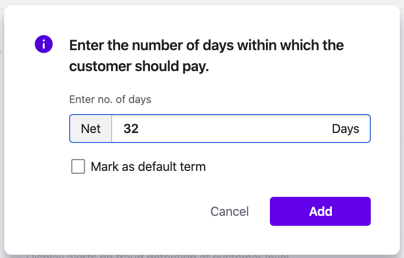
- (3) Add New Term: Allows you to add a new Net D term to the list of available options. (See screenshot below)
- This new term can range from 1 to 180 days.
- Use the Mark as default term option to set it as the site default. Note that, this does not change the net D setting already applied to your existing customers.
-
-
When net D is enabled, the payment term chosen is applied to only new customer records created.
-
Additionally, the payment term chosen can also be stored with new customer records created with auto-collection 'ON'. Contact support to enable this feature.
Once Payment Terms is enabled, invoices will be created in Posted status for Active subscriptions.
To display the Payment Term and Due Date in the Invoice PDF, go to Settings > Configure Chargebee > Invoices & Credit Notes > 'Invoices' tab > Enable 'Payment Terms & Due Date' > Apply Changes.
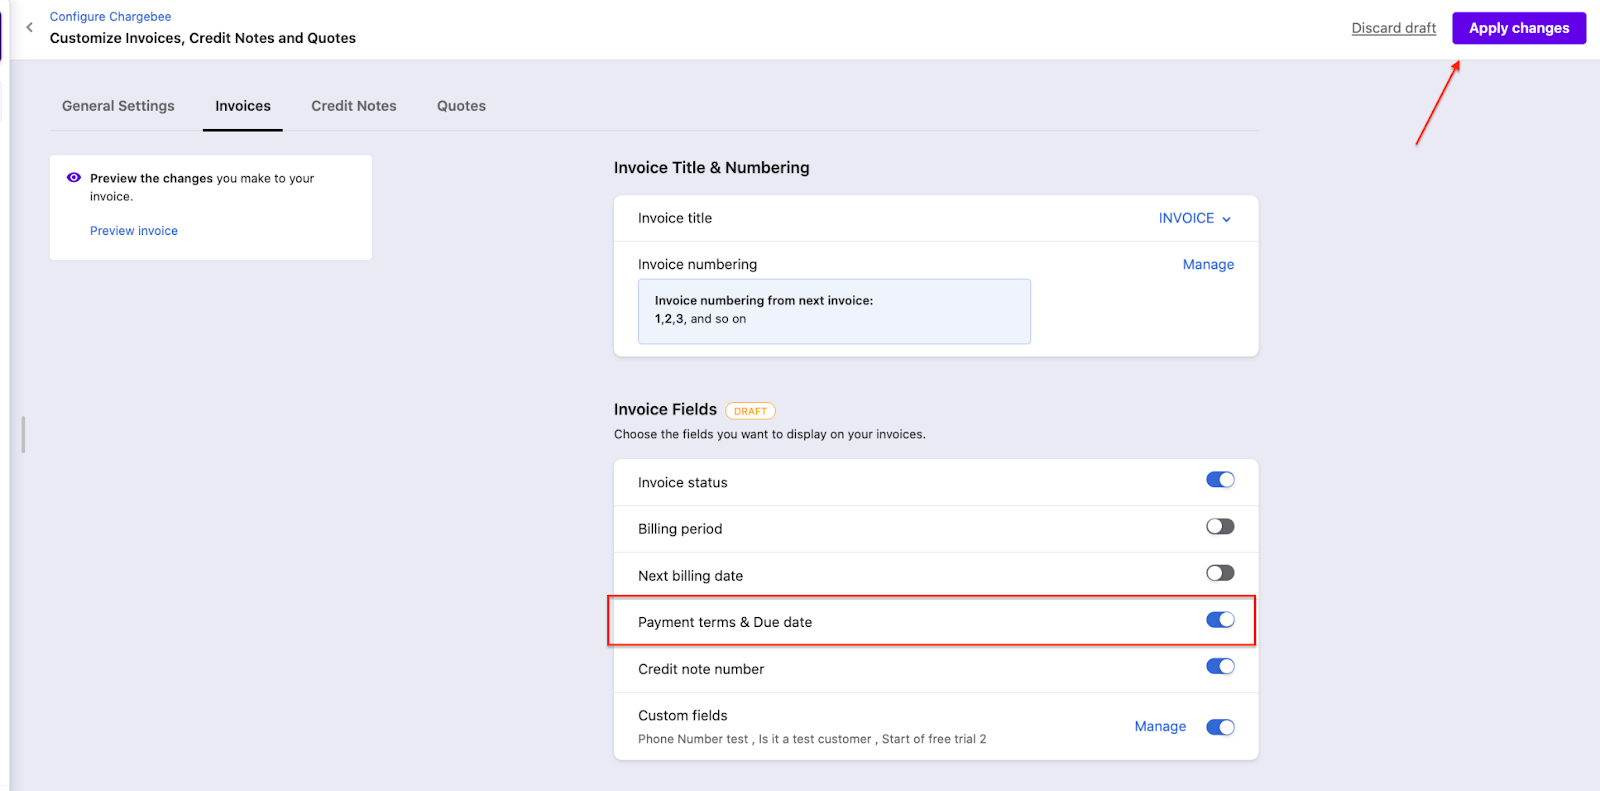
The invoice will now show what the payment term is (Net 15 or Net 30 days) and the due date for the payment, which is the date on which the invoice is generated + no. of days set as payment terms.
Note - For both the above cases, existing customer records are not affected.
To enable Payment terms for One-time Payments
By default Payment Terms for recurring invoices will be available on the Chargebee UI under Billing LogIQ. However, Payment terms for One-time Charges will not be available by default, and this feature can be enabled on demand. To enable "Payment Term for one-time invoice", please reach out to our support from here.
Was this article helpful?