Amazon Payments
Checkout by Amazon is an additional payment method you can offer customers with your Amazon Buyer Account. During checkout, your customers can choose to transact with Pay with Amazon. However, to complete the transaction, customers are required to sign in to their Amazon account and authorize all payments.
After checkout is completed using this payment method, the billing agreement is saved in Chargebee and used for all future payments. Additionally, customers can change their payment methods through the customer portal.
Integrate Amazon Pay with Chargebee
This integration must be configured on both your Chargebee and Amazon Merchant sites. Follow the steps below to configure:
Configuration on Chargebee
Follow these steps to connect your Amazon Pay account with your Chargebee site:
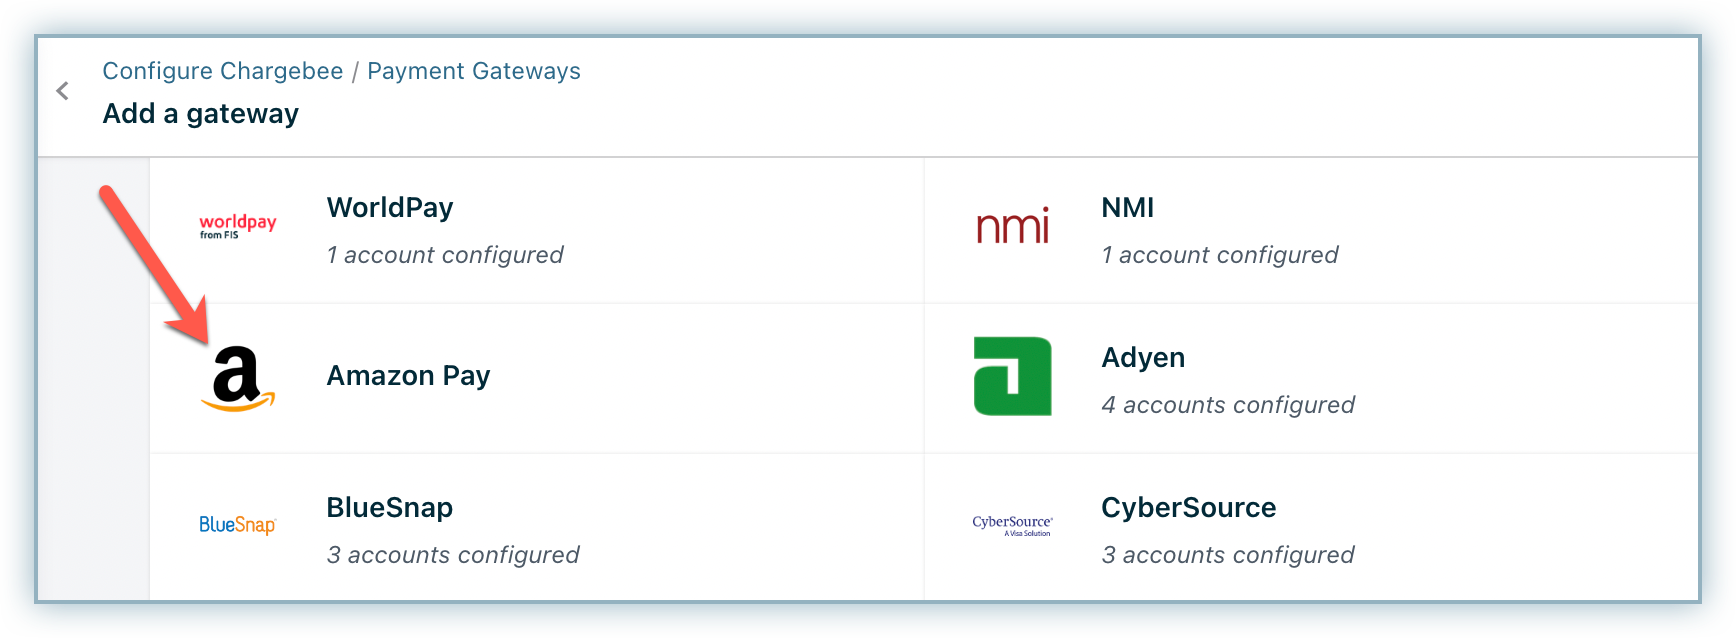
- Log in to your Chargebee site.
- Click Settings > Configure Chargebee > Payment Gateways.
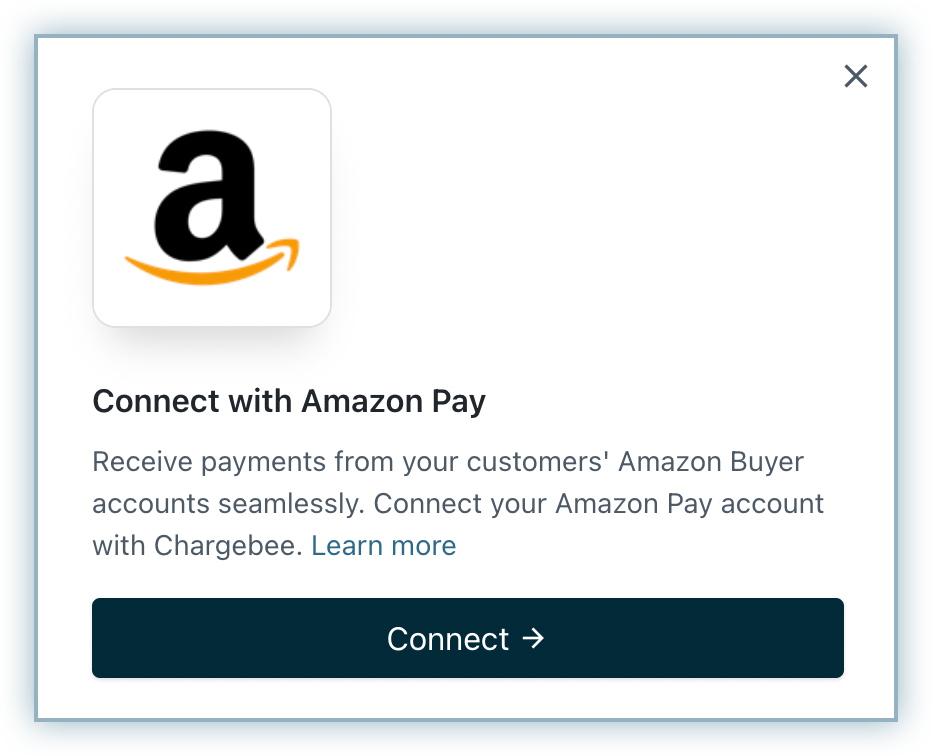
- Click Add Gateway and then click Amazon Pay.
- Click Connect to initiate configuring Amazon Pay.
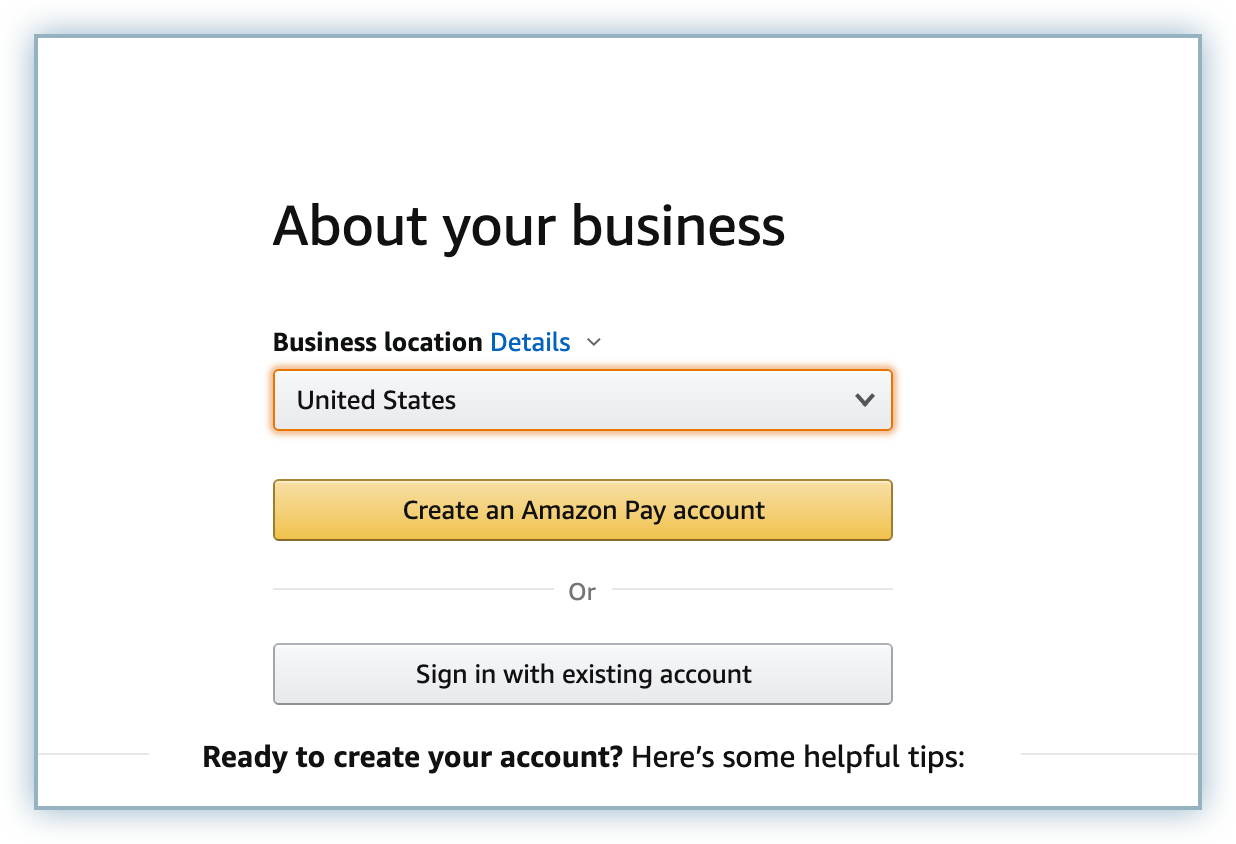
- Create an Amazon Pay account or sign in to an existing Amazon merchant account.
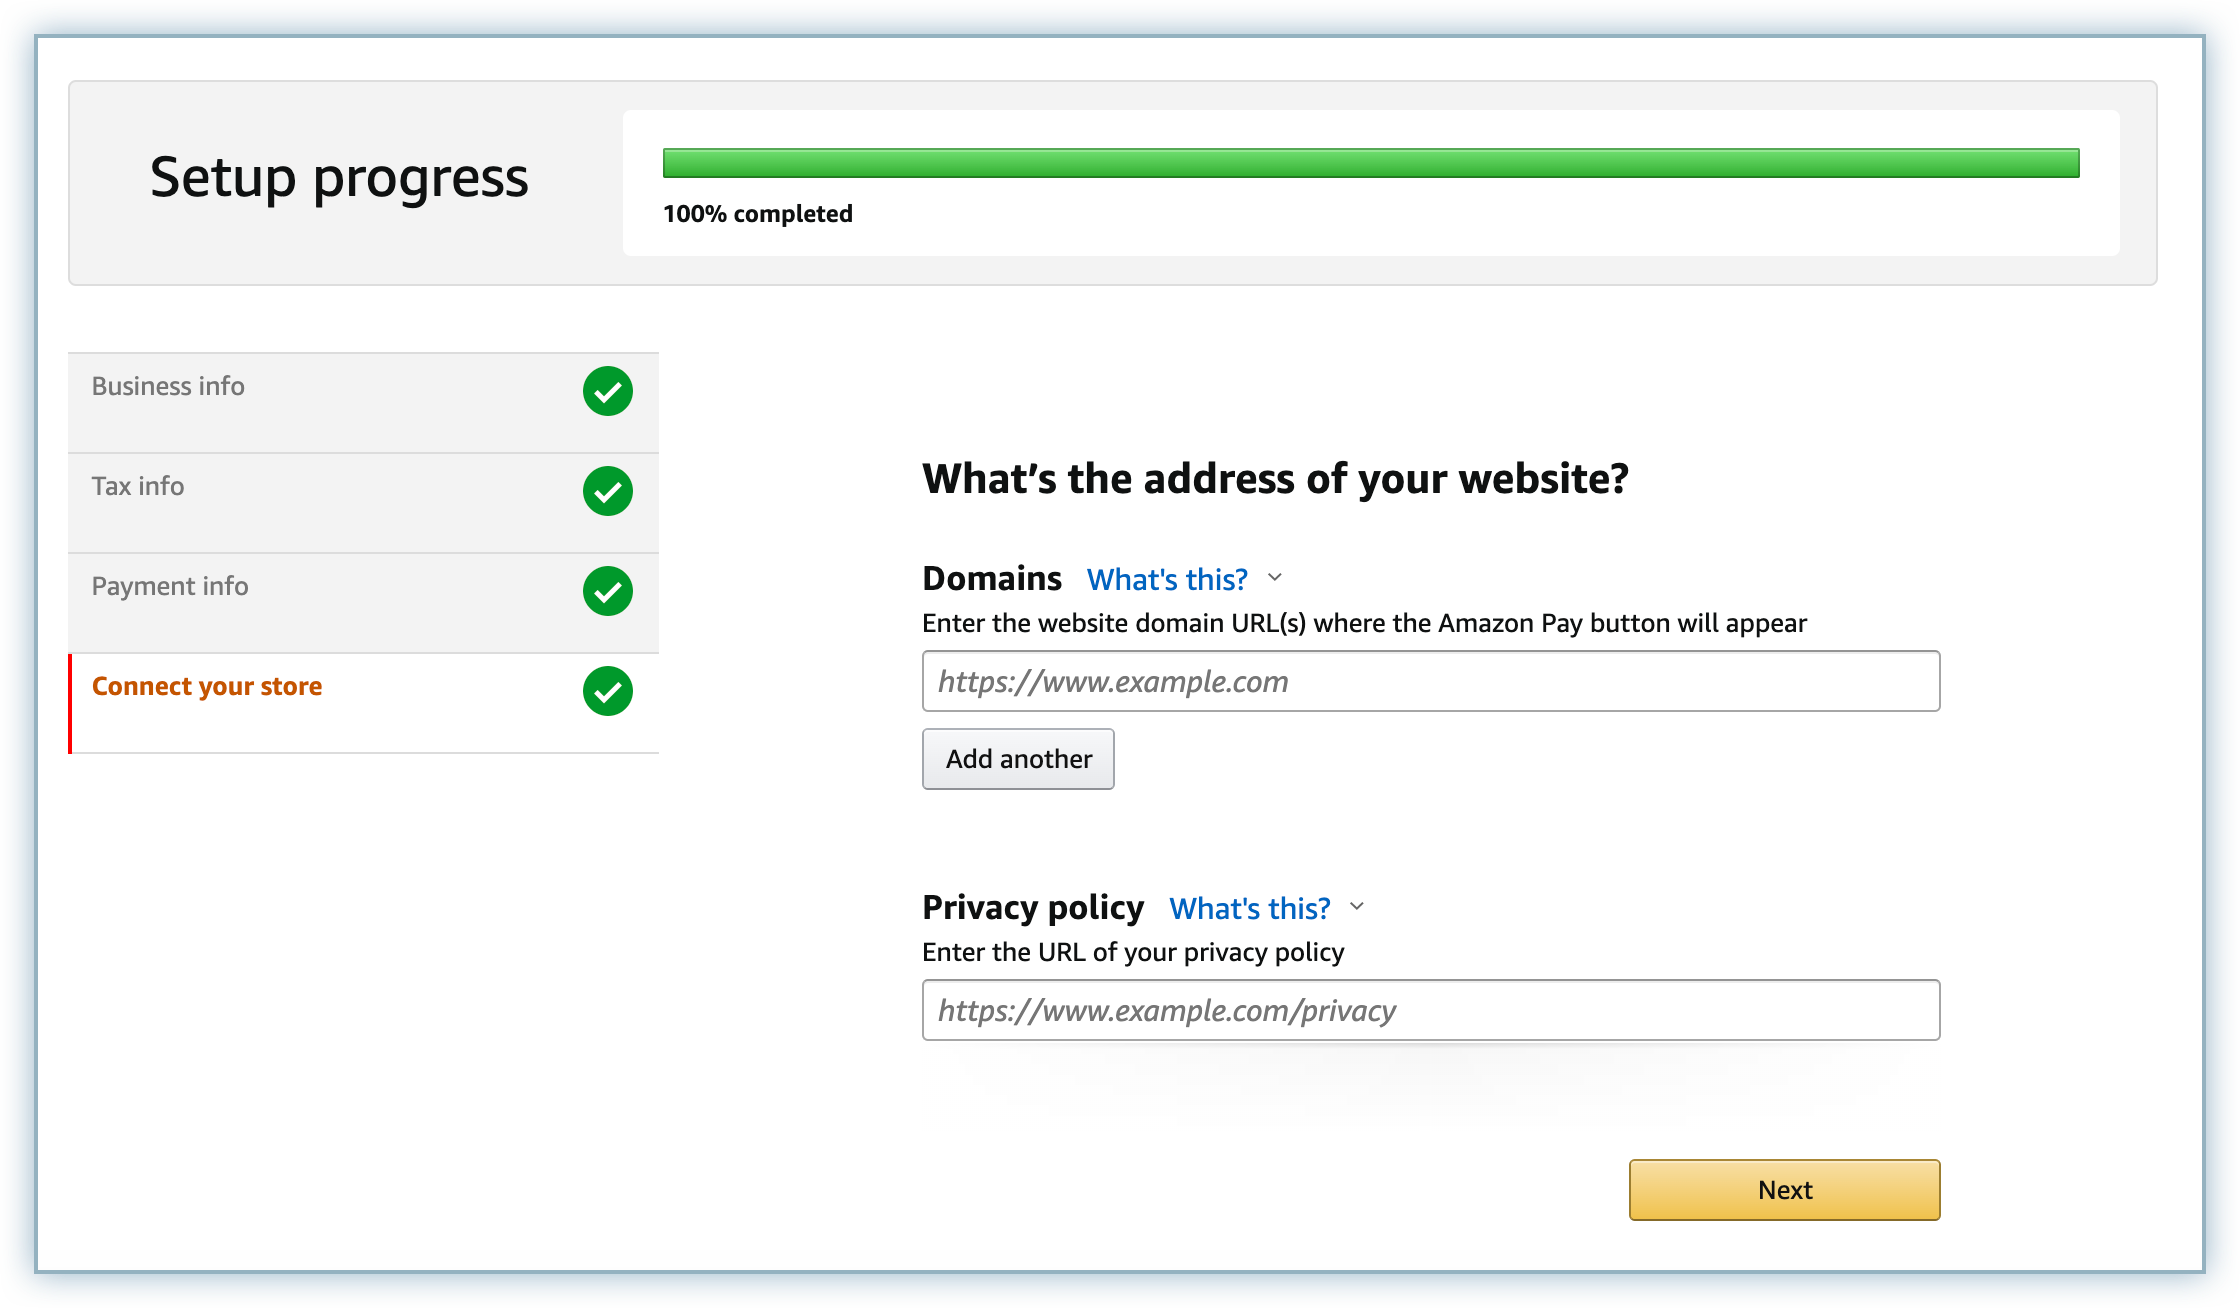
- Specify the following details to connect your store:
- Domains: The URL(s) for the page(s) where you would like the Amazon Pay button to appear.
- Privacy Policy: The URL to the page that houses your privacy policy. Click here for Chargebee's privacy policy. Click Add Gateway.
- Click Next.
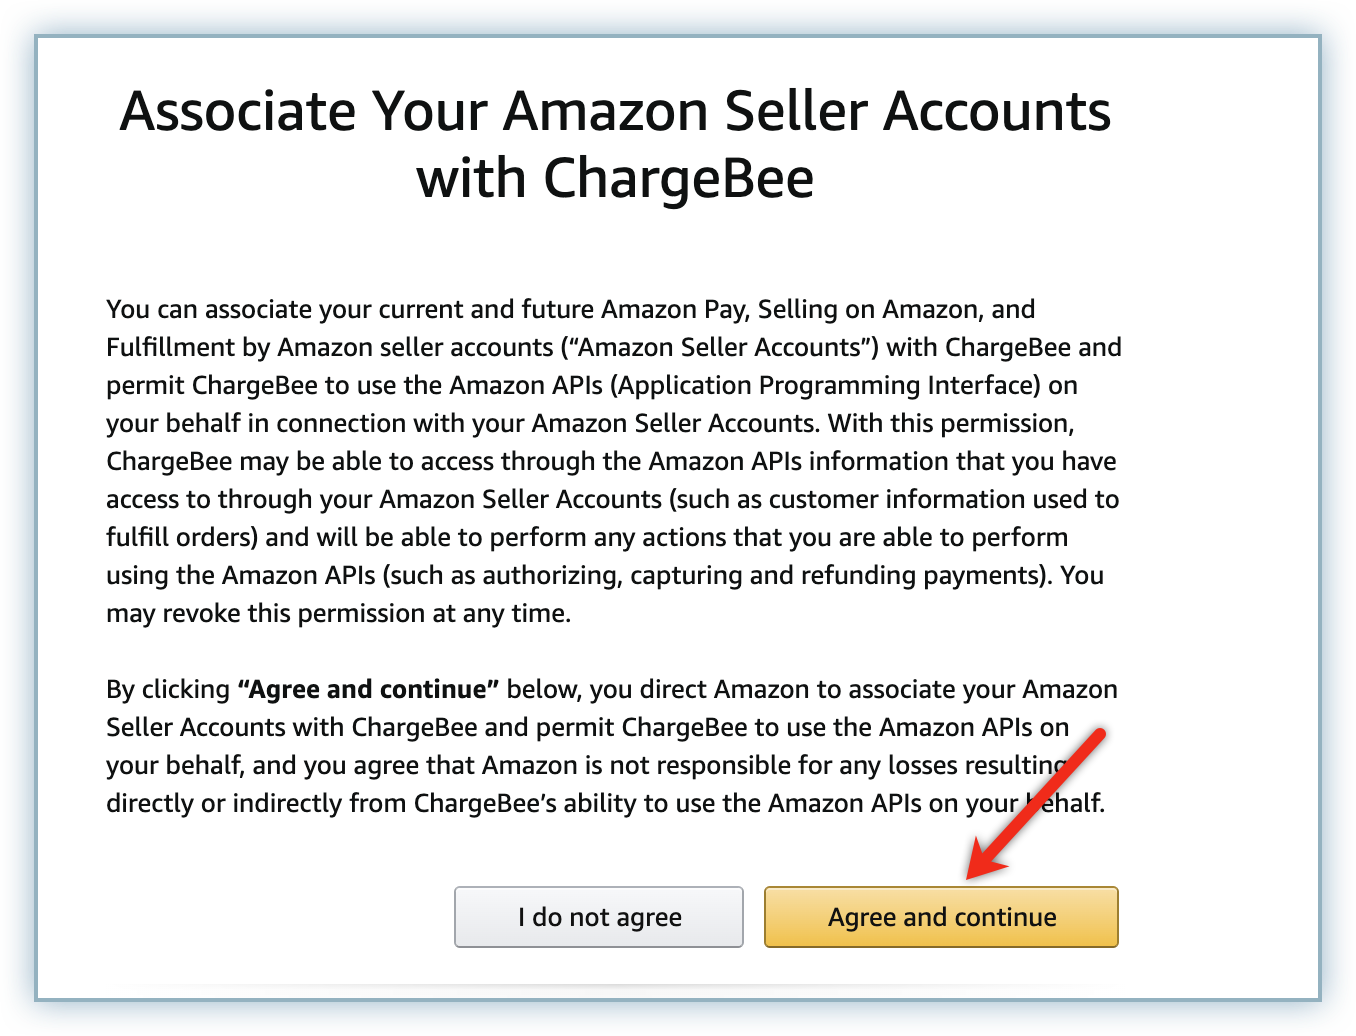
- Review the terms and conditions and click Agree and continue.
- Click Transfer API keys to configure Amazon Pay in your Chargebee store.
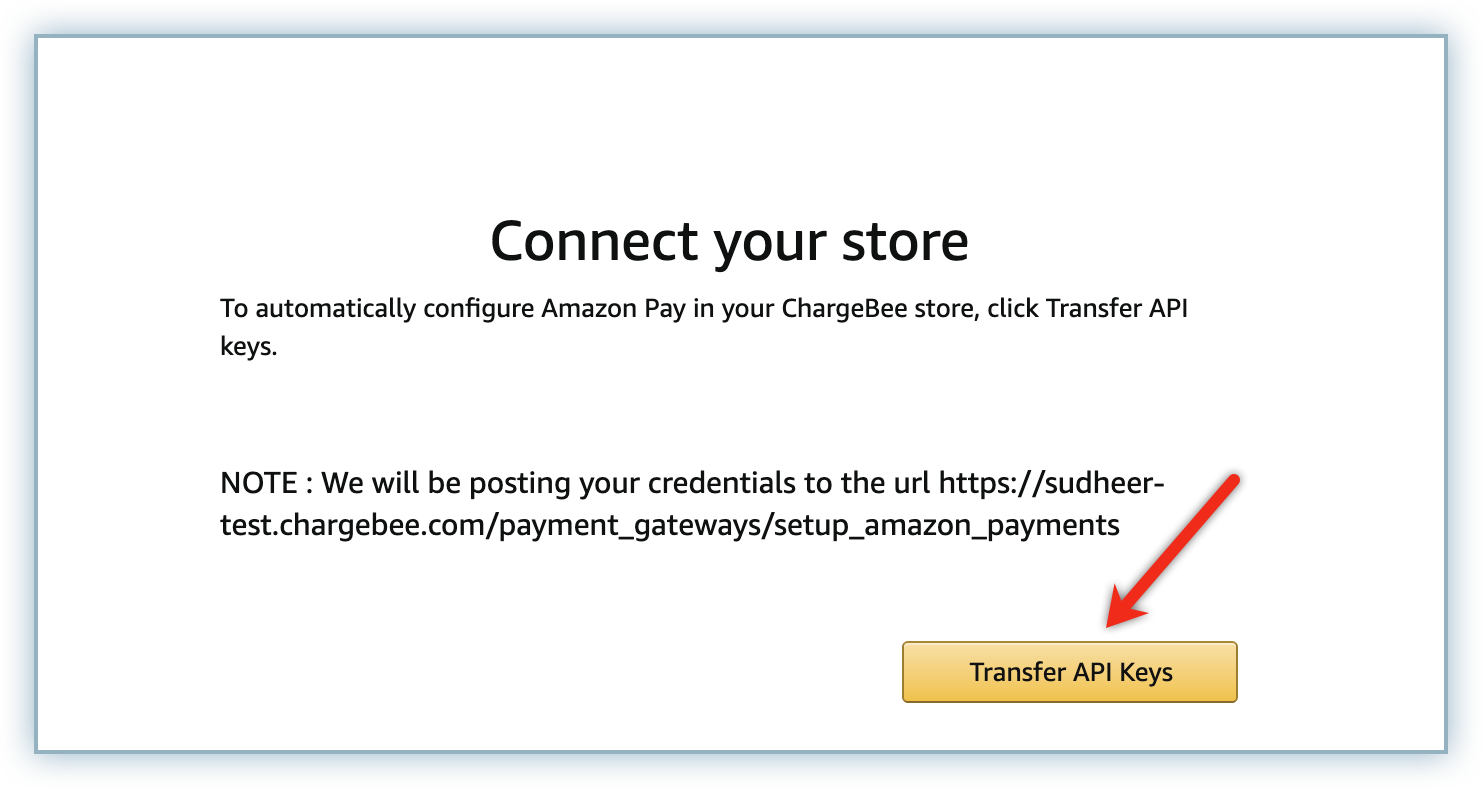
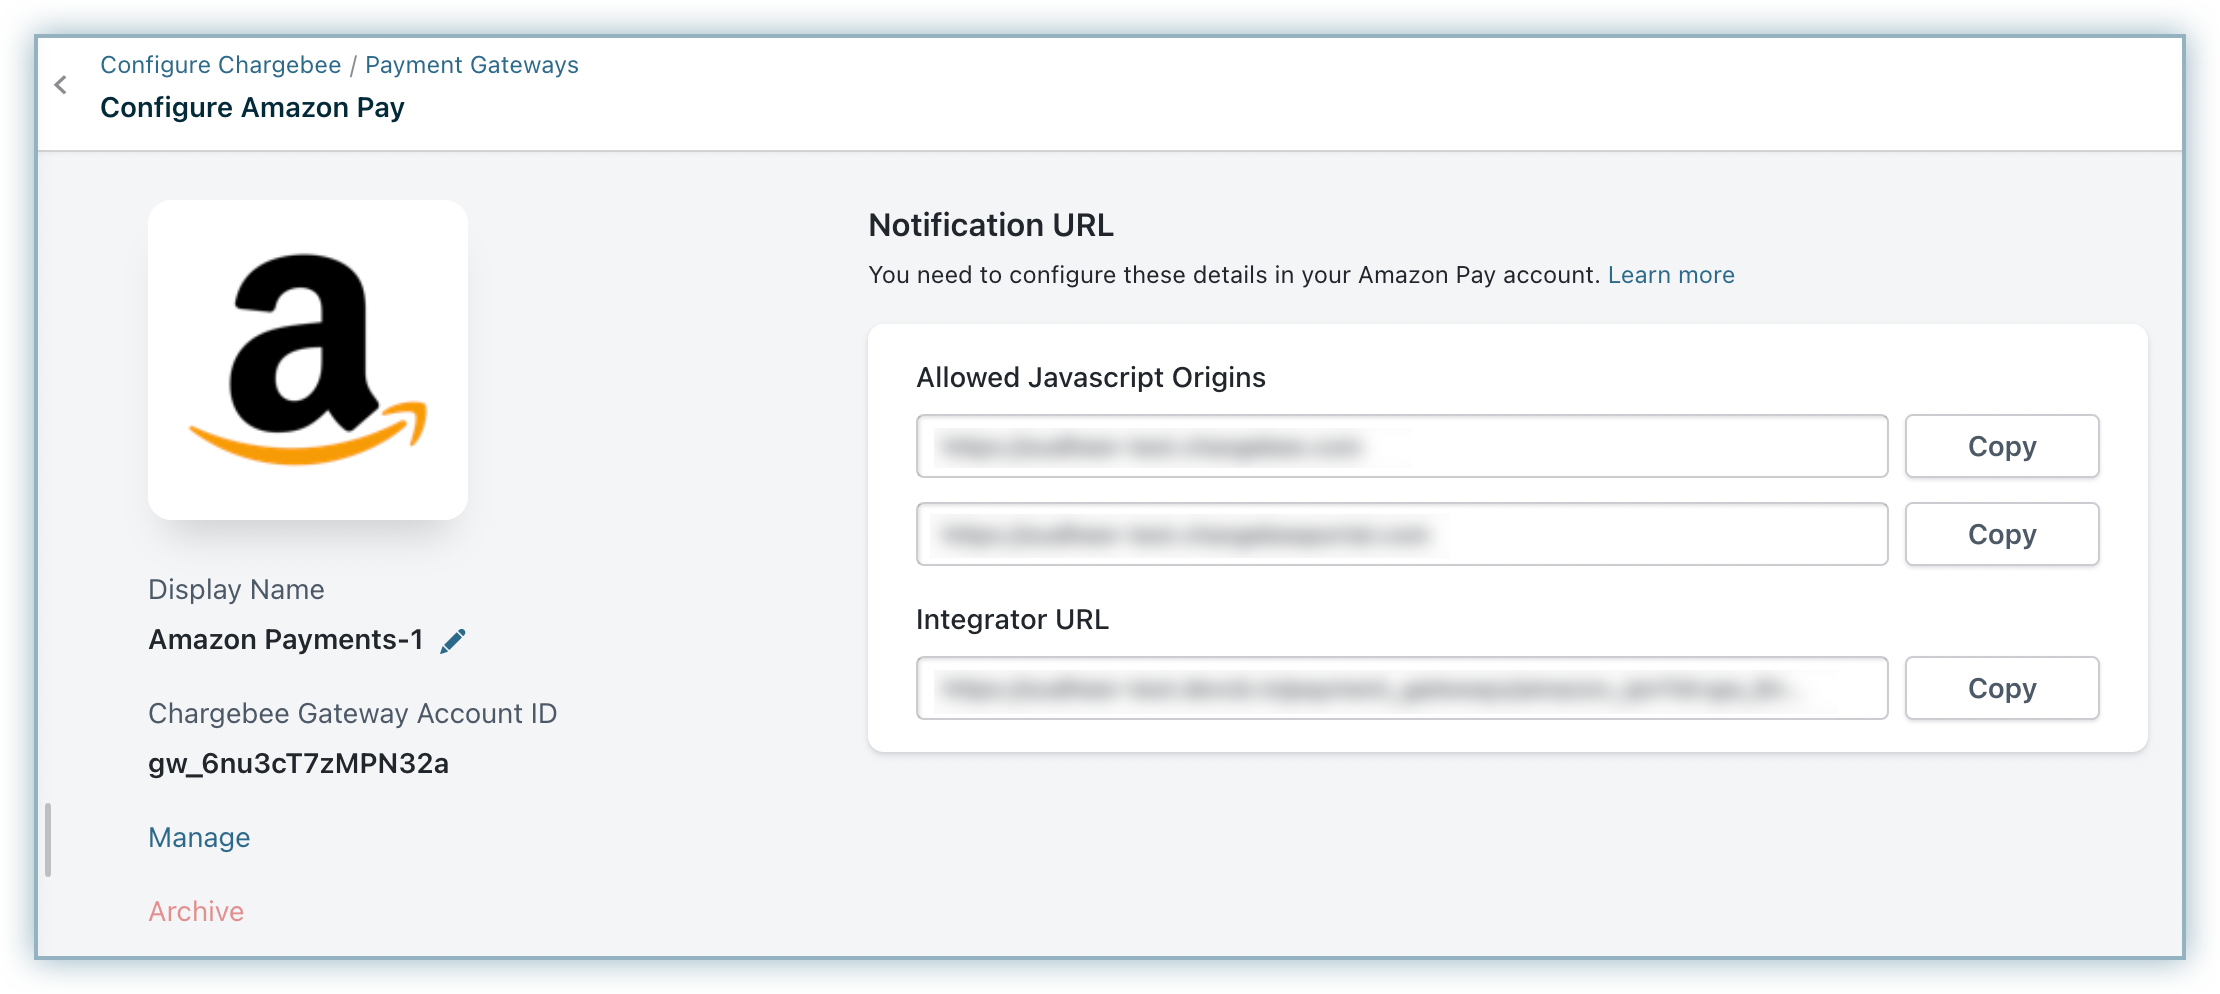
- You are redirected to the Chargebee site with the notification URLs created for Amazon Pay.
Configuration on Amazon Pay
-
Log into your Amazon Merchant account.
-
Select Amazon Pay (Sandbox View) and click Select Account.

-
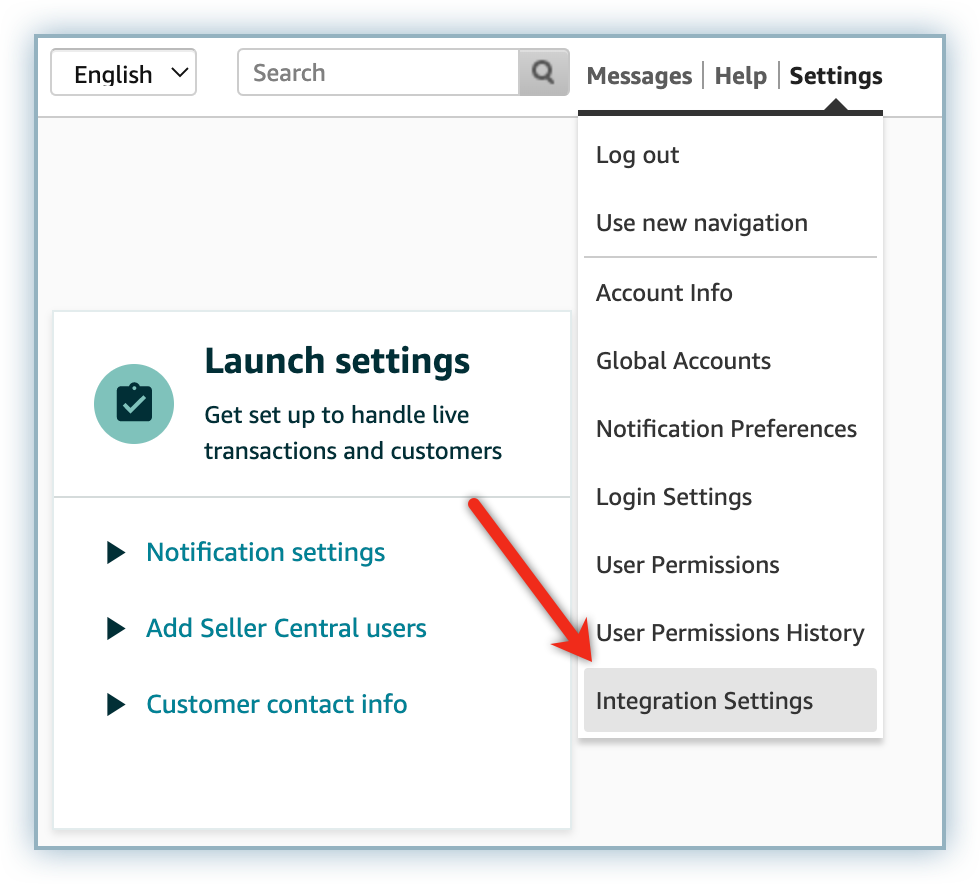
Click Integration Settings from the Settings menu.
-
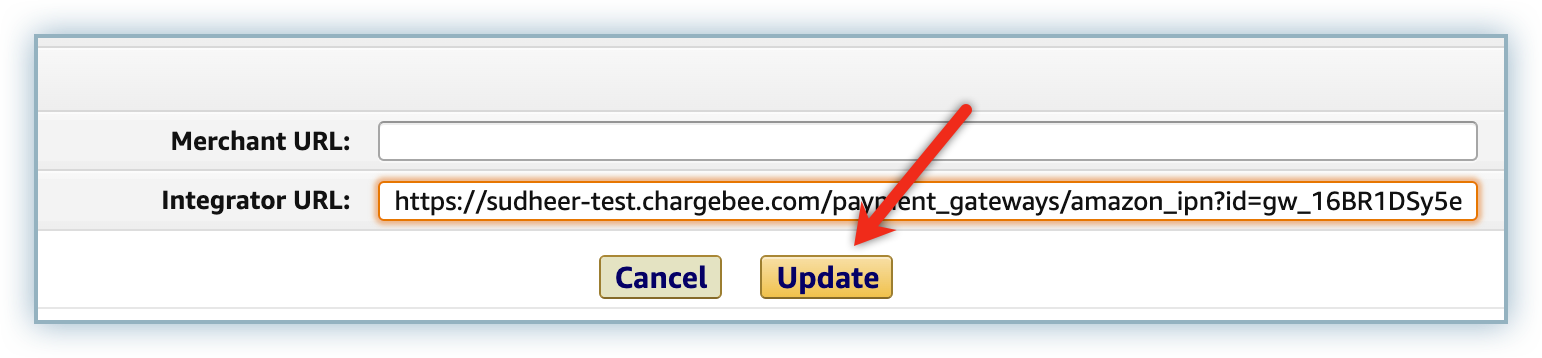
Click Edit to add to the Integrator URL field.

-
Copy and Paste the Integrator URL generated on your Chargebee site in the previous section and click Update.
-
Click Client ID/store ID from the Configuration menu.
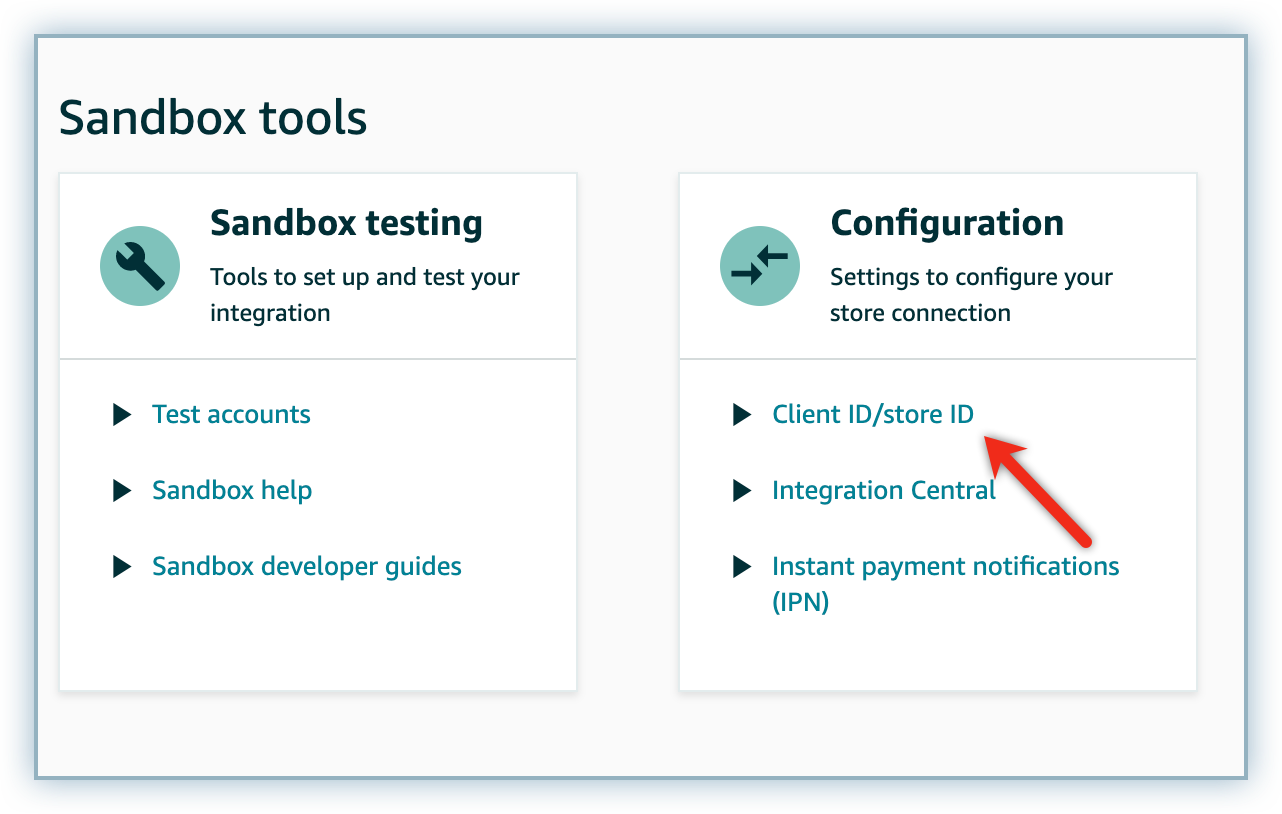
-
Click Edit from the Client ID / Store ID menu.
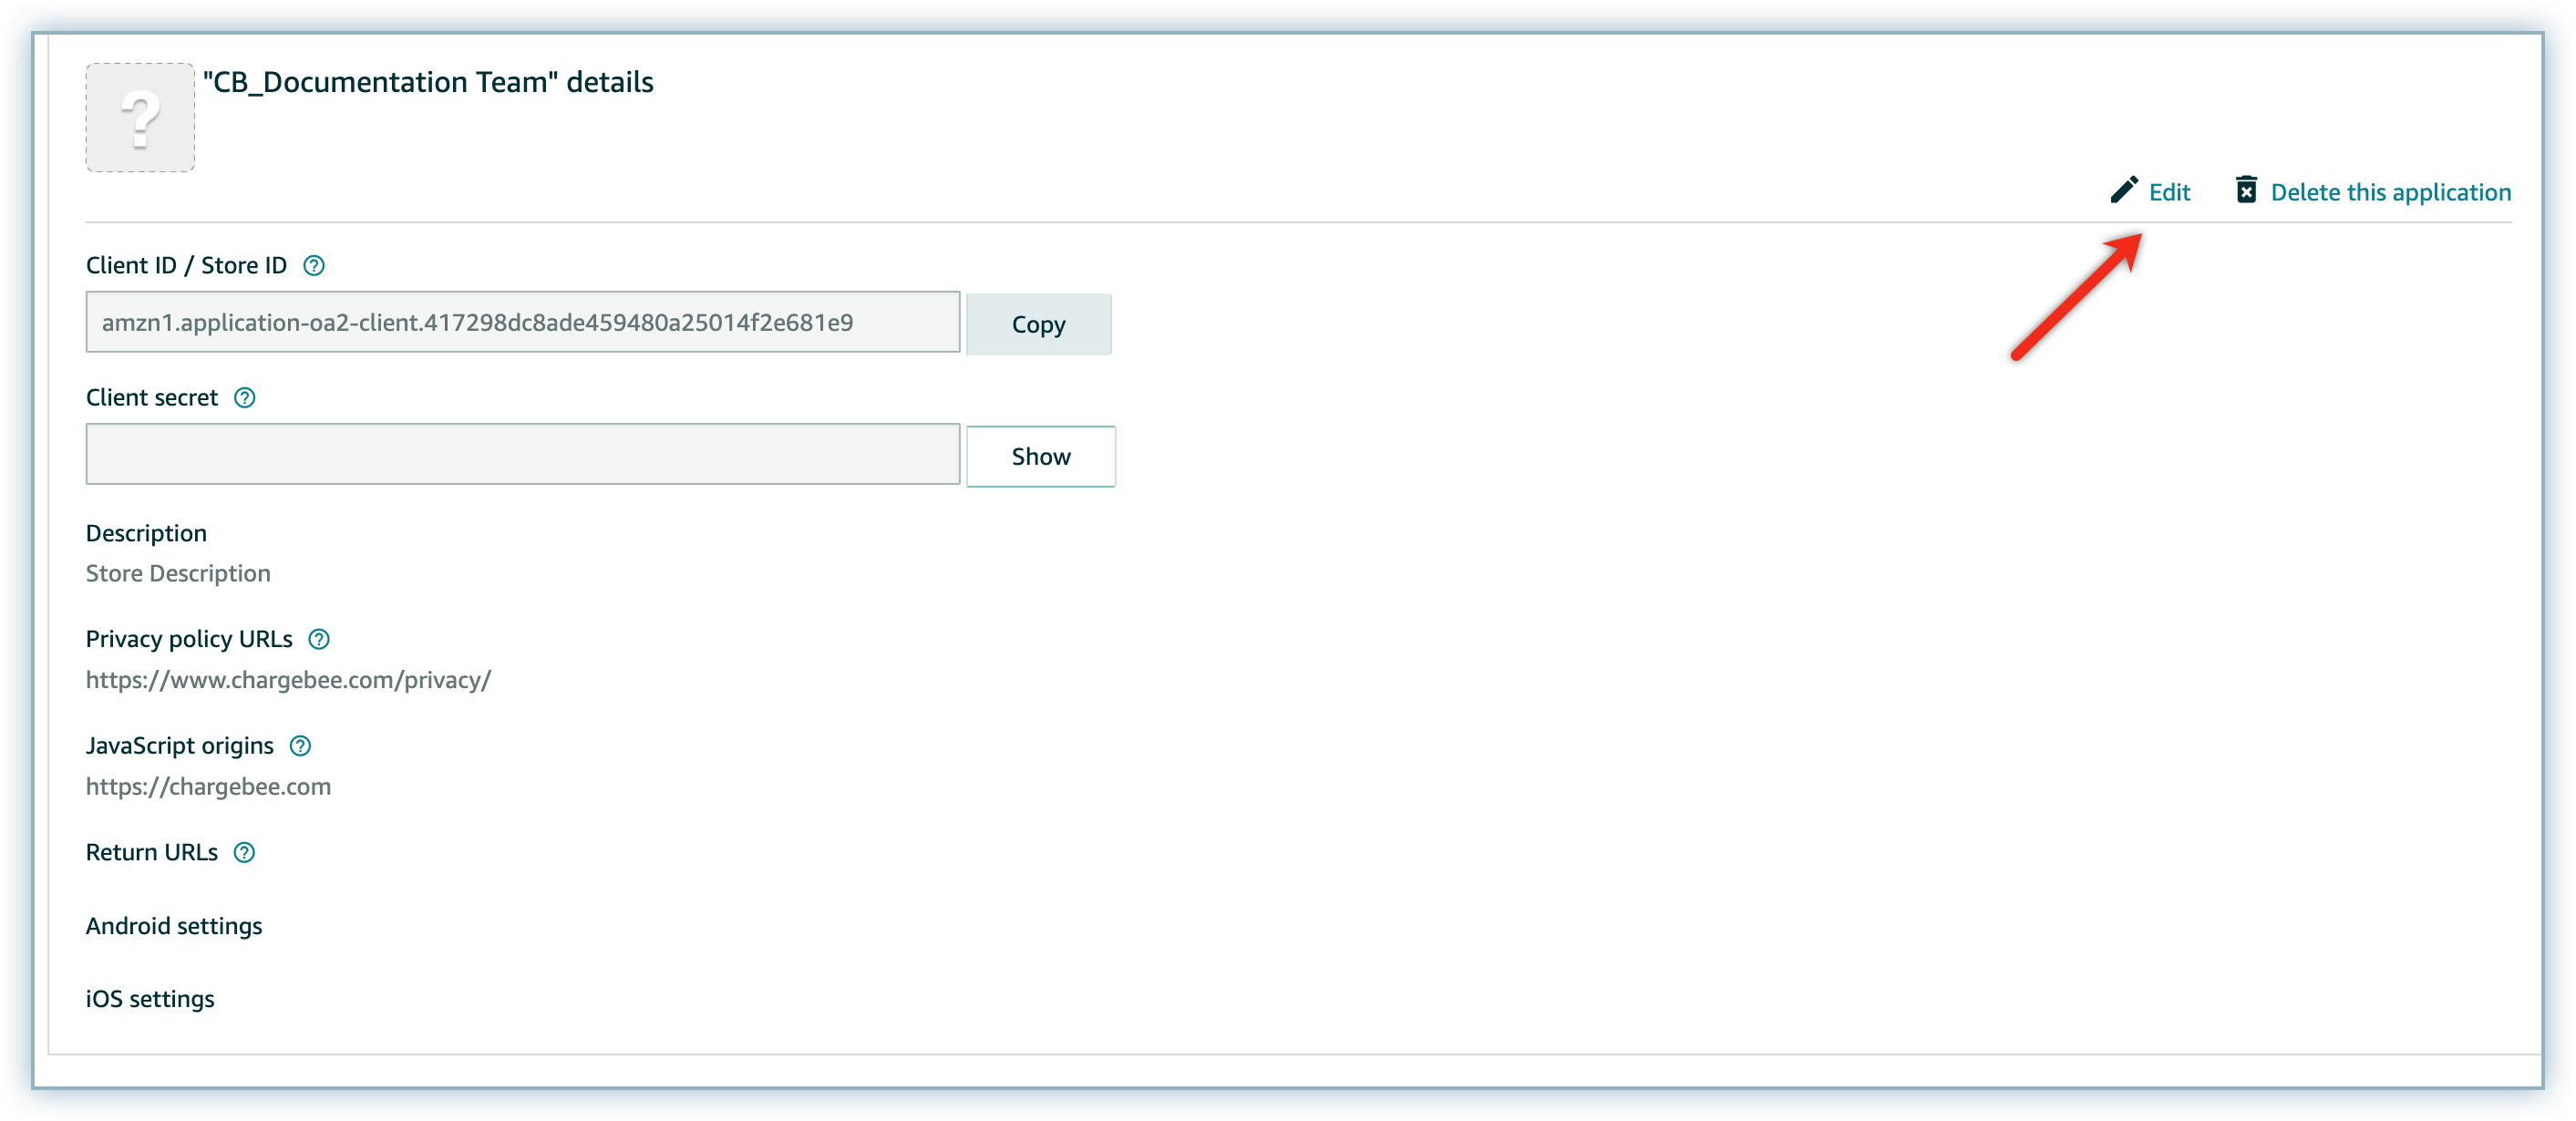
-
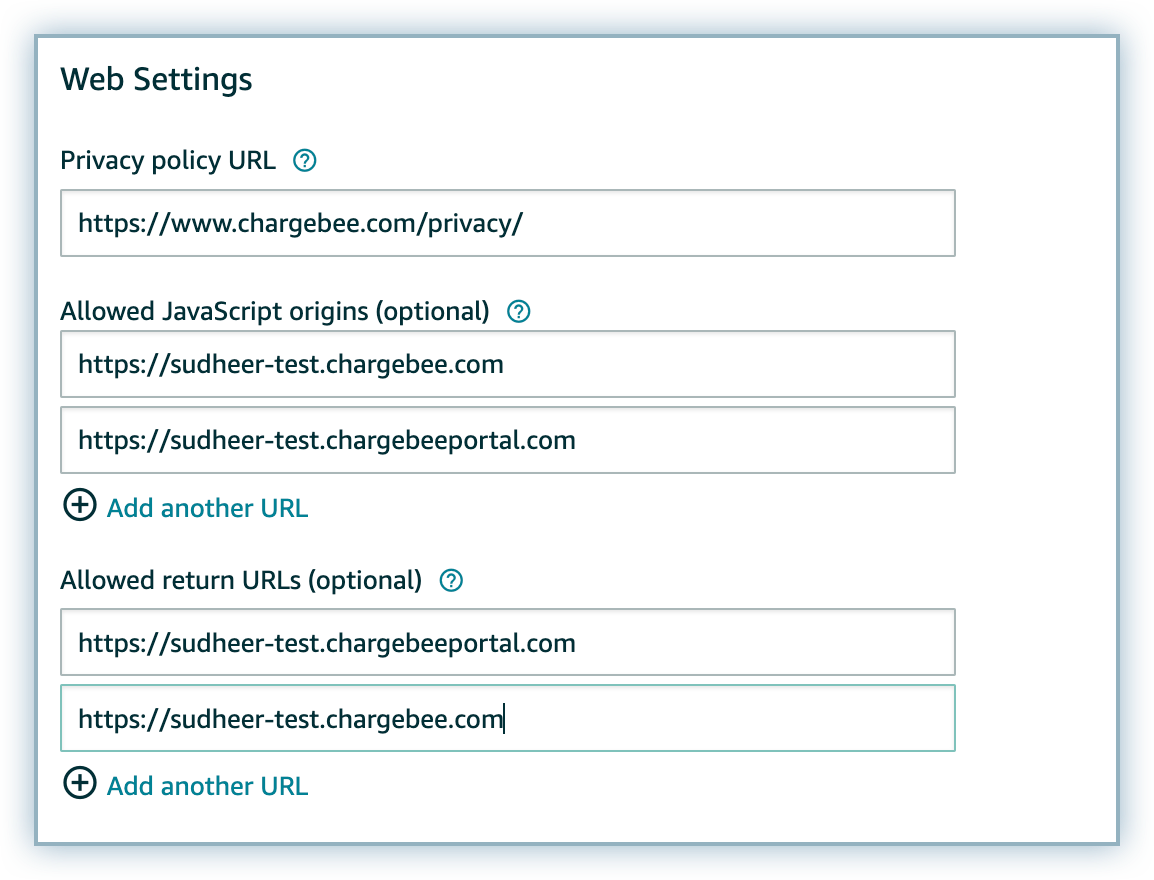
Copy and Paste the Javascript Origins generated on your Chargebee site to the Allowed JavaScript origins and Allowed return URLs fields.
-
Click Save Changes.
Checkout Using Amazon
If you've enabled Amazon payments in your Chargebee Payment Gateway Settings as explained above, customers will see it as an option during a hosted page checkout.
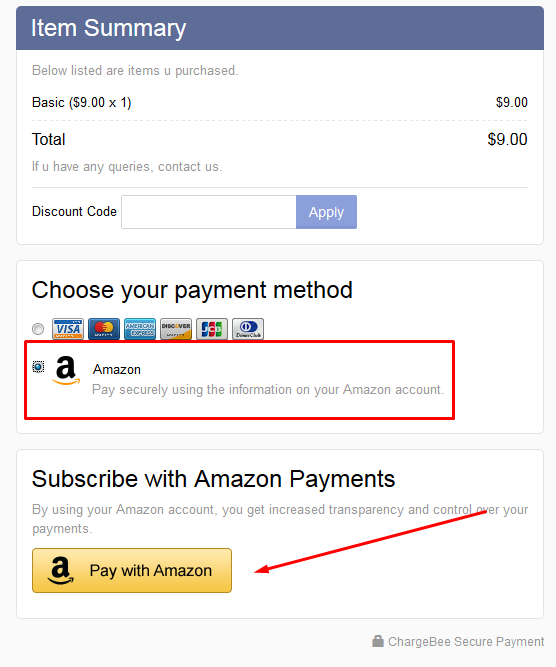
After they select Amazon and click on Pay with Amazon, they will be prompted to enter their Amazon Buyer Account credentials.

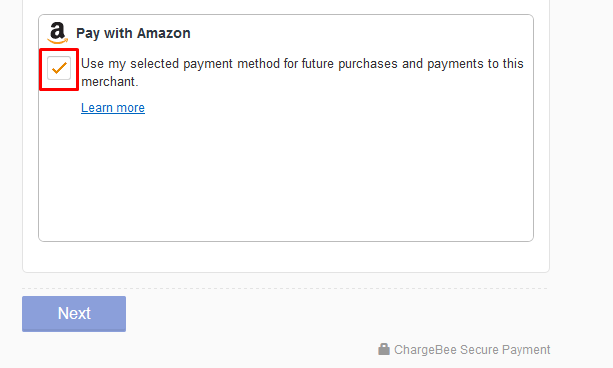
Once the customer's account is successfully authenticated, they can see their address and payment details. Here they can choose which address and card to use.

Customers also have the option of adding a new address or card to their Amazon account from here.
Customers then have to authorize using their account by checking the box and then clicking on Next.
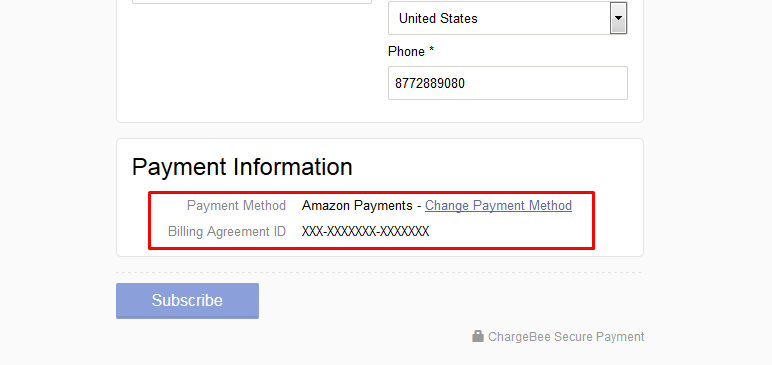
Now they can verify their order summary and also update their address details if required. At the bottom of the page, they can see their Amazon payment information and they also have the option of changing their payment method, if needed.
Amazon Payments with Chargebee's API
To accept payments via Amazon Payments using your custom checkout page, here's the process to be followed in a nutshell:
- Integrate your site with Amazon Payments (Login & Pay with Amazon). Learn more.
- Configure your Amazon Payments settings in Chargebee. Learn more.
- Push Billing Agreement ID (Charge Permission ID in case of Amazon CV2 integration) obtained from Amazon, to Chargebee Learn more.
P.S. Chargebee's Hosted Pages can still come to your rescue if you want to skip integrating with Amazon directly and quickly start accepting payments via Amazon Payments.
Integrating with Amazon Payments
Chargebee uses the Billing Agreement ID or Charge Permission ID of Amazon Payments to capture future payments.
Amazon Checkout V1 API (Legacy integration) Follow the steps mentioned in this document to integrate with Login and Pay with Amazon.
Chargebee takes over from Step 8 of the above process. Set up Amazon Payments in your website by following Steps 1-7. After Step 7 (Set Billing Agreement Details and Confirm the Agreement ) of the process, pass the Billing Agreement information along with the subscription details to Chargebee.
Amazon Checkout V2 integration Follow the steps mentioned in this document to integrate with Login and Pay with Amazon.
Chargebee supports AmazonPay Checkout V2 APIs. If you are using custom checkout with Amazon CV2, kindly reach out to Chargebee support to enable it.
Note
- Make sure your Checkout integration is using Amazon CV2 to enable support at Chargebee.
- Chargebee's Hosted page is still supported with Amazon Checkout V1 Integration.
Pushing information to Chargebee
[paraid push-info-to-chargebee] Chargebee can store the payment method information you provide, which will be used for charging customers for all future recurring payments. The specific information you need to provide will depend on your integration.
Billing Agreement ID (If you are using Amazon's Checkout V1 integration)
After customers authorize their payment via Amazon, a billing agreement is created. Chargebee requires this Billing Agreement ID to charge customers for all future recurring payments.
Chargebee can collect future payments only when the Billing Agreement object is in an open state. For the Billing Agreement ID to move from draft to open state, the Billing Agreement has to be confirmed. This can be done by calling the ConfirmBillingAgreement operation. So, before passing the Billing Agreement ID to Chargebee, ensure the agreement is confirmed.
Refer Chargebee APIs for sending Billing Agreement ID to Chargebee. Chargebee then sends this Billing Agreement ID to Amazon to validate it. After validation, the Billing Agreement ID is stored at Chargebee's end and used to charge the customer for future payments.
Information
- If the Billing Agreement is closed, Amazon Payments will notify Chargebee of the same. Chargebee will mark the payment method as INVALID and the whole process must be repeated once again.
- During future payments, if the Billing Agreement is closed, Amazon Payments will notify Chargebee of the same. Chargebee will mark the payment method as INVALID and try to charge the customers at 3 different intervals if dunning is enabled. In case the payment is not collected or dunning is disabled, the final action set in the Dunning settings will take place. Read more on Dunning.
Charge Permission ID (If you are using Amazon's Checkout V2 integration) After completing Checkout Session, Chargebee requires this Charge Permission ID to charge customers for all future recurring payments.
Information
- Charge Permission ID should be in "Chargeable" state.
- Amazon Payments will notify Chargebee if the Charge Permission state is changed. Chargebee will mark the payment method as INVALID if the state is not "Chargeable".
APIs for Sending Info to Chargebee
The Billing Agreement ID or Charge Permission ID can be passed to Chargebee with the payment_method[reference_id] parameter, using any of the following APIs:
Refer here for further information.
Note
While creating a subscription for an existing customer, the option to specify the payment method information is not available. This is because the payment method information is linked to customers and not the subscriptions.
Important points to note before using Amazon Payments with Chargebee
- Amazon Payments is currently supported for merchants in the United States only.
- This payment method is only supported on hosted pages when used with the Minimal, Elegant or Inspire theme. It does not work with Chargebee's Rhapsody theme.
- Only supports card-based payments using your customers' Amazon buyer account. Bank or other payment methods are not accepted with Chargebee.
- The only supported currency for Amazon Payments is USD.
- iframe tags are not supported by Amazon. Therefore, if you are using Chargebee Checkout you will have to add the following in the Header Script.
- Chargebee supports Amazon V2 API's. Make sure your Amazon account is upgraded to API v2 version. Reach out to Amazon support to enable it.
Was this article helpful?