Pay.com
Pay.com (Payments Made Simple) offers seamless payment processing solutions, ensuring secure and efficient transactions for your business. By integrating Pay.com with Chargebee, you can effortlessly manage subscriptions, automate billing processes, and provide a seamless payment experience for your customers. This document will walk you through the steps required to set up and configure the integration, enabling you to maximize the benefits of both platforms.
Integration options
You can integrate cards via Pay.com using the following:
Supported currencies and countries
Supported countries
This integration supports merchants onboarding from the following countries only:
- European Economic Area (EEA)
- Switzerland (CH)
- United Kingdom (UK)
- United States (USA)
- Australia (AU)
- New Zealand (NZ)
Supported currencies
This integration supports the following currencies:
| AOA - Angolan Kwanza | ARS - Argentine Peso | AUD - Australian Dollar | AWG - Aruban Florin | AZN - Azerbaijani Manat | BAM - Bosnia-Herzegovina Convertible Mark | BBD - Barbadian Dollar | BDT - Bangladeshi Taka |
| BGN - Bulgarian Lev | BMD - Bermudian Dollar | BND - Brunei Dollar | BOB - Bolivian Boliviano | BRL - Brazilian Real | BSD - Bahamian Dollar | BWP - Botswana Pula | BZD - Belize Dollar |
| CAD - Canadian Dollar | CDF - Congolese Franc | CHF - Swiss Franc | CLP* - Chilean Peso | CNY - Chinese Yuan | COP - Colombian Peso | CRC - Costa Rican Colón | CVE - Cape Verdean Escudo |
| CZK - Czech Koruna | DKK - Danish Krone | DOP - Dominican Peso | DZD - Algerian Dinar | EGP - Egyptian Pound | ERN - Eritrean Nakfa | ETB - Ethiopian Birr | EUR - Euro |
| FJD - Fijian Dollar | FKP - Falkland Islands Pound | GBP - British Pound Sterling | GEL - Georgian Lari | GHS - Ghanaian Cedi | GIP - Gibraltar Pound | GMD - Gambian Dalasi | GTQ - Guatemalan Quetzal |
| GYD - Guyanese Dollar | HKD - Hong Kong Dollar | HNL - Honduran Lempira | HUF - Hungarian Forint | IDR - Indonesian Rupiah | ILS - Israeli New Shekel | INR - Indian Rupee | ISK - Icelandic Krona |
| JPY* - Japanese Yen | JMD - Jamaican Dollar | KES - Kenyan Shilling | KRW* - South Korean Won | KYD - Cayman Islands Dollar | KZT - Kazakhstani Tenge | LAK - Lao Kip | LBP - Lebanese Pound |
| LRD - Liberian Dollar | LKR - Sri Lankan Rupee | MAD - Moroccan Dirham | MGA - Malagasy Ariary | MKD - Macedonian Denar | MMK - Myanmar Kyat | MOP - Macanese Pataca | MUR - Mauritian Rupee |
| MWK - Malawian Kwacha | MXN - Mexican Peso | MYR - Malaysian Ringgit | MZN - Mozambican Metical | NAD - Namibian Dollar | NGN - Nigerian Naira | NIO - Nicaraguan Córdoba | NOK - Norwegian Krone |
| NZD - New Zealand Dollar | PAB - Panamanian Balboa | PEN - Peruvian Sol | PGK - Papua New Guinean Kina | PHP - Philippine Peso | PKR - Pakistani Rupee | PLN - Polish Zloty | PYG* - Paraguayan Guarani |
| QAR - Qatari Riyal | RON - Romanian Leu | RSD - Serbian Dinar | RUB - Russian Ruble | SAR - Saudi Riyal | SBD - Solomon Islands Dollar | SEK - Swedish Krona | SHP - Saint Helena Pound |
| SGD - Singapore Dollar | SLL - Sierra Leonean Leone | SOS - Somali Shilling | SRD - Surinamese Dollar | STD - São Tomé and Príncipe Dobra | SYP - Syrian Pound | TJS - Tajikistani Somoni | THB - Thai Baht |
| TOP - Tongan Paʻanga | TRY - Turkish Lira | TTD - Trinidad and Tobago Dollar | TWD - New Taiwan Dollar | TZS - Tanzanian Shilling | UAH - Ukrainian Hryvnia | UGX - Ugandan Shilling | USD - United States Dollar |
| UYU - Uruguayan Peso | UZS - Uzbekistani Som | VEF - Venezuelan Bolívar | VND* - Vietnamese Dong | WST - Samoan Tala | XAF* - Central African CFA Franc | XCD - East Caribbean Dollar | XOF* - West African CFA Franc |
| XPF* - CFP Franc | ZAR - South African Rand | ZMW - Zambian Kwacha |
Note
- Currencies marked with an asterisk (*) are zero-decimal currencies.
- ISK and UGX are mentioned as zero-decimal currencies in Pay.com, but Chargebee does not treat them as zero-decimal currencies.
This integration is divided into the following set of steps required to complete the integration successfully:
- Retrieving the API Key from your Pay.com Account.
- Configuring Pay.com in your Chargebee site.
- Configuring Webhooks in your Chargebee site.
Let us dive deeper into these.
Retrieving API key from your Pay.com account
While configuring the Pay.com gateway in Chargebee, you will require the API Key from your Pay.com account to be entered in Chargebee. The API Key is mandatory for Chargebee to invoke the Pay.com APIs and complete the integration.
Follow these steps to retrieve it from your Pay.com account:
- Log in to your Pay.com Sandbox Account if you are connecting to a Chargebee Sandbox Domain, or Pay.com Live Account if connecting to a Chargebee Live Domain.
- Navigate to the Developers section from the left navigation pane and select the API Keys tab.
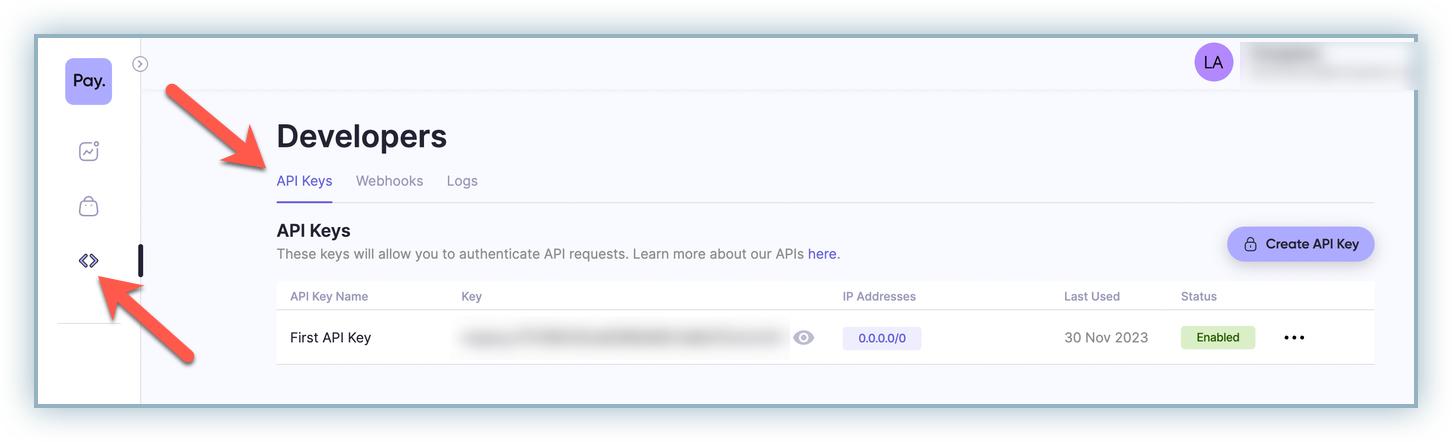
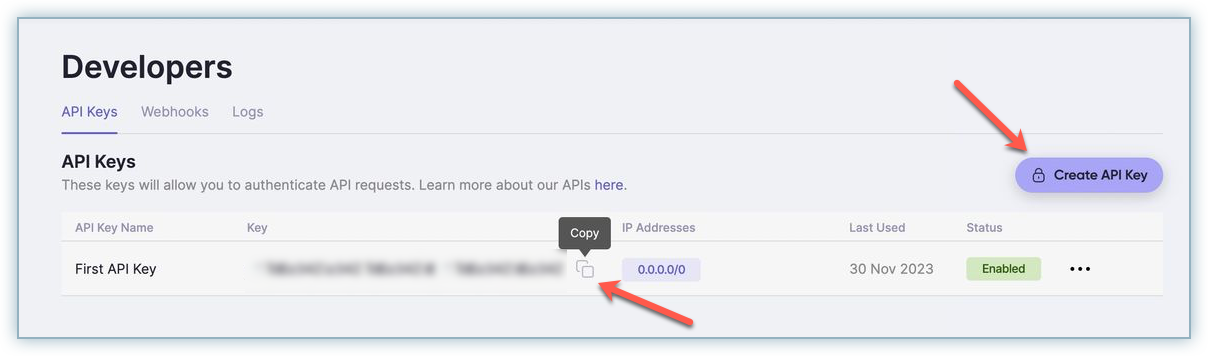
- Copy the API key if you already have one. If not, create a new key and copy it for further use while configuring Pay.com in your Chargebee site.
Configuring Pay.com gateway in your Chargebee site
Follow these steps to enable and configure Pay.com in Chargebee:
- Log in to your Chargebee site.
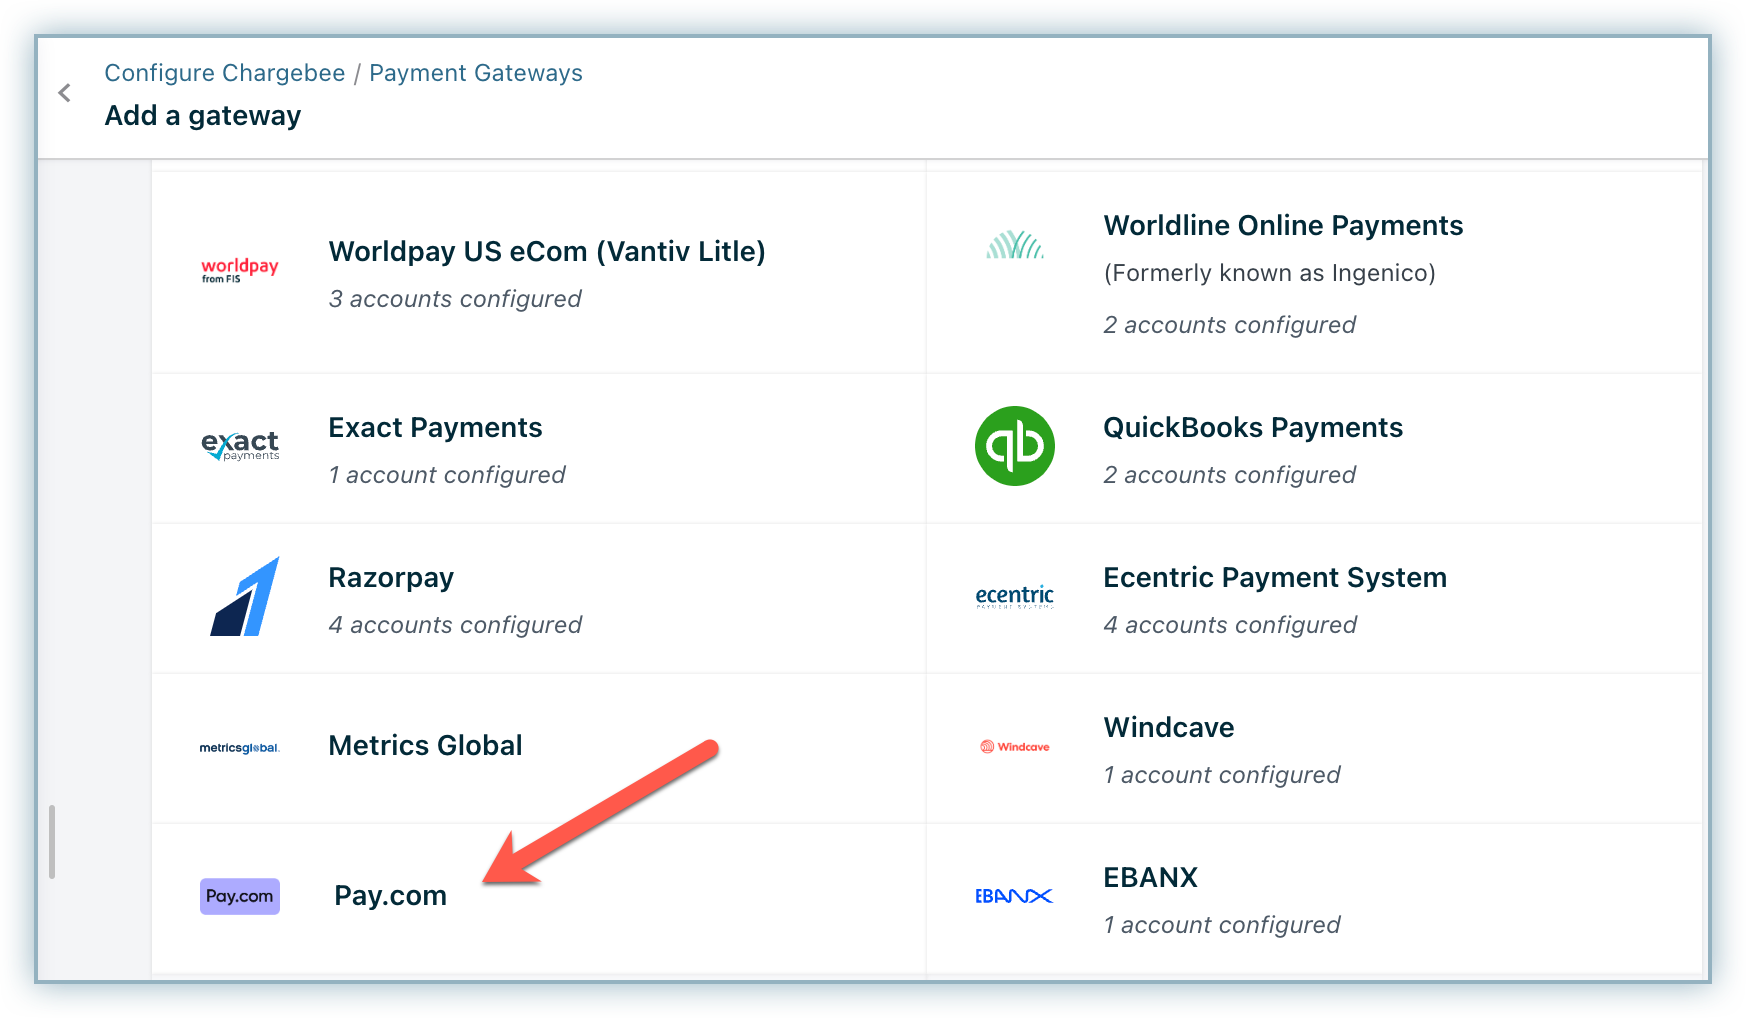
- Go to Settings > Configure Chargebee > Payment Gateways.
- Click Add Gateway and select Pay.com from the list.
- Enter the API Key fetched from your Pay.com account and click Connect.
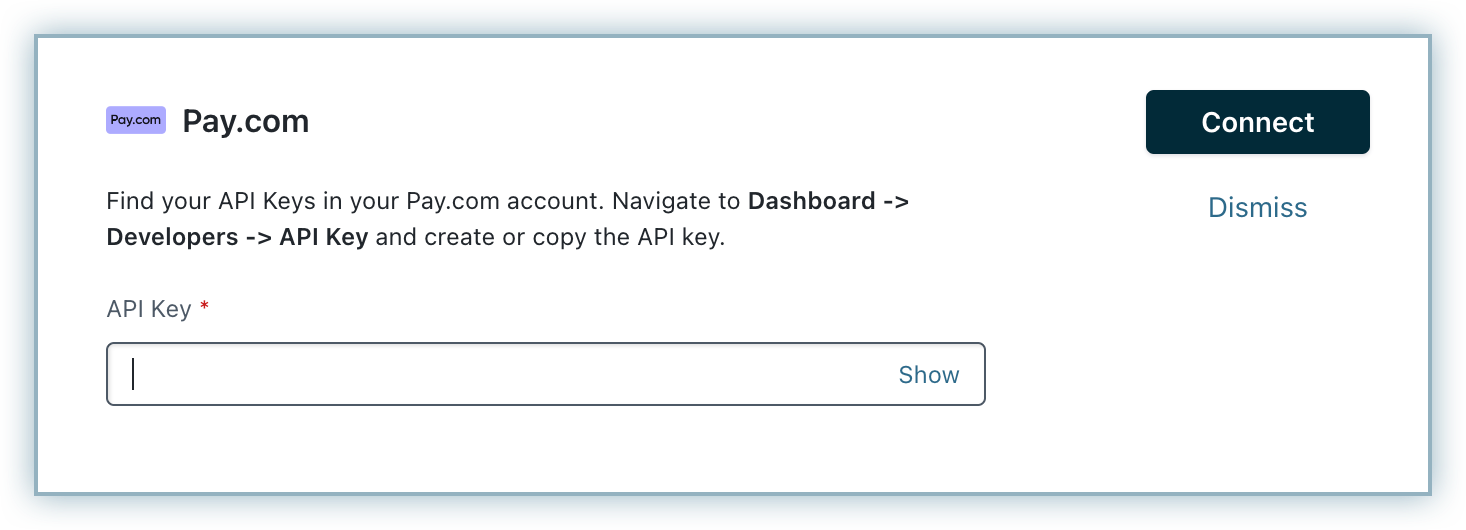
- The gateway configuration is completed and the Configure Pay.com page appears.
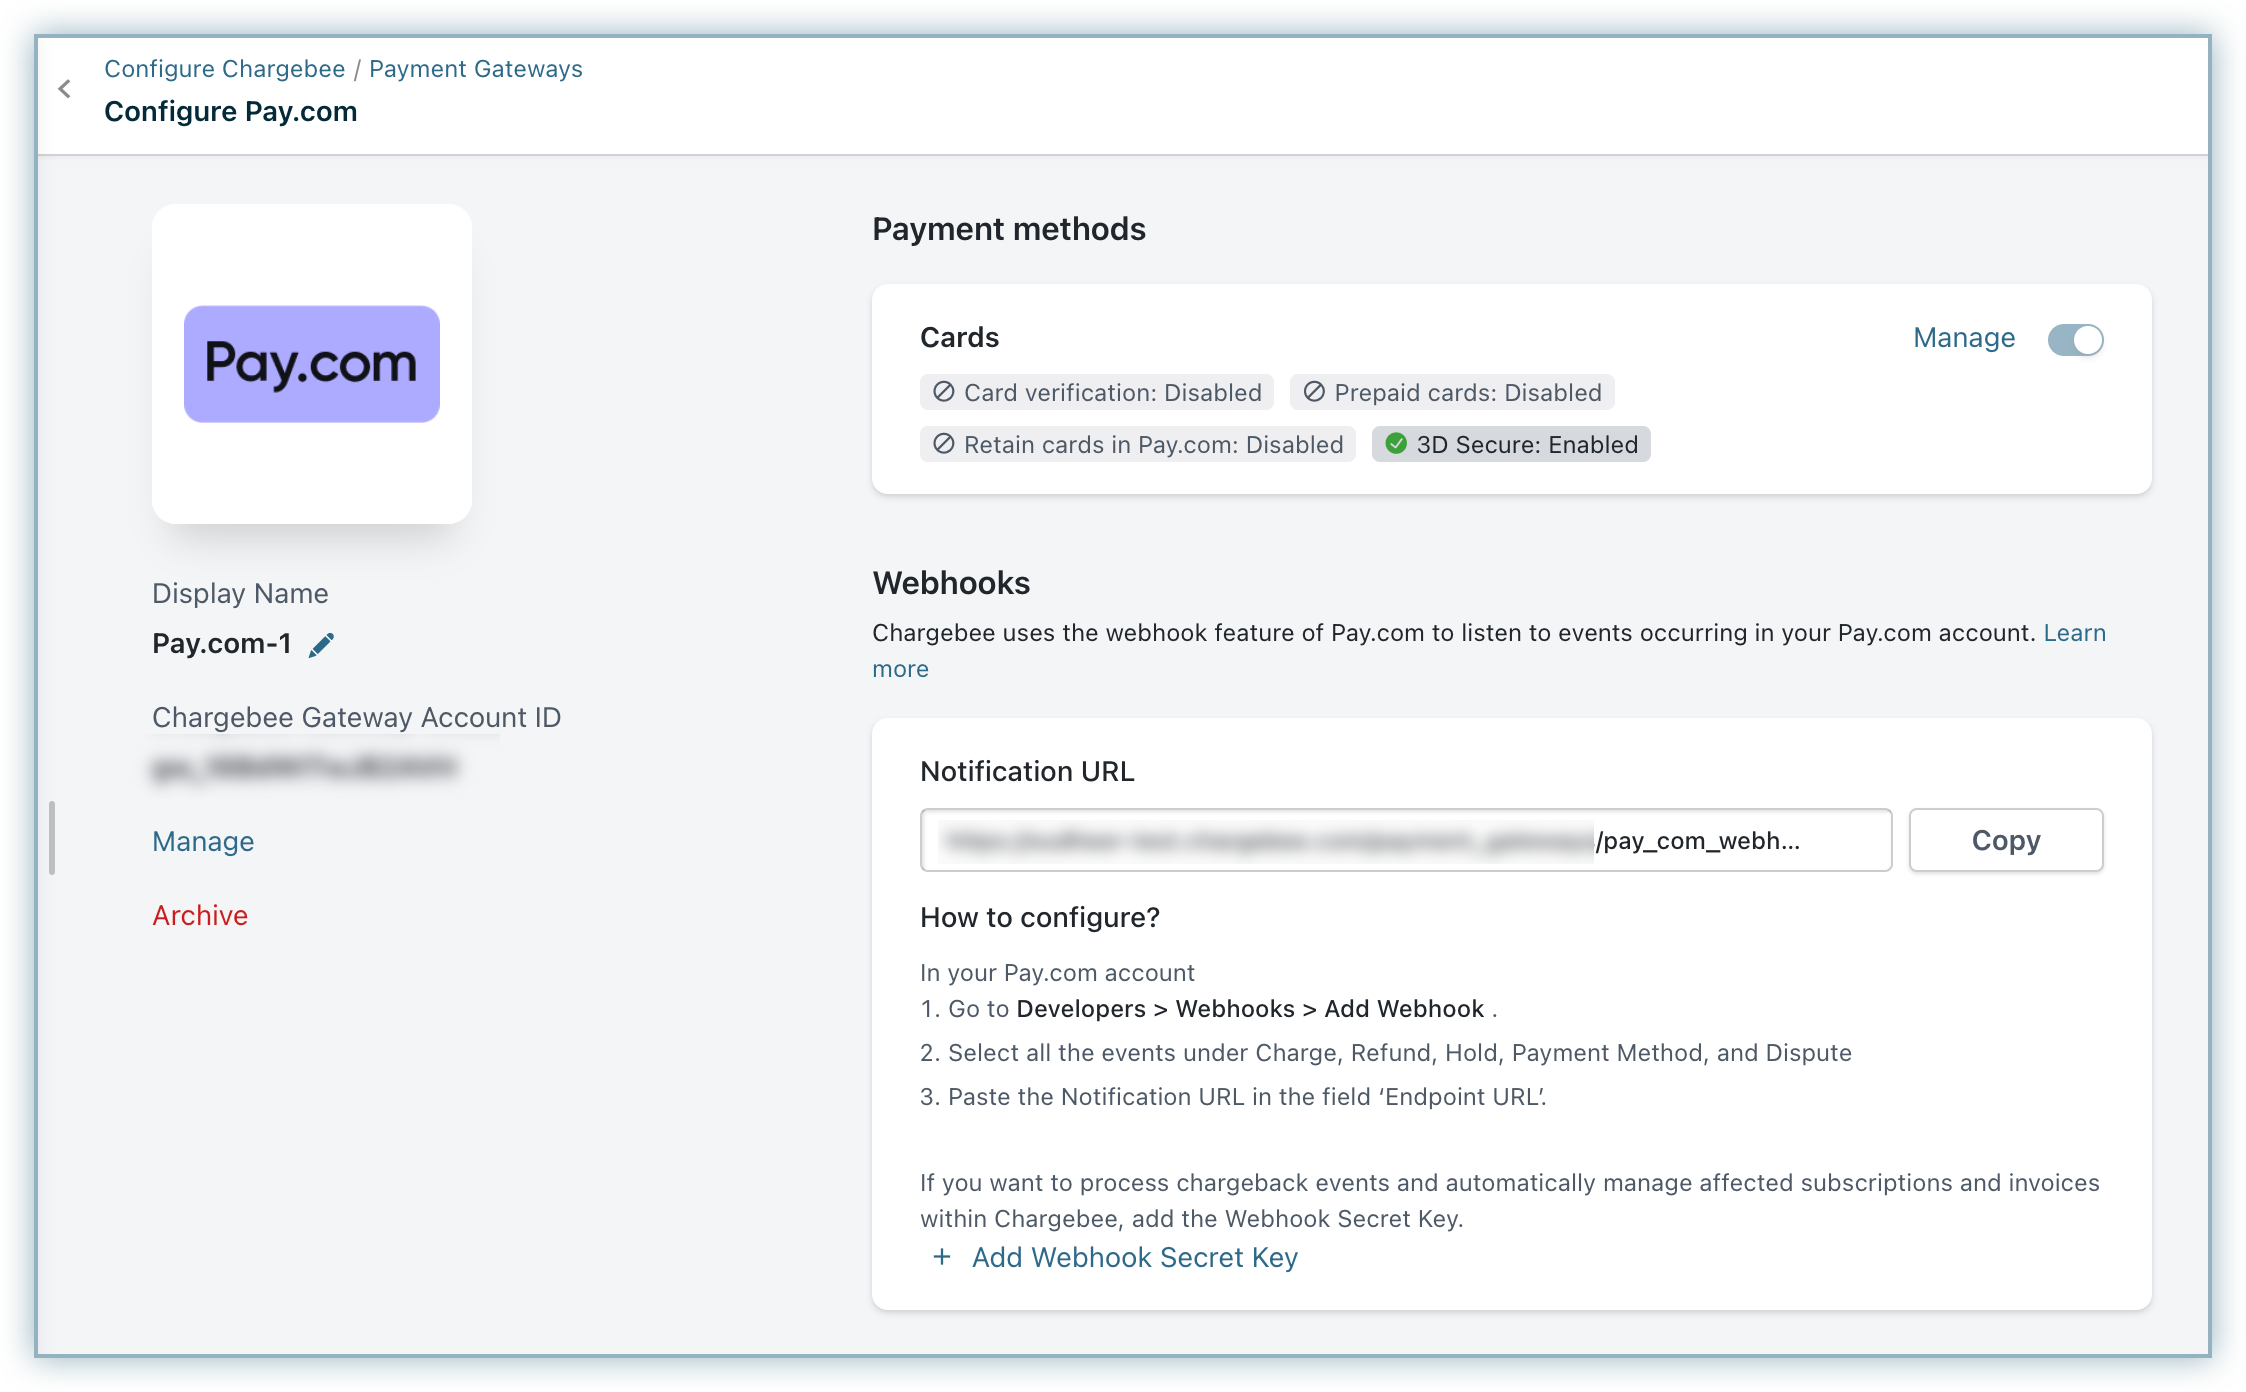
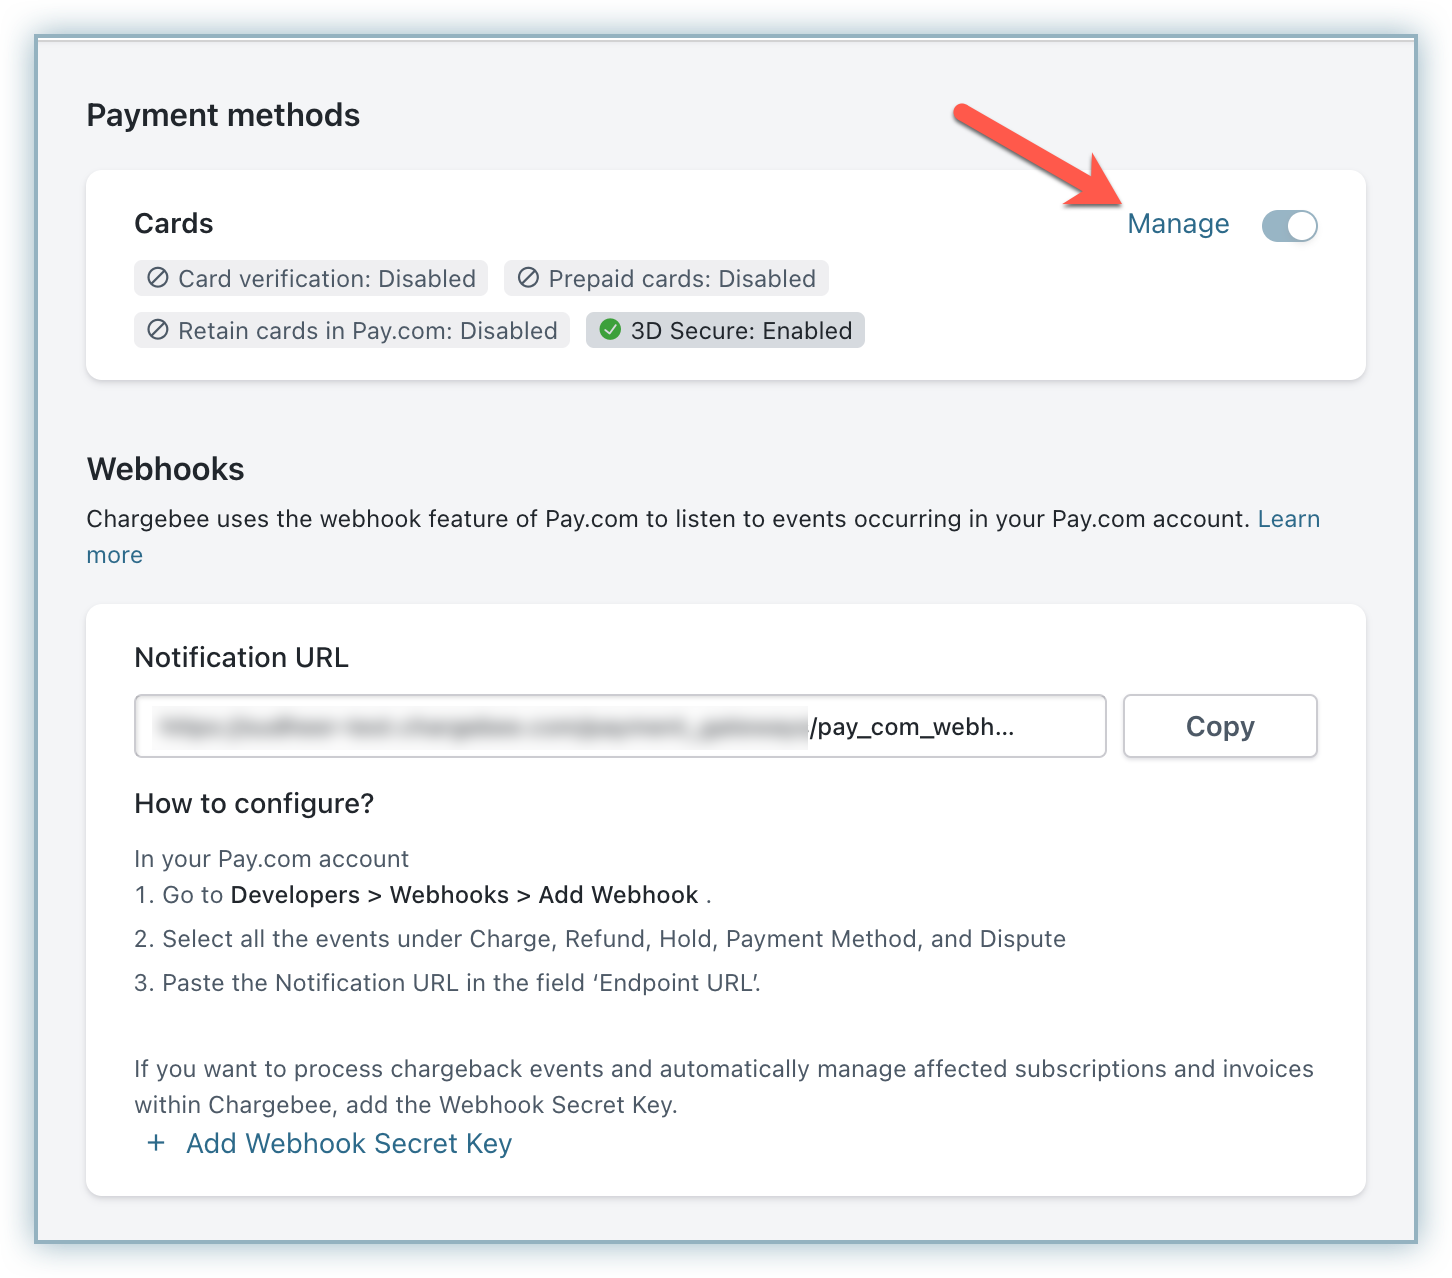
- Click Manage against Cards to manage your card-related settings.
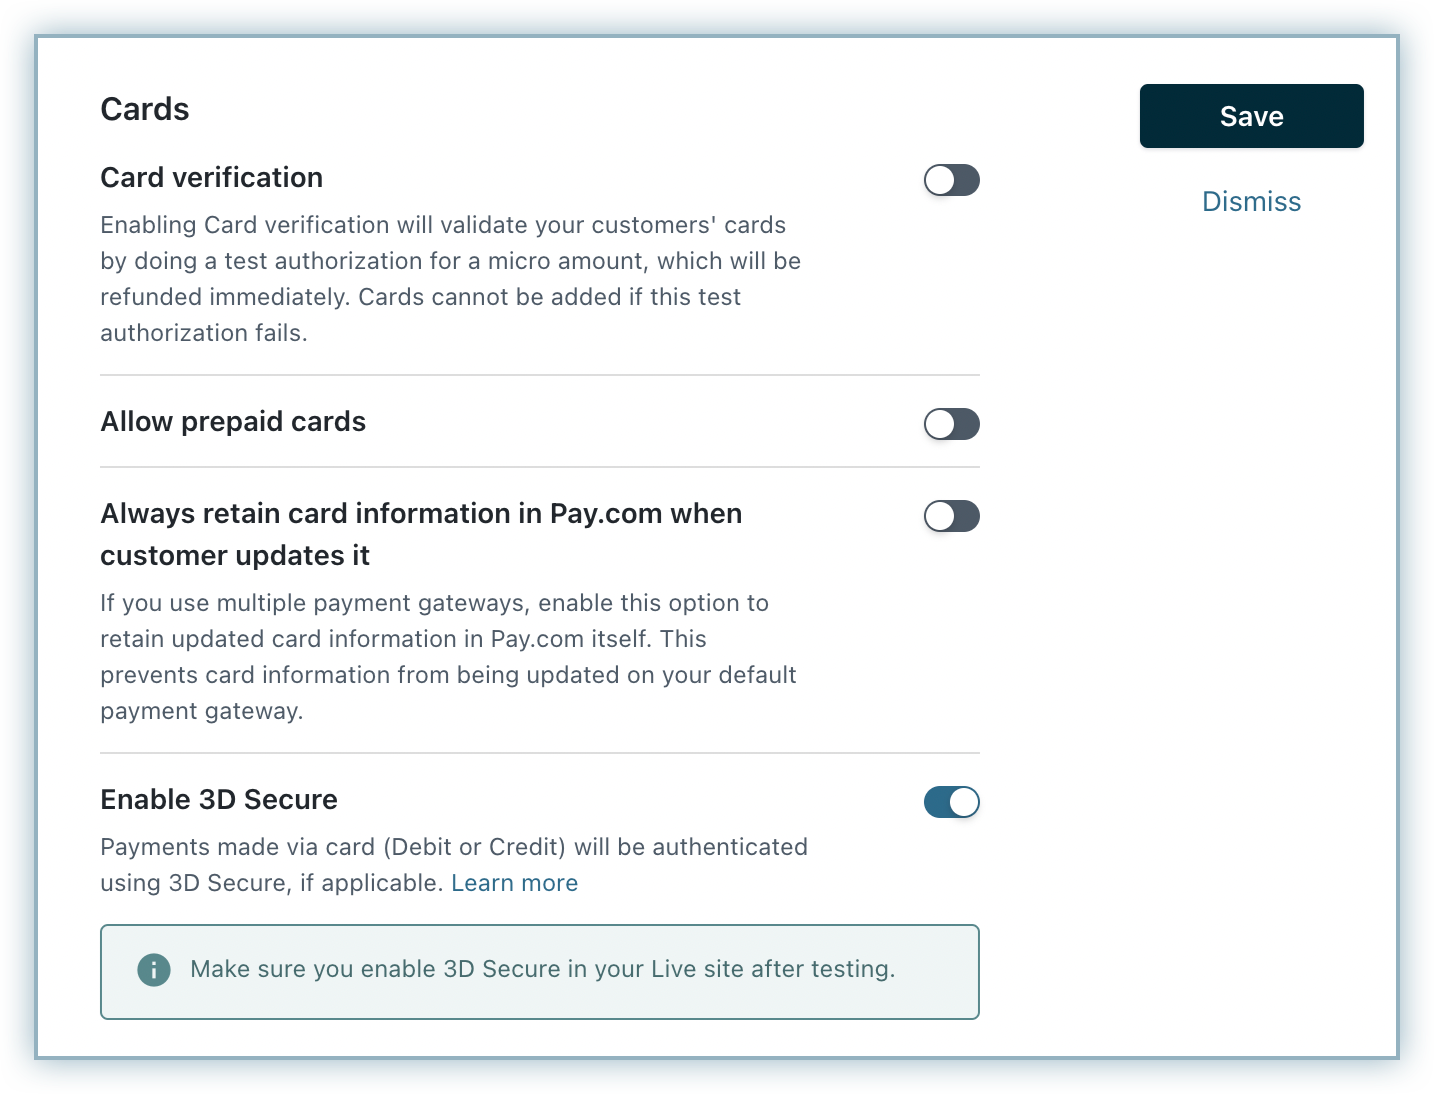
- Enable the following options as required:
- Card verification: This option is enabled by default to validate your customers' cards by doing a test authorization. A micro amount is deducted from the customer's card to collect mandatory information from Pay.com and for the integration to work properly. This amount will be refunded immediately. Cards that do not pass this validation will not be added.
- Allow prepaid cards: Enabling this option allows your customers to use a prepaid card for their transactions.
- Always retain card information in Pay.com when the customer updates it: This option determines where updated cards will be vaulted for existing customers when using multiple gateways. Enable to retain cards in Pay.com, even if smart routing is updated to a new gateway. Disable to gradually migrate customers to the new gateway as they update their cards. Learn more.
- Enable 3D Secure: Check with your gateway whether payment authentication for 3DS is enabled for your account. If not, enable it at your gateway and then in Chargebee. Also, make sure you complete the SCA checklist in Chargebee before accepting 3DS payments. This is to ensure that you can recover failed payments easily, without compromising your revenue. Learn more about PSD2 and Strong Customer Authentication.
- Click Save.
Note
Pay.com does not support $0 authorizations. As a result, a $1 authorization is performed by default when verifying a card. This amount is used solely for validation purposes and is automatically voided.
Configuring Webhooks
Before you proceed towards the webhook configuration, you must retrieve the Webhook Secret Key from your Pay.com account. This key is required to complete the configuration in your Chargebee site.
Retrieving Webhook Secret Key
To create and retrieve the Webhook Secret Key in Pay.com, first complete the configuration of Chargebee's Webhook endpoint in your Pay.com account. Once configured, Pay.com generates a unique Webhook Secret Key for each webhook endpoint set up in your Pay.com account.
Follow these steps to configure the Chargebee Webhook endpoint and retrieve the Webhook Secret Key from your Pay.com account:
-
Log in to your Pay.com Sandbox Account if not logged in already.
-
Go to the Developers section from the left navigation pane and select the Webhooks tab.
-
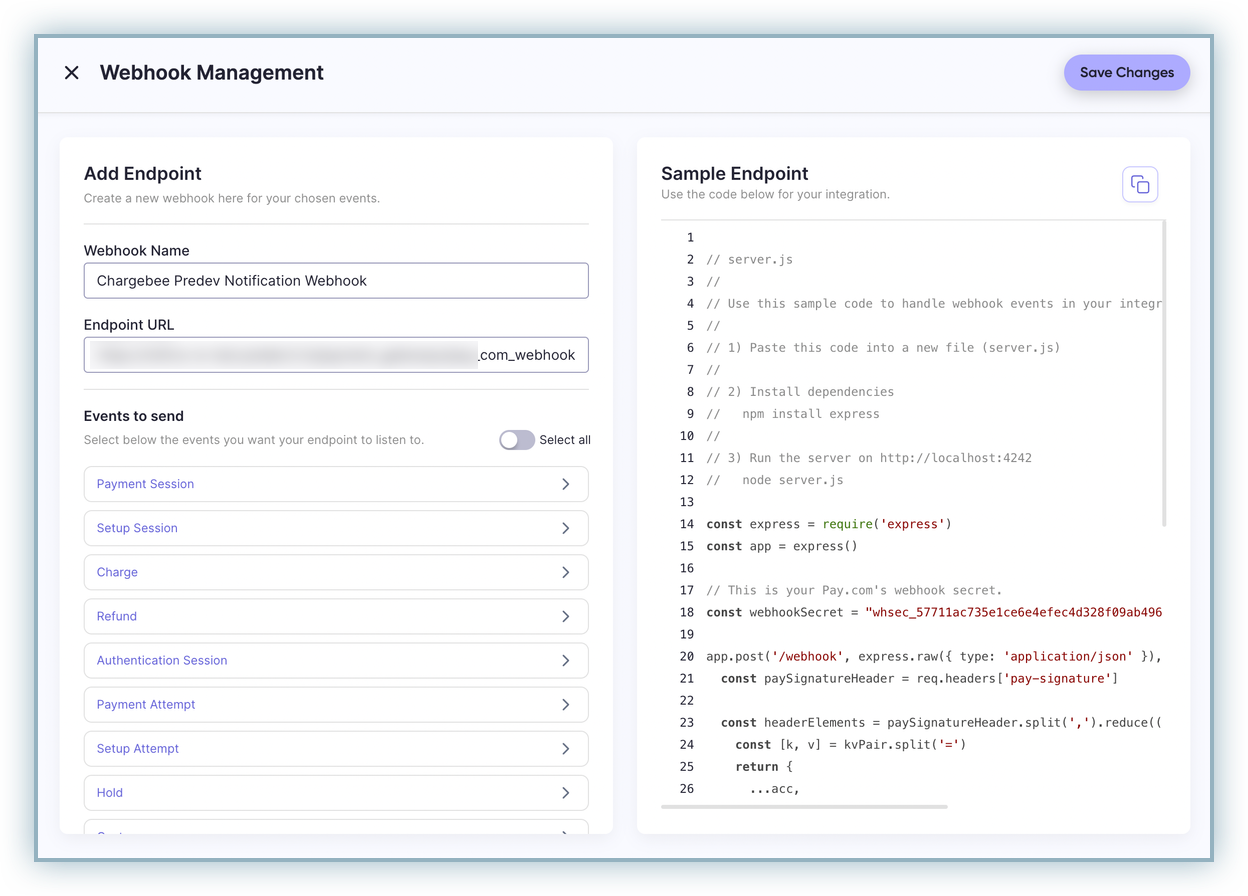
Click + Add Webhook.

-
Copy and paste the Notification URL from the Chargebee Gateway Configuration Page in the Endpoint URL field and provide a relevant Webhook Name.
-
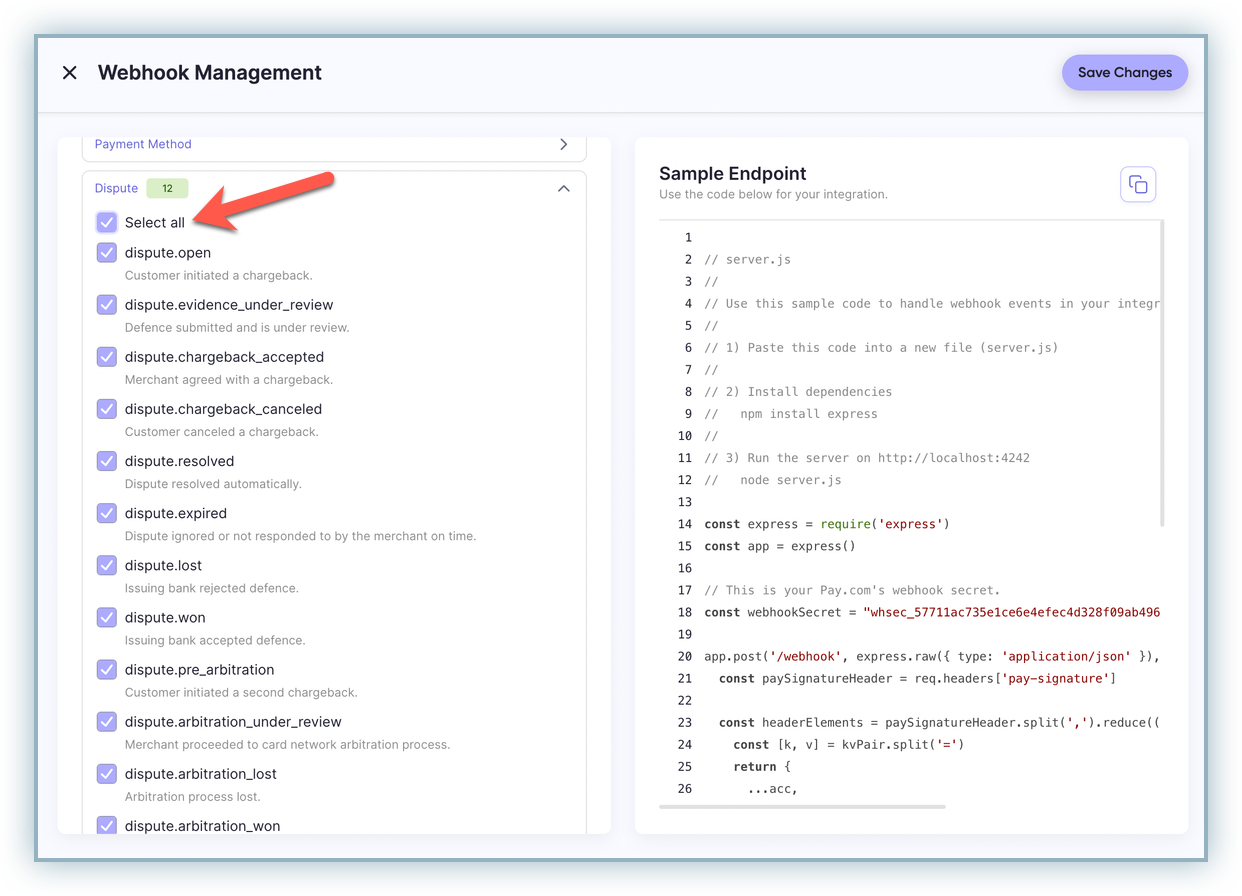
Select all the Dispute events and click Save Changes.
-
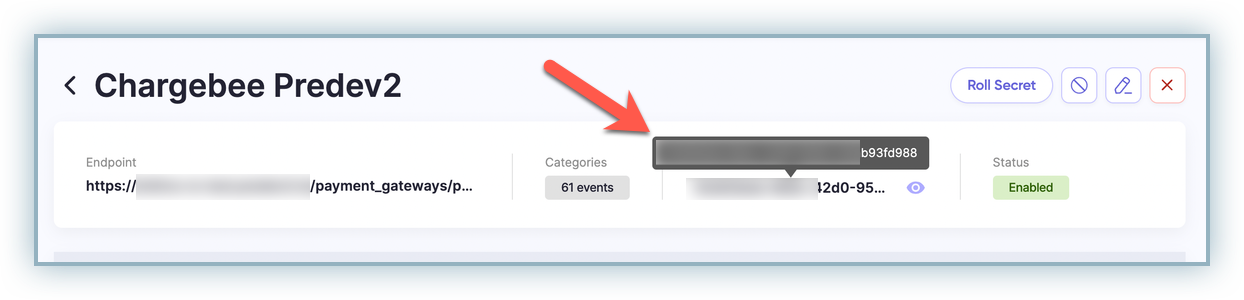
Copy the Secret Key from the saved Webhook Endpoint and save it for later use.
Configuring Webhook in your Chargebee Site
Follow these steps to complete the Webhook configuration in your Chargebee site:
-
In your Chargebee app, go to Settings > Configure Chargebee > Payment Gateways. Select your Pay.com instance from the list of gateways.
-
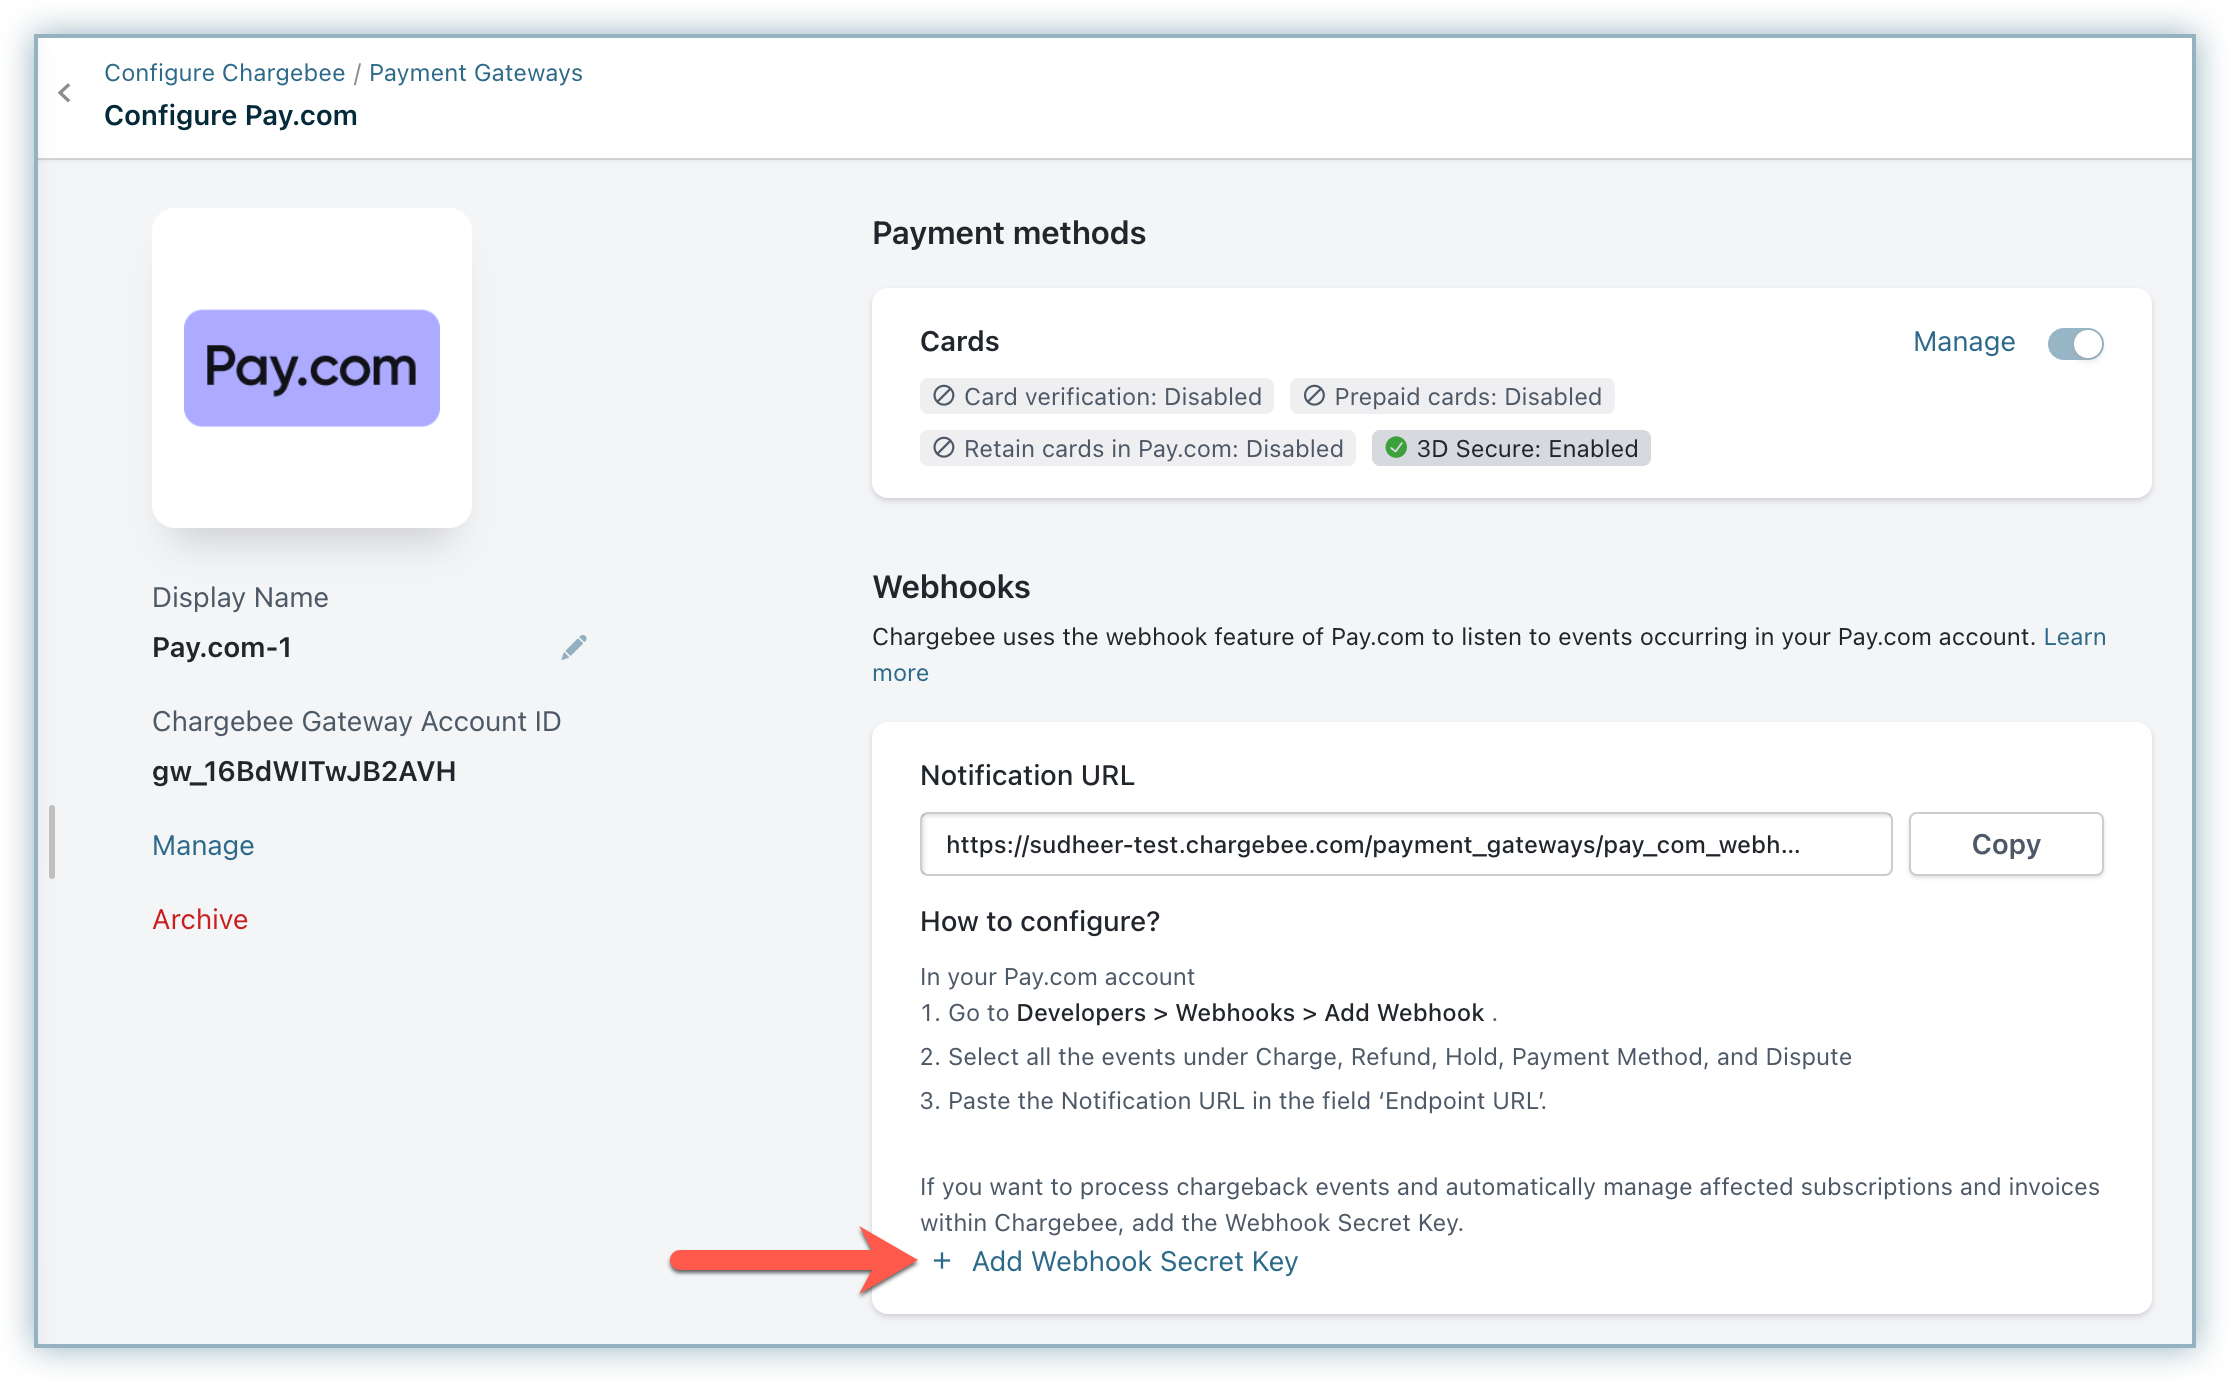
On the Configure Pay.com page, click + Add Webhook Secret Key under the Webhooks section.
-
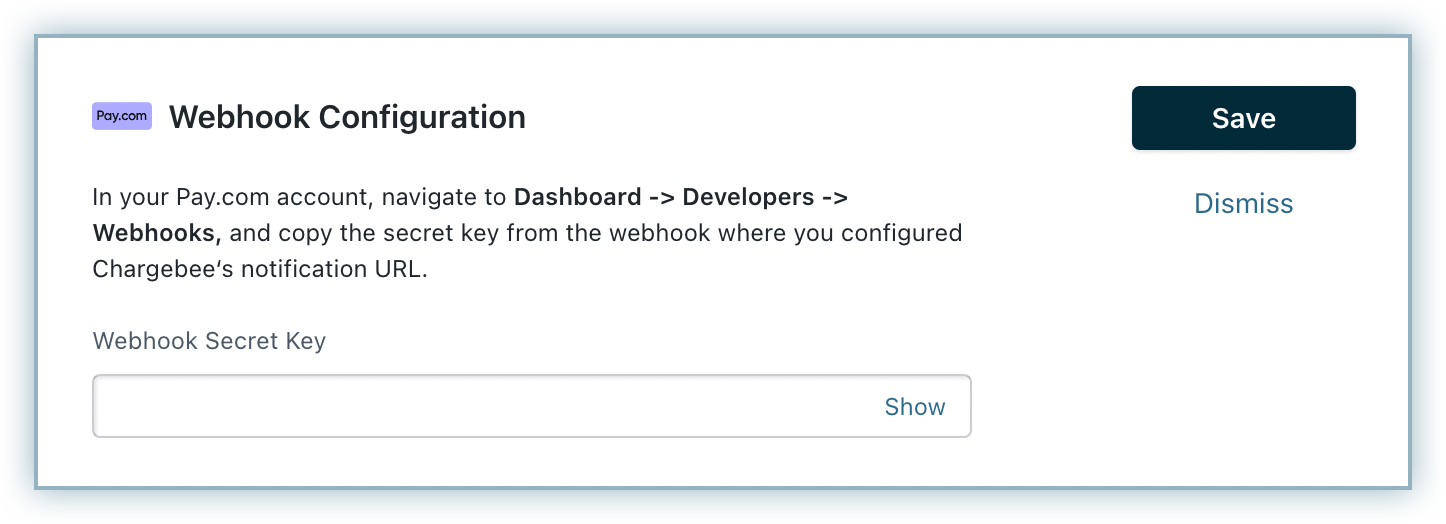
Enter the Webhook Secret Key copied from your Pay.com account as shown in the previous section and click Save.
Your webhook configuration is complete now. You can start viewing the webhook logs for the set events in your Pay.com account dashboard.
Supported Tokens
This integration supports the following tokens in the mentioned format:
| Token | Description | Formal and Sample |
|---|---|---|
| Raw Card Information | Raw Card details like Card number, expiry and CVV can be given as input if applicable. | First Name, Last Name, Card number, Card expiry, CVV, and Card billing address.card[] |
| Permanent Token | Permanent token is a combination of the customer ID and payment method ID available at the gateway. | Format - customer_id/payment_method_id Sample: 2844355640/pm_card_365001528248893440 |
| Chargebee Token | Chargebee.js token | token_id (Chargebee token can be created by giving Pay.com a permanent payment method ID) |
| Chargebee Payment Intent ID | This is the Payment Intent ID returned after a successful bank authorization process. | Format - **payment_intent[id]**Sample - __dev__8assMTnewj7fO__dev__cLD08udLibvNLcunV3uq81iAIujLLibhD |
Payment Flow
- Checkout Initiation: The customer initiates the checkout process.
- Payment Method Selection: The customer selects a credit card as the payment method during checkout.
- Initial Data Collection: a. The End Customer's details (Name, Billing Address, etc.) are collected based on the checkout page configuration. b. Card Details such as card number, expiry month & year, and CVV are collected.
- Non-3DS - If 3DS is not enabled, then payment is initiated directly & checkout is completed. (In this scenario, Auth Capture is a one-step process which means the payment is collected in a single step.)
- 3DS Authorization via Payment Intent a. If 3DS is enabled under Manage Cards on the Configure Pay.com page, then the payment goes through the Payment Intent flow, where the end customer is challenged with 3DS authentication. (Auth + Capture as two separate steps) b. The Auth API endpoint is invoked by which the respective checkout amount is held. c. 3DS challenge is enforced by redirecting the end customer to the 3DS challenge page. d. Post challenge completion, the Chargebee Payment Intent is moved to the Authorized Status.
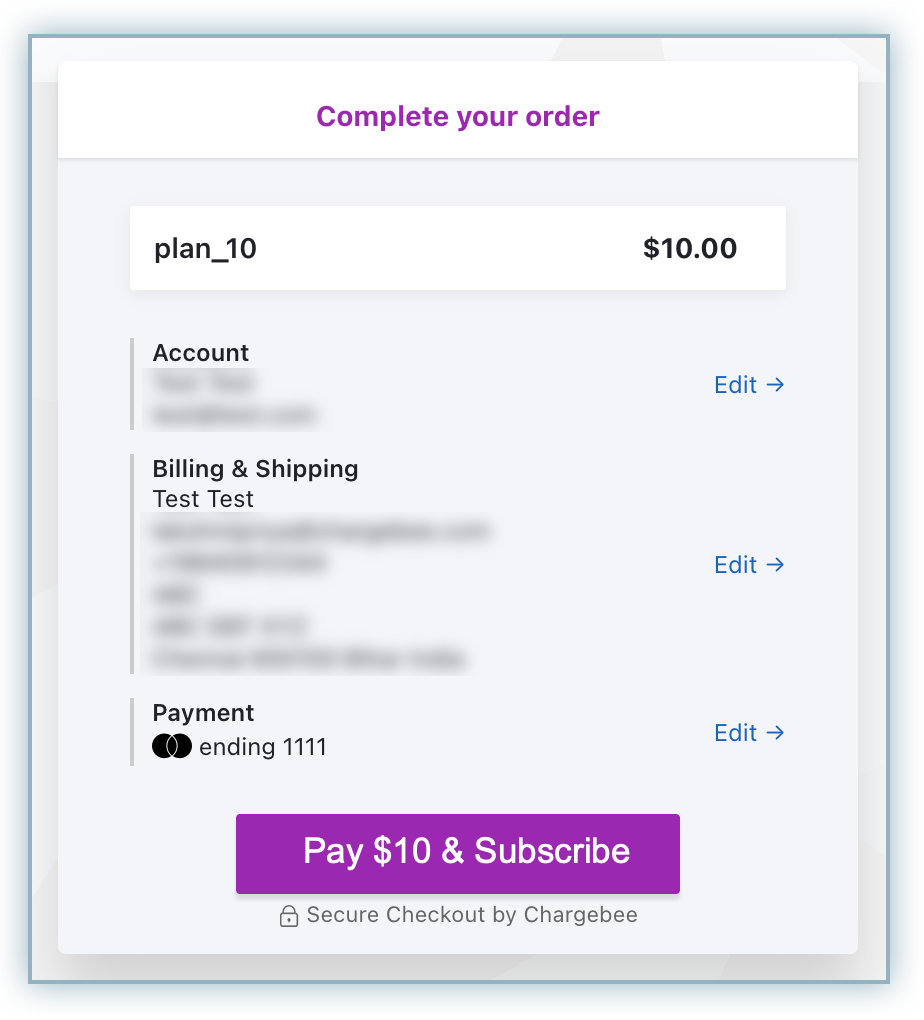
- Payment Summary Page: The customer is presented with a payment summary page, encompassing essential details like account information and billing particulars.
- Subscription Creation a. Upon clicking Pay & Subscribe, the subscription creation process is initiated. b. When the authorized payment intent is consumed for the subscription/invoice creation, the Charge API endpoint is invoked where the amount is deducted from the end customer account. c. Since Pay.com is a synchronous payment gateway, the transaction is settled instantly.
Adding or Updating Cards as a Payment Method
You can add cards as a payment method for Pay.com for this integration via the following methods:
- Via API a. Non-3DS Flow: Pay.com card can be added as a payment method via API using raw card information as well as a permanent token. b. 3DS Flow (if 3DS is enabled in the Gateway Configuration): Authorized payment intent is used as input to create a payment method via API, which implies that the payment method is added after the 3DS challenge.
- Via Checkout & Portal a. When the customer goes through the Checkout process and checks the box at the end for vaulting (storing or saving) the payment method for future/recurring use, it automatically gets saved for that customer. b. You can also send Add Payment Method / Update Payment Method requests to the end customers, upon which the payment method gets added.
Automated Account Updater
Chargebee seamlessly integrates with Pay.com to automatically update customer account details. Whenever there's a change in the customer's card number, expiration date, or CVV, Chargebee instantly reflects these updates in realtime. This automated process occurs during any subsequent transaction utilizing the vaulted Payment Method Token. By eliminating the need for manual intervention, this integration ensures a hassle-free experience for your customers while preventing payment failures caused by outdated card information.
Let us see how the Automated Account Updater works with an example:
- Initially, a customer completes a transaction using a credit card, which is securely stored in Pay.com with the unique token T1.
- If any modifications occur to the card linked with token T1, such as changes in the card number, expiration date, or CVV, Pay.com automatically updates this information.
- Subsequently, if a renewal transaction is initiated from Chargebee utilizing the token T1, Pay.com notifies Chargebee about the updated card details in the transaction response.
- Chargebee promptly detects and integrates the new card details provided by Pay.com, ensuring that customer information remains accurate and up-to-date.
Statement descriptor
We support the use of statement descriptors for Pay.com transactions. It's important to note that Pay.com enforces a character limit of 22 characters for these descriptors.
Information
If you configure a longer string, Pay.com automatically truncates it to 22 characters to adhere to this restriction.
Chargeback management
Chargebee supports chargeback management with Pay.com integration. Pay.com notifies about both Chargeback Initiated and Chargeback Lost events, so you can configure the required settings in the chargeback management settings in the Chargebee app. Learn more about configuring chargeback management.
Note
It is mandatory to complete the webhook endpoint configuration for dispute management to function properly in Chargebee, as disputes are notified to the Chargebee system by Pay.com via webhooks only.
Checkout Flow
The checkout process for Pay.com is a typical card checkout flow with a 3DS challenge (if applicable). It contains the following steps:
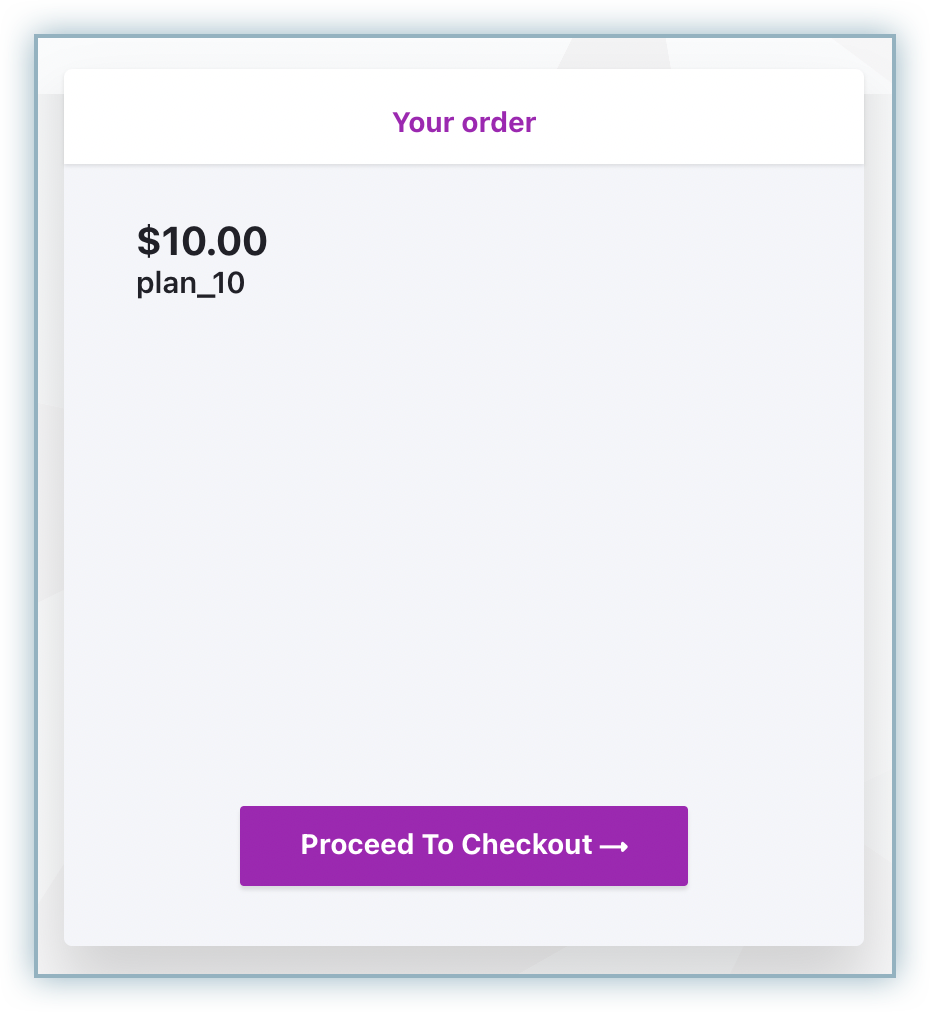
- The checkout is initiated, and the Your Order page appears. Click Proceed to Checkout to initiate a purchase.
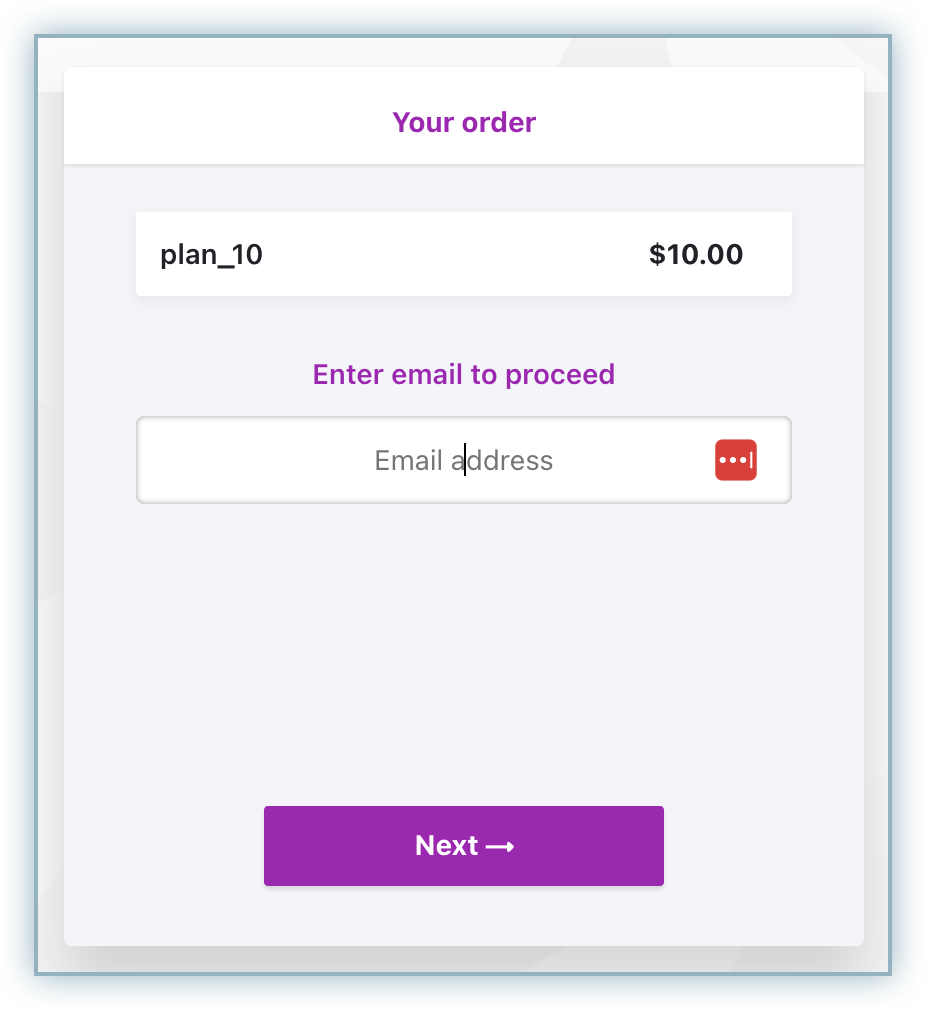
- Enter your email address and click Next.
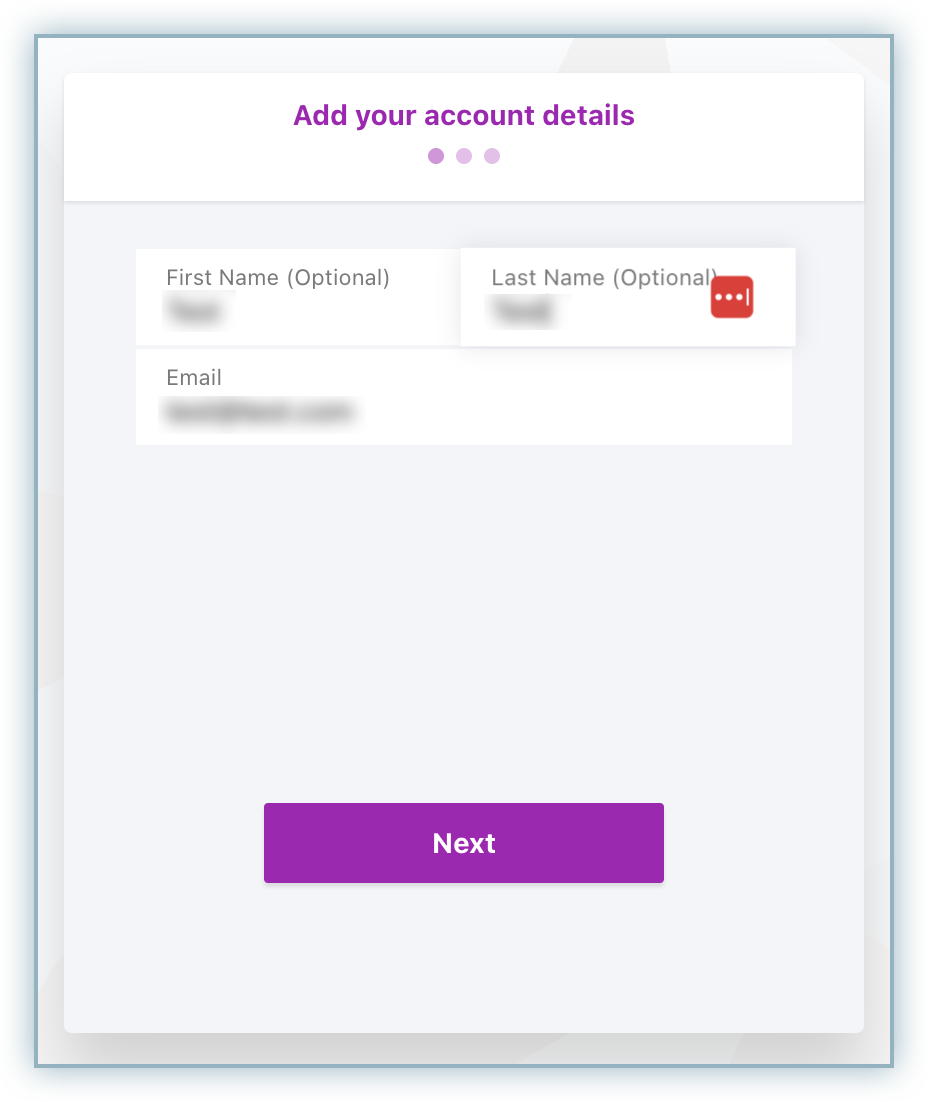
- Enter your Account Details field, i.e. First Name, Last Name, and Email Address, and click Next.
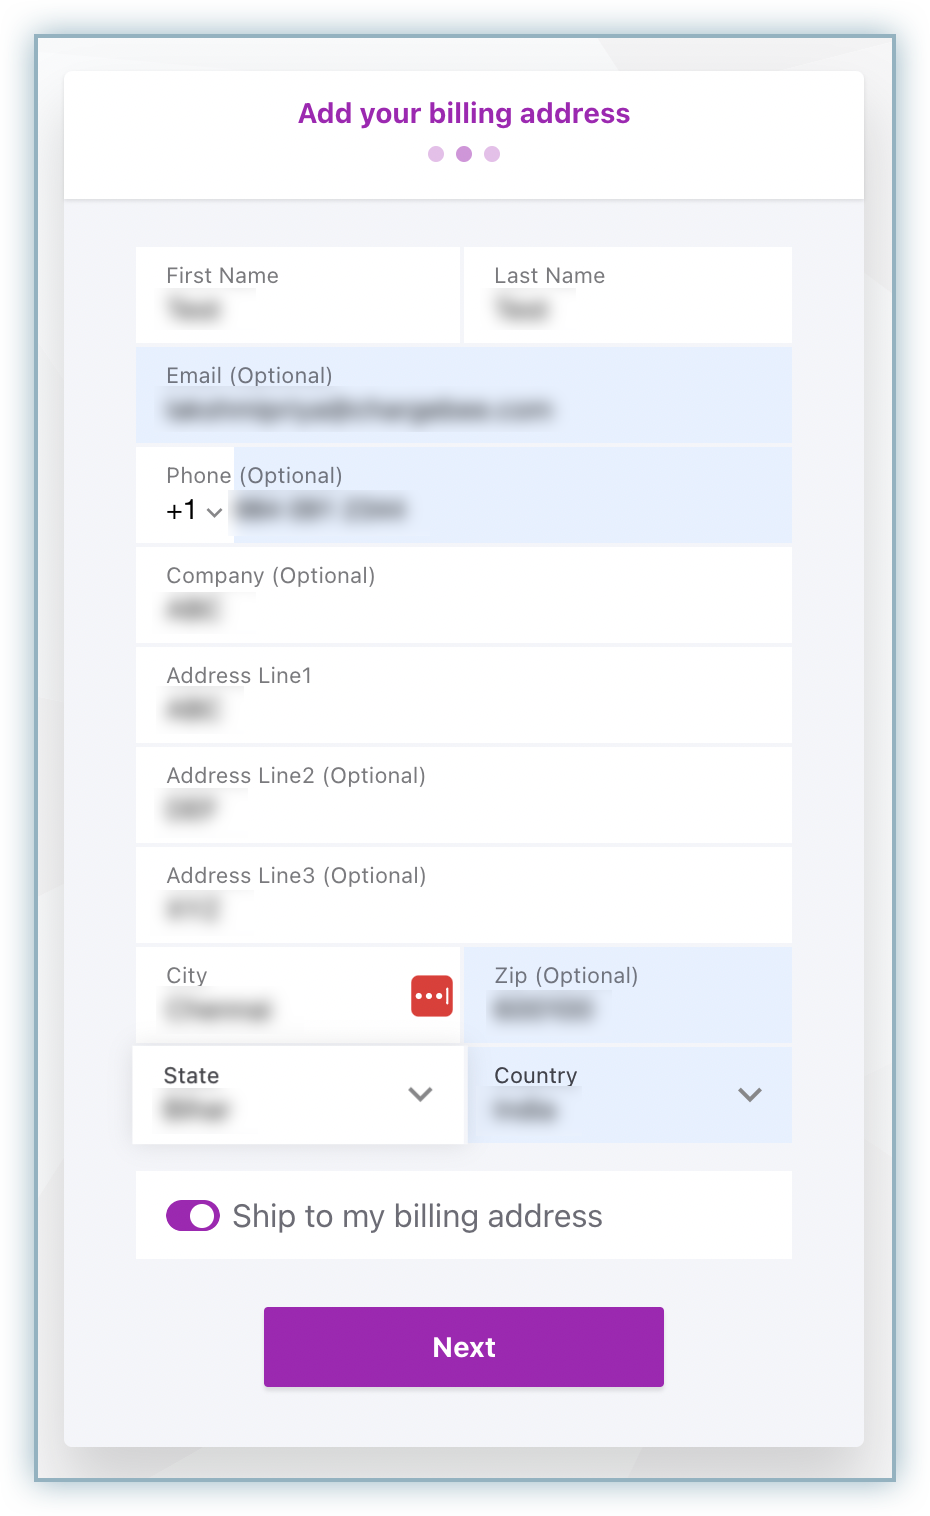
- Enter the Billing Address details and click Next.
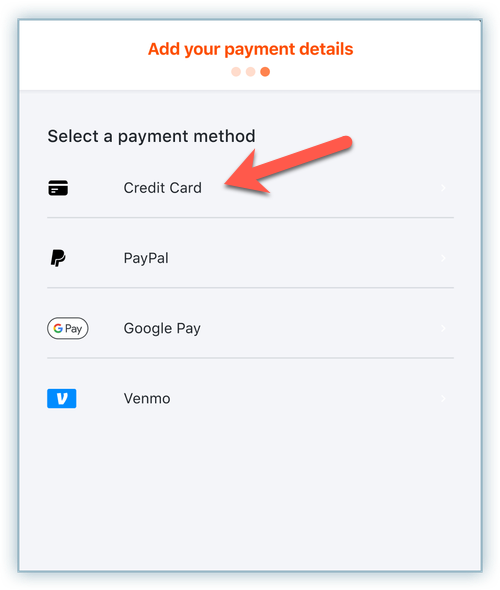
- Select **Credit Card as the payment method.
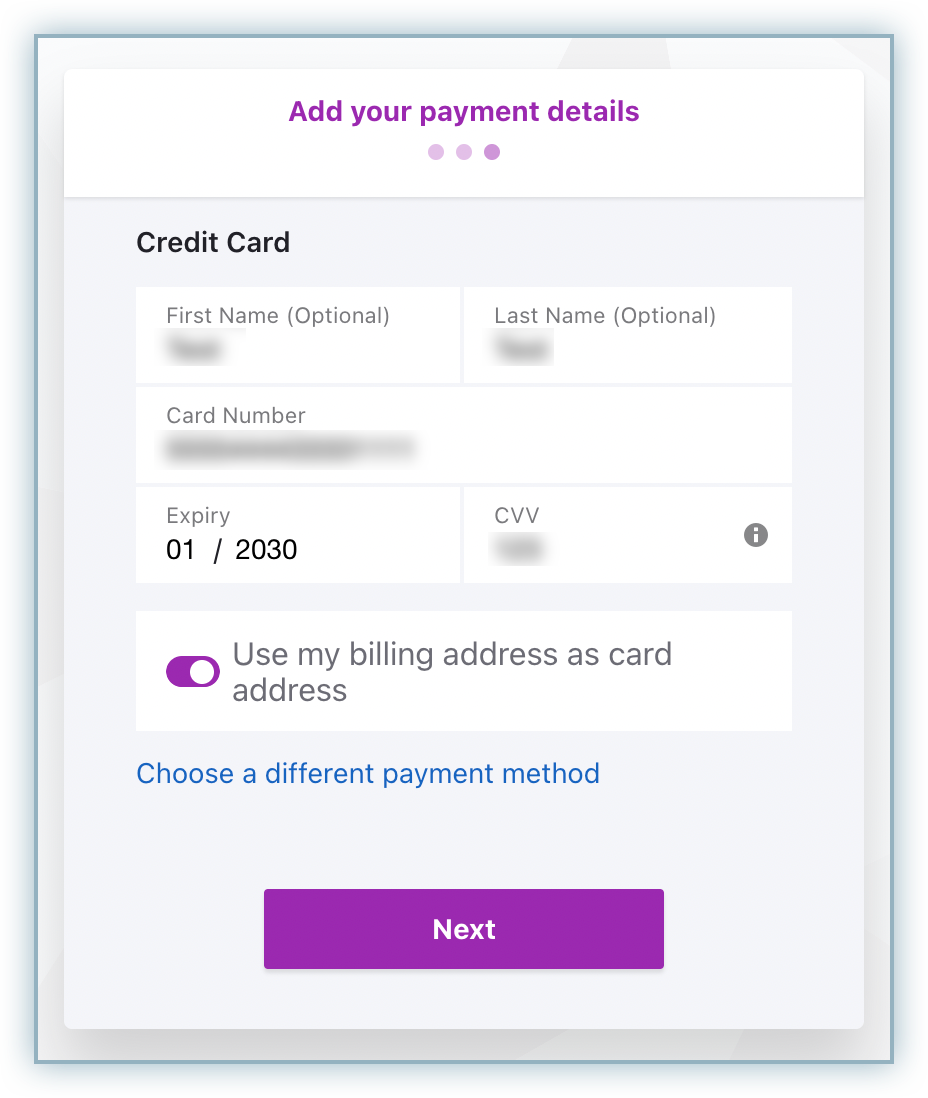
- Enter the Card details - Card Number, Expiry (Month & Year) and CVV. Click Next.
- Once reviewed, click Pay & Subscribe.
- If 3DS is enabled and the added credit card is applicable for the 3DS challenge, you will be redirected to the 3DS challenge page.
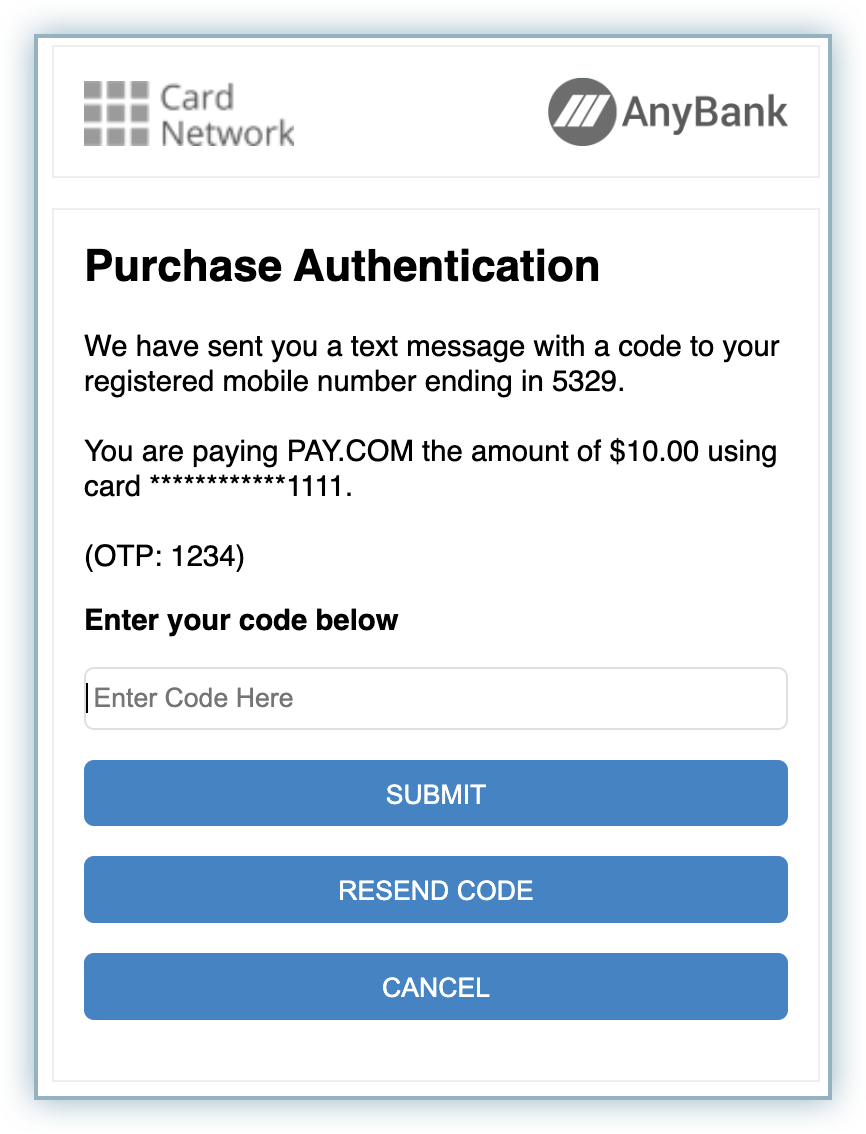
- Once the challenge is completed, you will be redirected back to Chargebee's checkout. Checkout is now completed and the subscription is created successfully.
Was this article helpful?