Payment Retries with FlexPay
This feature is a Private Beta Release. Request access to enable FlexPay for your Test and Live sites.
Chargebee's dunning suite offers options including payment retries, automated email notifications, Pay Now Links, and final automated actions, all designed to streamline the recovery of failed payments and automate key processes. Expanding on these capabilities, Chargebee now allows integration of FlexPay into its dunning framework, enhancing the efficiency of payment recovery efforts.
FlexPay is a leading payment retry management platform dedicated to addressing failed payments and customer churn for subscription-based companies. In collaboration with Chargebee, FlexPay's retry functionalities integrate seamlessly with Chargebee's dunning system.
Within Chargebee's dunning settings, you can configure distinct retry periods for Chargebee's internal retries and designate a period for FlexPay to intervene with its AI-powered retry engine for unresolved payments. When a payment enters FlexPay's retry queue, the engine determines the optimal retry frequency and time intervals. All transactions attempted through FlexPay synchronize with Chargebee, providing a comprehensive overview of payment recovery efforts.
Contact FlexPay for pricing and commercial details.
Supported gateways and payment methods
Currently, this integration supports the following payment gateways and payment methods:
| Gateways | Payment Methods |
|---|---|
| Stripe | Card, Google Pay, Apple Pay |
| Adyen | Card, Google Pay, Apple Pay |
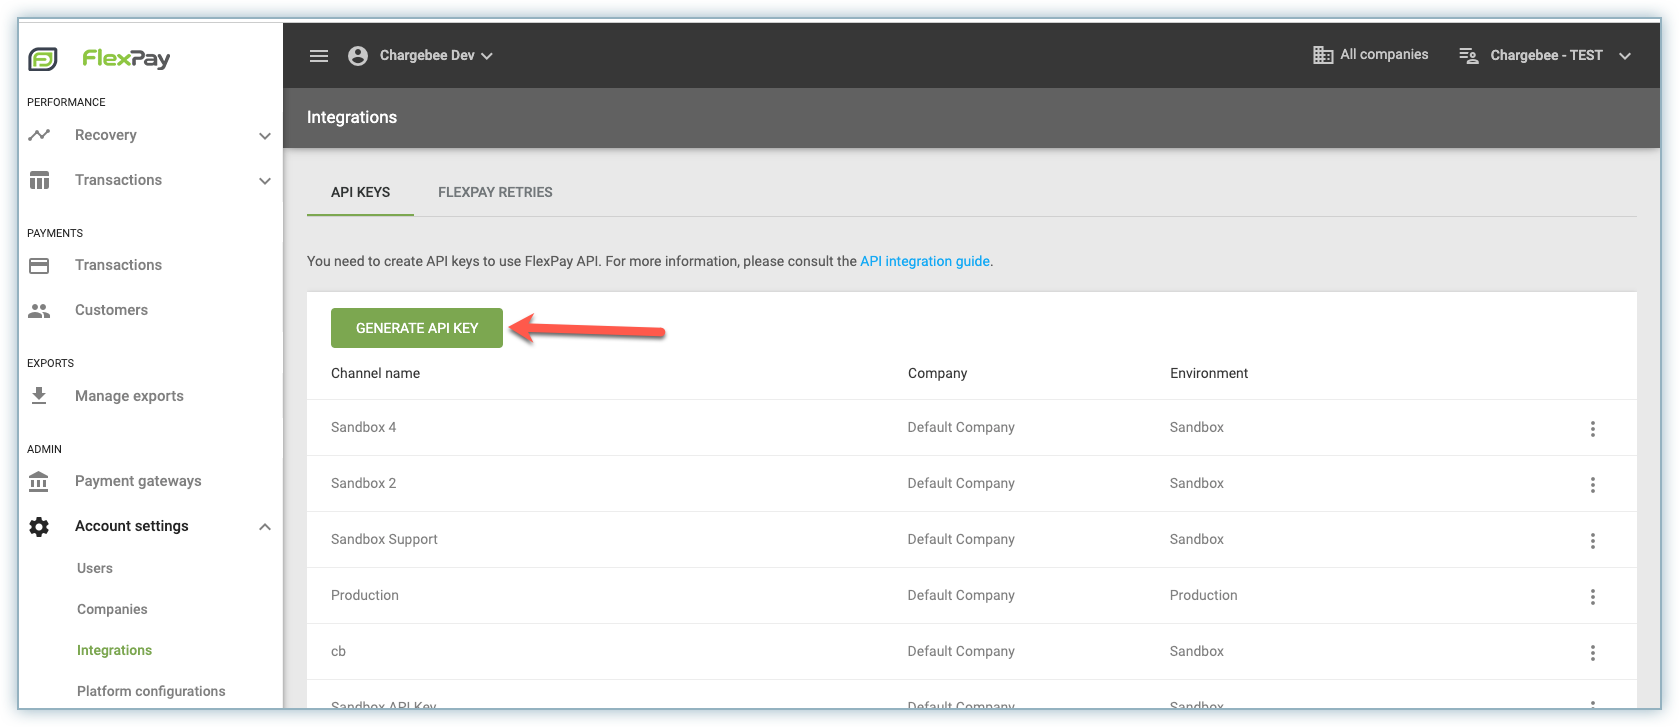
Retrieve FlexPay API Key
While connecting FlexPay with Chargebee, you are required to enter the FlexPay API Key. Follow the steps below to retrieve the FlexPay API Key from your FlexPay account:
-
Log in to your FlexPay account.
-
Go to Account Settings > Integrations > API Keys.
-
Copy an existing API Key or click Generate API Key to create a new one. Keep the key safe for use when configuring FlexPay in Chargebee.
Connect FlexPay to Chargebee
Note:
FlexPay is disabled by default in Chargebee. Reach out to Chargebee support to enable FlexPay for integration in Chargebee.
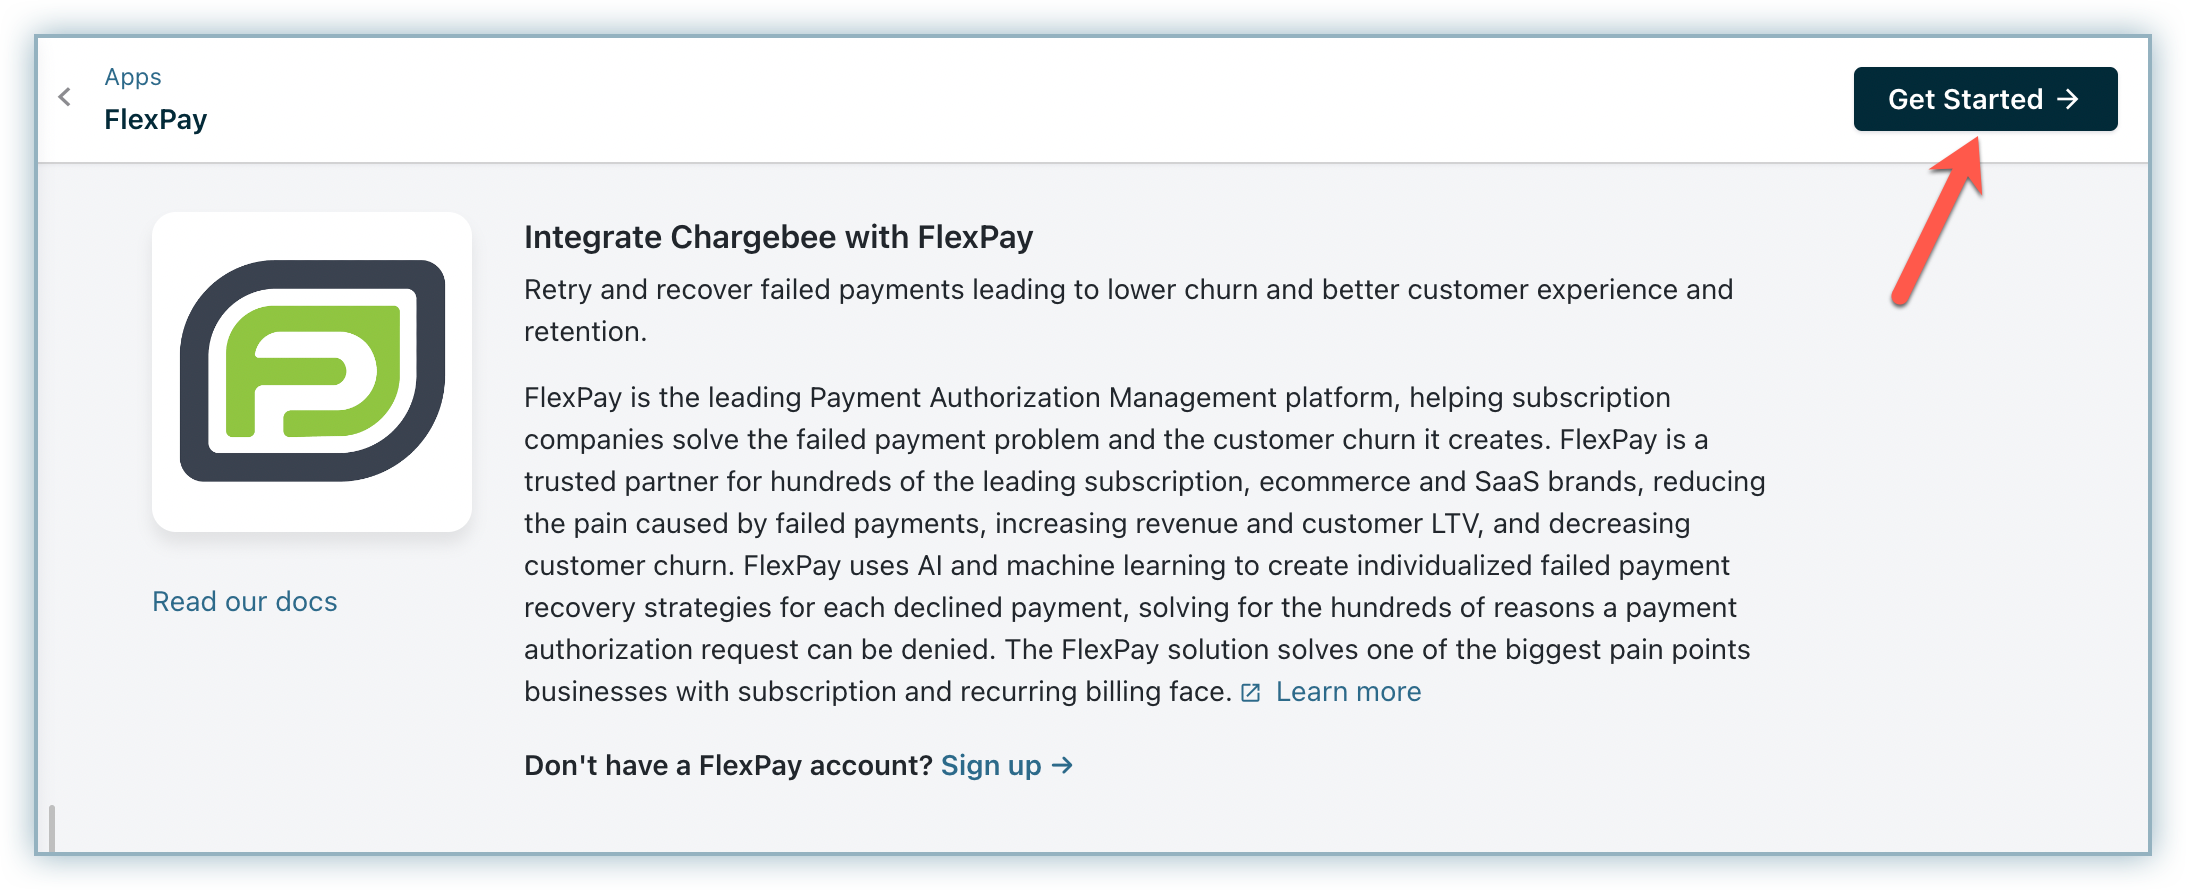
Once enabled, follow these steps to connect FlexPay to Chargebee:
-
The FlexPay app is in beta and not listed in the Chargebee marketplace. Use the URL https://domain.chargebee.com/third_party/flexpay to navigate to the FlexPay page in your Chargebee site.
-
On the Apps > FlexPay page, click Get Started.
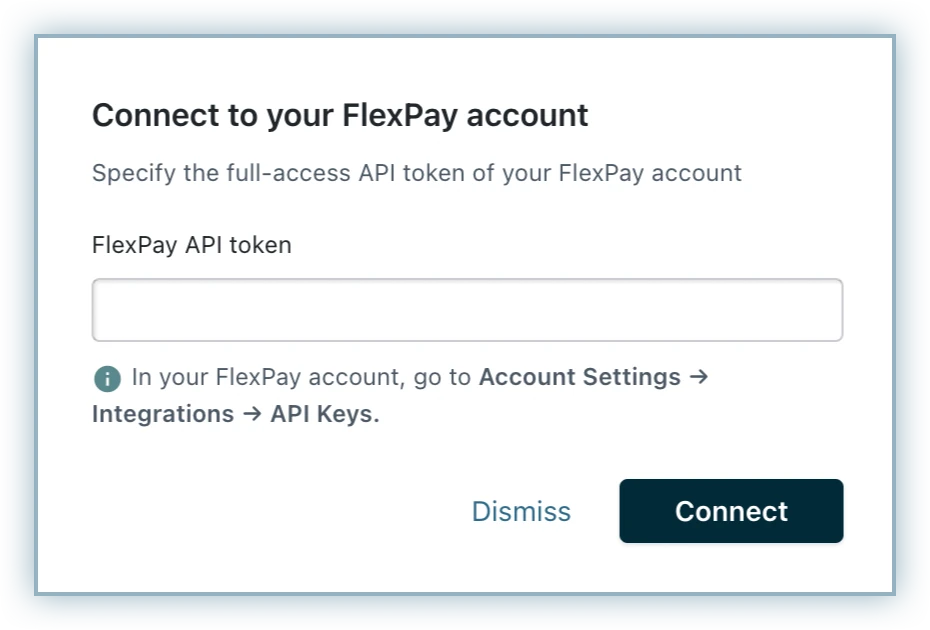
-
Enter the FlexPay API Token and click Connect.
Important configurations in your Chargebee site
The following configurations are crucial for using FlexPay with Chargebee:
Gateway Mapping configuration
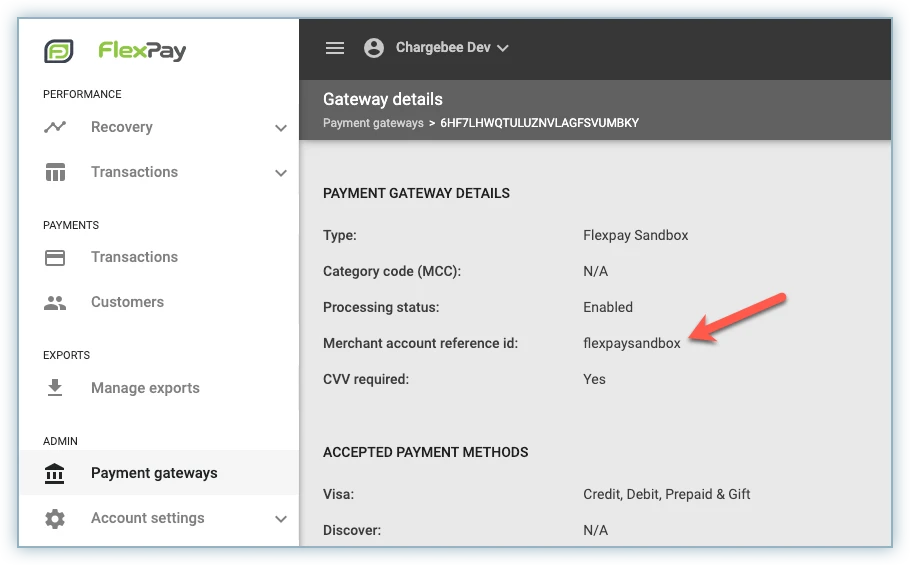
Before you configure mapping in your Chargebee site, retrieve the Merchant Account Reference ID from your FlexPay account. Follow these steps:
-
Login to your FlexPay account.
-
Click Payment Gateways from the FlexPay dashboard.
-
Click on the desired gateway and copy the Merchant Account Reference ID.
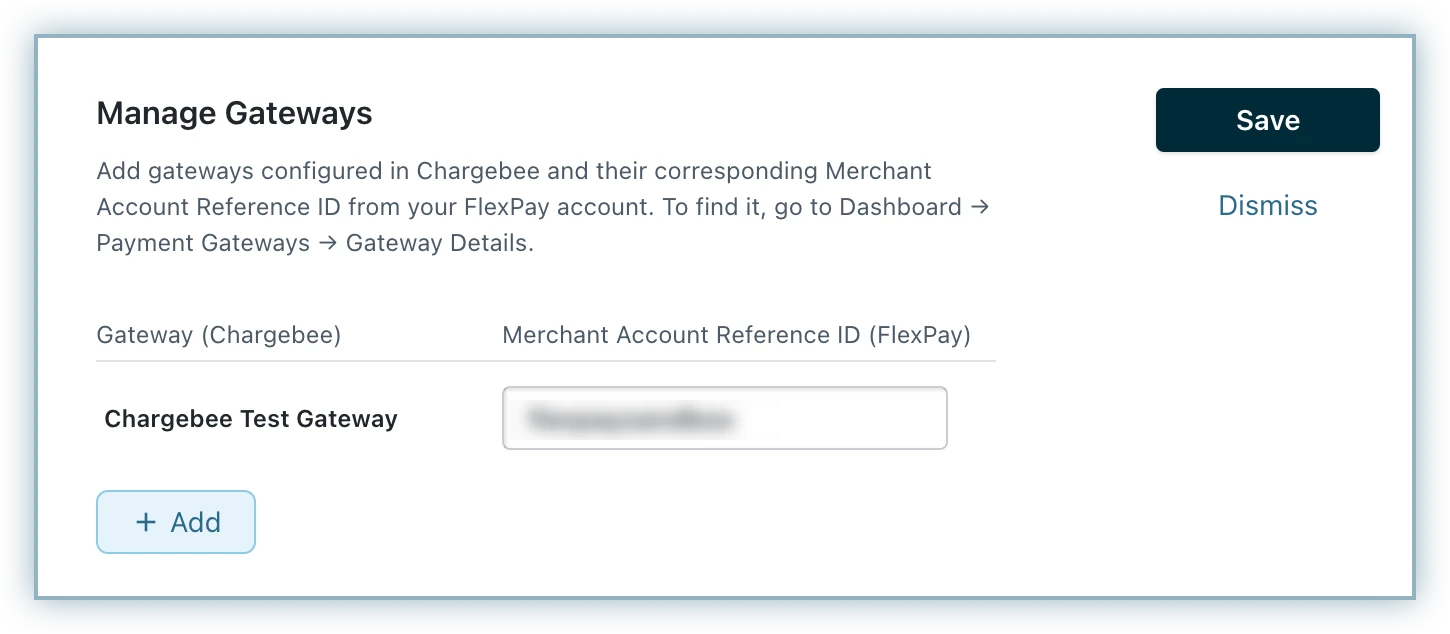
Once you have the Merchant account reference ID, move to the Chargebee app and follow these steps to manage existing gateway mapping or add a new mapping:
-
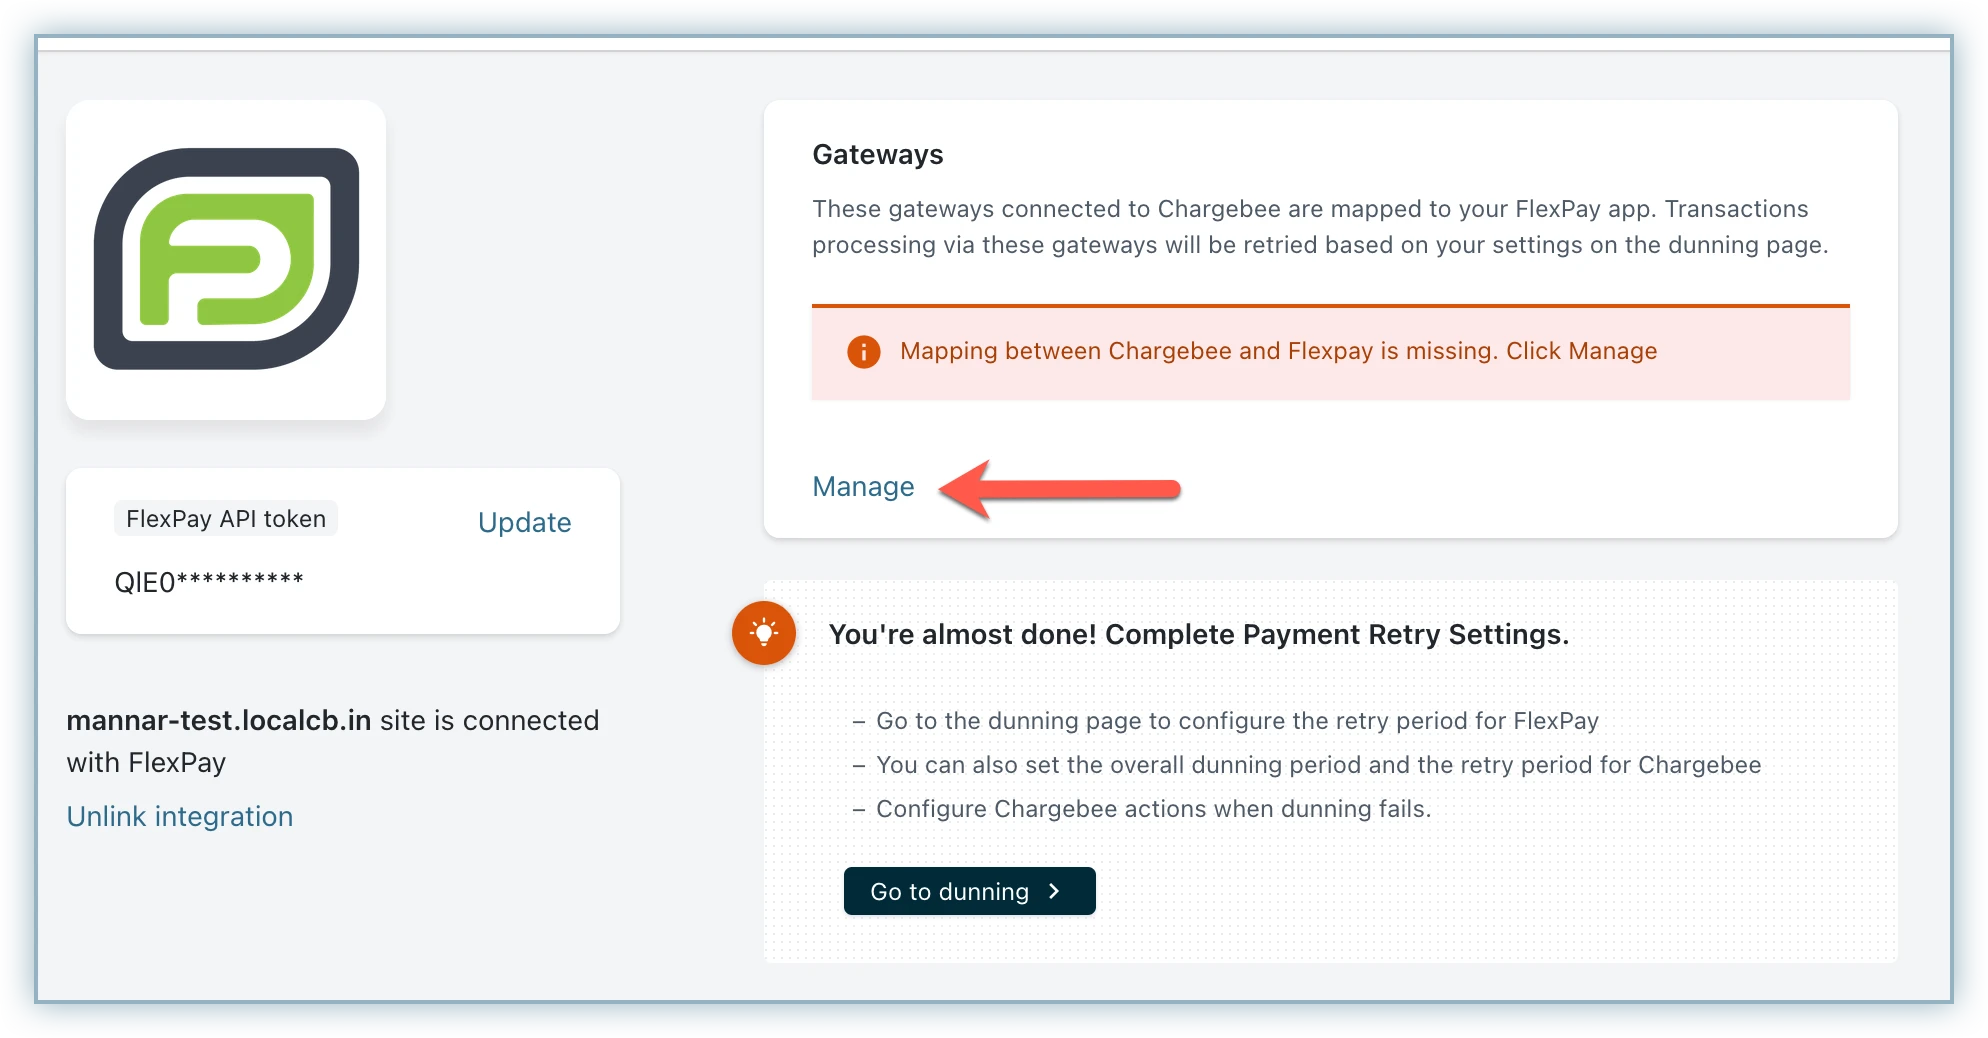
On the Configure FlexPay page, click Manage under the Gateways section.
-
Edit any existing mapping or click Add to add a new mapping.
-
Select the corresponding gateway account configured in your Chargebee site.
-
Enter the Merchant Account Reference ID fetched from the gateway account created in FlexPay.
-
Click Save.
-
If you use more than one gateway, make sure to retrieve the correct mapping for all gateways from FlexPay and configure it here for the setup to work properly
Note:
Ensure that the same underlying account is used for both Chargebee and FlexPay. In the example above, the same Stripe account is used to create both the Chargebee gateway account and the FlexPay gateway account. Integration with FlexPay will not work and payments will not reach FlexPay for retries if the wrong credentials are mapped in this section.
Dunning Configuration
Follow these steps to configure dunning:
-
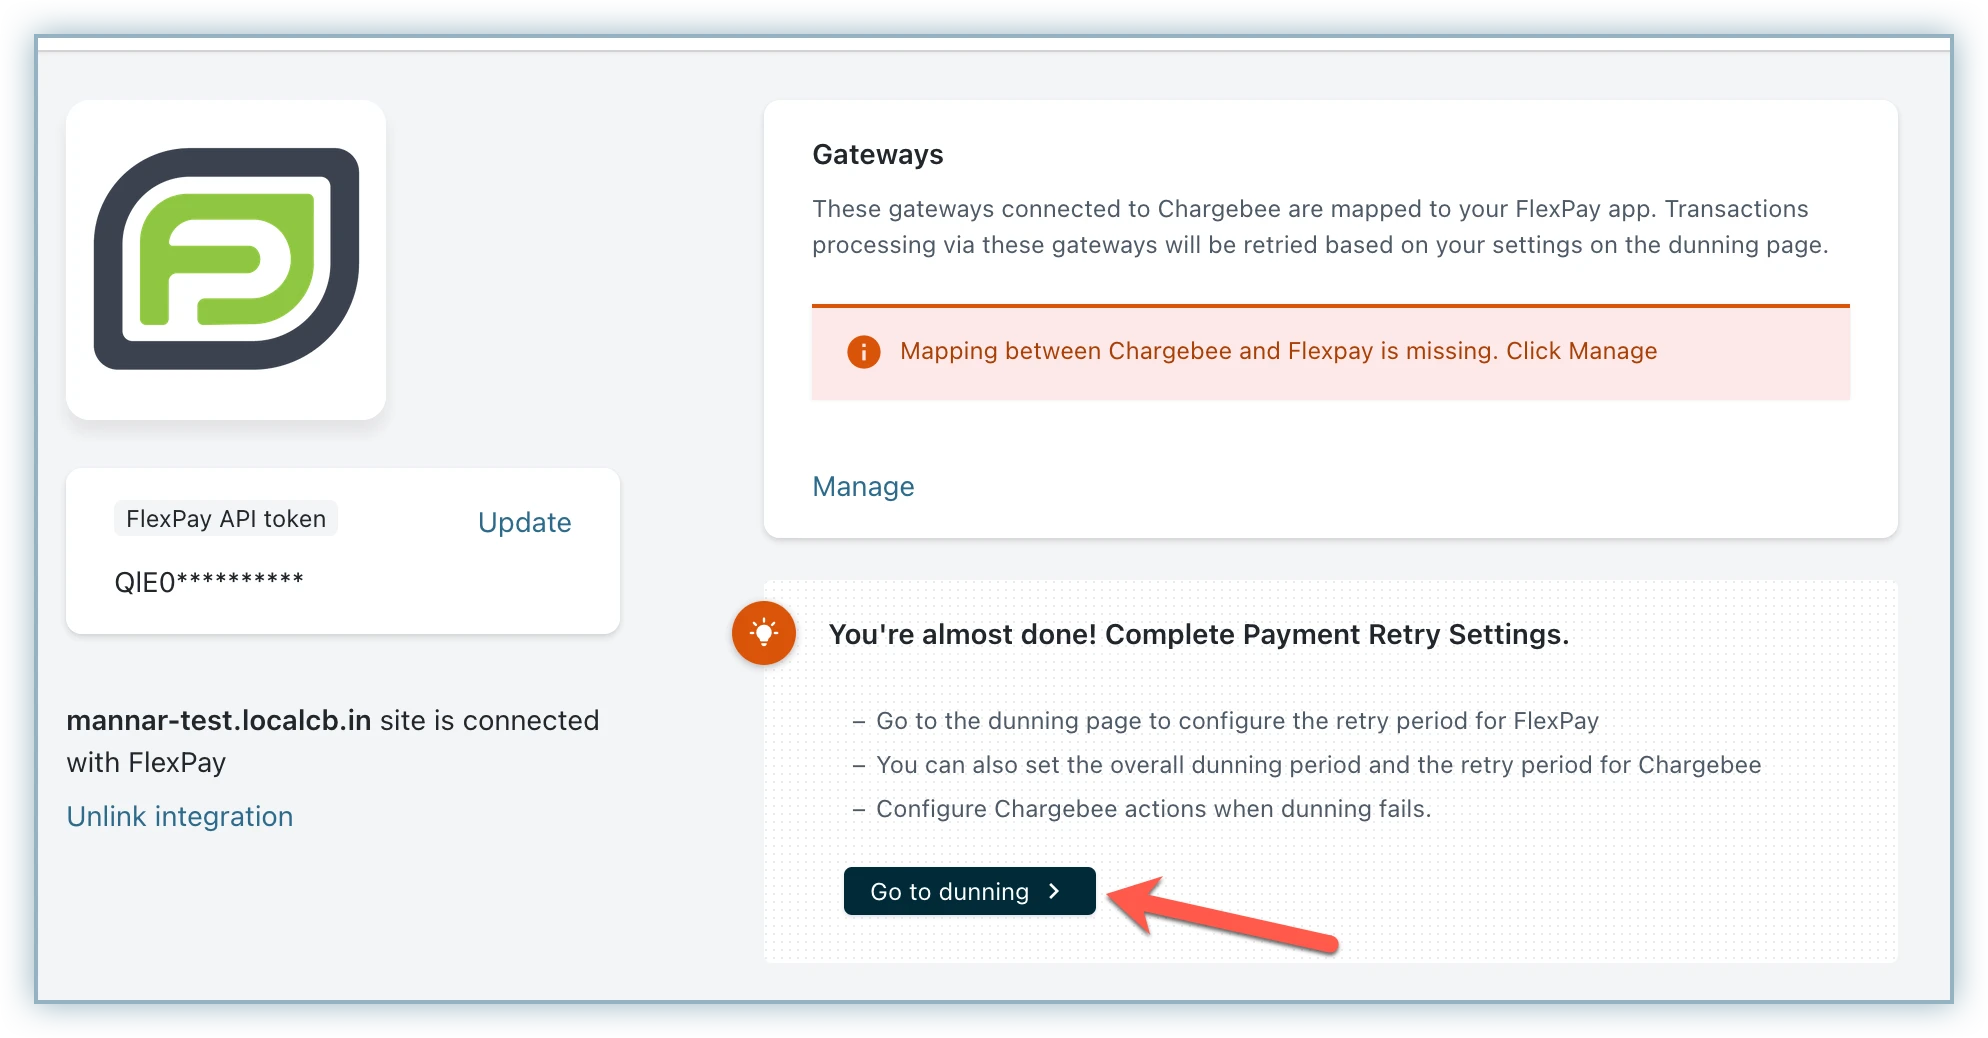
On the Configure FlexPay page, click on Go to Dunning.
-
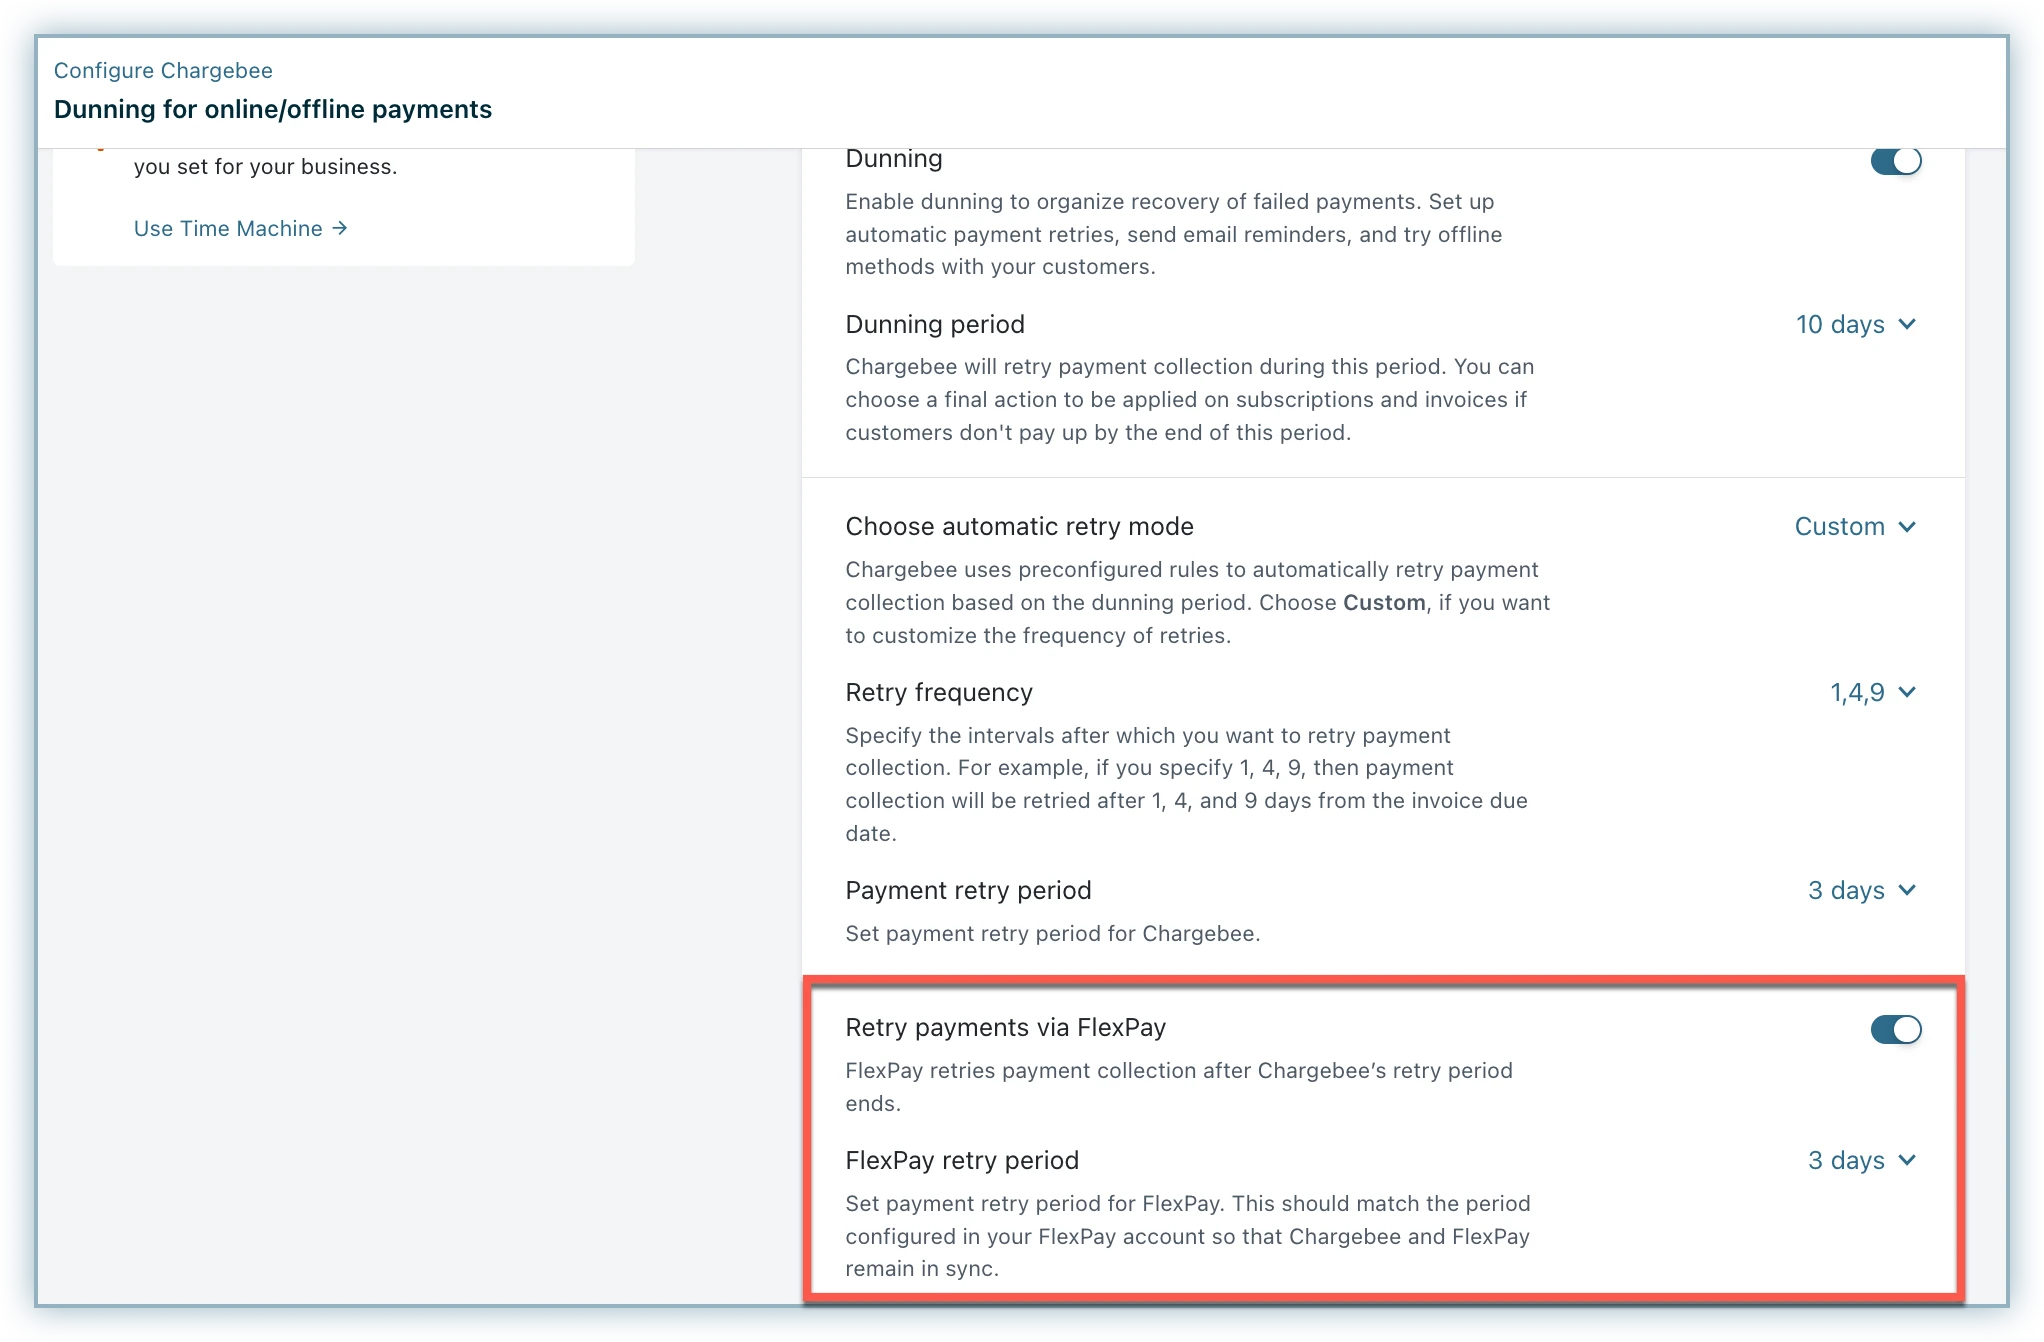
Enable Retry Payments via FlexPay to enable FlexPay dunning. You will get two additional options:
- Payment Retry Period: Enter the number of days to specify the dunning period within Chargebee.
- FlexPay Retry Period: Enter the number of days to specify the dunning period within FlexPay.
Note:
The sum of both these periods should be less than or equal to the Dunning period.
Transactions via FlexPay Dunning
Once the configuration is done, now failed transactions are ready to be recovered via FlexPay.
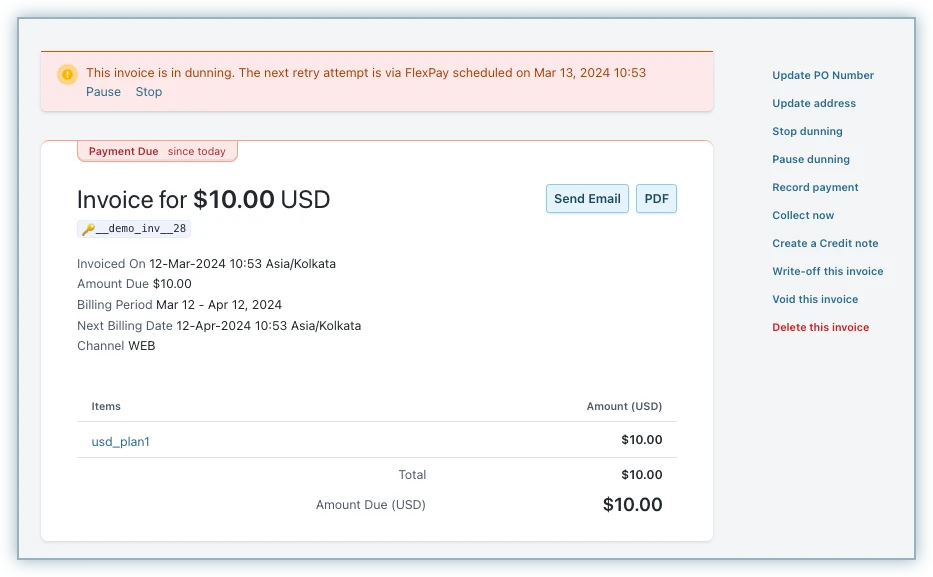
The invoice will show an info panel at the top that says which payment method will be used for the next retry.
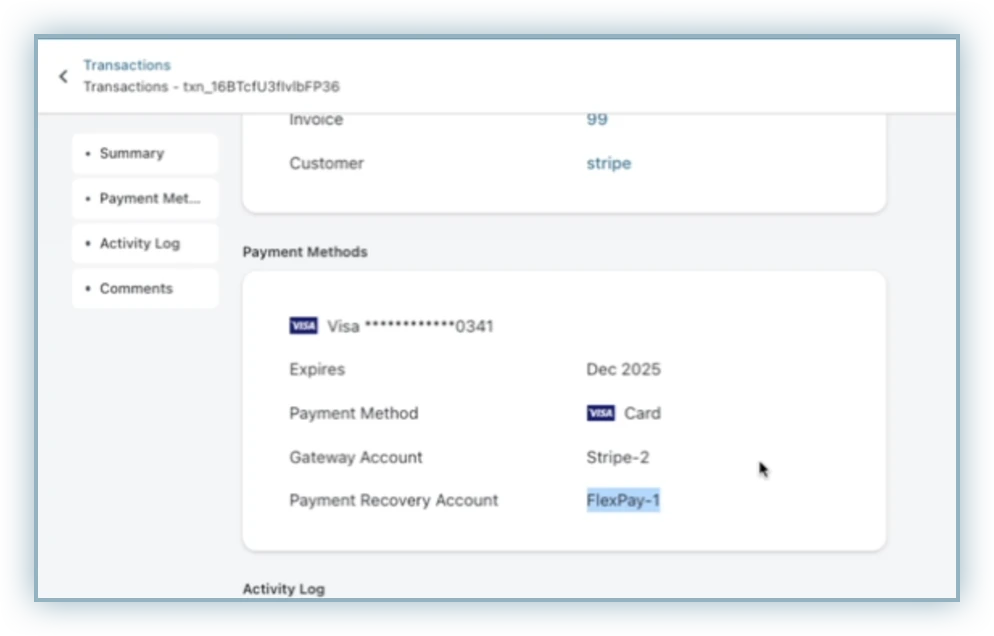
When a transaction is made through FlexPay, the transaction is shown in the merchant UI with the associated Payment Recovery Account.
Note:
- If a payment is processed through FlexPay and a refund is requested, the refund will also be processed through FlexPay.
- When dunning processes occur through FlexPay, note that if a customer updates their card details in Chargebee, retries will persist using the original card details initially sent to FlexPay.
- The sequence for payment recovery follows a structured approach: Chargebee handles initial recovery attempts, followed by FlexPay, according to the configured dunning periods within the dunning settings.
Was this article helpful?