Charges
Your Chargebee product catalog allows you to define plans and addons that represent your products and services. However, you may often need to bill your customers for products or services that are nonrecurring. Some of these charges may be ad hoc and not part of your standard product catalog.
Nonrecurring addons and one-time charges help you bill your customers in these cases. You can apply these to your customers through the Chargebee user interface or API.
Non-recurring Addon
In addition to plans and addons in Chargebee that are billed on a recurring basis, you can also create nonrecurring addons. These addons represent products or services that are charged for on an ad hoc basis and are either purchased once immediately or scheduled for purchase when certain events occur, such as subscription activation or trial start.
A nonrecurring addon can also be applied to a customer record, in which case it is not associated with any particular subscription.
Modeling a non-recurring or ad hoc purchase as a non-recurring addon in Chargebee, rather than as a one-time charge, gives you greater insights into which types and how many addons were applied to your subscriptions using reports.
Non-recurring addons can be applied to customers or subscriptions in several ways:
Add Addon Action
The Add One-Time Addon action can be found on the details page of both a subscription or a customer.
-
Applying to a Customer:
- Select the one-time addon to apply.
- If needed, change the price or quantity of the addon in the Unit Price field. If you want to price your addons in fractional amounts with more than two decimal places or charge for fractional quantities, you can enable multi-decimal support.
- Select a coupon to apply. (Only one-time coupons that are applicable to the addon are available here).
- Service Period:
- Choose the time period for the addon service by specifying the from and to dates and times.
- The default period is the current date and time and can be set to any period in the past or future.
- Chargebee accounts for this service period while running the revenue recognition and deferred revenue reports.
Note The time component can only be chosen when your site runs on millisecond-based billing mode.
-
Applying to a Subscription
- Select the one-time addon to apply. Any one-time addon, including those that may have been restricted for the selected plan, can be applied using this action.
-
If needed, change the price of the addon. If you want to price your addons in fractional amounts with more than two decimal places or if you want to charge for fractional quantities, you can enable multi-decimal support.
-
Service Period:
- Choose the time period for the addon service by specifying the from and to dates and times.
- The period must start after the subscription start date and time.
-
Chargebee accounts for this service period while running revenue recognition and deferred revenue reports.
Note The time component can only be chosen when your site runs on millisecond-based billing mode.
-
Choose whether to invoice the addon charge immediately or add it to unbilled charges for the subscription.
Edit Subscription
You can also add one-time addons after clicking Edit Subscription on the details page of a subscription.

- Choose the one-time addon to charge for. Any addons that have been restricted for the selected plan will not be available.
- If needed, change the price of the addon. If you want to price your addons in fractional amounts with more than two decimal places or charge for fractional quantities, you can enable multi-decimal support.
- Select the event at which to charge the addon. For some events, you can also choose whether the addon is charged just once or every time the event occurs.
- Service period:
- Choose the number of days that the addon service is to be accounted for. The period starts on the day/time the addon is charged.
- Chargebee accounts for this service period while running revenue recognition and deferred revenue reports.
Adding via API
A couple of API calls for charging nonrecurring addons are as follows:
- Create invoice for addon: immediately add a non-recurring addon to a customer or subscription.
- Charge addon at term end: add a non-recurring addon to a subscription at the end of its current term.
Note
- Changing the addon price is not possible if the pricing model for the addon is tiered, volume or stairstep.
- If an applicable coupon is present on the subscription, it will be applied to the addon.
One-Time Charges
You can collect a one-time payment from a customer or subscription using the Add Quick Charge option. This option is useful when you need to collect payments for goods or services that are not typically included in the subscription model. It can also be used to collect payment for a product or service that is not modeled in your system, such as a nonrecurring addon.
A one-time charge can be applied to a customer or subscription through the Chargebee UI or API:
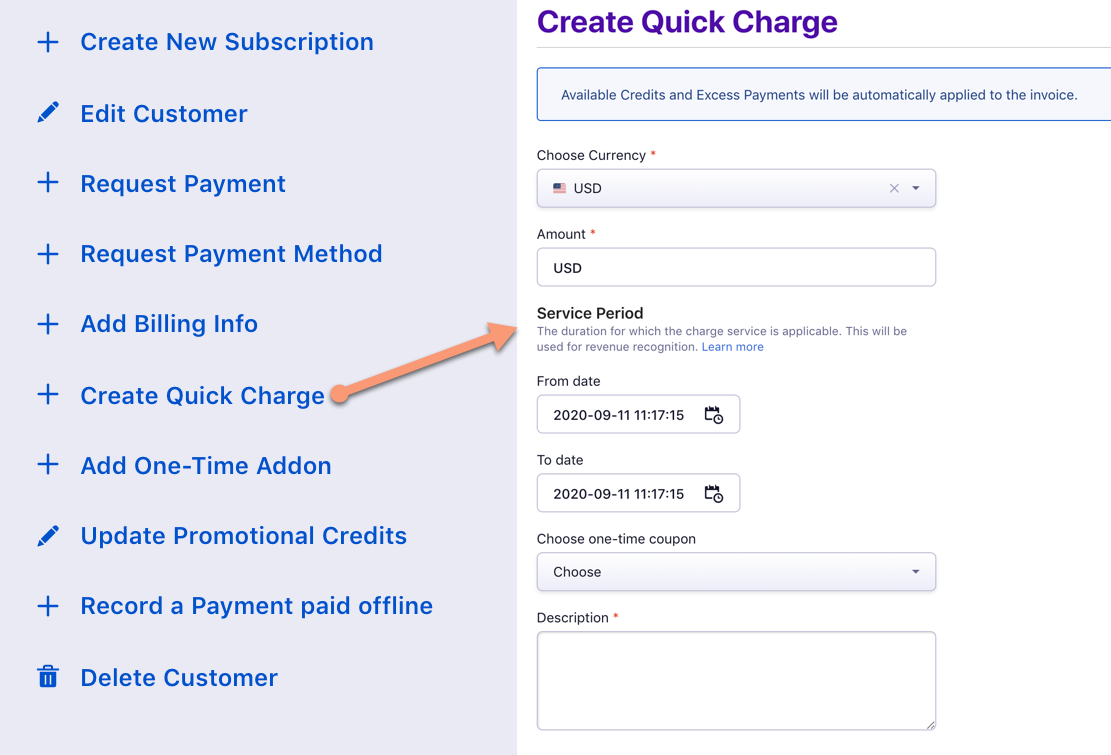
Add Charge via UI
On the Chargebee user interface, the Add Addon action on the details page of either a subscription or customer can be used to add a one-time charge. (Shown below for a customer)
-
Applying to a Customer:
- Specify the amount for the charge.
- Select a coupon to apply. (Only one-time coupons that are applicable to the invoice amount are available.)
- Service period:
- Choose the time period for the charged service by specifying the from and to dates and times.
- The default period is the current date and time and can be set to any period in the past or future.
- Chargebee accounts for this service period while running revenue recognition and deferred revenue reports.
Note The time component can only be chosen when your site runs on millisecond-based billing mode.
- Provide a description for the charge.
-
Applying to a Subscription:
- Specify the amount for the charge.
- Service Period:
- Choose the time period for the charged service by specifying the from and to dates and times.
- The period must start after the subscription start date and time.
- Chargebee accounts for this service period while running revenue recognition and deferred revenue reports.
Note The time component can only be chosen when your site runs on millisecond-based billing mode.
- Provide a description for the charge.
- Choose to invoice the charge immediately or add it to unbilled charges. An email notification can also be sent when the invoice is generated.
- Coupons cannot be applied to the charge if invoiced immediately.
- However, when the charge is added to unbilled charges, any invoice-amount coupon on the subscription will also apply to this charge.
Note: You cannot view the total one-time charges for a customer in the UI.
Opt-in feature
Alert while charging a customer having unpaid invoices:
Enabling this feature displays a prompt while a new charge is created for a customer with unpaid invoices.
Click Proceed to charge the customer or Dismiss to cancel the charge creating event.
This applies for charges created during,
- Subscription creation
- Subscription change
- Subscription term extension
- Subscription reactivation
- Add Addon or Add Charge actions
The prompt appears irrespective of the charge being invoiced immediately or added to unbilled charges.
To avail this feature, contact support.
Add Charge via API
Here are a couple of API calls that can be used to add charges:
- Create invoice for charge: immediately add a charge to a customer or subscription:
- Add charge at term end: add a charge to a subscription at the end of its current term.
Adding One-time Addons and Quick Charges
In addition to creating invoices for a single addon or quick charge, you can also create invoices for multiple charges and non-recurring addons together. When you want to add multiple ad hoc charges or non-recurring addons to a customer or a subscription, you can use the Add One-Time Addons and Quick Charge action.
To raise an Invoice for multiple ad-hoc charges and addons, follow these steps:
-
Navigate to the details page of the customer or subscription.
-
Click Add One-Time Addons and Quick Charge on the Action panel.

-
On the Add One-Time Addons and Quick Charges page, click Add Quick Charge to add any ad hoc charges.
-
In the Add Charge pop-up, enter the following details:
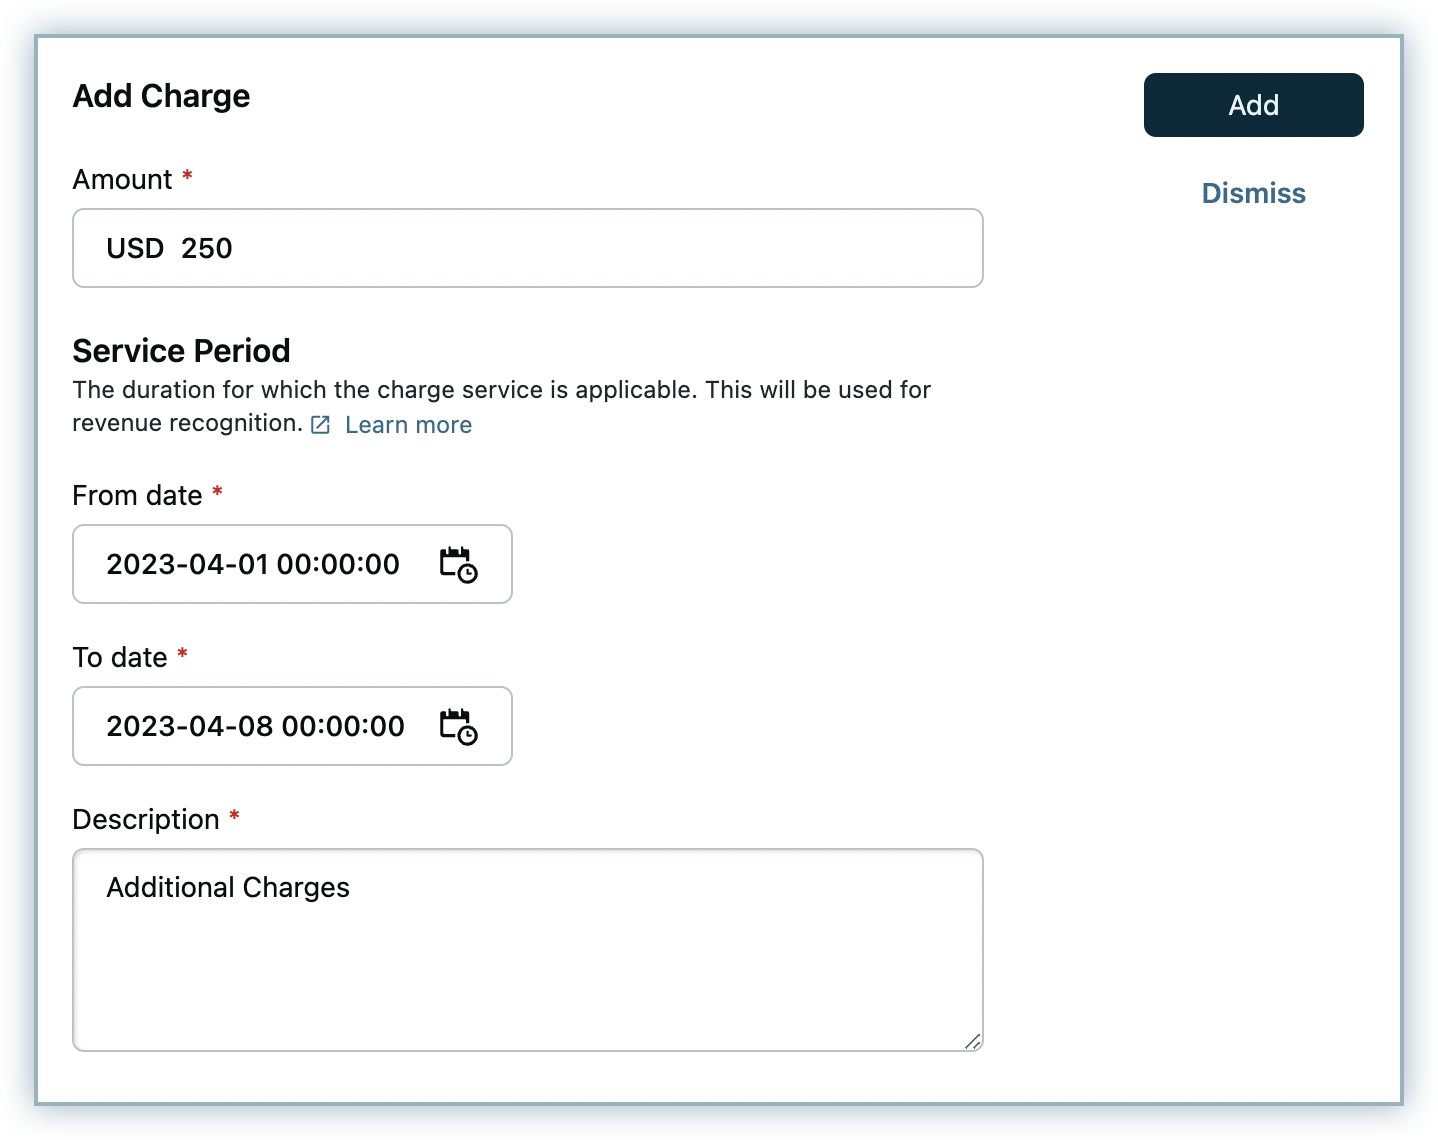
- Currency: Specify the currency for the charge.
- Amount: Specify the amount for the charge.
- Service Period: Select the time period for the charged service. Specify the from and to dates and times. Chargebee considers this service period for revenue recognition and deferred revenue reports. Note: The time component can only be chosen when your site runs on millisecond-based billing mode.
- Provide a description for the charge.
- Select Taxable if this charge is taxable (if left unselected, tax is not applied to this charge).
- Click Add. You can use Add Quick Charge to add more charges as needed.
-
Click Add One-Time Addon to add nonrecurring addons.
- Select an addon from the drop-down list.
- The price of the addon as configured is displayed. You can modify this price if needed. If you want to price your addons in fractional amounts with more than two decimal places or charge for fractional quantities, you can enable multi-decimal support.
- Service Period: Select the time period for the charged service. Specify the from and to dates and times.
- Chargebee considers this service period for revenue recognition and deferred revenue reports.
- Note: The time component can only be chosen when your site runs on millisecond-based billing mode.
- Tax-related fields as defined for the addons are displayed.
- Click Add. You can click Add One-Time Addon to add more nonrecurring addons as needed.
-
You can click Add Coupon/Coupon Code to apply a coupon. (Multiple coupons of the same type can also be added. Contact support to enable this feature.)
-
Specify the PO number if required.
-
Under Invoice Notes, you can add additional information to be displayed to your customers on the invoice. Invoice notes configured for invoices in general, and those added for a customer, subscription, or nonrecurring addon, if any, are displayed here as well. You can remove some of these notes and add a new note as needed. This note is displayed first in the invoice under Invoice Notes.
-
If the addon is a physical good to be shipped, you can add the shipping address details. You can choose to ship to the customer's billing address, or you can add a new shipping address. Any existing shipping addresses available for the customer are also available for selection.
-
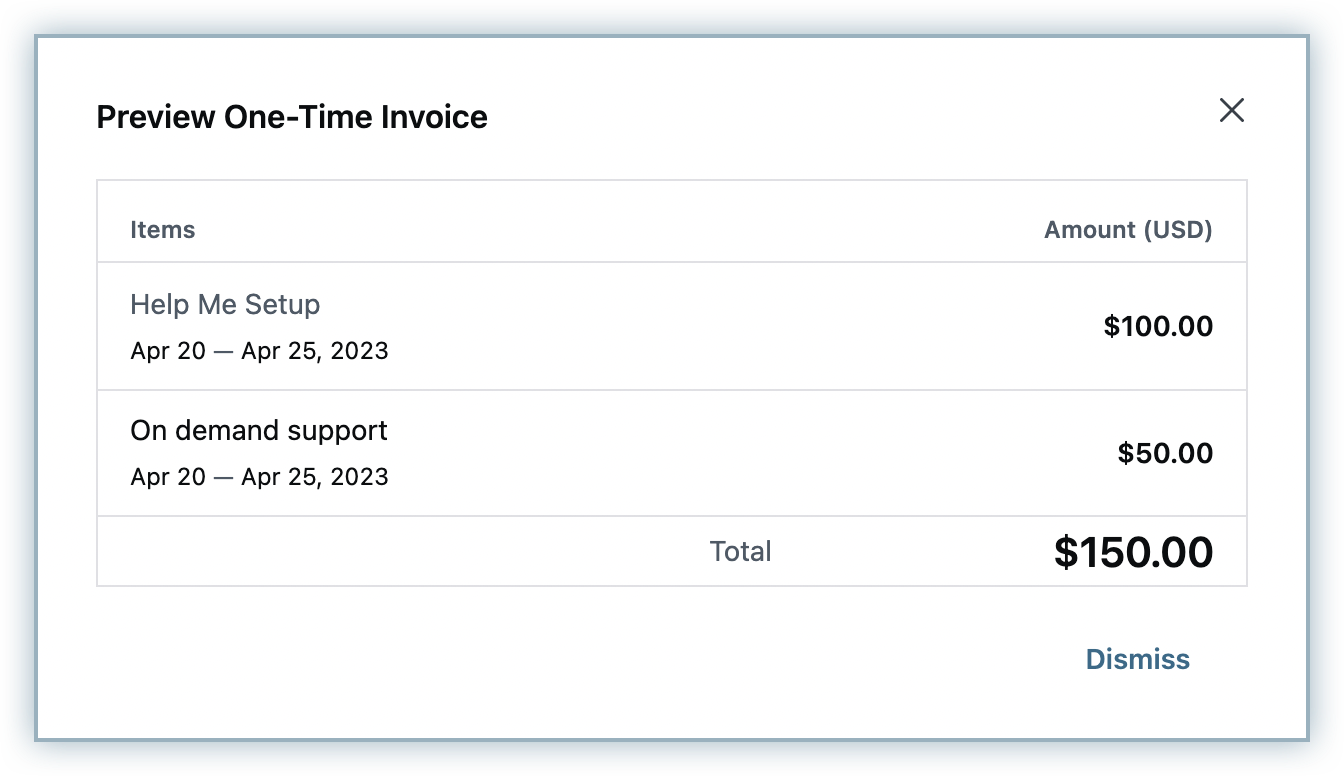
Click Preview and Send to preview the invoice, then click Create Invoice.
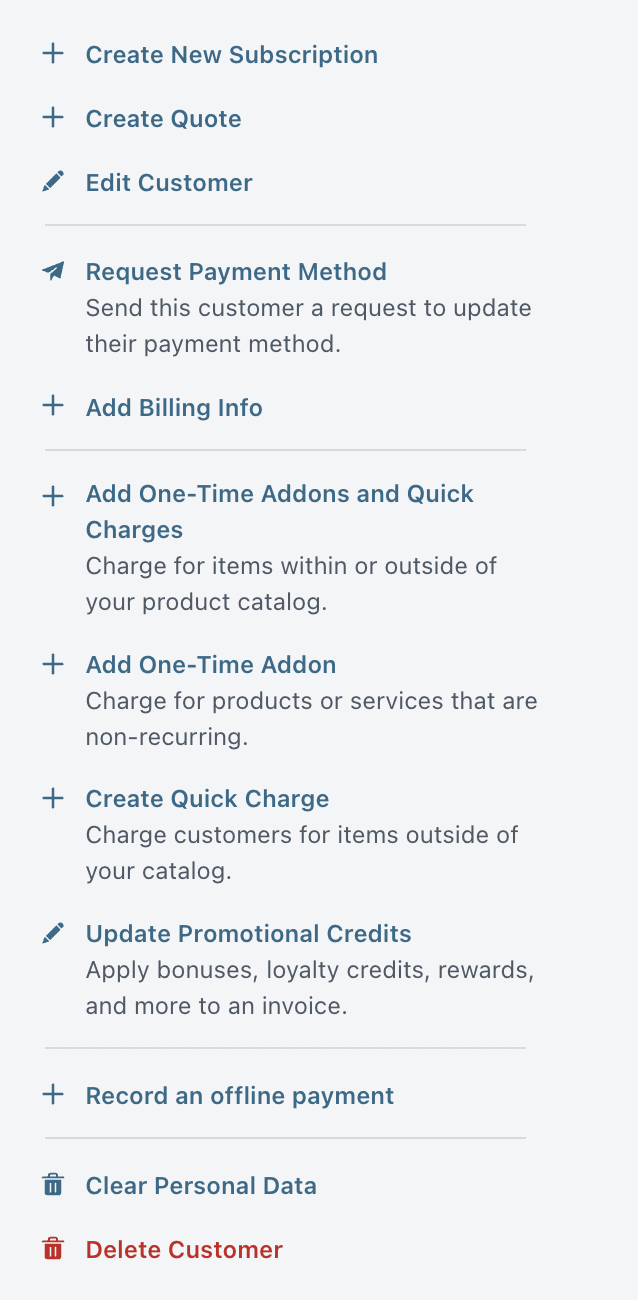
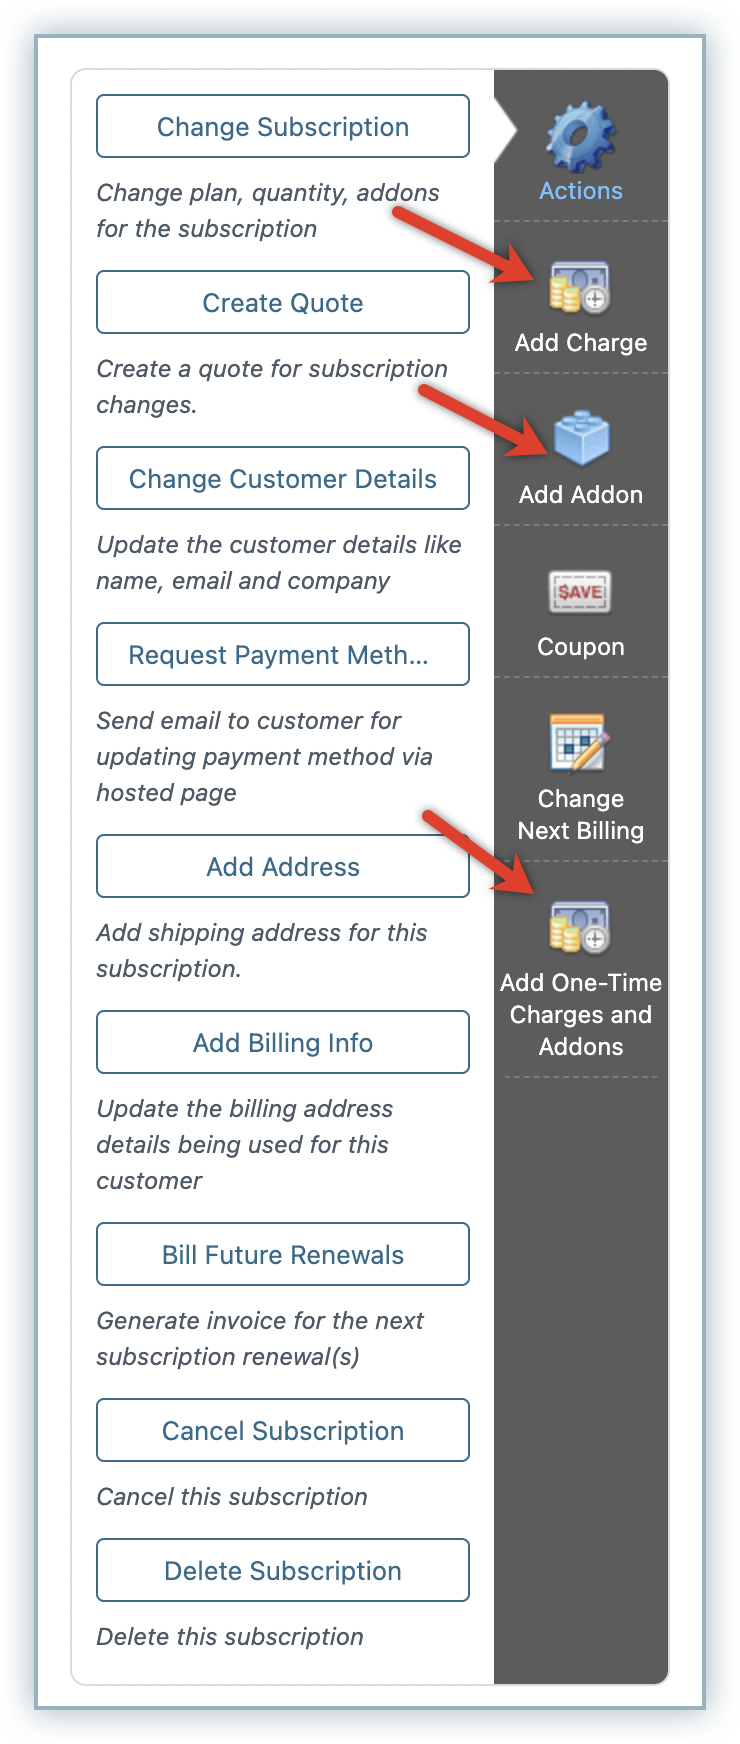
Classic UI users
Here's how the Add Addon, Add Charge and Add One-Time Charges and Addons option are displayed on the Action panel:
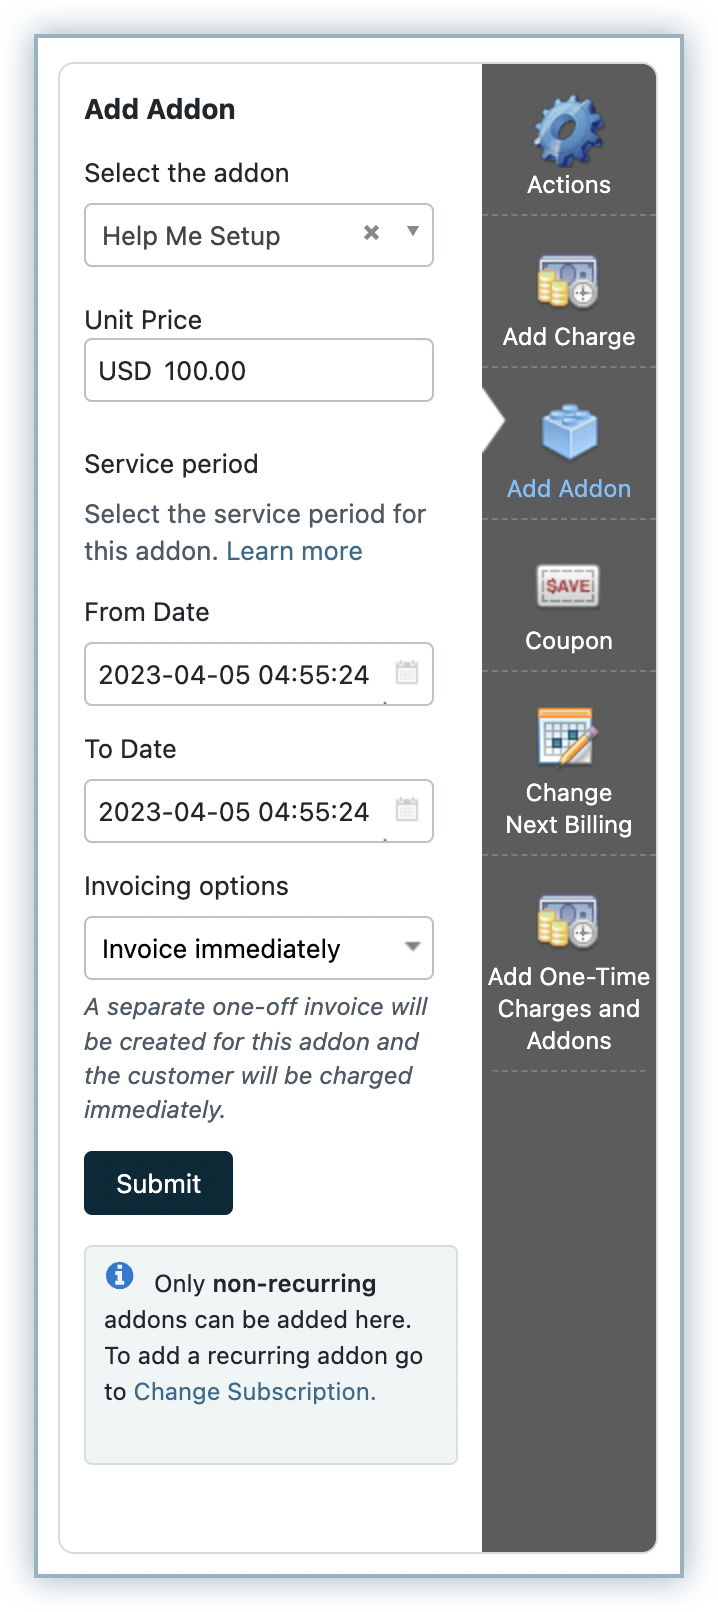
Here's how Add Addon configuration appears in the Change subscription page:
Was this article helpful?