Pre-implementation Settings in Sage Intacct
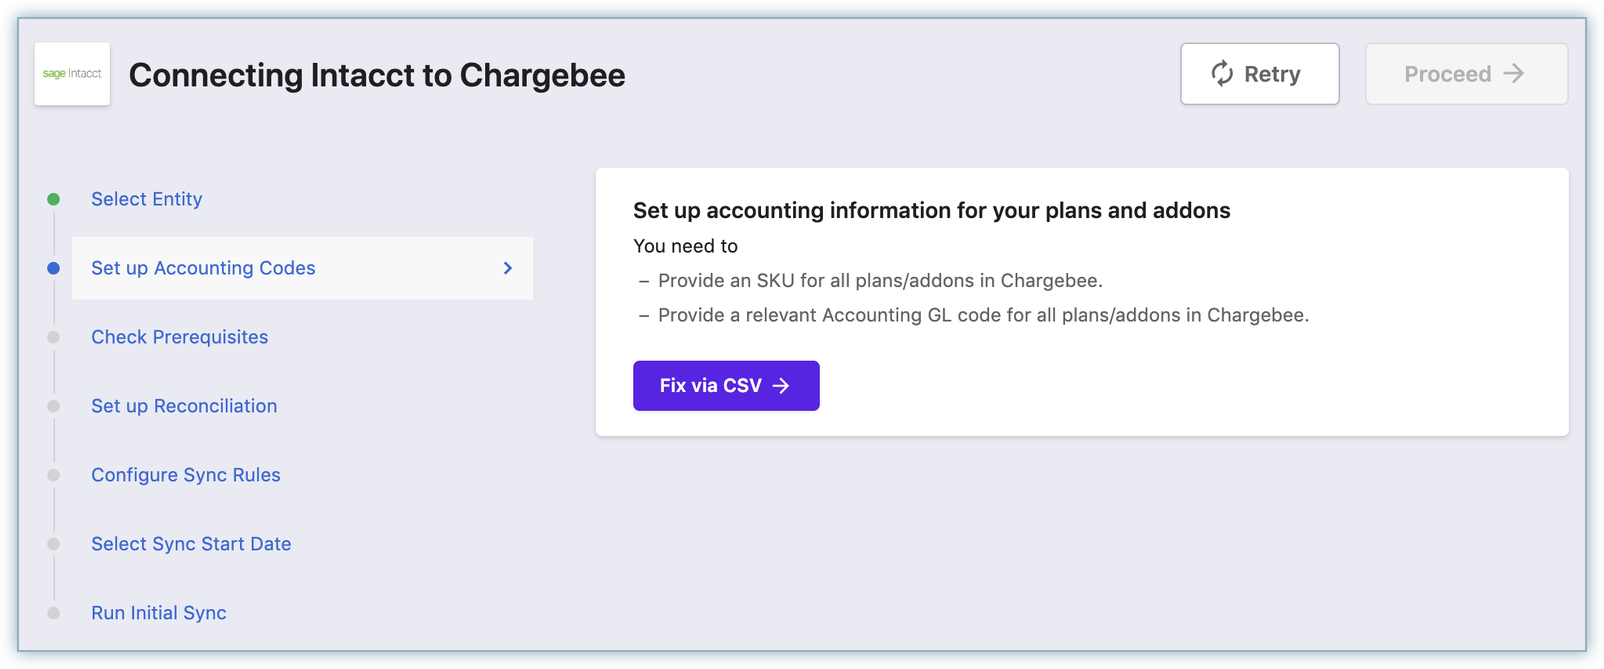
Chargebee integrates with Intacct to sync invoices and reduces manual efforts involved in managing your business financials.
The information below provides step-by-step instructions on how you can integrate your Chargebee site with Intacct. You can set up a Single-Entity or Multi-Entity Sage Intacct account integration with Chargebee.
Note
- Intacct integration is available on Chargebee's Rise plan and above. You can refer to the Pricing page for more information.
- Request access to enable Chargebee - Intacct integration for your site.
Pre-Implementation
Before connecting your Intacct account in Chargebee, make sure that you complete the following action in your Intacct account.
Create a New Role
As a first step, you need to create a new role for Chargebee API user with specific permissions to Intacct modules based on what is required for the integration. You can follow these steps to create a new role in Intacct:
-
Click Company > Roles > Add.
-
Enter the Role details and click Save.
-
In the Role Subscriptions page, do the following:
- Click Permissions for Order Entry Application/Module.
- Select Read-only from the top right and select Add/Edit for the following Activities/Lists:
- Order Entry Transactions Definitions (Add and Edit) Note:
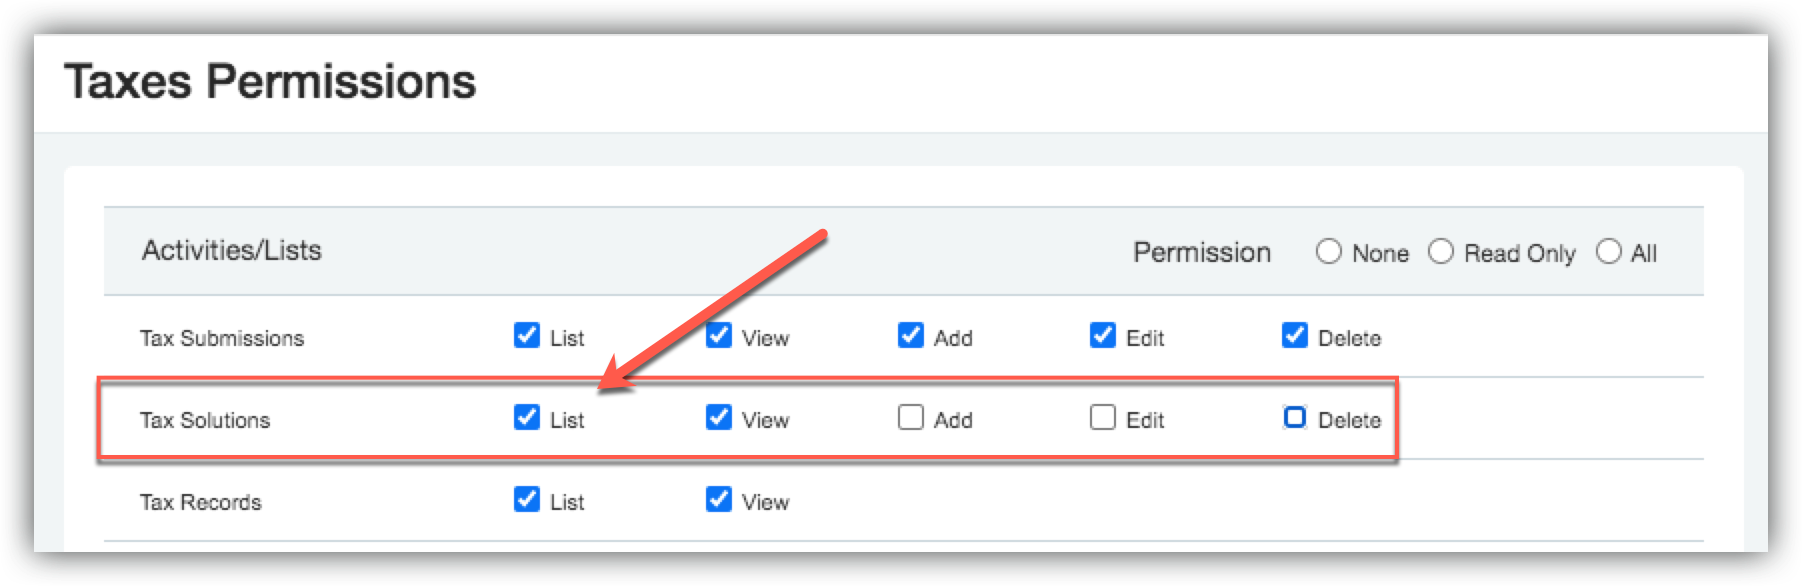
- If Tax Solutions module is available then configure the Tax permission as follows:
- Permission Setup for Tax Solutions - enable List and View.
- Select Company >Roles.
- Select Permissions.
- Customers (Add and Edit)
- Items (Add and Edit)
- Payments (Add)
- Payment Account Information (View)
- Payment Exchange Rate Information (View)
- Click Save.
- Click Save and the new role gets created successfully with the required permissions.
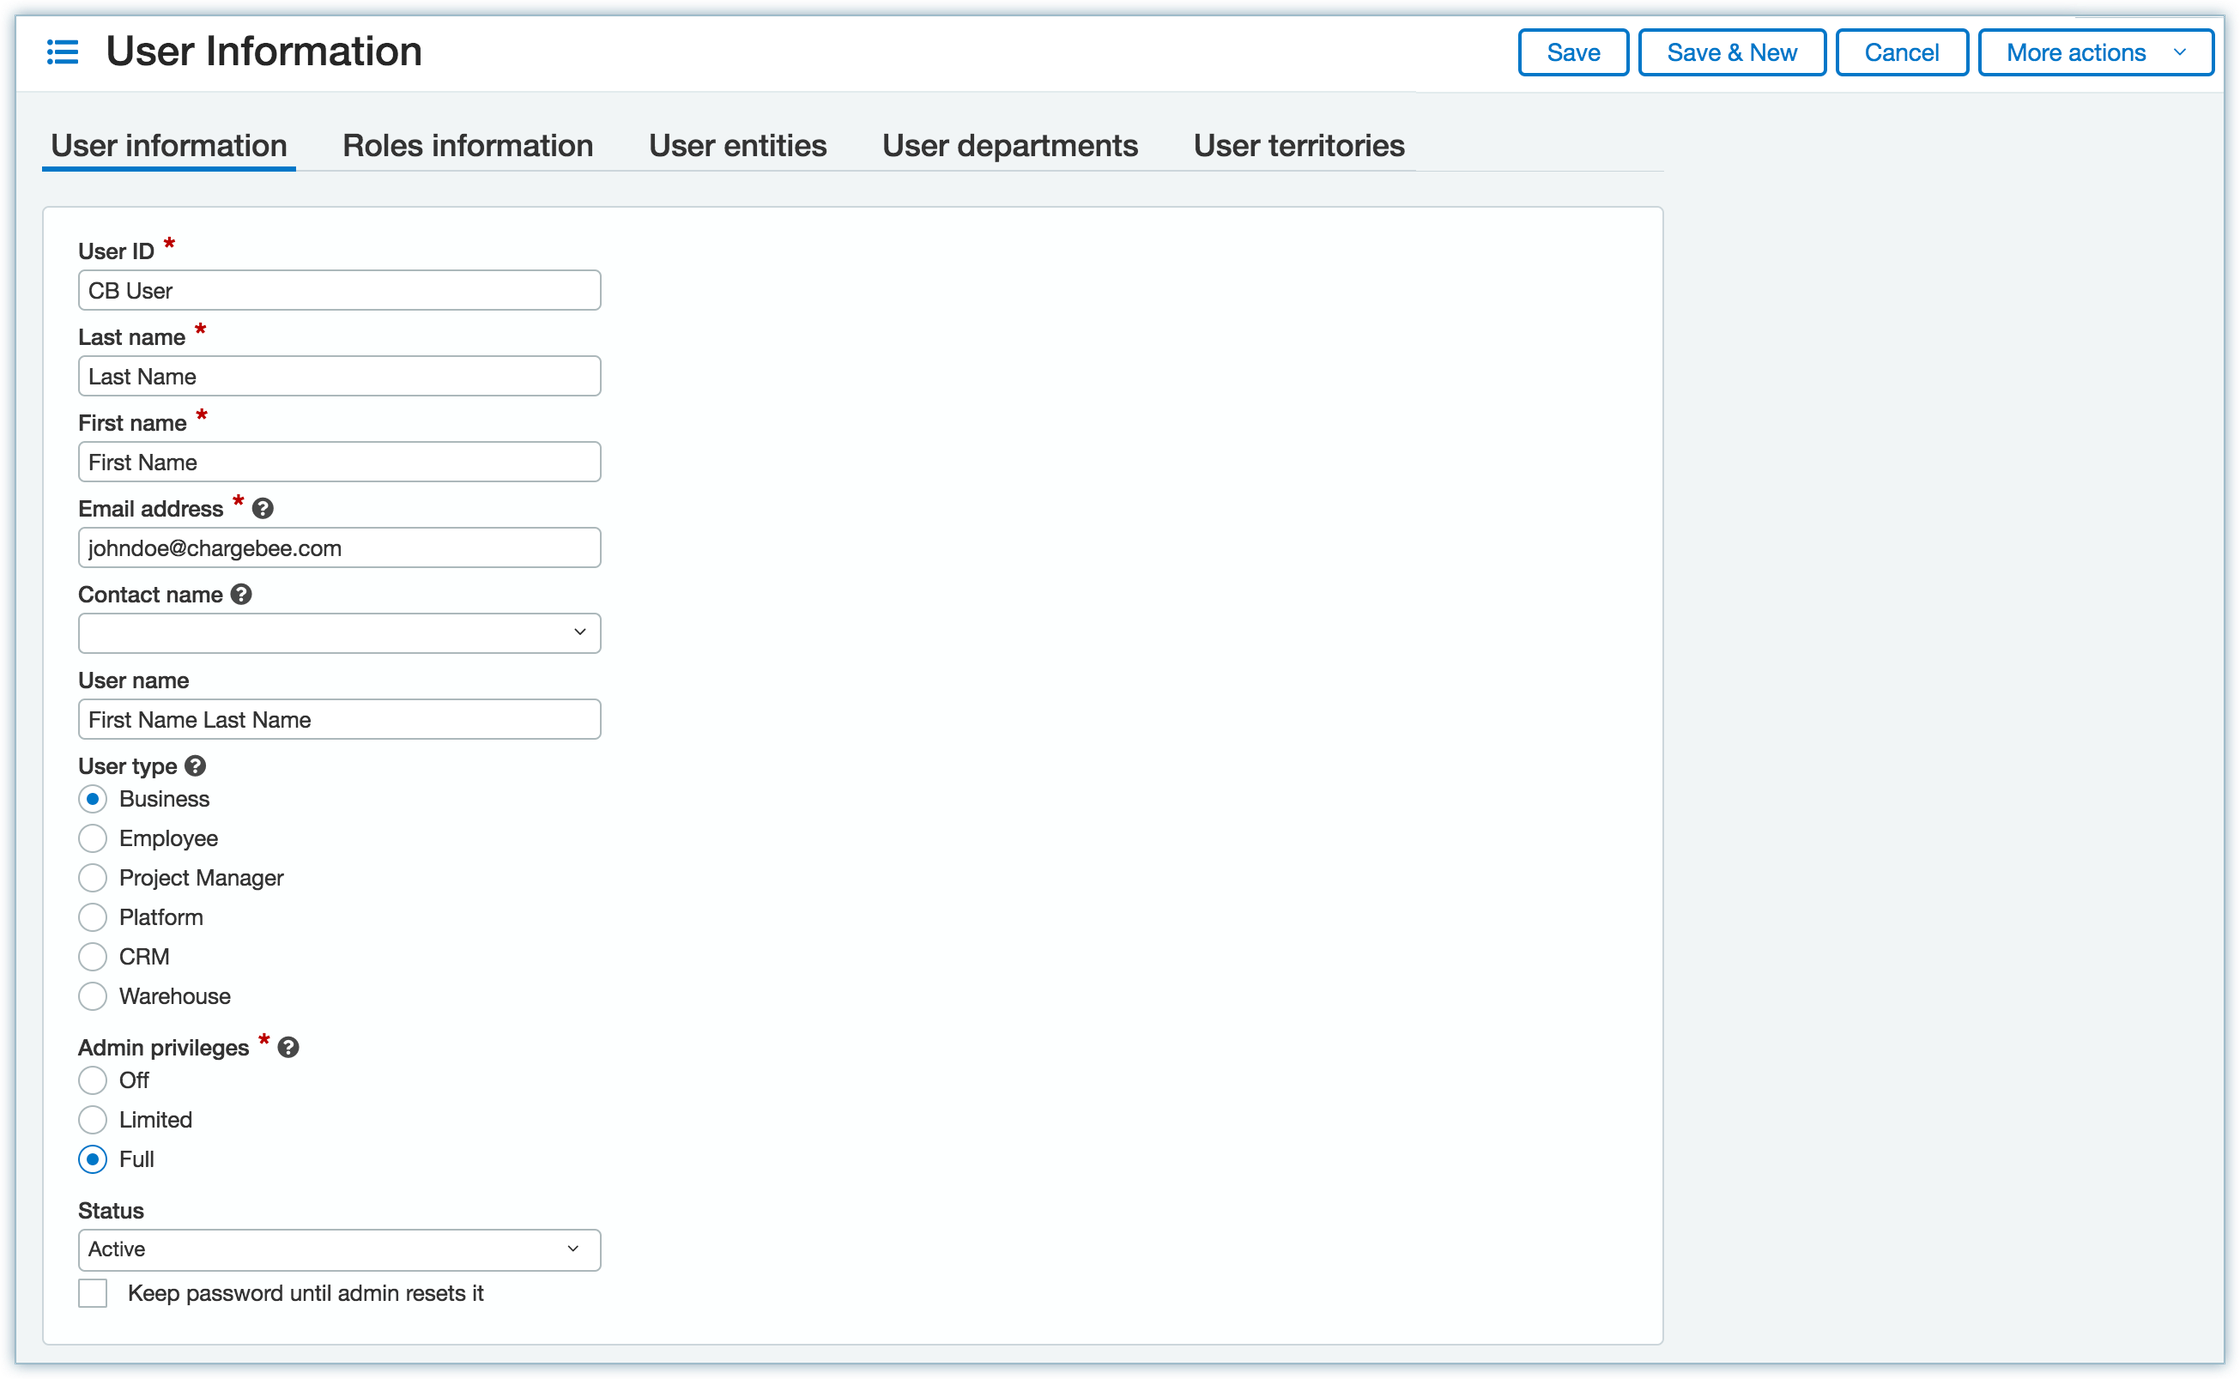
Add a New API User
You can now create a new API user for the purpose of this integration and assign the new role to this user. To create a new user in Intacct, do the following:
-
Click Company > Admin > Web Service users > Add.
-
Enter the user details, email address and the user name.
-
Under User type, select Business.
-
Under Admin privileges, select Full permission.
-
Navigate to the Role information tab and select the new Role that was created in the previous step.
-
Click Save.
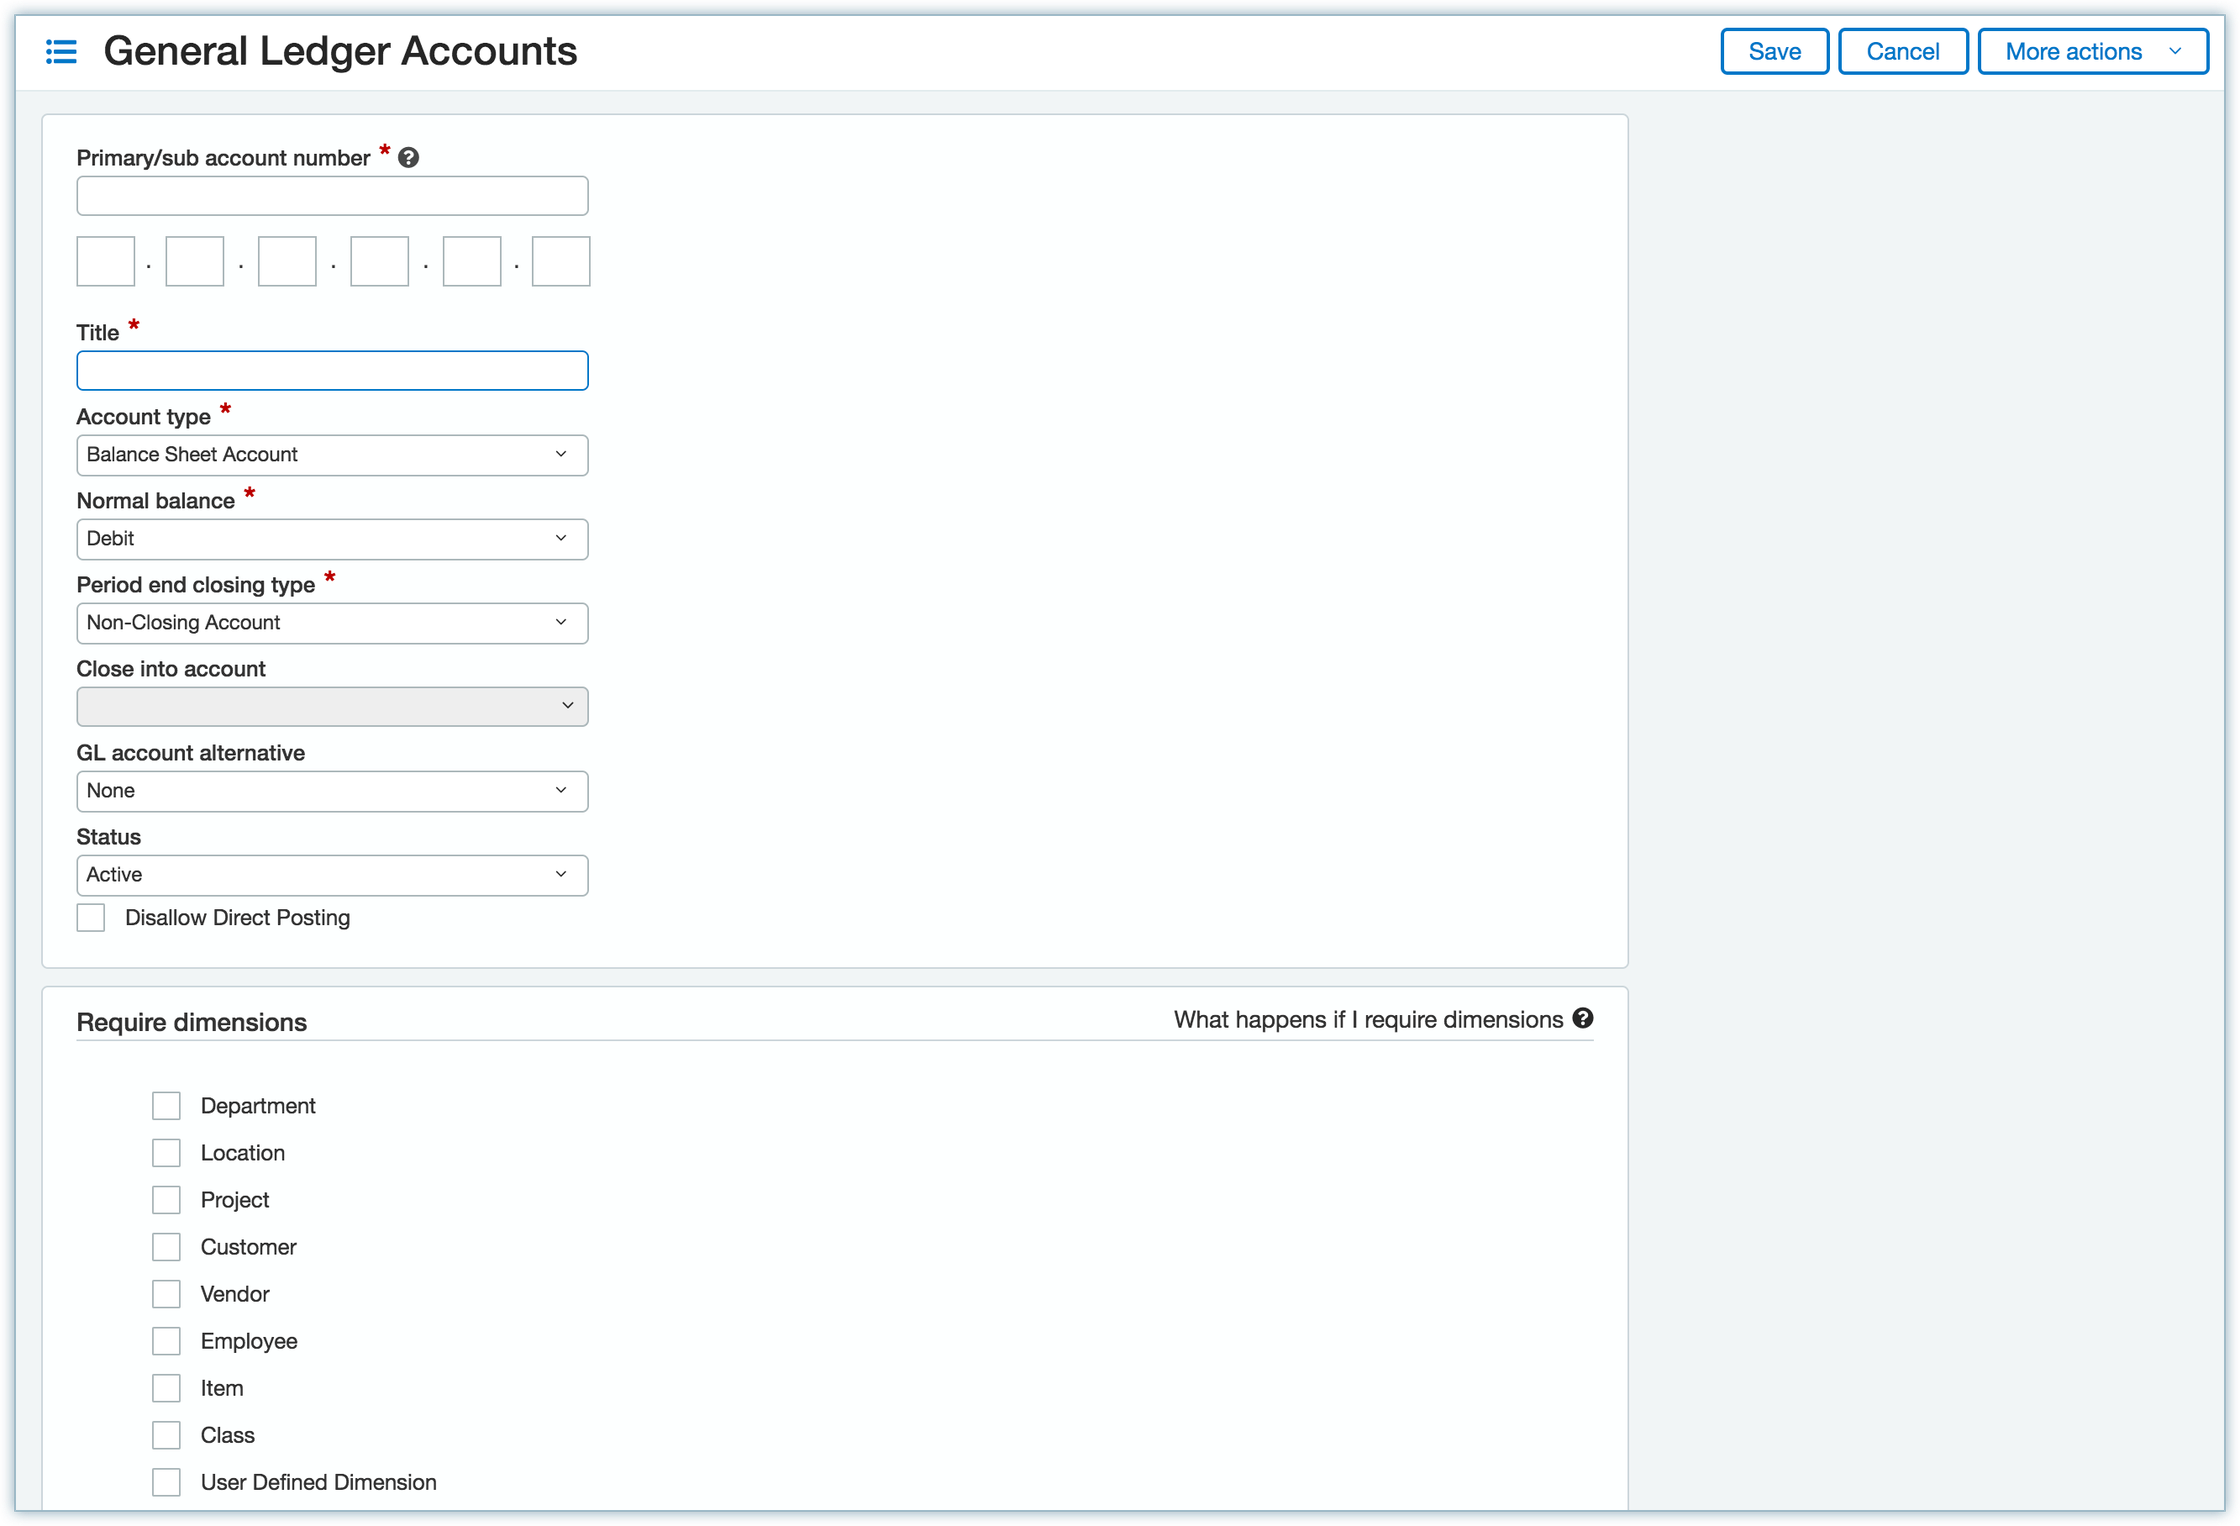
Create a GL Account
Create a General Ledger Account in Intacct by following these steps:
-
Click General Ledger > General Ledger Accounts > Add.
-
Enter the following details:
- Primary/Sub Account number: Specify the GL account number.
- Title: Enter a title for the account.
- Account Type: Select account type to be Balance Sheet Account.
- Normal Balance: Select Debit.
- Period End Closing Type: Select Non-Closing Account.
-
Click Save.
Create a Checking Account
Create a checking account in Intacct by following these steps:
- Click Applications > Cash Management > Checking > Add.
- Enter the Account Id, Account number, and Bank name.
- Select the GL account for this checking account and click Save.
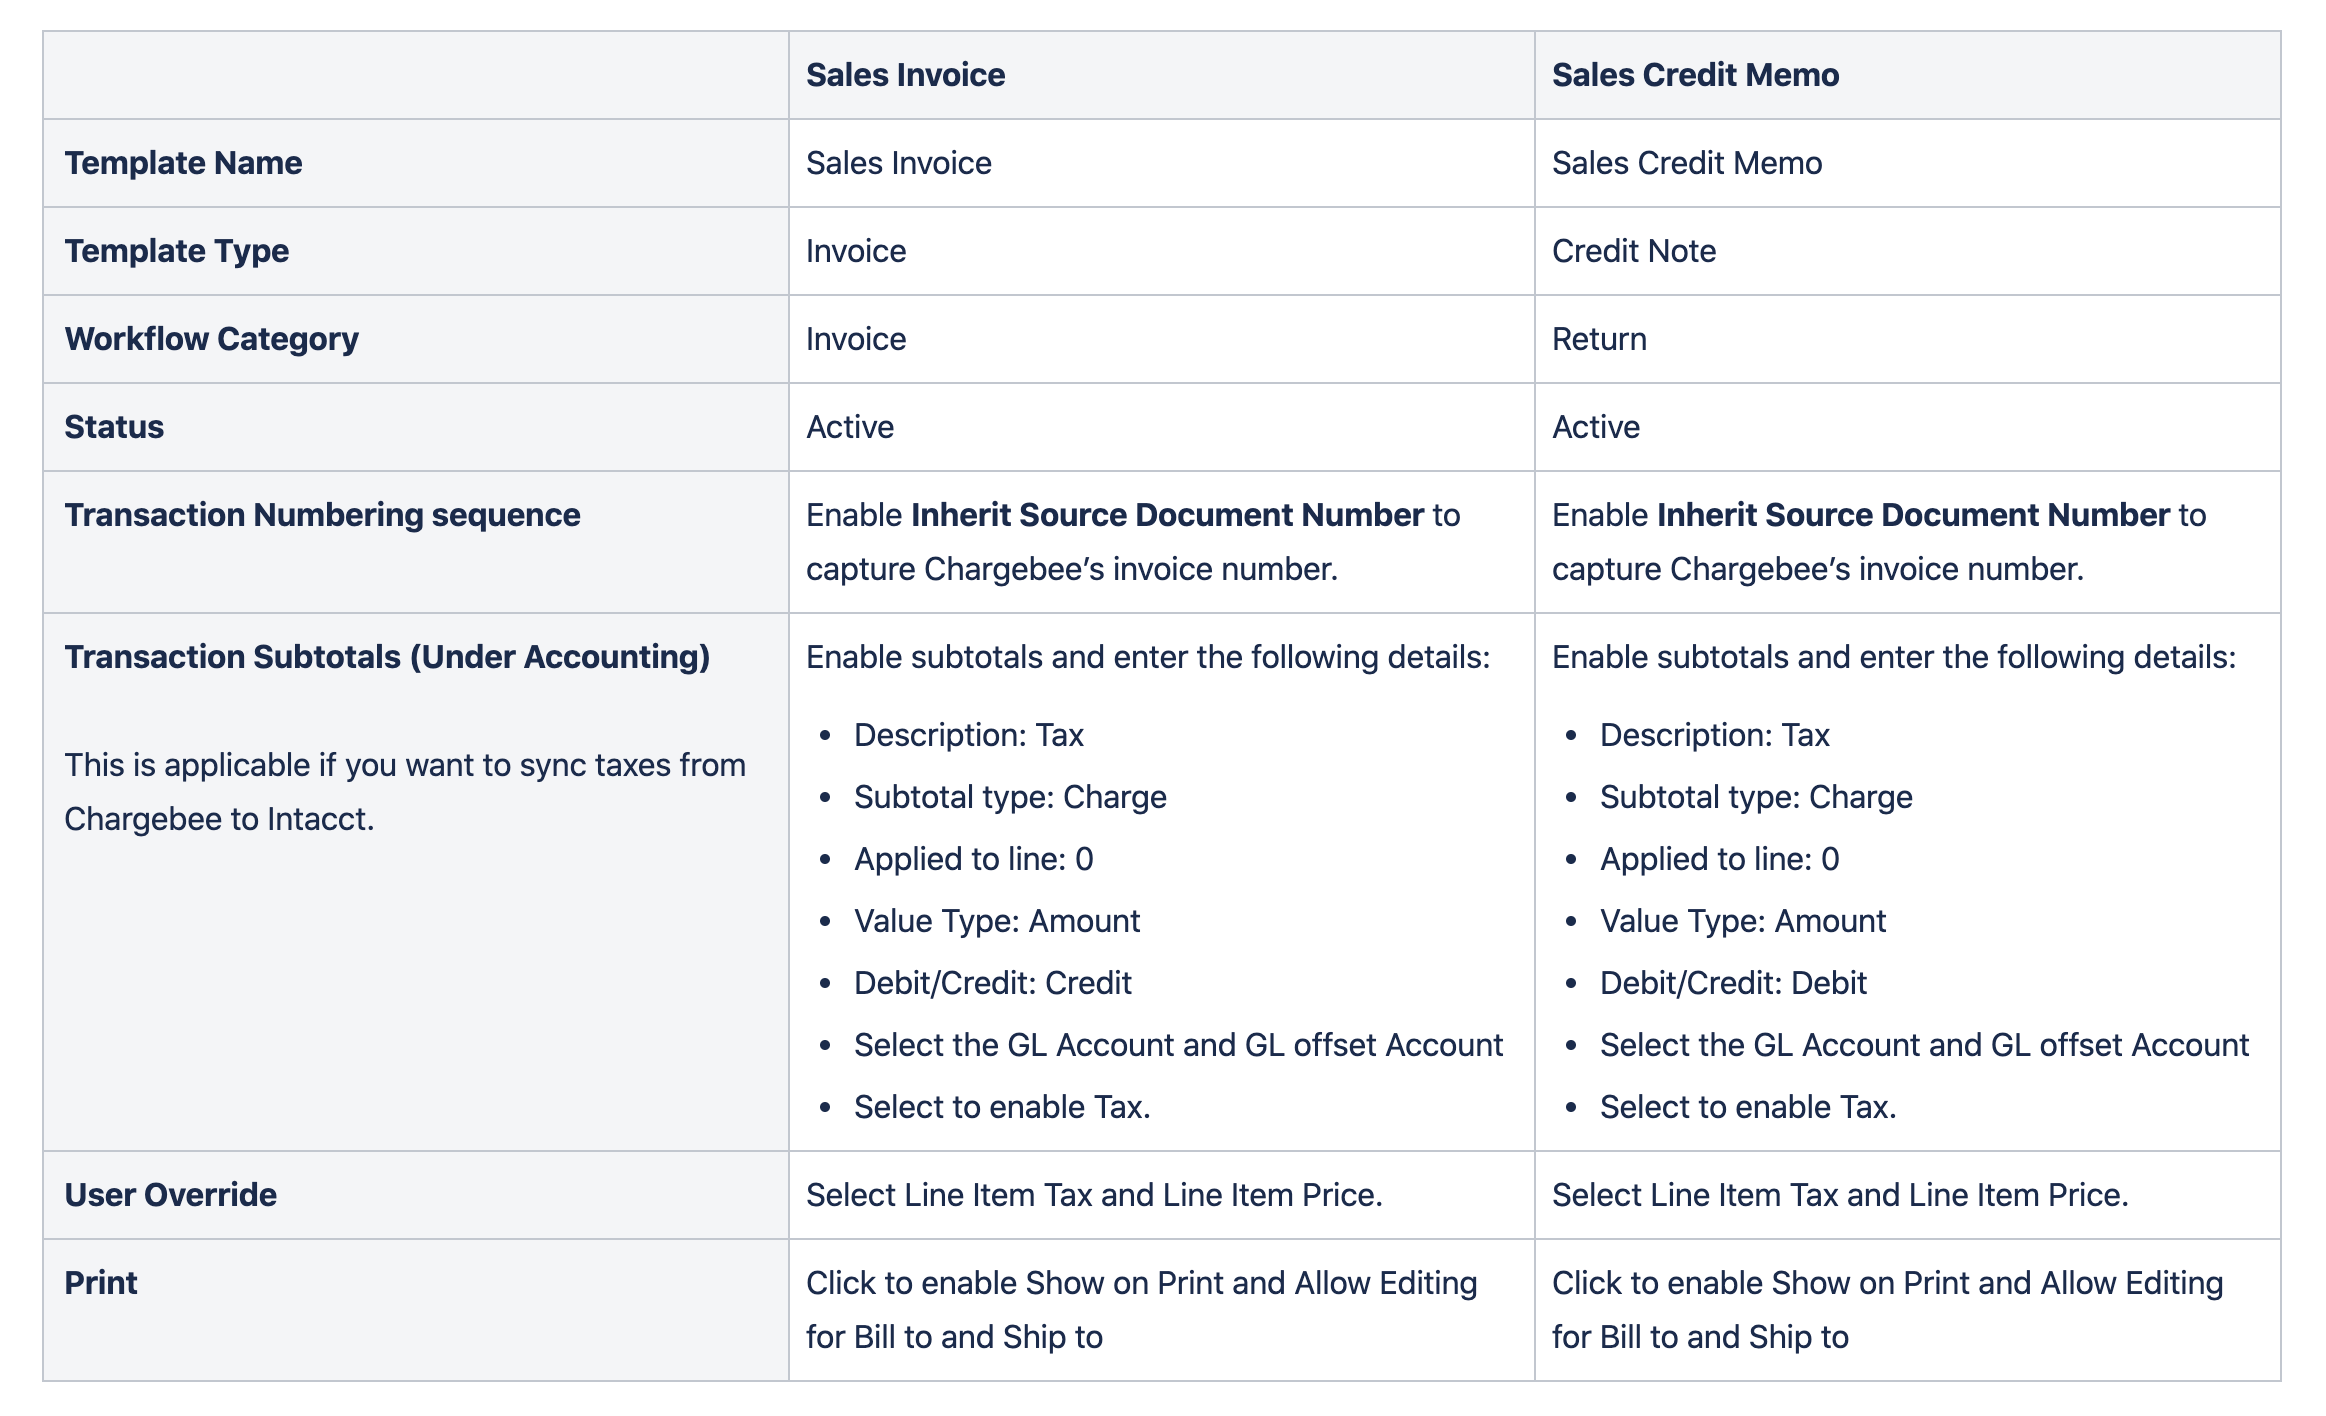
Add Transaction Definitions
You can follow these steps to add transaction definitions for Sales Invoice and Sales Credit Memo in Intacct:
- Click Order Entry > Setup > Transaction Definitions > Add.
- In the transaction definition order entry page, enter the following details to create Transaction definitions for Sales Invoice and Sales Credit Memo.
- Transaction subtotals are not required when Tax solution is enabled.
- Posting configuration details are required in both cases when the tax solutions are enabled and disabled.Create Transaction definition and posting configuration between item GL and GL Account.
- To create sales credit memo and sale invoice for the transaction definition.
Note If a Transaction Definition's positing configuration has a warehouse and Customer GL group then it is not supported as part of the integration.
Effective Permissions
Table for Single entity and Multibase currency-enabled sites.
| Subscription | Activity/List/Report | Permissions | Comments |
|---|---|---|---|
| Company | Entities | List | View | To obtain the entities and display in the dropdown. |
| General Ledger | Accounts | List | View | To fetch the GL (General ledger) accounts. |
| General Ledger | Revenue Recognition Schedule | List | Edit | Revenue Recognition schedule is required if the customer cancelled or paused the subscription. |
| Order Entry | Order Entry Transaction Definitions | List | View | To fetch transactions definitions for invoice and CN line items. |
| Order Entry | Items | List | View | Add | To sync plans/addons and other invoice line items from Chargebee to Intacct. |
| Order Entry | Item GL Groups | List | View | Map and validate the item GL group configured for invoice line items. |
| Order Entry | Order Entry Transactions | List |View |Add | To create the sales invoice, and credit memo. |
| Accounts Receivable | Manage Payments | List |View |Add | To manage payments for invoices. |
| Accounts Receivable | Customers | List |View |Add |Edit | Edit is required to change the modifications made in plan mapped to customer or taxes associated with the invoice. |
| Accounts Receivable | Invoices | List|View|Add | To add invoice for the customer. |
| Accounts Receivable | Adjustments | List |View |Add | To refund adjustments made to the invoice or credit note. |
| Accounts Payable | Pay Bills | Run | This is required for credit note refunds. |
| Accounts Payable | Bills | Add | |
| Cash Management | Checking Accounts | List |View | Bank accounts for managing mapping transactions. |
| Cash Management | Savings Accounts | List |View | Bank accounts for managing mapping transactions. |
For Multi-Currency sites: additional permission needs to be enabled along with the above permissions.
| Subscription | Activity/List/Report | Permissions | Comments |
|---|---|---|---|
| Company | Locations | List|View | This permission is required if invoice line items are to be synced with multiple entities. |
For the tax solution enabled Intacct instance, additional permission is required.
| Subscription | Activity/List/Report | Permissions | Comments |
|---|---|---|---|
| Tax | Tax Solution | List |View | To fetch the tax solution enabled in Intacct. |
Was this article helpful?