New in Chargebee: Explore Reveal and understand your payment performance end-to-end.Try Now

Docschargebeedocs

HomeBillingPaymentsRevRecGrowthReveal
Support

Product Updates


  • Release Notes

Getting Started


  • Overview
  • Chargebee Billing Data Centers
  • Object Relationship Model
  • Understanding Sites
  • Developer Resources
  • Chargebee Tech Glossary
  • Articles and FAQ

Implementing Chargebee


  • Implementation Guide
  • Go-live Checklist
  • Articles and FAQ

AI in Chargebee


  • Chargebee Agents
  • Chargebee Copilot
  • Chargebee MCP Server (Model context protocol)

Product Catalog


  • Product Catalog Overview
  • Coupons
  • Articles and FAQ

Subscriptions


  • Working with Subscriptions
  • Billing
  • Orders
  • Articles and FAQ

Customers


  • Managing Customers
  • Account Hierarchy
  • Email Notifications
  • Branding
  • Configure Multiple Languages
  • Articles and FAQ

Invoices, Credit Notes and Quotes


  • Invoices
  • Credit Notes
  • Quotes [Legacy]
  • Transactions
  • Articles and FAQ

Taxes


  • Overview
  • Configuring Taxes
  • Country-specific Taxes
  • Articles and FAQ

Hosted Capabilities


  • Overview
  • Hosted Checkout
  • Hosted Self-Serve Portal
  • Hosted Pages Features
  • Additional Hosted Pages
  • Payment Components
  • Managing payments with ChargebeeJS
  • Mobile-Optimized Hosted Pages
  • Articles and FAQ

Site Configuration


  • Users & Roles
  • Custom Fields & Metadata
  • Mandatory Fields
  • File Attachments & Comments
  • Advanced Filter Options
  • Multicurrency Pricing
  • Multi-decimal Support
  • Configuring Reason Codes
  • Events and Webhooks
  • API Keys
  • Time Zone
  • Time Machine
  • Transfer Configurations
  • Articles and FAQ

Reports and Analytics


  • RevenueStory
  • Home Dashboard
  • Frequently Asked Questions
  • FAQs for Classic Reports Sunset
  • Articles and FAQ

Integrations


  • Sales
  • Customer Support and Success
  • Finance
  • Tax
  • Marketing
  • Stitch
  • Collaboration
  • Contract Management
  • Order Management
  • Mobile Subscriptions (Legacy)
  • Other Integrations
  • Articles and FAQ

Data Privacy & Security


  • Two Factor Authentication
  • SAML Single Sign-On
  • System for Cross-Domain Identity Management (SCIM)
  • EU-GDPR
  • Consent Management
  • Personal Data Management
  • Compliance Certificates
  • HIPAA Guidelines
  • PCI Recommendations and Integration Types
  • Articles and FAQ

Data Operations


  • Bulk Operations
  • Migration
  • Articles and FAQ
  1. Billing
  2. Site Configuration
  3. Articles and FAQ
  4. Users & Roles
  1. Billing
  2. Site Configuration
  3. Articles and FAQ
  4. Users & Roles

Creating custom user roles/privileges in Chargebee

Scope

  1. How to add custom user roles in Chargebee?
  2. How to restrict access for the users/employee(s) to the Chargebee site?

Summary

Chargebee allows you to add multiple users to your account for performing different tasks such as members from finance, sales, or support teams. Different user roles that you can assign to the users provide different access levels to your account.

Although predefined roles come with fixed privileges, you may need a custom combination of actions for certain users. To add/delete or modify users of your Chargebee account, navigate to Settings > Team Members. Here's more on the list of roles that are available by default.

When to use Custom Roles

If the predefined roles in Chargebee don't grant the privileges you want to assign to a user, you can create a Custom Role and define the privileges that you require. The custom role allows you to configure privileges in the following modules:

  • Customers
  • Subscriptions (Invoices/ Credit Notes/ Orders/ Transactions/ Email Logs/ Events)
  • Product Catalog (Plans/ Addons/ Coupons)

How to Define a Custom Role

To define a custom user role in Chargebee:

  1. First, download this sample CSV file.. The file contains the structure required to specify module-level privileges.
  2. Add new columns in the CSV for your custom roles. Review the “Action Name” column to identify the specific permissions available across modules.
  3. Mark the relevant actions for your custom role by placing a check (✓) or Yes in the corresponding cells under your newly added column.
  4. Send the completed CSV to us by logging in to your Chargebee site, then navigating to the bottom-left corner and selecting Need Help? > Write to us.
  5. We will validate your entries and apply the custom role configuration to your site.

Each custom role must have a unique name. You can create up to 10 custom roles per site.

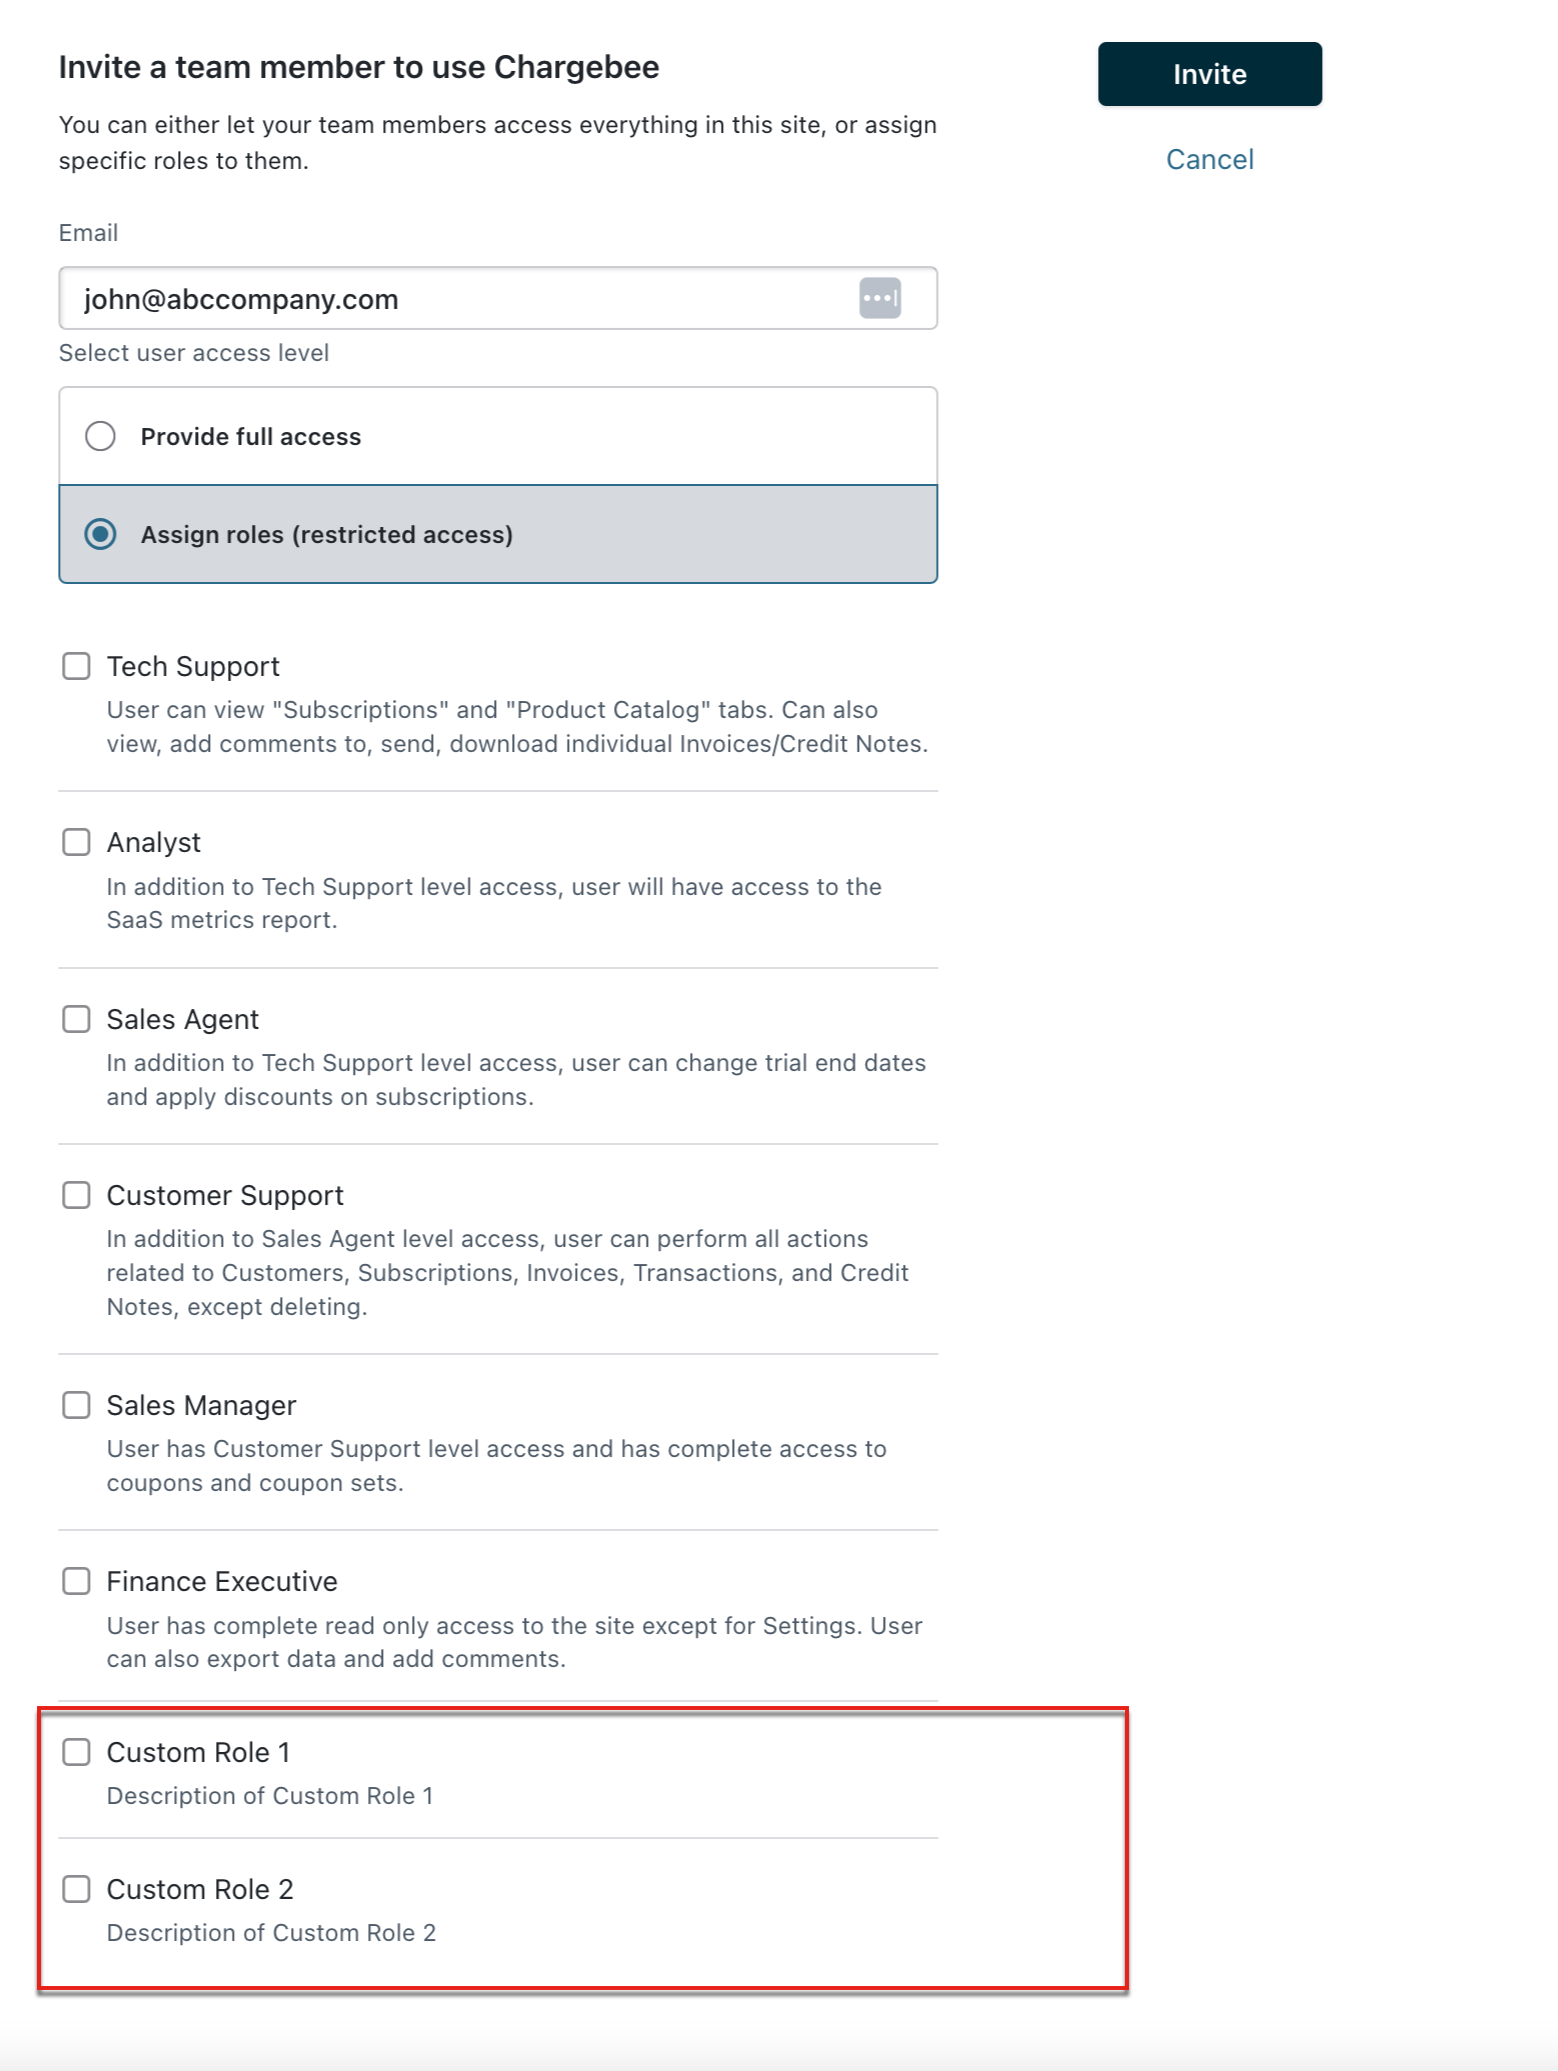
The new custom roles will be added along with Chargebee's predefined user roles. To assign a Customized user role to a user, navigate to Settings > Team Members and assign the new Role created to the user.

  1. Custom roles are only available from the Performance plan and above.
  2. Permissions related to Settings are not yet configurable. This feature is planned for a future release.

Related Articles

Changing Ownership of the Chargebee account if the owner is not present
Can the Chargebee account ownership/email id attached be changed?
Can I add additional users to my account?
Access levels of different user roles in Chargebee
How to find which team member performed a certain activity on Chargebee app?
What are SaaS metrics? What advantage does the "Analyst" role provide over "Tech Support"?
Sorry, you don't have the permission to view this page
Error message - "You don't have access to this page. Contact your admin for details" while trying to access the API keys on my site
How do I find how a specific change was made to a Customer or Subscription and by whom?

Show more

Was this article helpful?