Addons
Introduction
Addons are a great way of selling additional products/services to your customers and boost your sales revenue. Chargebee helps you do just that.
Addons can be included in a Subscription while
- creating the Subscription
- changing/updating the Subscription
- and additionally, for non-recurring addons, using the Add Addon action on the Customer or Subscription details page.
Creating an Addon
To create an addon, navigate to Product Catalog › Addons › + Create Addon and fill out the form.
Basic Addon Attributes
Here we look at some essential attributes of an addon:
Addon name
The Name field must be defined for an addon. It is the name used to refer to the addon on the Chargebee user interface. It's good to have a name here that is descriptive of the attributes of the addon such as its pricing and period so you can easily distinguish it from other addons in your site. So, instead of naming addons Addon A, Addon B etc., it makes more sense to name them "SMS Credits monthly USD", "Custom Reports quarterly AUD" etc.
Addon ID
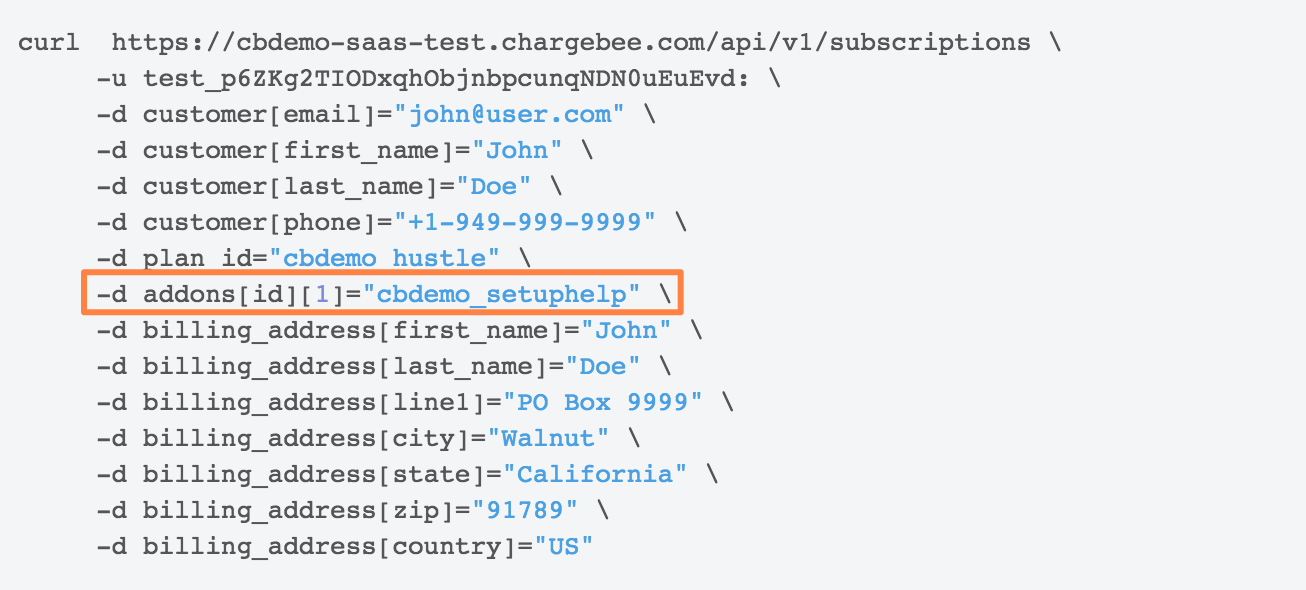
The Chargebee API uses the unique 'Addon ID' not the 'Addon name' to identify the addons on your website. The 'Addon ID' uniquely identifies the addon. When you create or update a subscription via the API from your app or website, use this ID to refer to the addon.
Invoice Name
The Invoice Name field defines the name of the addon as it appears to customers. This name is used for the addon in invoices and quotes. The Invoice Name for an addon should be what you intend the customer to associate with the addon.
Note
If you don't set the Invoice Name, the addon name is used instead.
Addon Description
A short description of the addon for the customer.
The addon description is displayed in the Portal when the relevant setting is enabled.
Enable the Show Addon Description in Invoices and Show Addon Description in Quotes options to display the addon description for the respective line items in your invoices and quotes PDFs. After you enable the setting, the PDF format of the invoices and quotes generated for the subscriptions of this addon displays the description.
Addon Types
An addon can be recurring or non-recurring.
Recurring Addon
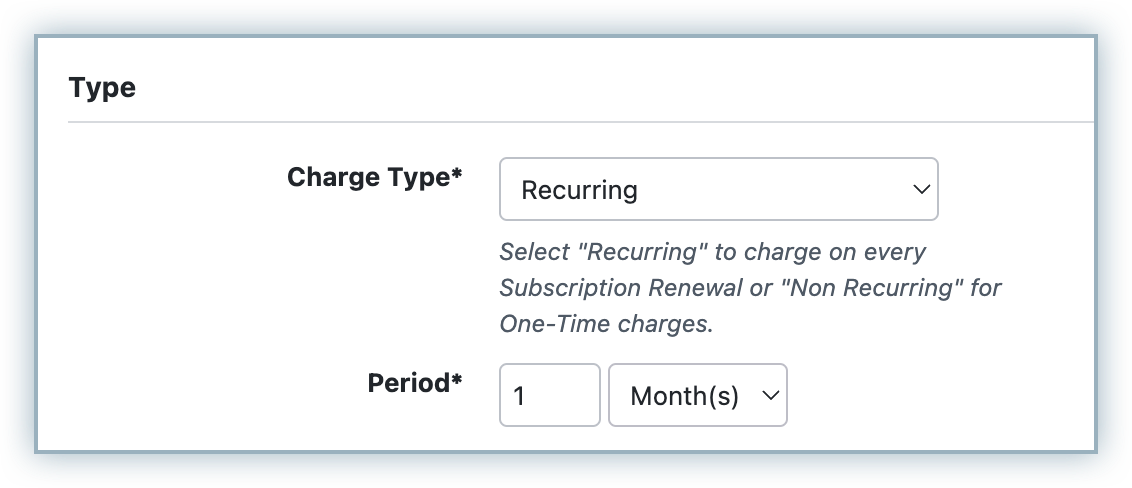
Such an addon renews each time the subscription renews.
Period
For recurring addons, you need to define a period. This is the period covered for the price of the addon. A recurring addon is only allowed to be attached to a subscription whose billing period is a multiple of the addon's period.
So, for example, the following statements hold:
- An addon whose period is say, 2 months, cannot be associated with subscriptions with billing periods being an odd number of months.
- An addon with a period of 1 year can be associated with a subscription of billing period say, 24 months.
- Addons with week-based periods can only be associated with subscriptions with week-based billing periods.
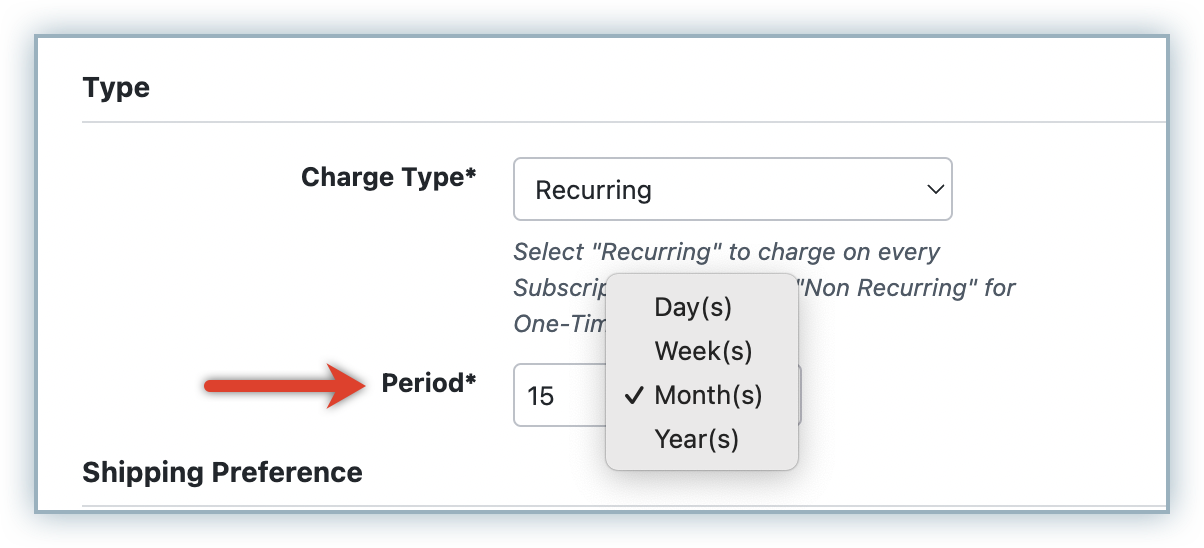
- Addons with day-based periods can only be with associated with subscriptions that have billing periods in multiples of the addon period days. For example,
- a 15 days addon can only be associated with plan subscriptions with 30 days (not 1 month, since the number of days in all months is not constant)or 45 days or 60 days billing period.
- You can associate a 45 days plan subscription with addons that have 1, 3, 5, 9, 15, 45 days billing periods.
- It is not possible to associate an addon with billing period in days to a plan subscription with a monthly or annual billing period, since the number of days in the month or year is not constant. Similarly, it is not possible to add a monthly addon to a plan subscription with 45 days billing period.
The billing price of the addon would be the price of the addon multiplied by the number of addon periods that go into a single subscription period.
Example Consider the following: Plan billing period: 1 year Plan price: $500 Addon period: 4 months Addon price: $30 When the addon is signed-up for with the plan, we have the invoice as: Plan cost: $500/year Addon cost: $120/year ($30x4) Total: $620
Note
As described above, the addon period does not determine when it is billed. In fact, addons get billed along with the subscription. The addon period is only used to calculate the billing price of the addon when attached to a subscription.
Non-recurring addon
A non-recurring addon or one-time addon does not get renewed. So it can be used for a one-off purchase such as extra data with an internet subscription.
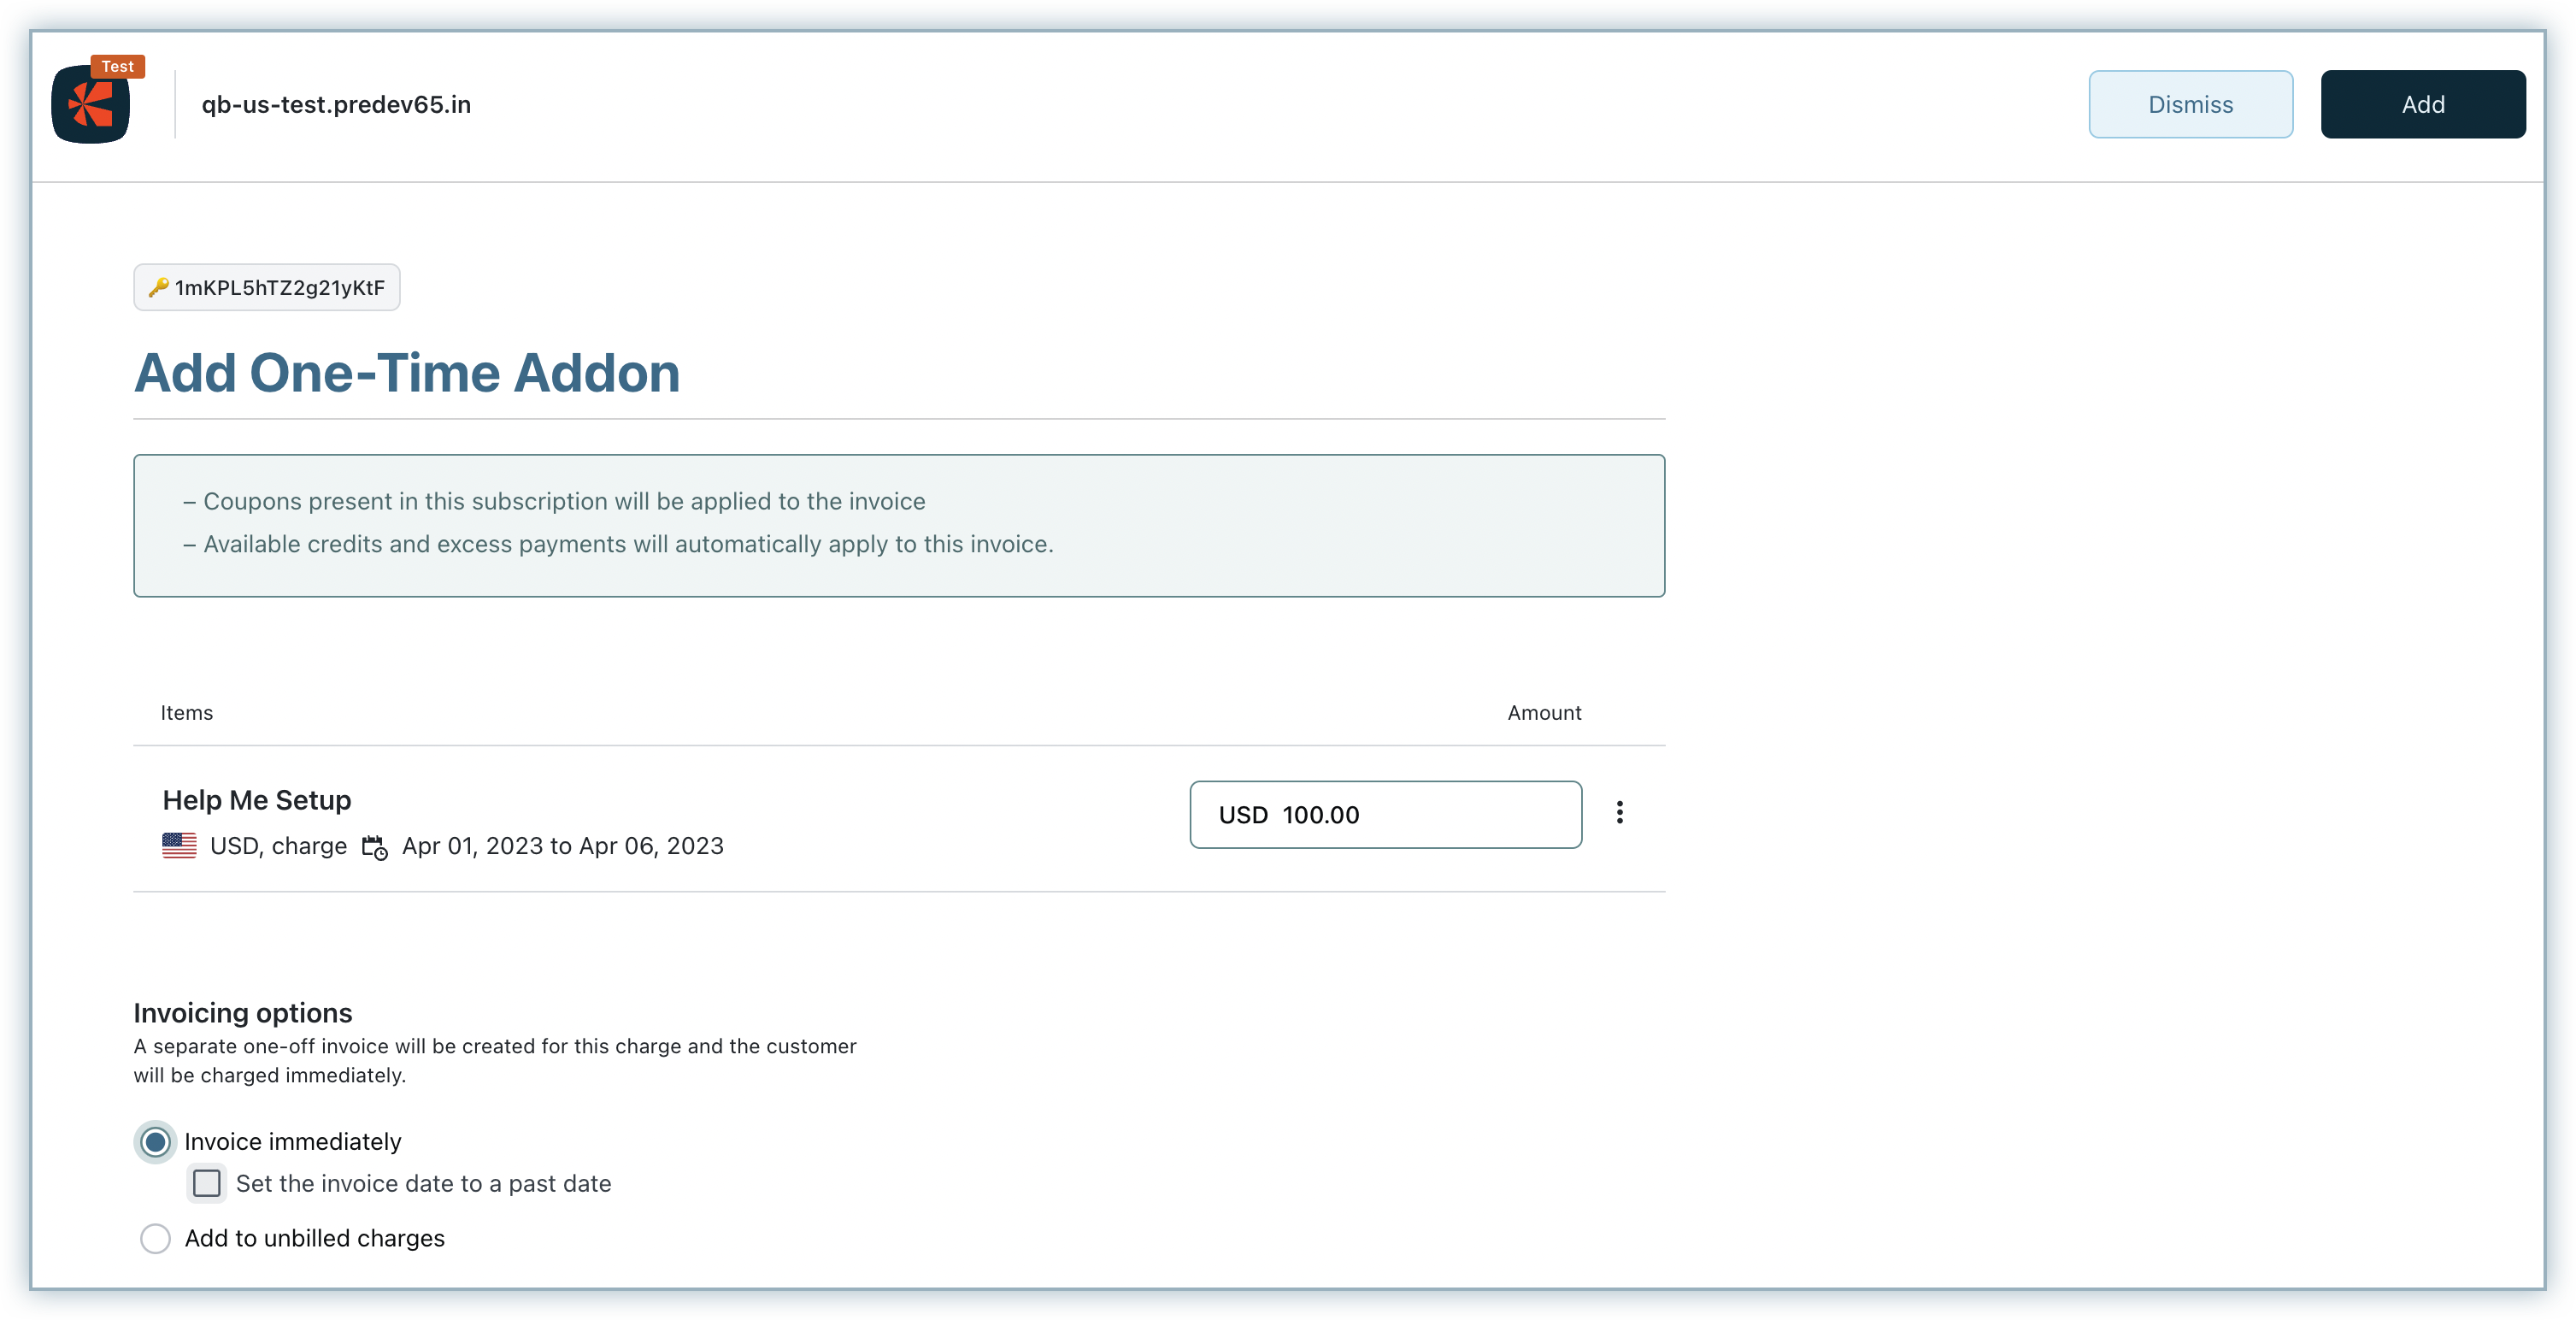
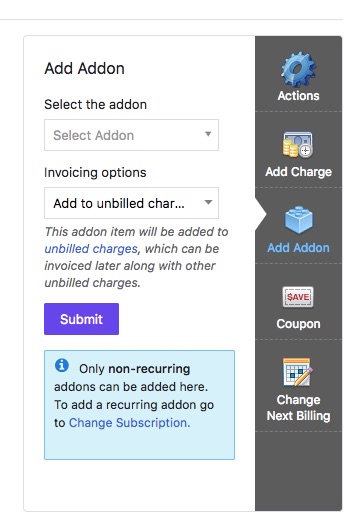
Classic UI users
Here's how the Add Addon option displayed in Classic UI:
Learn more about non-recurring addons here.
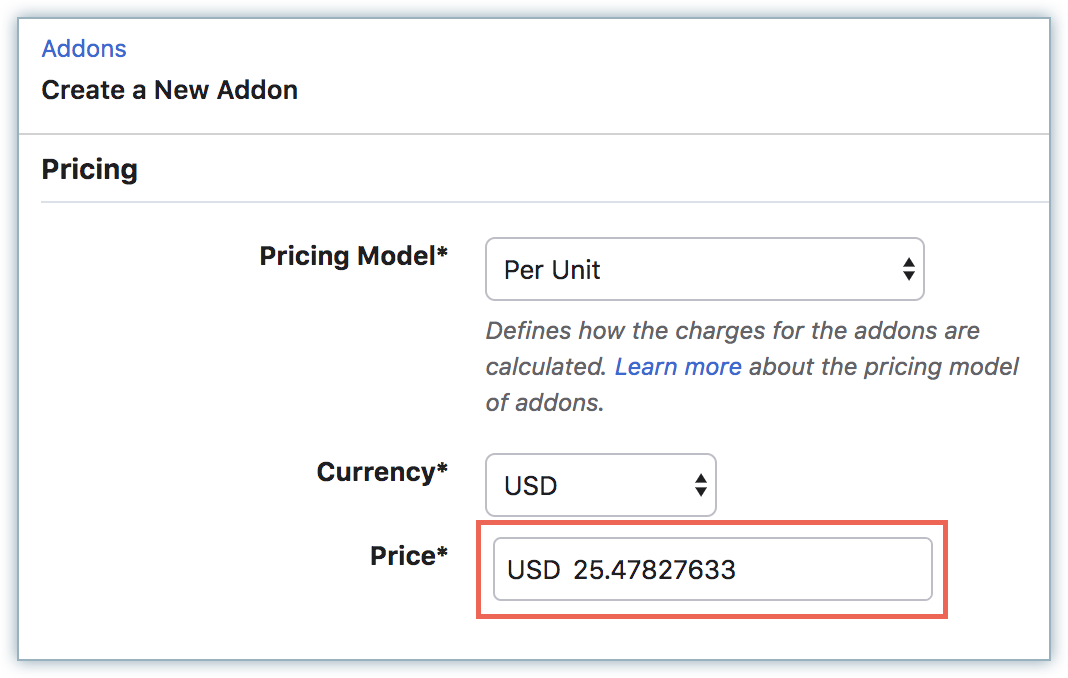
Pricing Attributes
Currency
Choose the currency that the addon will be billed in. If you do not see the desired currency listed, you may need to enable the currency in Chargebee. An addon cannot be attached to a plan with a different currency.
Note
You can only have one currency defined for an addon in Chargebee. If you wish to support multiple currencies for an addon, you must create separate addons for each currency.
Pricing model
The following options are available for addon pricing:
- Flat Fee
- Per Unit
- Volume
- Stair-step
- Tiered
1. Flat Fee Flat Fee addons can be used for products/services that do not have a quantity associated with them. So it has a fixed price for the addon period.
Example: Along with a subscription for online storage if you sell "Premium Support", this would be a "Flat Fee" addon. There is no quantity associated with it.
2. Per Unit Per unit priced addons can be used when products are charged per unit of quantity.
Example You can sell anti-virus software (priced per device) as an addon. The configuration would be: Addon pricing: Per unit Unit of measure: device Price: $10 Charge type: Recurring Period: 1 month This addon would then be charged $10/device/month
3. Volume Here too, the price is quantity-based. However, the per unit price is dependent on the range within which the total quantity falls. So under this model, you would define the quantity ranges and the per unit price for each. For example:
| Tier | 1 | 2 | 3 | 4 |
|---|---|---|---|---|
| Units in tier | 1-10 | 11-60 | 61-210 | 211 and above |
| Price | $10/unit | $7/unit | $4/unit | $1/unit |
If a customer signs up for 100 units, they would be charged $4 per unit based on the third tier (61-210 units), for a total of 100 x $4 = $400.
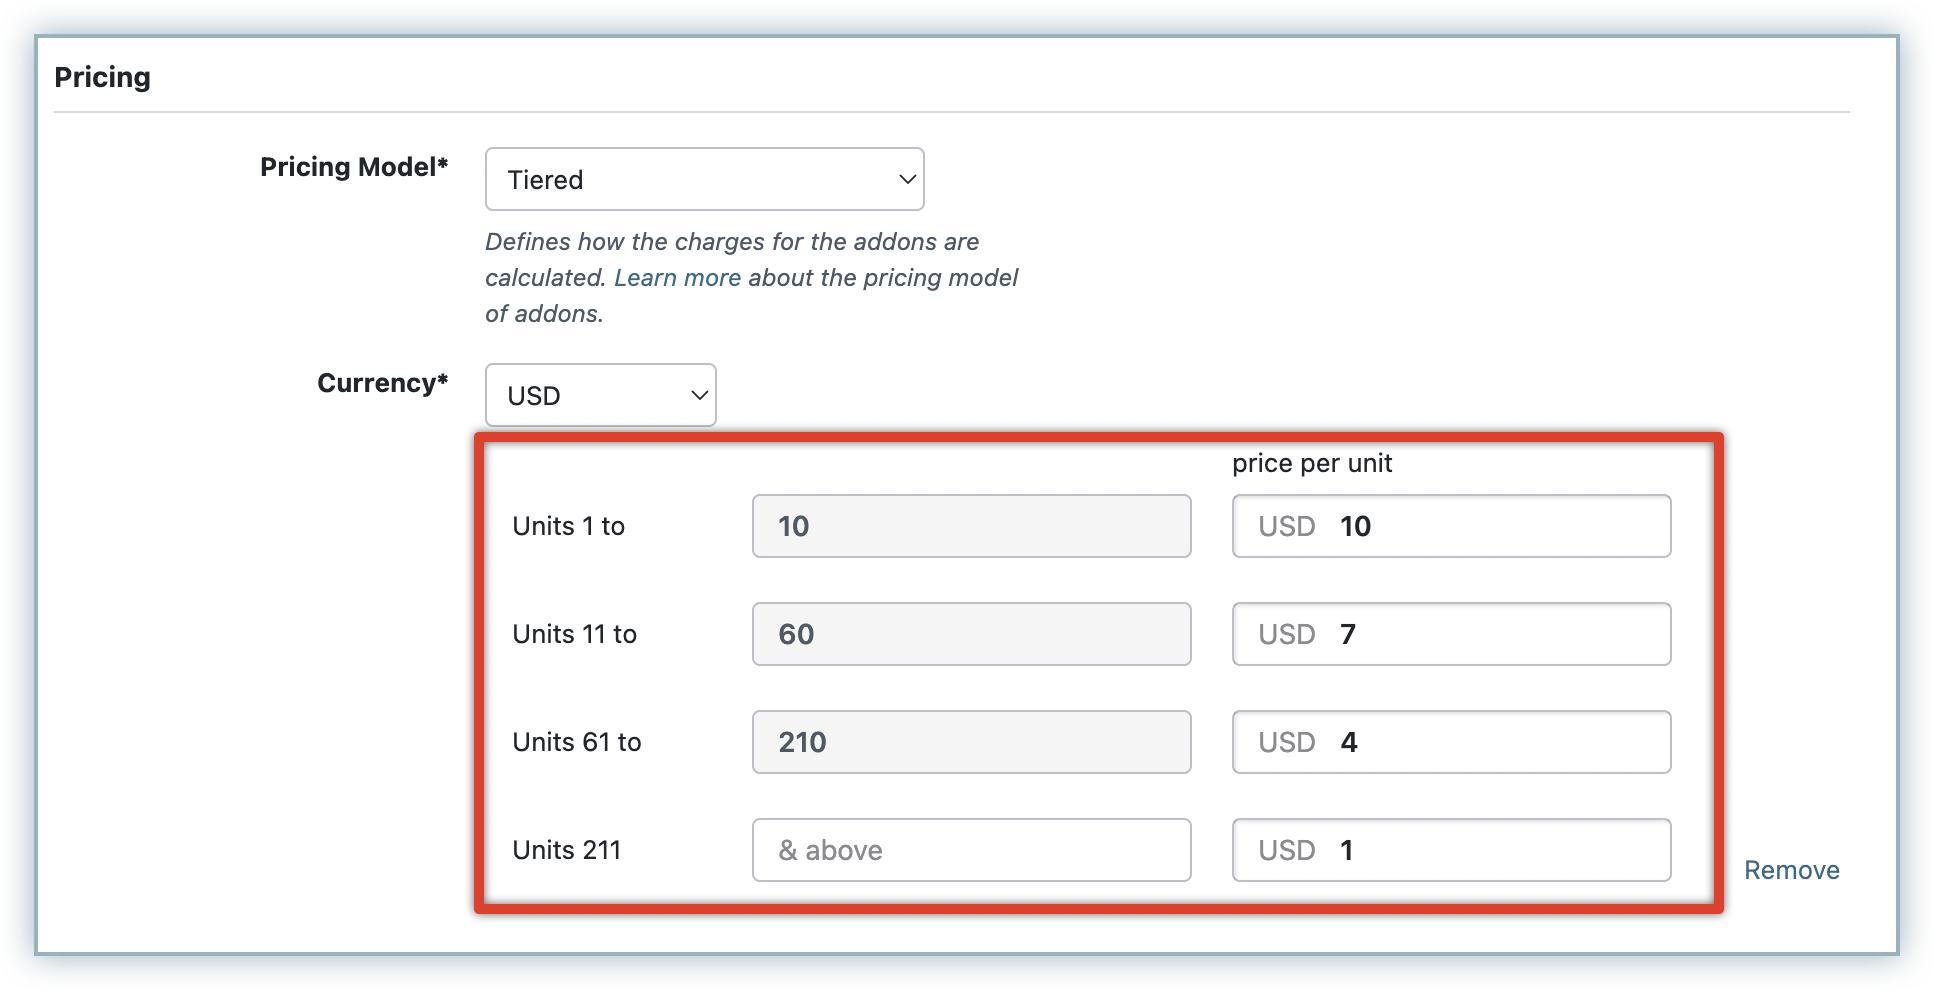
4**. Tiered** In tiered pricing also, the per unit prices are assigned to quantity-based ranges (tiers). When calculating the total price, quantities are purchased from successive tiers, starting from the lowest. Let's consider the same tiers as the example before:
| Tier | 1 | 2 | 3 | 4 |
|---|---|---|---|---|
| Units in tier | 1-10 | 11-60 | 61-210 | 211 and above |
| Price | $10/unit | $7/unit | $4/unit | $1/unit |
If a customer buys 8 units, they would be charged $10/unit, which is $10 x 8 = $80.
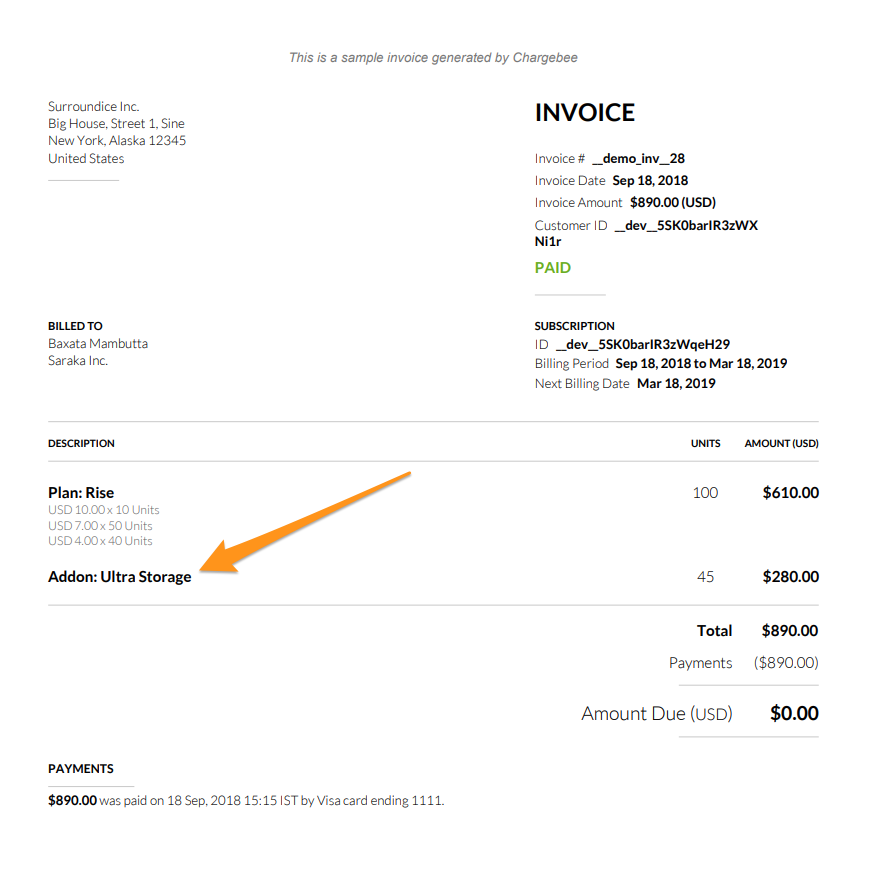
If a customer buys 100 units then they would be charged:
- $10/unit for the first 10 units (tier 1)
- $7/unit for the next 50 units (tier 2)
- $4/unit for the remaining 40 units (tier 3)
For a total of: $10 x 10 + $7 x 50 + $4 x 40 = $100 + $350 + $160 = $610.
On the web interface, the above examples for tiered and volume pricing are configured as shown:
See also: How tiered pricing looks on Chargebee's Checkout and Self-serve Portal screens.
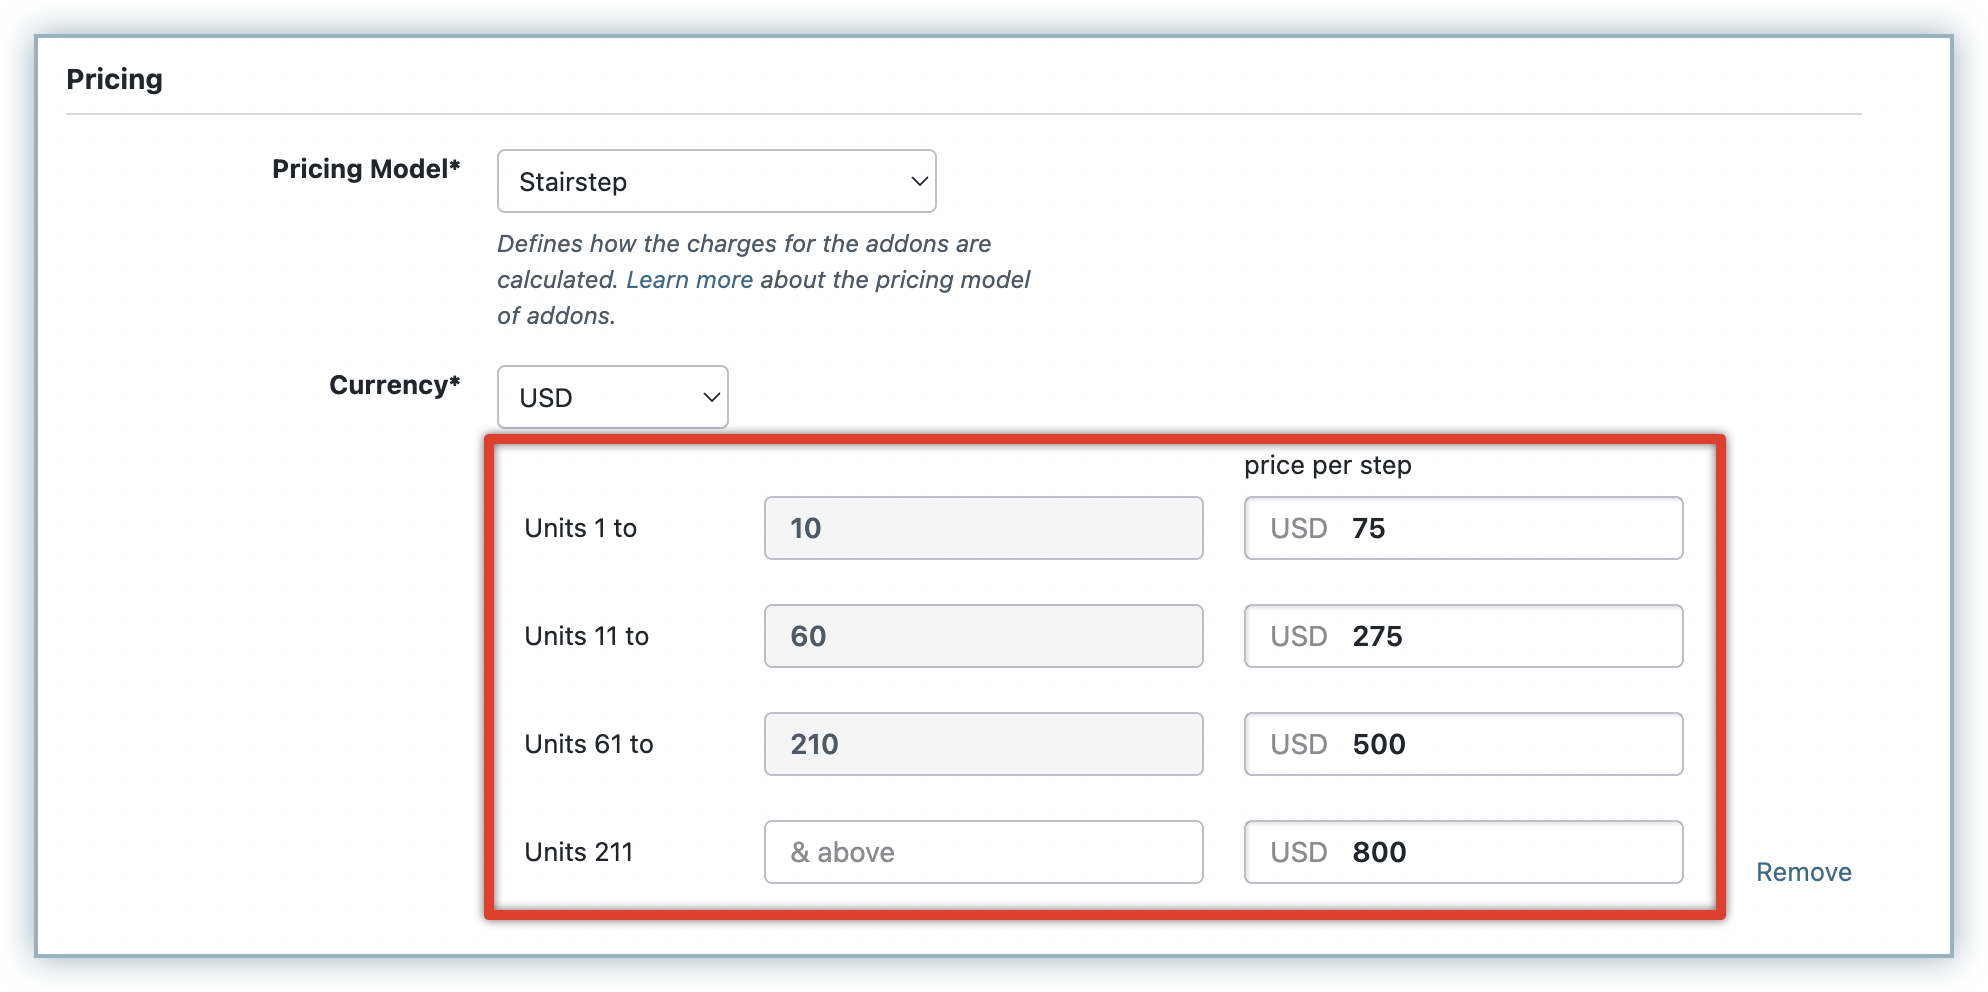
5. Stair-step
Stair-step pricing also defines quantity tiers against which prices are defined, but for each tier, a flat price is assigned instead of a per unit price.
So we have the following tiers or "steps" as before, with the prices against each as shown:
| Steps | 1 | 2 | 3 | 4 |
|---|---|---|---|---|
| Units in step | 1-10 | 11-60 | 61-210 | 211 and above |
| Price | $75 | $275 | $500 | $800 |
If a customer buys 100 units, they are charged as per step 3: a flat $500. If the customer buys 5 units, they are charged as per step 1: a flat $75. If they buy 400 units, they are charged $800 (step 4).
The configuration on the web interface is shown below:
See also
Examples on how proration is done for quantity-based pricing models when the quantity purchased is changed in the middle of a billing period.
If you want to price your addons in fractional amounts with more than two decimal places, or if you want to charge for fractional quantities, you can enable multi-decimal support in your Chargebee site. You can specify the addon price and units value in multiple decimals, based on the number of decimal places that you have configured.
Shipping Preference
Allows you to configure whether the product is a physical item that can be shipped. If so, then for recurring addons, you must mention how often an item is shipped in a single addon period.
Note
Shipping preferences must be enabled using the Enable shipping fields checkbox under Settings > Configure Chargebee > Billing LogIQ.
Associated Plans:
This section shows what plans the addon is associated with. By default, all compatible addons can be attached to a plan. However, you can also fine-tune how addons are associated with a plan.
Accounting Fields
The Accounting Information section helps Chargebee sync up with any accounting applications that you integrate with, like Xero and QuickBooks. Each of the accounting fields captures information that helps track product-specific sales/revenue from an accounting perspective.
- SKU: Store Keeping Unit or SKU is a name used to identify a product/service in inventory management or accounting systems. You can use this as an alternative name for your addon and it will be used as the Product Name in the accounting system.
- Accounting code: This field captures your Accounting systems' General Ledger Account code/name. When product information is synced to the Accounting system, the product specific information will be synced with this account as captured here. This is a mandatory field. You cannot proceed with accounting integration if this field is left blank.
- Accounting category: The Accounting Category captures product-specific additional metadata or categorization for reporting purpose in the accounting systems (such as regions you are selling to or branches you are selling from). It should be entered in the format: : . E.g. "Region: Northern"
If you are using QuickBooks - you can enter one category (referred to as Classes/sub-classes)
If you are using Xero - you can enter two categories, Accounting Category_1, Accounting Category_2 (referred to as Tracking categories).
For information regarding these fields in API, refer to the addons section in the API documentation.
Note
These fields will not be available by default, you should enable these fields at Settings > Configure Chargebee > Billing LogIQ and select Enable Accounting Fields for integration.
Taxes
If Taxes have been configured, you can choose to exempt an addon from taxes by unchecking This addon is subject to taxes while creating the addon.
Tax Profile
If you choose to keep the addon taxable, select a tax profile for it. This determines which taxes are applied to the addon price during invoicing.
Self-serve Portal
The Self-serve Portal can be used by your customers to make changes to their subscription. You can decide whether an addon is available to customers on the portal. Use the Display in Customer Portal checkbox while creating or editing the addon.
See also: This FAQ for a glimpse of what tiered pricing looks like on the Self-serve Portal and Checkout.
Addon Actions
When you are on the details page of any addon, you will find the actions pane on the right. The following actions are available:
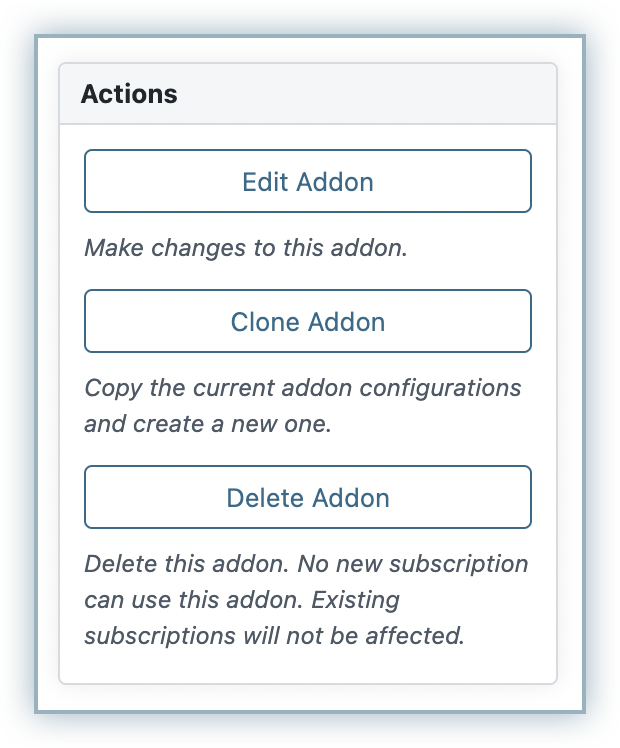
Edit Addon
This action allows you to change the addon configuration. The Addon ID for an addon cannot be changed once the addon has been created.
If there are no subscriptions attached to the addon, you can change every attribute except 'Addon ID'.
If subscriptions are attached to the addon, you can change everything except the following:
- Addon ID
- Addon Charge Type (Recurring/Non-recurring)
- Addon Period
- Pricing Model
- Currency
- Tier/step prices (for volume, tiered, and stair-step priced addons)
- Shipping preference (only if order(s) have been created for the addon)
Addon Price Change
When an addon has subscriptions attached to it, you can change the price of the addon (though only when the addon pricing is flat fee or per unit).
Navigate to Product Catalog > [Addon name] > Edit Addon. Enter the new price of the addon under the Pricing section. Click Update Addon.
The new price is applied to all new subscriptions with the addon. Existing subscriptions are not affected and continue to be renewed with the old addon price.
Clone Addon
You don't have to create an addon from scratch every time. You can use the Clone Addon action to copy an existing addon and then make changes to it.
When you click Clone Addon, a form just like Create a New Addon opens with the configuration of the cloned addon pre-filled. You can now edit the form and save to create the new addon.
Bulk Creation of Addons
You can upload a CSV file containing a list of addons into Chargebee. Chargebee allows you to create a maximum of 10,000 addons in a single shot.
To bulk create addons, you can navigate in one of 2 ways:
-
Go to Product Catalog > Addons and on the top right corner, click on the upload icon (shown below).
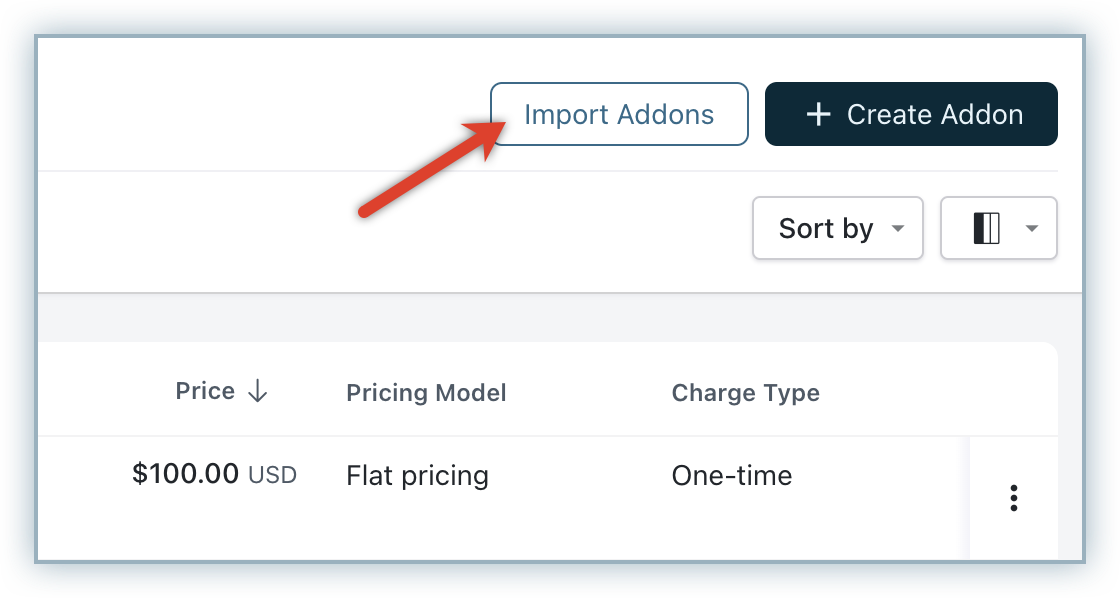
Classic UI Users Instead of the upload icon, you would see the Import Addons button above.
- Alternatively, you may go to Settings > Import & Export Data > Choose a bulk operation > Select Create Addons and then click Proceed.
Step 1:
In the Upload CSV page that opens, upload the CSV file that contains the list of addons that are to be imported.
Note
Chargebee follows a naming convention to map the fields in the CSV to that in the application. Please make sure that your column names are specified as mentioned below.
- Addon[id] - ID of the addon
- Addon[name] - Name of the addon
- Addon[invoice_name] - Invoice Name of the addon
- Addon[description] - Description for the addon
- Addon[charge_type] - Charge type of the addon (recurring/non recurring)
- Addon[price] - Price of the addon
- Addon[currency_code]- Currency code of the price (USD/INR etc)
- Addon[period] - Tenure of the addon (days/weeks/months/years)
- Addon[period_unit] - Total period of the addon (1,2,3)
- Addon[type] - Type of the addon (On Off/Quantity)
- Addon[unit] - Total number of units
- Addon[enabled_in_portal] - If it must be enabled in the customer portal or not
- Addon[taxable] - If the addon is taxable
- Addon[tax_profile_id] - Tax profile ID
- Addon[tax_code] - Tax code
- Addon[invoice_notes] - Invoice Notes
- Addon[meta_data] - JSON metadata Refer this link
- Addon[sku] - SKU
- Addon[status] - Status of the addon (active, deleted etc)
- Addon[accounting_code] - Ledger account code/name
- Addon[accounting_category1] - Tracking category
- Addon[accounting_category2] - Tracking category
Step 2:
Chargebee will validate the file and show the list of matched and unmatched columns. Unmatched columns are columns that have not followed Chargebee's rules for naming convention in a bulk update.
This step will contain 3 tabs:
Unmatched columns: Columns whose values could not be matched with the values in Chargebee
Columns matched based on the last operation preference: This section will contain the column names and the mapped columns, in case you have previously imported a CSV file. If this is the first time you are performing bulk operation for addons, you can ignore this section.
Matched columns: Columns whose value has been successfully matched with that of Chargebee's.
Match the columns accordingly and click Next.
Step 3: Confirm Errors
This step will display the errors that occurred while validating the file. Resolve the errors (if any) and then click Create Addons.
Note
- Bulk operations are irreversible, therefore exercise extra caution while performing them.
- Also, they can only be performed by Admins.
Delete/Archive Addon
Deleting and archiving depend on whether the addon has any subscriptions associated with it.
Deletion
- You can only delete an addon if it has no subscriptions linked to it. When you delete an addon, it is completely removed from Chargebee and no longer appears in the list of addons.
- After an addon is deleted, its name and ID can be reused.
Archiving
-
When you try to delete an addon that has subscriptions linked to it, it gets archived instead. This way, the addon though not deleted is prevented from being used for new subscriptions.
-
Any existing subscriptions with the addon are not affected after archiving; they continue to renew as usual along with the subscription.
-
The name or ID of the addon cannot be reused when the addon is archived.
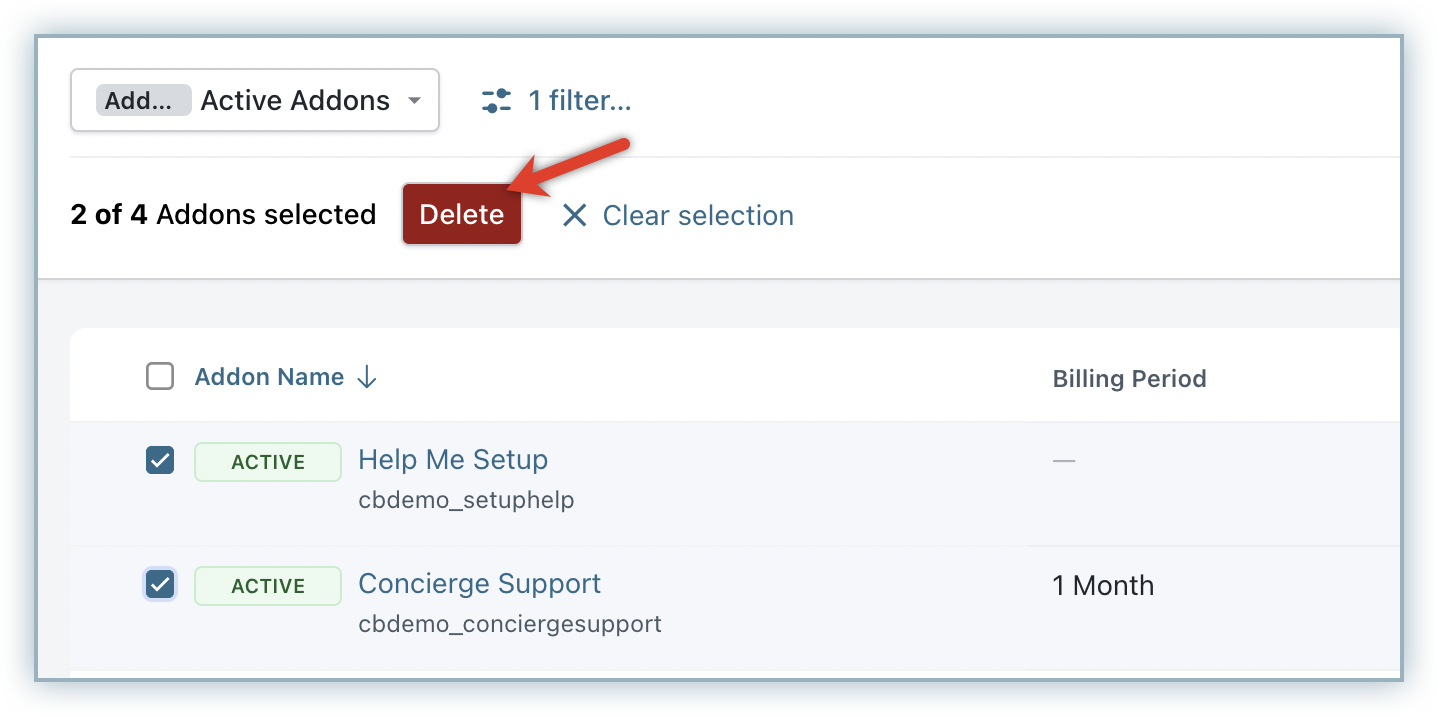
-
You can delete or archive multiple addons in Chargebee in one shot. To do this, go to Product Catalog > Addons, select the addons to be deleted, and click Delete (shown below).
Classic UI Users Navigate to Product Catalog > Addons > Click Bulk Action > Select the addons to be deleted and click the Delete button.
Note
Bulk Actions can only be performed by Admins.
FAQ
1) Can recurring addons be added to a subscription in the middle of its term? Yes, this can be done by choosing Change Subscription under the list of actions available on the subscription details page. If proration is enabled, the charge for the addon is prorated for the remaining term of the subscription. If disabled, then the addon is charged for from the next renewal.
2) Can I control how many times a recurring addon renews with the subscription? Yes, for this, enable billing cycle for addons.
Note
If you do have a usage-based or metered billing subscription model, then you can create non recurring quantity based addons to apply metered charges as addons. Learn more about metered billing.
3) Can I have trial periods for addons too? Yes, enable addon trials for this.
4) How is a one-time charge different from a non-recurring addon? A non-recurring addon is a product or service that has been modeled into Chargebee that does not renew with the subscription though it is linked to it. A one-time charge is an ad-hoc charge against a customer and is not linked to any particular subscription. More information about these two ways of charging is presented here.
5) I have a usage-based subscription model, how do I handle that in Chargebee? Use Chargebee's metered billing feature to use non-recurring addons to apply usage charges.
6) Can I see how, say, an addon/plan with tiered pricing looks like on Chargebee Checkout and Self-serve Portal? Yes, see this FAQ.
Articles & FAQs
Was this article helpful?