Bulk Deletion of Payment Methods
Bulk deletion of payment methods is a Bulk Operation that allows merchants to simultaneously delete multiple payment methods using a CSV file upload. This can be used to delete payment methods from Chargebee only or from both Chargebee and the connected payment gateway.
This high-impact operation is governed by an Approval Workflow to ensure all deletions are authorized before execution, helping to prevent accidental data loss.
Accessing the Bulk Deletion screen
To start a bulk deletion operation:
- Log in to your Chargebee Billing site.
- Navigate to Settings > Import & Export Data and select Choose a bulk operation.
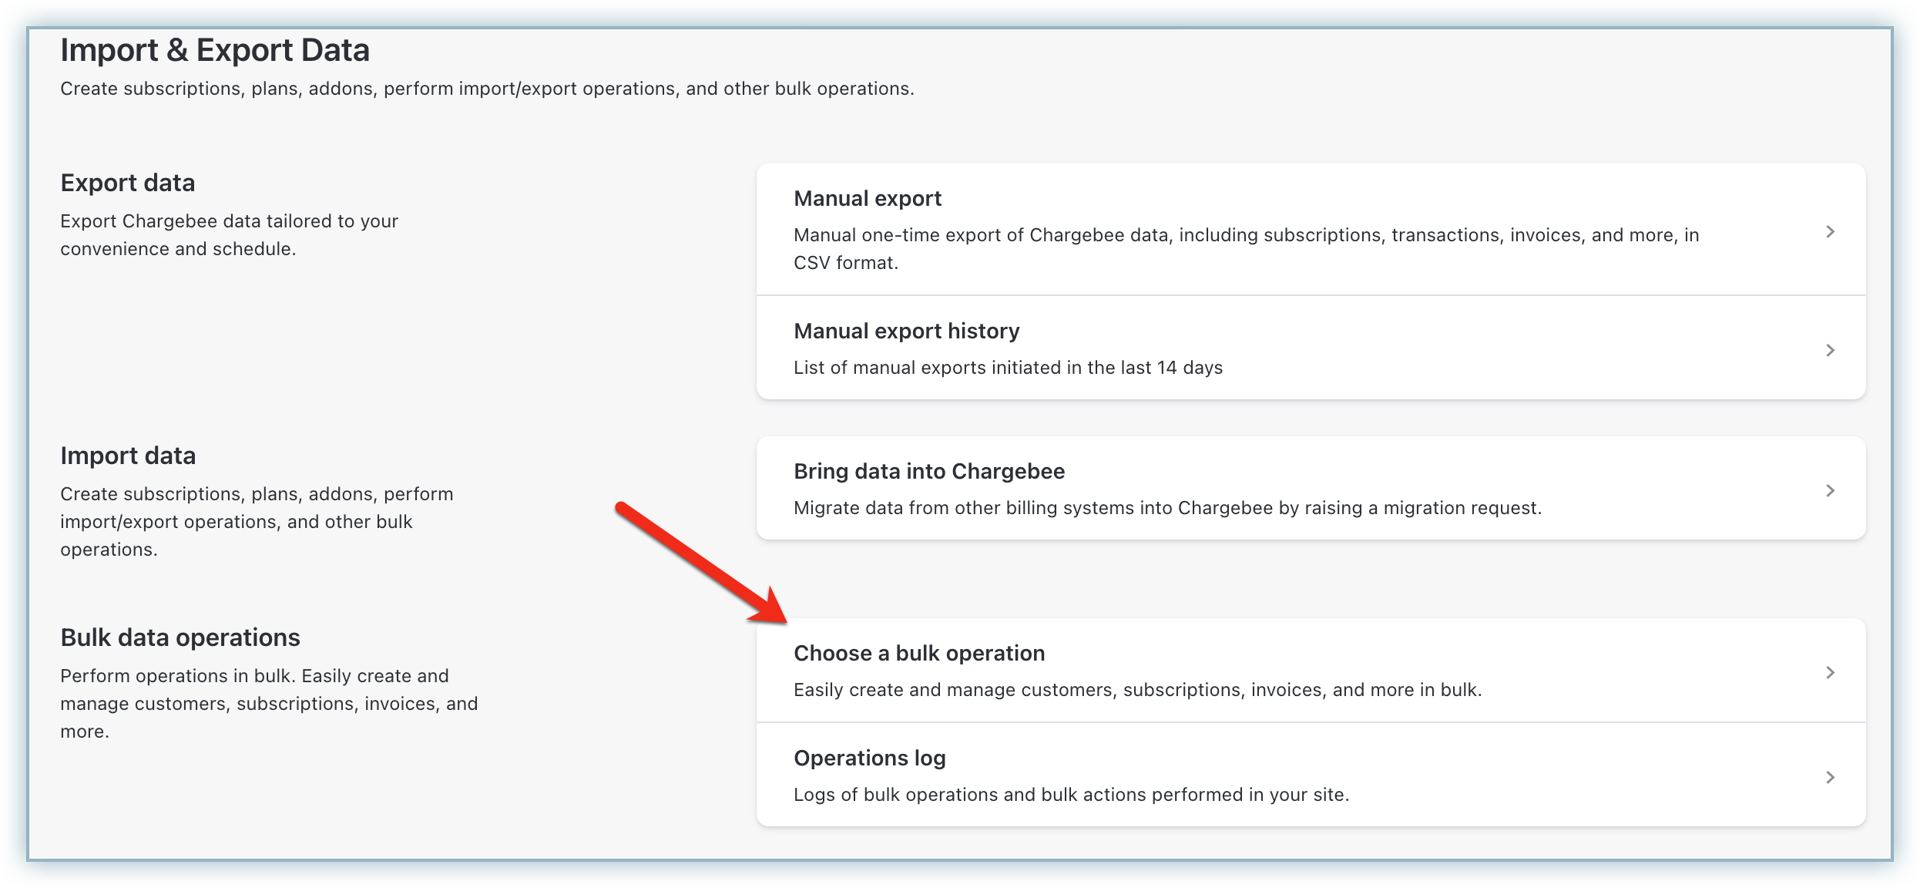
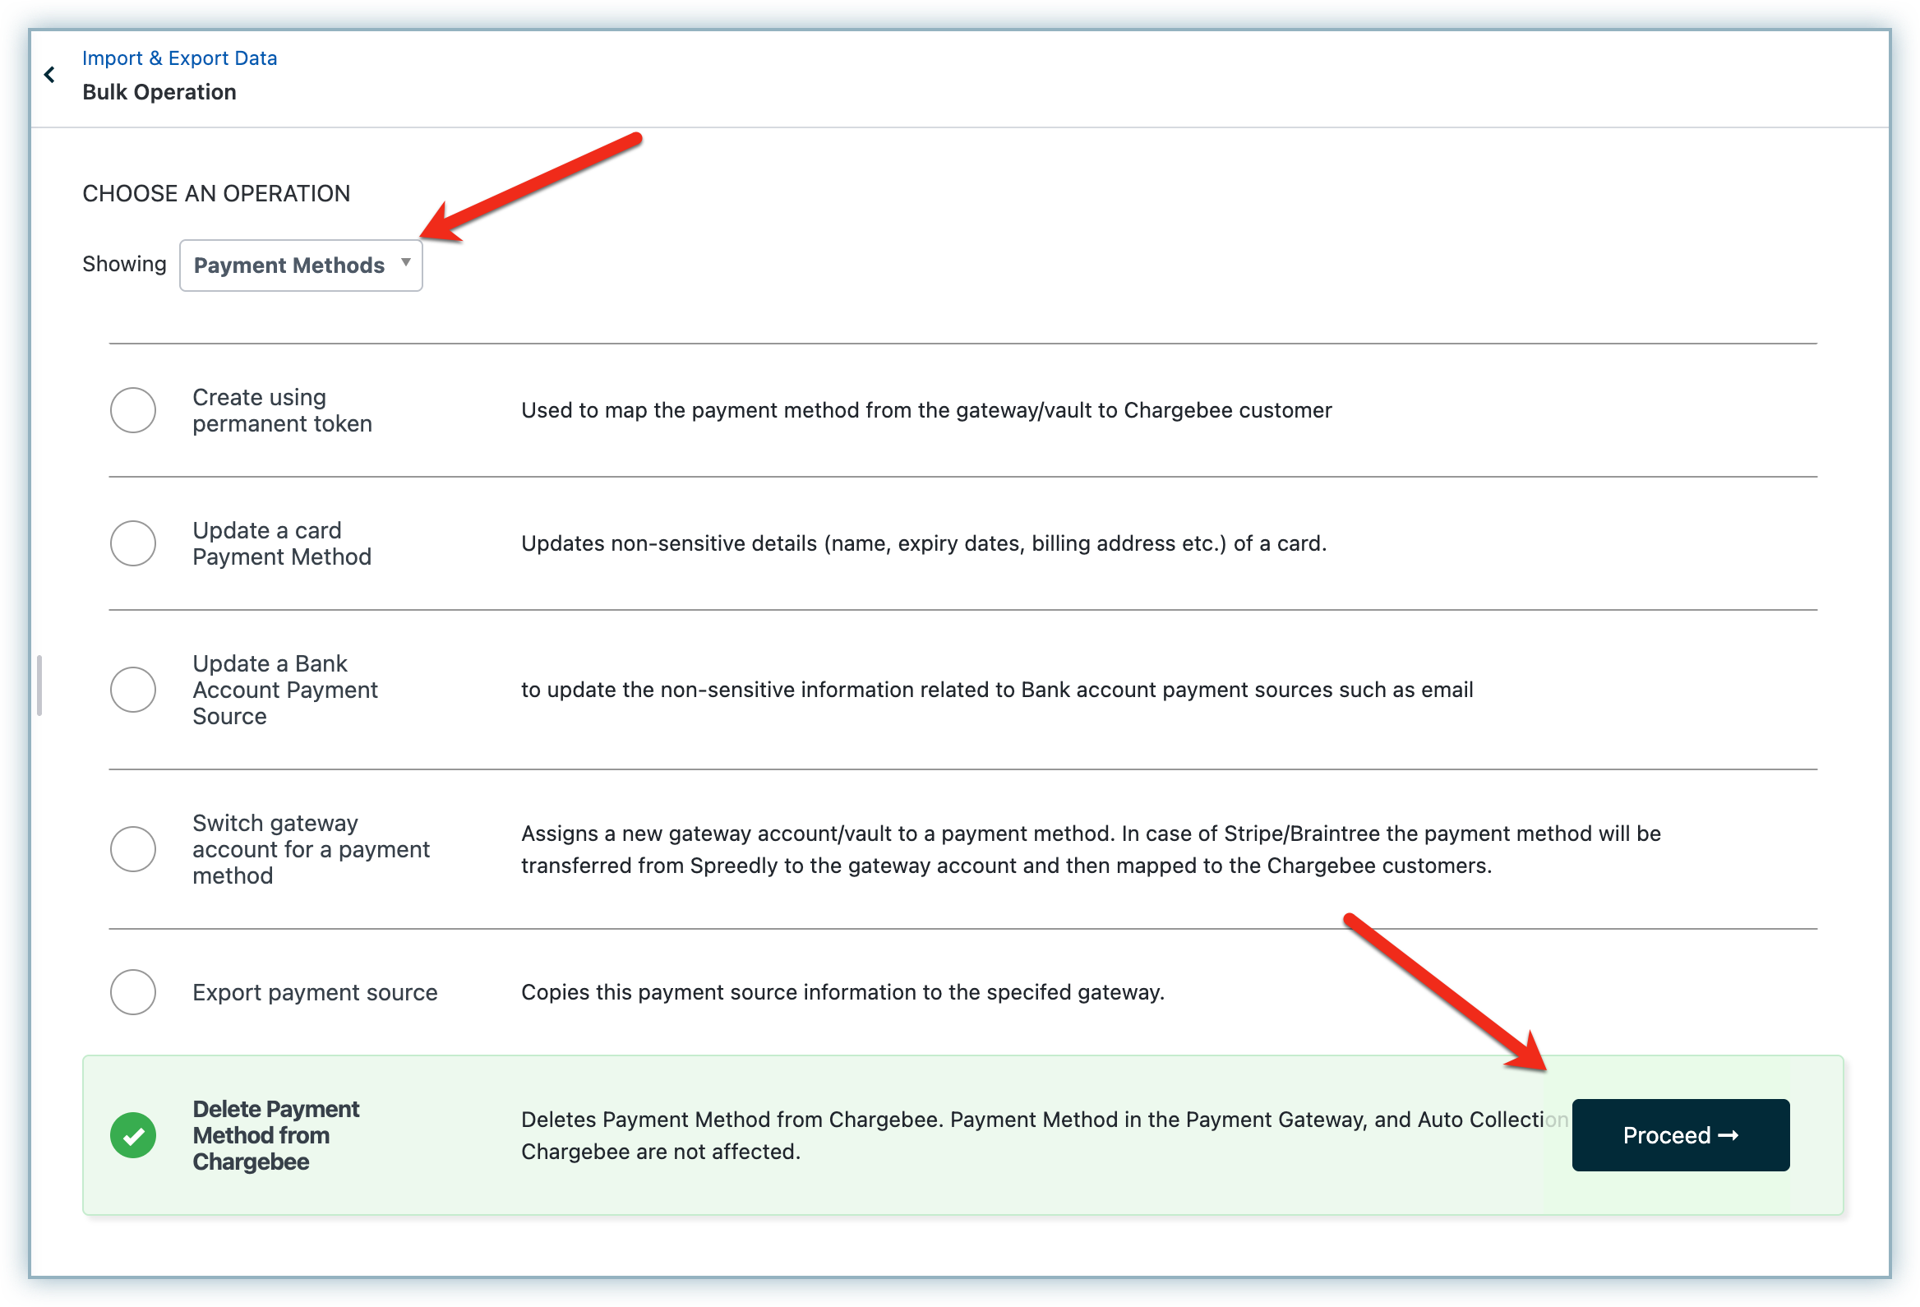
- Select Payment Methods from the dropdown and select the operation: Delete Payment Method from Chargebee.
- Select Proceed.
Steps to perform a Bulk Deletion
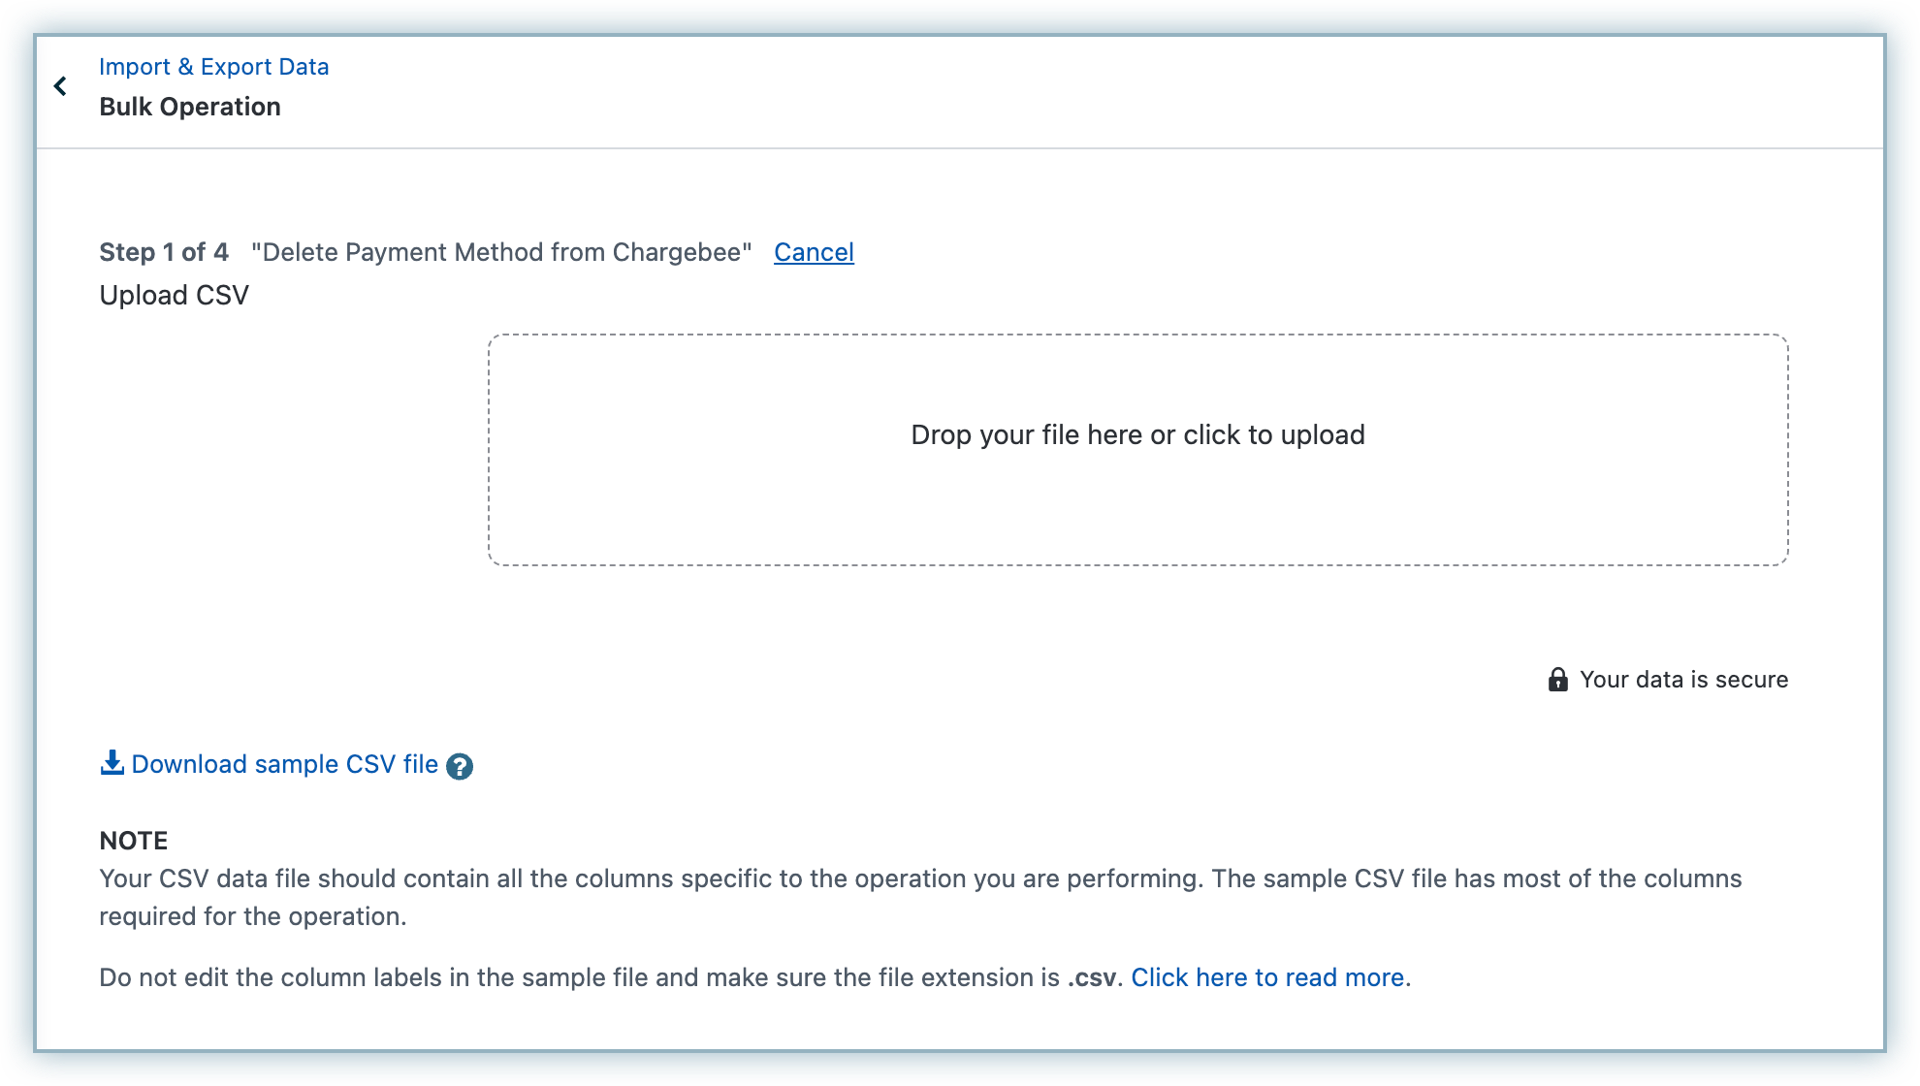
Step 1: Upload CSV
- Drag and drop or click to upload your CSV file.
- Download the sample CSV file to use the correct column headers.
- Required column:
payment_source[id]
Step 2: Configure operation (Optional)
- Select the following as required:
- Disable Webhooks - to prevent triggering external event notifications.
- Disable Email Notifications - to suppress emails to customers.
- Advanced Transformations - if additional processing is needed.
- Click Continue.

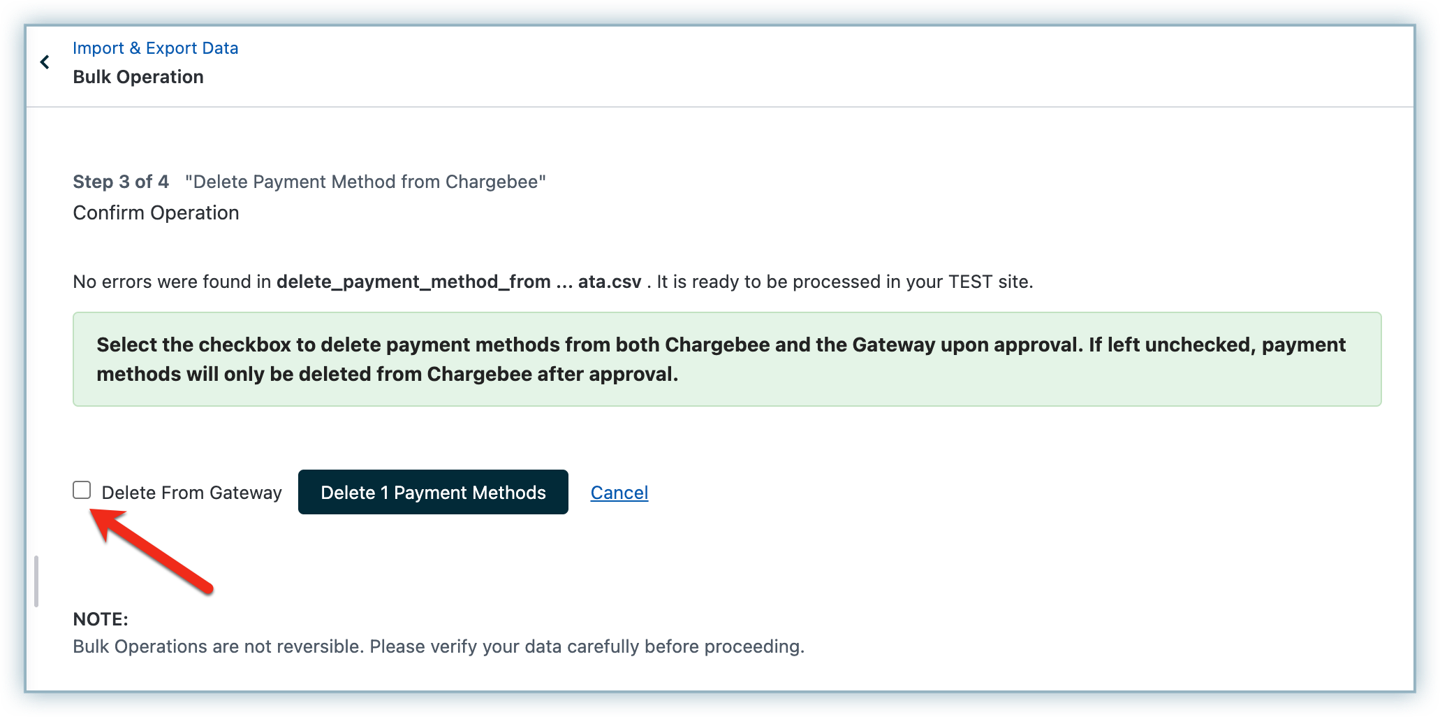
Step 3: Confirm deletion options
- Review the summary.
- To delete payment methods from both Chargebee and the Gateway, check the Delete from Gateway box and click Delete Payment Method.
- Alternatively, select Delete Payment Method directly to delete payment methods only from Chargebee.
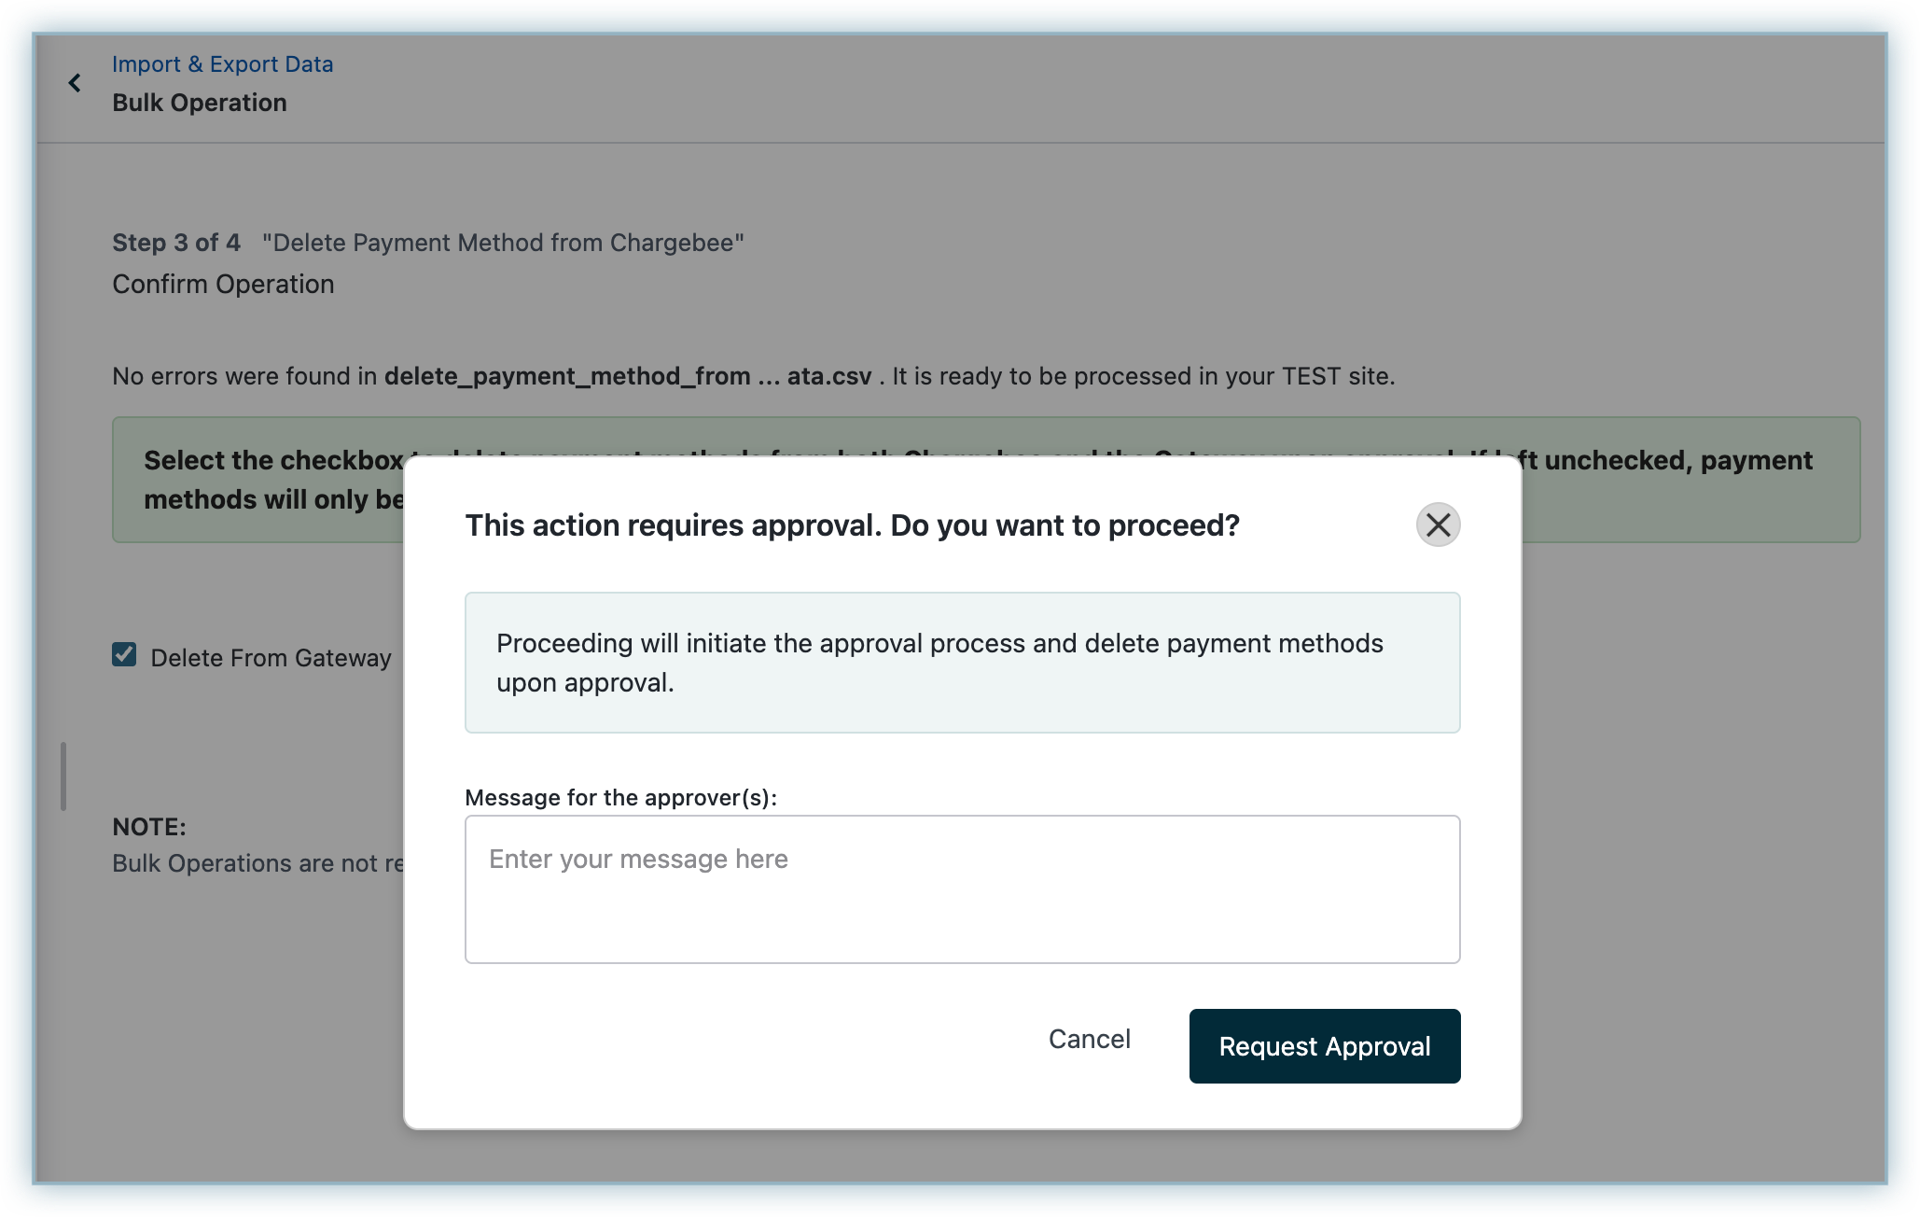
Step 4: Submit for approval
- When you click Delete Payment Method, a pop-up appears, prompting you to request approval.
- Add an optional message to the approvers and click Request Approval.
Approval workflow
Once submitted, the bulk deletion request enters an approval workflow. This ensures only authorized users (Site Owners/Admins) can review and confirm such actions.
-
Accessing the Approval Request If you have the appropriate authorization (Site Owner or Admin), you can view and take action on approval requests.
-
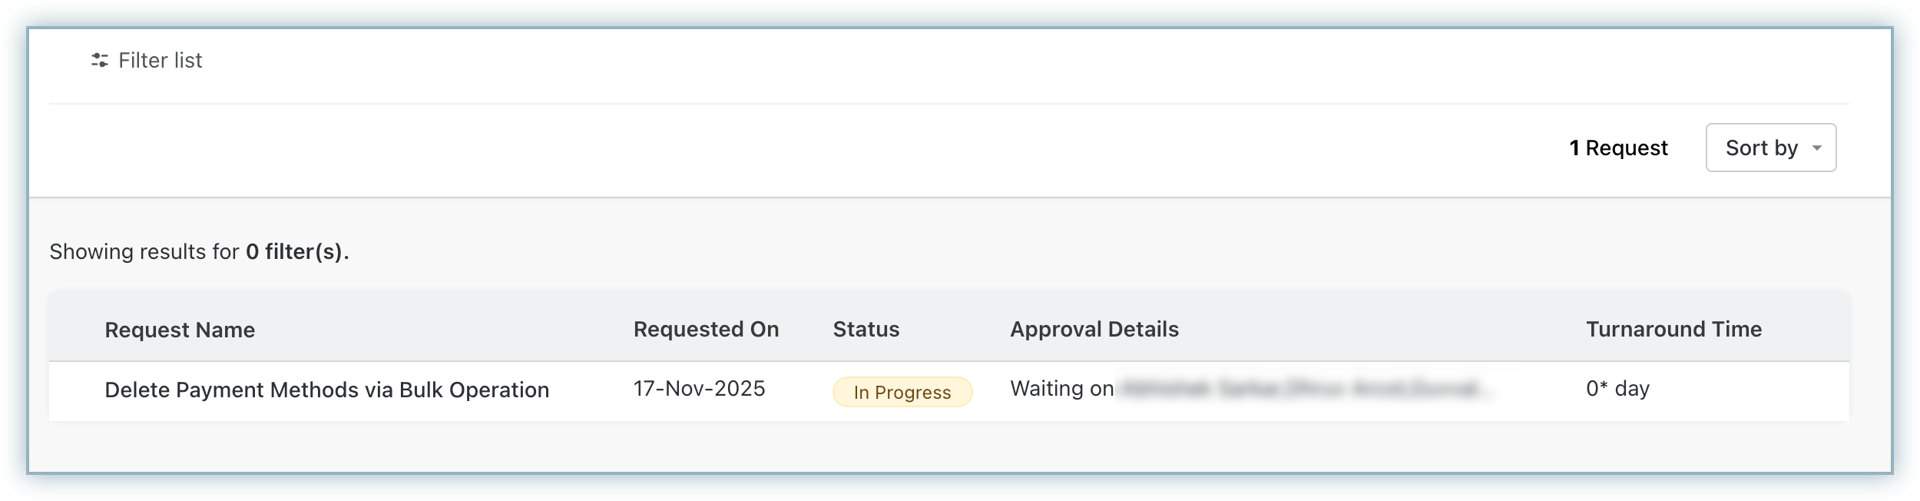
Go to Approvals > My Requests in the left navigation of your Chargebee site.
-
You will see a list of pending requests, including the requester's name, time, and a summary of the action.
-
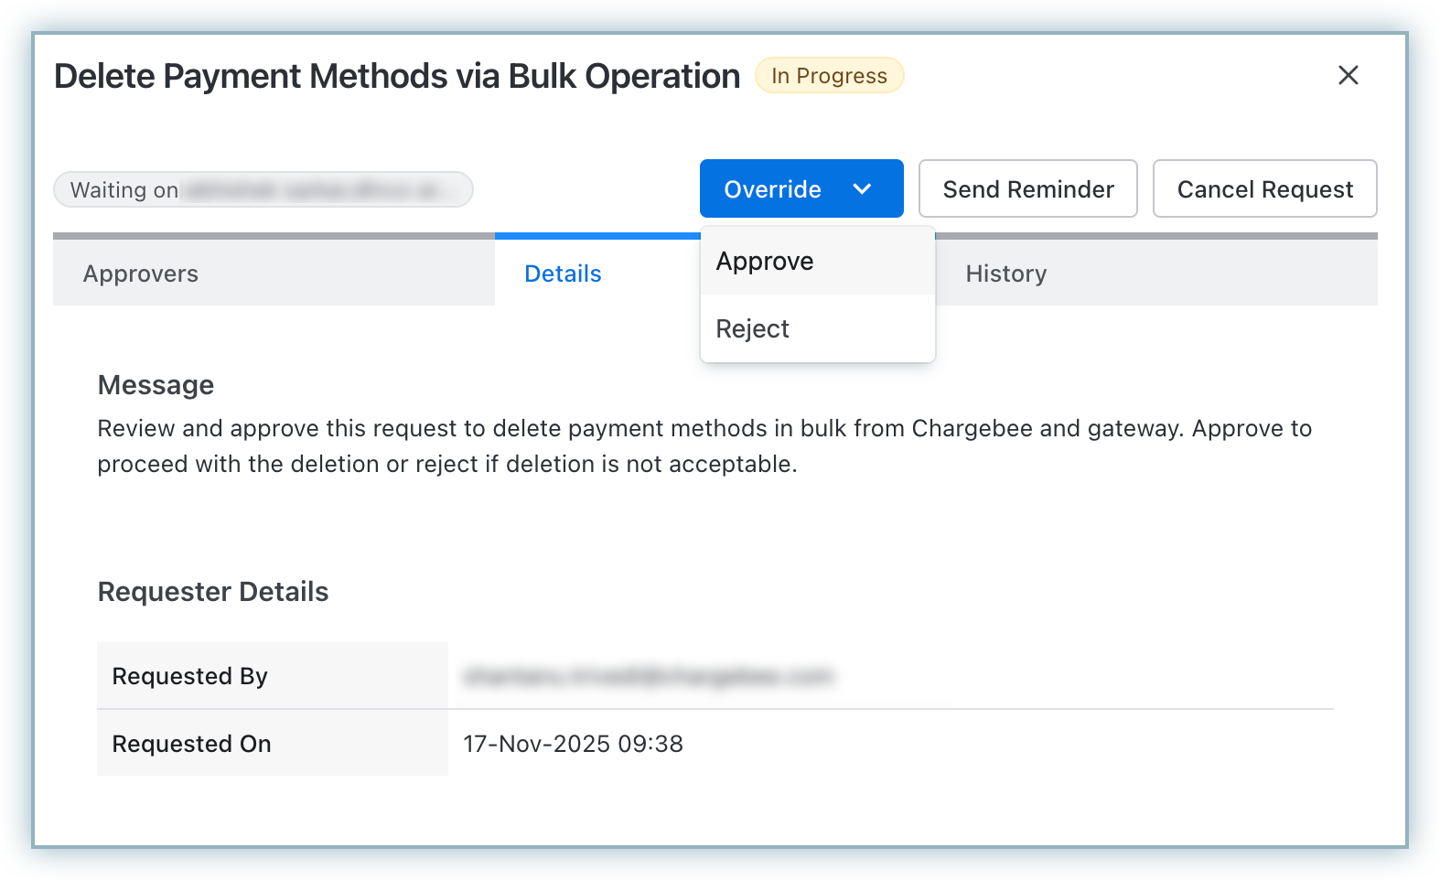
Click a request to view more details and take action.
-
-
Approver Review Once you open a request, you will see available options:
- Approve - Initiates the deletion based on the selected scope.
- Reject - Cancels the deletion.
- Send Reminder or Cancel Request - Optional actions to follow up or withdraw the request.
-
Approval Outcomes
a. If approved: Chargebee deletion occurs immediately, and the Gateway deletion (if selected) is scheduled after a delay.
b. If rejected: No deletion occurs. The request is closed.
-
Notifications: The requester receives an acknowledgement email once the request is either approved or rejected.
Was this article helpful?