Custom Fields and Metadata
Chargebee lets you create custom fields for customers, subscriptions, features, product families, plans, addons, price points, and coupons. After creation, you can add these fields to hosted checkout pages and invoices. You will also be able to access them via the web interface or API.
Custom Fields for Customers
Use the option to create custom fields for the Customer object if you need to collect customer-specific information, such as date of birth, age, or gender.
Custom Fields for Subscriptions
Use the option to create custom fields for the Subscription object when the information you need is subscription-specific, and your customers have multiple subscriptions. E.g., domain URLs, phone numbers, tracking IDs, shipping dates, t-shirt sizes.
Custom Fields for Invoices/Credit Notes
Use this option to create custom fields for the Invoice or Credit note object when the information you need is specific to a particular Invoice or Credit note, and cannot be created at a Customer or Subscription level. E.g., Approved by, Additional status, Collection agency name, Expected date of collection, and so on.
Note
The Invoice and credit note custom fields cannot be used as filter criteria while filtering records in the API or the UI.
Custom Fields for Features
Use this option to create custom fields for the feature entity, enabling you to capture additional information such as the feature type, version, and other relevant details.
Custom Fields for Plans/Addons
Use this option to create custom fields for your plans and addons if you would like to stored specific information related to the plan (like which country the plan is available in, for example) for your future reference (Chargebee will not use this information). The information, once captured, will show up in the plan/addon's details page.
Note
Plan/Addon related custom fields will not show up in Chargebee's hosted pages. Your customers will not be able to access custom fields relating to a plan/addon.
Types of Custom Fields
The supported custom field types are:
-
Single-line text: This field will appear as a textbox, and the maximum character limit is 99.
-
Multi-line text: This field will appear as a text area, and the maximum character limit is 250.
-
Dropdown: This field type will appear as a dropdown menu. You can add as many options as you'd want, but ensure that the total number of characters used for all the options put together, does not exceed 5000.
-
Checkbox: As is evident from the name, the field type can be used for creating checkbox options. The default value of this field type will be false.
-
URL: This field type will appear as a text area. The URL provided here will be validated for "http://" and "https://".
-
Email: This field type will appear as a textbox. The email address will be validated.
-
Date picker: Use this field type if you want to collect date-related information.
-
Timestamp: If you need to collect information related to date as well as time as a timestamp, use this field type.
-
Numbers: You could use this field type for collecting information such as phone number. This field does not accept input other than numbers.
You can add up to a total of 50 custom fields each to Customers, Subscriptions and Plans/Addons modules. The breakdown is as follows:
- 30 String fields (includes single line text, multiline text, dropdown, checkbox, URL and email)
- 5 Date fields
- 5 fields of the type Timestamp
- 10 fields of the type Numbers
Creating Custom Fields
To create custom fields in your Chargebee site, go to Settings > Configure Chargebee > Custom Fields in your TEST site. You'll be provided with a 'toolbox' for creating the fields you require:
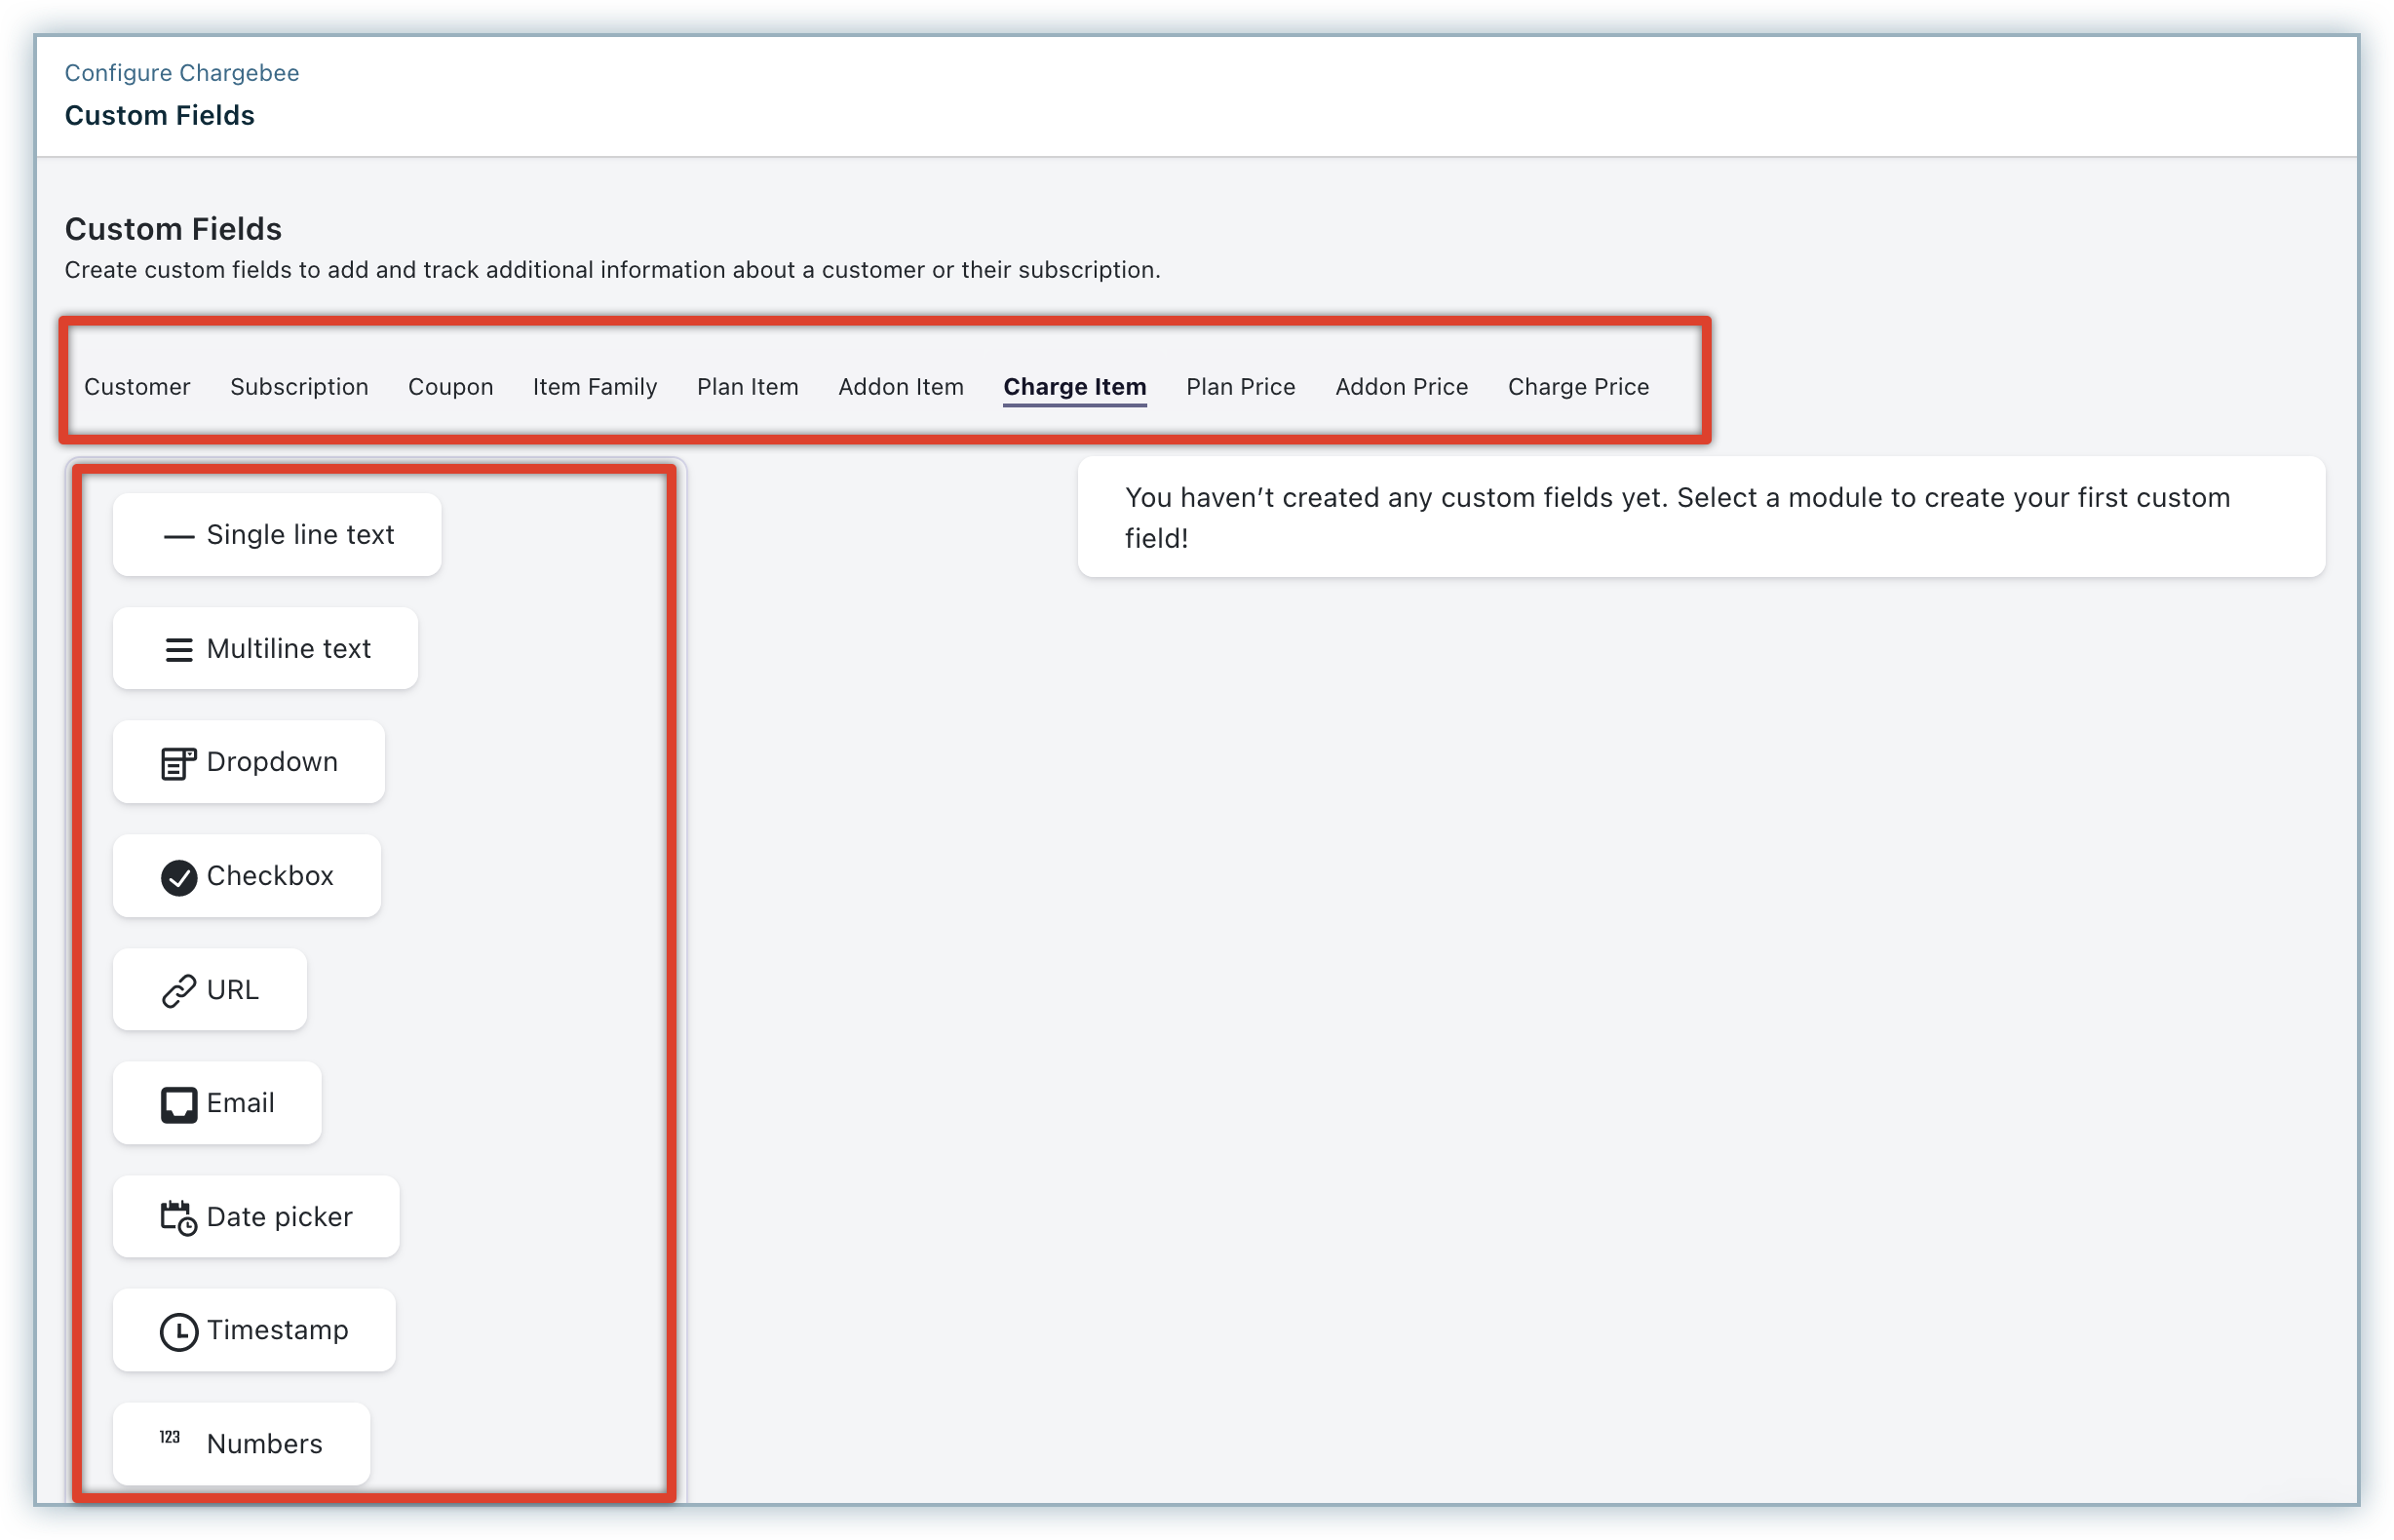
1. Create Custom Field in Test Site: Select the field type you want to create from the tabs and fill in the details in the field creation screen that appears:

Field Label: Text that will appear on the UI for hosted pages and invoices. API Name: Field reference for API calls and merges.
The custom fields are considered 'active', and will now be available only on the test site. You need to publish the fields to your live site to include custom field information in the invoices that you send to your customers, or in the hosted pages viewed by them. Ensure that you check how the fields work for all your use cases before pushing it to your live site.
2. Publish Custom Field to Live Site: In the Custom Fields main page, click Publish to Live and confirm changes.
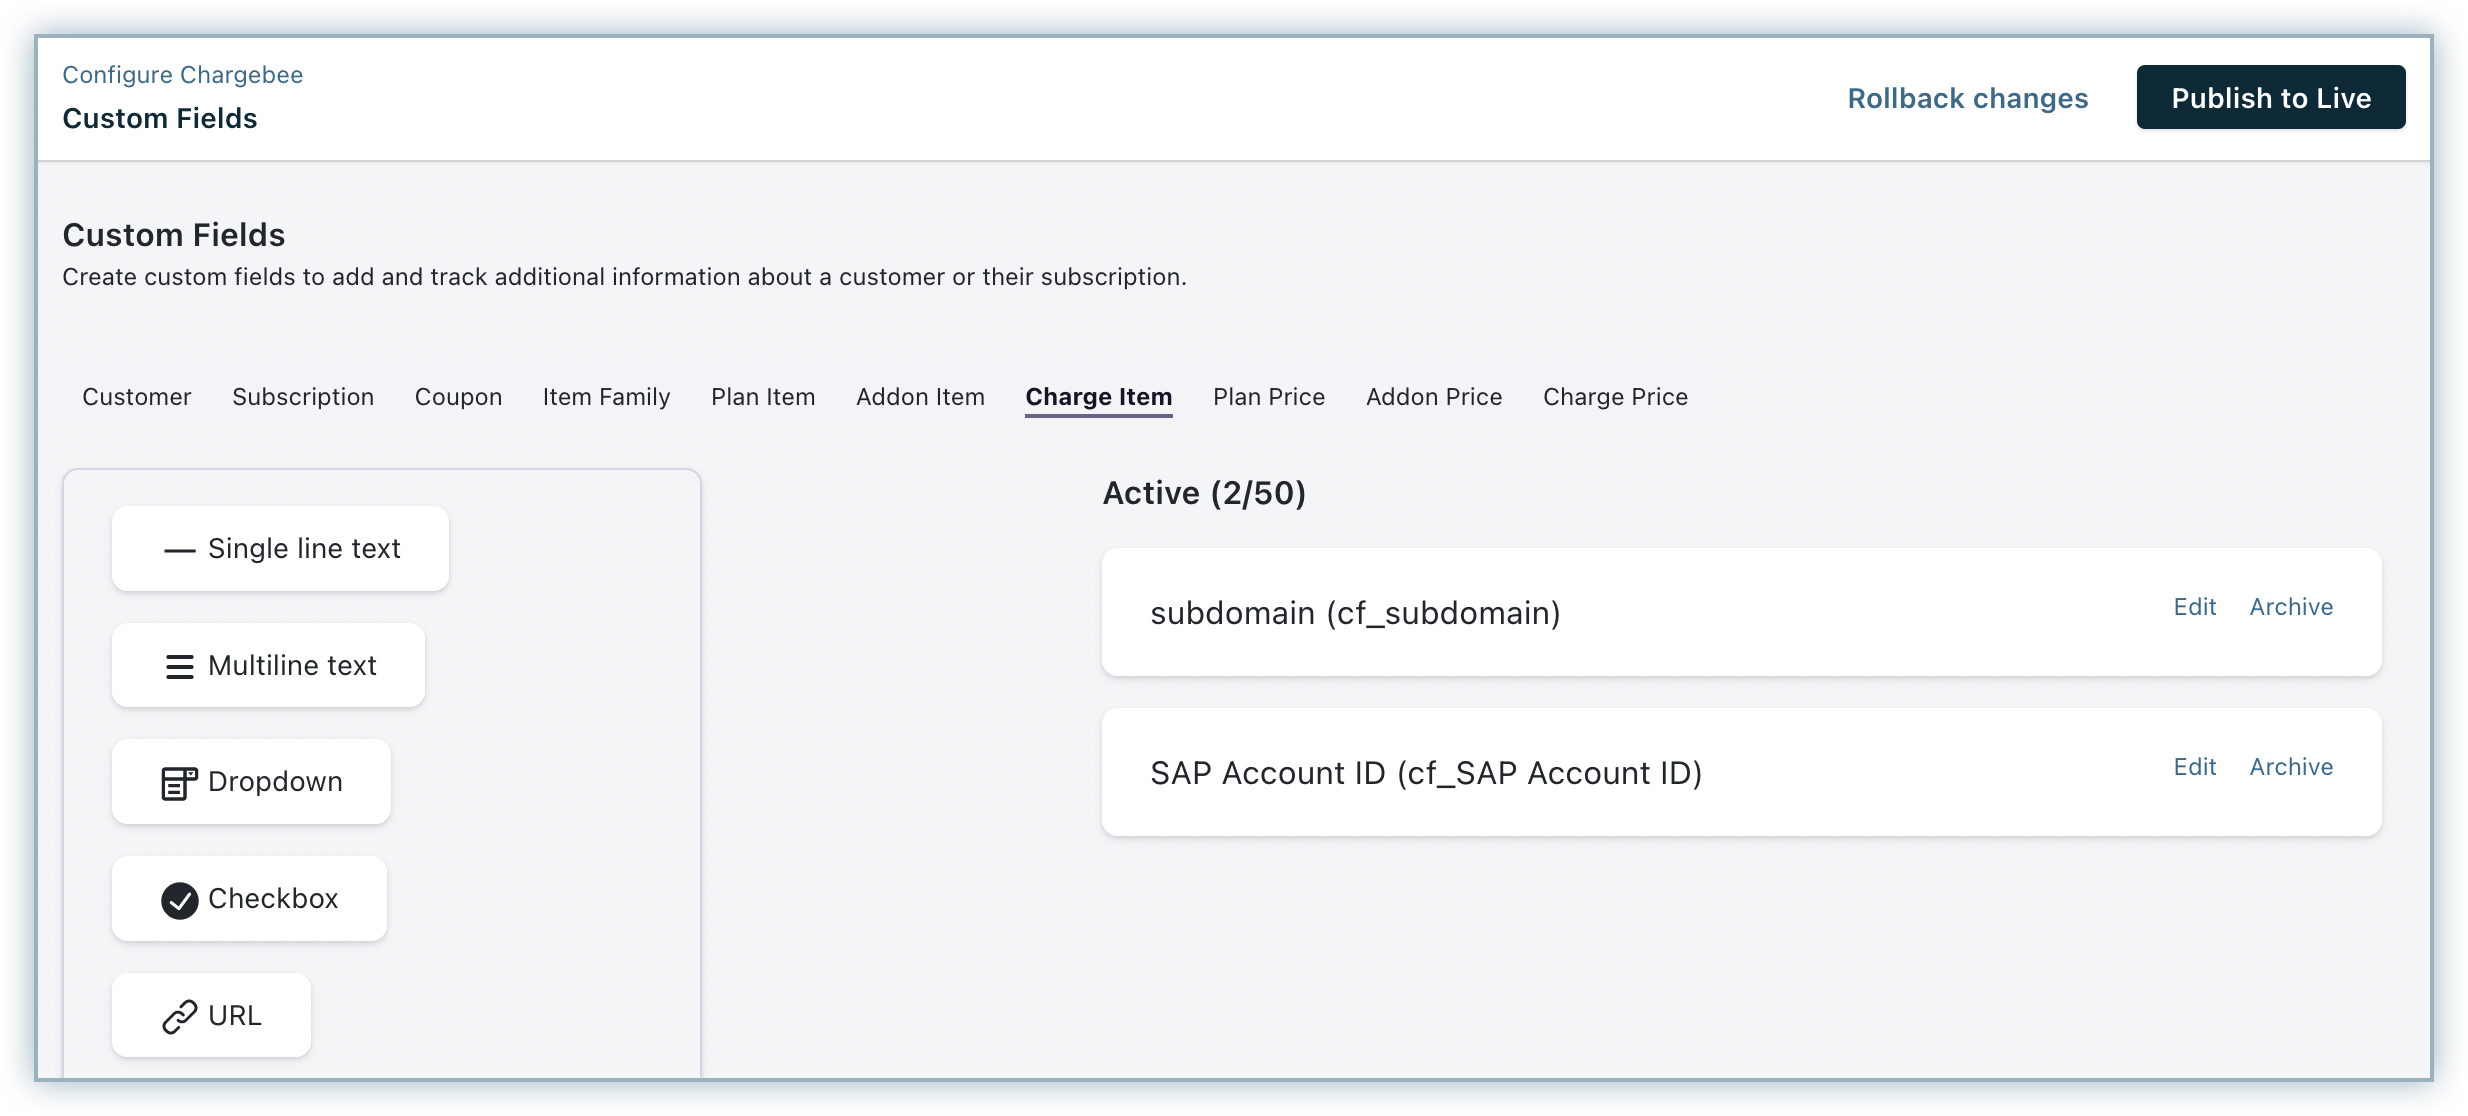
The custom fields will now be available on your LIVE site. To display the same on your hosted checkout page:
If you're using In-app Checkout, navigate to Settings > Configure Chargebee > Custom Fields to make further changes in the LIVE site.
Archiving and Unarchiving Custom Fields
You can archive 'active' custom fields. Open the required custom field, and click the Archive button available on the top right corner. The field will be listed under the Archived section in the main Custom Fields page.
To unarchive, open the archived field and click the Unarchive option available on the top right corner.
Discarding or Deleting Custom Fields
Archived custom fields that have not been pushed to the live site can be discarded. Open the archived field, and click the Discard Field option available on the top right corner.
You can delete an Archived custom field permanently from your test site using the Discard option if it has not been synced with live site.
Note
You can delete live-site custom fields only via backend. Contact support with the custom field ID that you want deleted from your live site.
Discarding Changes Made to Custom Fields
You can discard changes you have made to the existing custom fields that have also been pushed to the live site. Open the modified field, and click the Discard Changes option available on the top right corner.
Rolling Back Changes Made to Custom Fields
Clicking Rollback changes will discard all changes that have not been published to your Live site. If you have created new fields but haven't pushed them to your live site, they will be discarded as well.
Adding Data to the Custom Fields
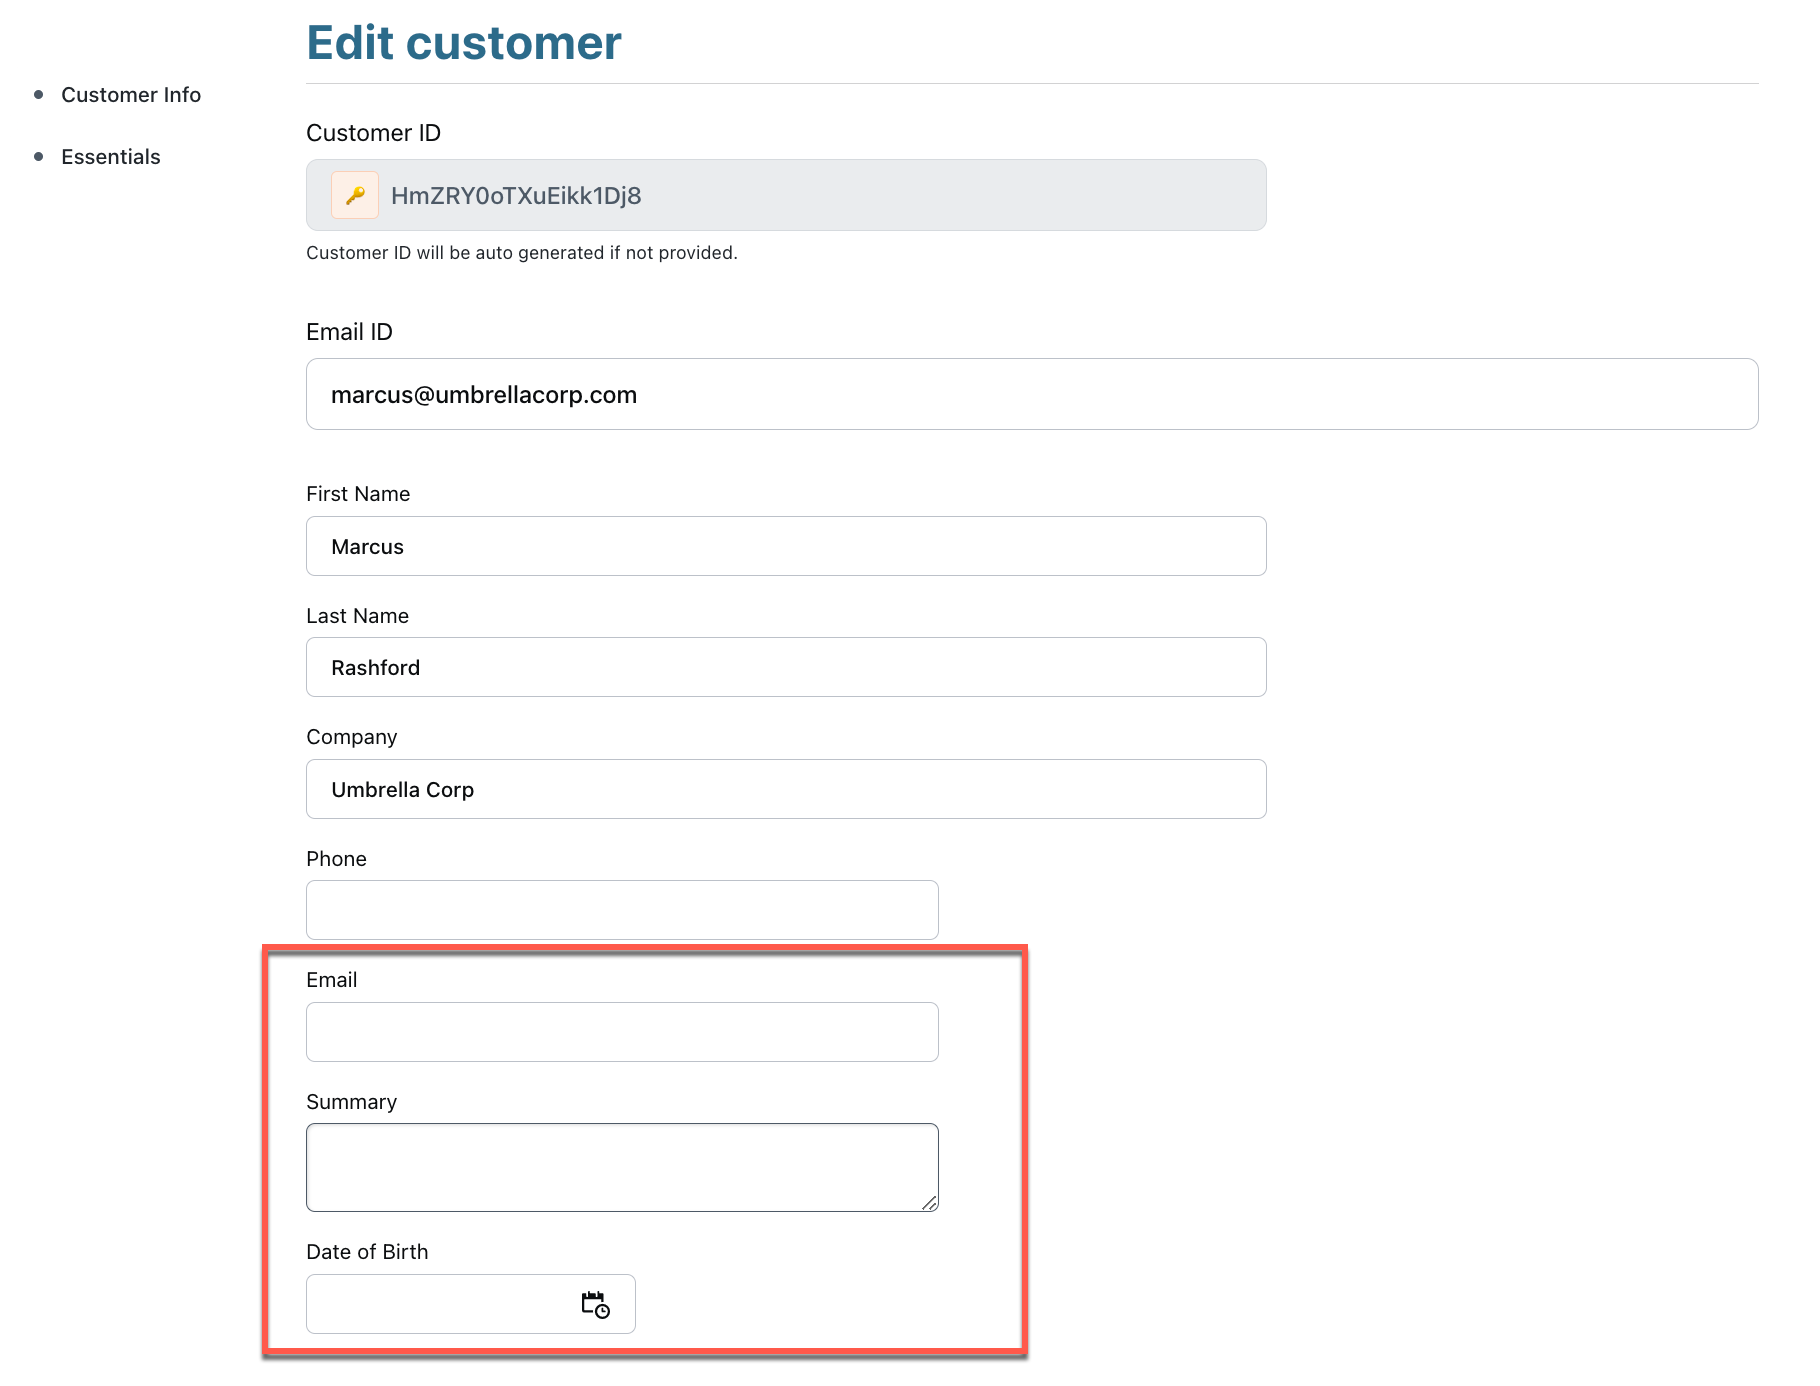
Once the custom fields have been added to your site, you can add data to the custom fields by editing or creating data in objects for which custom field has been created.
For example, to add data to a custom field for an existing customer, open the customer details page and use the Edit Customer option. This will display all the custom fields that are available in your site and you can add the data here.
You can capture custom field data during sign up through the hosted pages, using the API or through the web interface.
Capturing custom field data via hosted pages
You can collect the custom field data via the hosted checkout page. Make sure to enable the custom field created for customer portal.
Note
You can also collect custom field data during sign up through hosted pages by capturing the data on a page prior to directing users to the hosted checkout page.
Updating custom field data through the customer portal
By default the custom field that you create will be in Hide and Non Editable state in the customer portal. If you'd like to make visible these fields on the customer portal or make them editable, change your preferences as explained in Configuring hosted pages. Your customers can now log in to their customer portal and update the data for your custom fields.
Using the API to collect custom field data
For API users, if you have custom fields created in your Chargebee site, they will be listed in your API documentation as part of your input parameters. These fields are visible only when you are logged in to the same Chargebee site where they were created. For example, if you are not logged in, these fields will not be shown under Customers → Customer attributes.

Adding custom field data through the web interface
When creating a new subscription or a customer using the web interface, the list of custom fields will be displayed in the creation page.
Reordering Custom Fields
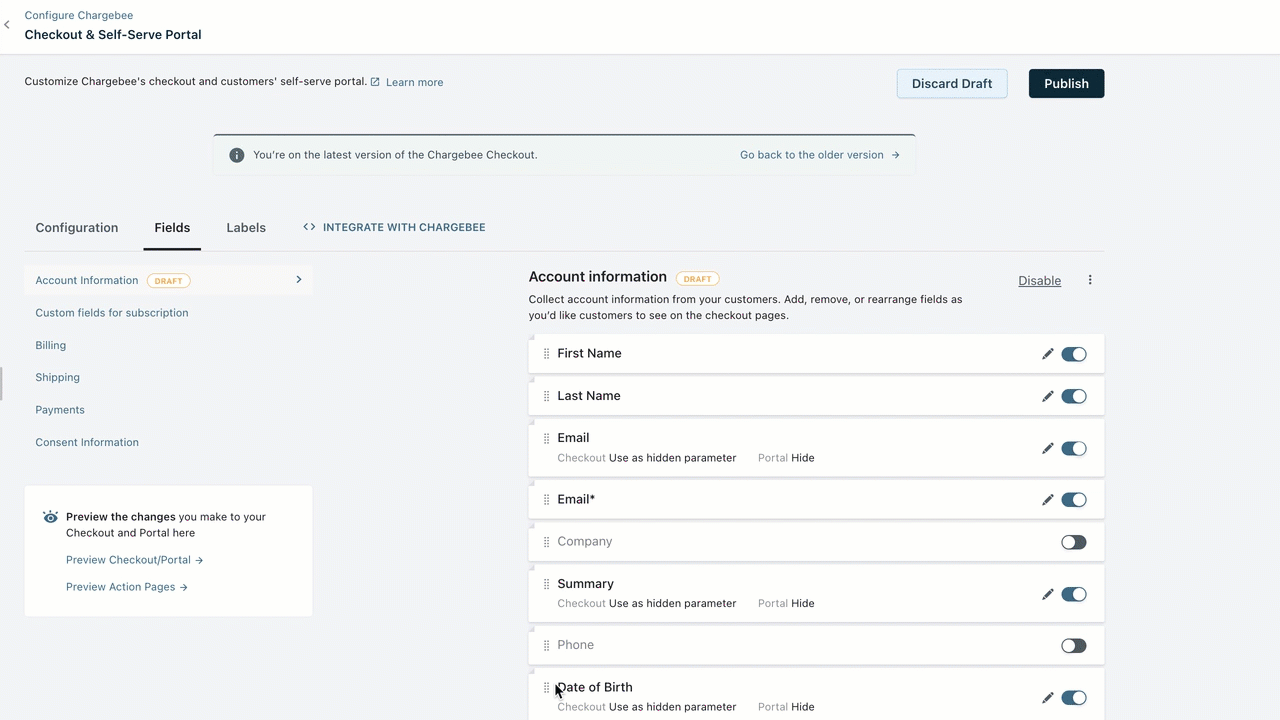
The custom fields you've created can be reordered to make data entry easy and logical for your customers.
If you're using In-app Checkout, custom fields can be reordered by placing the field in the right position. Navigate to Settings > Configure Chargebee > Checkout and Portal > Fields.
Note
This feature is only available on specific plans. To know more, visit Chargebee's Plans and Pricing page.
Grouping Custom Fields
Custom fields can be grouped to make all the related information available in one place. Learn how to group custom fields in Chargebee.
Viewing Custom Field Data
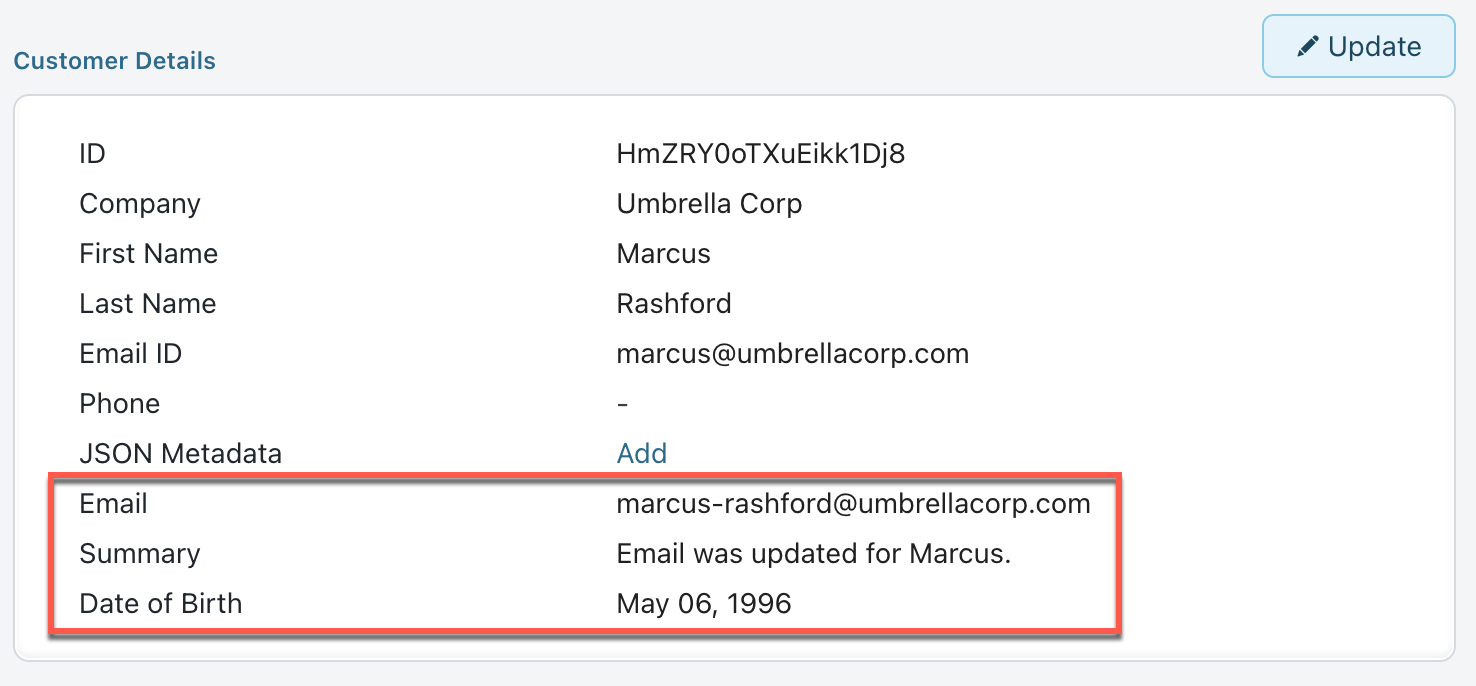
Once the data for the custom fields are captured and stored, they appear on the detail section of the respective page.
For example, the data captured for custom fields created in Customer Object will appear in the Customer Details section.
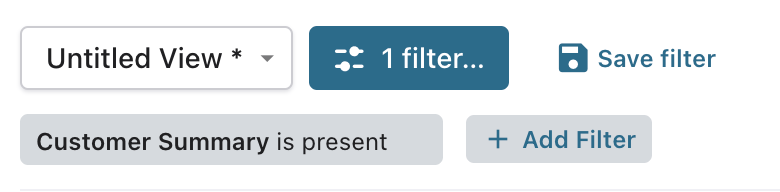
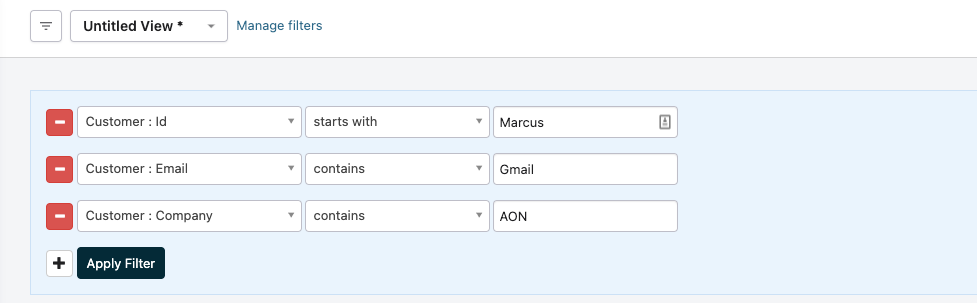
Search and Filter with Custom Fields
The custom fields created for your site will be available in the filter section when you search or filter customers/subscriptions.
Note
If consolidated invoicing is enabled, it's not possible to filter using subscription custom fields in the Invoices page.
Custom fields will also be available as mail merge fields and can be used in your email notification templates.
Classic UI users
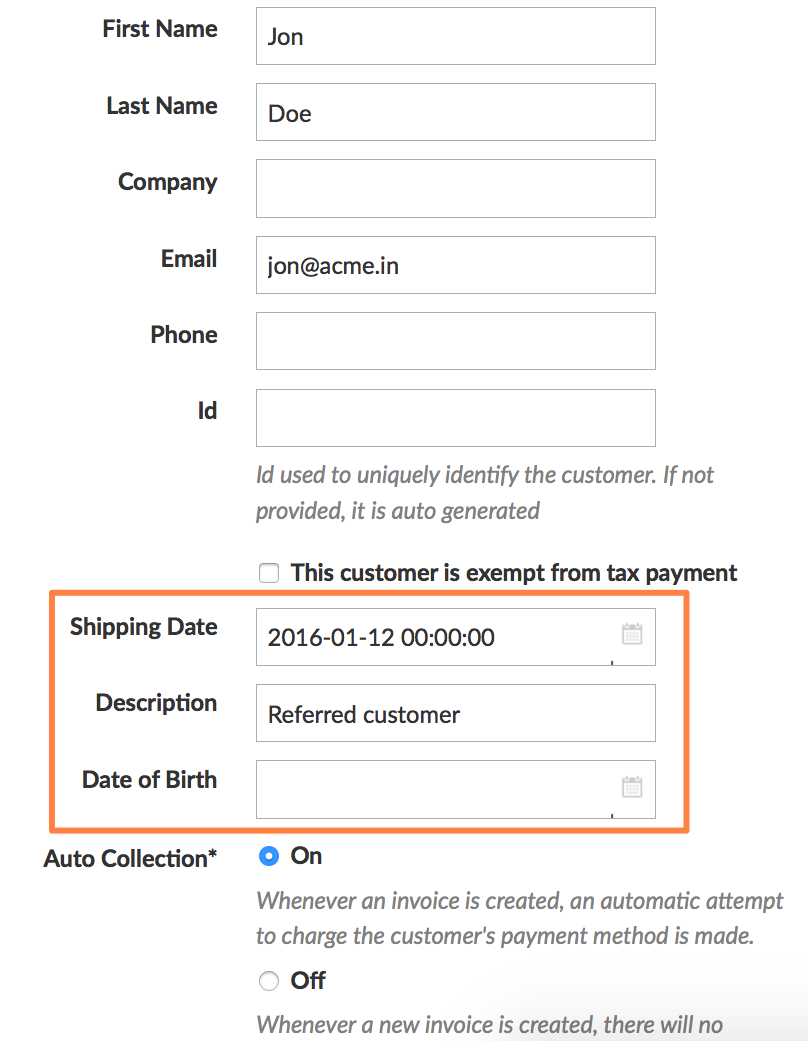
Here's how the custom fields appear in Change Customer Details page:
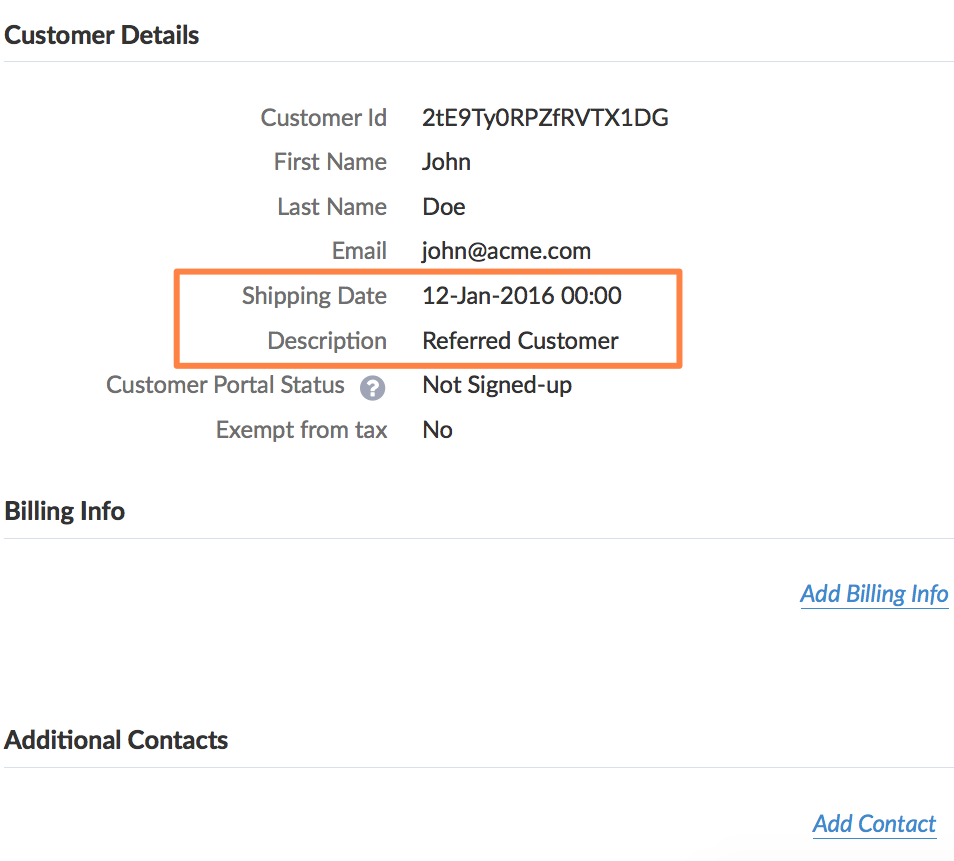
Here's how the custom field data appear in customer and subscription details page:
The advanced filter for custom fields is displayed as shown below:
Was this article helpful?