Customizing a Pricing Table
Overview
You can customize various elements of your pricing page and match your brand's look and feel to get the most out of your pricing page and improve your conversions. You can customize the experience of your pricing page for both new users and returning users or subscribers individually.
Customizing pricing page for new users
Chargebee pricing table allows you to personalize your pricing page for new visitors based on your specific business requirements.
- Navigate to Offers > Pricing Tables.
- Select a pricing table to open its configuration page.
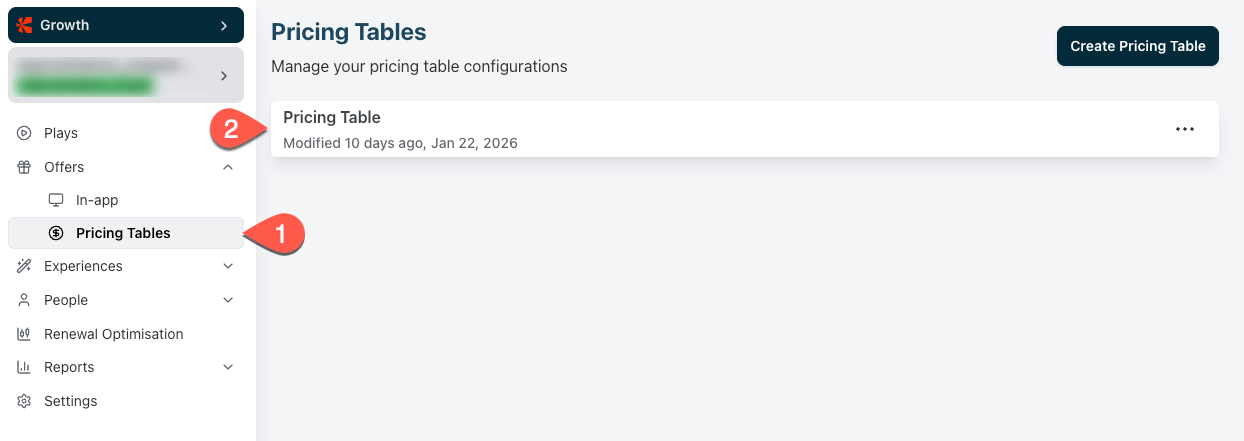
- Select the New User tab.
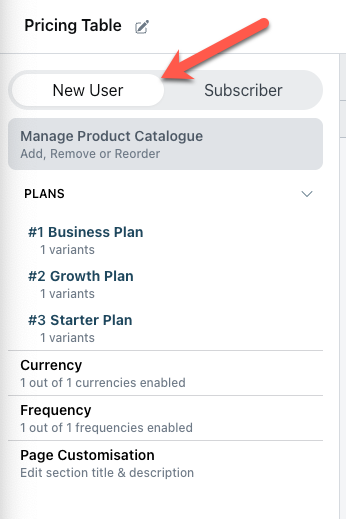
Customizing product catalog-related information
You can customize how the product catalog is displayed on the pricing page.
Add, remove, and reorder plans
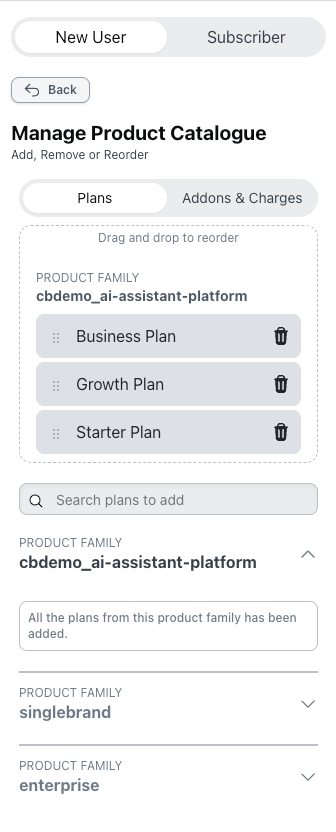
Select Manage Product Catalog to customize the following.
- Drag and drop to reorder the plans based on how you want to display them on the pricing page.
- All plans from respective product families are fetched and displayed from your Chargebee Billing site for selection. You can select one or more plans from the list to add to your pricing page.
- You can also use the search box to look for specific plans and add them to the pricing page.
Customize plans and edit their pricing
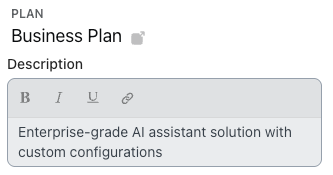
Select a plan name to customize the following:
Description
Enter a description for the plan.
Highlight plan and add badge
You can enable the Highlight Plan toggle to visually highlight a plan as most popular, or you can select Add Badge to add a "Most Popular" badge to the plan, or you can do both.
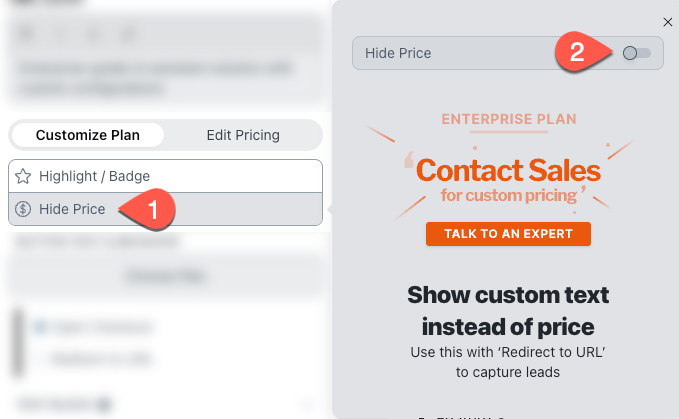
Hide price and add labels
You can enable the Hide Price toggle to hide the price of this plan and add custom labels such as "Contact Sales" or "Reach Out to Us" along with Redirect to URL to capture leads.
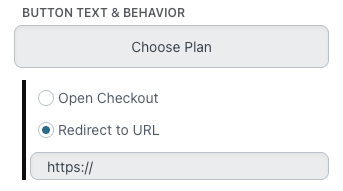
Button text and behavior
Under Button Text & Behavior, enter a button text to be displayed on the plan call-to-action (CTA) button, and select a preferred behavior on click. You can select to Open Checkout or Redirect to URL and specify a URL.
Feature list
Under Feature List, you can add the list of features included in the plan within the text box.

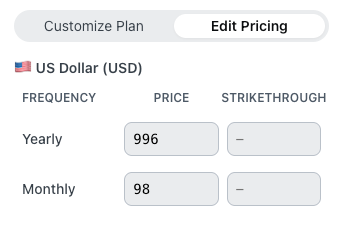
Edit pricing
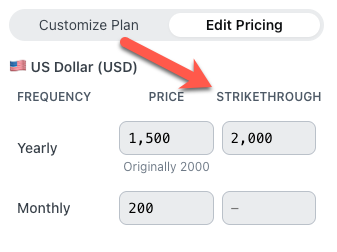
Go to the Edit Pricing tab to override the actual price and add a strikethrough price to highlight discounts or promotions.
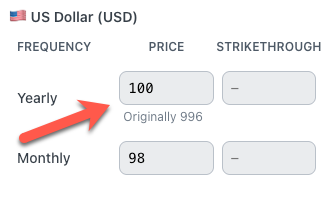
Price override
Price Override allows you to change the final pricing of a plan card easily with a single action. This overridden price is applied during a Checkout session. Use this simple yet powerful feature to offer quick discounts to your customers or to test a pricing change swiftly before making a permanent update.
If a subscription is created using the overridden price, the new price will be applied to all downstream processes, including invoice generation and revenue recognition.
Note
Overriding the price here does not update the original plan price in the product catalog.
To enable Price Override on your Pricing Table site, follow these steps:
- In Chargebee Billing, enable price override in the product catalog.
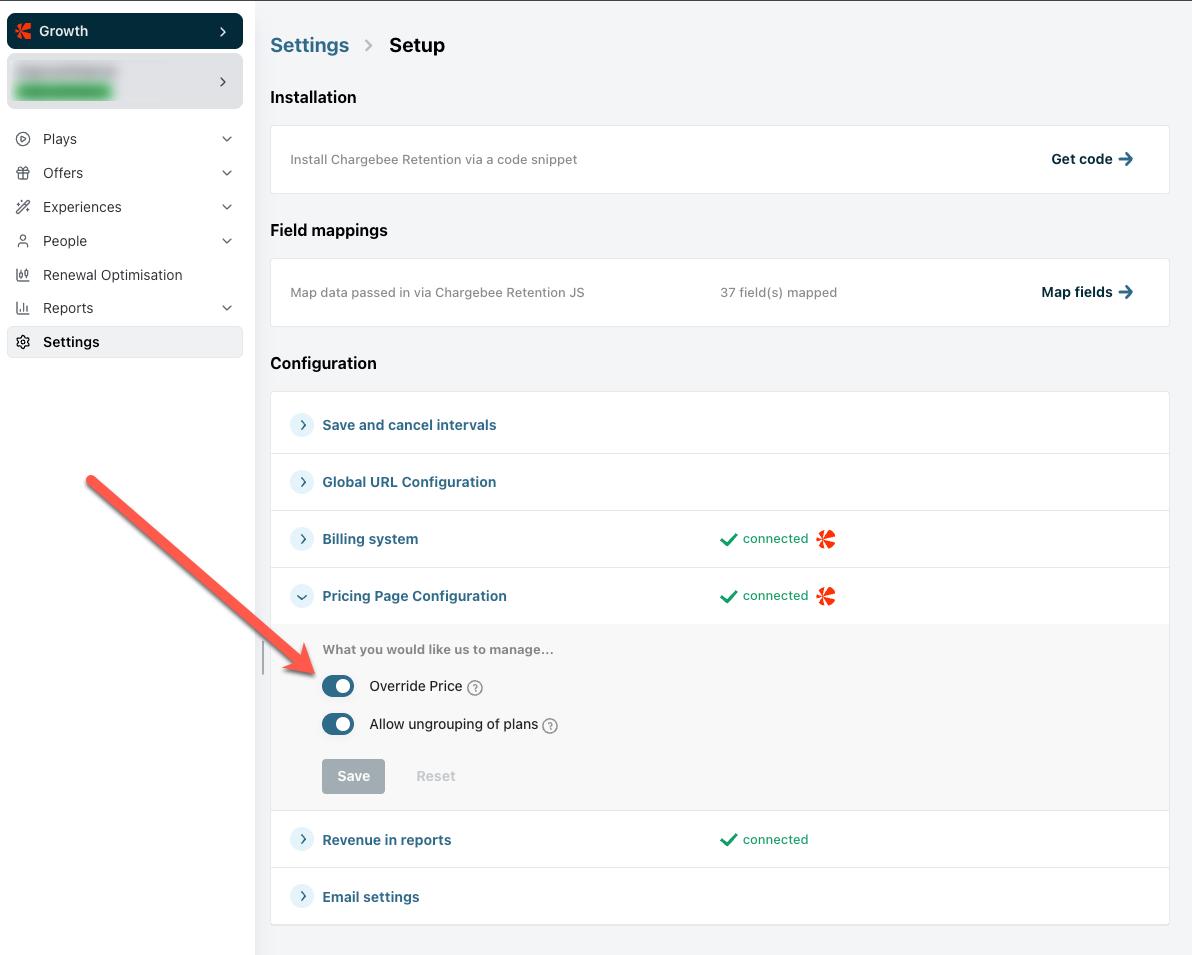
- In Chargebee Growth, go to Settings > Setup > Pricing Page Configuration.
- Enable the Override Price toggle.
Note
Disabling Price Override removes all existing price overrides from all pricing tables in your Pricing Table site. The plan price in the product catalog will apply instead.
Strikethrough price
Use the strikethrough price feature to create a sense of value for your customers, whether or not you are applying an actual price override or providing a discount on the pricing page via API. This feature allows you to show the original price with a strikethrough on the plan card while displaying the current price next to it.
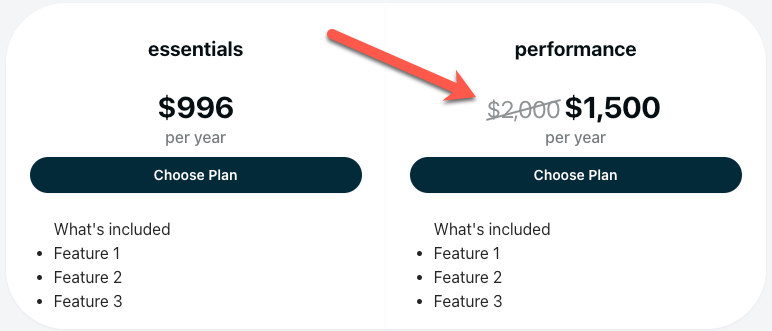
Use strikethrough pricing to highlight a price change, making the current price look more attractive. You can leverage this technique with or without a price override or discount via API. If you're not using an override or discount, the strikethrough price still serves as a visual cue to entice customers into making a purchase.
To set a strikethrough price, enter the original price in the Strikethrough field.
Price variants
The Price Variants feature in Chargebee Billing, allows you to configure different prices for various user segments based on factors like geography, acquisition channel (e.g., website or email), and product attributes (e.g., t-shirt size). This approach helps optimize conversions and analyze price responsiveness while maintaining a streamlined product catalog.
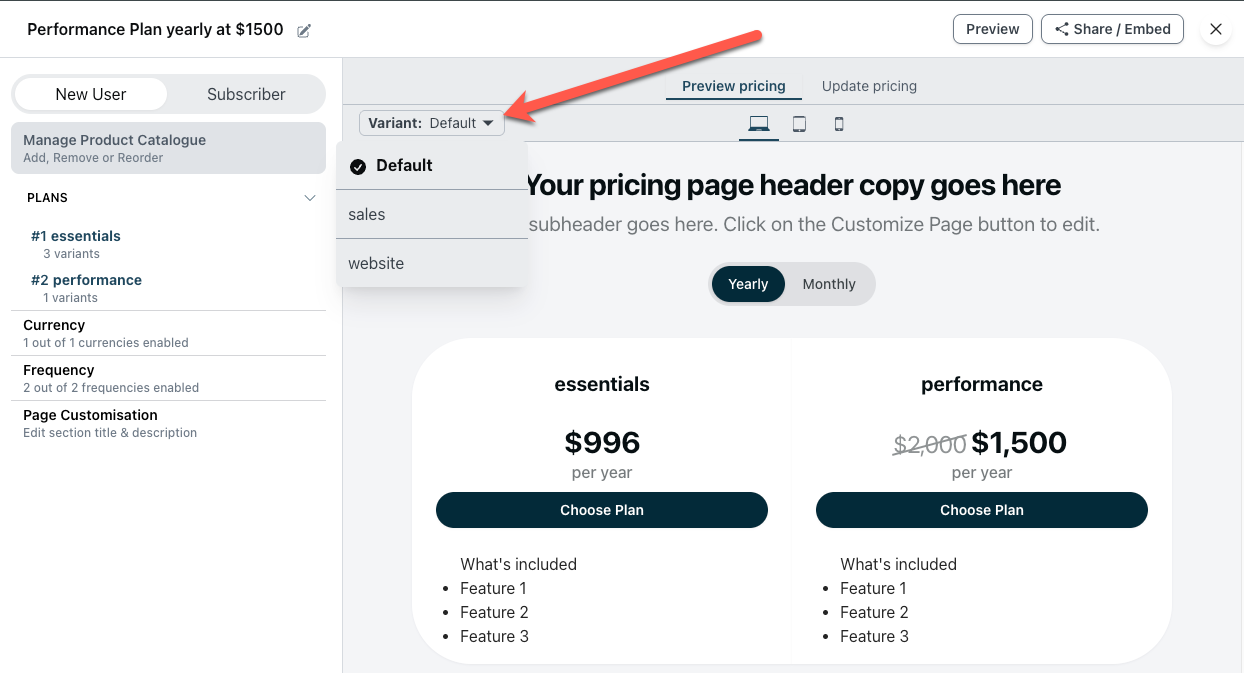
For the plans listed on the pricing table, any attached price variants configured in Billing Product Catalog are also displayed. You can choose the price variant (screenshot below) to preview its pricing table.
Edit pricing for a price variant
Follow these steps to override the price and add strikethrough prices for price variants in Pricing Tables.
- Set up Price Variants in Chargebee Billing.
- Enable Price Variants.
- Create Price Variants.
- Attach Price Variants to plan prices.
- Override prices and define strikethrough prices for plan price variants.
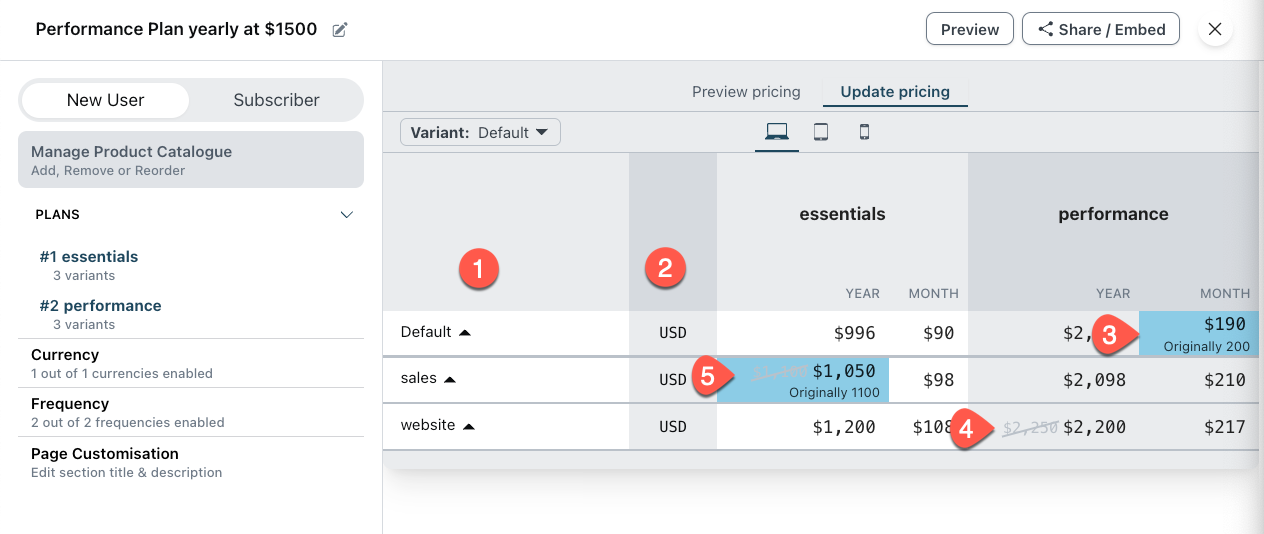
- Open the pricing table.
- Select the Update pricing tab. The table displays the prices for each enabled plan, grouped first by price variant (1) and then by currency (2).
- Click a cell in the table to:
- Enter an overridden price. (3)
- Enter a strikethrough price. (4)
- Enter both an overridden price and a strikethrough price. (5)
Select the price variant to display for the user
When embedding the pricing table, only the default price variants of the plan prices are shown. However, you can dynamically set the price variant for the plan prices displayed. To do this, integrate Pricing Tables via Chargebee.js on your frontend and use the setPriceVariant() function.
Note
When using setPriceVariant(), if the specified price variant is unavailable for a plan price, the default plan price in the Billing Product Catalog is shown. If no default plan price exists, the corresponding plan card does not appear in the pricing table.
Show addons and charges
In addition to plans, you can display addons and charges on your pricing page.
Before you begin, ensure the following steps are completed in Chargebee Billing:
- Attach the addons as Recommended or Mandatory to the appropriate plans.
- Attach the charges to the appropriate plans to be applied at the appropriate event in the subscription lifecycle.
Once the above configuration is complete, you can show them on your pricing page as follows:
- Select Manage Product Catalog.
- Select the Addons and Charges tab.
- Enable the Enable Addons and Charges toggle.
- The attached addons and charges are now displayed on the pricing page configuration page.
Customizing currency
When you are a business selling in multiple currencies, you can choose to display your plan pricing in select currencies or all of them. Follow the steps below to customize the currency details in your pricing page:
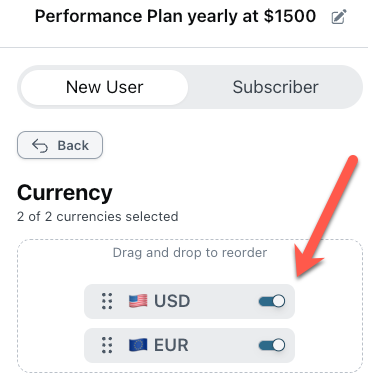
- Click Currency from the customization options.
- Click to enable the currencies in which you want to display your plan details in the pricing page. When more than one currency is selected, a currency selector is automatically added for your visitors to click and choose their preferred/relevant currency from.
- You can drag and drop the currency options to reorder their display on the drop-down list based on your preference.
Customizing frequency
While selling your plans in multiple billing frequencies like weekly, monthly, and yearly, you can use this option to customize the plan frequencies that you want to display on the pricing page. To customize plan frequencies:
- Click Frequency from the customization options.
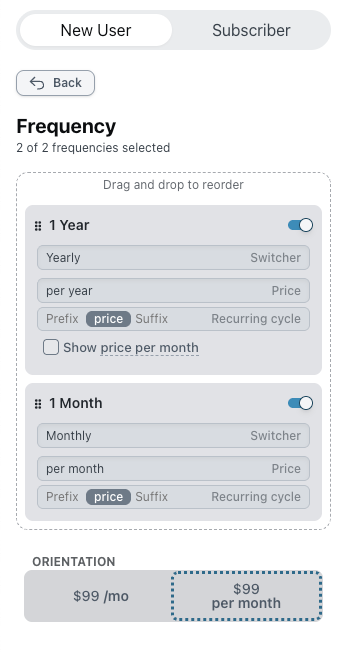
- All the plan frequencies for which price points are added in your Chargebee Billing Product Catalog are automatically listed for selected. Select the plan frequencies that you want to display in your Pricing Page.
- For yearly frequency, you can optionally select Show price per month to display the reduced price of the plan per month when purchased annually.
- Drag and drop to reorder the frequencies based on your preferred order of display.
- Click the labels to customize the text.
- Select your preferred Orientation to display the price per month/year accordingly.
Customizing branding
You can customize the branding of your pricing page to match your brand's look and feel.
- In Chargebee Growth, navigate to Experiences
- If you have a single brand site: click Branding.
- If you have a multi-brand site: click Brands, then open the appropriate brand, and then click Branding.
- Click the Pricing table tab to switch the preview to the pricing table surface.
- Click the Edit branding button to open the branding editor.
- Customize the branding using the options in the left panel, then click Done to save your changes.
Brand overrides
To give specific pricing tables a different look without changing the brand's default branding, use brand overrides.
Customizing pricing page for existing users
In addition to customizing your pricing page for new users, Chargebee pricing table allows you to customize the pricing page experience for your returning users, also known as subscribers.
Follow the steps below to customize your pricing page for subscribers:
- In Chargebee Growth, navigate to Offers > Pricing Tables.
- Select the pricing table by clicking on it.
- Click the Subscribers tab.
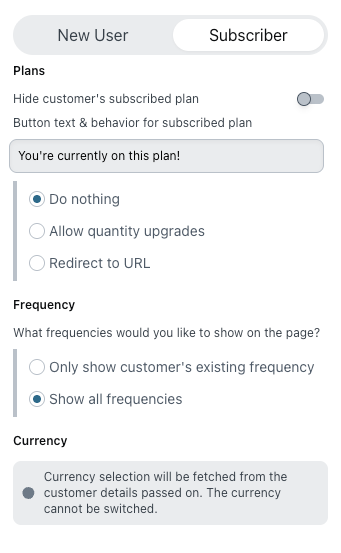
- Under Plans, you can customize the following:
- Enable the toggle to Hide customer's subscribed plan if you do not want to display the plan that the customer has already subscribed to.
- Under Button text & behavior for subscribed plan, you can enter the text that gets displayed on the subscribed plan. Select what happens when customers select the button:
- Do nothing: Disable the button from the plan card, so that customers do not have a click-to-action for the plan that they've already subscribed to.
- Redirect to URL: Redirect the customer to a specific page URL.
- Allow quantity upgrades: Allow the customer to increase the quantity of their subscribed units.
- Under Frequency, you can customize What frequencies would you like to show on the page? You can select:
- Only show customer's existing frequency: Displays only the plan frequency that the customer is already subscribed to.
- Show all frequencies: Displays all the available frequencies of the plan.
Obtain the pricing table ID
- In Chargebee Growth, navigate to Offers > Pricing Tables.
- Select the pricing table to open its configuration page.
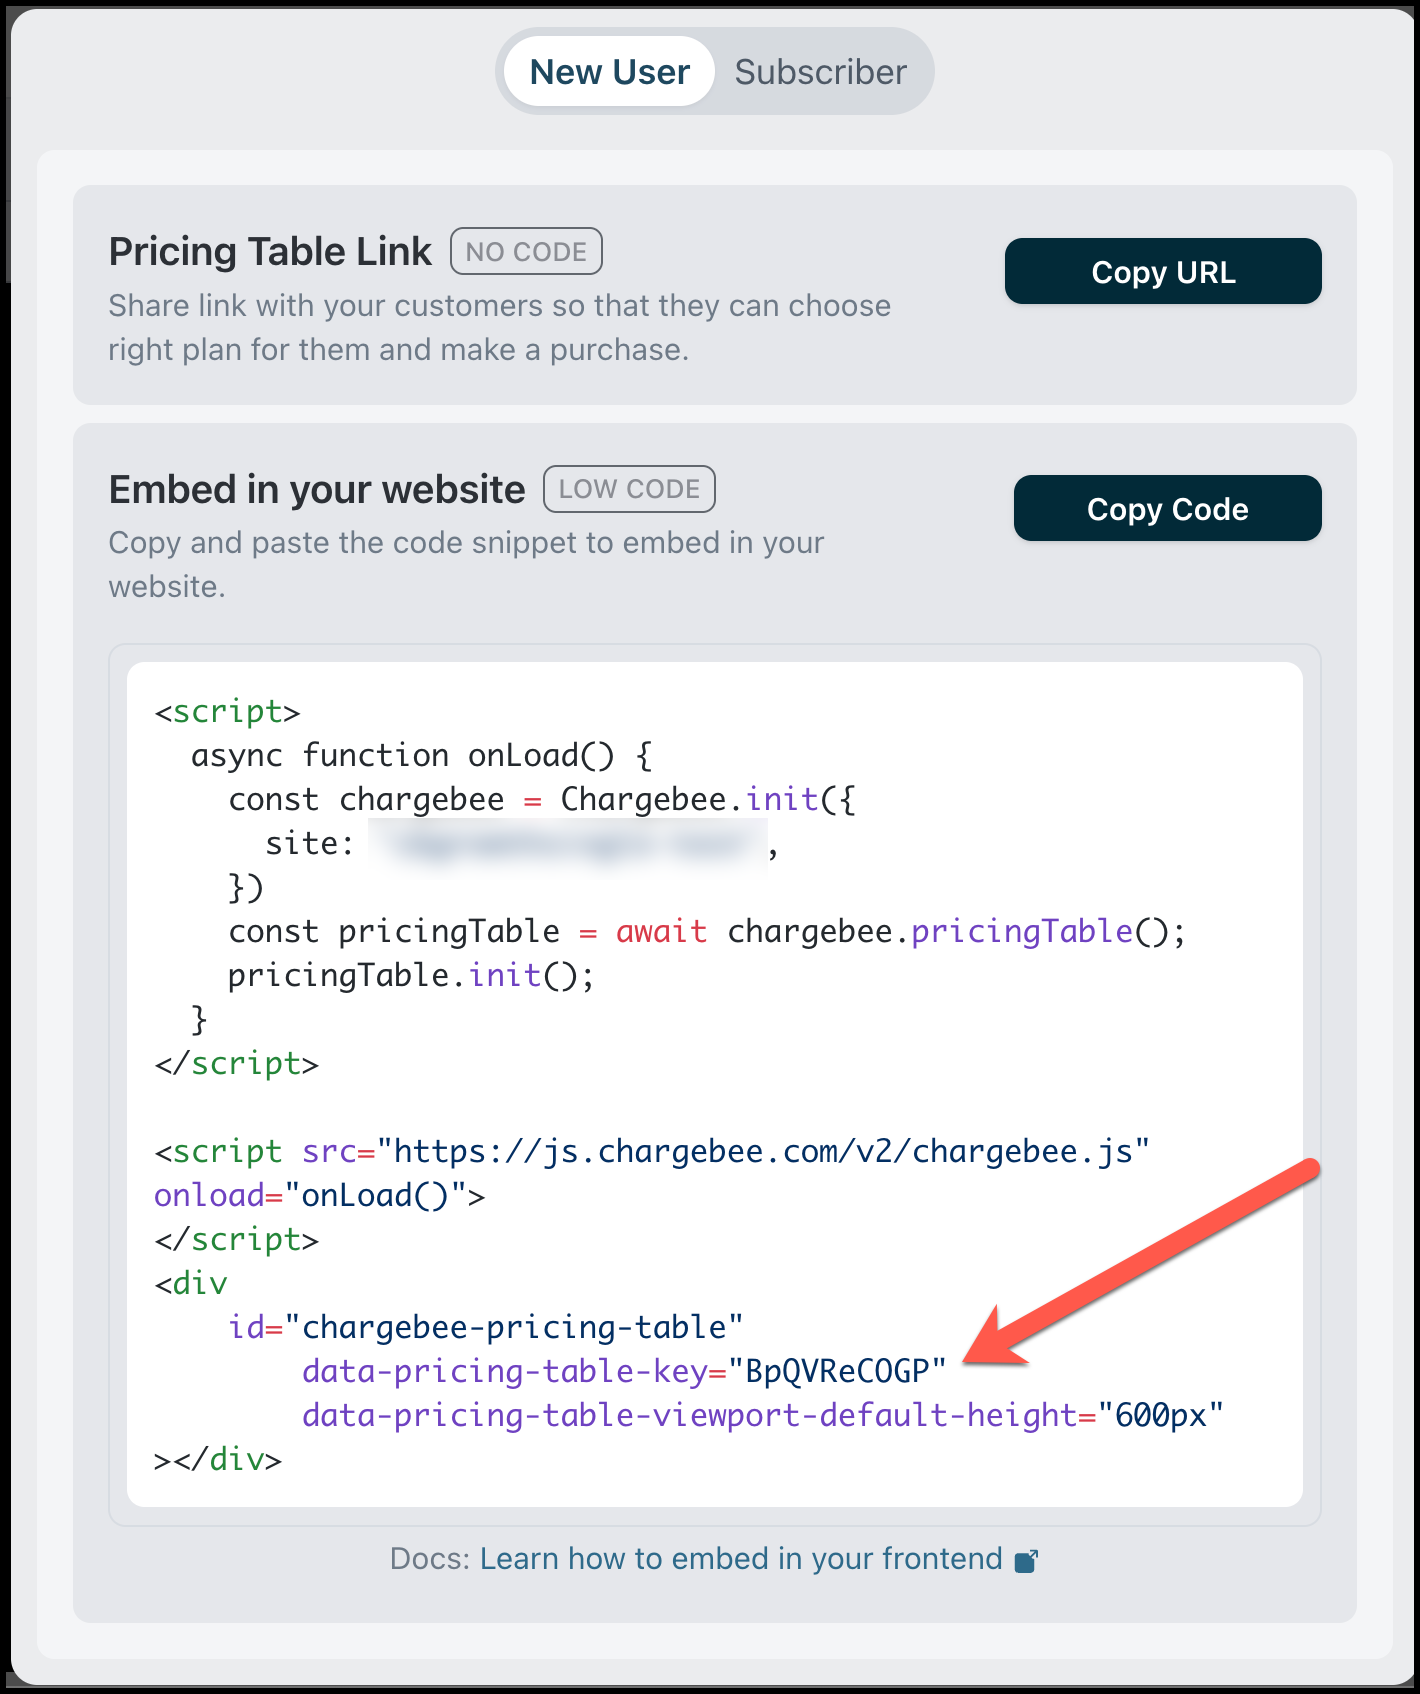
- Select Share/Embed.

- Under Embed in your website, in the JavaScript code, note the value of the
data-pricing-table-keyattribute. This is the pricing table ID. For example, in the screenshot below, the pricing table ID isBpQVReCOGP.
Was this article helpful?