Understanding Sites
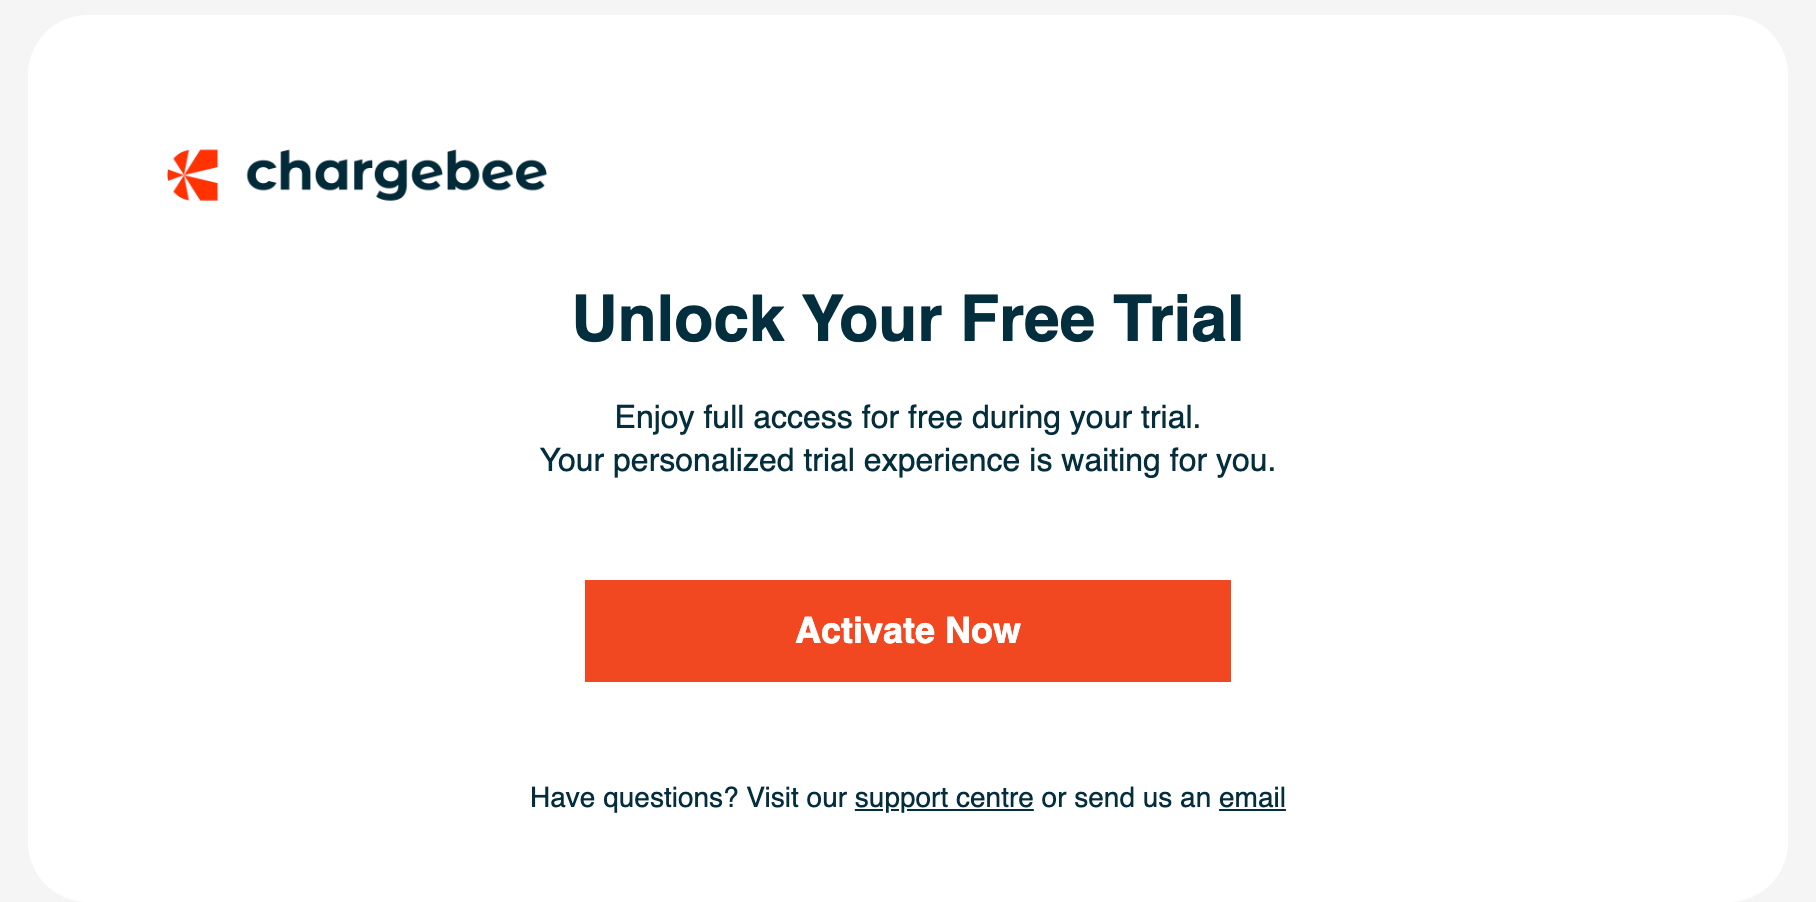
Once you sign up for Chargebee, you will be guided to set up a ‘Site' by adding your domain and company name.
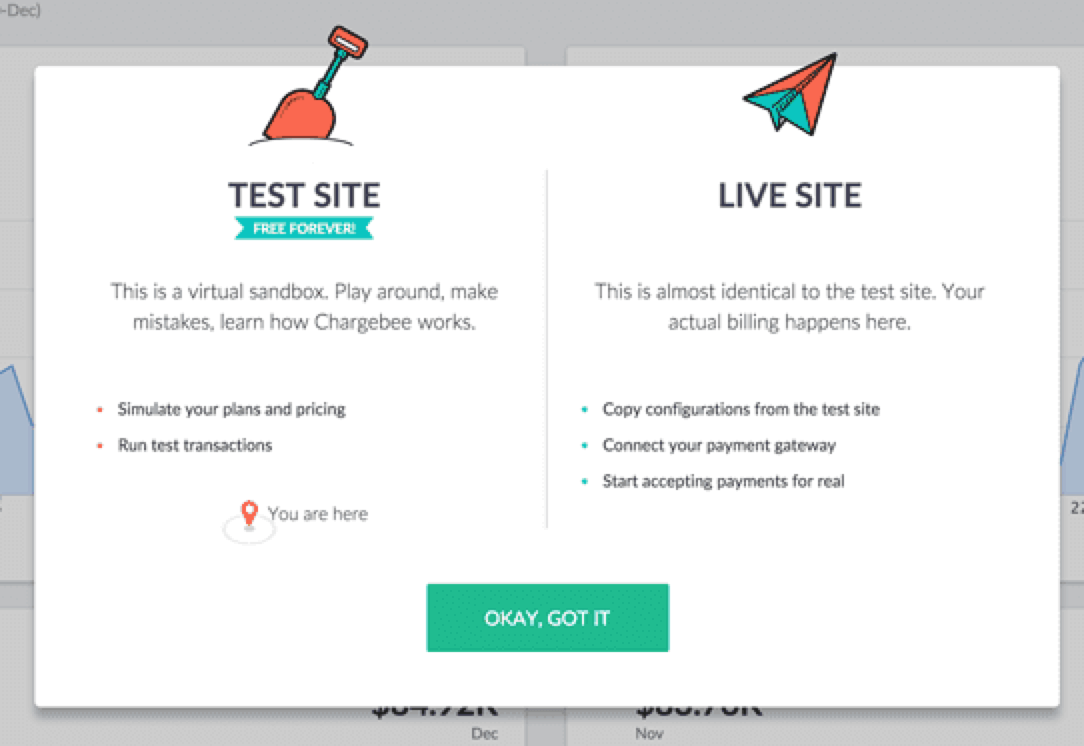
A Site is the heart of a Chargebee account. This is where you'd maintain all your information in Chargebee. Any account in Chargebee will have 2 sites - Test Site and Live Site.
In this documentation we are going to see how to set up and manage your sites.
Configuring Domain Name
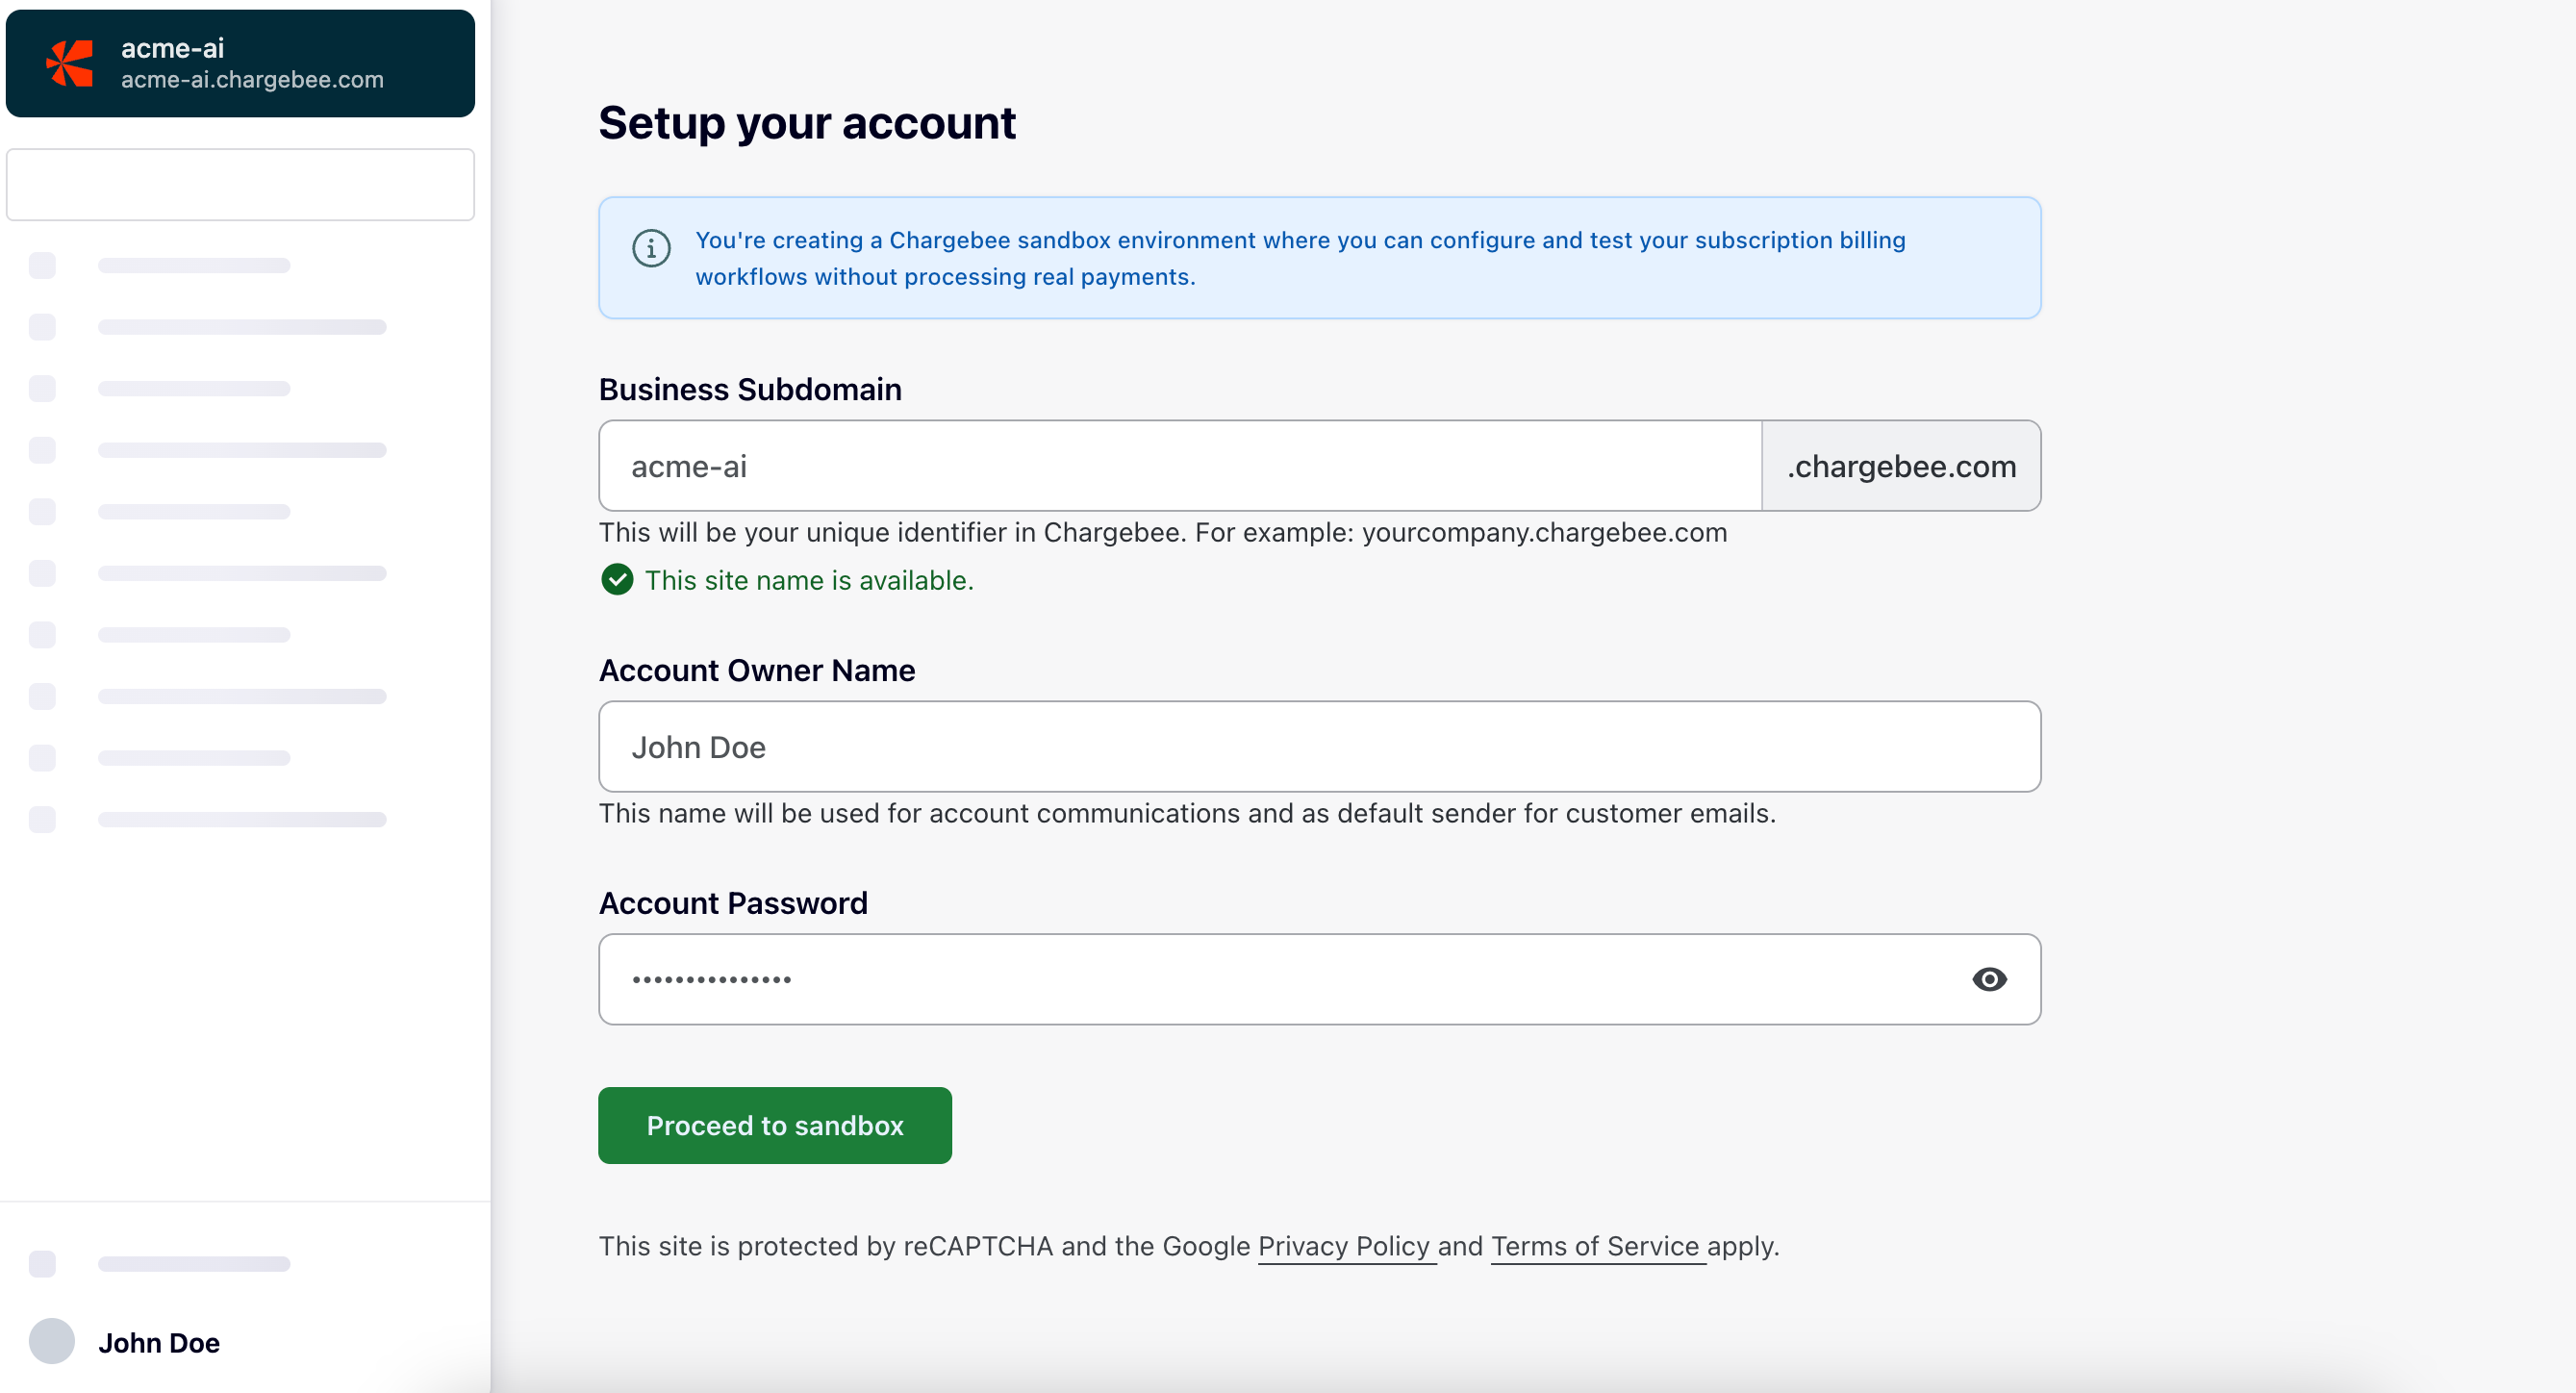
Domain name is your site's name in Chargebee. Once you sign up with Chargebee, a ‘Complete Account Setup' email will be sent to your email ID. Click the link in the email to setup your password and domain name.
Each domain name in Chargebee is unique just like your business. It is mandatory that you finish your account setup process in order to perform customer facing actions in Chargebee.
Test Site
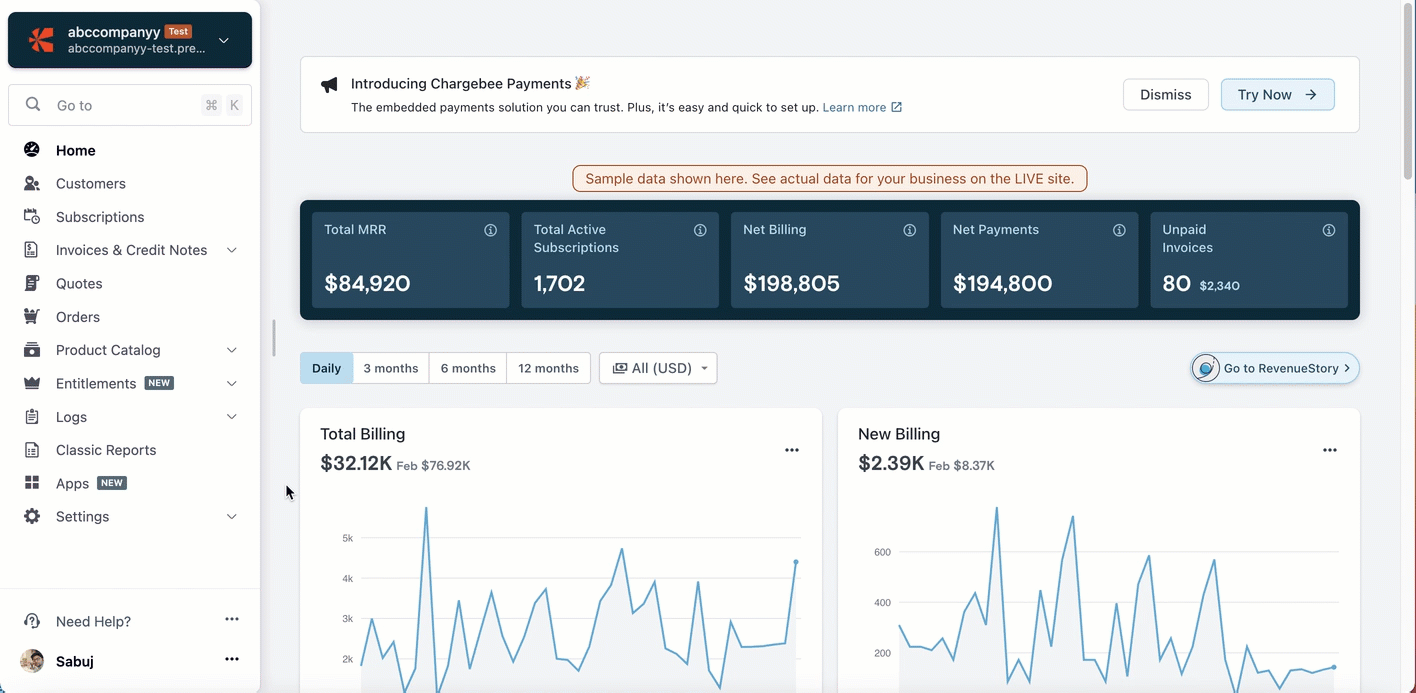
Once you set up your domain name, you will be able to login to your test site. The test site is a sandbox environment where you can get hands-on experience of Chargebee. You can explore the Test Site by testing your billing configurations, creating plans, adding customers, subscriptions, and more. The information that you add or delete here will have no effect on your actual customer data. You can use this environment to test new features released by Chargebee.
Auto-Populate Test Site from your Pricing Page during Sign Up
Chargebee enables an AI-powered test site setup by parsing your business website's pricing page. This automates the demo site creation by configuring product families, plans, addons, price points, features, and brand by learning from your website.
This eliminates the need for manual data entry, providing a fast, relevant, and customized onboarding experience.
This section explains how to automatically populate your test site based on your website's pricing page.
Prerequisites
- You must sign up with a valid business email.
- Your website must have a publicly accessible pricing page.
To auto-populate your test site based on your website's pricing page, follow these steps:
- Sign up for a Chargebee Billing test site using your business email.
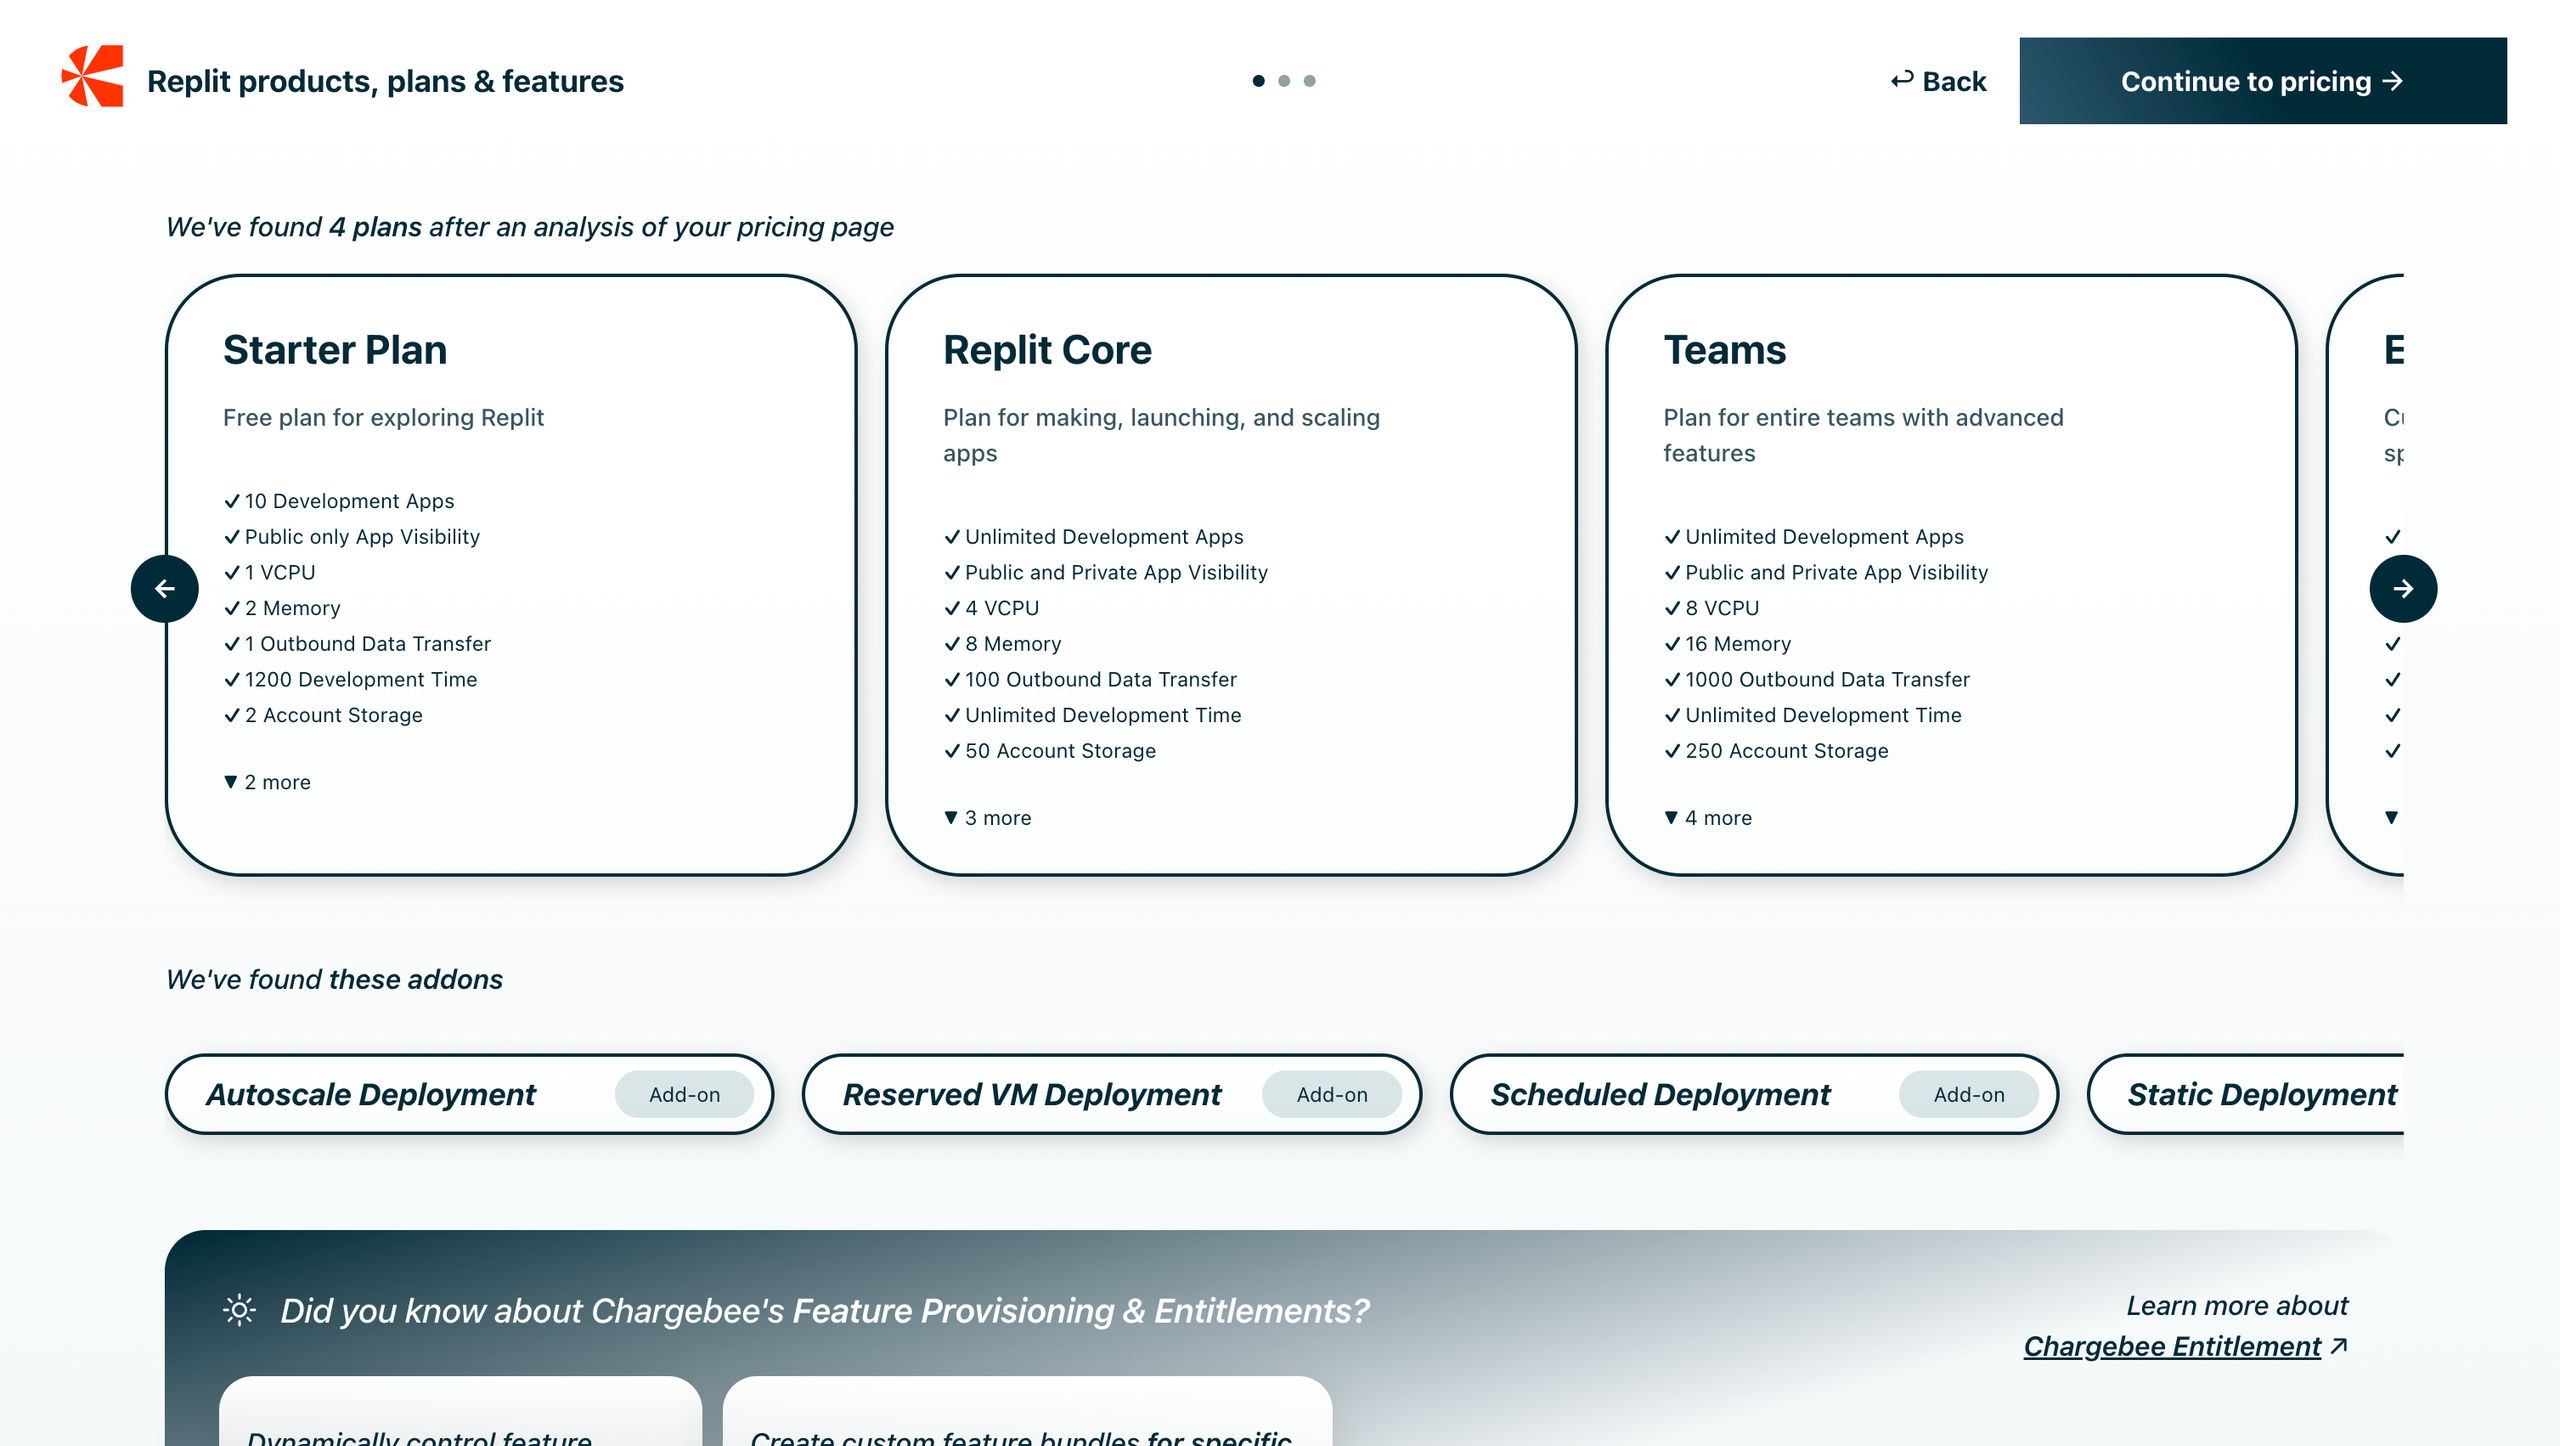
- Claim your account from your registered business email. From the email address you provided during sign-up, Chargebee will try to find the pricing page and, if available, provide an option to auto-populate the Chargebee test site. If there's no pricing page, you can provide any pricing page URL.
- Click Proceed to continue with auto-configuration or Skip the setup. If you choose Skip, it will take you to your test site's dashboard without any auto-configuration.
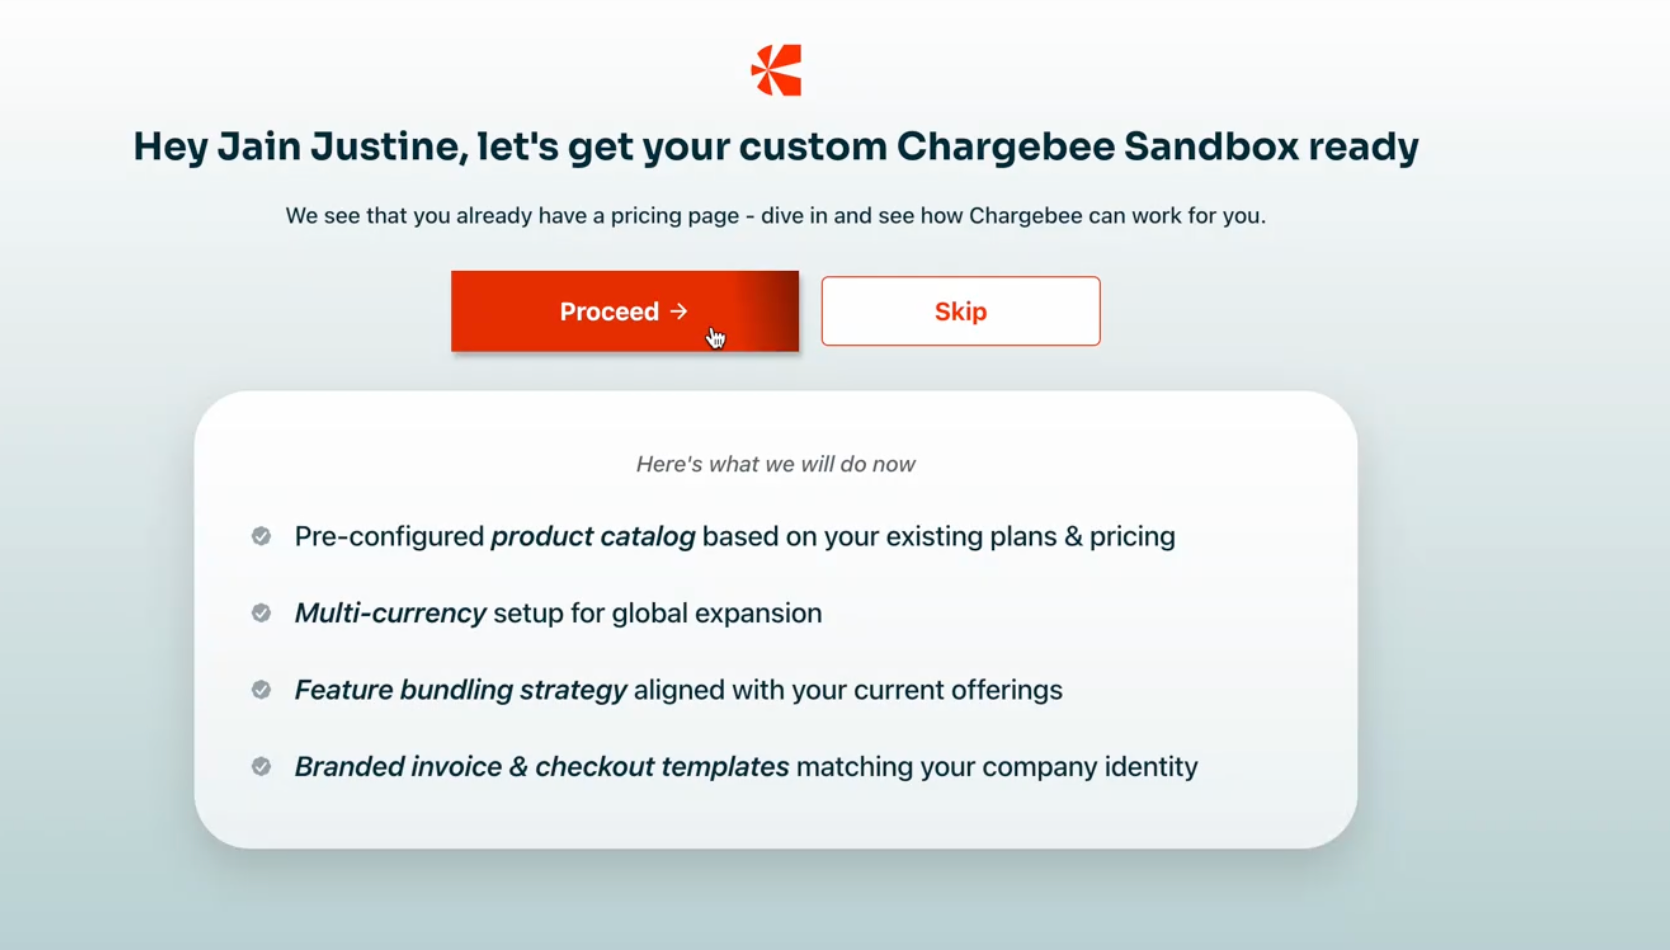
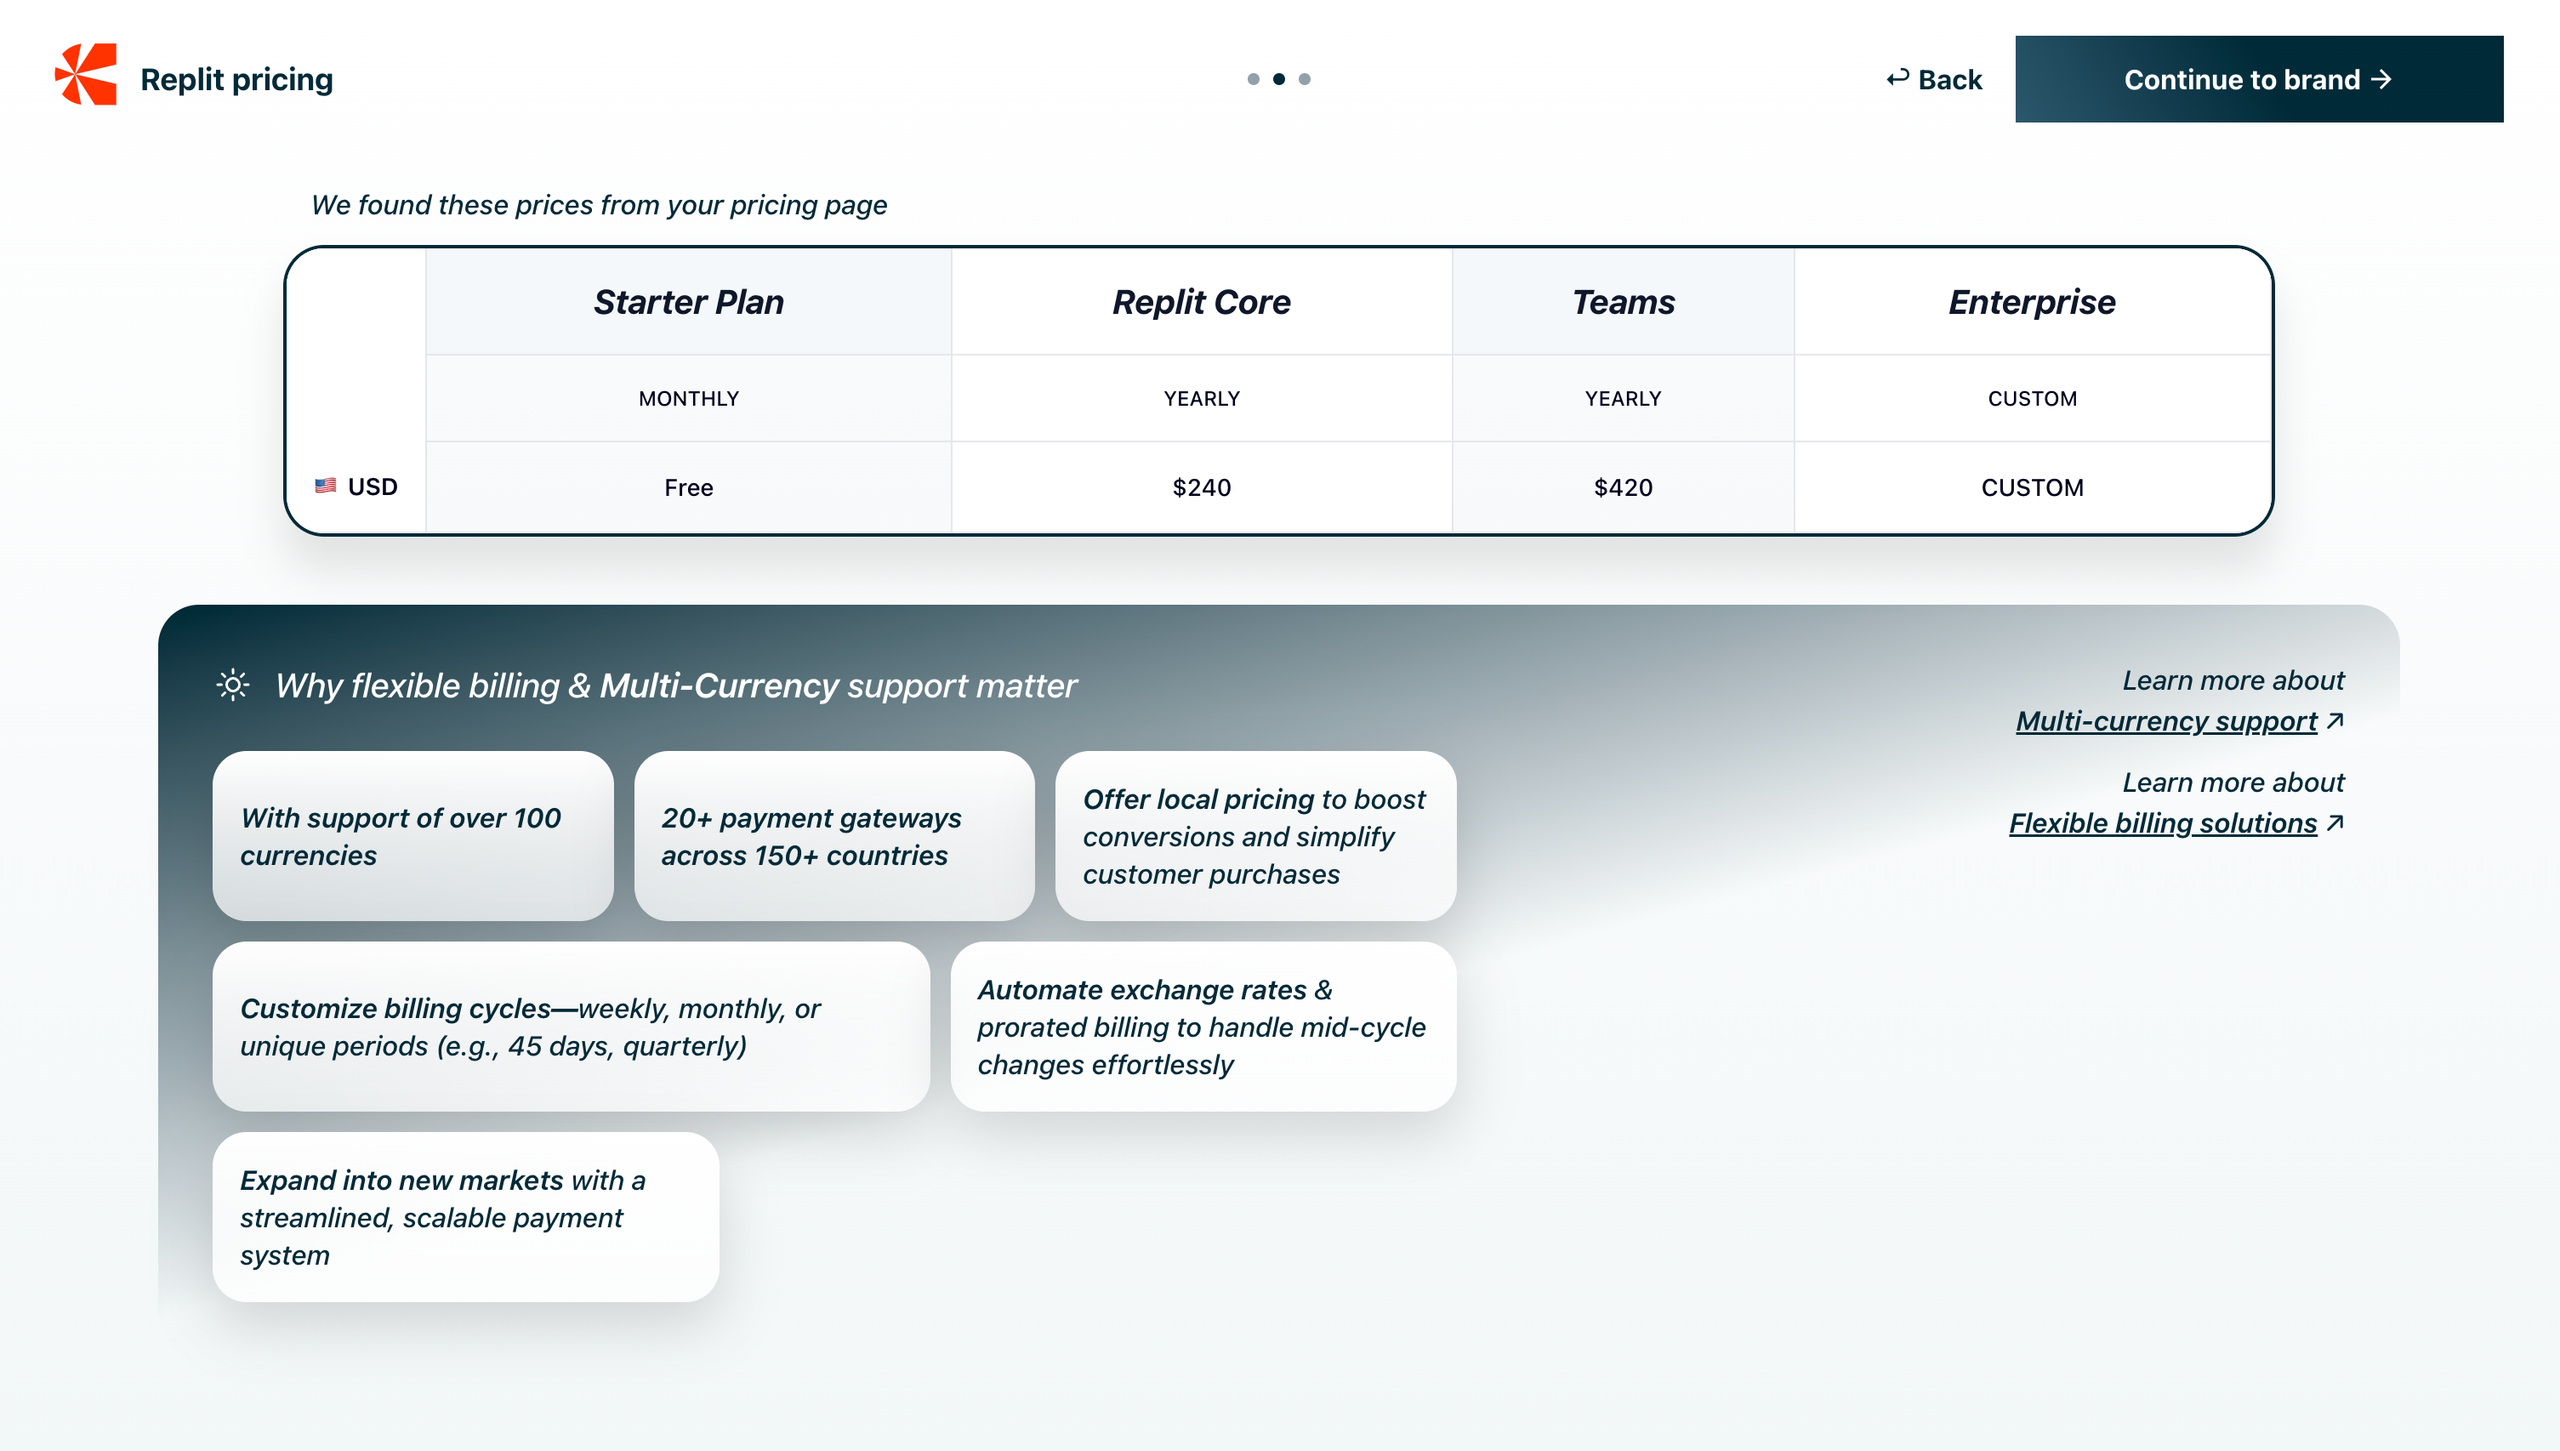
- When you click Proceed, product details from your website appear. Click Continue to pricing to see the pricing details.
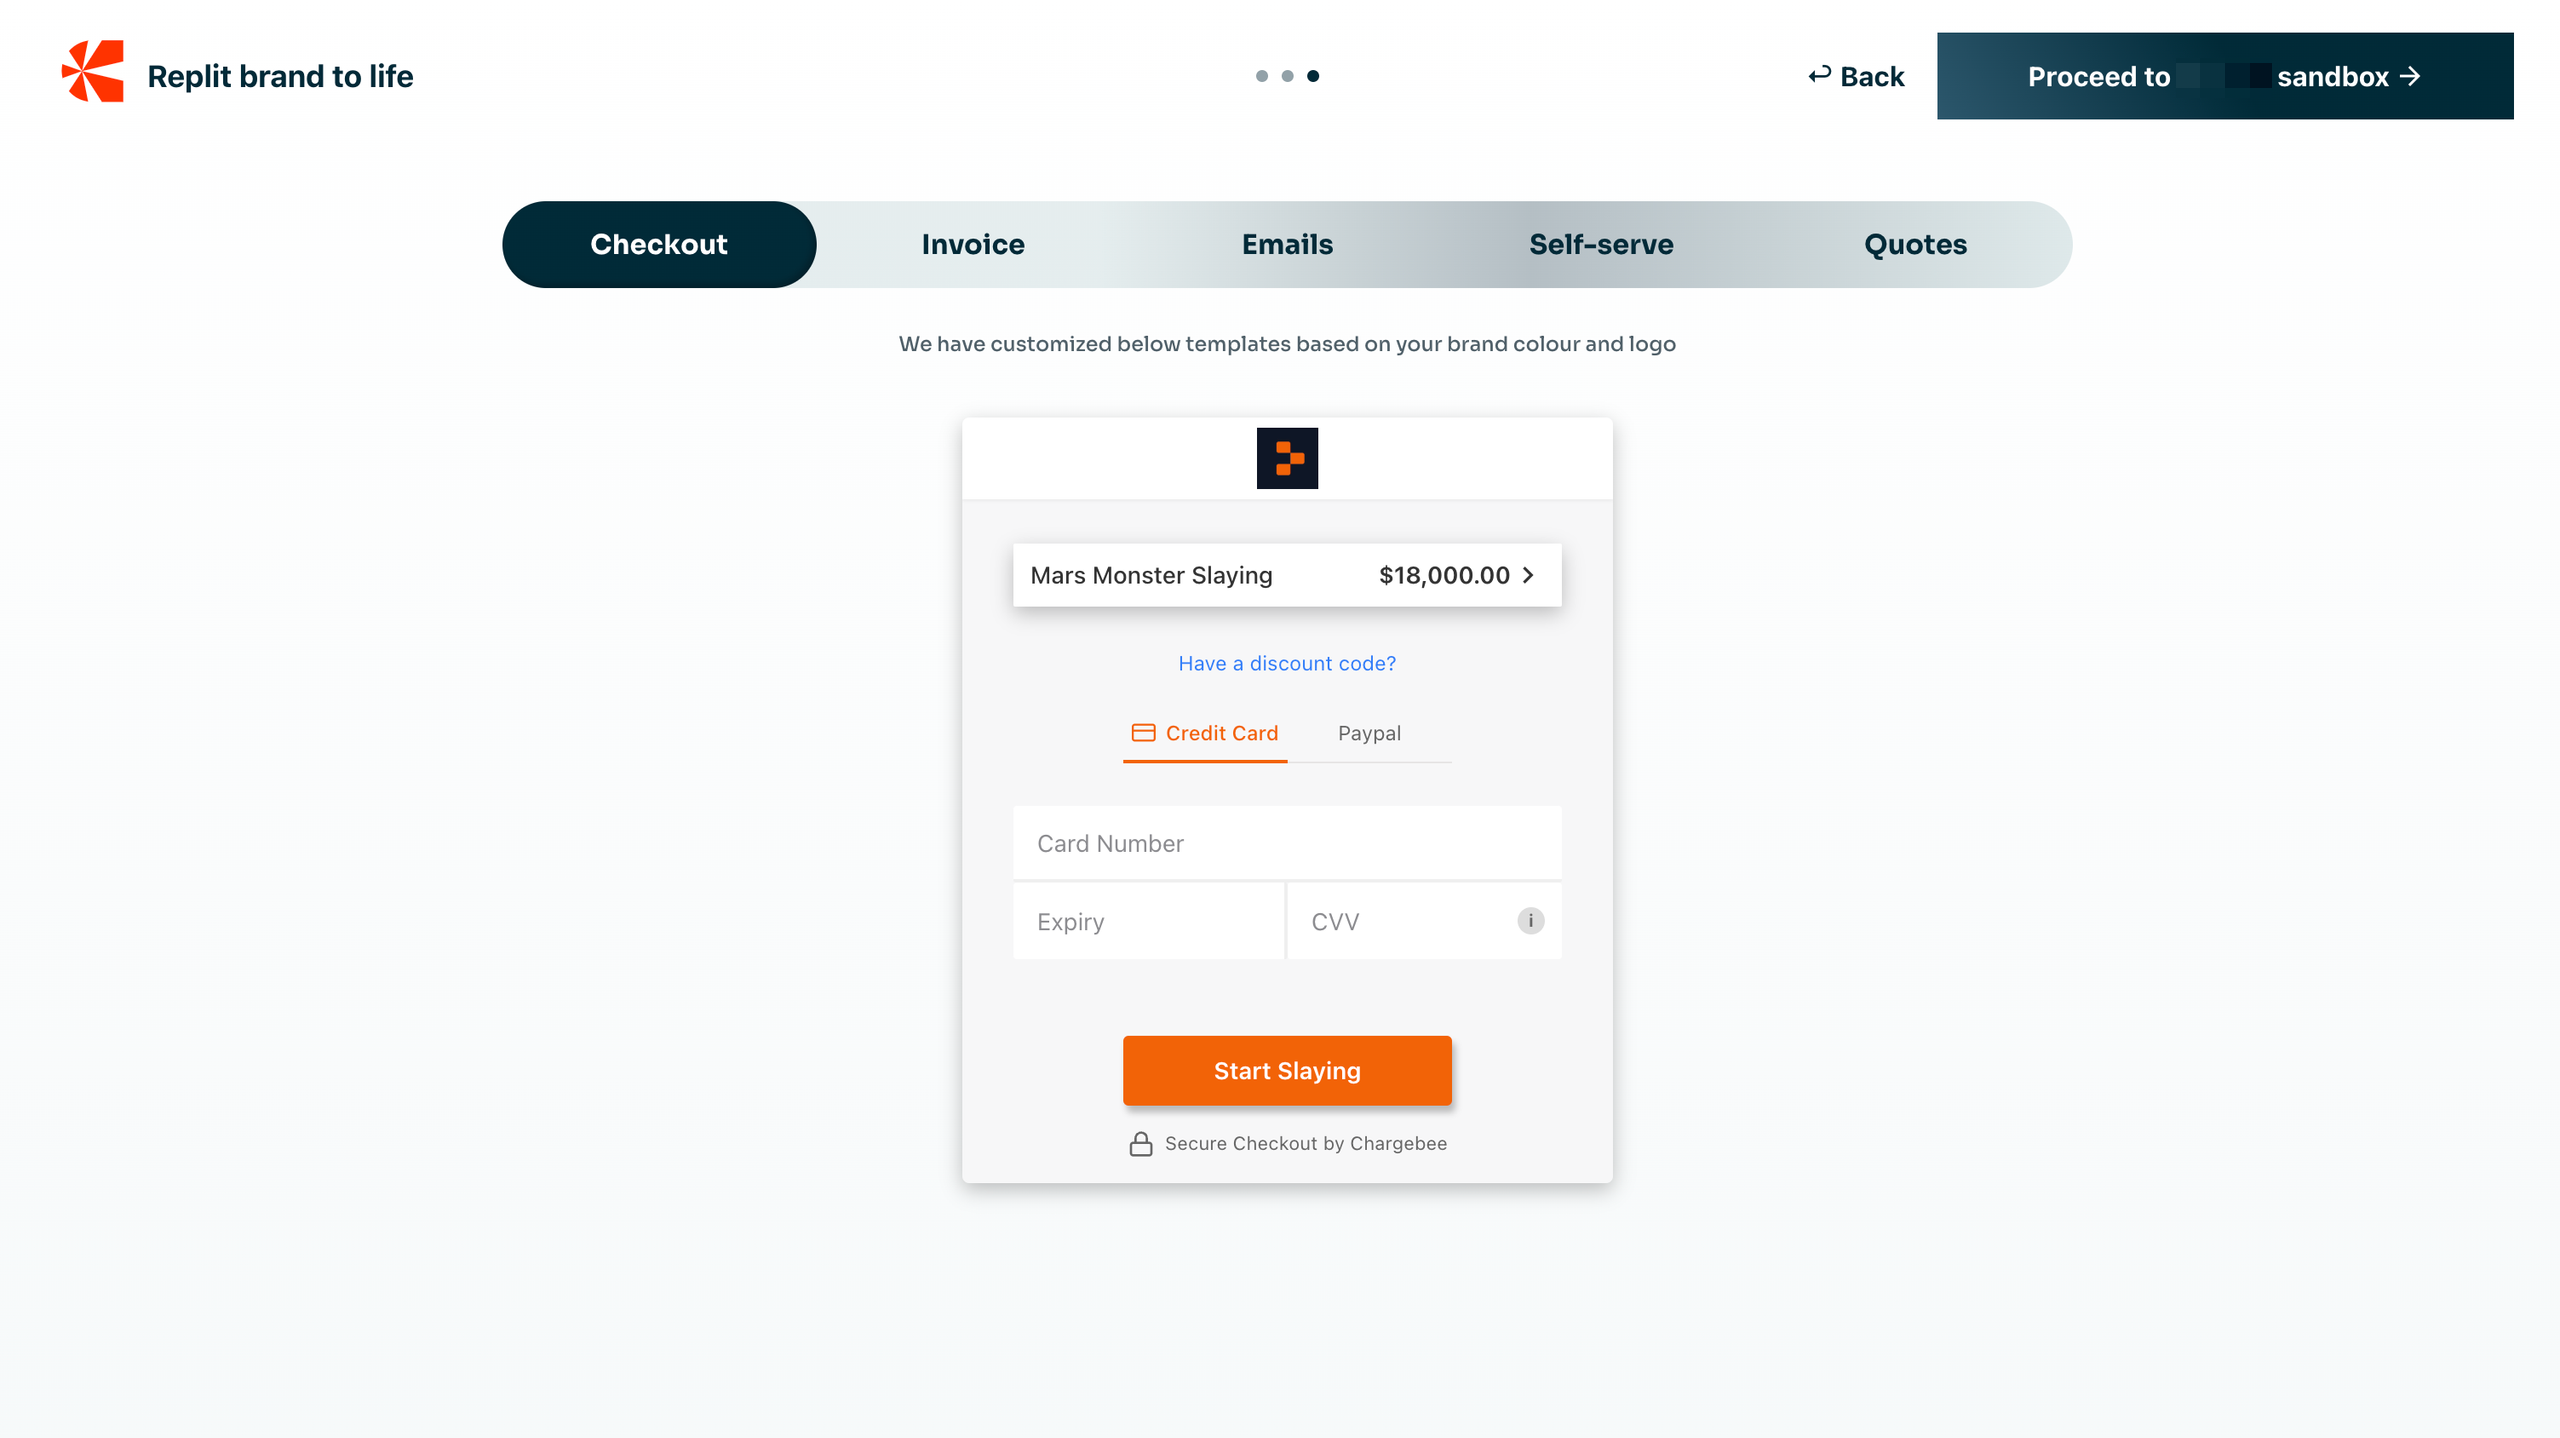
- Click Continue to brand to see the branding template changes based on your brand color and logo.
- Click Proceed to sandbox to see the test site with your products, prices, and more.
- When you click Proceed, product details from your website appear. Click Continue to pricing to see the pricing details.
- Once the sync is completed, on your Chargebee test site, review the generated product families, plans, addons, price points, features, and brand detected from your pricing page. You can manually modify these at any time.
Note
- After setting up your test site, you can repopulate it from your pricing page or any pricing page.
- Some websites may block scraping attempts due to third-party protections (e.g., Cloudflare), preventing Chargebee from accessing the pricing page.
- When no pricing page is detected, you will be prompted to enter a pricing page URL of your choice that fits your business model.
- AI-generated setups may not always match the pricing page 100%. They aim to be as accurate as possible, but they may occasionally require manual refinement.
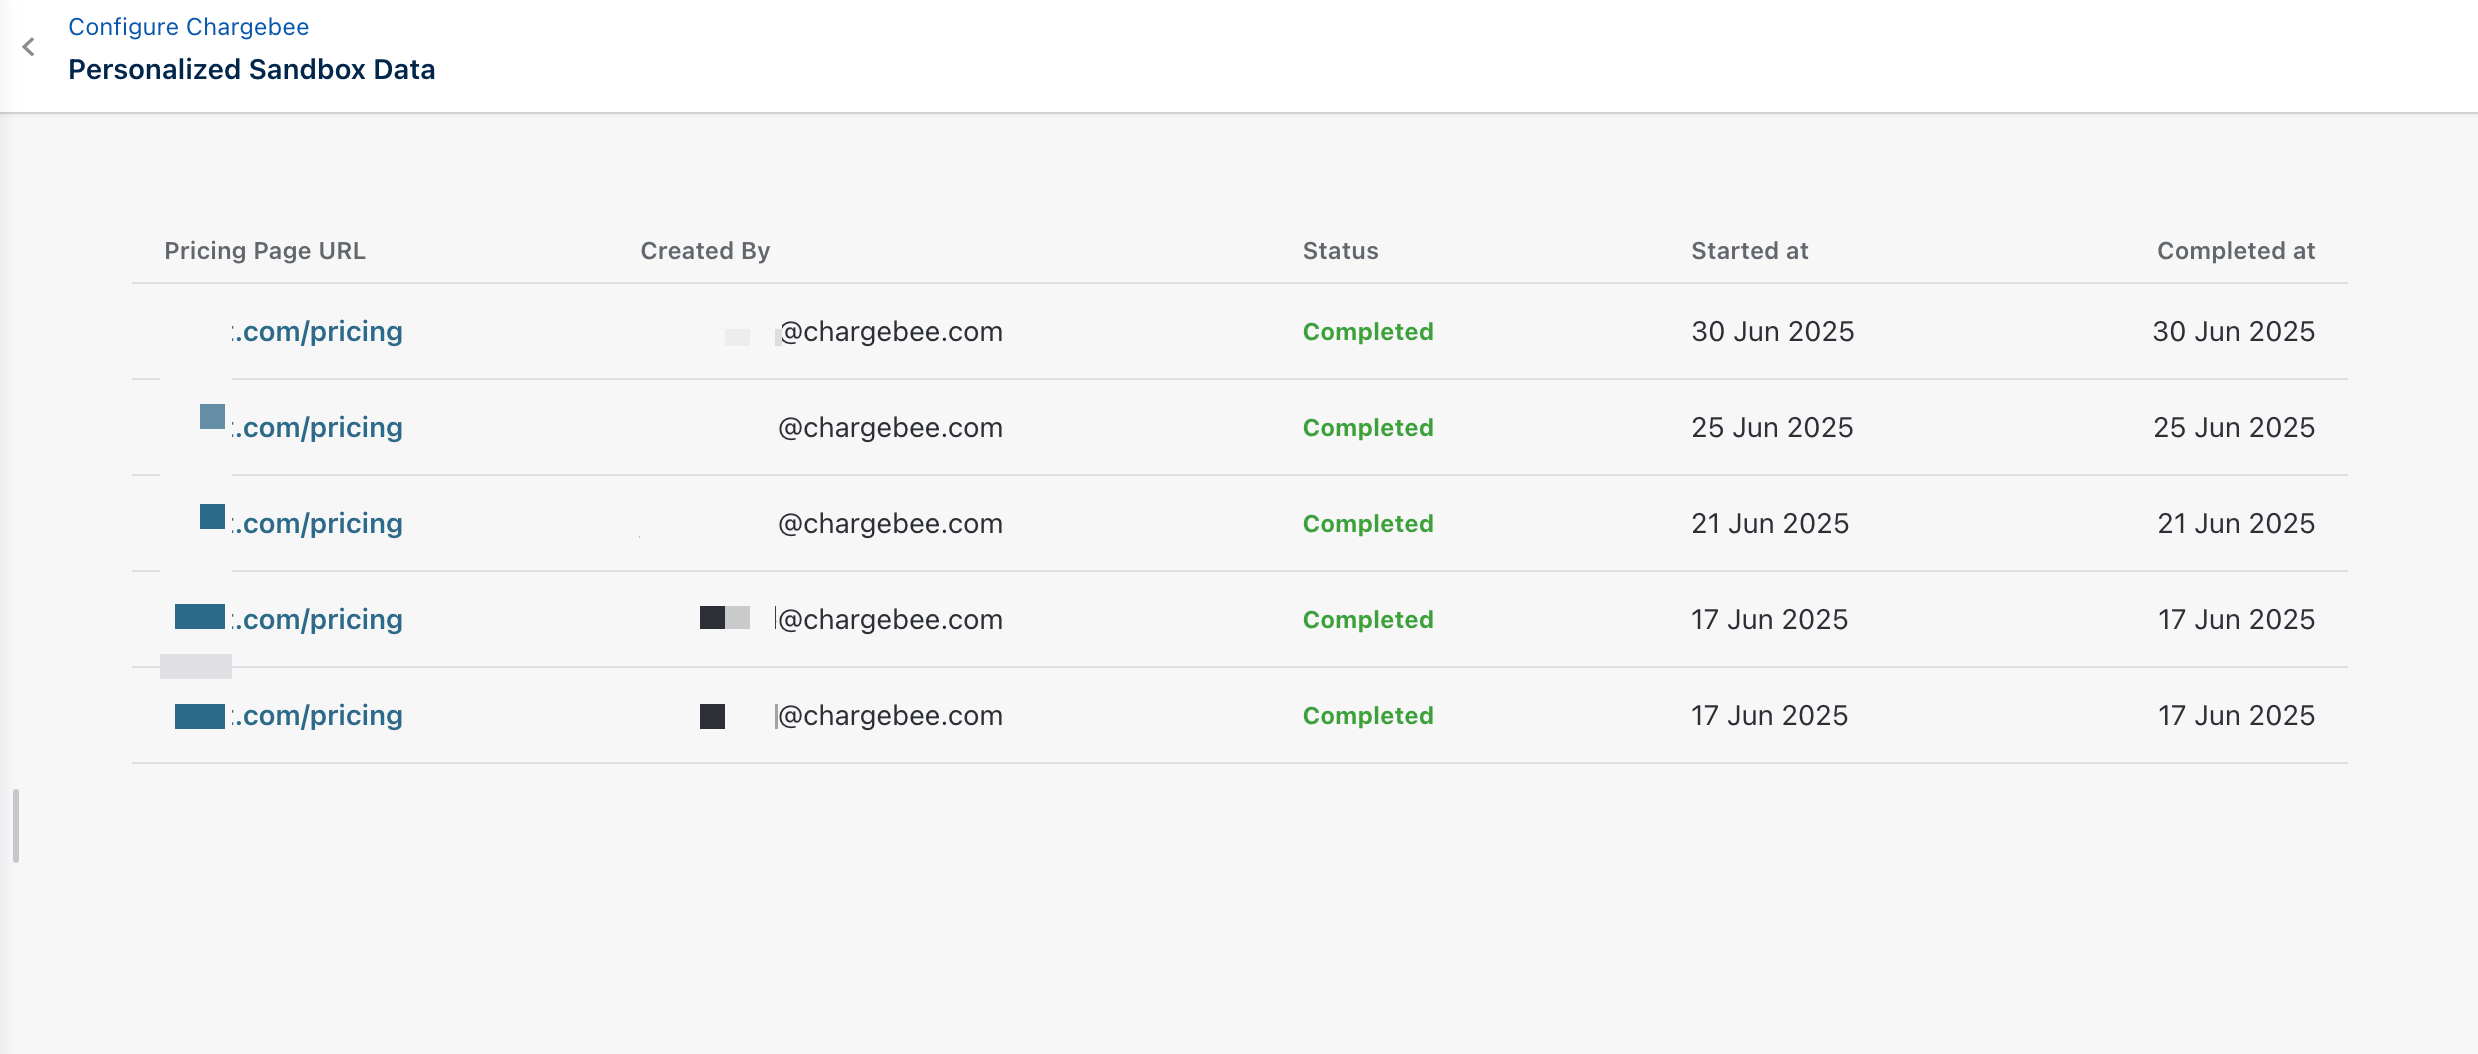
View History
To view the history of auto-populated data for your site, please navigate to Settings > Personalized Sandbox Data from the left navigation. Click View Past Populations. You will see the history of auto populations.
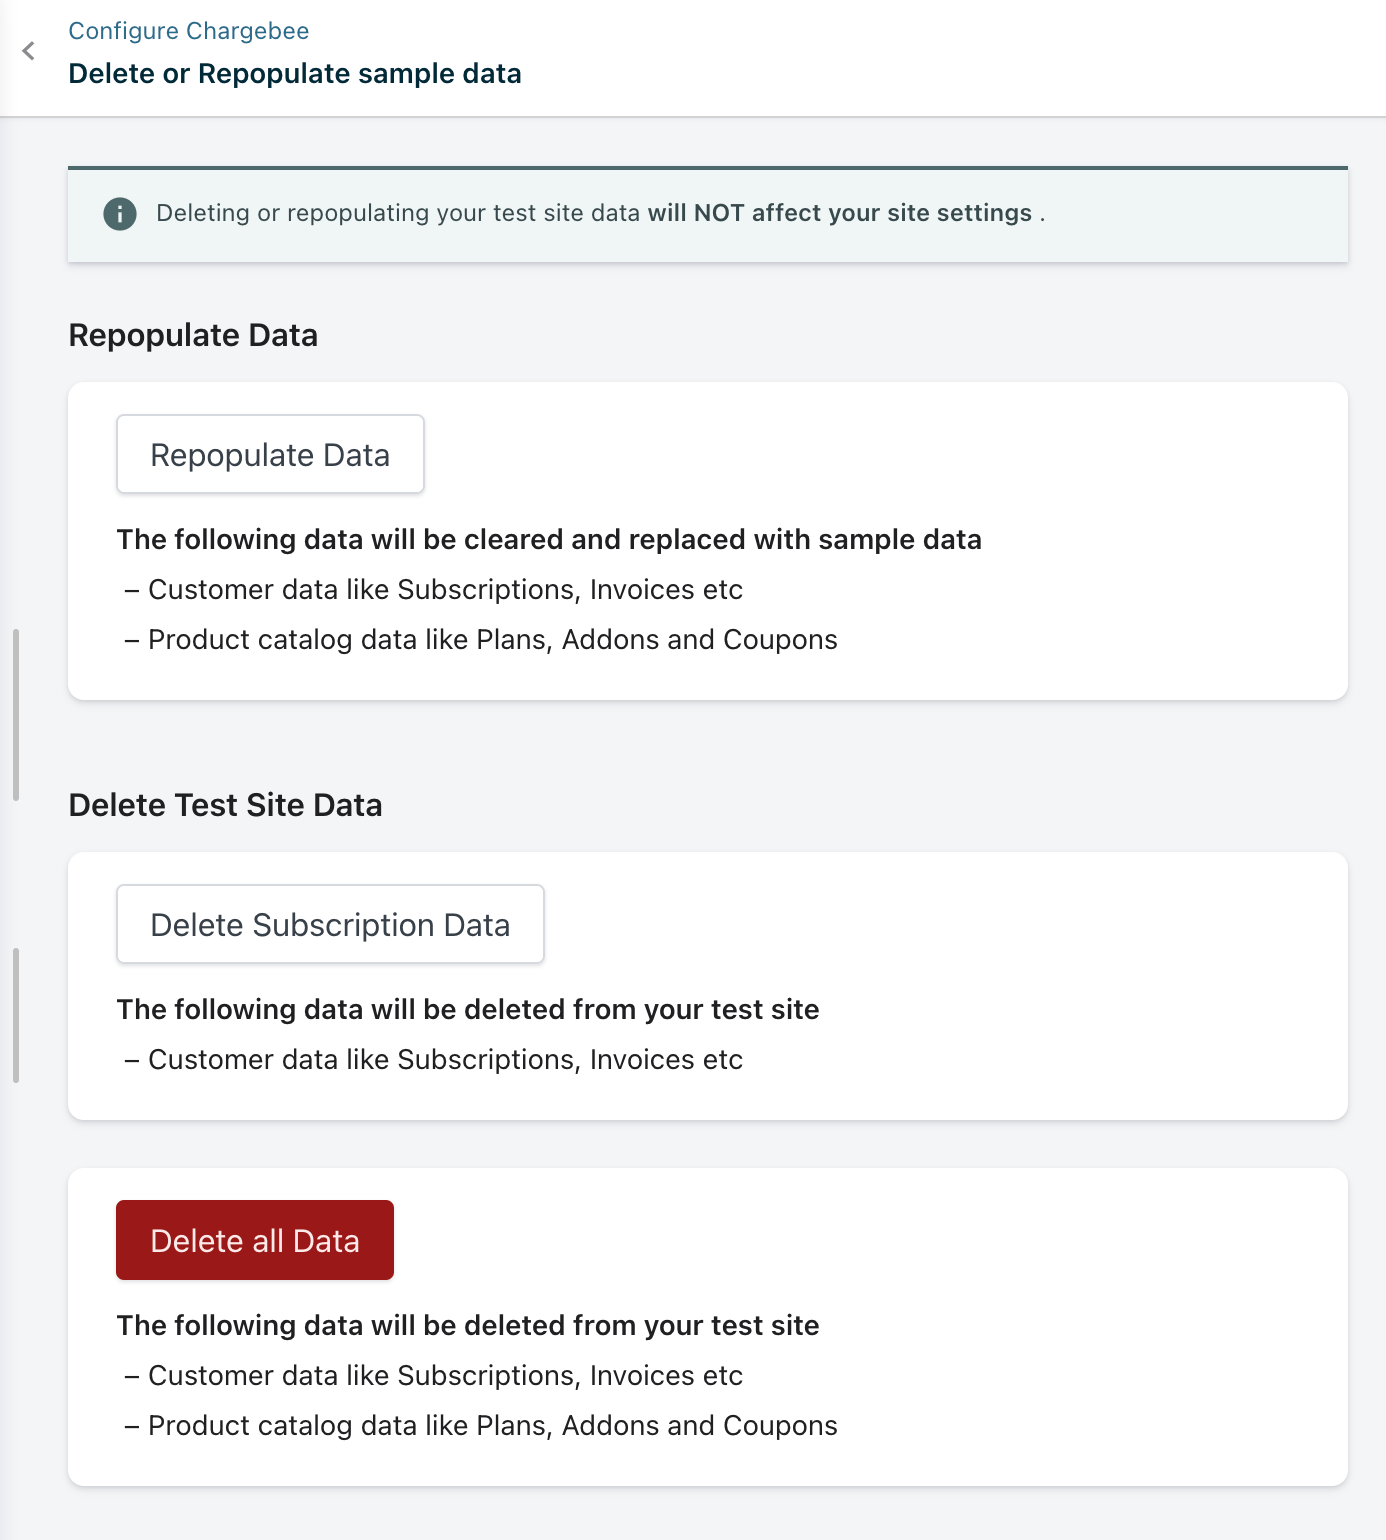
Managing Test Site Data
By default, your Test site will be populated with sample data that you can use to test various billing scenarios. You can also add your own customer information and explore the product's capabilities. To delete or repopulate the sample data provided by Chargebee, click Settings > Configure Chargebee > Delete or Repopulate Sample Data.
Repopulate Test Site Data from a Pricing Page
Your old site data will be cleared, and the new data generated from the given pricing page will be populated.
If you want to repopulate your test site data, such as product families, plans, addons, price points, features, and brand from your pricing page or any other pricing page, follow the steps
- Login to your Chargebee Billing test site.
- Navigate to Settings > Configure Chargebee > Personalized Sandbox Data.
- Click Repopulate Data.
- Follow steps 3 and 4 to repopulate your test site data.
View history of your repopulated test site data.
Chargebee Test Payment Gateway
Chargebee Test Gateway allows you to visualize scenarios such as payment success, payment failure (due to invalid card details or insufficient funds), smart routing etc. This test gateway is available only in the Test Site. When you sign up for Chargebee, Chargebee's Test Gateway will be configured by default for your account. However, you can also choose to configure multiple Chargebee Test Gateways if you wish to test features.
Time Machine
Time Machine is a simulation feature that allows you to test the billing configurations in Chargebee. You can test features such as dunning, consolidated invoicing, subscription states, scheduled subscription actions, webhooks, etc., by virtually traveling in time. This allows you to understand and verify how the billing rules configured in your test site will work in real time. Time Machine is available only on your Test site. You can access the Time Machine by clicking Settings > Configure Chargebee > Time Machine.
Learn more about Time Machine.
Live Site
A Live site is where actual customer billing happens. Once you have tested all the features of Chargebee and want to start billing your customers in real time, you can go ahead and enable your Live site.
Before proceeding to enable your Live site, make sure to complete all the items in our Go Live Checklist.
Transfer Configurations
Chargebee understands that it is difficult to configure all the settings that you have set in your Test site again in your Live Site. Therefore to make work simple, Chargebee allows you to seamlessly transfer almost all of your Test site configurations into your Live site.
To use this tool, you must have the Live site enabled for your Chargebee Test site. Click Settings > Configure Chargebee > Transfer Configurations .

Learn more about Transfer Configurations.
Inviting Team Members
Chargebee allows you to share your site with your Team Members. You can also define various job functions that chalk out the kind of access each user will have to your site.
Click Settings > Team Members to share your site with someone. Learn more about sharing your site with your team members.
Note
You need to share your Test site and Live site individually with your Team Members for them to access it.
Changing Account Ownership
Chargebee supports transferring ownership of the site. This means that the current owner of the site will be able to transfer ownership to another user, a permanent change that will reflect in both the Test site and the Live site (even if the Live site has not been enabled yet). Learn more
Security
Chargebee allows you to set up Single Sign on and Two Factor authentication as a part of our security measures. Once you set them, they will be applicable for all your team members.
Chargebee Notifications
Chargebee allows you to configure alerts that can be sent internally to you and your team to notify important activities. You can configure Chargebee Notifications to get information on:
- New Revenue Alerts: When the first invoice is created for a customer.
- Invalid Payment Methods: Whenever the customer's payment method becomes invalid.
- Fraud Monitoring: Whenever a suspicious transaction is detected. Please do note that this supported only in Stripe.
- Daily Digest Mails: Mails regarding sign up, transaction summary etc.
- Gateway Reconnect Mails: Mails regarding gateway access and configuration errors.
- PayPal Chargebee Replication Alerts: When a subscription is changed in PayPal.
- Webhook Failure Alerts: When a webhook fails.
- Chargeback Automation Failure Alerts: When intervention is required to perform operations on invoices and subscriptions under chargeback.
- Chargeback Won: When the gateway notifies that a chargeback is won.
Was this article helpful?