ACH payments via Stripe
Chargebee allows you to configure ACH direct debit payments using Stripe. This section explains how to set up ACH direct debit payments using Stripe in Chargebee.
See also
- Stripe's ACH guide
- Configuring ACH Credit Transfer via Stripe in Chargebee.
Prerequisites
To accept ACH payments using Chargebee, you must:
- Be a US-based merchant selling to customers residing in the US.
- Have a US/USD bank account linked with Stripe and configured with Chargebee.
Accepting ACH payments in Chargebee
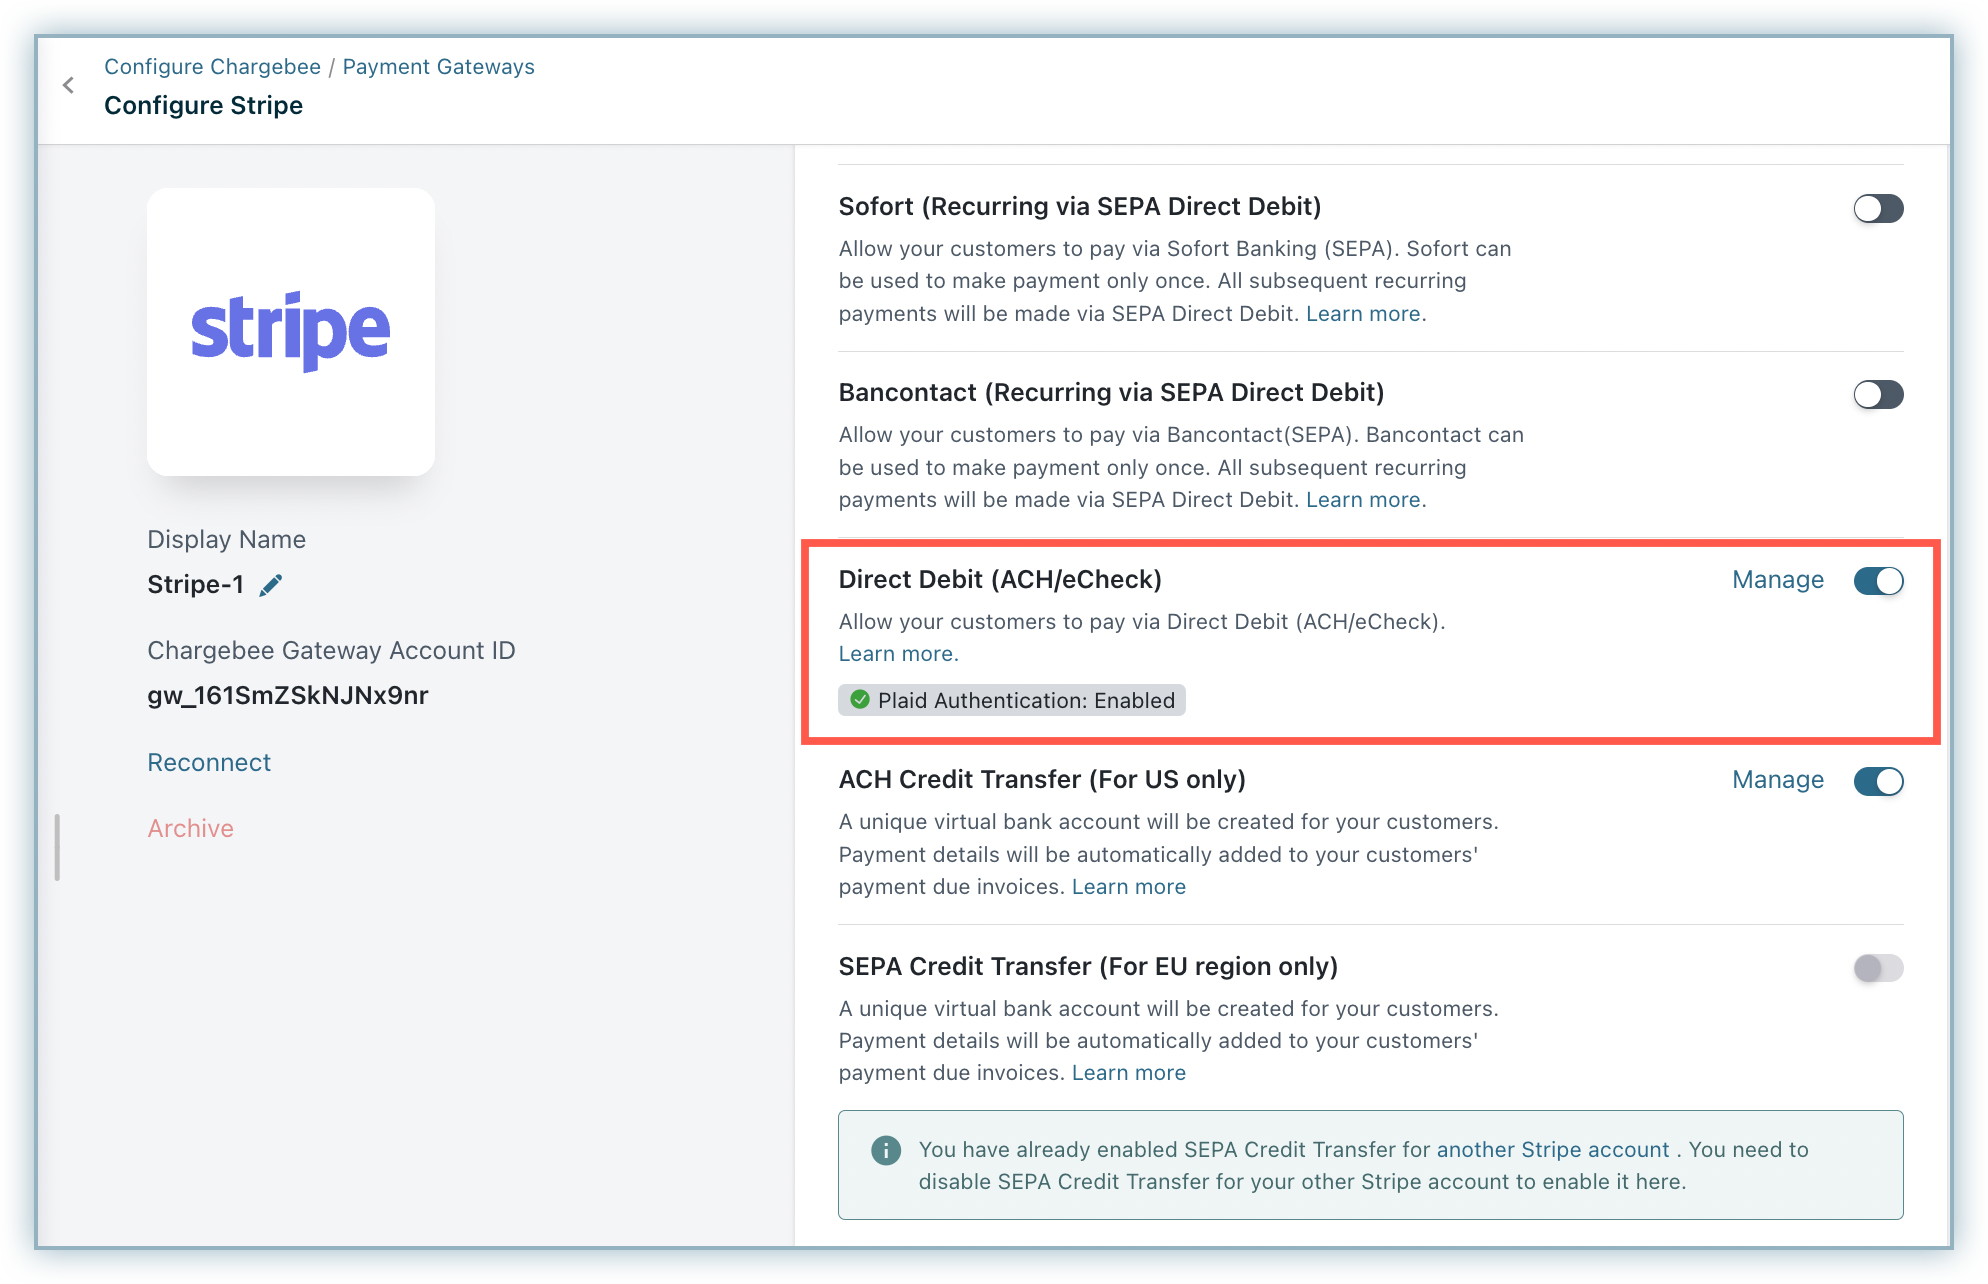
Step 1: Enable ACH payments on Chargebee. Navigate to your Stripe configuration page (Settings > Configure Chargebee > Payment Gateways > Stripe) and enable the Direct Debit (ACH) option.
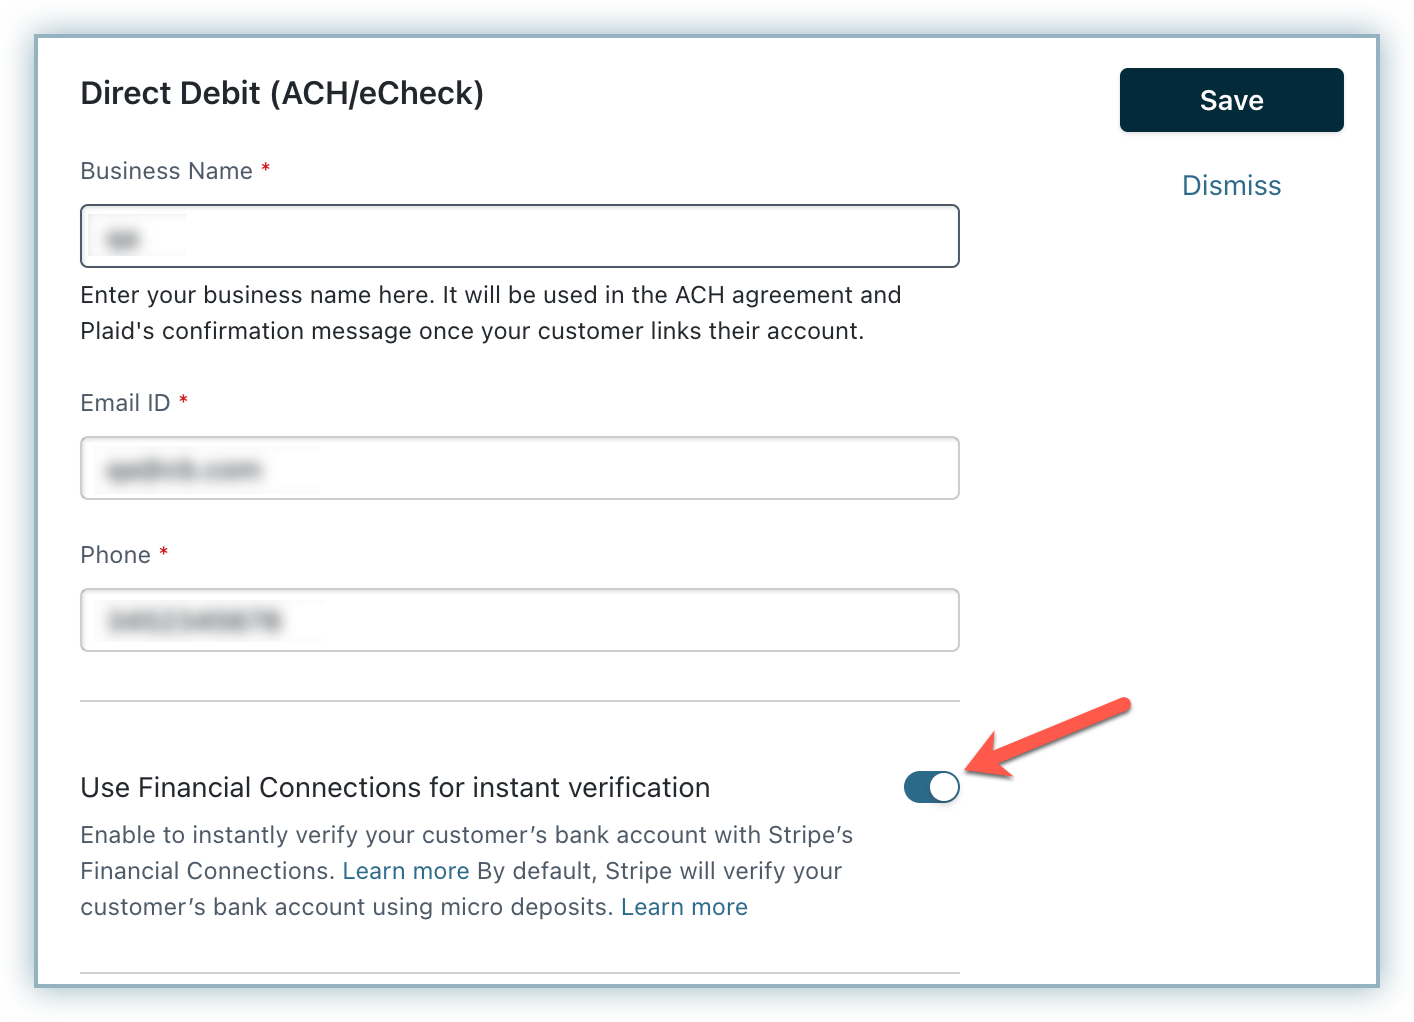
Step 2: The National Automated Clearing House Association (NACHA) and federal legislation mandate that you have an Authorization Agreement with your customer to charge their bank account. When you enable a customer to pay via ACH, Chargebee displays an authorization agreement for them to sign on the relevant page (depending on where your customer is entering their bank details). You can configure the information that appears on this agreement by entering the Business name, email address, and phone number of your company on your Stripe configuration page.
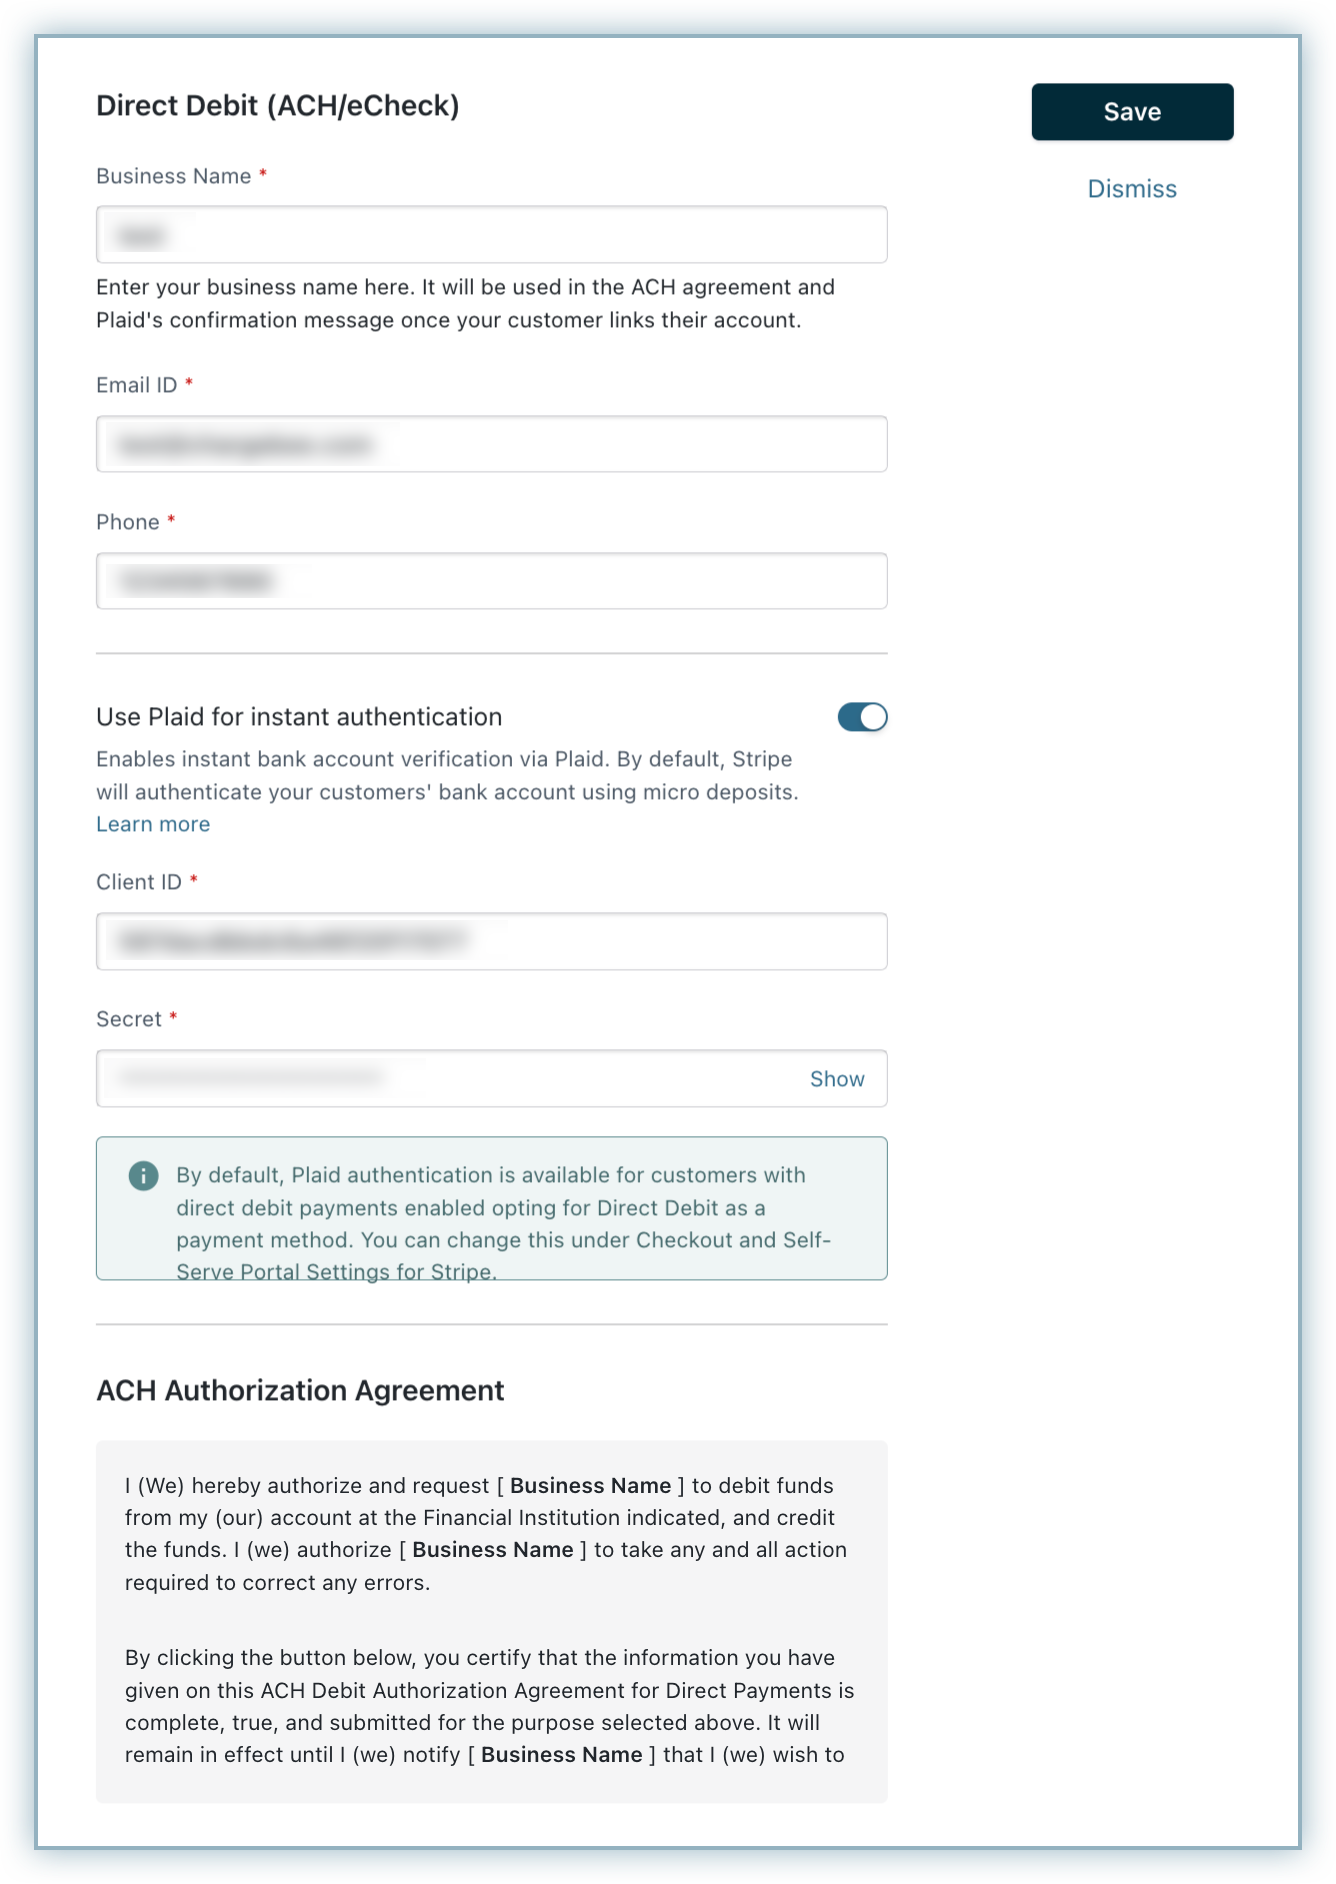
Step 3: Enable Use Plaid for Instant Authentication if you want to authorize using Plaid or enable Use Financial Connections for instant verification if you want to authorize using Financial Connections.
By default, Micro deposits are the mode of verification. Learn more about different modes of Authentication.
Step 4: Next, you need to allow your customer to pay via bank account. This additional step ensures that payments by ACH are an option only for customers you know and trust.
In the customer's profile, enable the option to pay via their bank account.
Authentication
Stripe supports three modes of verification:
-
Via Plaid, a third party application that authenticates bank information.
-
Via micro-deposits, wherein the customer communicates the precise amounts (which are usually in cents, hence the name) transferred to the bank account to prove that the person has access to their bank statements.
-
Via Financial Connections, which is Stripe's proprietary instant verification method, can be used to access users' financial data with permission. This data includes tokenized account and routing numbers, balances, ownership details, and transactions.
Financial Connections provides a secure platform for your customers to link their bank accounts to your business, enabling the secure sharing of this vital financial information.
Note
- Stripe will notify Chargebee in case of verification failure. On such instances, Chargebee will mark the payment method as INVALID. Customers will have to repeat the whole process once again.
- If there are three consecutive payment failures using the direct debit payment method, it will be marked as invalid in Chargebee. In such cases, you should remove the existing payment method and ask your customer to add a new one.
Using Plaid
Note
No new merchants will be onboarded to Plaid. However, existing users can still refer to the documentation for their current setup. We recommend new users to refer to Financial Connections as a better alternative.
Plaid is a third party application that allows for quick authentication of bank information, enabling instant verification of bank details and payment collection.
Note
- Plaid is a paid service.
- Since Plaid is an instant verification payment method, customers will be charged immediately.
To allow your customer to verify their bank accounts using Plaid, follow these steps:
Step 1: Setup/Connect your Stripe and Plaid accounts
Connect your Stripe and Plaid accounts so that Plaid can facilitate the creation of bank account tokens on your behalf. Find out more about how to do this on Plaid's page.
Step 2: Connect your Chargebee and Plaid accounts
-
Navigate to Settings > Configure Chargebee > Payment Gateways > Stripe
-
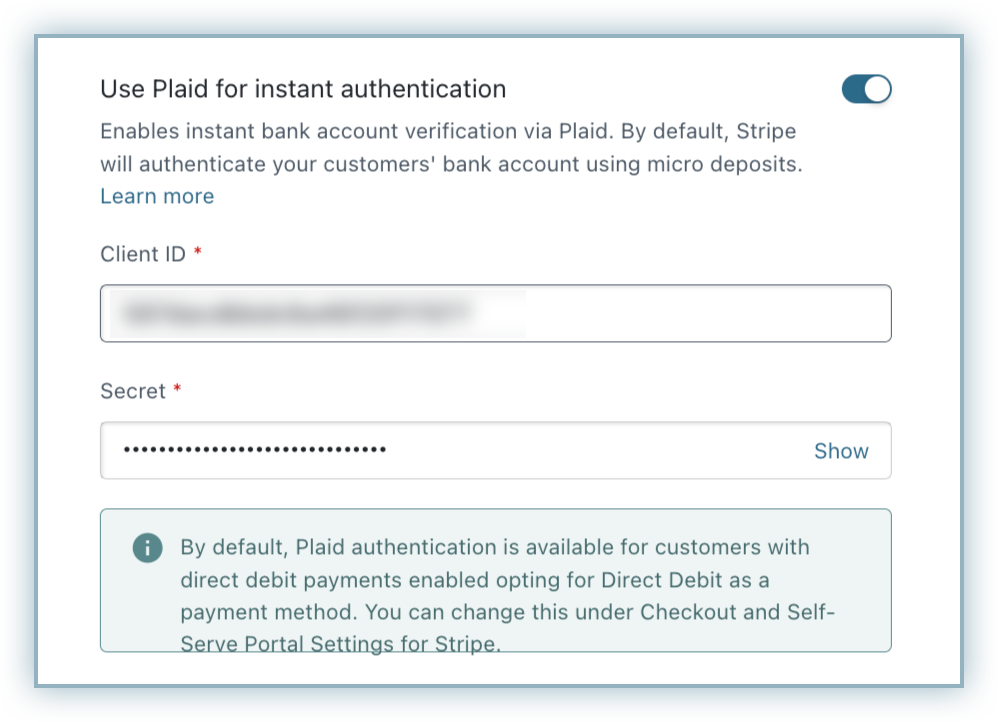
Enable the Use Plaid for Instant Authentication option
-
Connect Plaid to Chargebee by entering your Client ID and Secret API Keys: This information helps Chargebee connect with your Plaid account. You can find this information in your Plaid Dashboard by navigating to Team Settings > Keys.
Step 3: Checkout page and customer portal setting
-
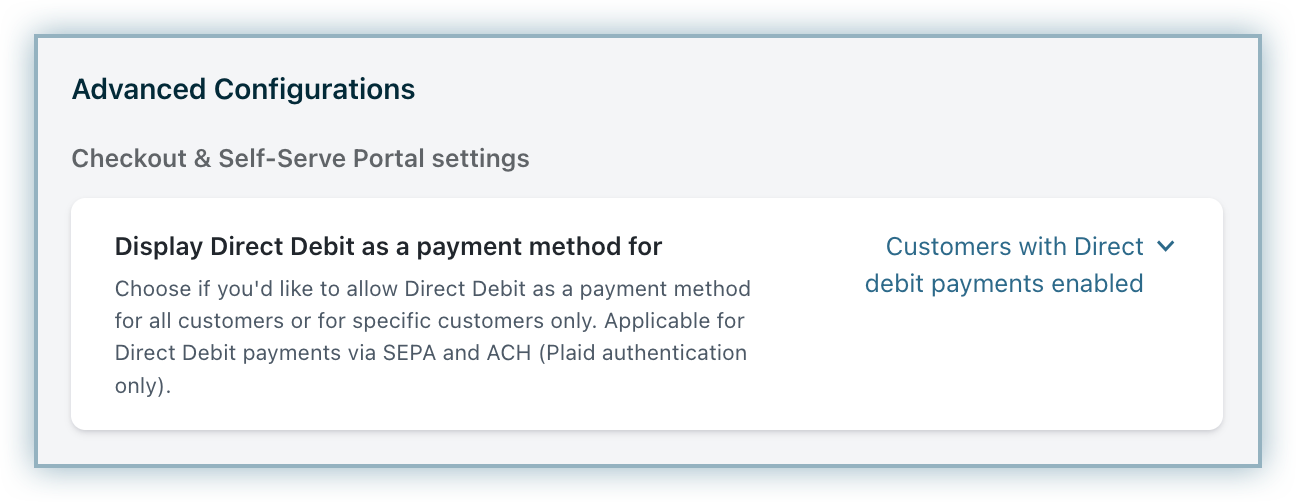
Choose customers for whom you want to display direct debit as a payment method in the Chargebee checkout and self-serve portal. Select the necessary option from Display Direct Debit as a payment method for setting in the bottom of the page. Available options are:
-
All your customers - This options allows all your customers (including new customers) to pay via ACH irrespective of whether the Allow this customer to pay via his/her Bank Account option is enabled on the customer's details page.
-
Only customers with Direct Debit enabled
-
Note
This option is applicable for direct debit payments via Stripe ACH (Plaid only) and SEPA.
- Finally, click Apply option at the top of the page to save your ACH settings.
Once you have completed these three steps, your customers will be able to verify their bank accounts using Plaid when they choose ACH as their payment method.
When your customers are setting up ACH payments, they will be redirected to Plaid. Plaid verifies bank details using the customer's (bank account related) login credentials. Once verified, customers are redirected back to Chargebee's hosted pages where they can enter their personal details, shipping and billing addresses and so on, and complete their payment.
Using Micro Deposits
When you use the Micro Deposit option, the customer will first have to provide the bank details using the customer portal. Verification using Micro Deposit is a free service and the whole verification process will take about 2-3 business days.
Once the bank details are collected, it has to be verified. For verification, Stripe will deposit 2 small amounts into the customer's bank account. Your customers will have to validate the amount transferred.
There are three ways to add and verify a customer's bank account using micro deposits:
- On the Chargebee site
- On the Customer Portal.
- On the Stripe interface (for verification alone)
On the Chargebee Site
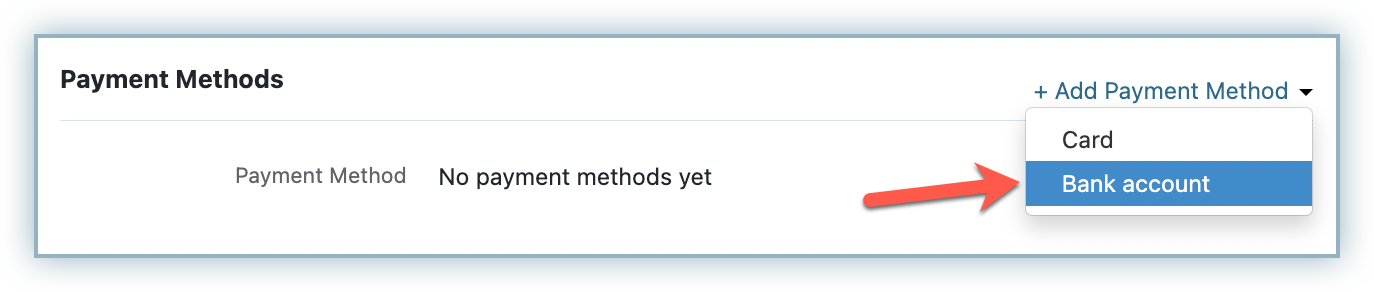
To add a customer's bank account on the Chargebee interface, navigate to the Payment Method section on the customer's details page and click Add Bank Account.
Note
This option will not be available if you have not enabled the Allow customer to pay via their bank account option when creating this customer (see step one). To enable this option for an existing customer, click Edit Customer on the Action panel.
To add a bank account, you will need the following information:
- Customer's name as per bank account
- Name of the bank
- Account holder type
- Bank account number
- Bank's nine digit routing number
You can also use an API to collect the bank details from the customer Refer to our API documentation to learn more
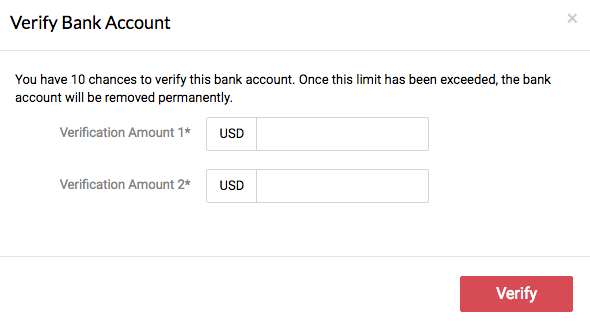
After you click Add bank account you will be directed back to the customer's page, where the newly recorded details should appear along with a verify this account option. Clicking this option will cause a verification window to pop up with fields to enter the exact amounts that have been transferred to the customer's account. The customer will need to provide you with this information after checking their bank statements.

If incorrect information is entered into the verification pop up more than 10 times, the customer's payment details will be marked as INVALID. The whole process will have to be repeated with fresh account details in the event of this happening.
On the Customer Portal
The process of adding and verifying an account is very dependent on the customer. So we've made it possible for you to allow the customer to handle the entire process on their end via the customer portal.
On the customer portal, your customer would have to navigate to and click Update Payment Details option to add their bank details. After they click Add bank account they will be directed back to the portal, where the newly recorded bank details should appear along with a verify this account option. Clicking this option will cause a verification window to pop up with fields to enter the exact amounts that have been transferred to their account.
As on the web interface, if incorrect information is entered into the verification pop up more than 10 times, the customer's account will be marked as INVALID in Chargebee. On such events, if you wish to verify again, the whole process will have to be repeated with fresh account details. If incorrect information is entered in the customer portal, you will be notified by email.
Note
The Request Payment Method option is a great way to initiate this process for a new customer. Find it under the Actions tab on the customer's page.
On Stripe
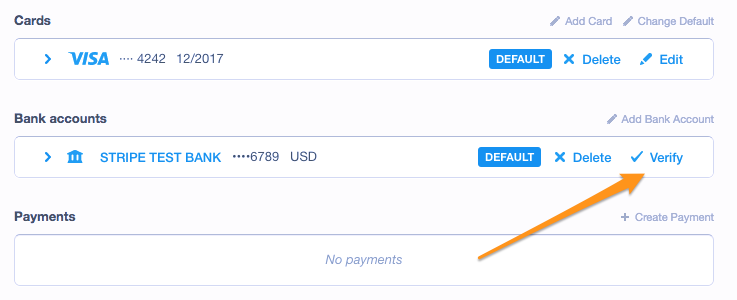
If you want to verify the customer's bank account on the Stripe interface, click the verify option that appears next to the customer's bank details. The subsequent pop-up has fields to enter the exact amounts that have been transferred to the customer's account in cents.
Chargebee will be notified of the verification via webhook.
Note
If you want to add or update a verified bank account on Chargebee from Stripe via API, check out this solution article.
Using Financial Connections
Prerequisite: Ensure to enable Financial Connections in your Stripe account before configuring it in your Chargebee site.
Follow the steps below to enable Financial Connections for your ACH payments via Stripe in your Chargebee site:
- Navigate to Settings > Configure Chargebee > Payment Gateways > Stripe.
- Enable Use Financial Connections for instant verification.
- Click Save.
Note
- When you are configuring Stripe and enabling Direct Debit (ACH/eCheck) for the first time, you will see Financial Connections as the only option for bank account verification. On the other hand, all users who have Plaid enabled in their ACH via Stripe configuration will continue to see Plaid as the available option only. Contact Chargebee Support to enable Financial Connections for your Chargebee site.
- By default, Stripe uses Micro Deposits method for verification when a specific verification method is not selected.
The ACH workflow on Chargebee
After the customer has accepted the Authorization agreement and the bank account has been added and verified, they are ready to make ACH payments, and you are ready to receive them.
Here's what the workflow looks like:
-
When an ACH payment is made (for both one time payments and recurring payments), a payment due invoice with a payment initiated tag is created on Chargebee.
-
ACH payments may take up to 5 working days. When the funds are received, Stripe marks the payment as successful, if they are not, it marks the payment as failed.
-
Chargebee is notified of the change in the status of the payment (again via webhook) and consequently marks the invoice as either paid (for a successful payment) or not paid (for a failed payment). For more, check out our invoices page.
The invoice generated looks like this:
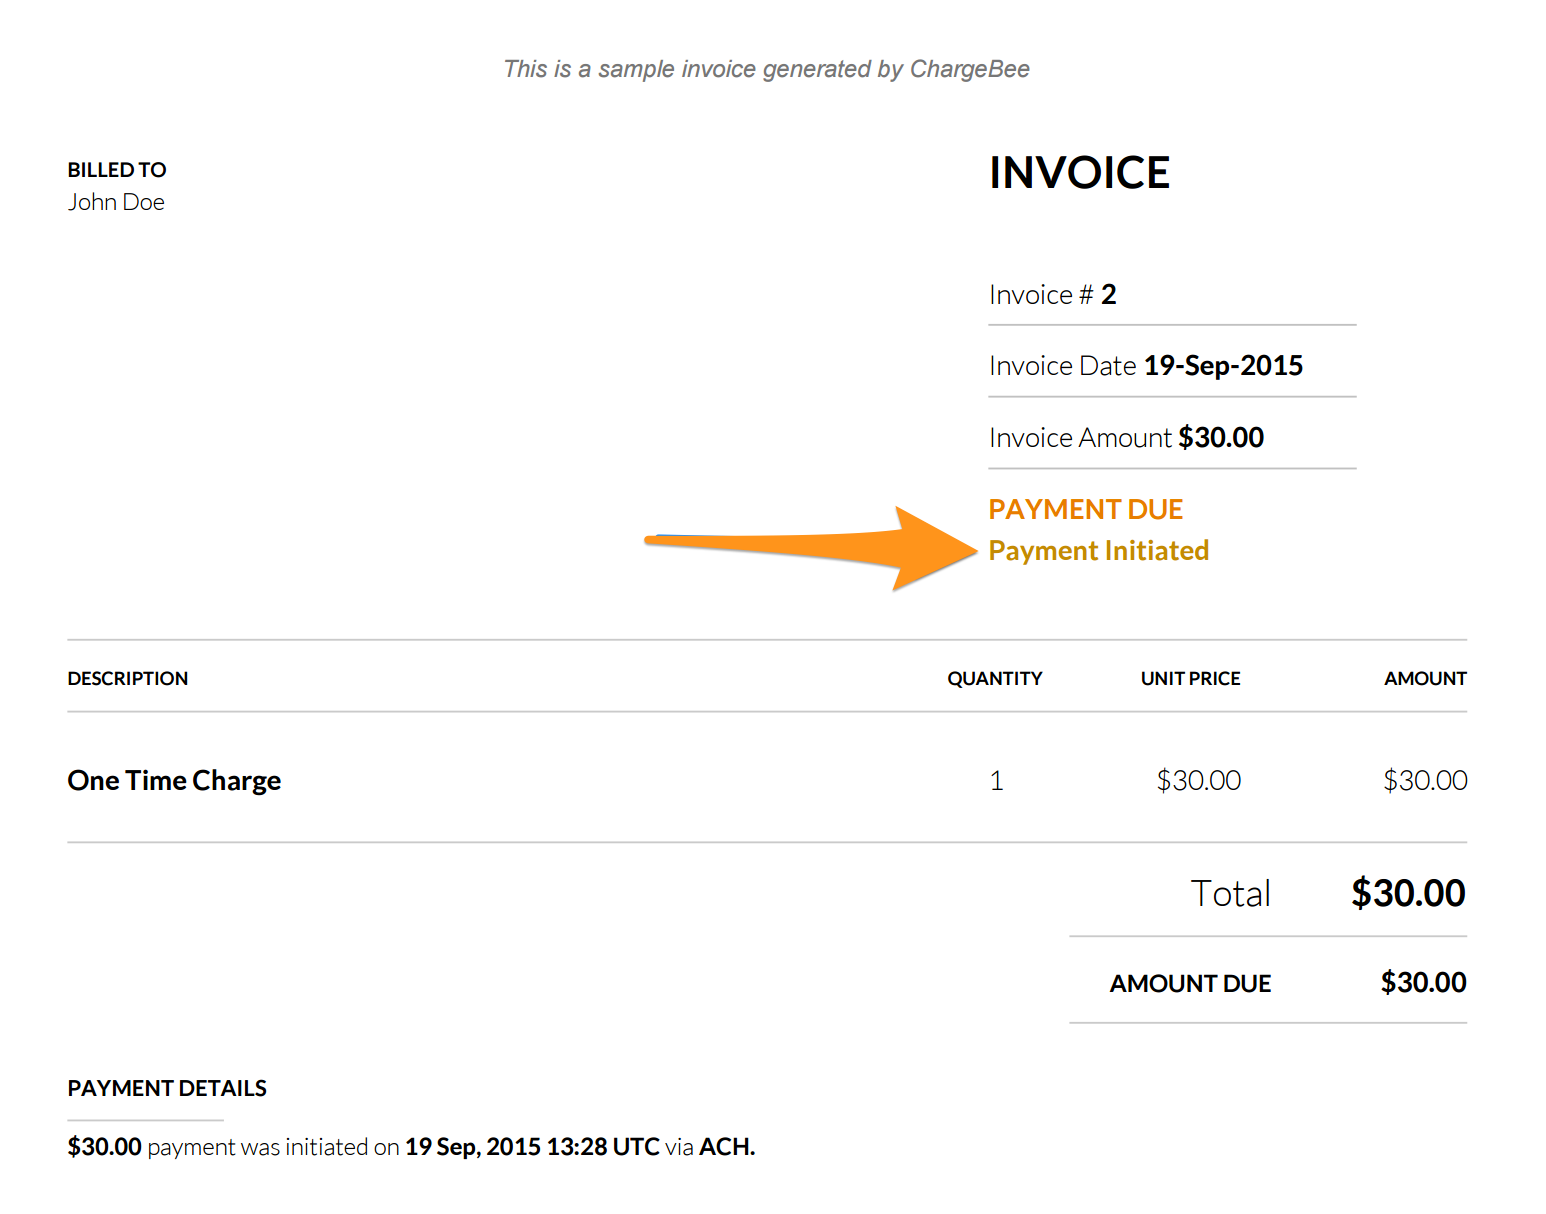
- In case of payment failure during renewal, Stripe will notify Chargebee of this. If dunning has been enabled, Chargebee will attempt to charge the customers based on your dunning configuration. In case of 3 consecutive failed attempts, payment method will be marked as Invalid and the final action set in the Dunning settings will take place.
To learn in detail about how the workflow looks like on Stripe, check out their ACH guide.
ACH Credit Transfer
Offline payment methods, primarily bank and wire transfers (also called push payments) are used by SMBs and Enterprise businesses alike.
When customers pay offline, the transaction details are not sufficient to update the due invoices,
- either the payment amount changes due to foreign exchange rate conversion involved in multi currency payments or
- reference details or payment instructions do not reach when you receive the payment
So there is a lot of manual effort involved in reconciling payments with due invoices. With Stripe's ACH Credit Transfer feature , Chargebee updates payment due invoices (offline) accurately and removes the effort required to search and update due invoices.
What is the feature all about?
- Chargebee auto-generates a virtual bank account for each of your customers via Stripe.
- The virtual bank account details are mentioned in the invoice (payment instructions) sent to your customers
- Customers can transfer the amount to this virtual bank account
- Chargebee receives the payment info from Stripe and reconciles the invoices (unpaid invoices are marked as paid automatically).
Card payments vs. ACH payments: The waiting period
Unlike card payments, where the authorization and transfer of funds happens immediately, the authorization and transfer process has a waiting period for payments via ACH. This waiting period is typically up to five business days. Settlement takes about eight working days in total.
ACH email notifications
Before you read about the types of email notifications, enable Enable Direct Debit Emails for Chargebee on the Configure Stripe page.
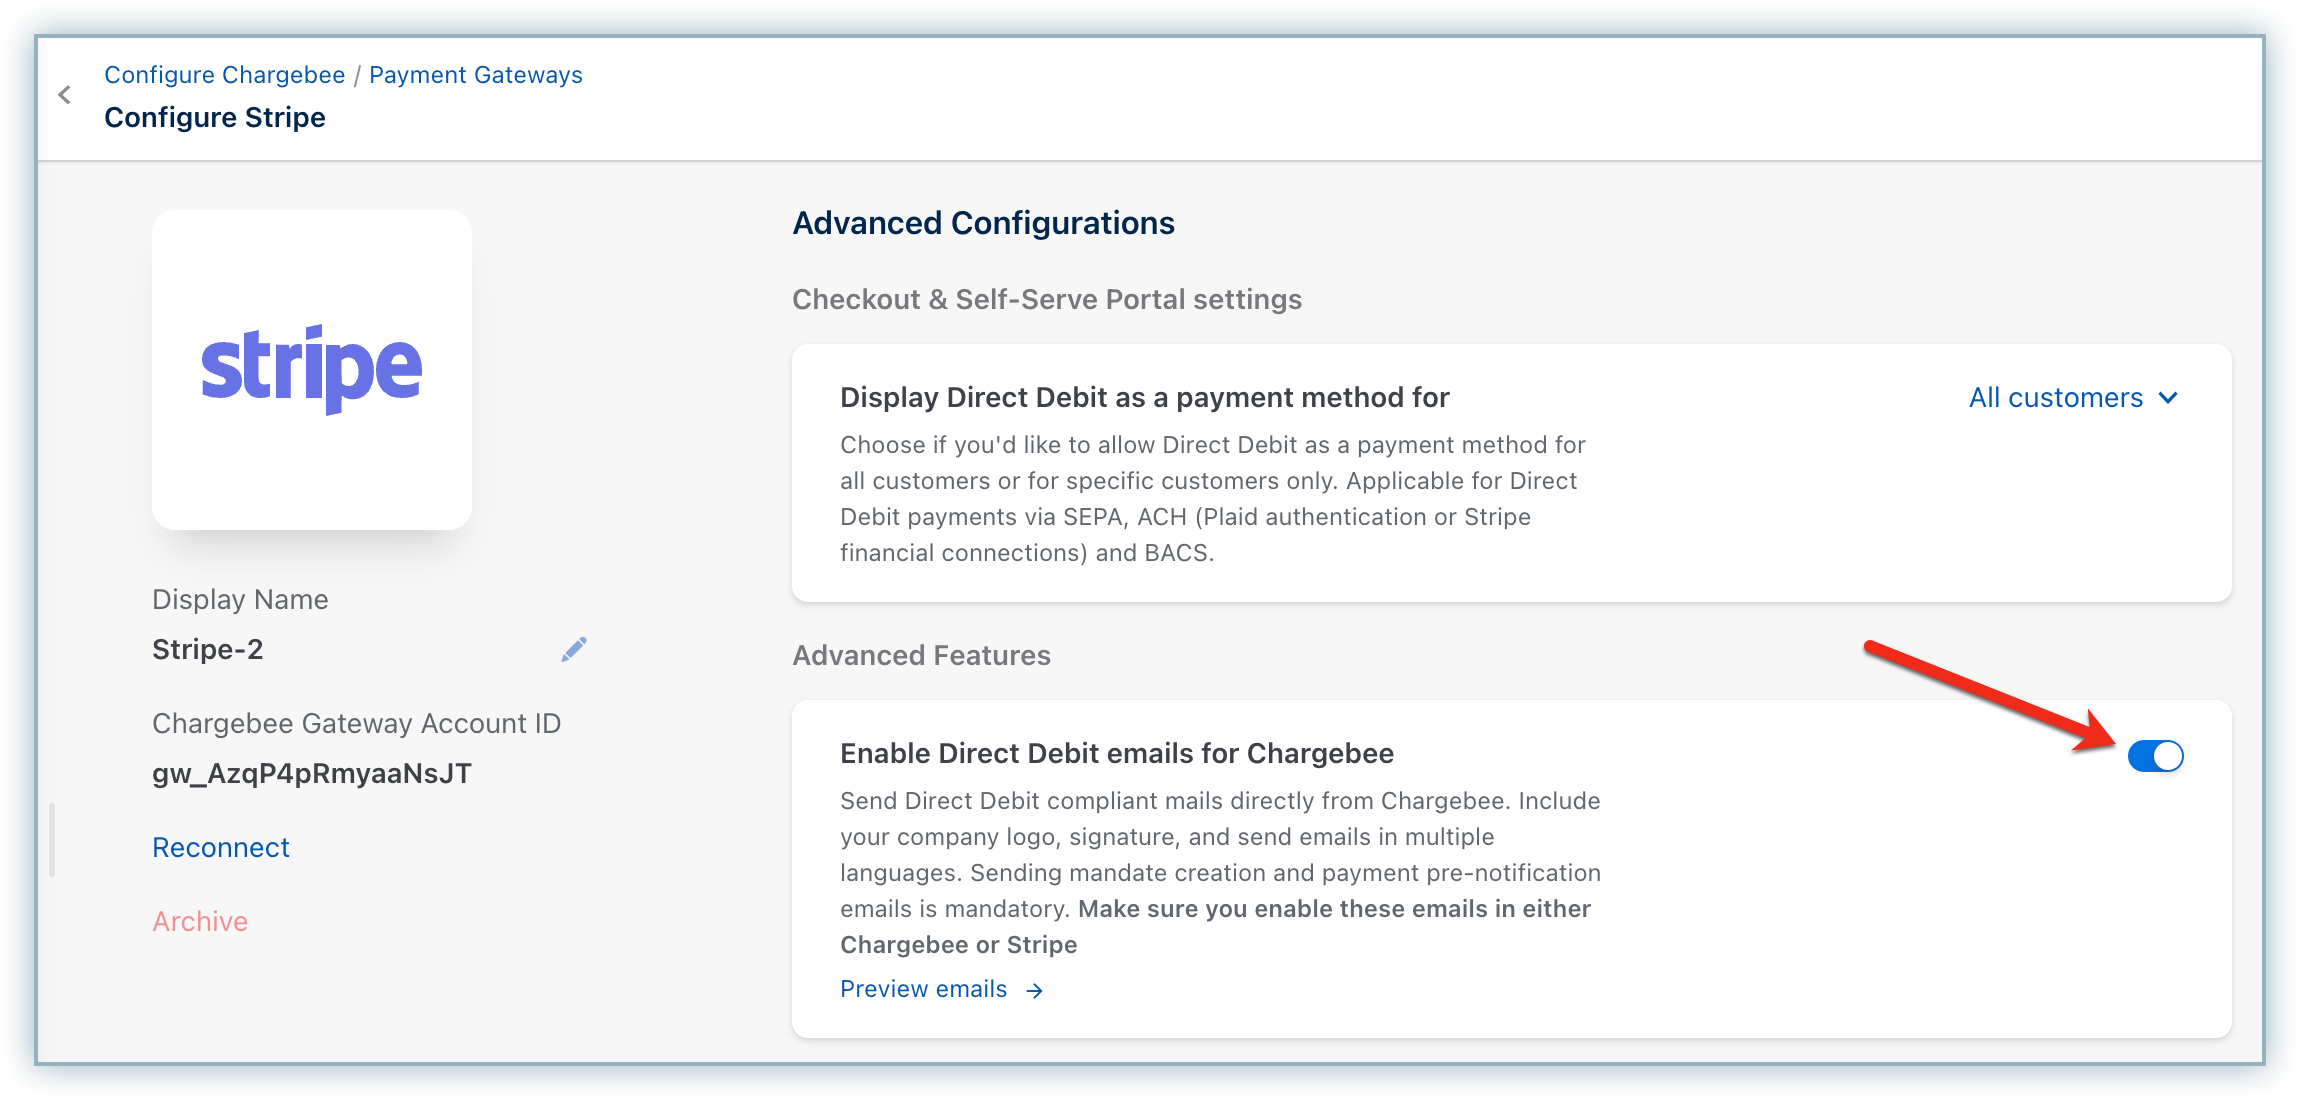
Two types of email notifications are available for ACH payments:
-
Payment Initiated: To inform customers that a payment has been initiated via Direct Debit from their bank accounts.
-
Refund Initiated: To inform customers that a refund has been initiated towards their bank account.
Note
Additionally, we would strongly recommend enabling the Subscription Renewal Reminder notification, as customers have to be given notice before they are charged via Direct Debit.
Invalid Payment Method Email Notifications
You can also configure the Invalid Payment Method notifications to inform your customers about card expiry or payment failure.
You can set up these notifications by clicking Settings* > Configure Chargebee > Email Notifications > *Invalid Payment Method.
Refer to this section to learn more.
Note
For a seamless customer experience, disable Stripe's direct debit notifications and enable them in Chargebee if you prefer Chargebee to manage them. Enabling notifications in both systems will now result in duplicate emails being sent to customers.
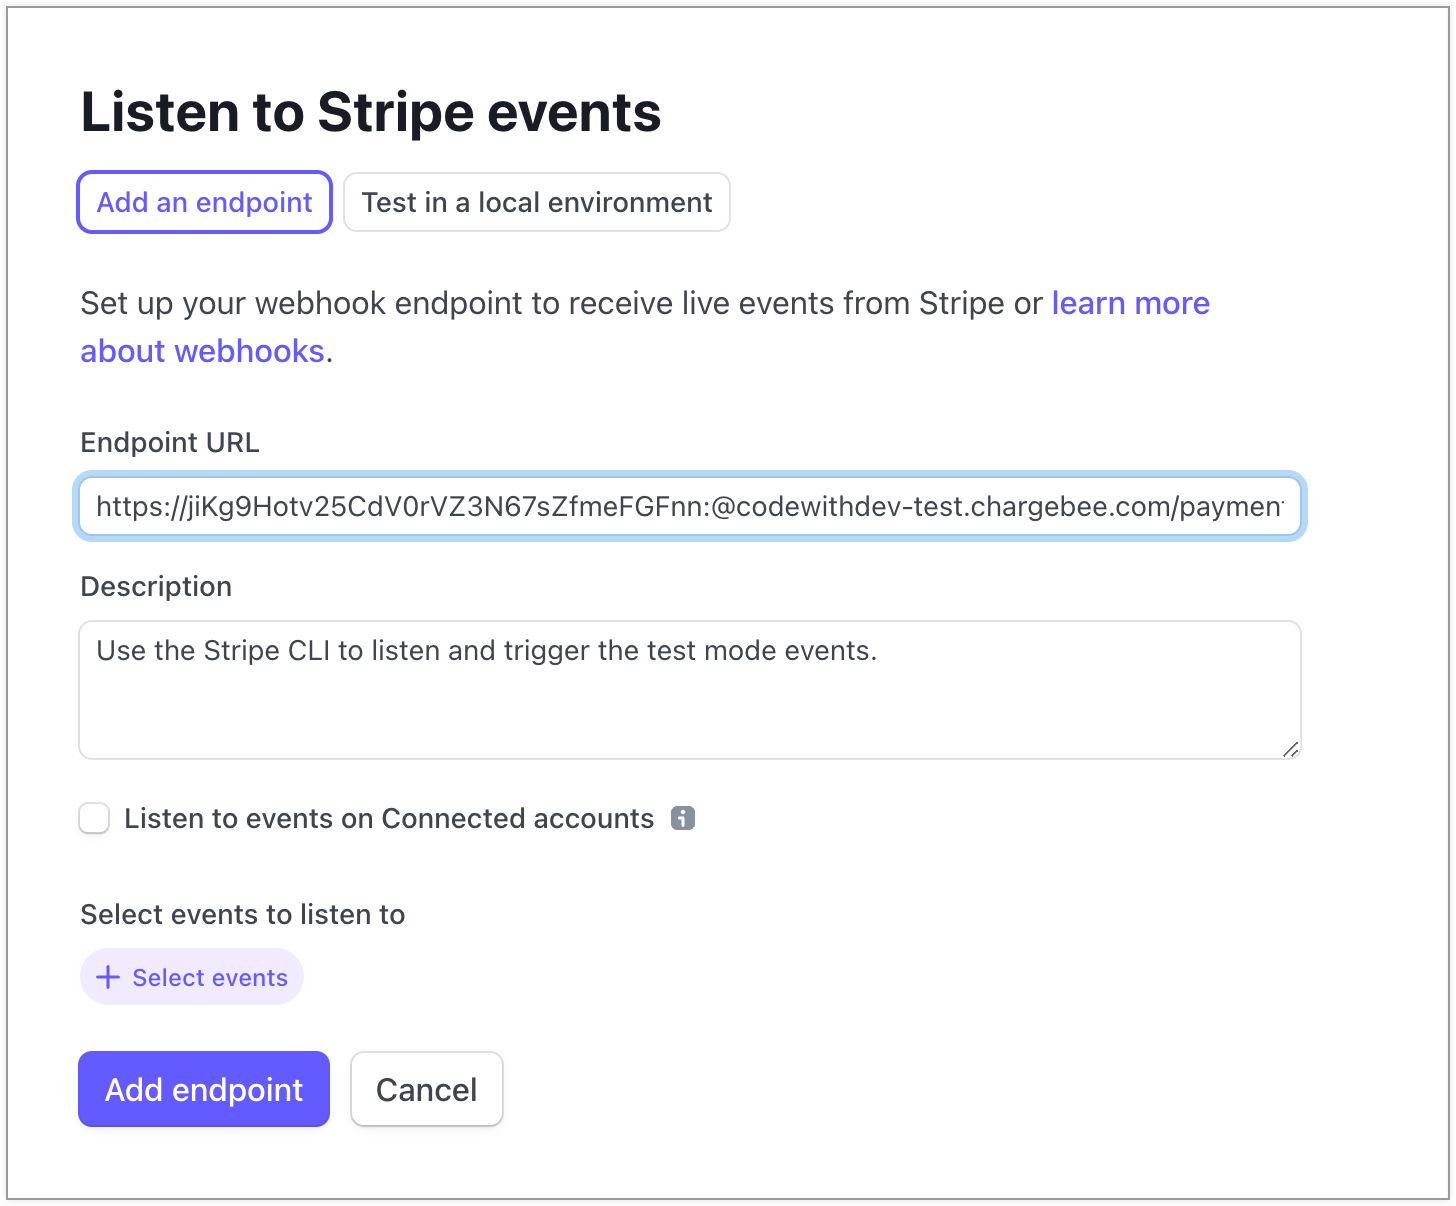
Configuring Webhooks
Webhooks are indispensable to a smooth ACH workflow; they notify Chargebee of any changes made to the transaction on Stripe so Chargebee can keep you updated on what's going on with your payment. They can be configured by pasting Chargebee's notification URL in your Stripe account at Your account > Account settings > Webhooks > Add endpoint > Account. Find a more detailed tutorial on configuring webhooks on our Stripe page. Please do note that while you are configuring webhooks, please select all types of events.
Note
In case you remove your Stripe account from Chargebee, this URL will no longer be valid. Adding Stripe to Chargebee again will generate a new URL that you will (once again) have to paste in your Stripe account.
Additional Configuration
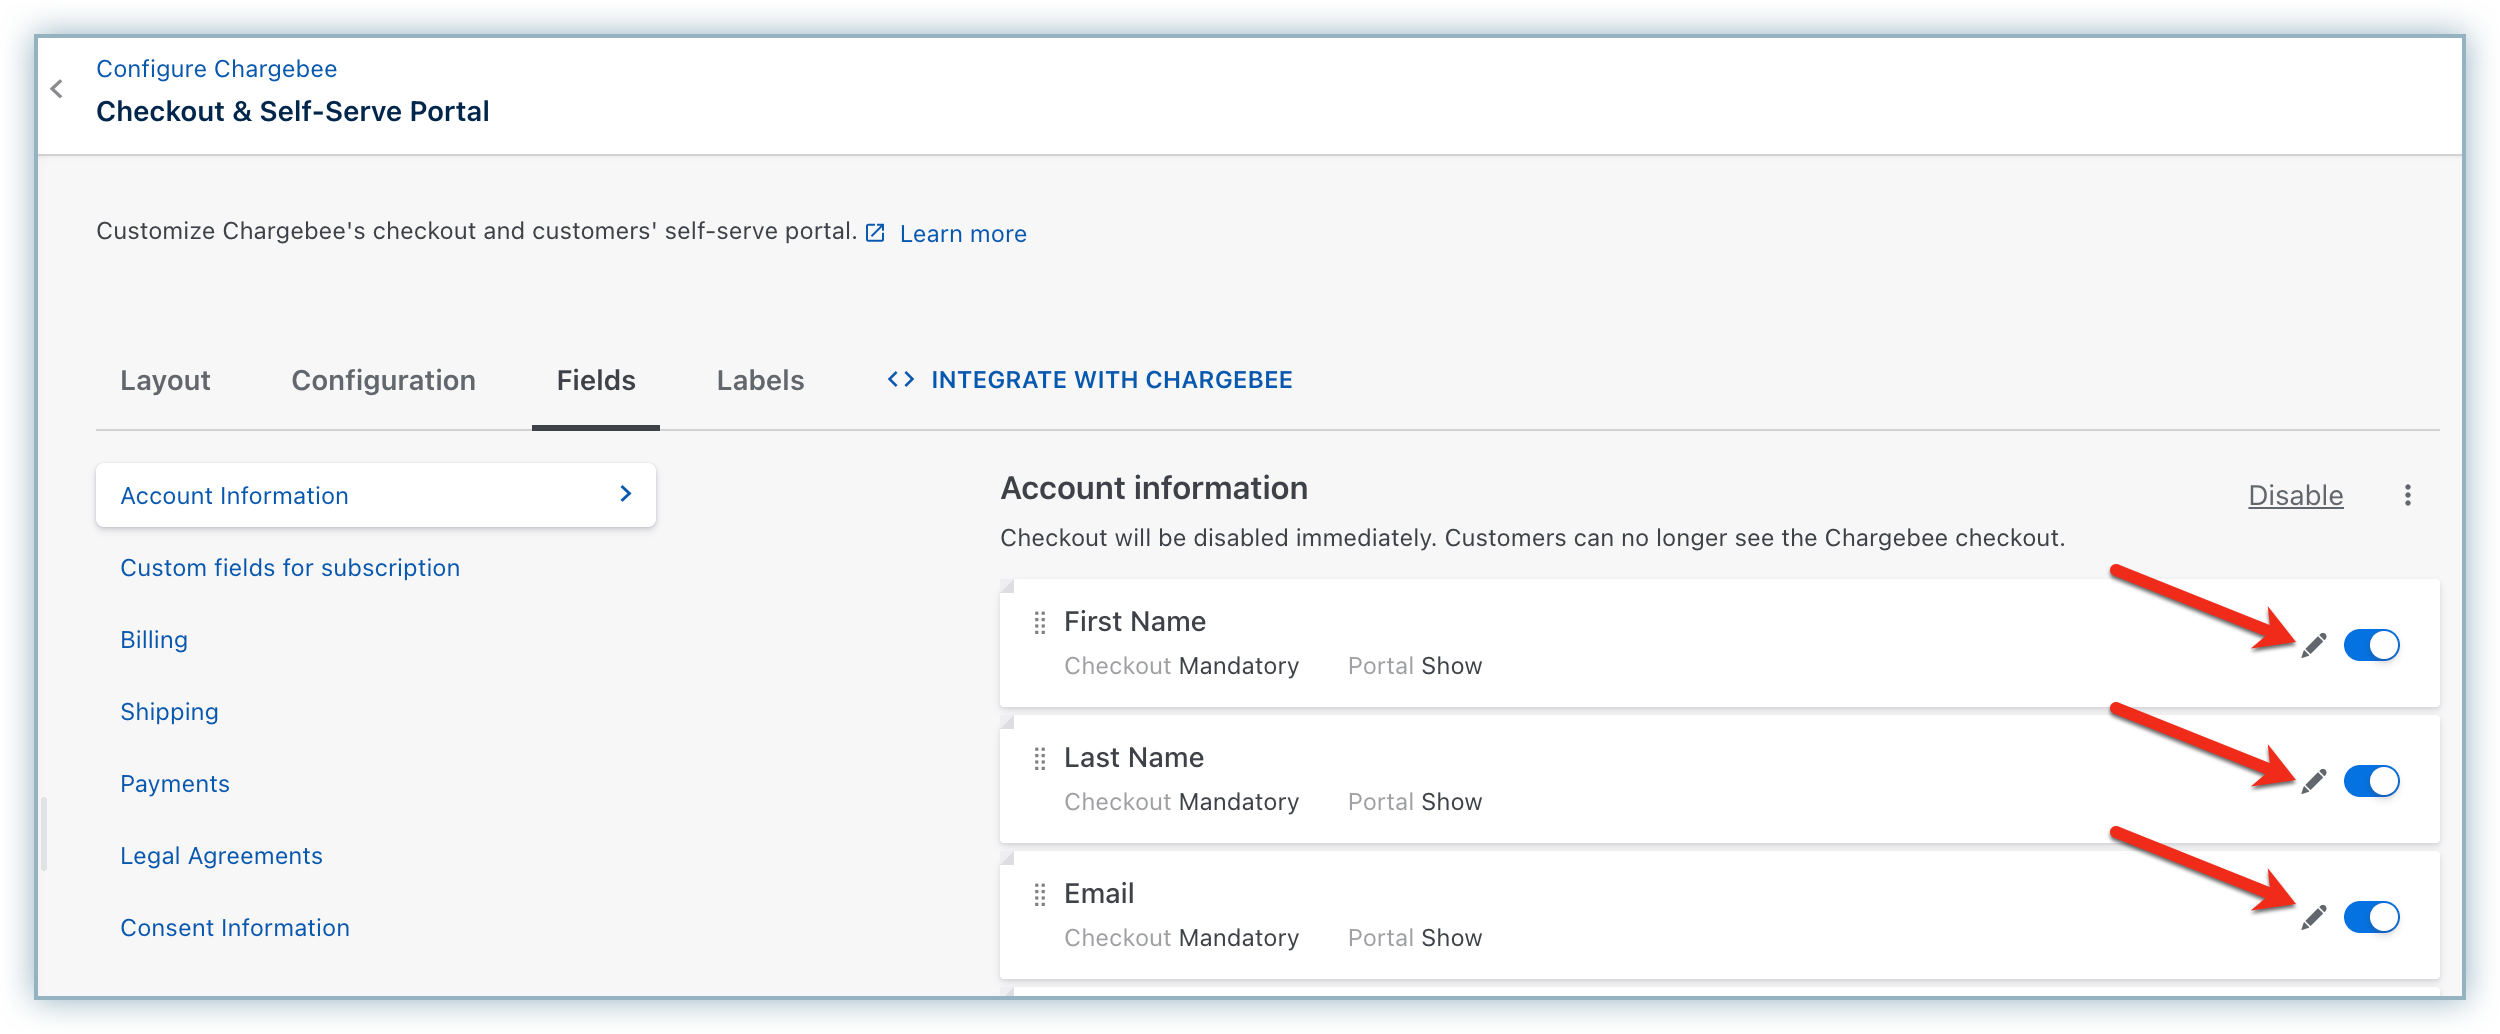
If you intend to use Chargebee's Hosted Pages for this integration, some fields must be configured as mandatory in Chargebee's checkout settings:
Follow these steps to make the required fields mandatory in Chargebee:
-
Go to Settings > Configure Chargebee > Checkout & Self-Serve Portal.
-
Select the Fields tab.
-
Enable the First Name, Last Name, and Email fields.
-
Click the edit icon for each field and select Mandatory from the In checkout drop-down field.
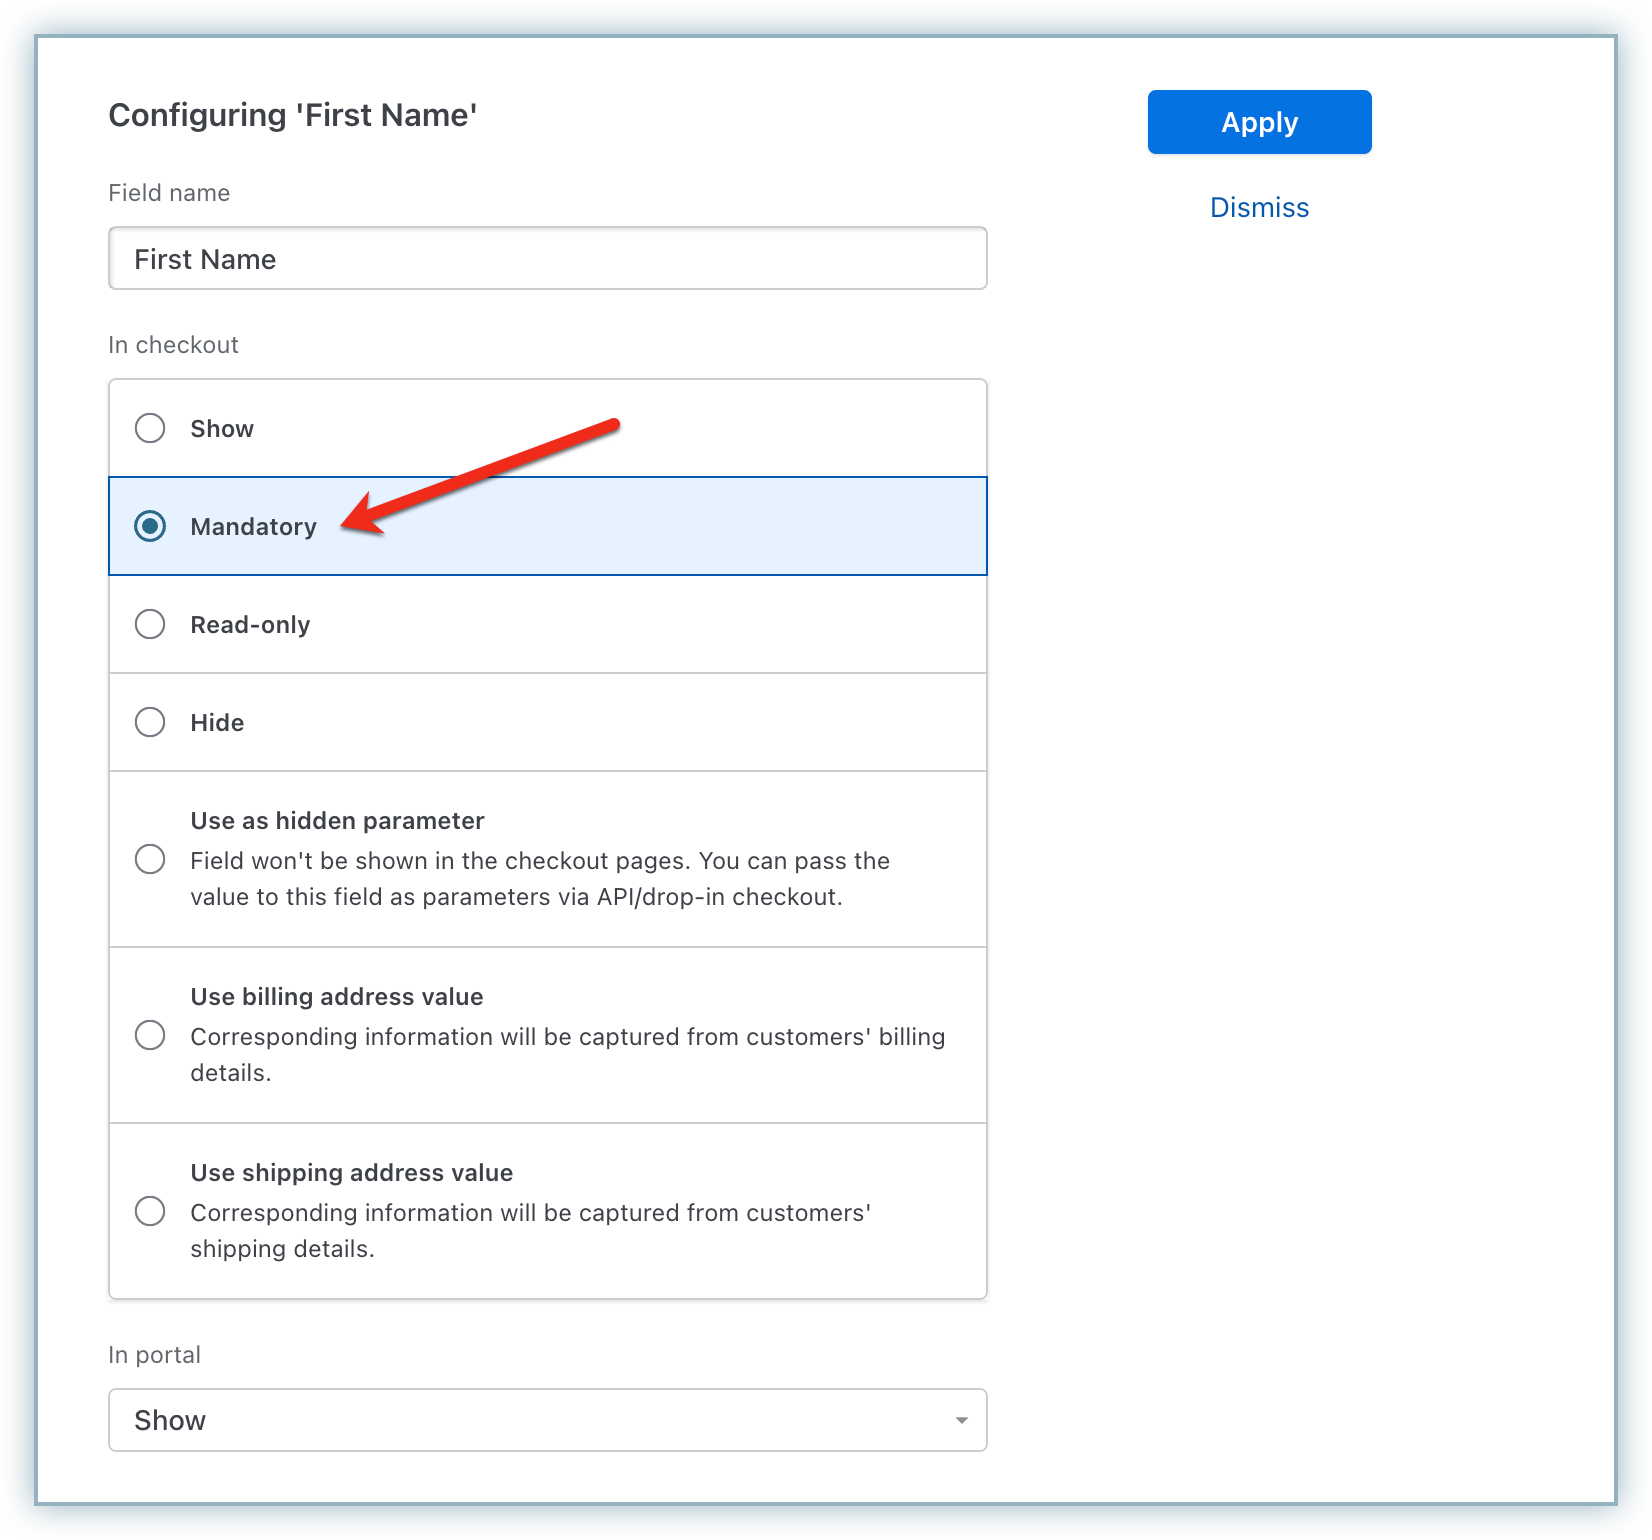
-
Click Apply and then Publish.
Was this article helpful?