Orbital (Chase Paymentech)
Orbital is now deprecated. Existing users can continue using the integration without interruption. However, new onboarding is no longer available.
Introduction
Chase Paymentech is a leading credit card processor and payment gateway provider. Chargebee accepts payments via Chase Paymentech's Orbital gateway.
Note
- Chase Paymentech provides two host platforms, Salem and (PNS) Tampa. Chargebee supports processing only via the Salem platform.
- The Orbital payment gateway can be used only in Chargebee's live site; it is not available in the sandbox site.
Choosing Orbital
Review the following criteria before choosing Orbital as your payment solution:
- Countries supported: Orbital is currently available only for merchants operating in Canada and the US. Click here to see if Orbital is supported in your location.
- Currencies supported: Orbital supports approximately 130+ currencies.
- Pricing: Learn about Orbital payment gateway's current pricing information here.
- Payment methods: Orbital supports a wide range of debit and credit cards, including MasterCard, Visa, Discover Network, and American Express. Currently, Chargebee supports payments via cards only through Orbital. Get detailed information on the payment methods supported by Orbital here.
Note
3D Secure is not supported for this integration.
Types of accounts
Orbital does not support a test account.
You can accept payments via Orbital once you sign up for a merchant account.
Click here to sign up for a merchant account.
Prerequisite
Chargebee currently uses Spreedly, a third-party card vault, to store the customer's card information. If you are using Orbital's services already, you will have to migrate your customer's card information to Spreedly to start using Chargebee with Orbital. Contact Chargebee Support for more information on the migration process.
Integration options
Option A Chargebee's hosted checkout pages + Orbital
In this method, a customer's card information is collected by Chargebee's secure hosted pages and passed on to Orbital.
Your PCI compliance requirements are greatly reduced because of Chargebee's hosted pages. As a merchant using Chargebee's hosted pages, all you have to do is submit a Self Assessment Questionnaire (SAQ-A) to stay compliant.
PCI compliance requirements: Low
Option B Chargebee API + Orbital
With this option, the collection of card information is handled at your end and is passed on to Chargebee later. Once captured, Chargebee routes the card information to Orbital.
PCI compliance requirements: High
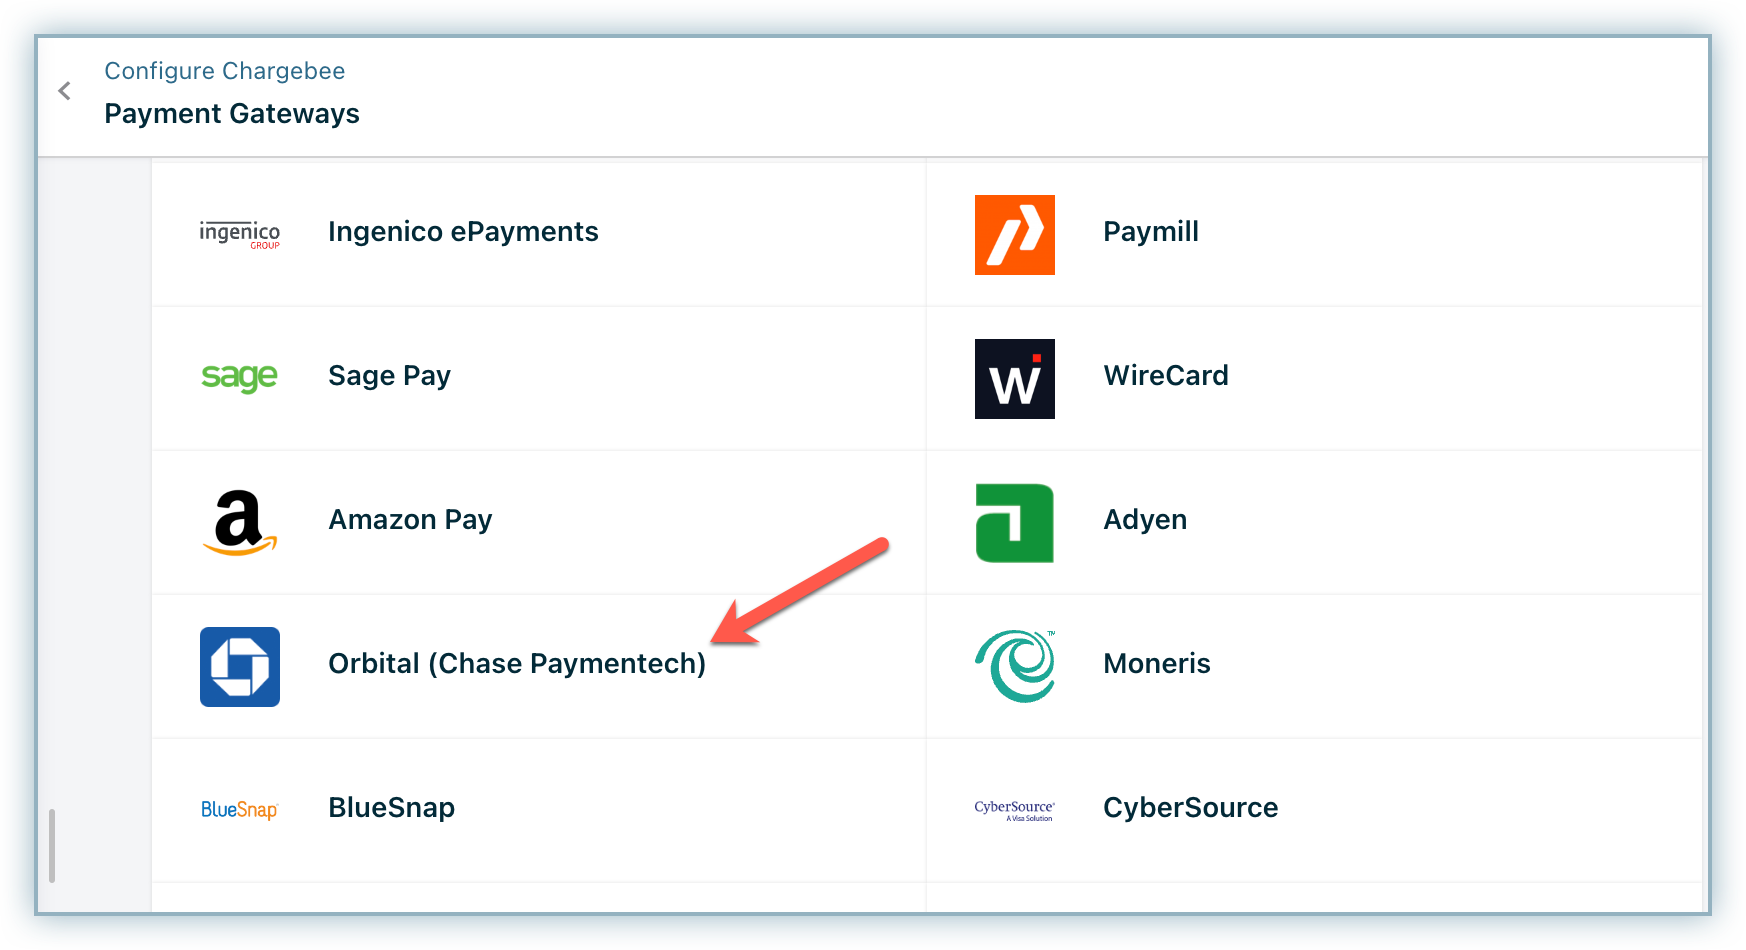
Configuring Orbital
Log in to your Chargebee live site. You can configure Orbital only in your live site.
Step 1: Click Settings > Configure Chargebee > Payment Gateway > Add a Gateway > Orbital.
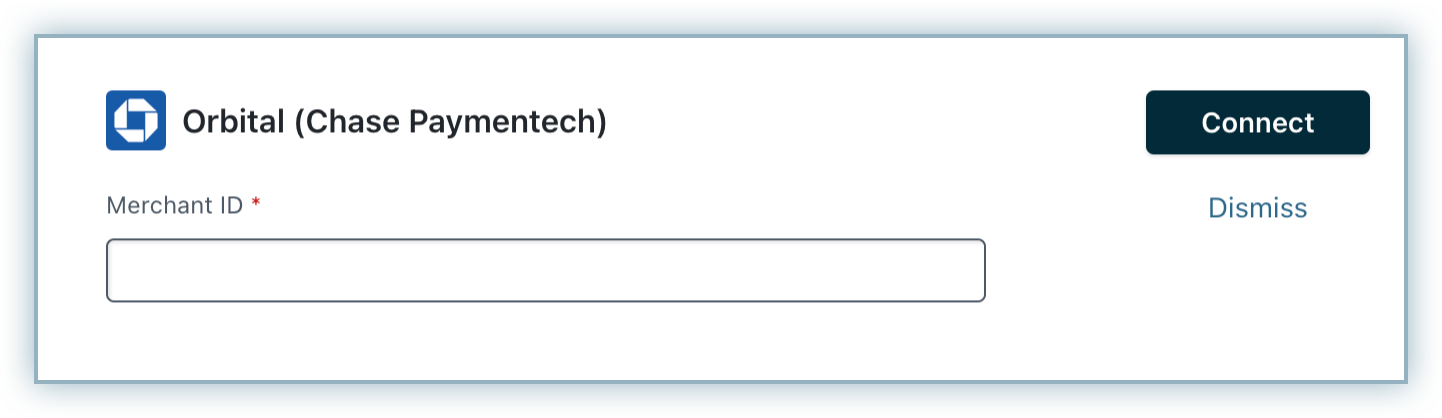
Step 2: Enter your Merchant ID and click Connect.
Step 3: You have now configured Orbital.
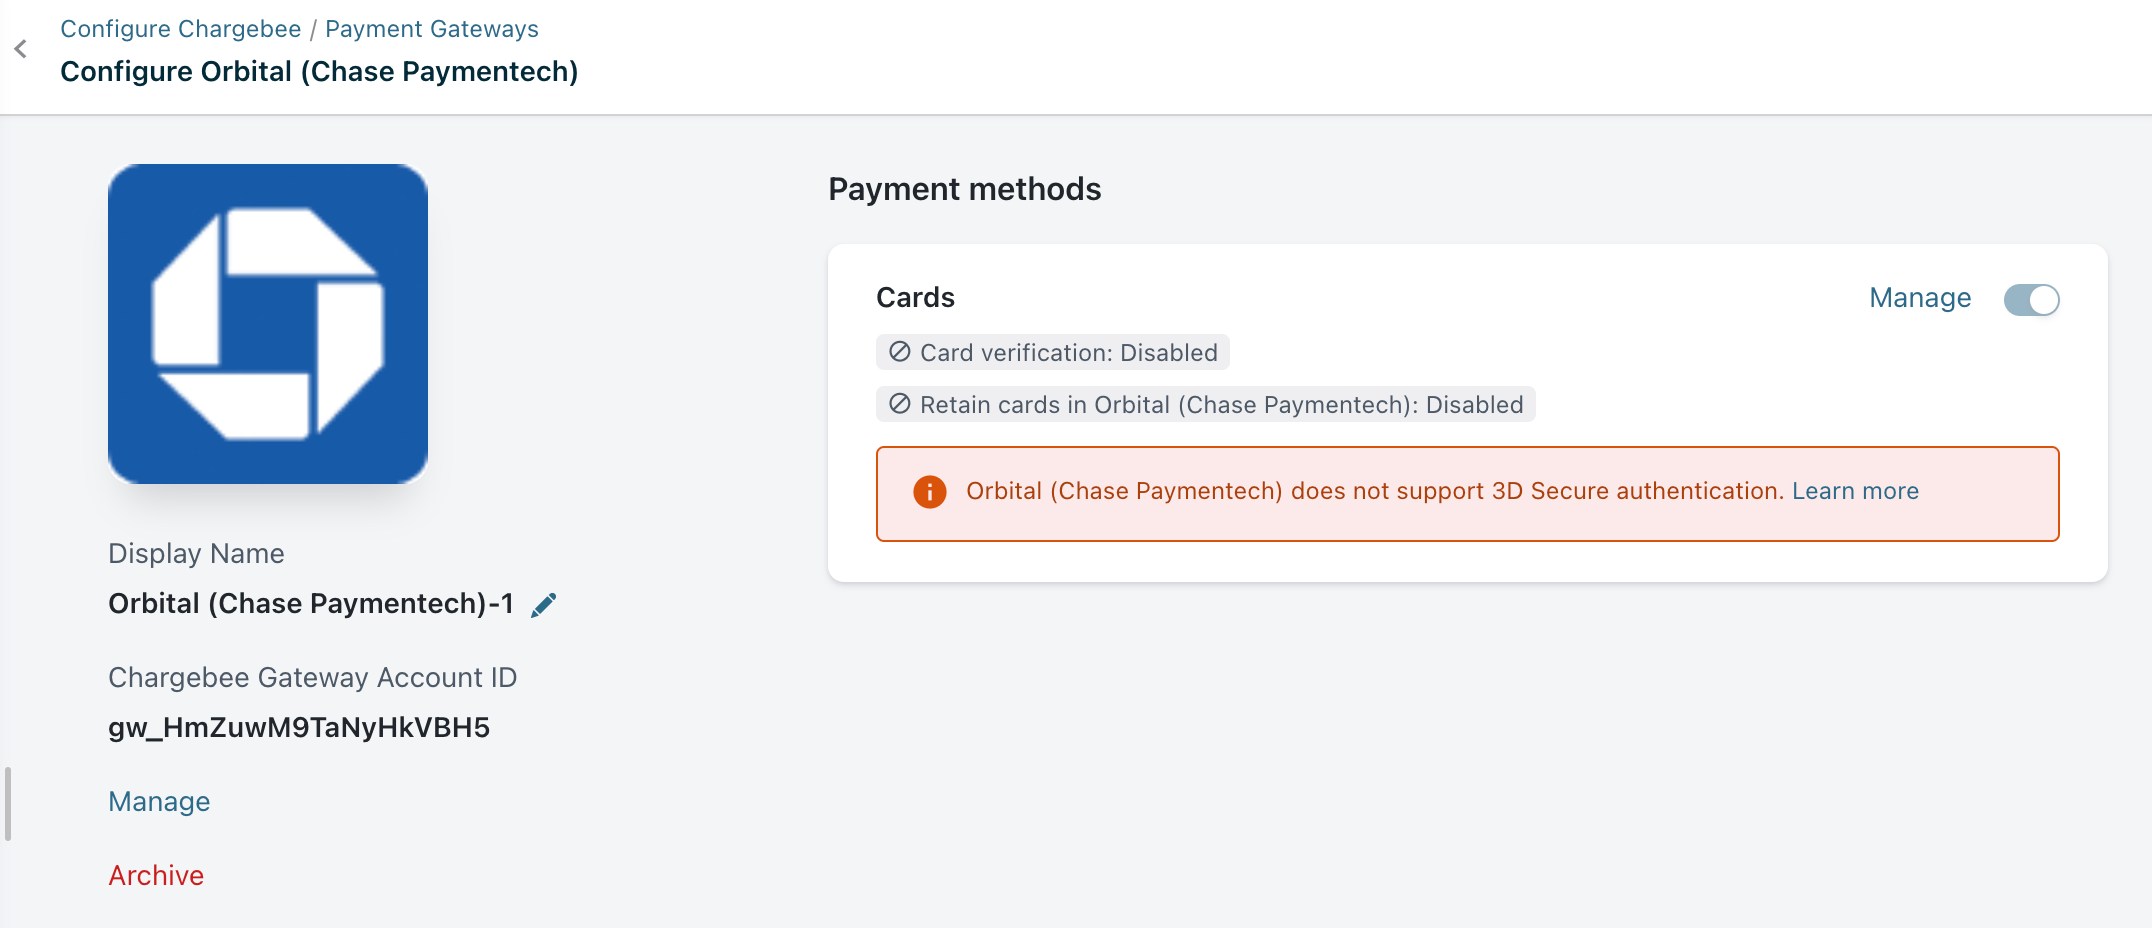
Step 4: Next, you can configure the other cards setting by clicking the Manage link. The Cards setting will open as shown below. Select the necessary settings.

- Card verification: Chargebee allows you to verify the customer's card before adding it. In this process, a small amount will be debited from the customer's card and refunded instantly. If this authorization fails, the customer cannot add their card. If you wish to activate this authorization, enable card verification.
- Always retain card information in Orbital when customer updates it: Enable this option if you are using multiple payment gateways and want the customer's latest card information to be updated in Orbital.
Step 5: Click Save.
- Always retain card information in Orbital when customer updates it: Enable this option if you are using multiple payment gateways and you want the customer's latest card information to be updated in Orbital.
Step 5: Click Save.
Was this article helpful?