New in Chargebee: Explore Reveal and understand your payment performance end-to-end.Try Now
Docschargebee docs
HomeBillingCPQPaymentsRevRecGrowthReveal
Support

Product Updates


  • Release Notes

Getting Started


  • Overview
  • Chargebee Billing Data Centers
  • Object Relationship Model
  • Understanding Sites
  • Chargebee Tech Glossary
  • Articles and FAQ

Implementing Chargebee


  • Implementation Guide
  • Go-live Checklist
  • Articles and FAQ

Agentic AI


  • Chargebee Copilot
  • MCP Servers

Developer Resources


  • Developer Resources Overview
  • API Explorer
  • Articles and FAQ

Product Catalog


  • Product Catalog Overview
  • Coupons
  • Articles and FAQ

Subscriptions


  • Working with Subscriptions
  • Billing
  • Orders
  • Articles and FAQ

Customers


  • Managing Customers
  • Account Hierarchy
  • Email Notifications
  • Branding
  • Configure Multiple Languages
  • Articles and FAQ

Entitlements


  • Entitlements Overview
  • Features Overview
  • Feature Management
  • Managing Product Entitlements
  • Subscription Entitlements
  • Customer Entitlements
  • Grandfathering Entitlements
  • Articles and FAQ

Usage Based Billing


  • Understanding Usages
  • Setting up Usage Based Billing
  • Usage Alerts
  • Prepaid credits
  • Metered Billing
  • Articles and FAQ

Invoices and Credit Notes


  • Invoices
  • Credit Notes
  • Quotes [Legacy]
  • Transactions
  • Articles and FAQ

Taxes


  • Overview
  • Configuring Taxes
  • Country-specific Taxes
  • Articles and FAQ

Hosted Capabilities


  • Overview
  • Hosted Checkout
  • Hosted Self-Serve Portal
  • Hosted Pages Features
  • Additional Hosted Pages
  • Payment Components
  • Pricing Table
  • Managing Payments with Chargebee.js
  • Mobile-Optimized Hosted Pages
  • Articles and FAQ

Site Configuration


  • Users & Roles
  • Custom Fields & Metadata
  • Approvals
  • Mandatory Fields
  • File Attachments & Comments
  • Advanced Filter Options
  • Multicurrency Pricing
  • Multi-decimal Support
  • Configuring Reason Codes
  • Events and Webhooks
  • API Keys
  • Time Zone
  • Time Machine
  • Transfer Configurations
  • Articles and FAQ

Multi Business Entity


  • Multi Business Entity Overview
  • Customer Transfer Overview
  • Articles and FAQ

Mobile Subscriptions


  • Overview
  • Omnichannel Subscriptions
  • Omnichannel One-Time Orders
  • Mobile Subscriptions (Legacy)

Reports and Analytics


  • RevenueStory
  • Home Dashboard
  • Frequently Asked Questions
  • FAQs for Classic Reports Sunset
  • Articles and FAQ

Integrations


  • Sales
  • Customer Support and Success
  • Finance
  • Tax
  • eInvoicing
  • Marketing
  • Stitch
  • Collaboration
  • Contract Management
  • Ecommerce Management
  • Articles and FAQ

Data Privacy & Security


  • Two Factor Authentication
  • SAML Single Sign-On
  • System for Cross-Domain Identity Management (SCIM)
  • EU-GDPR
  • Consent Management
  • Personal Data Management
  • Compliance Certificates
  • HIPAA Guidelines
  • PCI Recommendations and Integration Types
  • Articles and FAQ

Data Operations


  • Bulk Operations
  • Migration
  • Articles and FAQ
  1. Billing
  2. Customers
  3. Articles and FAQ
  4. Configuration
  1. Billing
  2. Customers
  3. Articles and FAQ
  4. Configuration

How do I email a "Quote"?

Summary

Chargebee lets you send quotes to your customers. Quotes can be sent for a new subscription, existing subscription, or one-time charges. However, you have to do this manually using the send email button from the Quotes details page.

To email a "Quote" follow the steps below:

  1. Create the quote, if you don't already have one.

  2. Go to Dashboard > Quotes > Select the quote > Select Send Email from the action panel to the right.

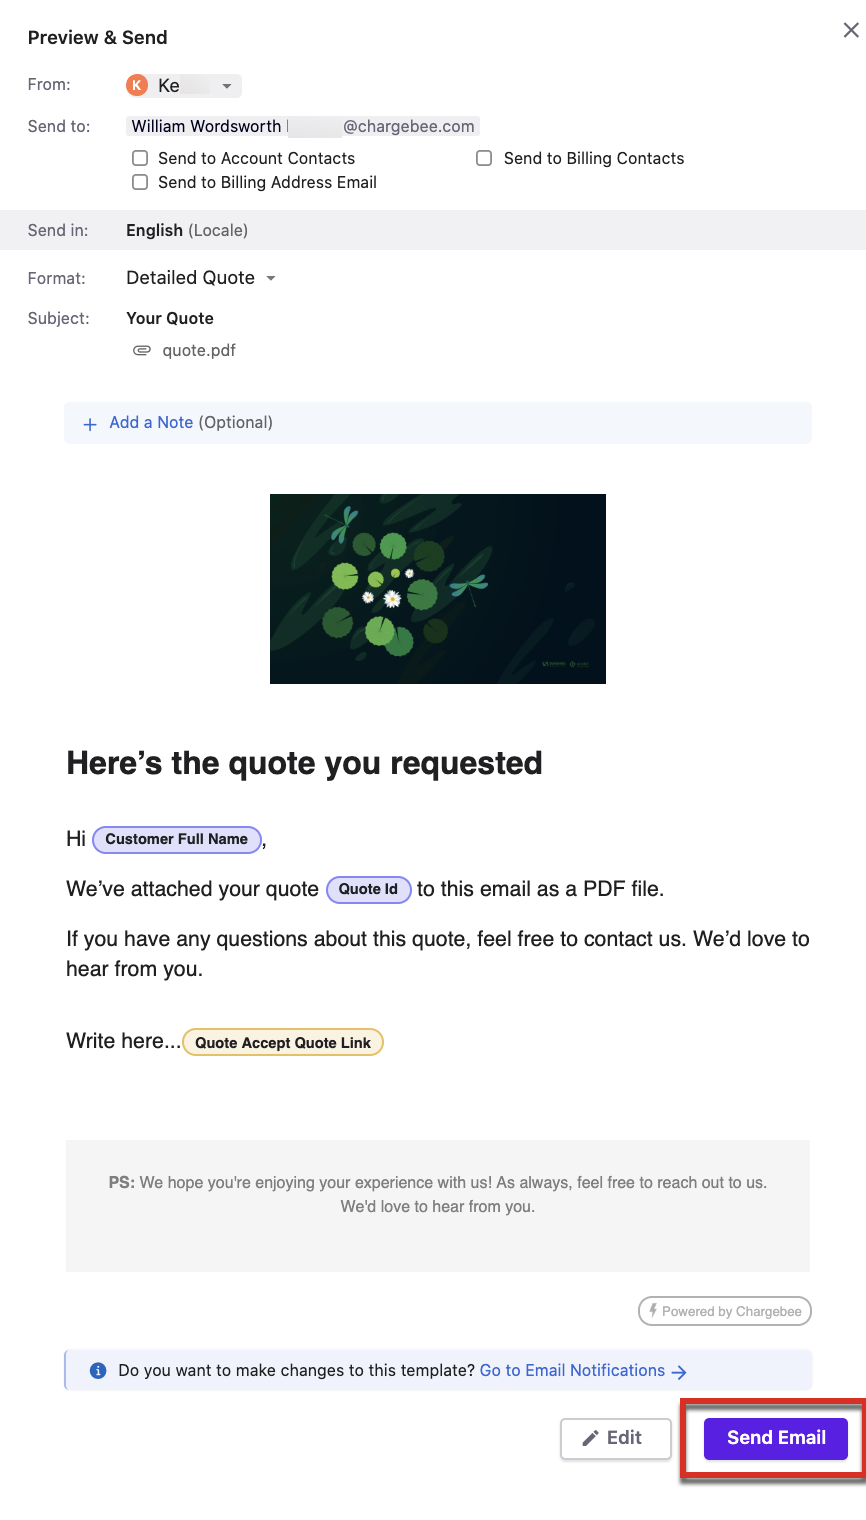
  3. Now, preview the fields and click Send Email. (To know more about Format, click here.)

image
Preview & Send In-app view

  1. Your customer now receives an email with an "Accept Quote" link.

  2. Clicking on the "Accept Quote" link leads the customer to a Checkout page, subscribing to which creates an invoice for the customer.

Notification Protocol for Extended Quote Expiry Dates

To extend the expiry date of the quote, navigate to the Quote and click on the “Extend Expiry Date” > Select the new expiry date > click Confirm.

Note

Automatic notifications are not triggered when extending a quote's expiry date; therefore, it is required to manually attach a note to the quote documenting the new expiry date and send an email notification to customers using the “Send Email” option. It is recommended that this manual process be completed within 24 hours of the extension to ensure optimal customer awareness and engagement.

Was this article helpful?