What are the User Access Control limitations for Entities?
Problem Statement
You want to understand User Access Control limitations for entities, including the difference between entity admin and site admin, and business entity access limitations.
Solution
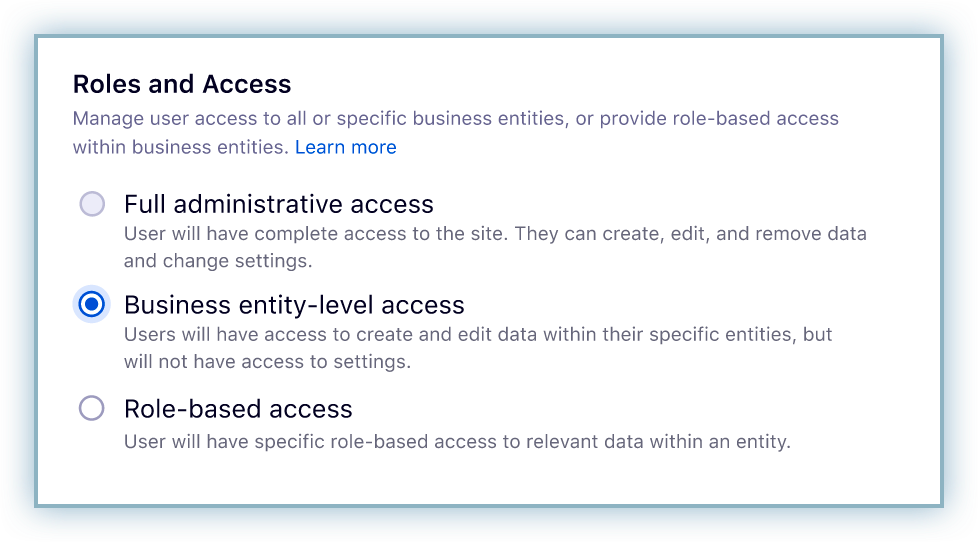
Access levels are categorized by business entity access and define the actions available to users.
| Category | Select Entities | Assign Access |
|---|---|---|
| Business Entity | All Business Entities | Full Access: Users have complete access to the site. They can create, edit, and remove data and change settings. |
Business Entity level Access: Users can create and edit data in specific entities and manage team members, but cannot access settings. | ||
Role Based Access: Access is assigned based on roles configured on your site. | ||
| Business Entity | Specific Business Entities | Business Entity level Access: Users can create and edit data in specific entities and manage team members, but cannot access settings. |
Role Based Access: Access is assigned based on roles configured on your site. |
When inviting users, a user can assign only access levels equal to or lower than their own.
Configuration Steps
Site Admin User
A Site admin can invite users with the same or lower access. Example: Site Admin providing Entity Admin access.
Step 1: Log into your Chargebee site and ensure Site view is selected from the switch icon.
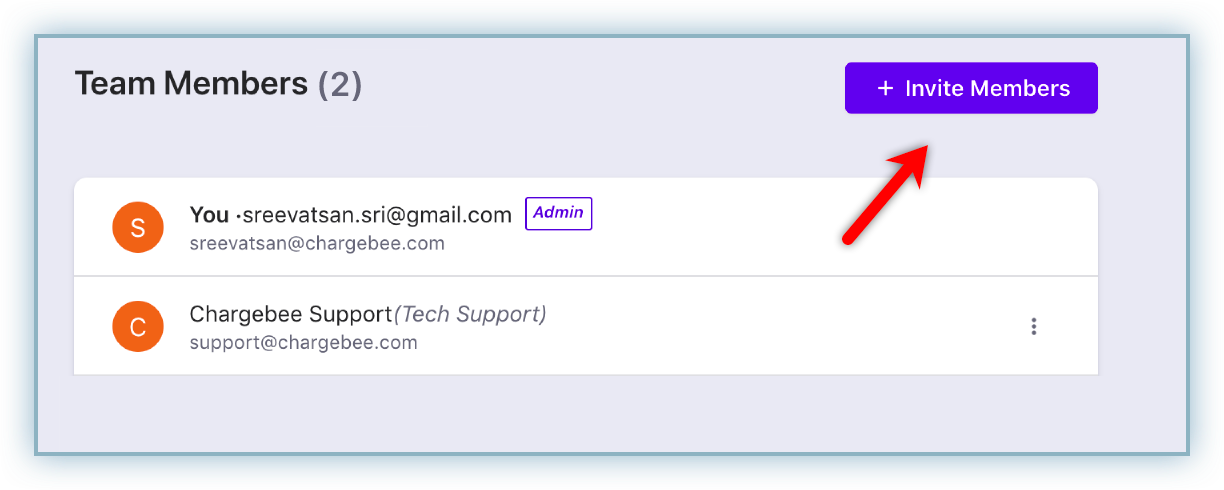
Step 2: Navigate to Settings > Team Members.
Step 3: Click Invite Members to assign access levels and send email invites.

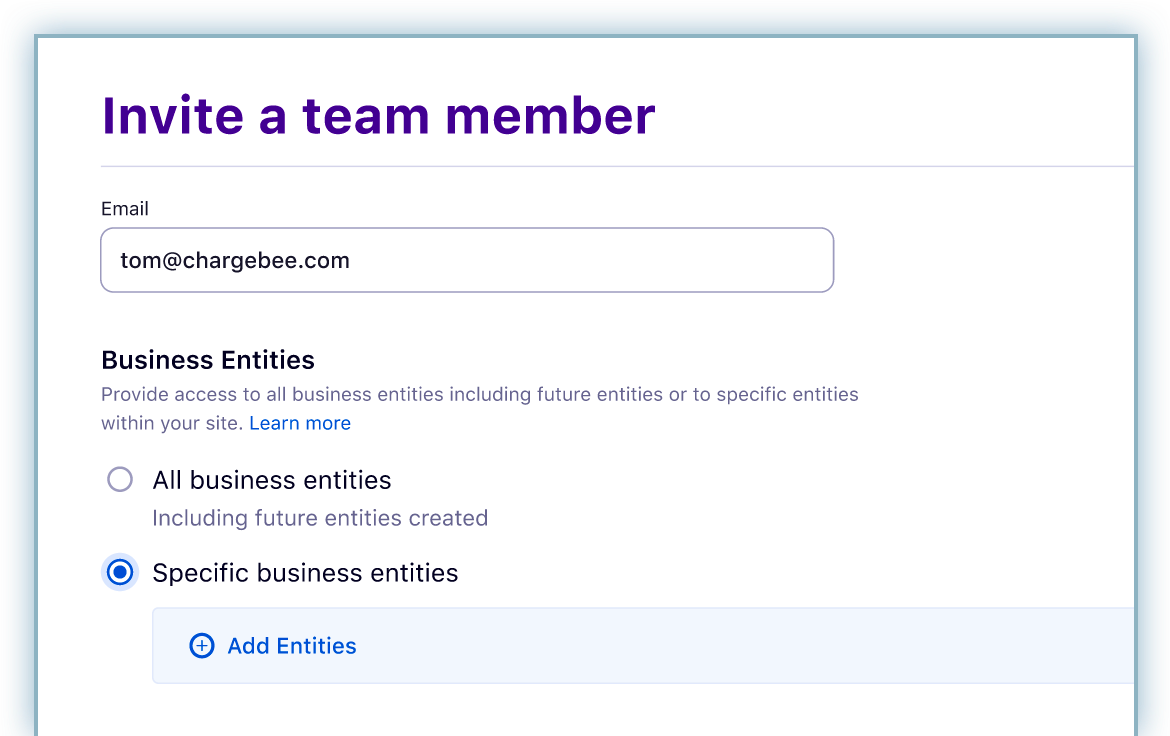
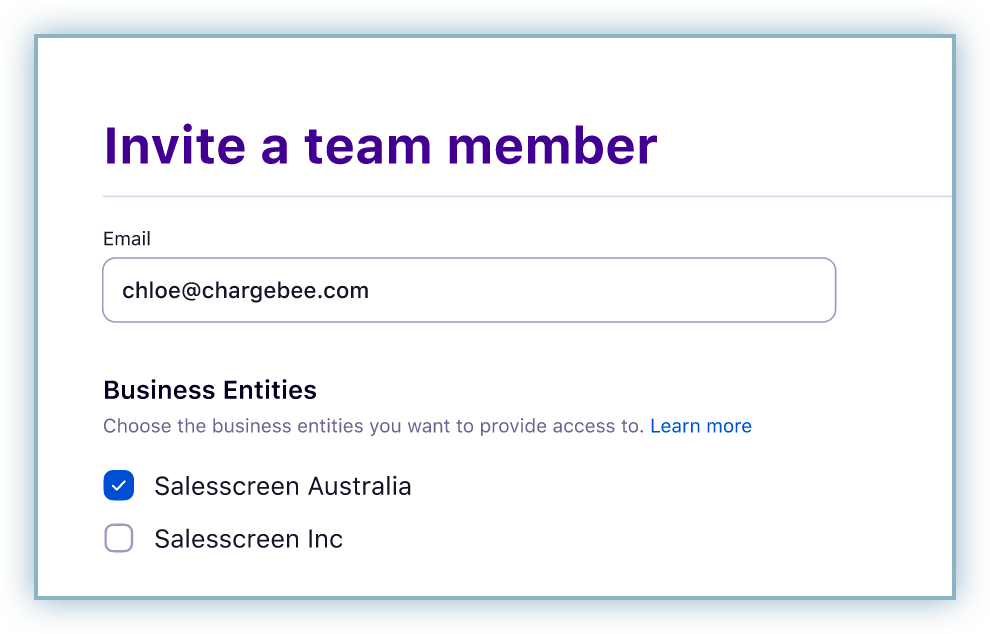
Step 4: Enter the invitee's email and select the applicable radio button. If you select Specific business entities, click Add Entities.
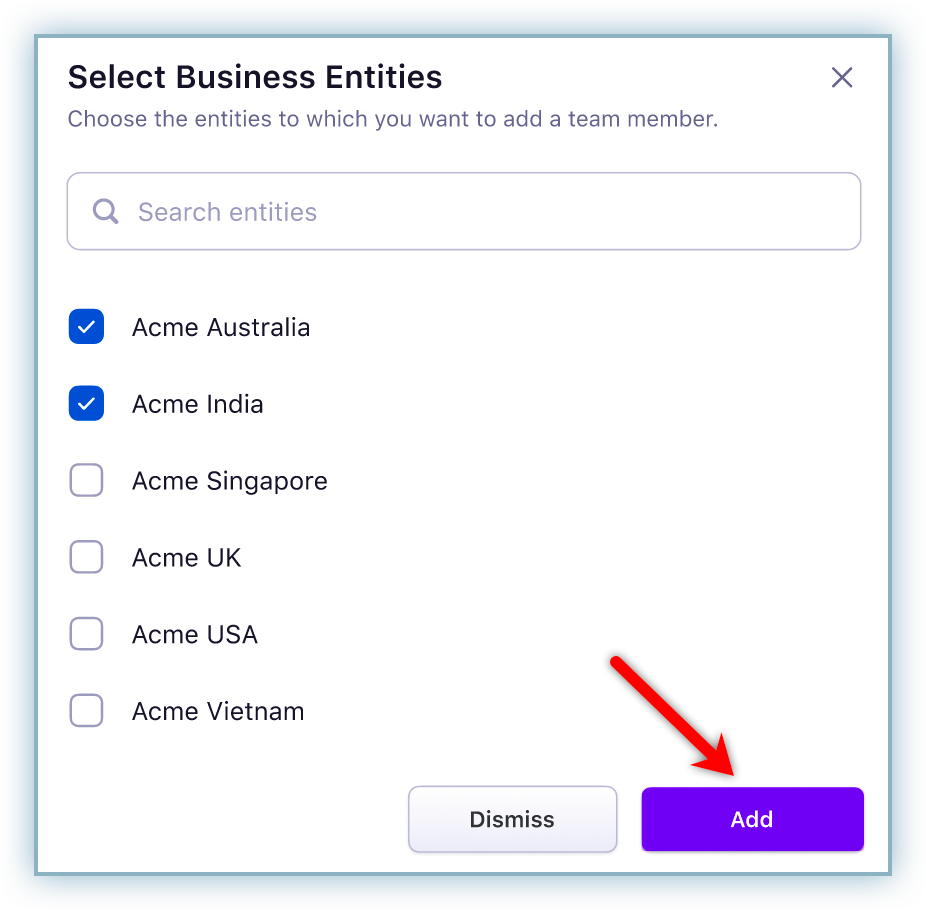
Step 5: Select the applicable entities and click Add.
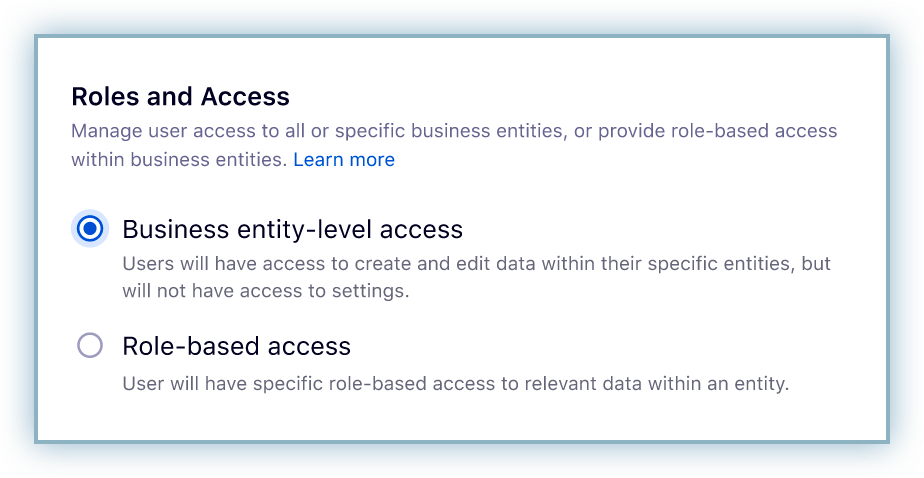
Step 6: Select the applicable radio button to assign Roles and Access.
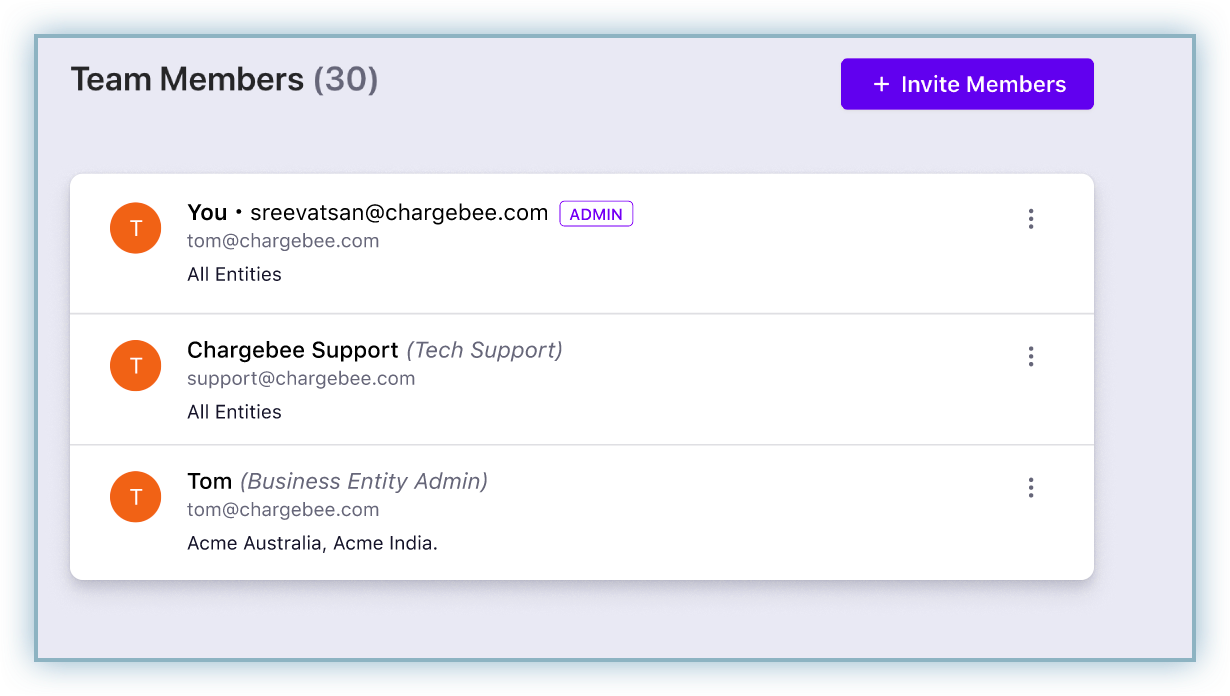
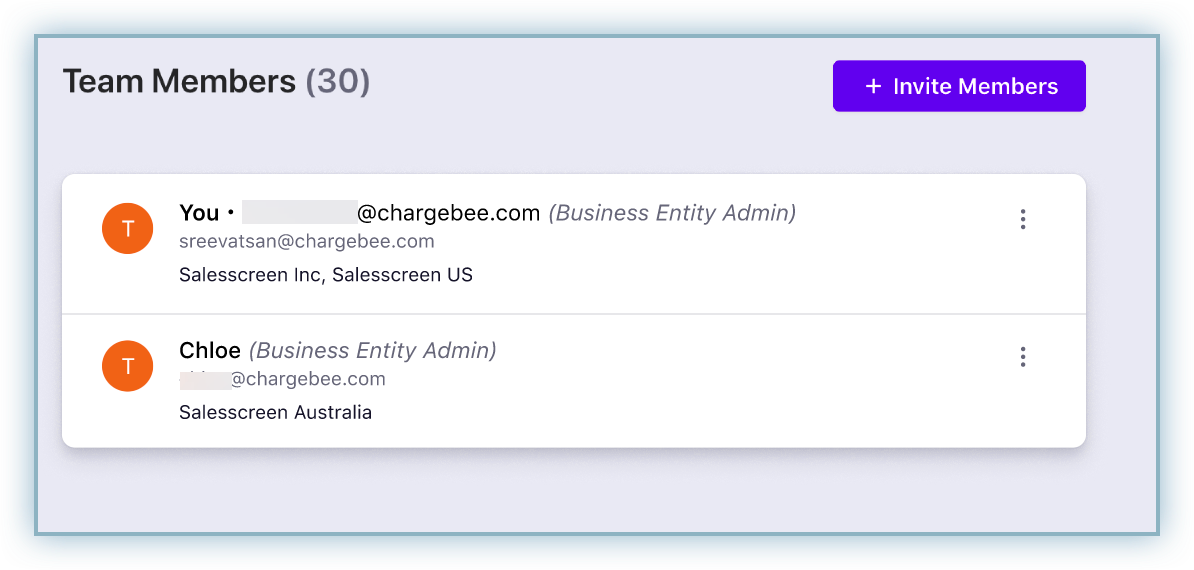
Step 7: Click Create to send the invite. Review the access view page that lists current users and their access levels.
Entity Admin User
An Entity Admin can invite users with the same or lower access. Example: Entity Admin providing Entity Admin access to another user.
Step 1: Log into your Chargebee site and select Entity view from the switch icon.
Step 2: Navigate to Settings > Team Members.
Step 3: Click Invite Members.
Step 4: Enter the invitee's email and select the entities the user will access. (Entities shown are limited to those the entity admin has access to.)
Step 5: Select the applicable radio button to assign Roles and Access.
Step 6: Click Create to send the invite. Review the access view page.
Important Notes
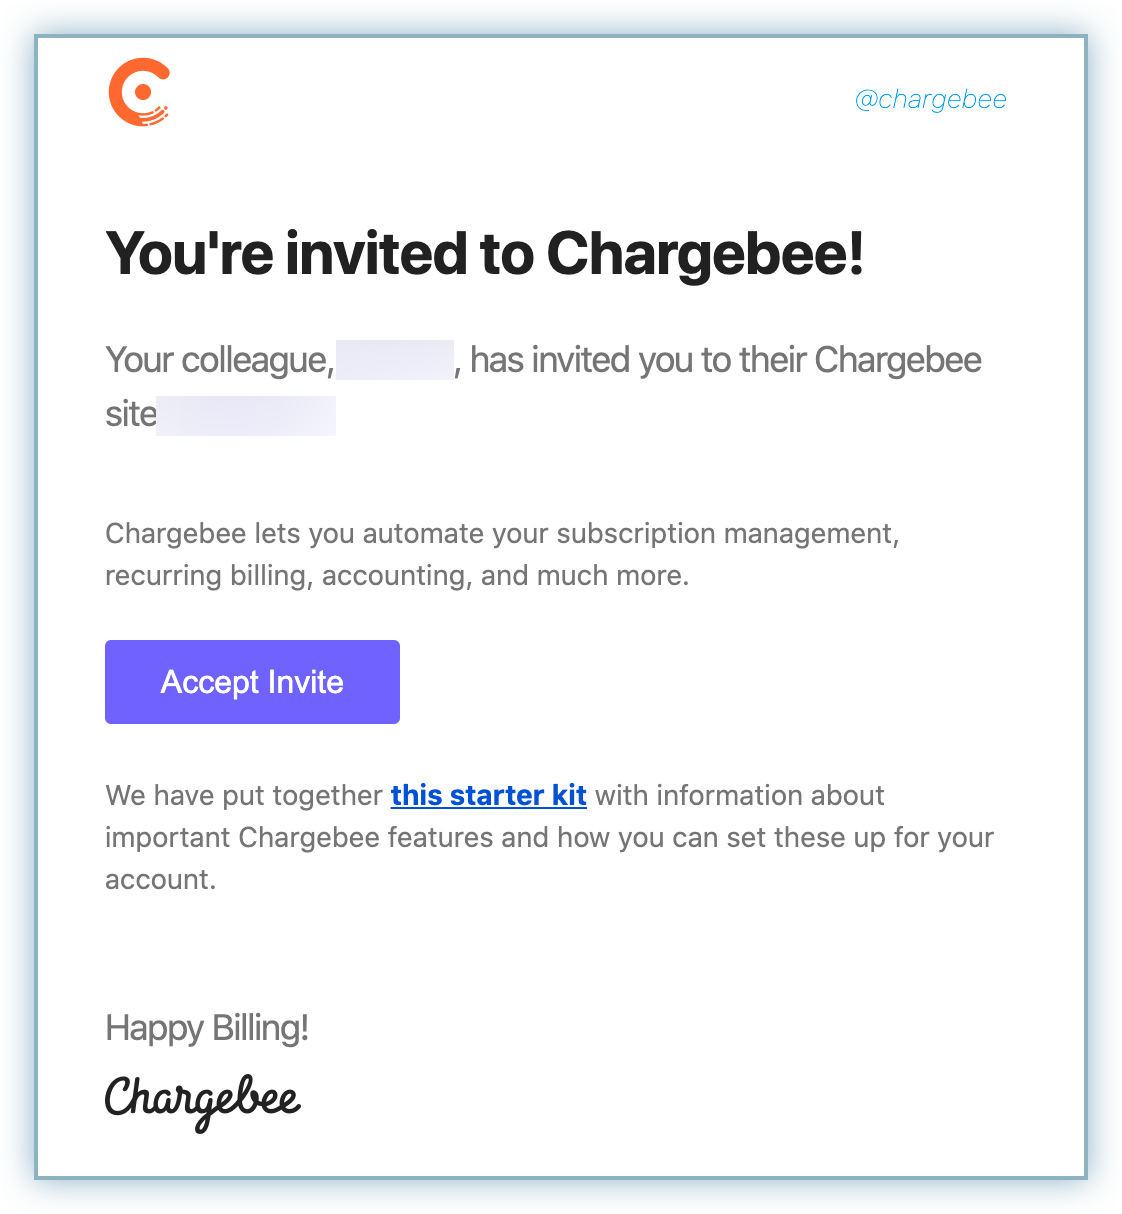
The same steps apply to add multiple team members. Advise invitees to check for the email with Accept Invite to join the Chargebee site.
Was this article helpful?