Configuring QuickBooks
By integrating your QuickBooks Online account with Chargebee, you can automate the synchronization of invoices, customers, and other data from Chargebee to QuickBooks that are crucial for your financial management and analysis.
We recommend that you consult your accounting advisor before configuring the integration. You can test the integration on the Test Site before setting up the integration on the Live Site.
Prerequisites (to be verified in Chargebee)
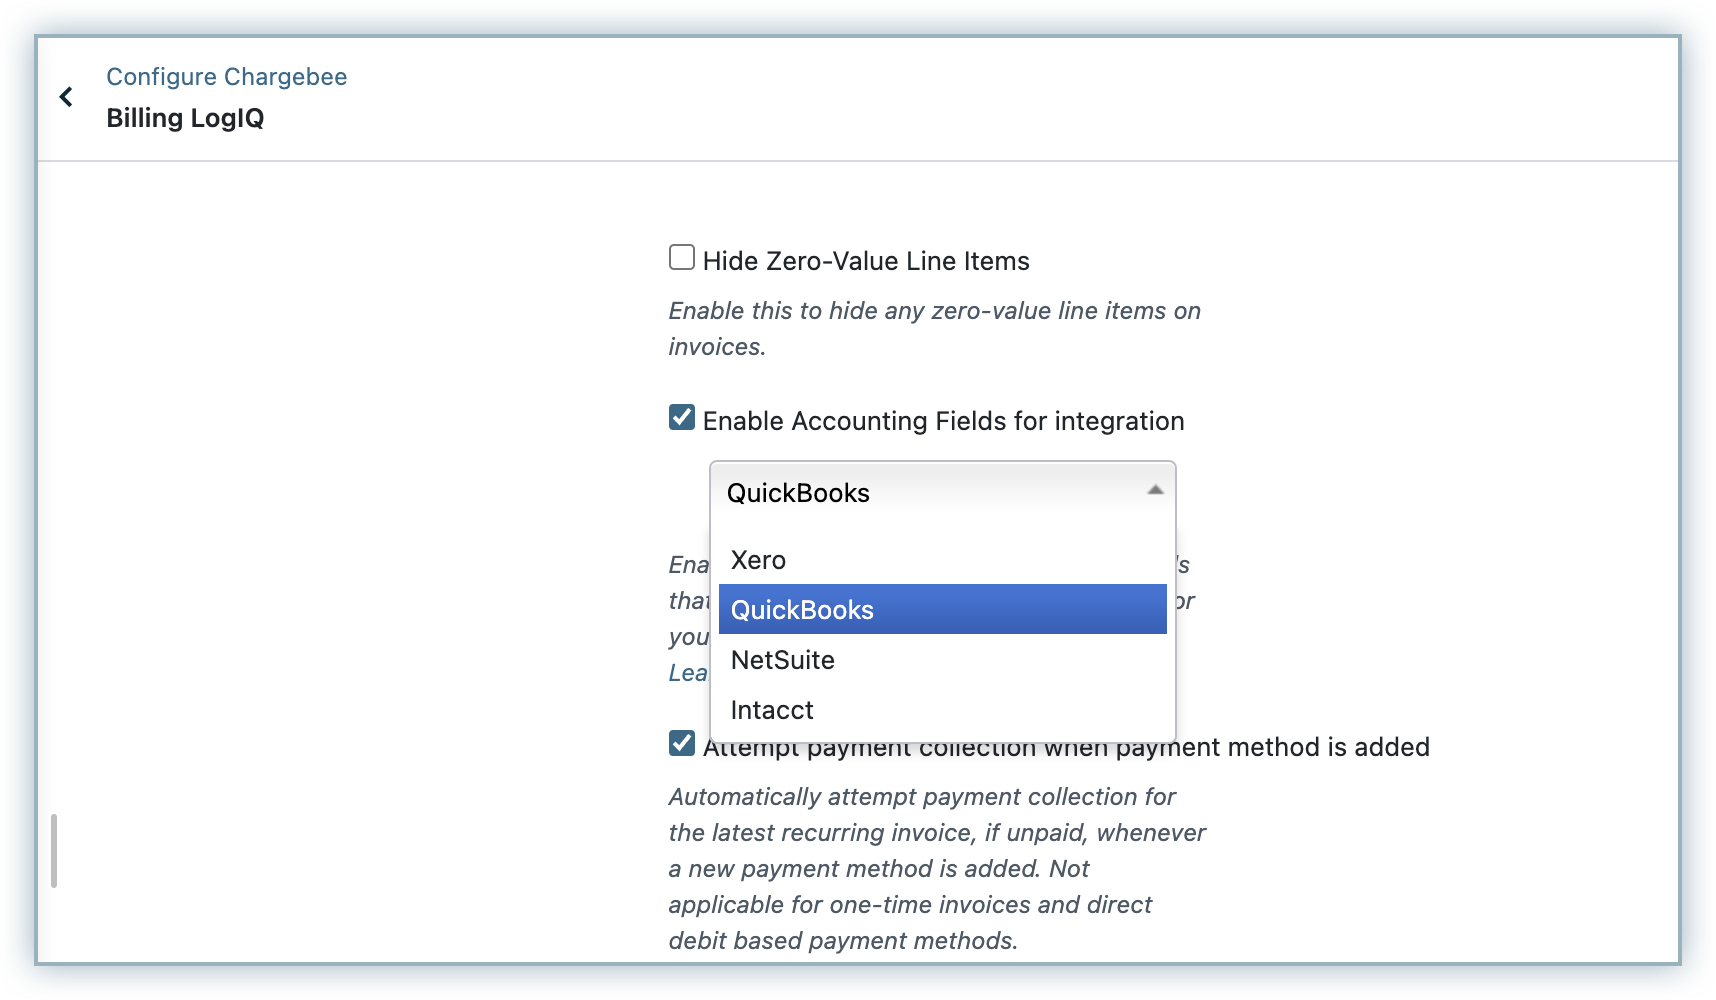
Enable Accounting Fields
Ensure that you have enabled Accounting fields for QuickBooks. You can enable this by navigating to Settings > Configure Chargebee > Billing LogIQ.
Setup your Product Catalog
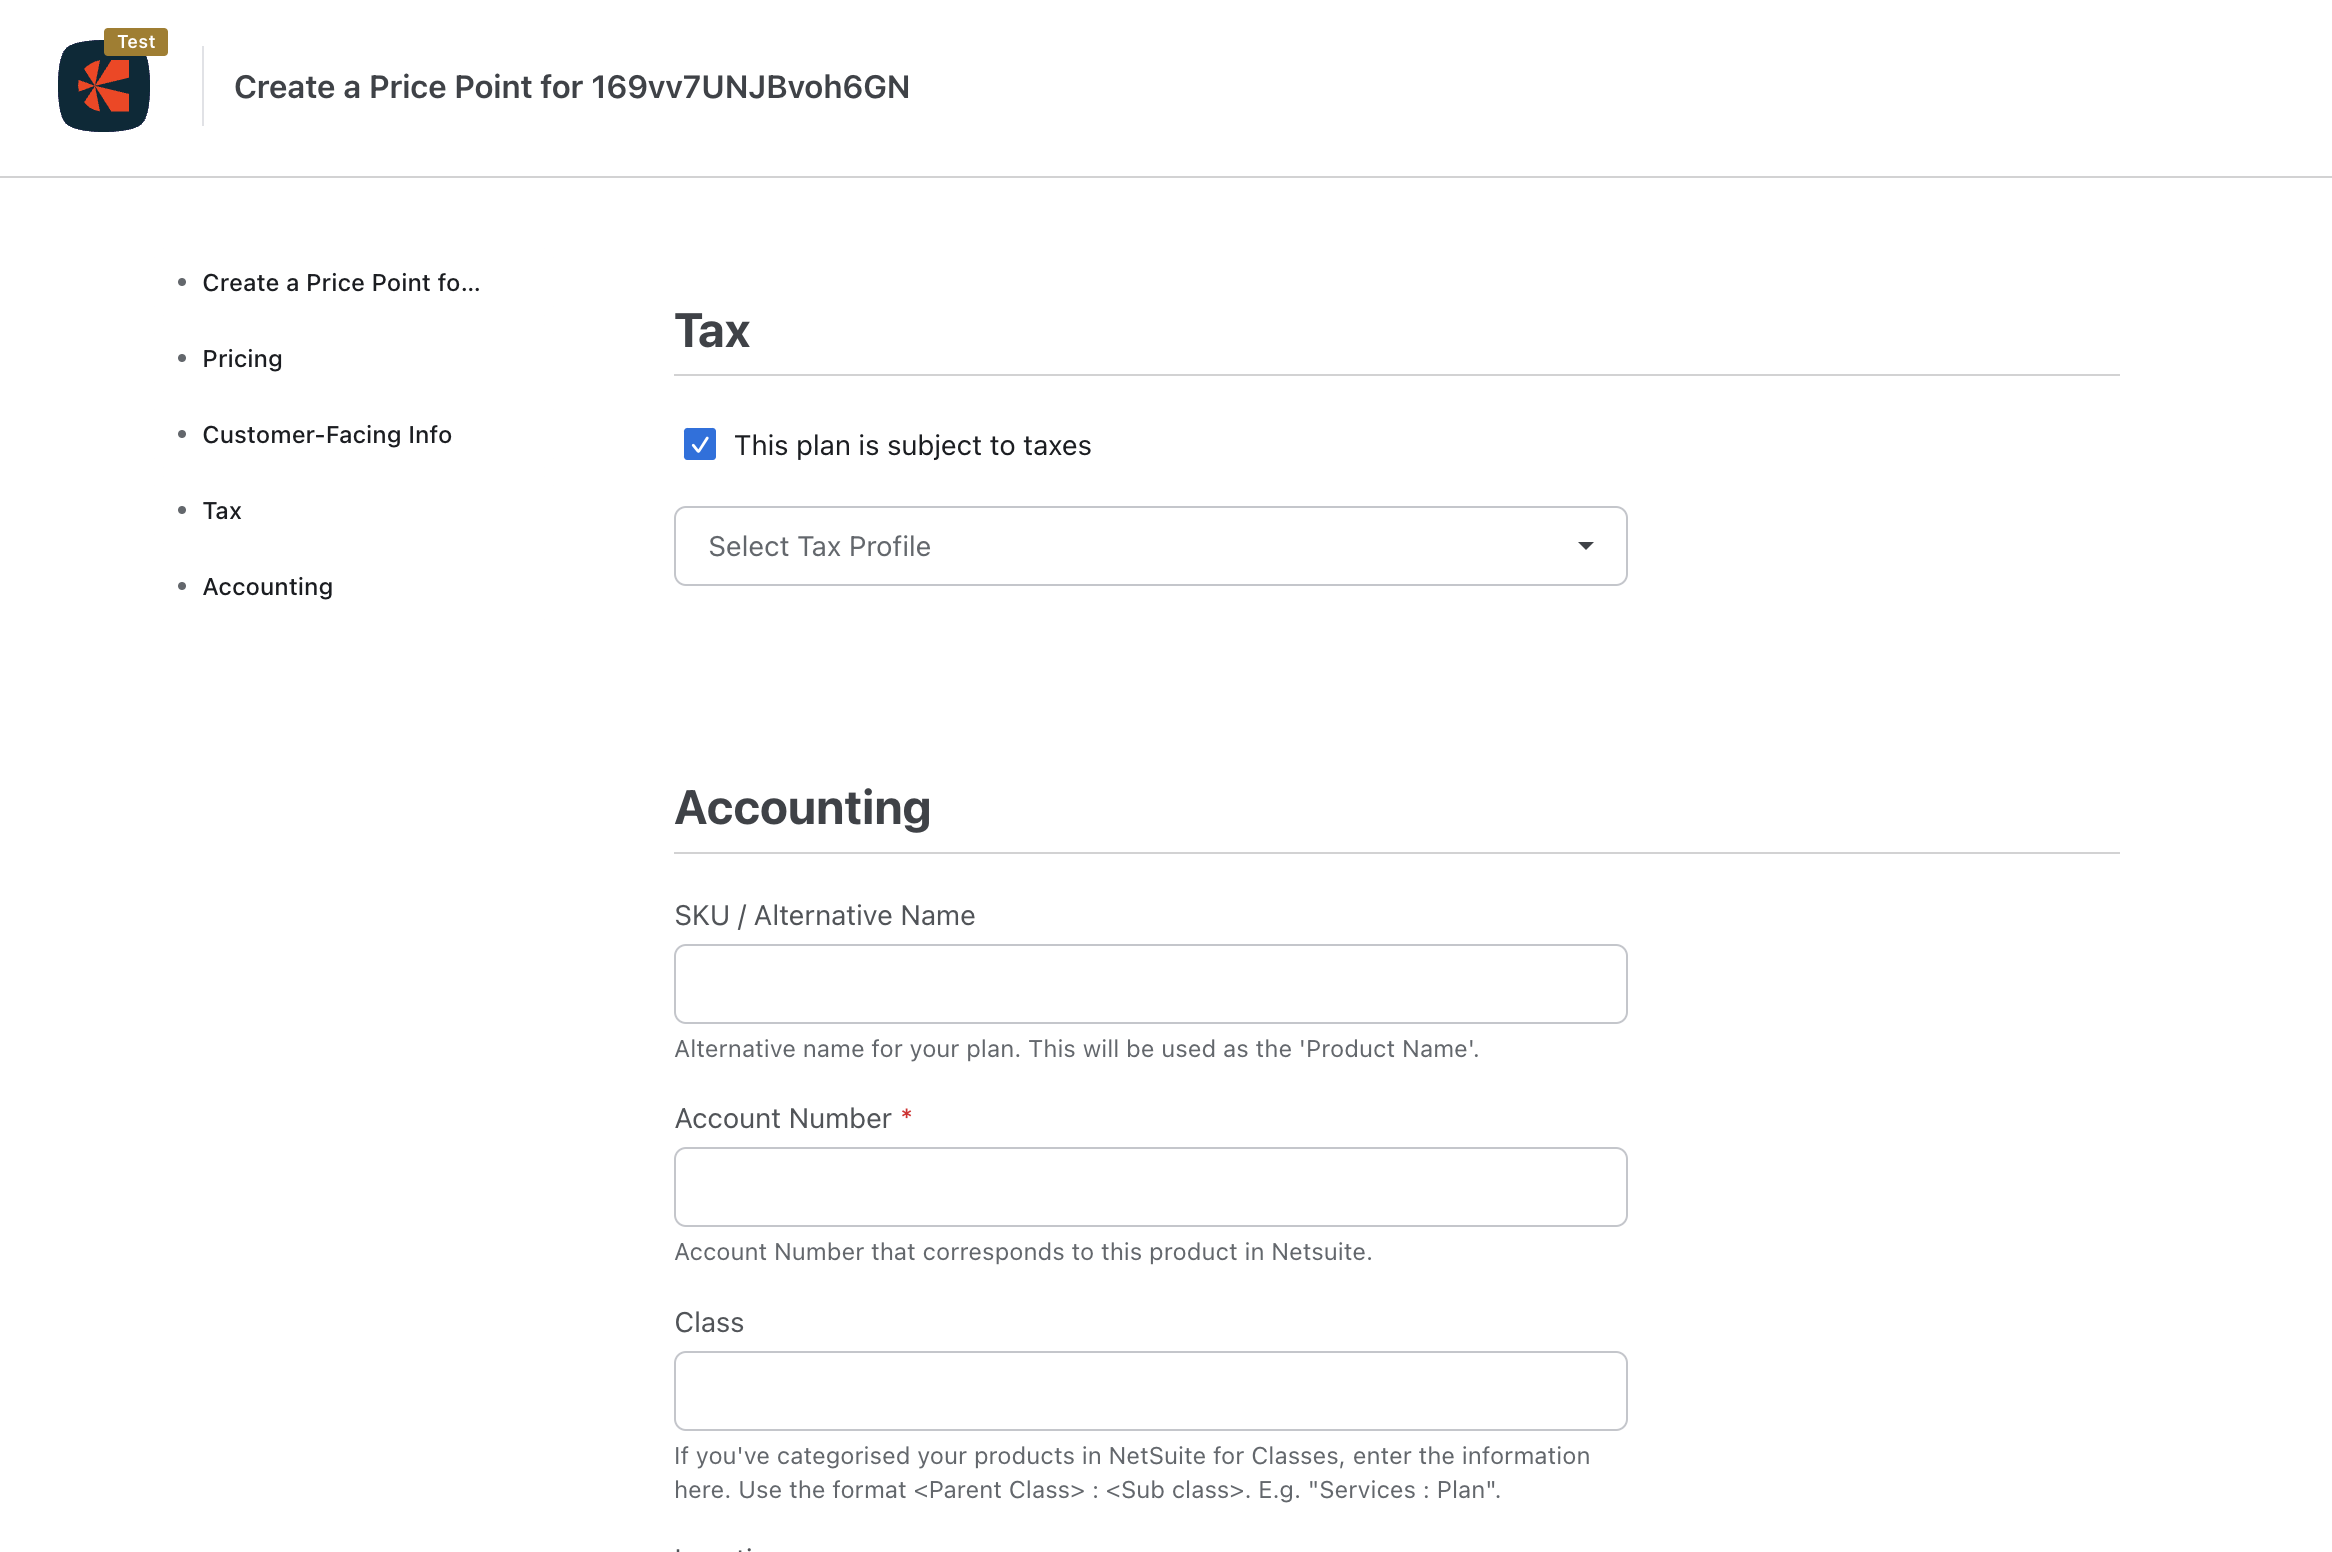
Enter accounting fields for the Plans and Addons in Chargebee:
- SKU - You can enter a Product name/ SKU here and this will be used as Product/ service name in QuickBooks. If a product/ service is already present in QuickBooks, Chargebee maps the product to the existing product in QuickBooks and new product is not created.
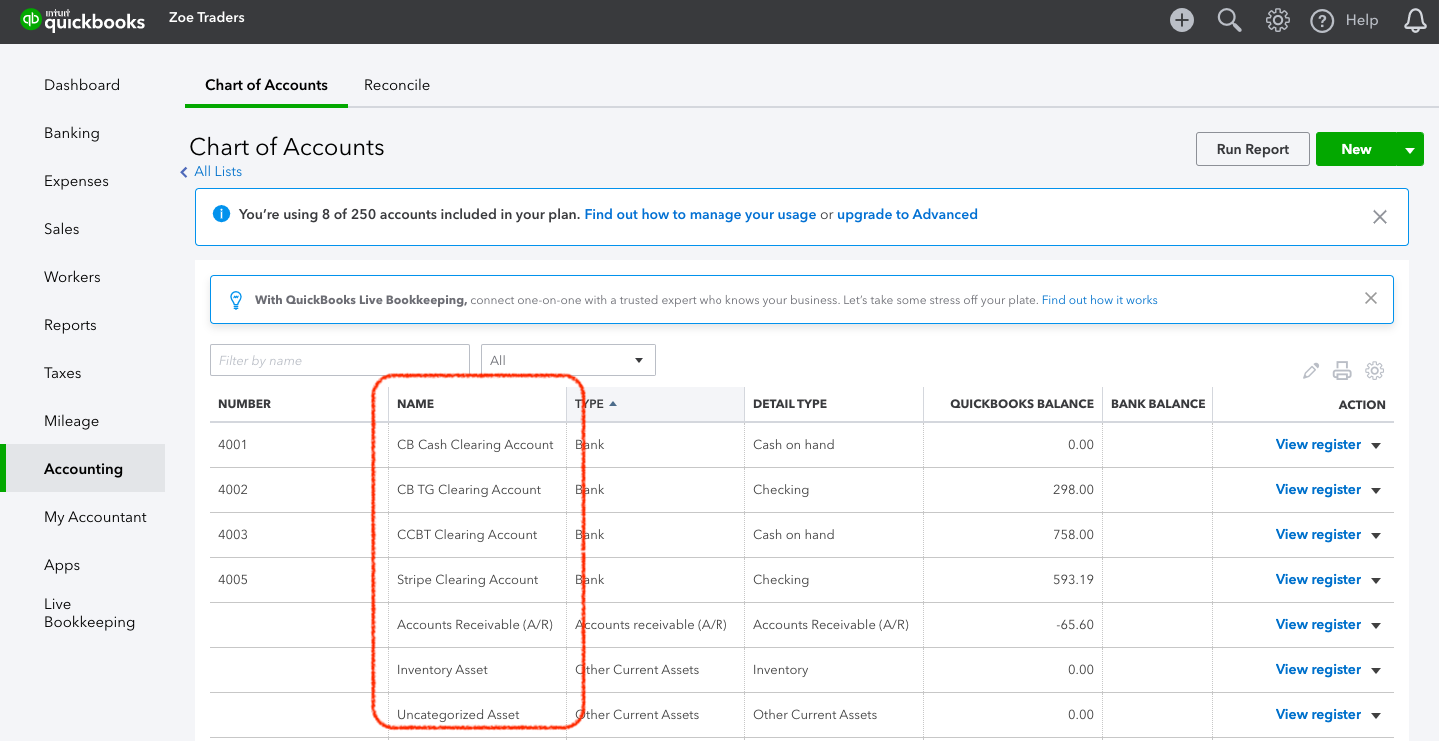
- Account Name - The Sales/Revenue GL Account Name in QuickBooks should be entered here (the field is shown in the screenshot below from QuickBooks Chart of Accounts).
- Class - If Tracking category is required for Plan/Addon price point, the Class can be entered here. Class tracking at customer level also is possible, contact support to set this up.
Caution!
- When you add new plan/add-on price points in Chargebee anytime after the integration is set up, do not forget to enter the SKU and GL Account Name fields.
- If you make any changes to the GL Account Name in your QuickBooks account anytime after the integration is set up, you need to update them in Chargebee as well. Failing to do so could lead to a sync error.
Check Currency Settings
Verify the following rules:
- The base currency in Chargebee and QuickBooks should be the same.
- If you have multiple currencies enabled in Chargebee, then you should ensure these currencies are enabled in QuickBooks as well.
You can view the currencies in Chargebee by navigating to Settings > Configure Chargebee > Currencies.
Set up Organization Address
Ensure that you have provided your organization address in the Chargebee site. You can do this by navigating to Settings > Configure Chargebee > Business Profile.
Prerequisites (to be verified in QuickBooks)
Disable "Automatically Apply Credits" option in QuickBooks
Navigate to Settings > Company Settings > Advanced > Automation > Automatically Apply Credits in QuickBooks and disable the "Automatically Apply Credits" option. This ensures that QuickBooks does not apply credits automatically and waits for details to be synced from Chargebee.
Enable "Custom Transaction Numbers"
Navigate to Settings > Company Settings > Sales > Sales Form Content in QuickBooks and enable the "Custom Transaction Numbers" option to ensure that the invoice number and credit note number are created as they are in Chargebee. Additionally, if you are generating invoices manually in QuickBooks, the invoice number sequence will not be disturbed.
Best Practice
Apart from enabling "Custom Transaction Numbers" in QuickBooks, you can apply invoice/credit note numbering customization settings in Chargebee to add a dynamic prefix. This will help avoid errors on duplicate document numbers during the sync.
Configuration
Step 1: Connect Chargebee to QuickBooks
-
Log in to your Chargebee site.
-
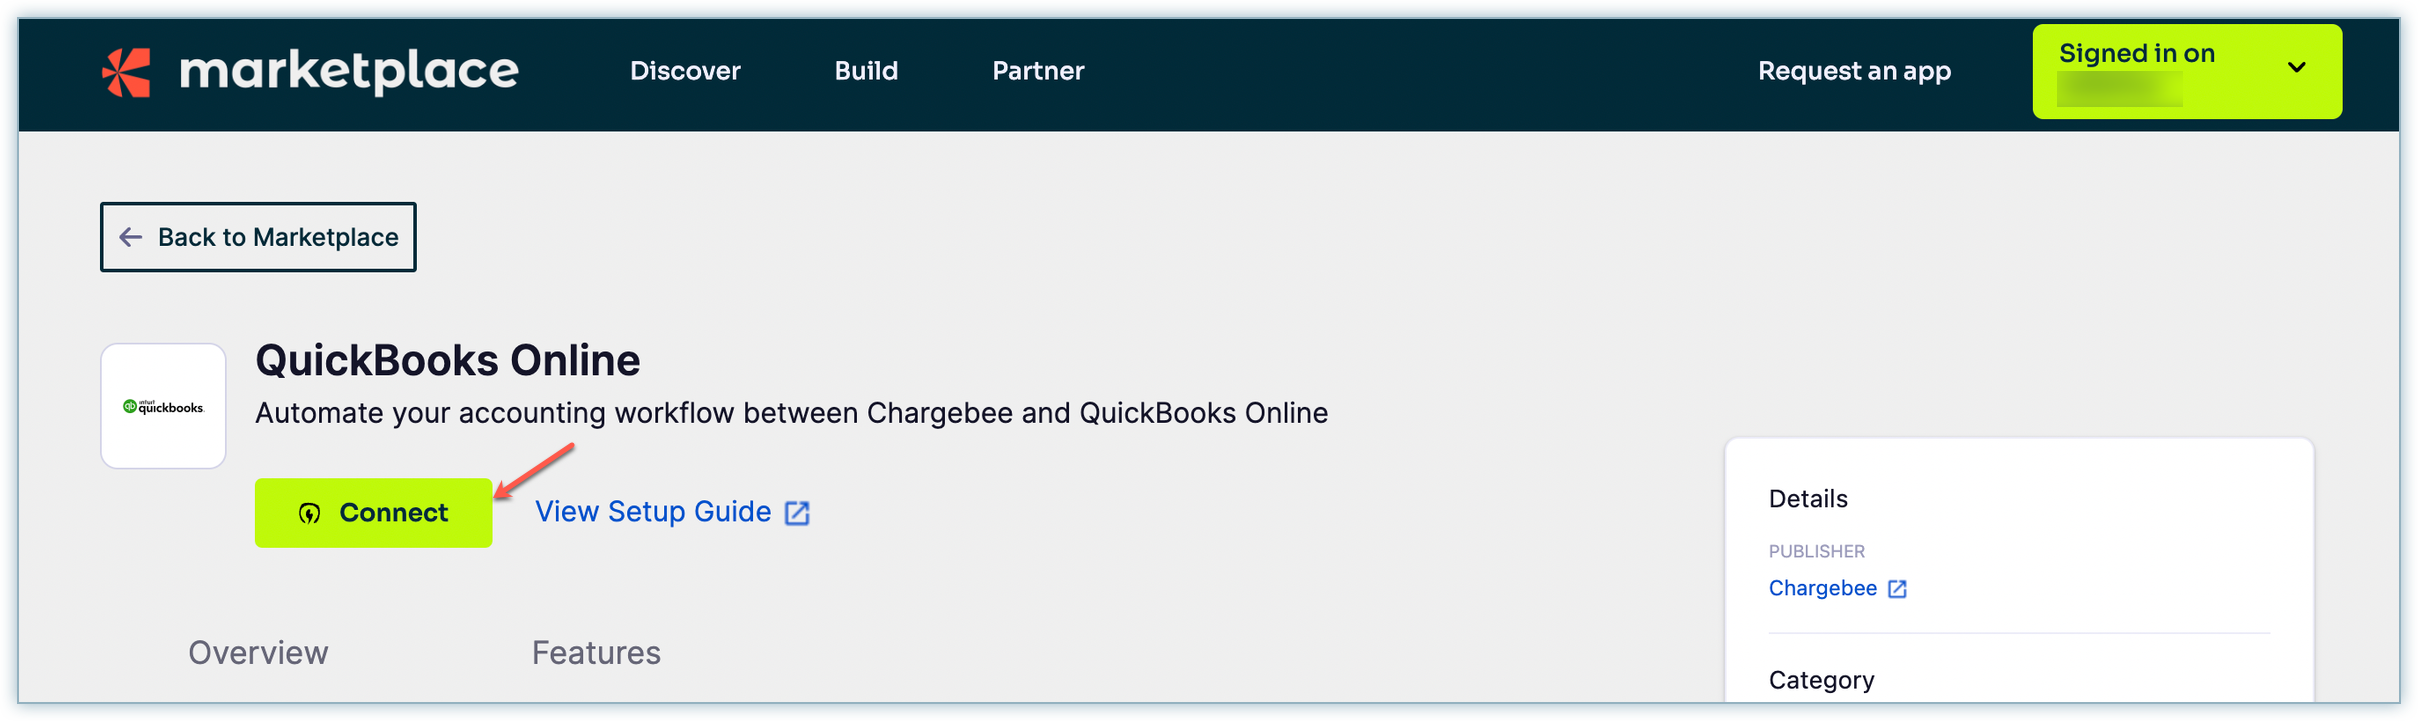
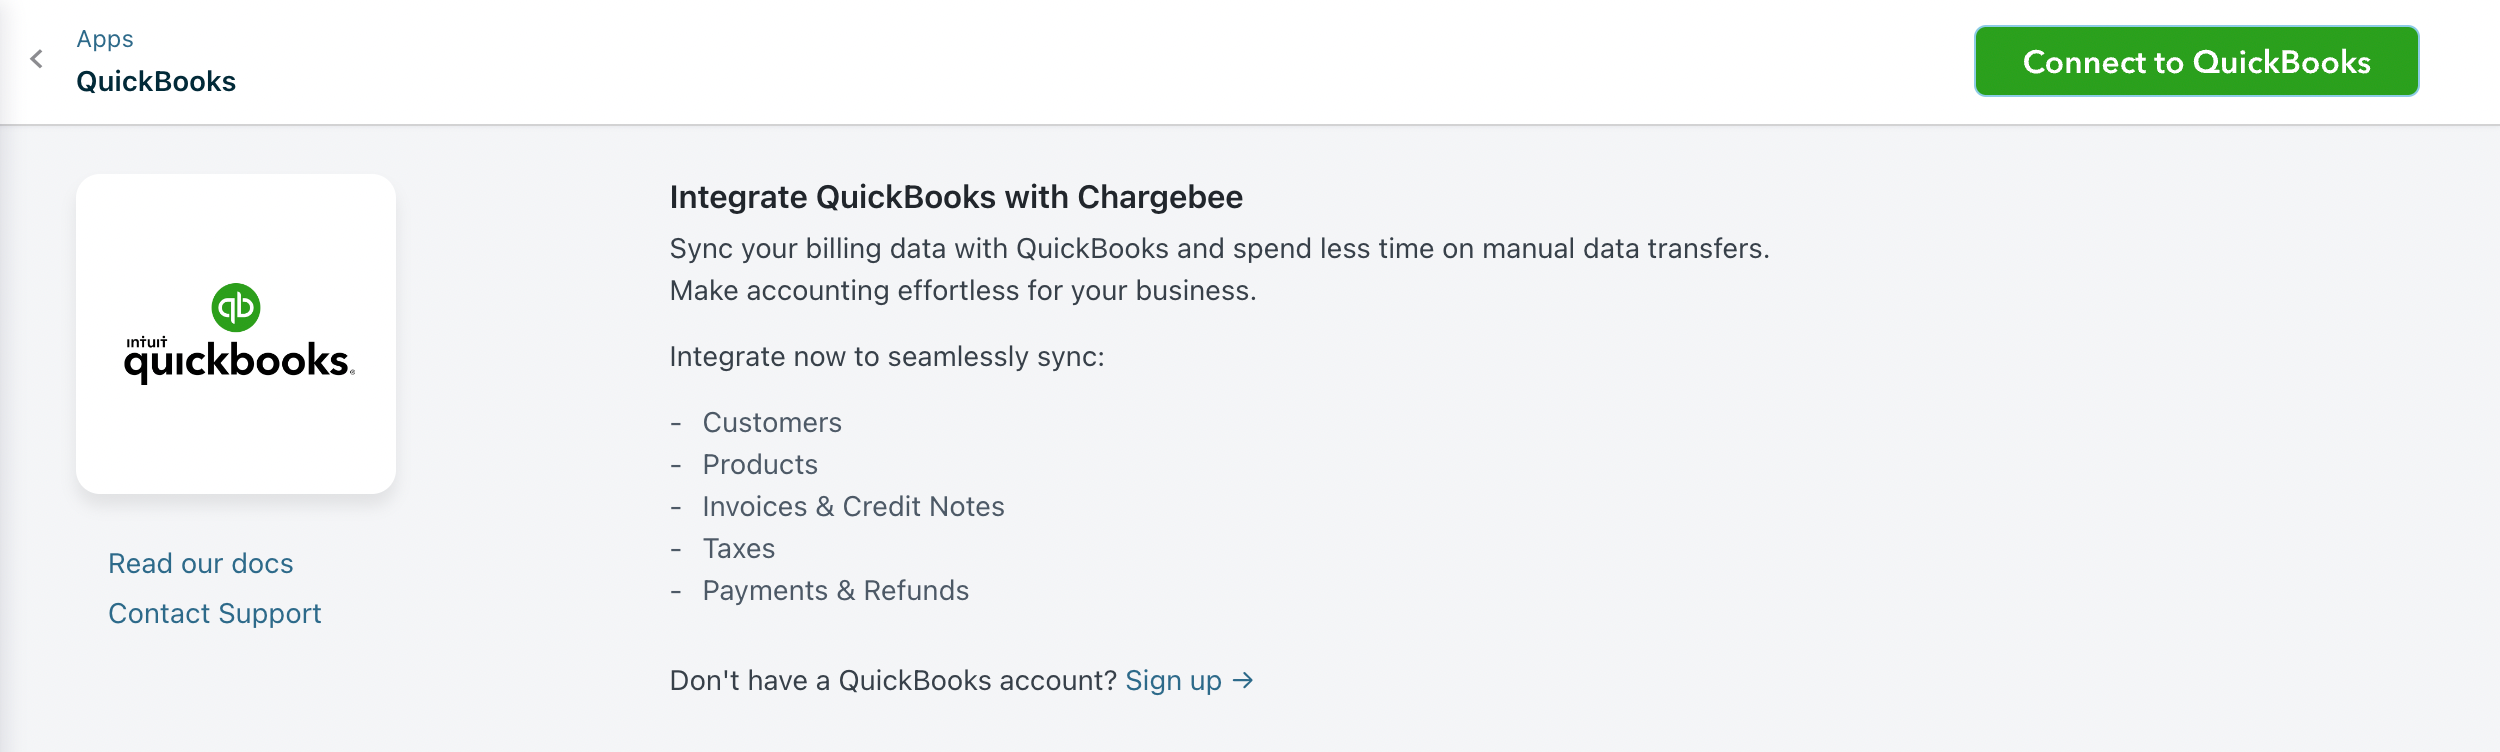
Connect to the QuickBooks application listed on Chargebee's app marketplace by selecting Apps > Marketplace > QuickBooks.
-
Click Connect to get started with the integration.
-
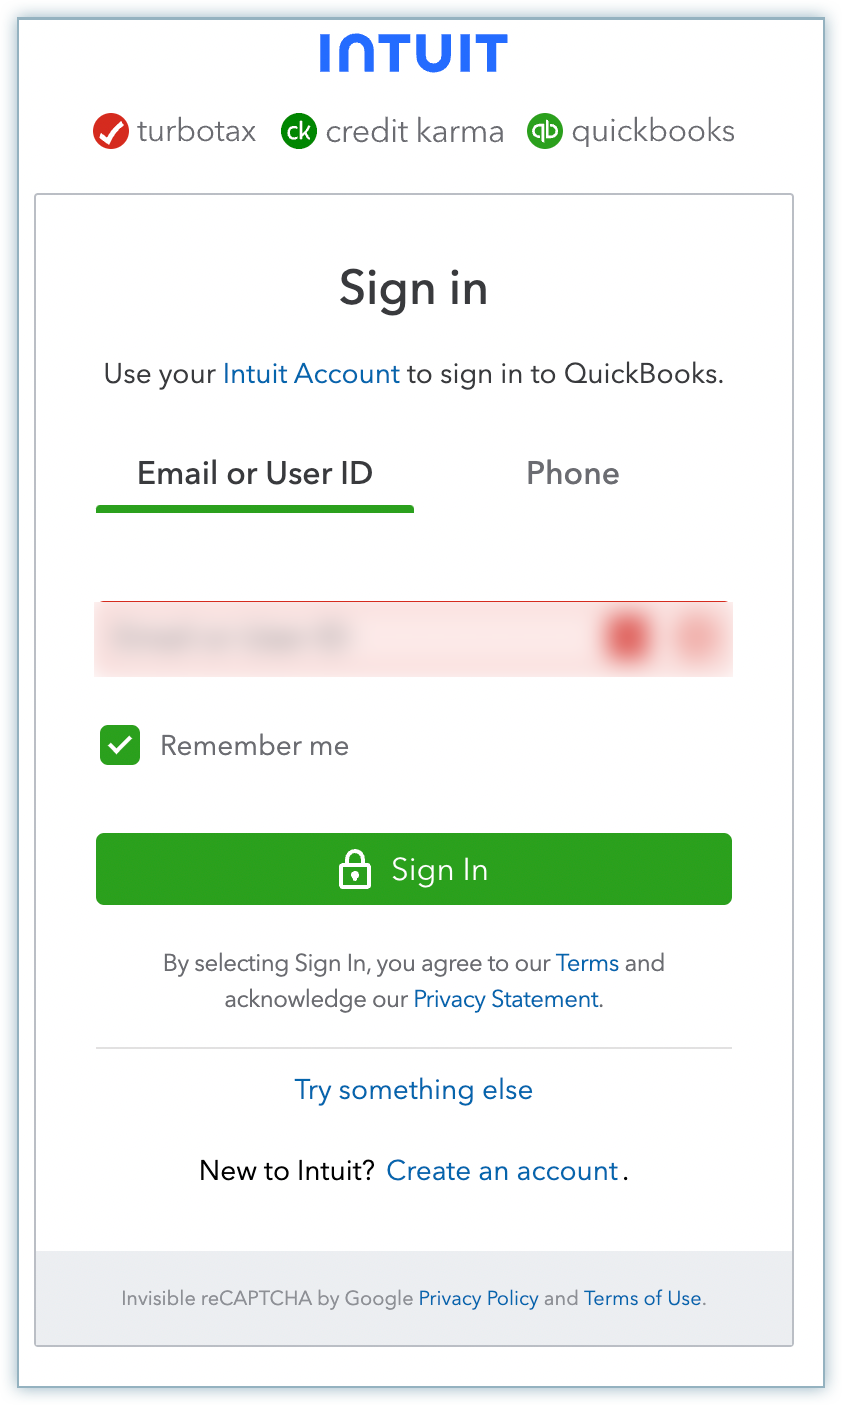
Log in to your QuickBooks account.
-
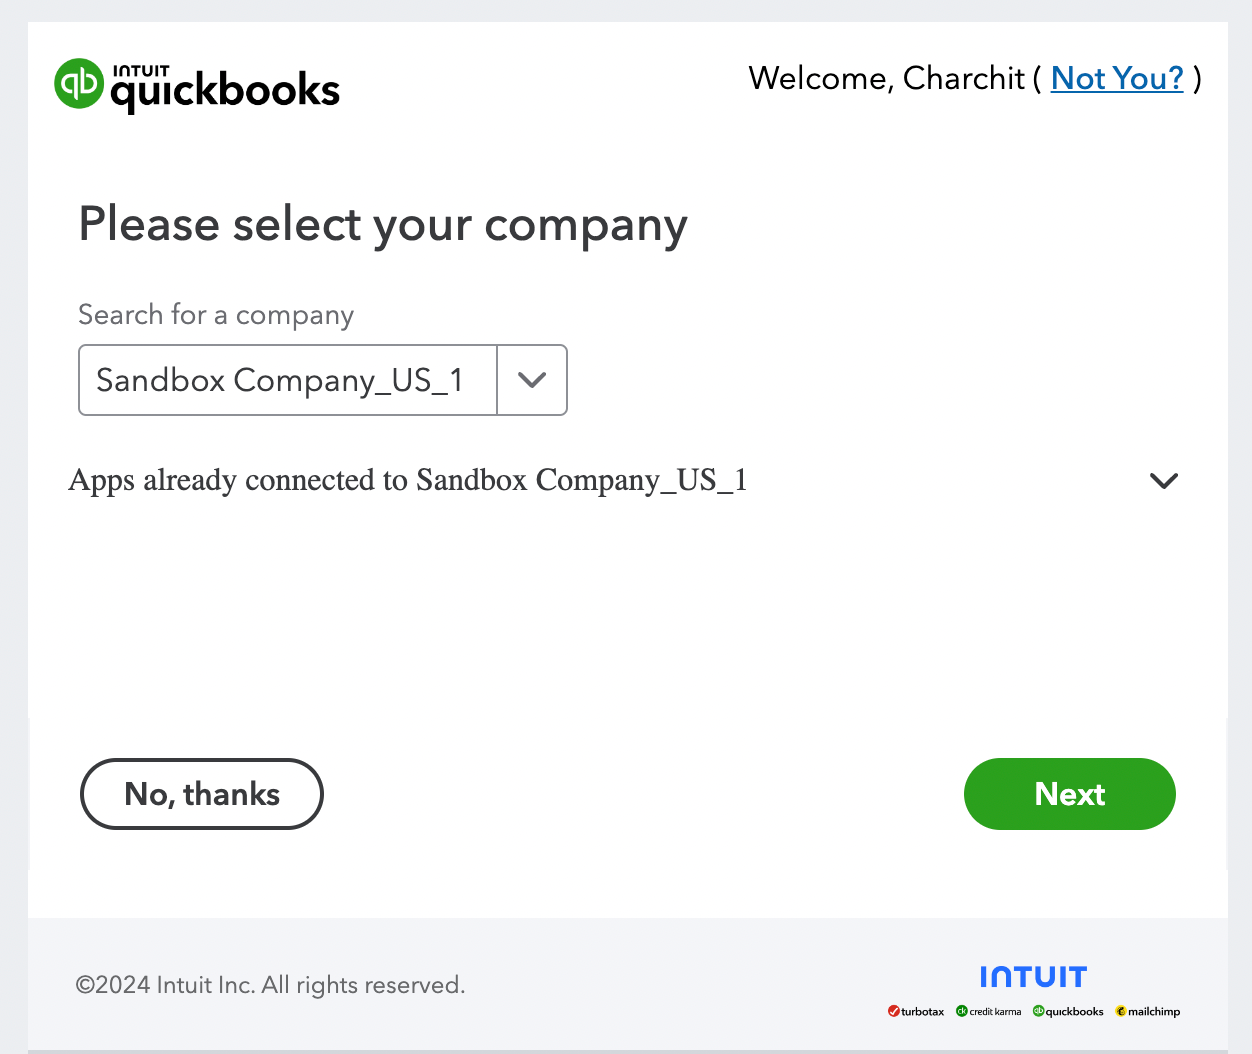
Select your company using the drop-down and provide access to the data.
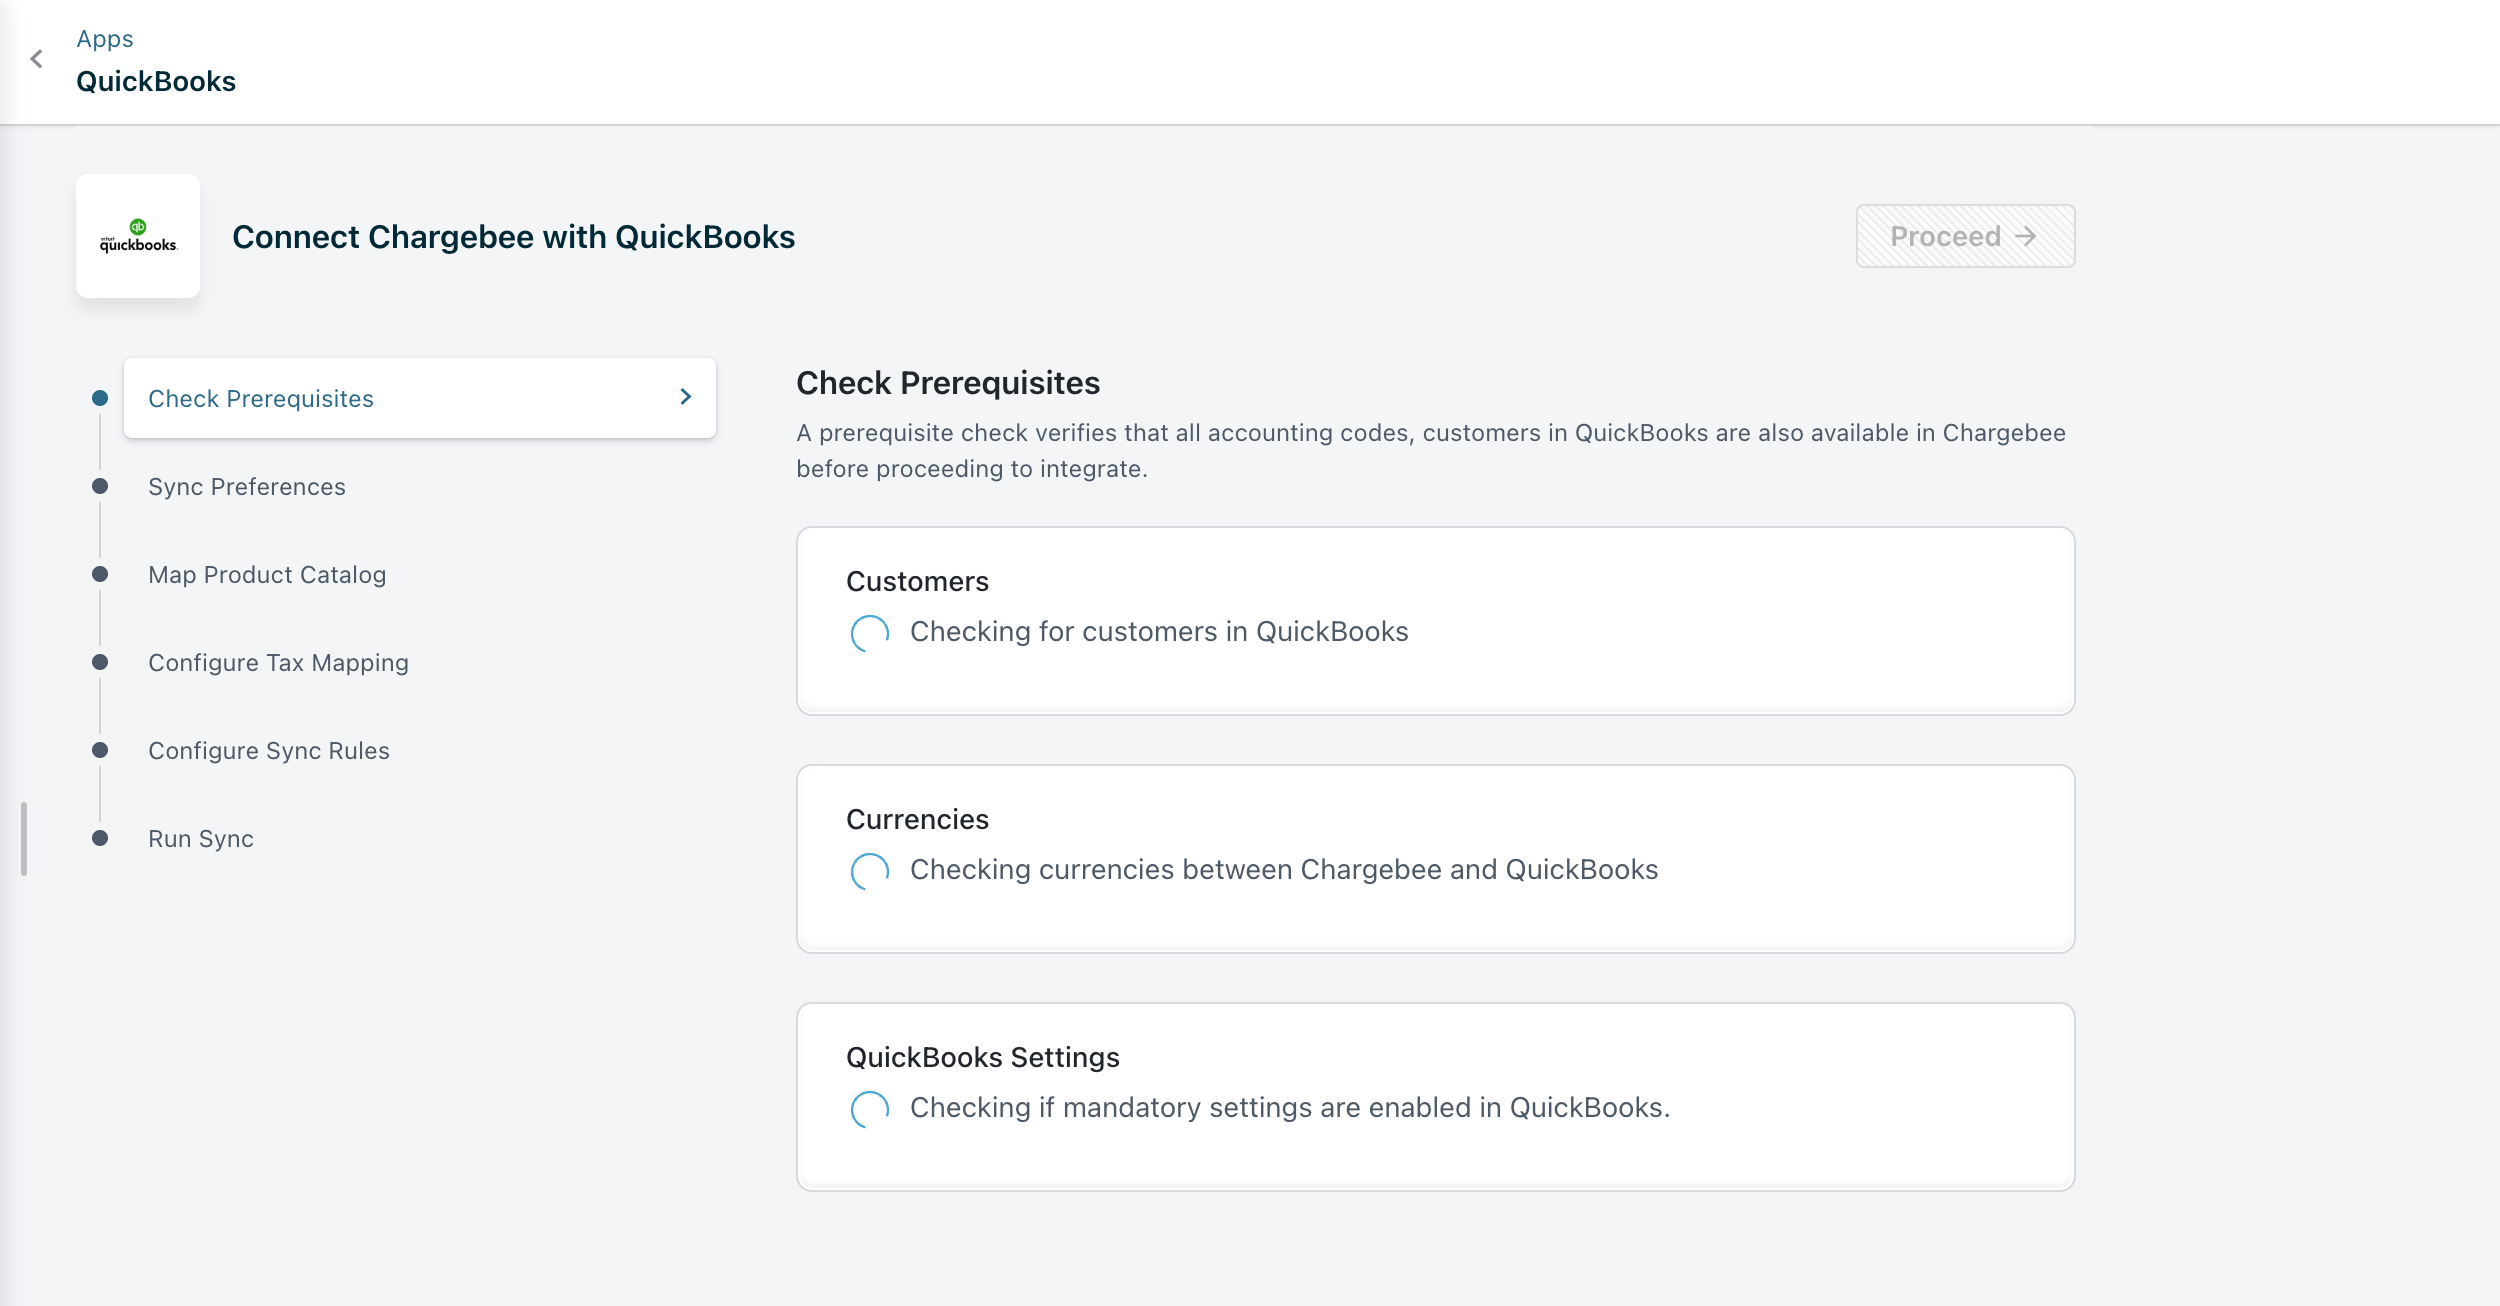
Step 2: Check Prerequisites
Chargebee performs a list of checks in QuickBooks. This prerequisite check verifies whether the accounting codes, customers, and their currencies in QuickBooks are available in Chargebee before proceeding with the integration.
-
Customer duplicate check: If invoices from Chargebee are already available in QuickBooks, customers will be present as well. To avoid duplicates, you must map the customer records between both systems. Once the setup is complete, you can download the list of customers as a CSV file, map the customers, and upload the updated sheet using Record mapping.
-
Currency check: The currencies in Chargebee should also be in QuickBooks. Chargebee does not compare currencies via API. You should manually compare and add the currencies in QuickBooks.
-
Preference Check: Perform this check if Tracking Classes and Custom Transaction Numbers are enabled in QuickBooks. If not, it will guide you through enabling these two settings.
Note
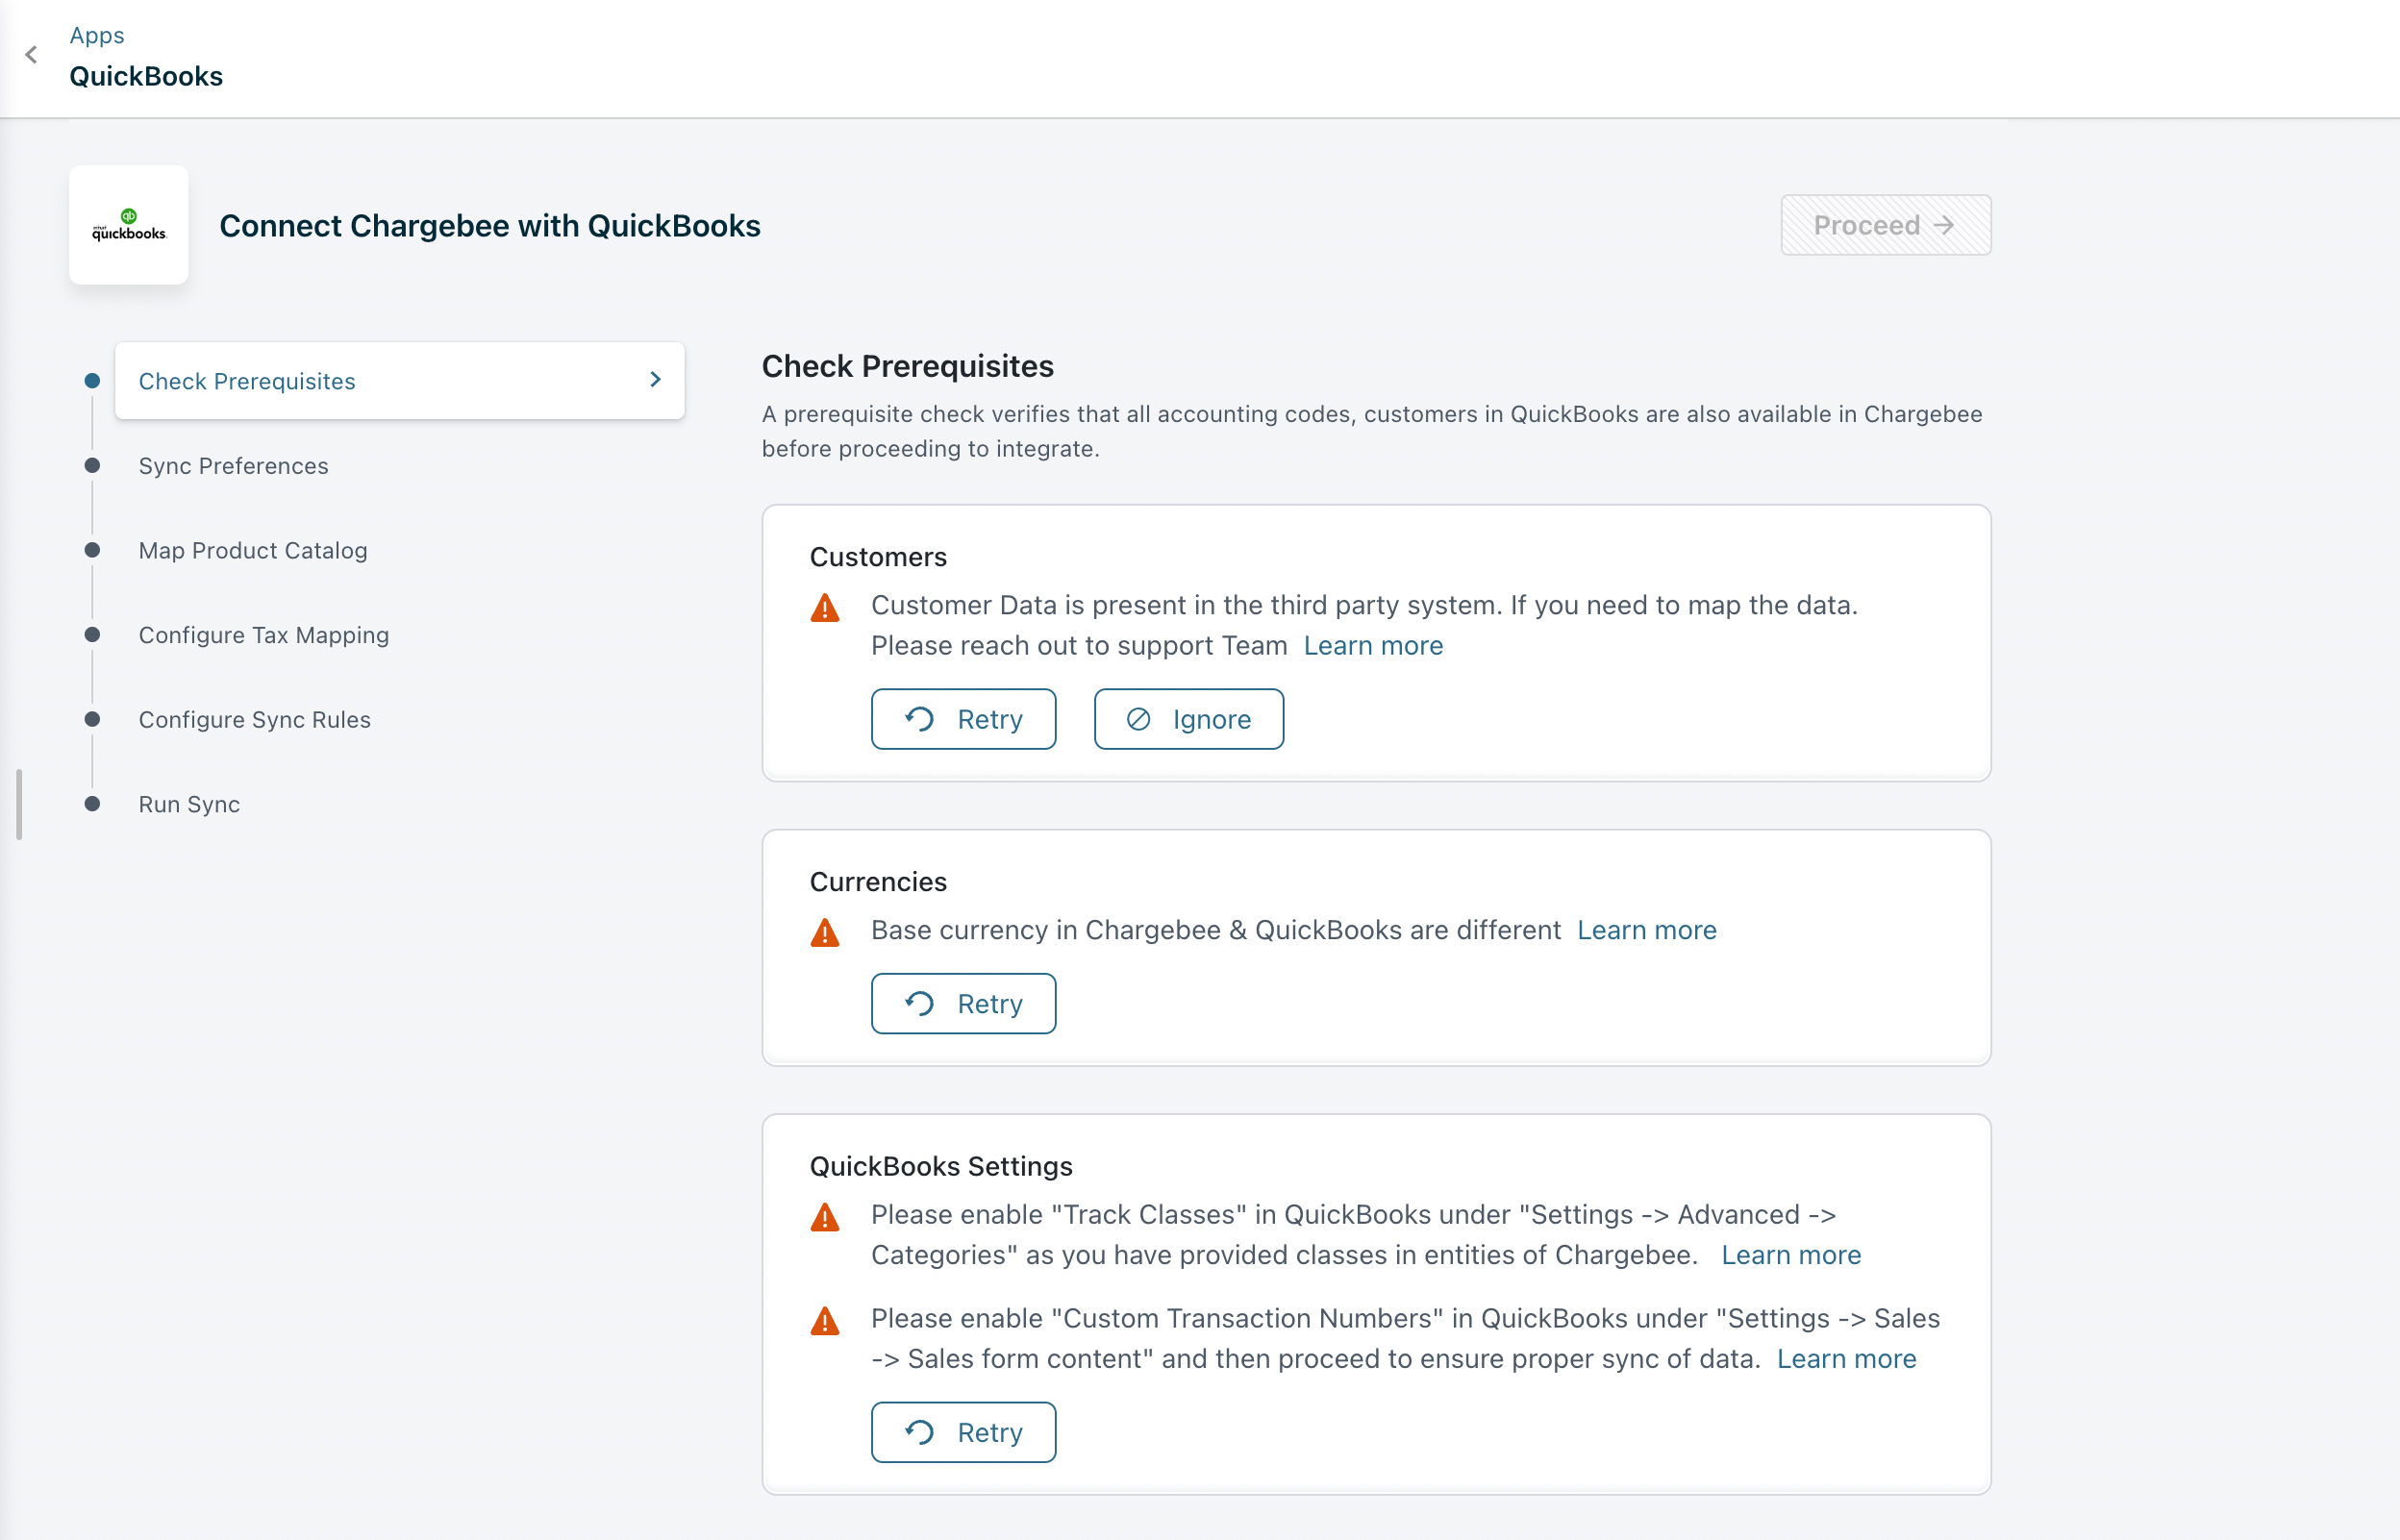
The following error message will appear if customer data already exists in QuickBooks. In such cases, contact Chargebee Support.
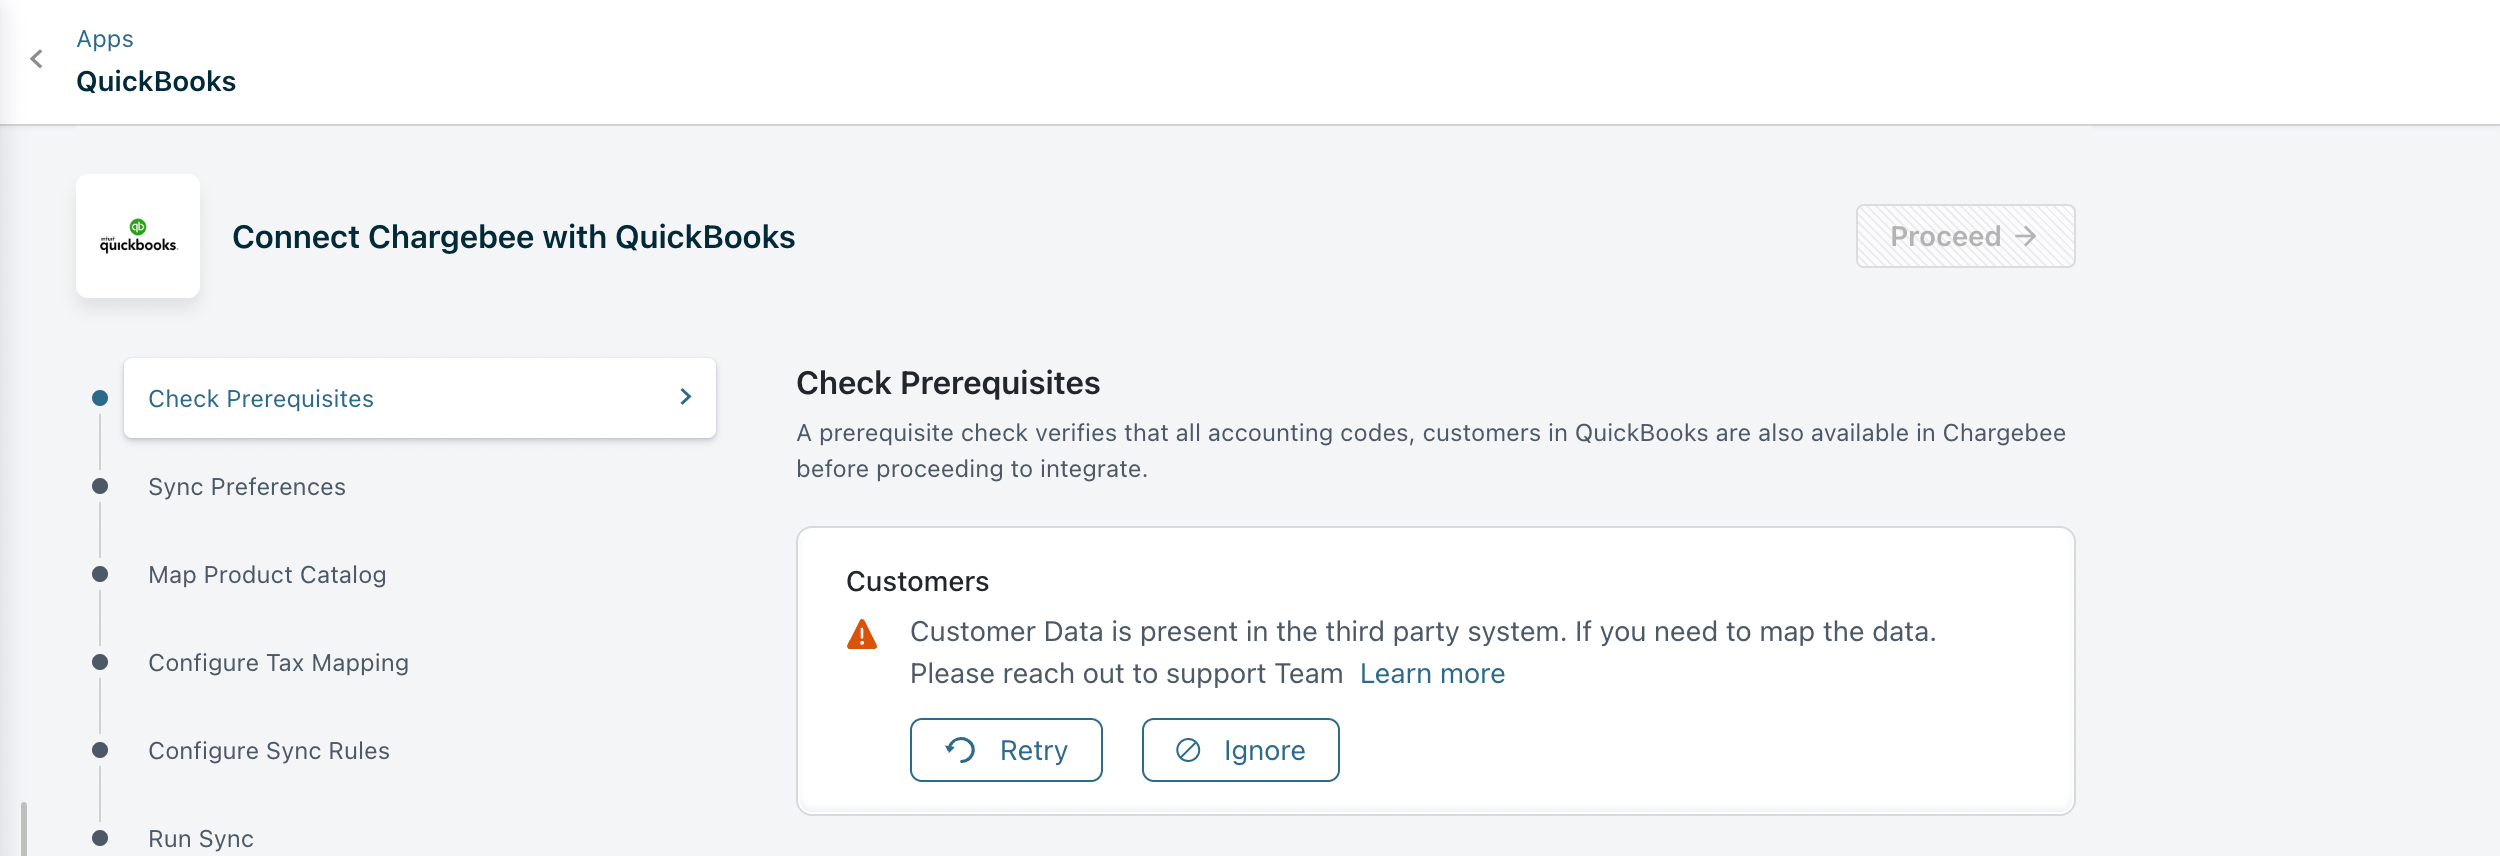
If there are any configuration issues in the currencies setup or preferences, they will be displayed as shown below.
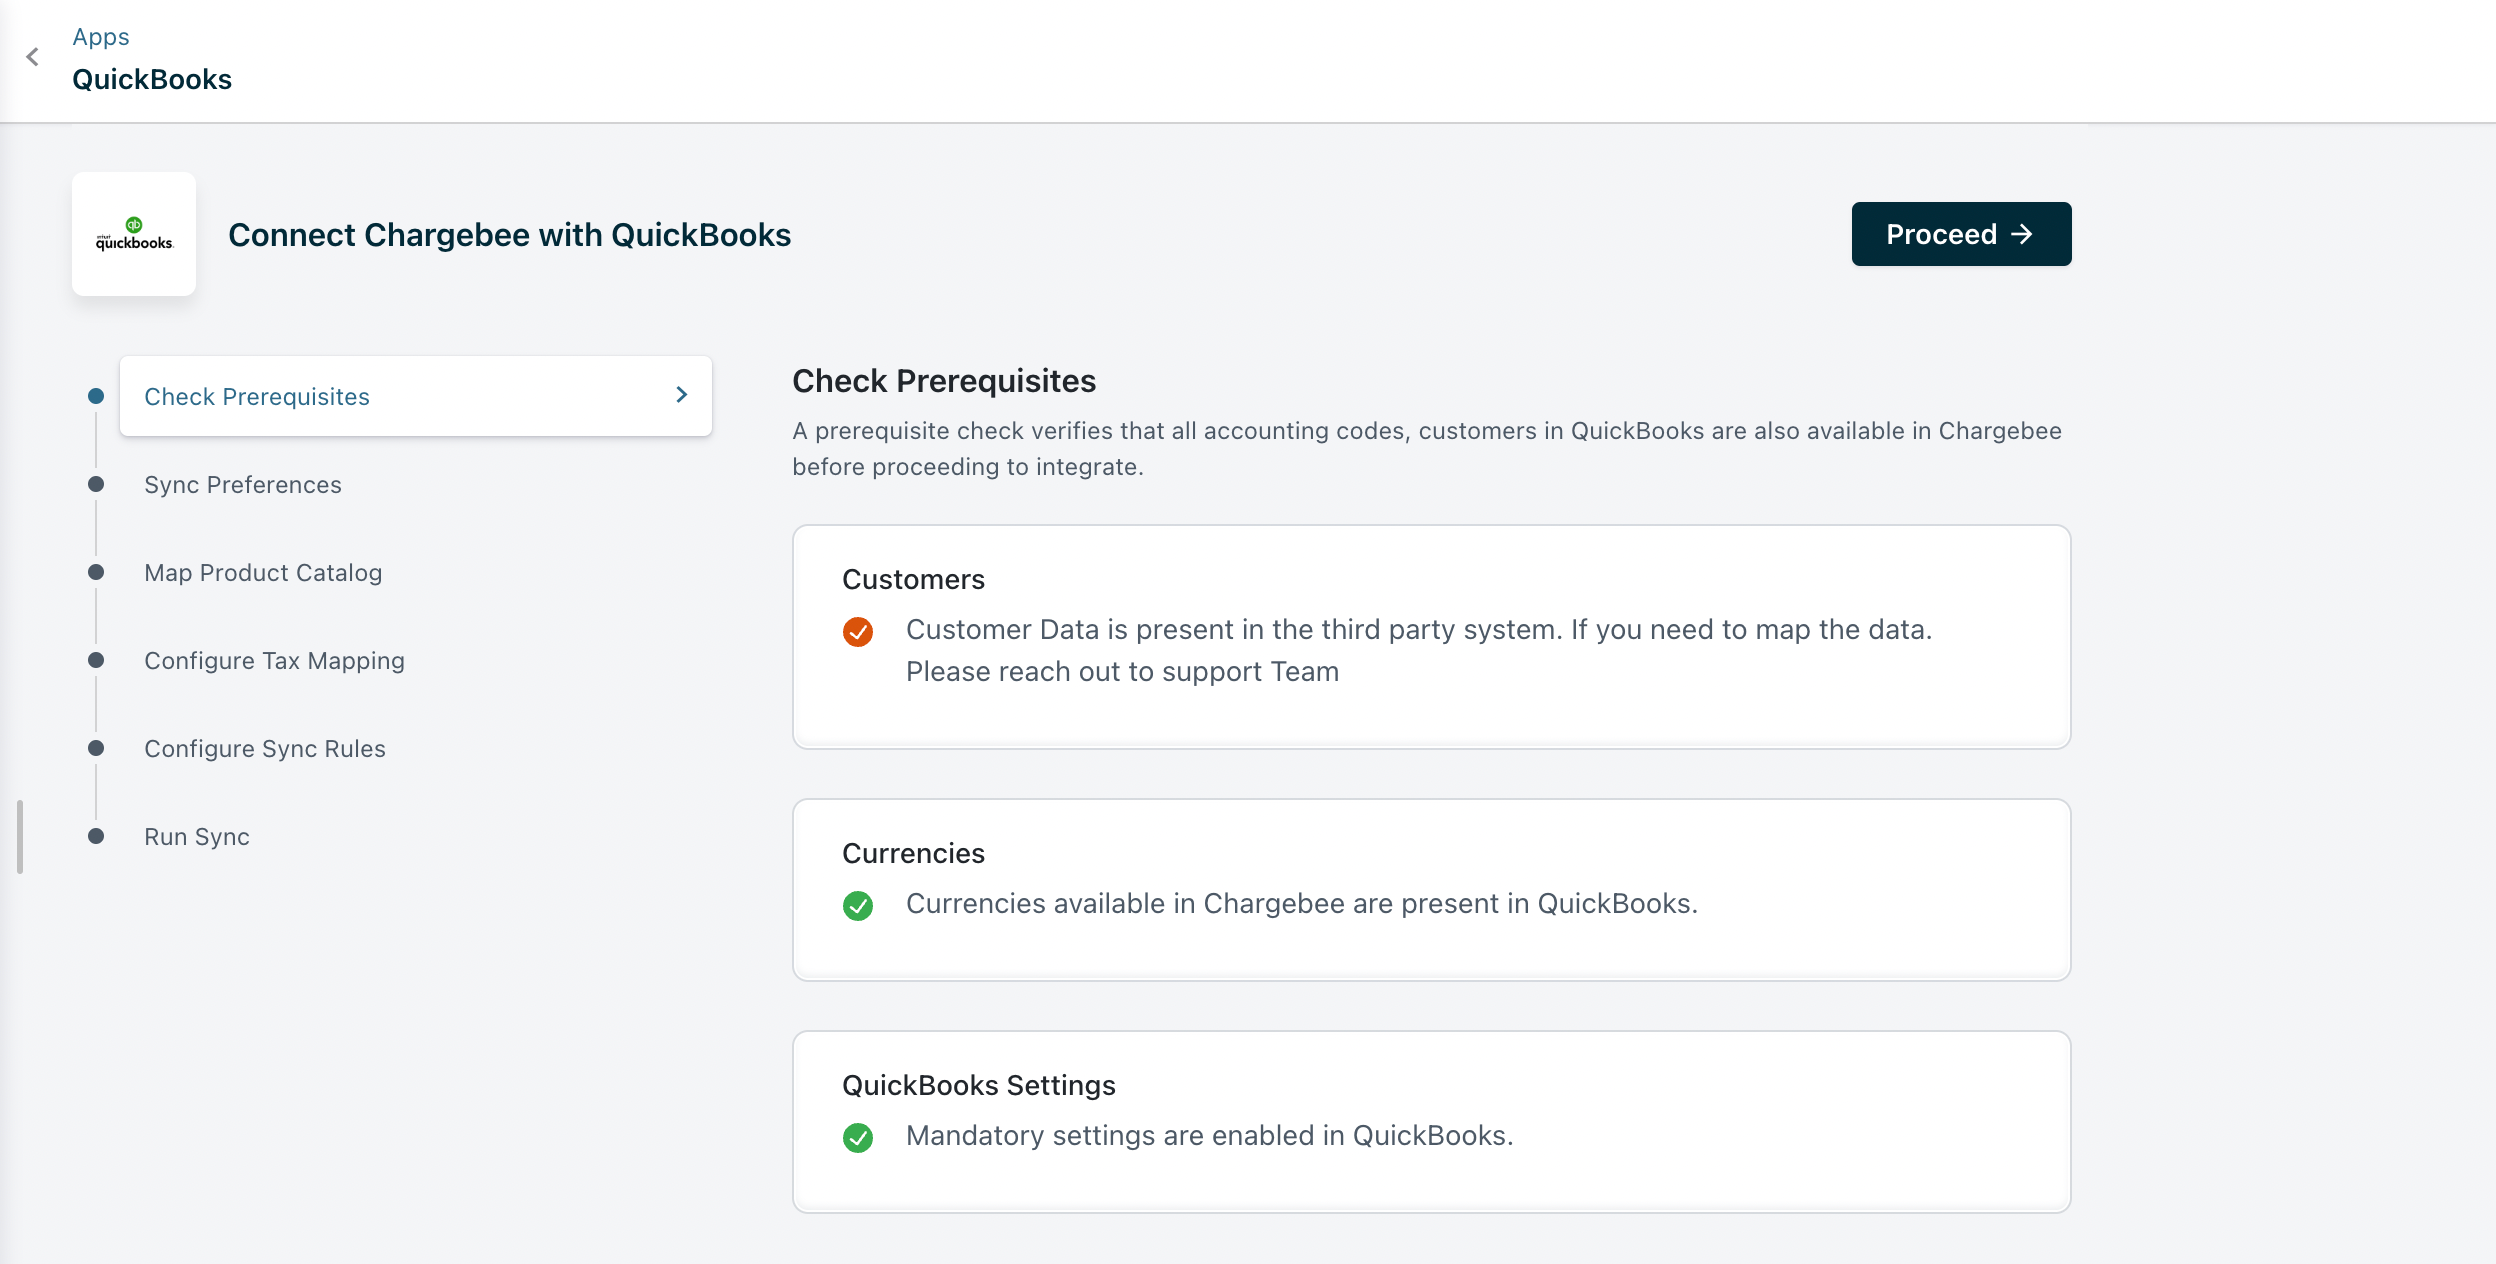
Once the above errors are addressed, the Proceed button is enabled. Click Proceed to move to the next step.
Step 3: Sync Preferences
In this section, you need to perform account mapping for payments, invoice line items, and refunds.
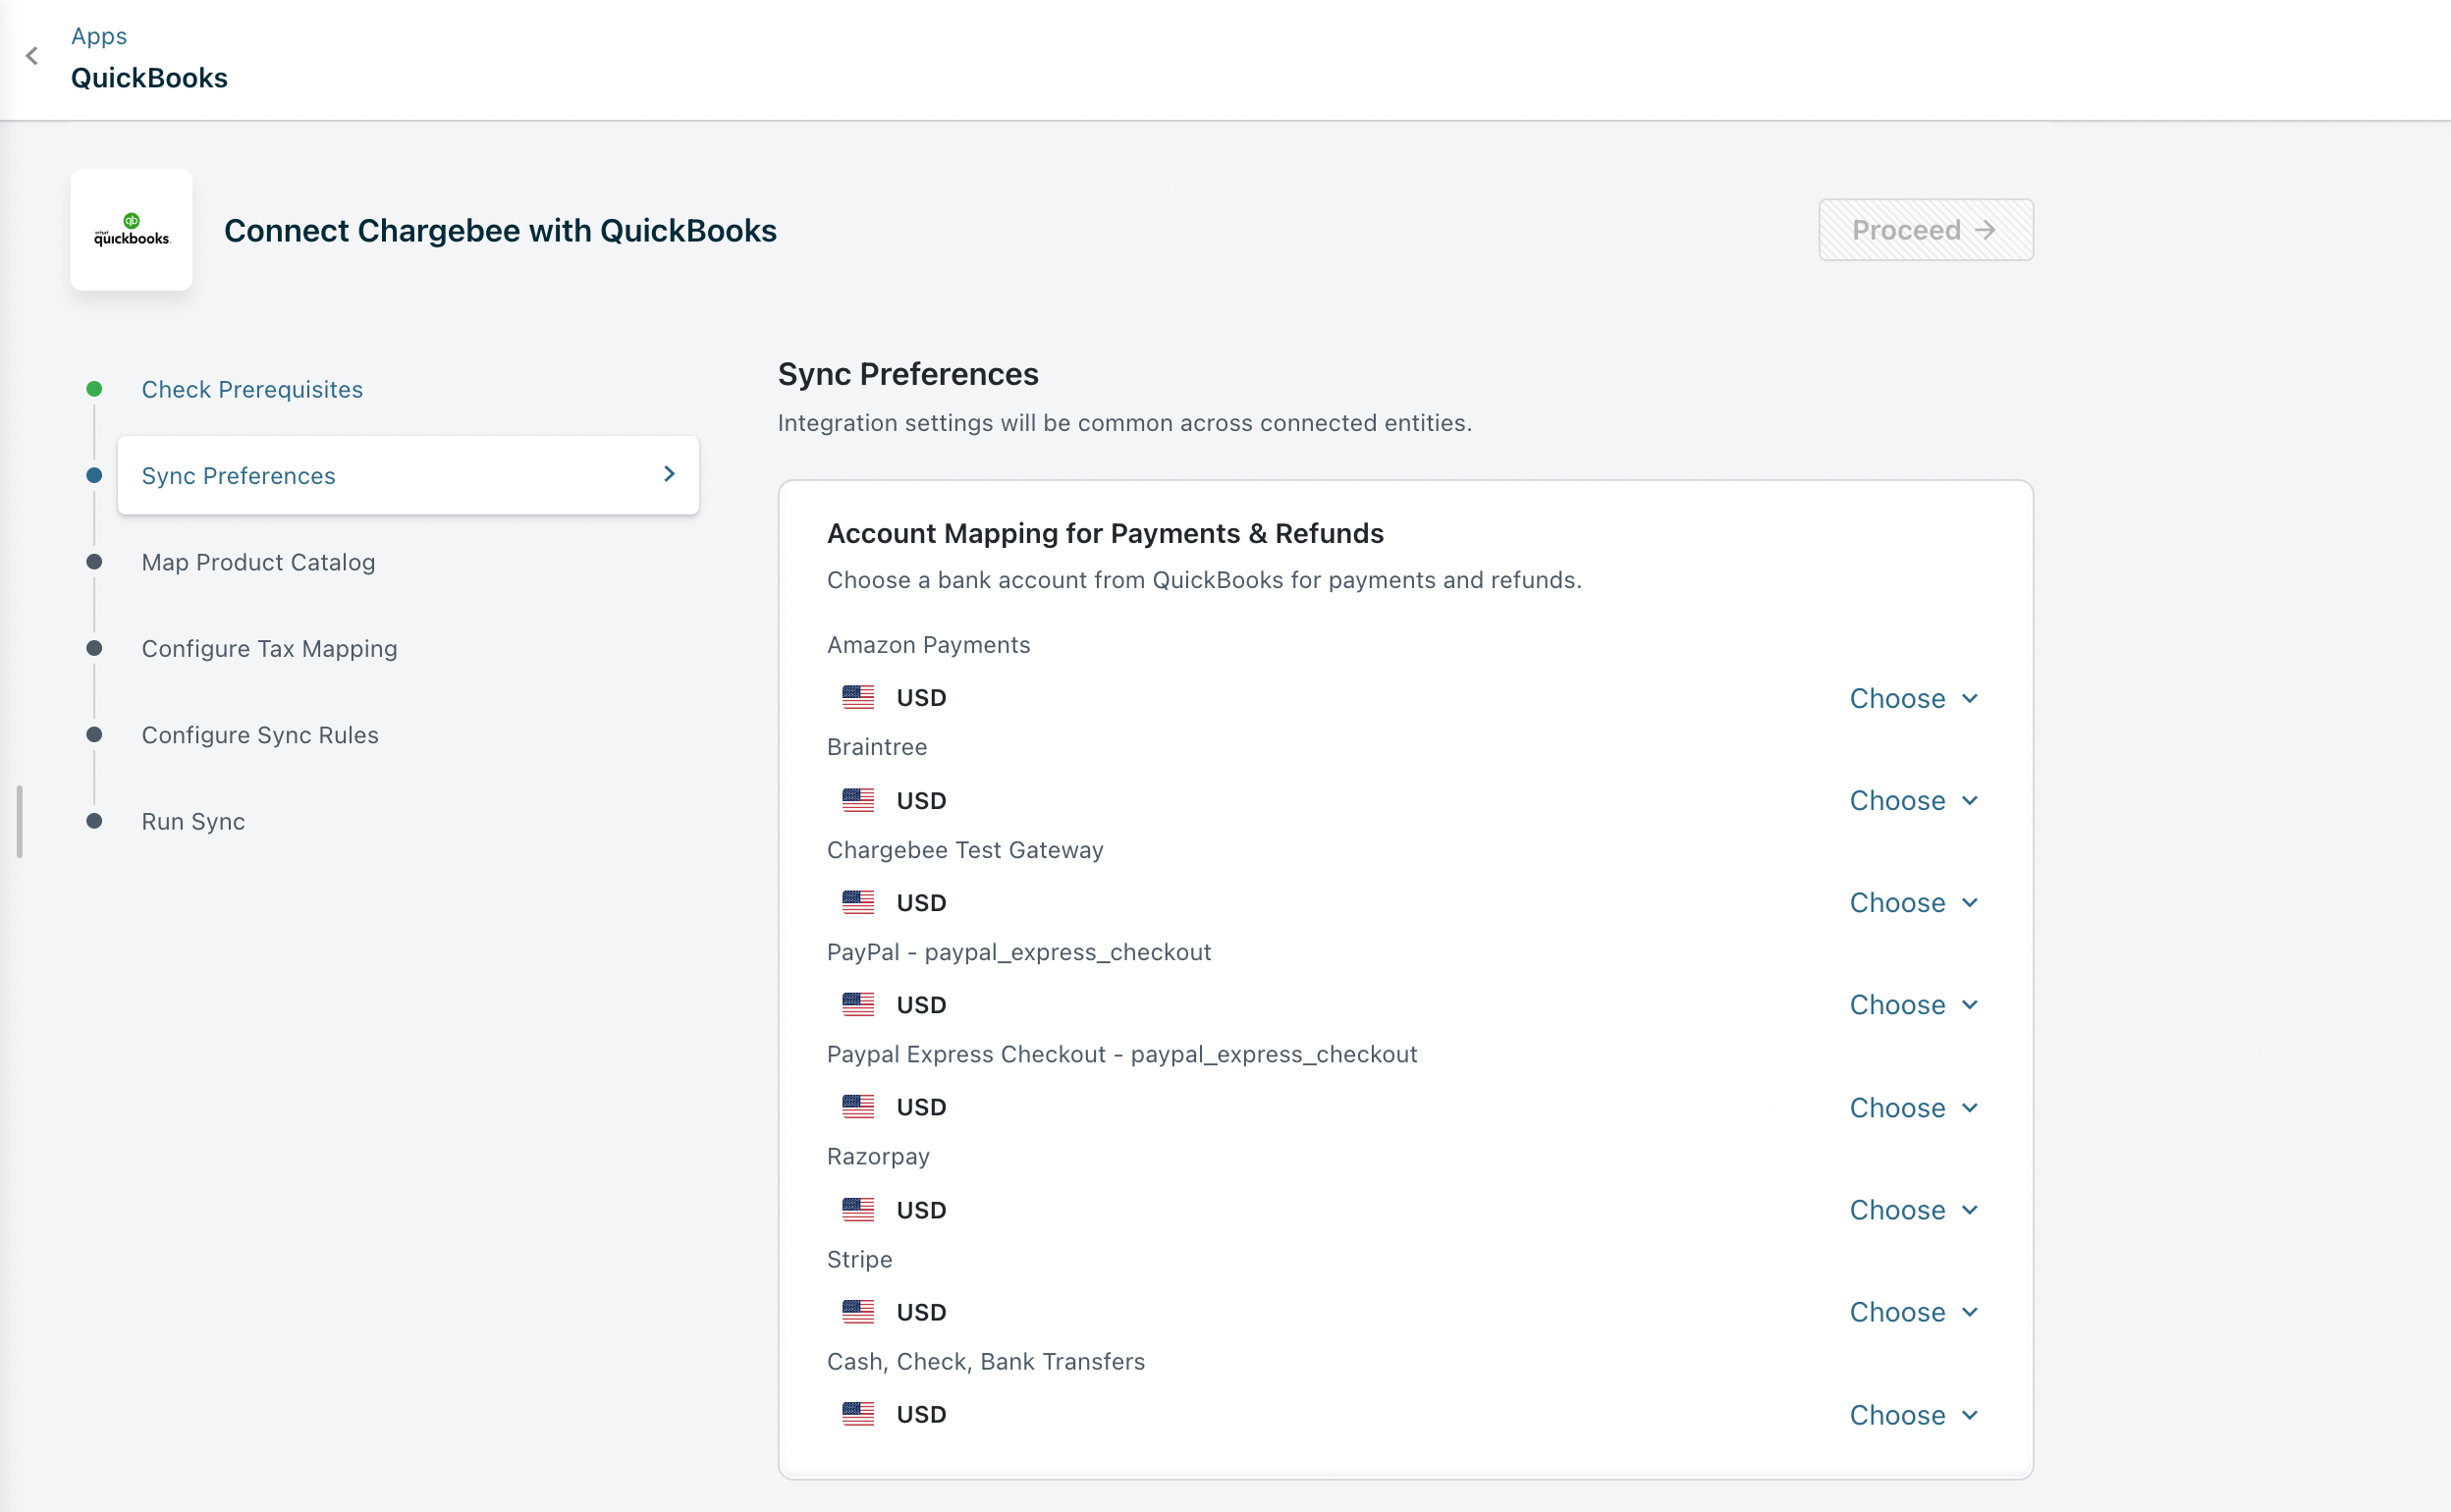
Account Mapping for Payments and Refunds
Payment transactions recorded in Chargebee can be mapped to payment accounts in QuickBooks. For reconciliation purposes, you can select a clearing or undeposited funds account. If you have multiple currencies, payment gateways, or payment methods enabled, you can choose specific payments or checking accounts.
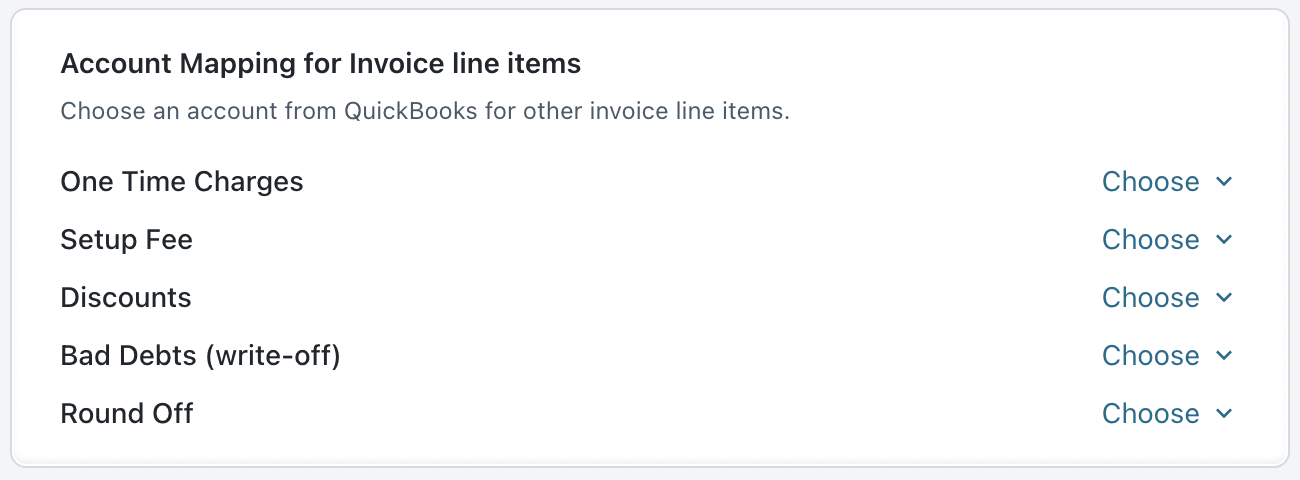
Account Mapping for Invoice Line Items
Account mapping for invoice line items involves assigning specific accounts or categories to each line item on an invoice.
Offline Payment Configuration
Offline Payment Configuration offers flexibility for syncing offline payments from QuickBooks to Chargebee automatically. You can enable this to allow sync to handle offline payments automatically or disable it if you need to record offline payments manually in Chargebee.

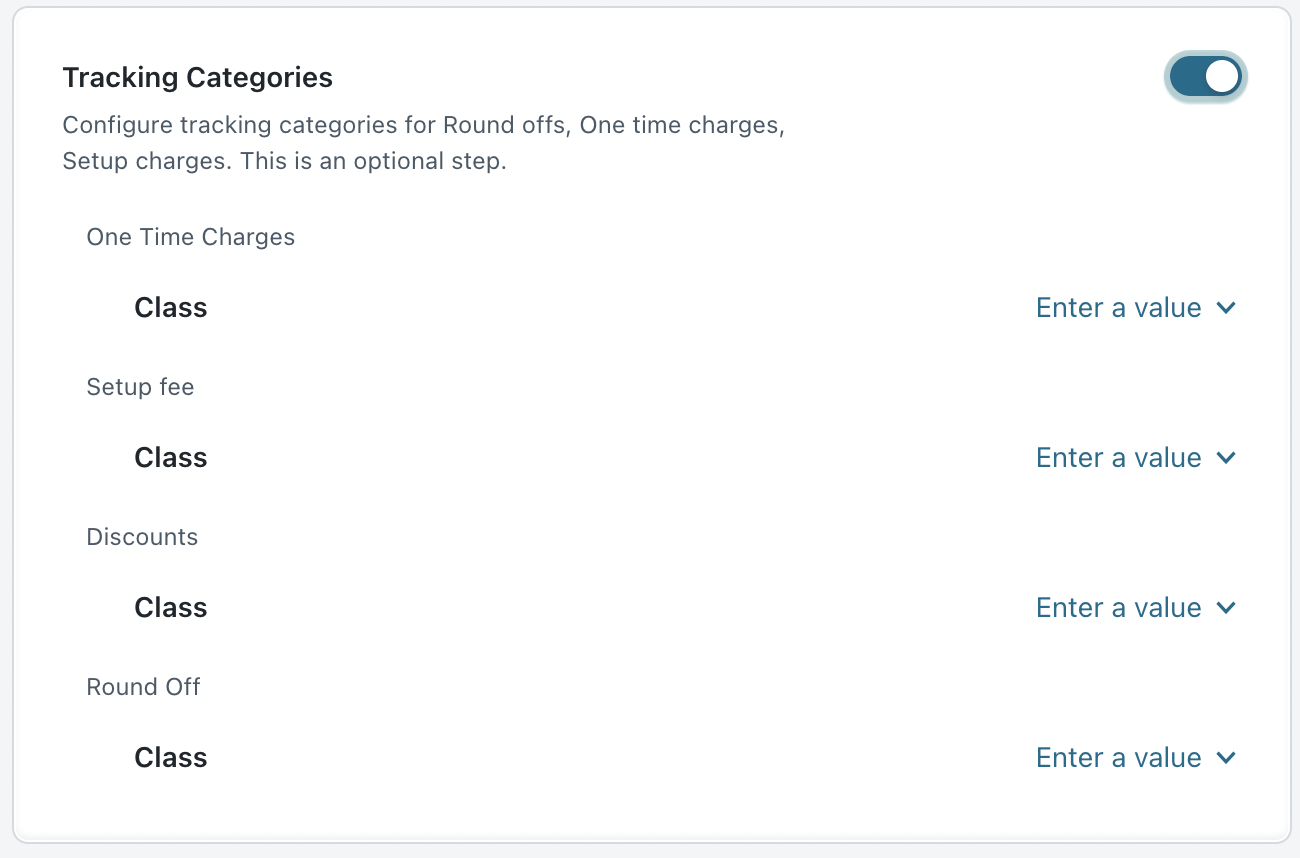
Tracking Categories
You can send tracking category information from Chargebee for invoice line items when the Tracking Categories button is enabled.
Sync Voided Invoice as Credit Note Configuration
This allows you to decide how to sync voided invoices in QuickBooks. If this configuration is enabled, voided invoices will be synced as credit notes in QuickBooks.

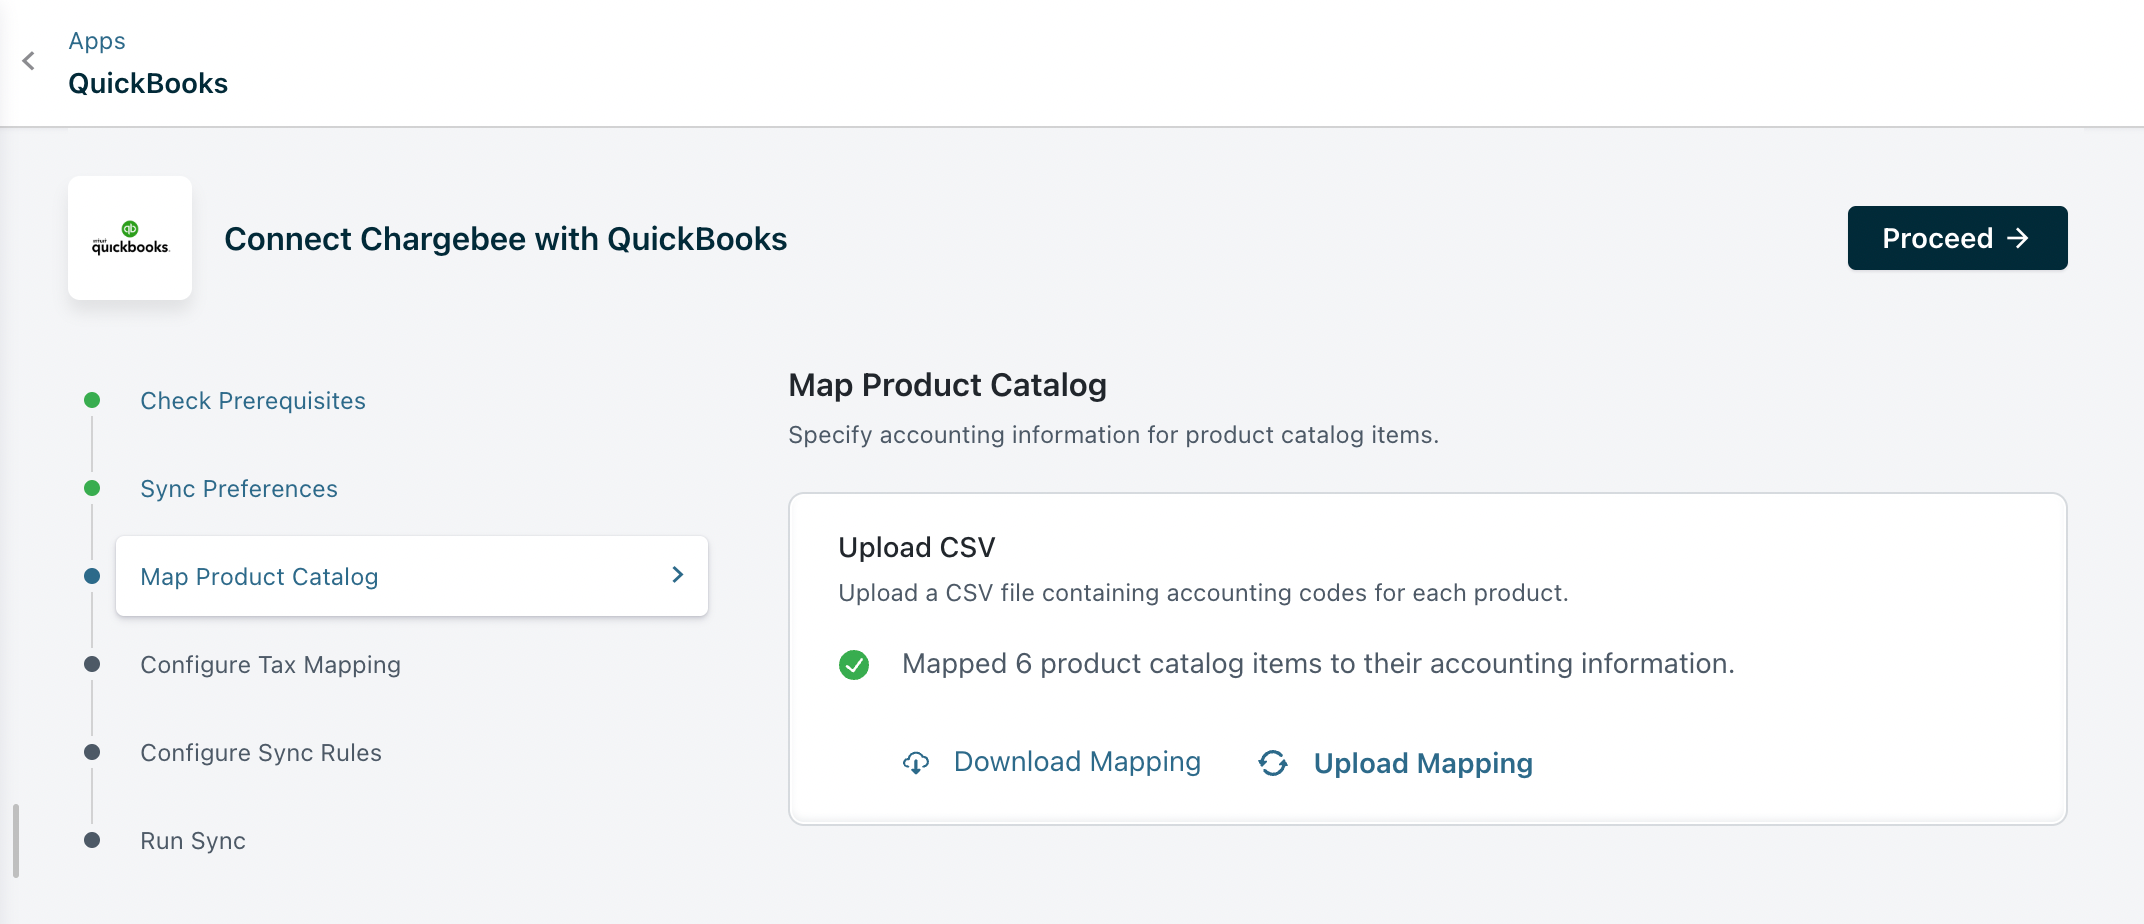
Step 4: Map Product Catalog
Once the account mapping for payments, invoice line items, and refunds is complete, click Proceed to move to the next step.
Note
The Map Product Catalog feature is deprecated for test sites, and the product catalog step will no longer be available except for sites using Multi Business Entity with Product Catalog. Deprecation for all live sites is also planned. New users should configure price points for the plan, add-on, and charge under Accounting Details.
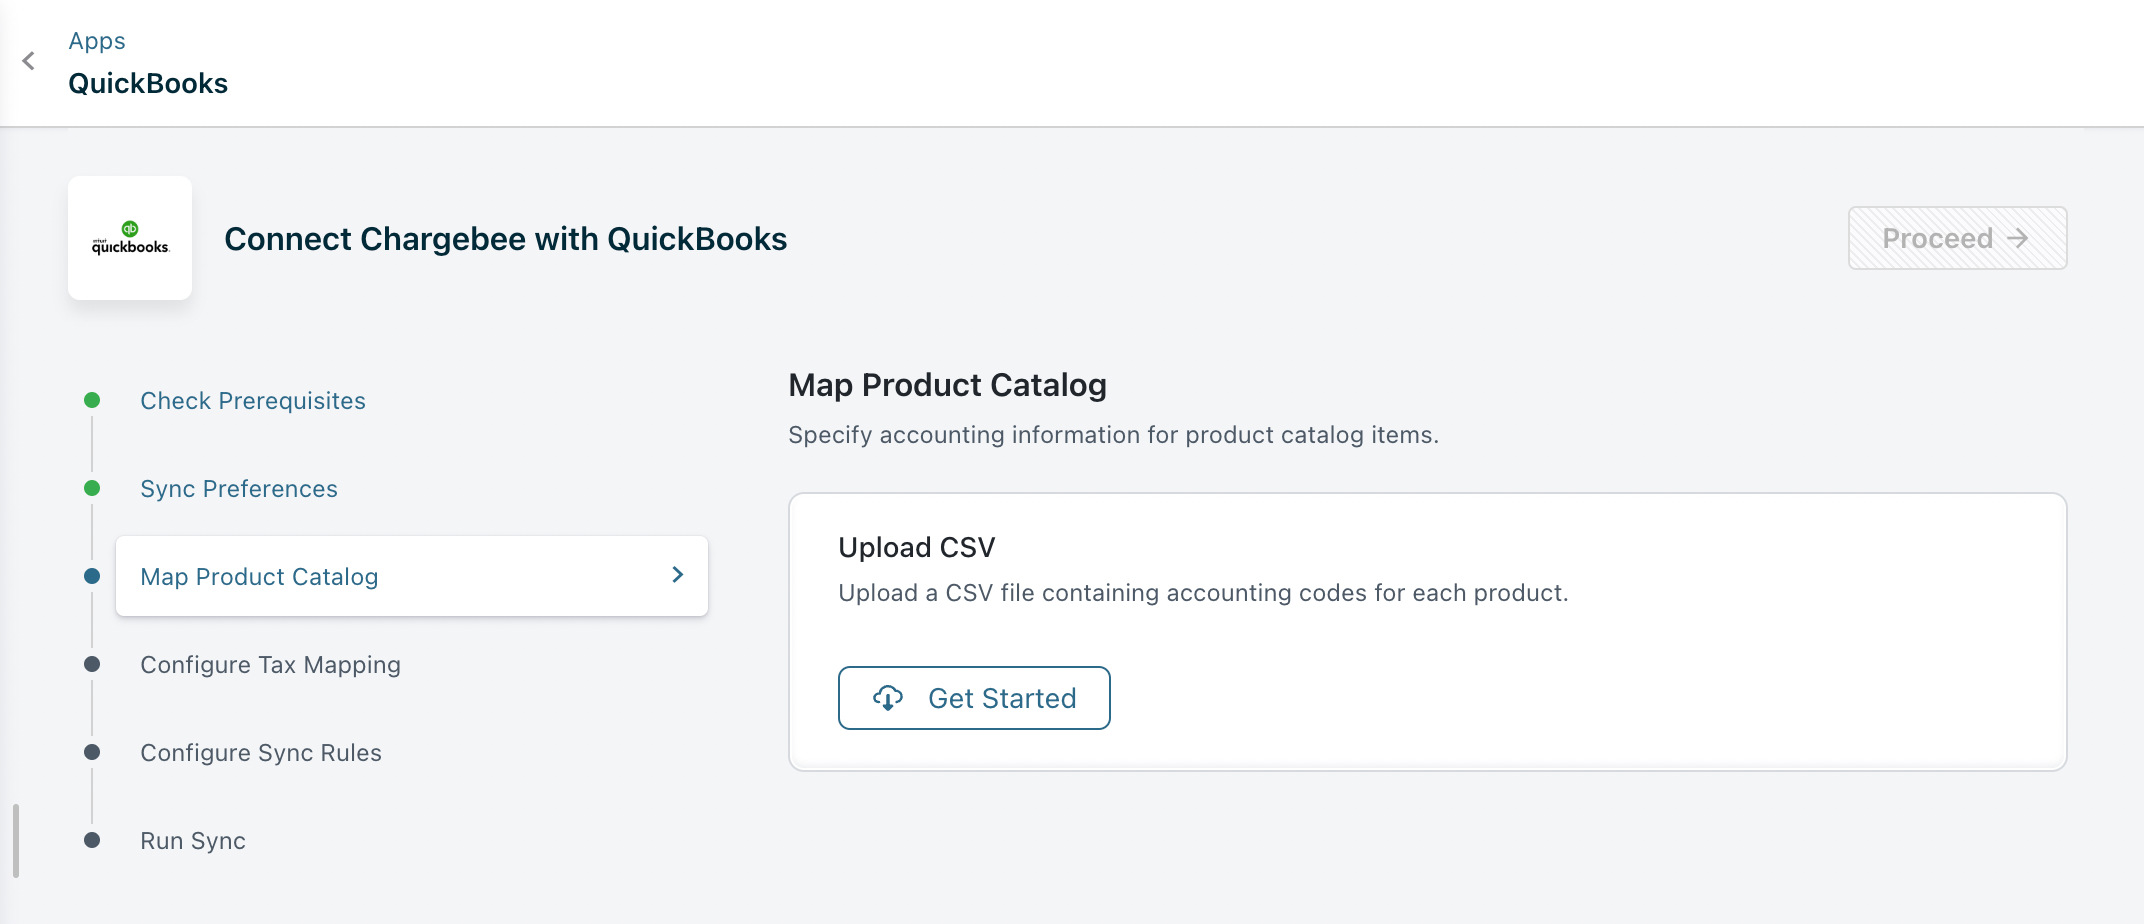
You can upload a CSV file containing mapping details between products and business entities. Within these mappings, you can specify accounting codes for each entry.
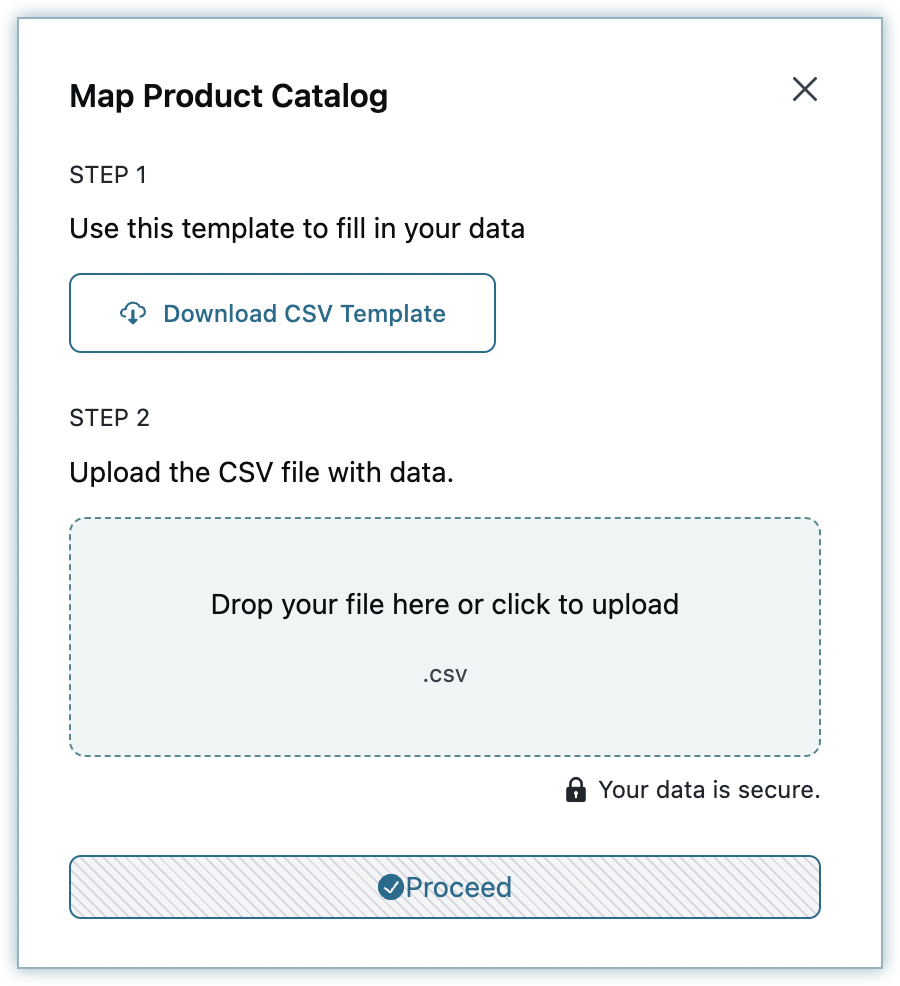
The sample downloaded CSV file contains the following fields:
| CSV Field Name | Description | Additional Info |
|---|---|---|
| PRODUCT_ID | Unique identifier for Chargebee's item prices. | |
| PRODUCT_NAME | Name of the Item price in Chargebee's Product catalog. | |
| SKU | SKU of the product | This field is used to map the existing items from QuickBooks to the respective plan/addon in Chargebee. It can be used as an alternative name for plan/addon and its character limit should not exceed 30 characters. |
| ACC_CODE | The accounting code is associated with the item. | The Accounting code field should be filled for all the plans and addons. |
| ACCOUNTING_FIELD1 | Accounting Category 1 | If you have classified Track Classes for your products in QuickBooks and would like to sync data specific to it, enter the information here |
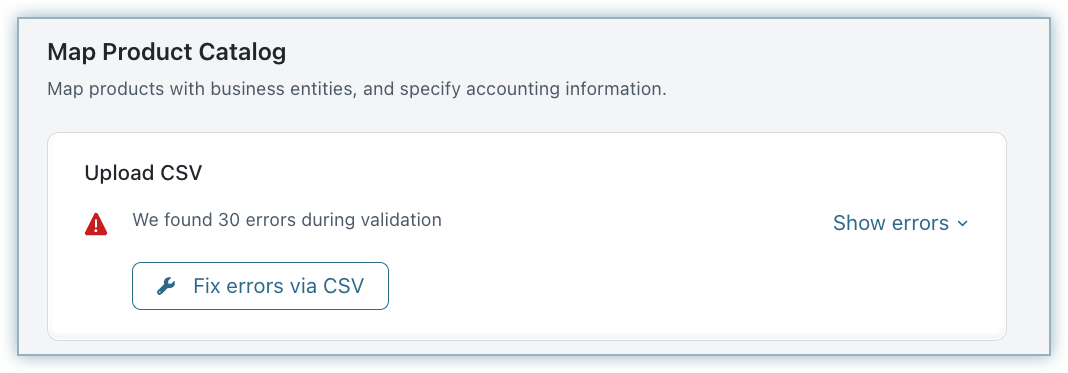
If there are any errors during validation, an error message is displayed. This can be fixed by re-uploading the file with the correct mapping.
Upon successful validation, you can see the successfully mapped records as shown below.
Note
- Once the Product Catalog Mapping is complete, accounting configurations on the item prices details page will no longer apply.
- If you prefer not to create multiple items and instead use a single item for all business entities, ensure that the SKU remains consistent and upload the CSV file accordingly.
- To streamline the process and save time, Chargebee pre-fills the CSV file with information from the UI filled on the item prices page's accounting details tab. Even if there are no changes, the CSV file needs to be re-uploaded initially.
Step 5: Configure Tax Mapping
You can map tax codes, which will sync invoices and credit notes.
Note
This step will be available only if you have enabled taxes on your Chargebee site.
Chargebee retrieves both the default and custom tax rates created in your QuickBooks account. You can select a tax rate from the drop-down list and map for each category and region.

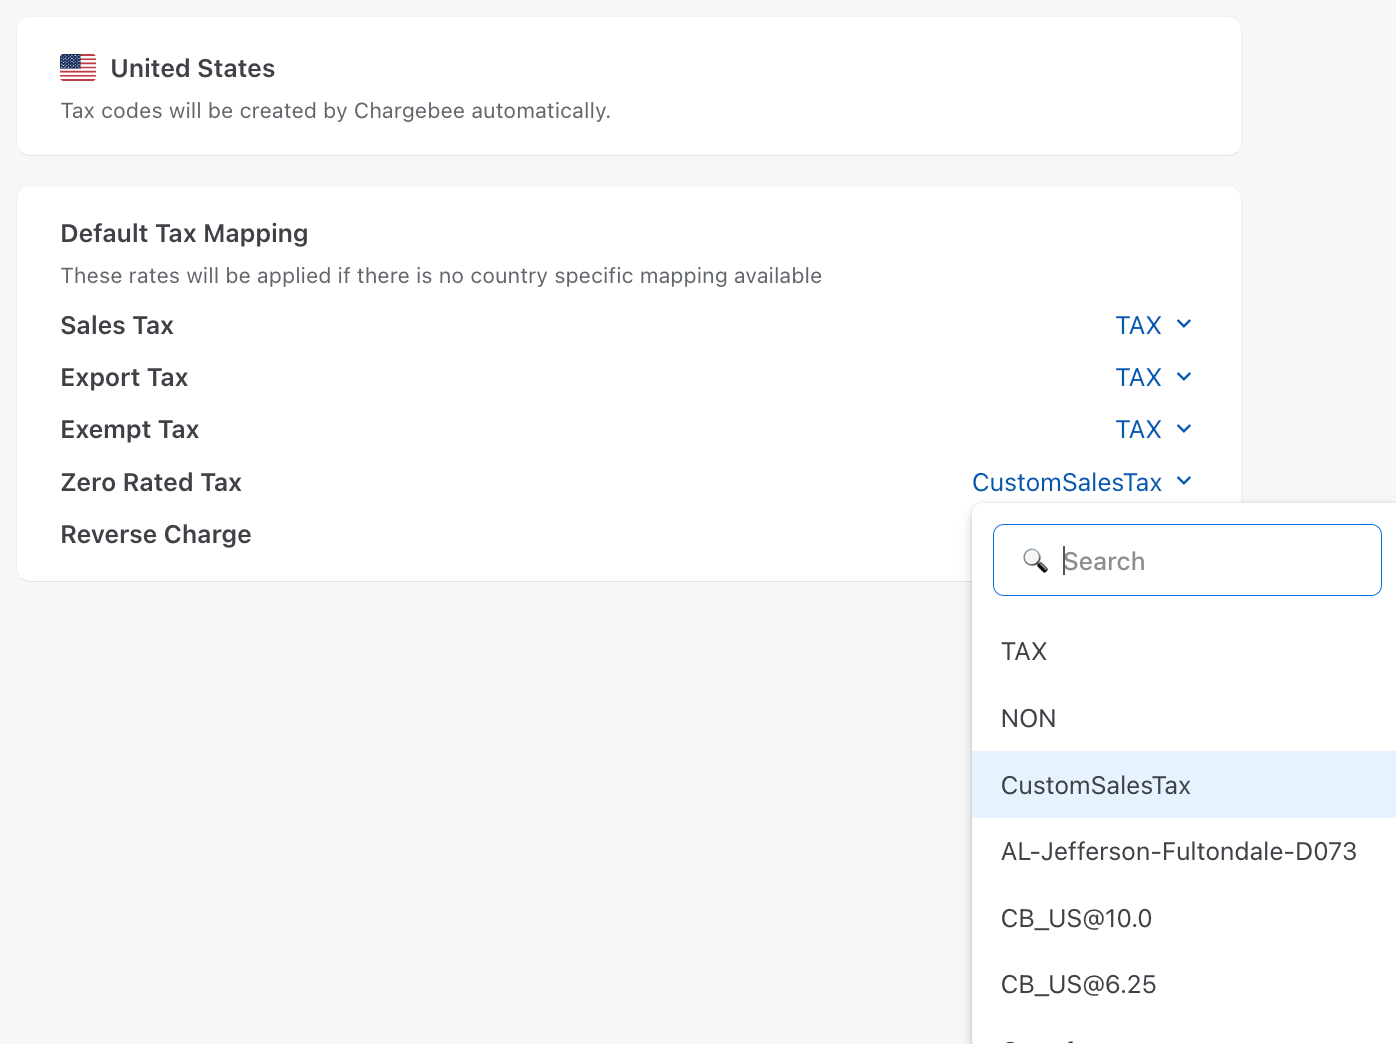
Using the US Edition of QuickBooks (or Global Edition):
Chargebee will create Tax Rates in QuickBooks automatically. Providing tax code mapping for the US is a tedious process.
Using a Canada, Australia, New Zealand, South Africa, or Singapore Edition of QuickBooks
You can select from the list of default tax rates created in QuickBooks.
| Category | Select a Tax Rate from QuickBooks |
|---|---|
| Sales | Select a Tax code to map all your taxable sales, such as New Zealand's 15% GST. |
| Exempt | Select a Tax code to map sales exempt from taxes - Customers or Products can be exempted. |
| Export | Select a Tax code to map sales to any other country outside your taxable region. |
| Reverse Charge | Select a tax code for B2B sales with a valid Tax registration number. |
Using the UK Edition of QuickBooks
A UK organization in QuickBooks supports EU VAT Returns filing from within the application. QuickBooks creates default taxes to facilitate accurate VAT Liability reporting.
While configuring taxes in Chargebee, you can select from one of the default tax rates created in the QuickBooks UK version.
- If you are VAT MOSS REGISTERED, Chargebee will create a new Tax Agency, "MOSS" and create country-specific Tax Rates (MOSS Spain, MOSS France, etc.) based on which country the sale is made to. QuickBooks recommends this approach.
- If you are not VAT-MOSS REGISTERED, Chargebee will allow you to select taxes from the default rates created in QuickBooks.
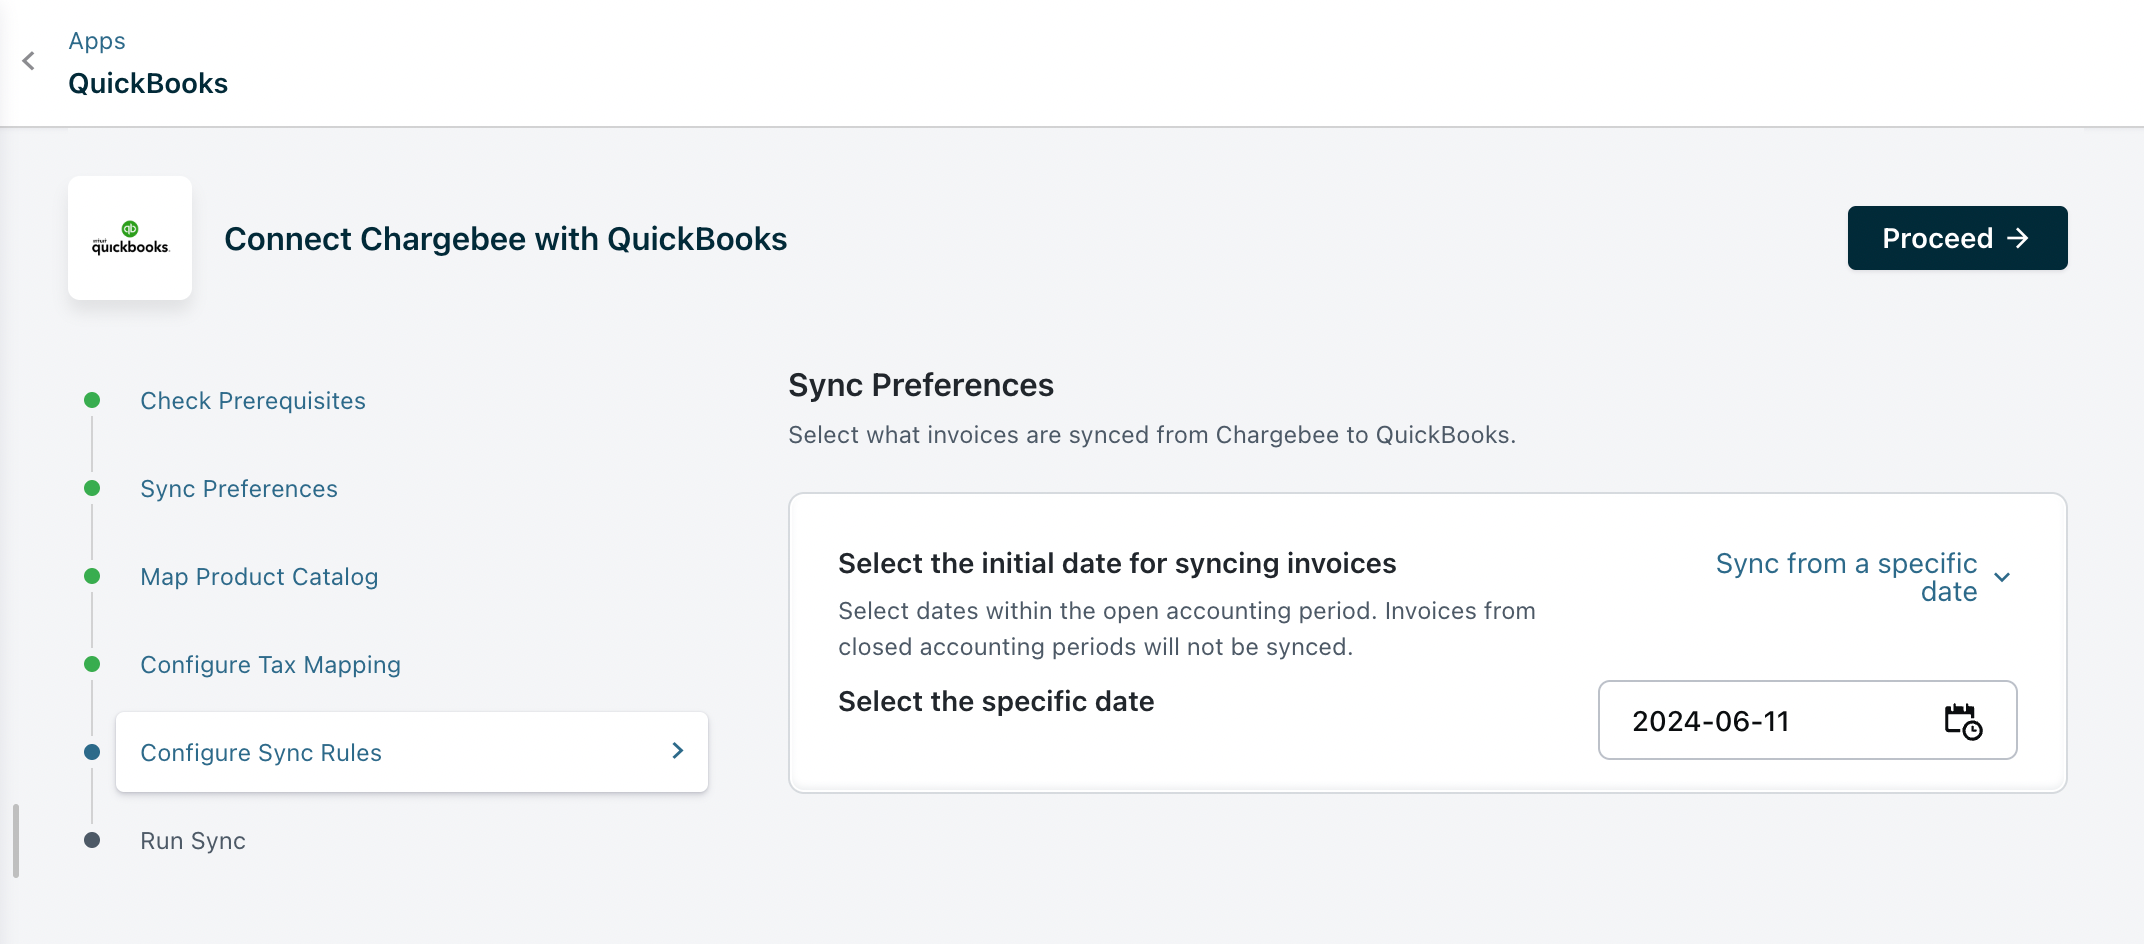
Step 6: Configure Sync Rules
You can choose to sync invoices from Chargebee to QuickBooks from a particular date by selecting the relevant date from the drop-down.
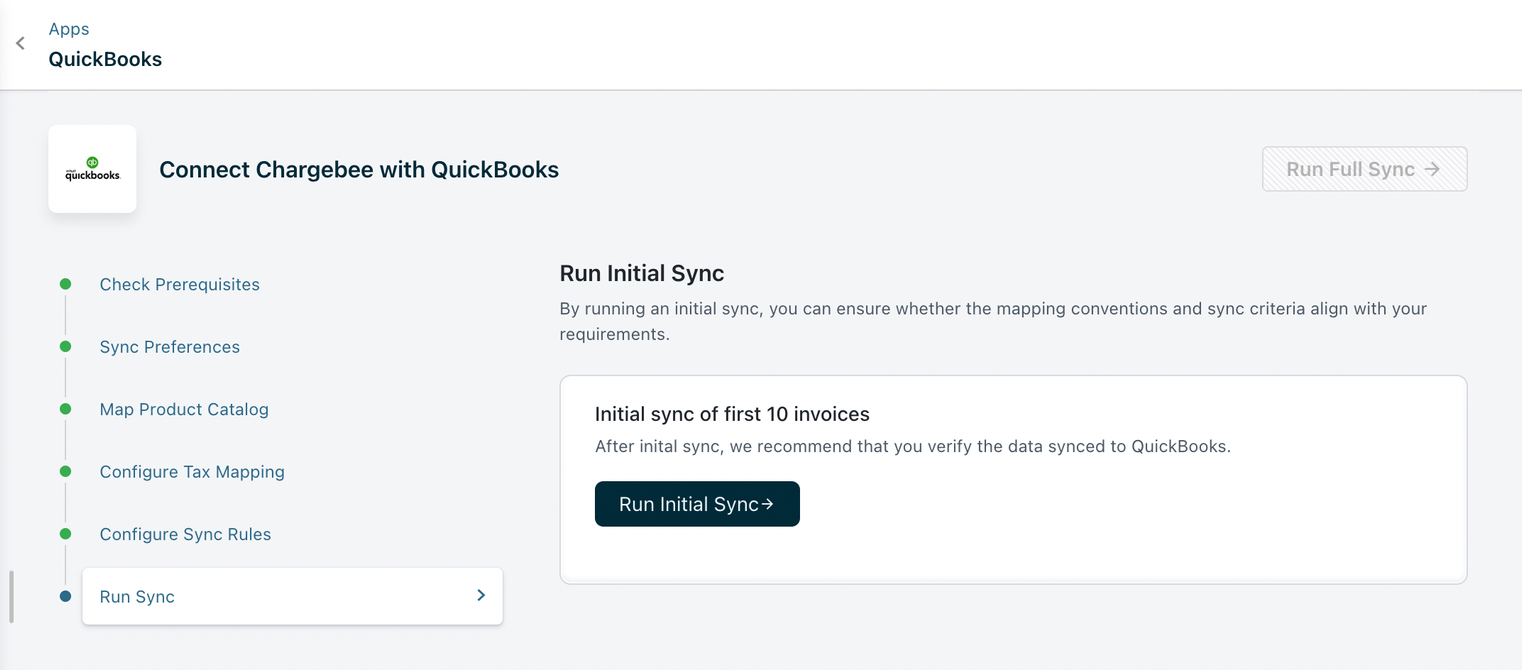
Step 7: Run Sync
Once the configuration is complete, click Run Initial Sync to begin the sync. Chargebee will sync the first 10 invoices, to ensure that mapping, conventions, and sync criteria align with your requirements.
The errors found during this initial sync are displayed below. You can click Show errors to view the error details.
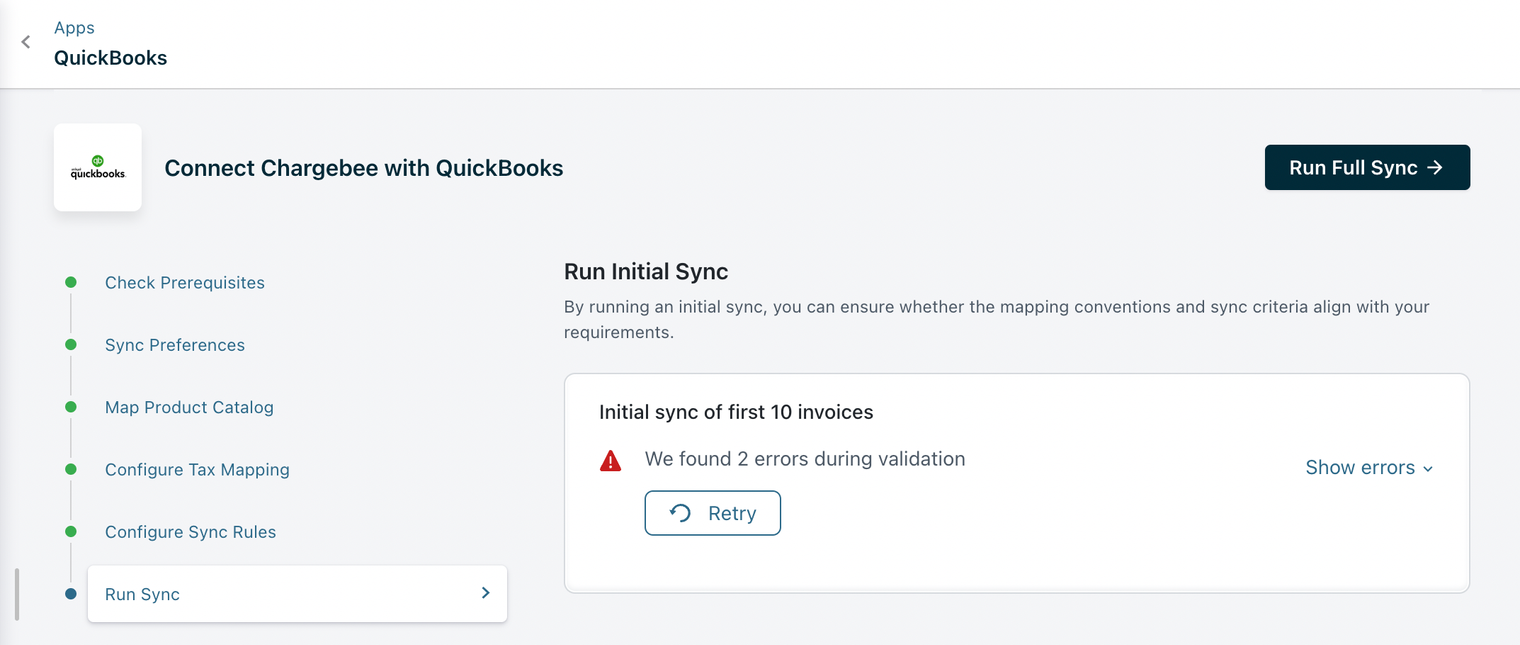
You need to review these invoices in QuickBooks.
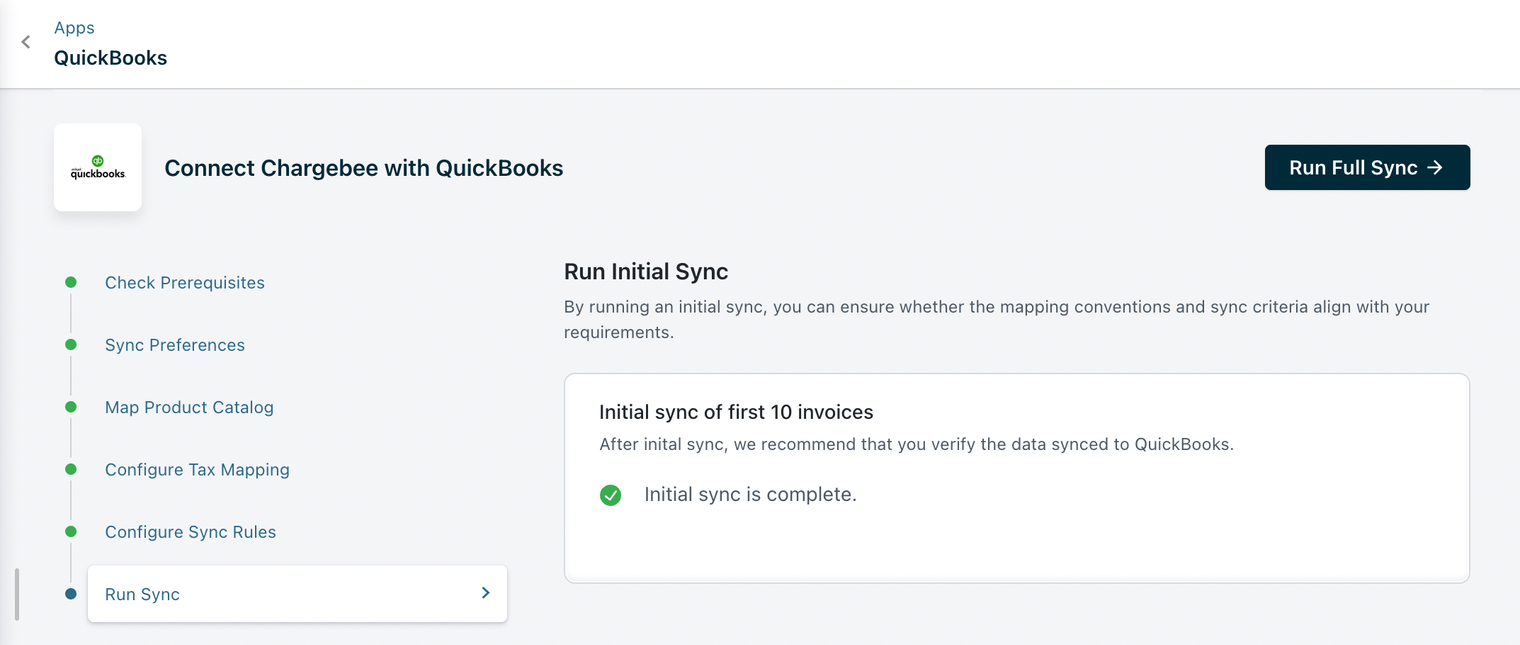
On triggering Run Full Sync
If the sync works as expected, you can click Run Full Sync.
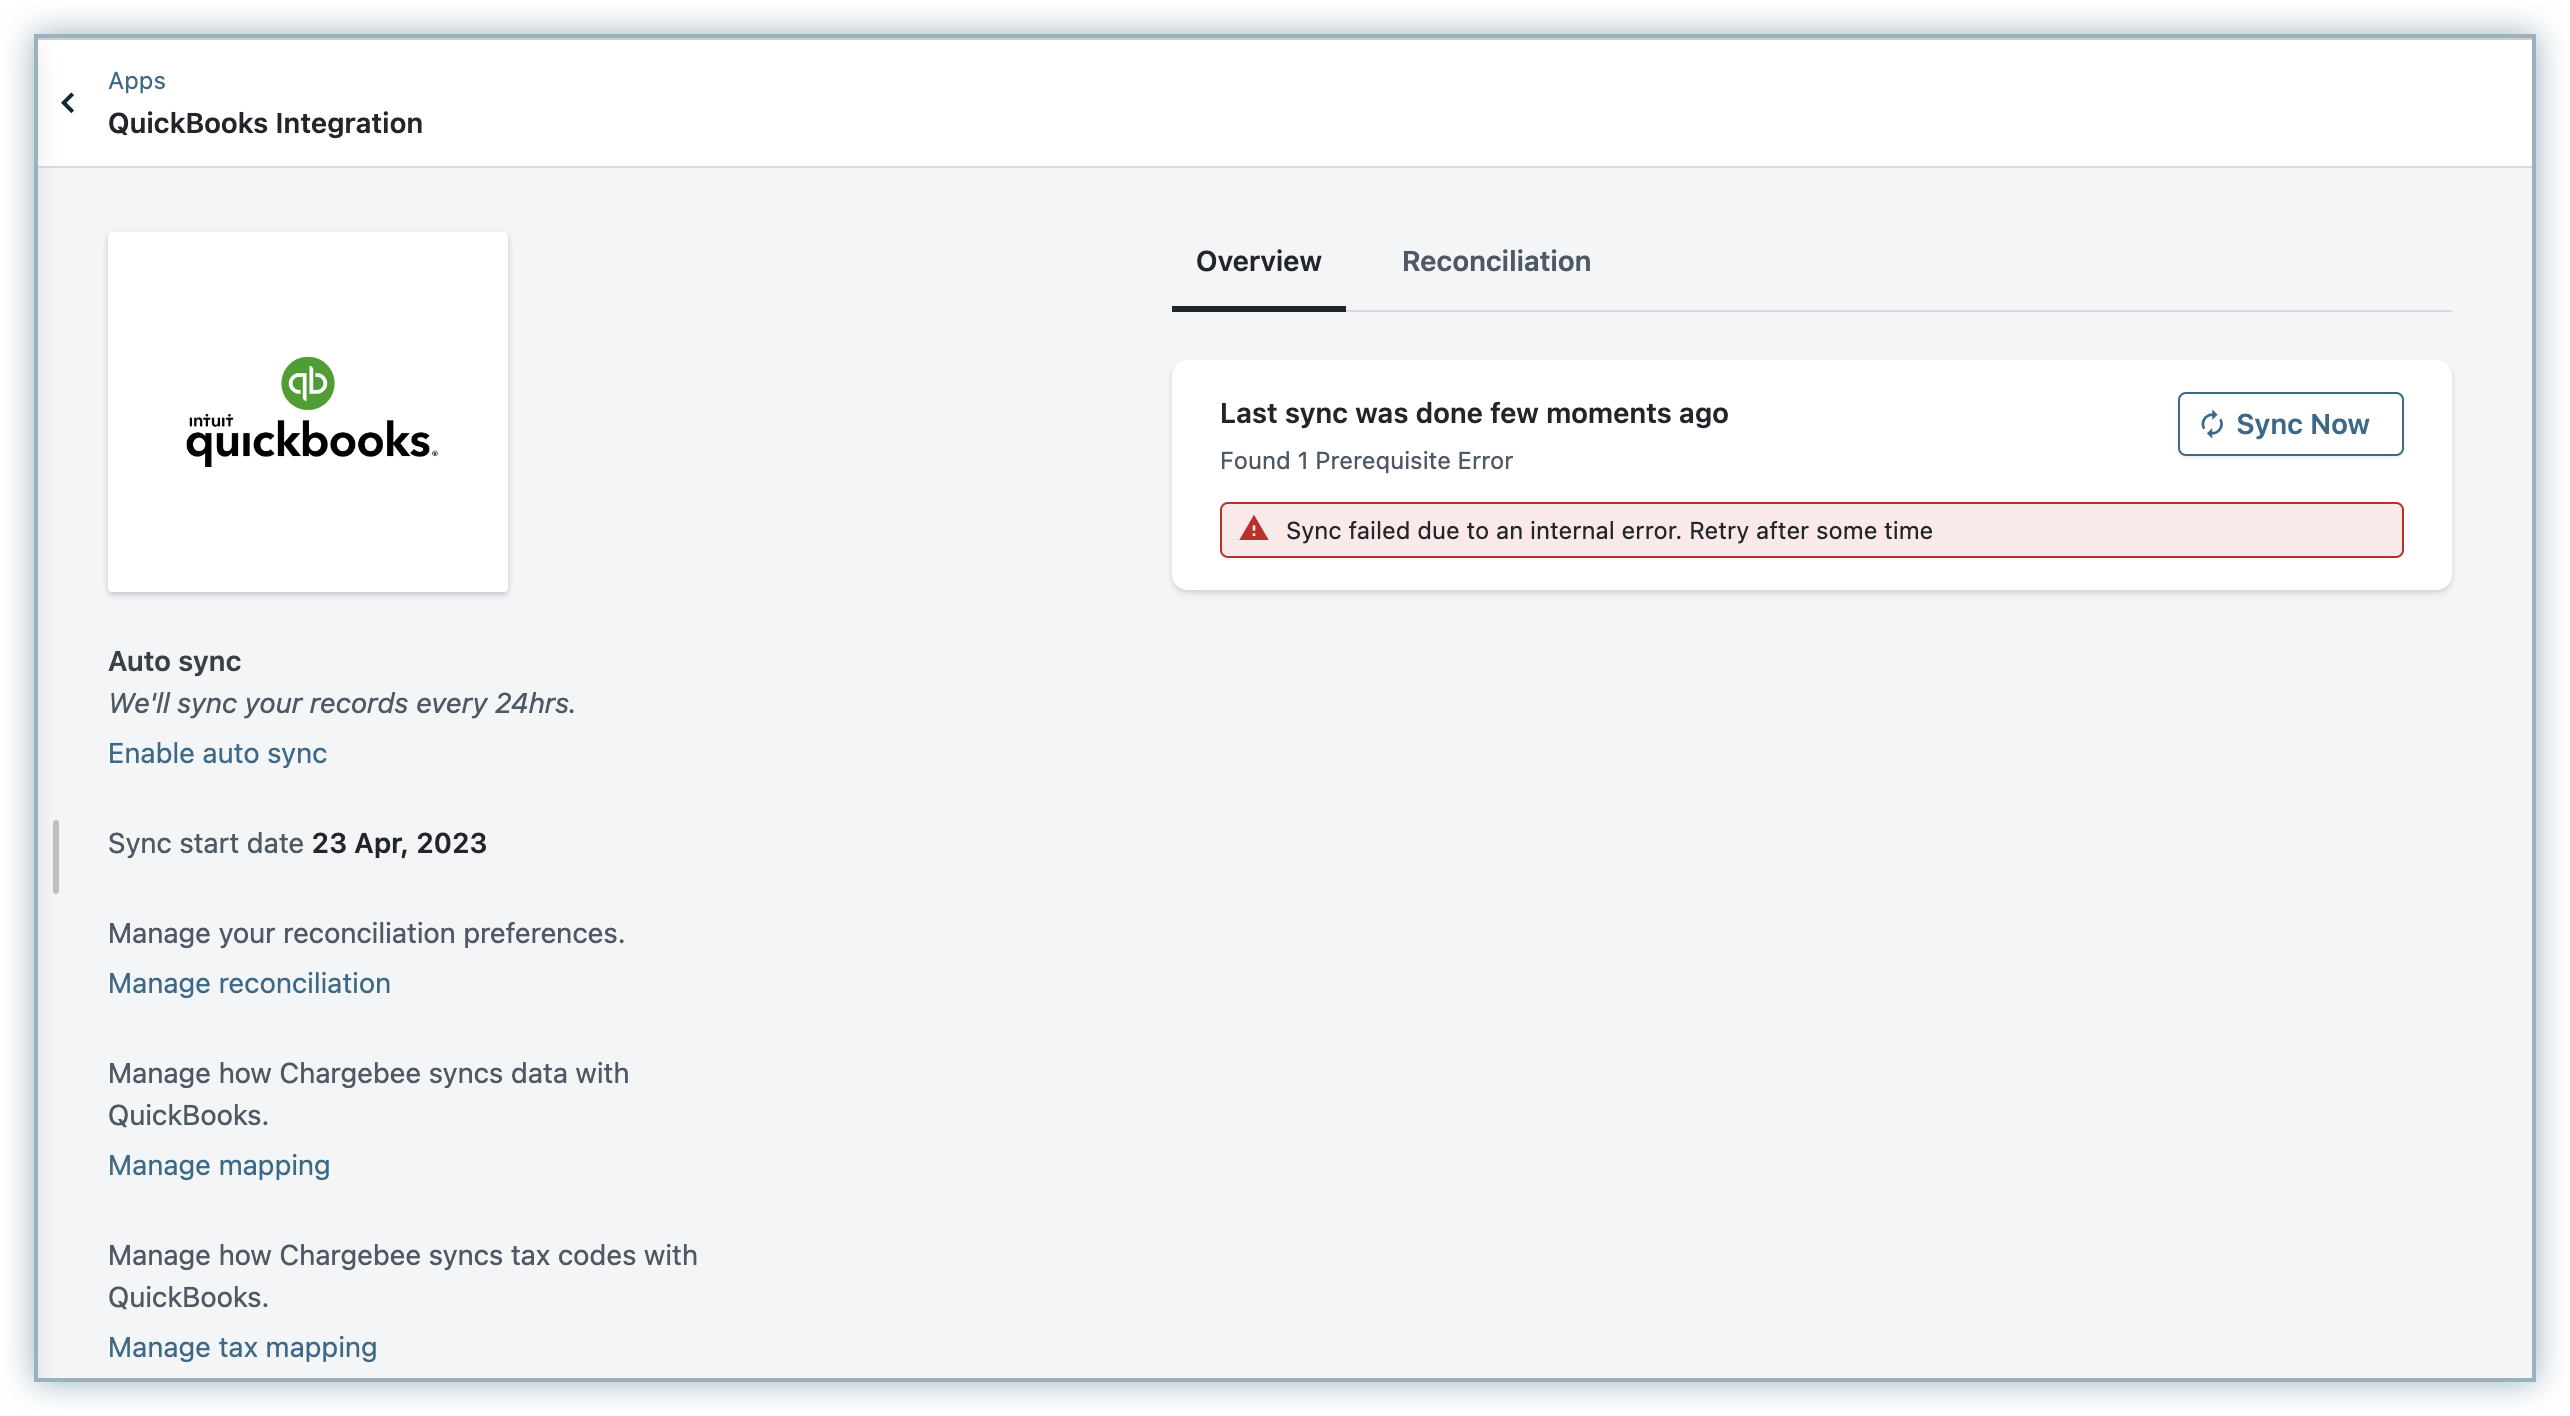
When Run Full Sync is triggered, the sync dashboard is displayed, where you can view or manage settings.
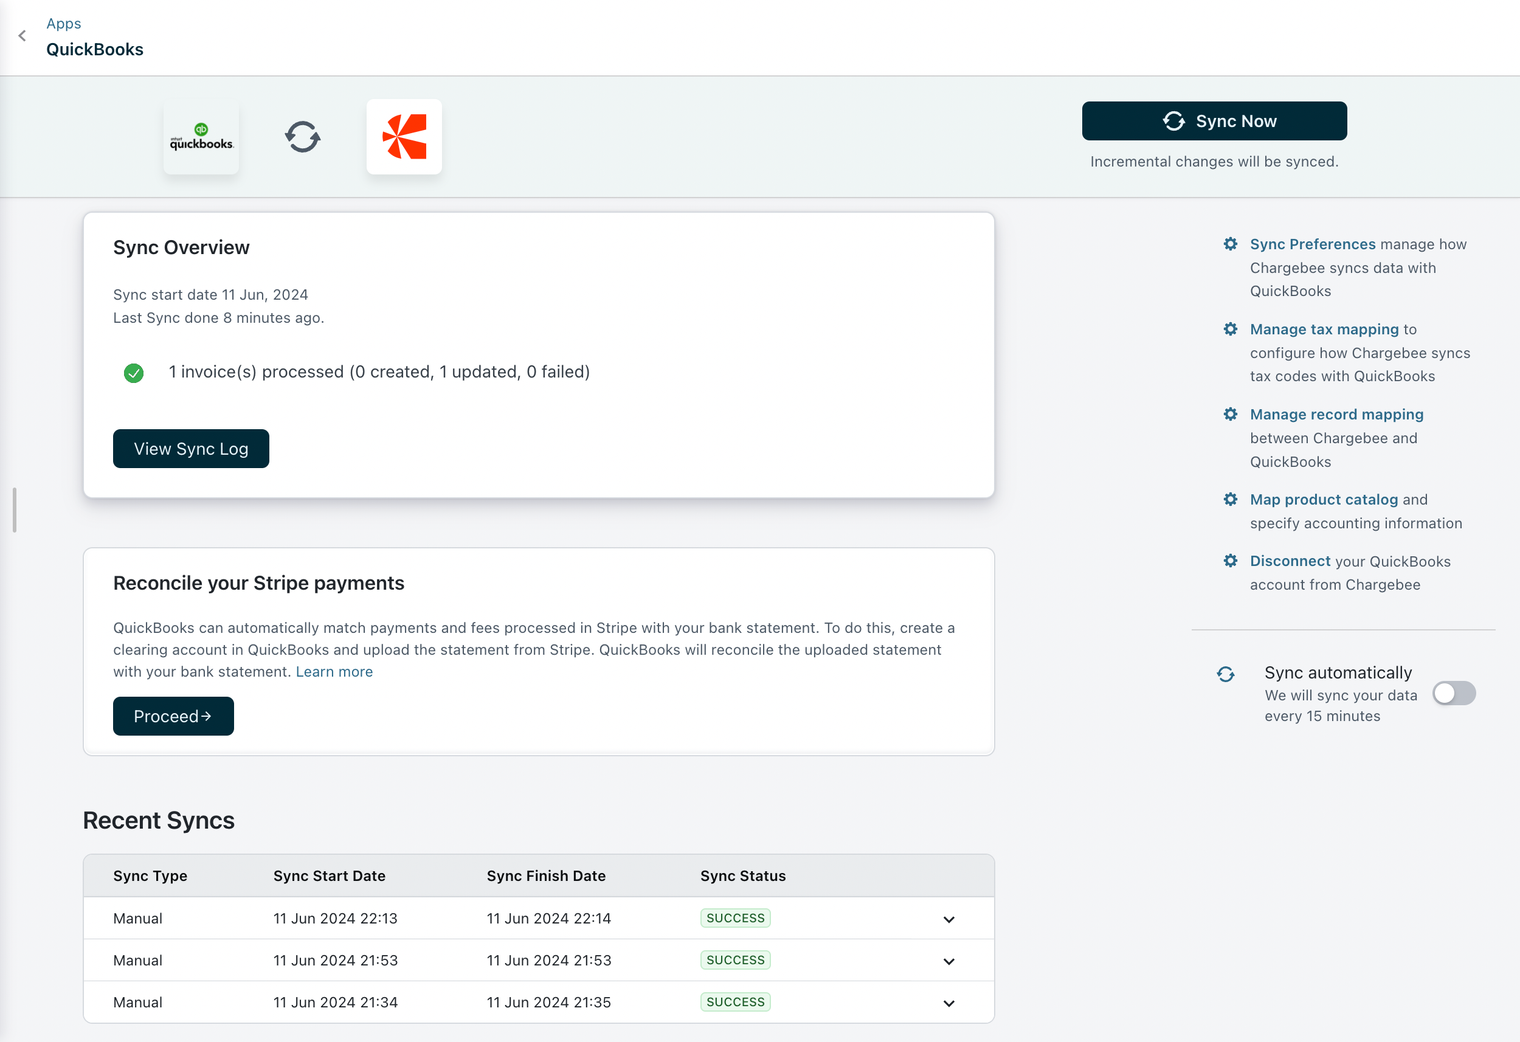
Enable/Disable Auto Sync
After setting up the integration, you can configure the daily schedule to sync all the information to QuickBooks automatically. Invoices and related information will be synced once every 24 hours. You can choose to disable auto-sync if required.
Sync Now
For on-demand sync, you can sync data from Chargebee to QuickBooks immediately.
Sync Preferences
You can edit the configurations or GL Account mapping provided during the setup process.
Manage Record Mapping
You can add or update the mappings for the Chargebee records (invoices, customers, credit notes, and transactions).
Manage Tax Mapping
Adjust the tax mapping configured during the setup process. If new tax regions have been added in Chargebee settings, update the tax mapping in this section accordingly.
Map Product Catalog
Manage and update the product catalog.
Disconnect
Disconnecting will unlink this integration, and to reconnect, you will need to perform all setup steps again.
Sync Preferences
After you run the sync, you can view the last sync details along with errors found during sync, if any:
Sync Now
For on-demand sync, you can push data from Chargebee to QuickBooks immediately.
Enable/Disable Auto Sync
After setting up the integration, you can schedule to sync all the information to QuickBooks on a daily basis automatically. Invoices and related information will be synced to QuickBooks once every 24 hours. You can choose to disable auto-sync if required.
Manage Mapping
You can edit the configuration details provided as part of the integration setup process:
- Edit the GL Account mapping
- Enable or disable offline payment sync from QuickBooks to Chargebee
- Edit tracking categories
Manage Tax Mapping
You can modify the tax codes selected during the setup process. If you have added tax regions in your Chargebee settings, you can provide the new tax codes here.
Unlink
If you want to stop syncing data from Chargebee to QuickBooks, you can unlink the integration.
Chargebee will remove/update the authentication and configuration as per the following:
For Test Sites:
- Authentication details will be removed
- Sync configuration and GL account mapping will be removed
- If you reconnect to the same QuickBooks Company, the invoice mapping will not be retained.
For Live Sites:
- When you unlink, the invoice data mapping between Chargebee and QuickBooks will remain intact.
- If you connect to the same organization again, the data already synced will not be pushed to QuickBooks.
- If you want to connect to a different company, contact support.
Note
- If you want to update details, please do so in Chargebee; the modifications will be synced to QuickBooks in a subsequent update.
- We recommend that you make the changes in Chargebee, such that data is consistent in both systems.
Sync Offline Payments (QuickBooks to Chargebee)
You can choose to retrieve offline payments into Chargebee (or not) with the Sync Offline Payments option.
Caution!
When Sync Offline Payments is not enabled and you make an offline payment in QuickBooks against a payment due invoice in Chargebee, you would have to manually record a payment against the invoice in Chargebee as well. Failing to do so could throw an error message "The invoices linked to this payment do not match." You can manually correct this in QuickBooks.
With the Sync Offline Payments option enabled, Chargebee will read the transaction in QuickBooks, retrieve the transaction, and mark the invoice as PAID, so you need not record a payment in Chargebee manually.
Note: The exchange rate applied in QuickBooks is not imported into Chargebee when the offline payment is imported.
If the payment is associated with a credit note in QuickBooks, we will not sync the payment back. For offline sync to work, the payment should be tied only to an invoice.
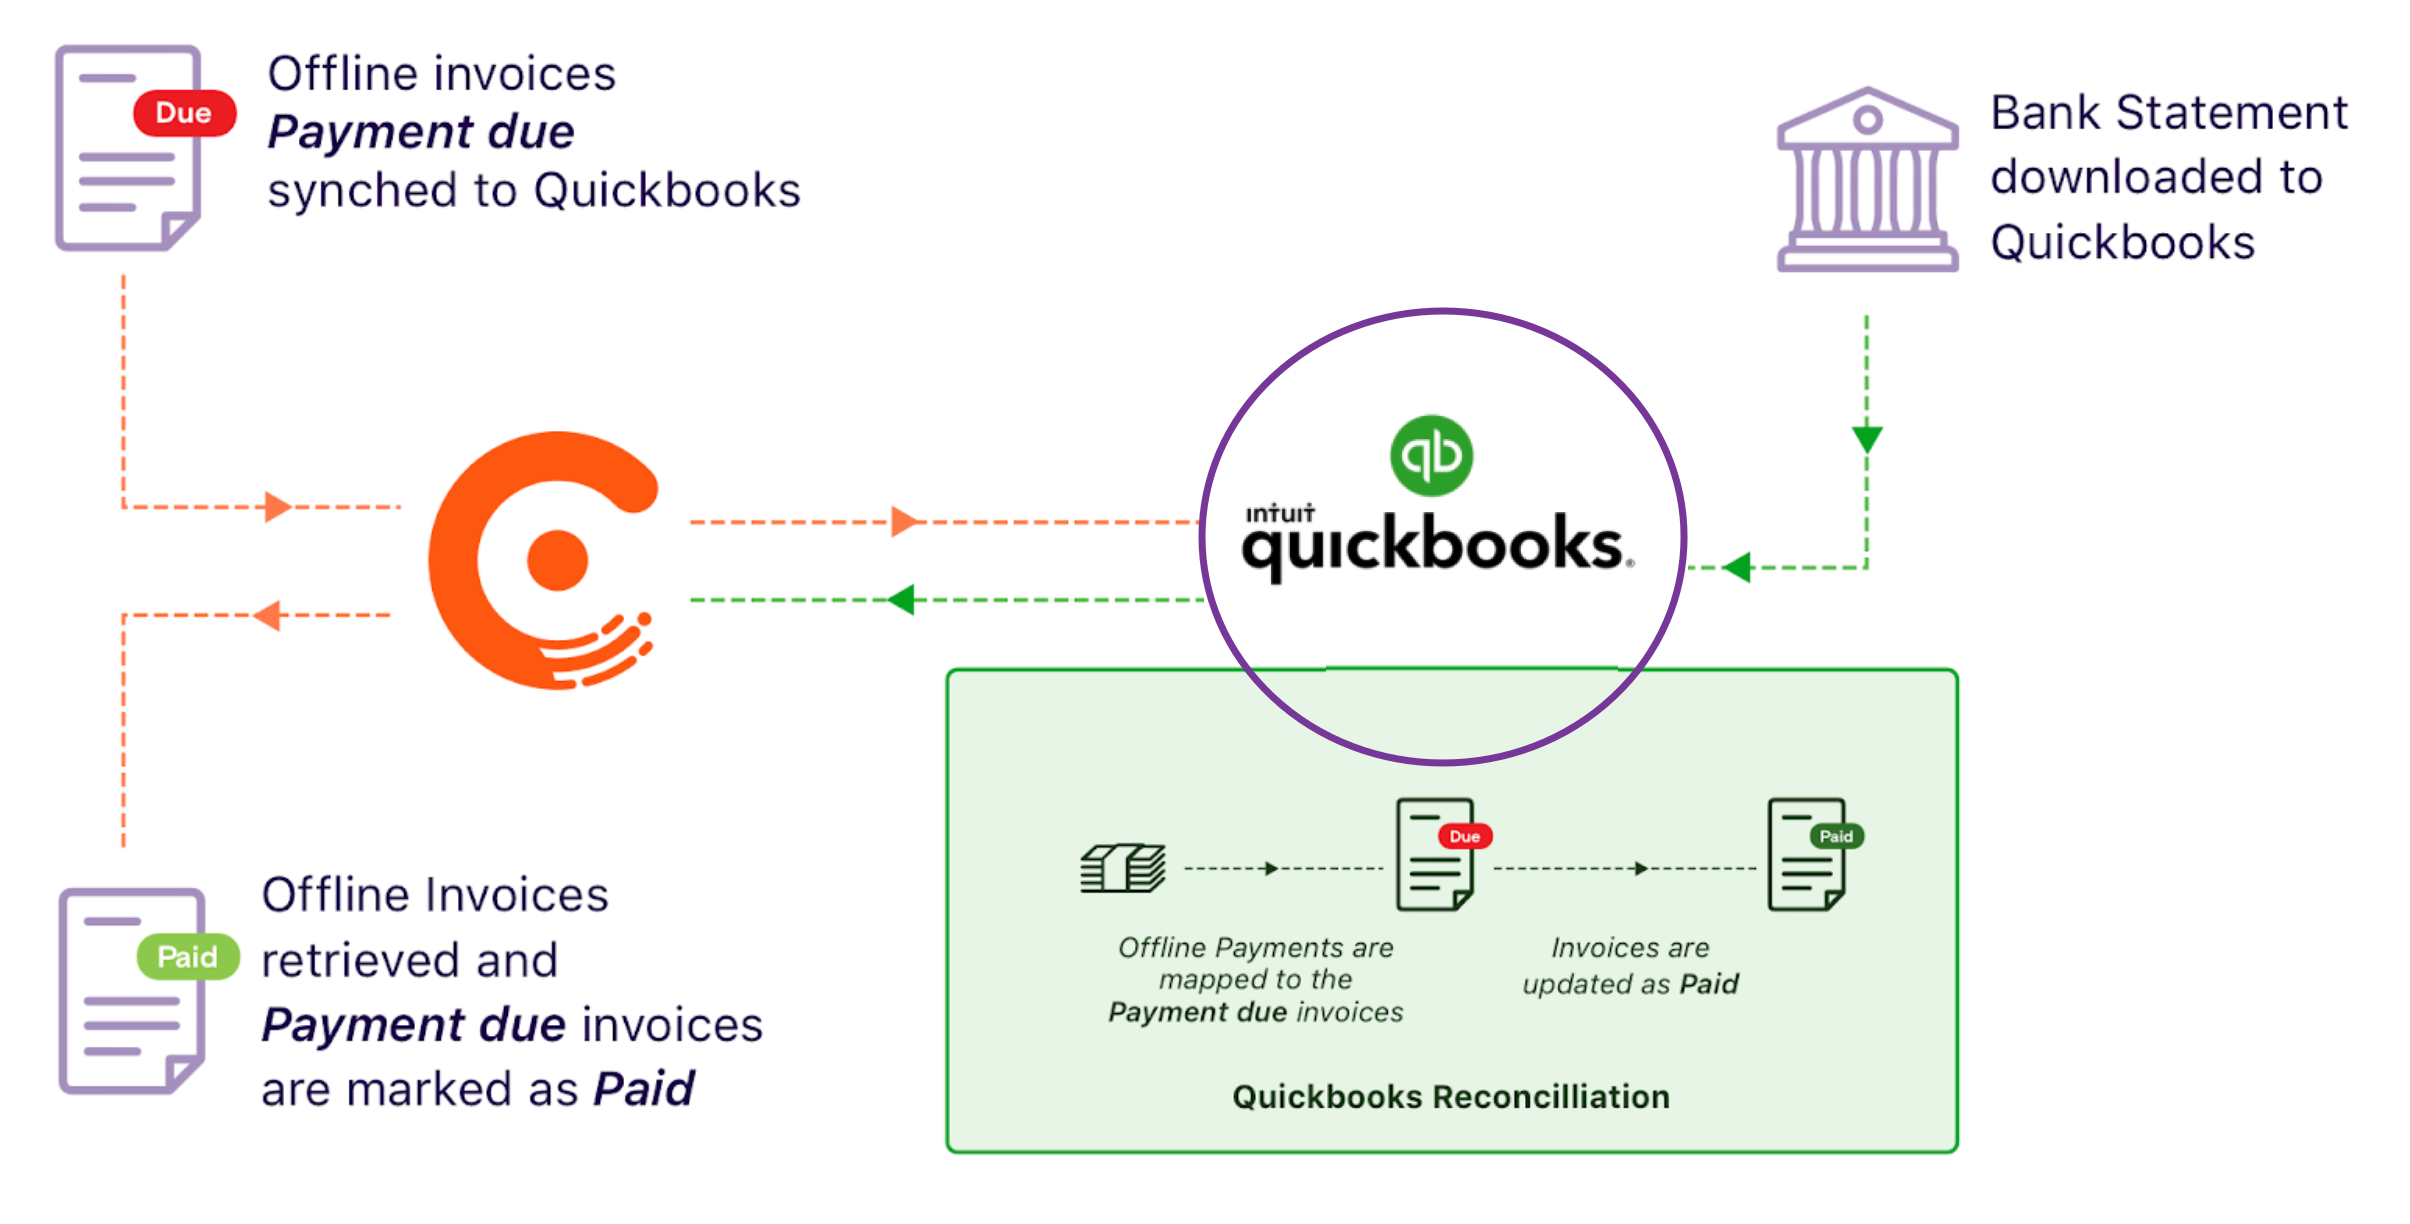
- Chargebee syncs the invoices to QuickBooks.
- The bank statement is downloaded into QuickBooks for reconciliation.
- When you reconcile offline payments against payment due invoices in QuickBooks, QuickBooks marks the invoice as PAID.
- Chargebee will read these payments, create the transactions in Chargebee, and mark the payment_due invoices as PAID.
Reconciliation
Note: Only applicable for sites which have Stripe gateway configured.
Chargebee recommends the following payment reconciliation method:
- Create a clearing account in QuickBooks
- Map payments/refunds to this clearing account
- Generate the gateway statement from Chargebee
- Upload it into the clearing account in QuickBooks
- Run Chargebee's Reconciliation Google Chrome Plugin to reconcile bank statement and transactions in QuickBooks automatically
Read more about Chargebee's reconciliation process.
See also
Was this article helpful?